Posted on 5 Comments

Silhouette America Home Office Tour

Another one of my dreams has come true! A Silhouette Home Office Tour!

IMG_20190909_162031317_HDR

I had the privilege of getting invited to the Silhouette Cameo 4 launch and they offered a home office tour. We flew directly from the Silhouette Getaway weekend to Utah & with a quick drop off of our luggage to the hotel, headed to Silhouette Headquarters.

It was so inspiring to see all the creative projects displayed around the office!

There are 2 things that I cherish the most about any of my Silhouette travel adventures. First, the people! The relationships with those people. That is what this is all about! Whether it’s a hands on retreat, workshop, All Things Silhouette Conference, or even my Facebook page and groups – it’s all about the people! I love that many of those who have attended lessons with me are now great friends and it blooms into so much more than just teaching them how to use their Silhouette. That is the connection that brings us together.

Second, the creative inspiration! It is all around.
No matter where I go I see projects that inspire me to Create!

Since I could not take you all along with me, I wanted to share my experience as much as I can. I am going to share some of my favorite parts of the Silhouette Home Office tour.
(Note – post contains many photos – so it will take time to load)

Libby photo

On our way to the Home Office tour. My friend and colleague Libby Ashcraft with Libby’s Loft. Libby and I have been roommates for a couple years when we travel to the Silhouette events and she helps me in so many ways. I am not a sewer, so she fields many of my questions on that niche of things.

Ben

Ben Wood with Silhouette America has become my friend and resource through the All Things Silhouette Conference. He was the head of Silhouette support when I first met him and as recently moved to a new role in Silhouette and we caught him right as he was leaving for the day. I have bugged Ben many times with a large variety of questions regarding Silhouette software and am always appreciative of his time and answers back to me. I will miss his Troubleshooting class at ATS Conferences, but want to congratulate him on his new position.

Group photo

Left to right: Spencer Livingston (Silhouette), Sarah Cannon (Silhouette), Libby Ashcraft, Barbara Foster, Terri Johnson, EllyMae Habets, Julie Huggins, Lycia Evanoff, Mandy Graham, Sierra Dungan (Silhouette).

This is the reception area of the Silhouette Home Office.
I am very blessed to have met each and every one of these people in this photo.

There were so many fabulous creative projects on display and I could have probably spent hours just photographing them all. In fact, they did have to circle back around at one point because we were loitering a little long with some Silhouette creative project designers. It was pretty funny!

Spencer

Spencer Livingston, Silhouette VP, with 10 years of Silhouette evolution.

Warehouse copy

On our tour was the Silhouette warehouse, which is at the back end of the Silhouette office. This may not look that exciting, but I loved seeing it! All these Silhouette goodies under one roof!

Studio

A glance at the newly re-decorated Studio where the magic happens in the videos Kelly Wayment creates and the new Maker’s Studio video that are posted on the Silhouette America Facebook page.

Studio shelves copy

Another view in the Silhouette Video Studio. Look at all those pretty colors and the video lighting stand-in when there is not a real person available for the job. It is amazing all the little details that go into creating a video.

Project shelves Showroom copy

Creative projects that are in the Office Showroom. I wish my Studio looked that great.

Project shelves copy

And many more projects created by Silhouette Creative Designers.

Chameleon photo

3D Chameleon – Design by Mesh & Crafts – Chameleon – Design #287227

Cake boxes copy

So many neat projects! These boxes are created with Cake Box design by Daniela Moscone in the Silhouette Design Store.

Coral cut on cardstock copy

Can the Silhouette machines cut intricate designs? I know I have had success with it but I also see many struggle too. This is a coral design cut out of cardstock that was hanging in the office. It can take some practice, good quality cardstock, and a sharp blade.

Faux Stained Glass dragonfly copy

Faux stained glass dragonfly created with Silhouette Shrink Plastic. I just do not have enough time for all these projects that can be created with the Silhouette machines.

Faux Stained glass butterfly copy

Another faux stained glass project. This butterfly is gorgeous and the photo does not do it justice. The projects that the Creative designers create are amazing and I would love to spend an entire day with them (write that down on the bucket list).

Faux Agate Art copy

Now, these Agate Art projects first caught my eye at the Silhouette Summit in May where there was one on display. These photos do not capture the beauty of these creations made from Silhouette Shrink Plastic. But, if you want to know how they are created, check out the Shrink Plastic Agate Art on the Silhouette 101 blog HERE. It is great to see all these amazing projects by Silhouette but it also adds to my ever growing project creation list that I’d like to do.

Sparkleberry Goody Bags

I spy Sparkleberry HTV on those goody bags being prepared for the Cameo 4 launch. I’ll share more on the Cameo 4 launch coming soon.

Now, you may be wondering where the other photos of the office are. Well, it is much like any other offices you may visit. The inside areas of the office space are filled with cubicles that house the retail, support, creative designers, and other desks.
All around the edges of the office are more offices.

IMG_20190909_170531425 copy

And I mentioned that I was one of the lingering tour attendees, talking with the creative designers and discussing product ideas. Our tour guides looped back around and found us pretty quick though and as the tour was coming to an end, the Product tester’s office was pointed out to me and I snapped a quick photo. There isn’t much to see but I did get to pick his brain at the Cameo 4 launch about all the materials he had been testing for the Cameo 4.
This is another section of the office that I would love to spend a full day observing.

Cameo 4- header copy

I can’t wait to get my Cameo 4 and start my own testing and sharing with you all too!
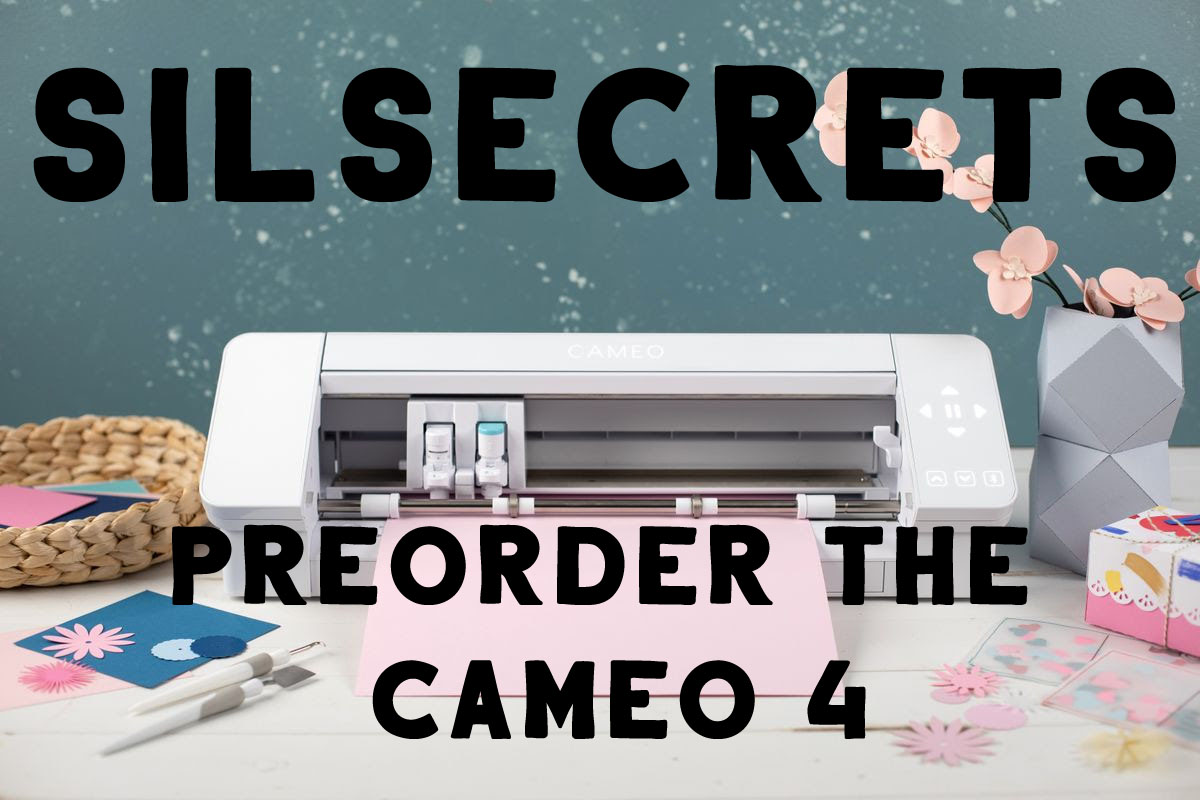
I was #4 to pre-order my Cameo 4 from Silhouette America as soon as it went live!
Pre-order yours direct from Silhouette America and get FREE shipping with my code SILSECRETS by clicking HERE.

Or you can also grab bundles at Heat Press Nation and Swing Design!

Whether you decide to get one now or stay with your current machine, I encourage you to get it out and play with it! All of the Silhouette machines are great machines & none are obsolete!

Silhouette Live

What did you think? Feel free to let me know what your questions are and what you thought of the tour on my Facebook group at Silhouette Secrets with EllyMae.

I’m off to work on classes for the All Things Silhouette Conference which I heard only had about 30 tickets left.
I hope you enjoyed my glimpse of the tour I received at the Silhouette Home Office.

All Things Silhouette Conference Collage

Photos of my current classes at the All Things Silhouette Conference.

Enjoy!

SS_Signature copySS Logo snip it

**This post may contain affiliate links. What that means is that I may receive compensation if you purchase through the links I have provided. The price you pay for the product or service is not higher but I may get compensated for sharing.

Posted on 1 Comment

Cameo 4 – New release – Pre-Order Now

At the Silhouette Summit in May they announced the release of the new Cameo 4 (check out my Summit Show & Tell post HERE) and I am excited to say that I am in Utah and attending the Silhouette Cameo 4 Launch.

Yesterday we had a tour of the Silhouette Headquarters and I will be sharing more on that and what I see & learn at the Cameo 4 launch later this week.

IMG_20190909_162031317_HDR

The Cameo 4 is available to Pre-Order starting at 12 pm MST through Silhouette America with my code SILSECRETS. And this code is also good for FREE shipping on your order! Keep in mind that this is a Pre-Order, so when the Cameo 4 machines are available to ship those who have pre-ordered will be the first ones to ship.

Cameo 4 copy

A few things you may be asking yourself….

Do I need a Cameo 4?
If you already own a Silhouette machine, the answer may be NO. While there are a few updates to the new Cameo 4, your current Silhouette machine will still work. All the Silhouette machines are great machines. I still have a Cameo 1 that is going strong and it is WELL used.

Do I want a Cameo 4?
The answer could be YES or NO. This answer will vary from user to user. Me personally, I will be getting the Cameo 4 for many reasons.

I want to test it out for cutting thicker materials.

I also teach on the Silhouette machines, so I feel that in order to teach Silhouette users, I need to know the machine. So I will be clicking buy at 12 PM MST when the Pre-Order goes live.

Do you need a Cameo 4 bundle?
Again, this is only a decision you can make for yourself. Me personally, I have the other supplies that a bundle might have and I’ll save that extra little bit for the specialty tools that will be coming soon.

However, if you are a new user or feel a bundle is right for you there are a couple of retailers who have bundles available.
Check them out here:
Heat Press Nation
Swing Design

*Please note that the white Cameo 4 machines will be the machines that are shipping the soonest and the color machines will follow later.

The only person that can make the decision on whether you “need” a Cameo 4 is YOU.

Once I receive a Cameo 4, I will begin testing and becoming familiar with all that this new machine can do.

But until it arrives at my house, I will continue to make lists of what projects I want to “test” on this new machine.

I would love to see what projects you create with any Silhouette machines! Feel free to post on my Facebook group at Silhouette Secrets with EllyMae.

Enjoy!

SS_Signature copySS Logo snip it

**This post may contain affiliate links. What that means is that I may receive compensation if you purchase through the links I have provided. The price you pay for the product or service is not higher but I may get compensated for sharing.
Posted on 7 Comments

Silhouette Curio Beginner Etching

Today I am guest over on the Terri Johnson Creates blog giving my “secrets” to getting started etching with your Silhouette Curio.

beginner curio Etching metal header copy

Head on over to her blog and find out more HERE.

If you have not taken that baby out of the box yet, check out this unboxing video

And more tips to getting started on this post – The Curio – Getting Started.

I hope this helps you to get the Curio out of the box or uncover it from it’s “safe” place and get to playing with it.

And join me at the All Things Silhouette Conference in November where we will have several different Silhouette Curio classes available.

Don’t have a Curio yet, but are in the market? Here are 3 places to shop for one:
Silhouette America
Swing Design
Amazon

I would love to see what you create – feel free to post on my Facebook group at
Silhouette Secrets+ with EllyMae.

Enjoy!

SS_Signature copySS Logo snip it

**This post may contain affiliate links. What that means is that I may receive compensation if you purchase through the links I have provided. The price you pay for the product or service is not higher but I may get compensated for sharing.

Posted on 8 Comments

Let’s Explore v4 – Pattern Fill

In the past several weeks I have been using the Fill Pattern option in the Silhouette software to create my own papers for projects that I needed. While I have a large paper collection, there are just times I do run into a project, that I want a specific paper for and I don’t have it – like this 3D Tank project I complete a few weeks back.

Header Tank post

Last week, I started a project with my daughter and we only had wood patterned paper to make 1 of the project. So the Silhouette Design Store, my Silhouette software and my Canon printer came to the rescue.

IMG_20190731_205738918 copy

This Lath Decorative Board is created completely out of cardstock. Paper A is a retired patterned paper from my Close to My Heart collection and paper B is one that I filled with the pattern fill option and printed through my Canon printer onto white cardstock.

Pattern Fill header copy

I posted this on my Silhouette Secrets+ Facebook page  when I was working on the project and asked for guesses on which one was printed. Almost all the guesses were for A as the printed paper. This is a great option if you do not have the specific pattern in your stash that you need.

Sil_Secrets_PatternFill

If I don’t have the supplies on hand, it usually means that this project would have been put on hold for the time being, but now with the option to print and cut my own paper designs, I can get to crafting.
The project above is a Lath Board with Flowers Project by Nilmara Quintela from the Silhouette Design Store.

Let’s take a look at how you can use the Pattern Fill option to expand your options in Silhouette Projects.

The Fill Pattern tab is found on the right side under the Fill Color Panel – Tab 3.

Fill Pattern Panel2

This short video shows how easy it is to fill shapes with patterns from the Silhouette library.

Once you have your design set up with the pattern fill, you can use the Print and Cut feature to print the design out with your home printer and then cut on the Silhouette machine.
Check out this post Print & Cut – Part I for my tips for a successful Print and Cut.

I hope you learned something new today in the “Let’s Explore v4” series!
There are so many options in the Silhouette Software and the only way to learn is one thing at a time! I hope you get a chance to play around with this and more soon!

The designs used in this post can be found in the Silhouette Design Store:
Combat Tank 3D Box by Snapdragon Snippets
Lath Board with Flowers Project by Nilmara Quintela
Bracket Label Thank You Card by Lori Whitlock
Ink Splat Pattern by Loni Harris
Mermaid Scales Purple Pattern by Studio Illustrado
Hibiscus Paper by Miss Kate Cuttables
Canvas by Digital Pink Ink

I would love to see what projects you create! Feel free to post on my Facebook group at Silhouette Secrets with EllyMae.

Enjoy!

SS_Signature copySS Logo snip it

**This post may contain affiliate links. What that means is that I may receive compensation if you purchase through the links I have provided. The price you pay for the product or service is not higher but I may get compensated for sharing.
Posted on 6 Comments

Let’s Explore v4 – Preferences – Tools

When you use the drawing tools in the Silhouette Studio software, does every click of your mouse continue to draw another shape?

Did you know that you can change this behavior within the software?

Click on the Preferences icon in the bottom right corner of the Design Tab or click on the Edit option in the top left menu & choose Preferences.

Preferences copy

Then choose the Tools tab at the top of the Preferences window.

If the software continues to draw shapes with each click of the mouse, this preference can be found under the “Action After Tool Use” section of the Tools tab.

After drawing Tools

I change the After Creating a Shape and the After Drawing Freehand to “Choose Select” then choose Apply and Ok.

Choose Select

Now when you choose a Drawing Tool or the Line Drawing Tool, it will go back to the selection arrow instead of continuing to draw shapes.

Tip: I keep the Eraser and the Knife tool as “Continue Using” because typically I will continue using the eraser or knife. I have the After Using Zoom set to “Choose Select” because I don’t want each click of my mouse to keep zooming in on the design. I prefer to have my selection tool again and if I need to zoom in more, I will choose zoom again.

Sometimes these defaults can get reset in the software, but after you know what they are and how to adjust them, you can easily go in and change it to what you prefer.

Each user will have a preference on how they like to work in the software. I prefer to draw one shape and then have the selection arrow as my next option as I am rarely drawing more than 1 of an item at a time when I’m designing.

Feel free to post your comments and questions below or on my Facebook group at Silhouette Secrets with EllyMae.

Enjoy!

SS_Signature copySS Logo snip it

**This post may contain affiliate links. What that means is that I may receive compensation if you purchase through the links I have provided. The price you pay for the product or service is not higher but I may get compensated for sharing.

Posted on 14 Comments

Mastering the Line Tools in Silhouette Studio: Your Ultimate Guide to Precision Design

Silhouette Studio Line Tools
Silhouette Secrets+ with EllyMae

Let’s Explore v4 – Line Tools in Silhouette Studio

When it comes to creating stunning designs in Silhouette Studio, the Line Tools are your secret weapon for precision and creativity. From drawing simple straight lines to crafting intricate custom shapes, these tools open up endless possibilities for your crafting projects. Whether you’re a beginner exploring the basics or an experienced designer looking to refine your techniques, understanding how to use the Line Tools effectively can take your designs to the next level. In this guide, we’ll walk you through each Line Tool, share pro tips for maximizing their potential, and show you how to incorporate them into your next Silhouette masterpiece. Let’s dive in!

Sometimes, I think that the tools on the left side of the Silhouette Software get lonely. There is so much that you can do within the software in creating your own designs and I love seeing what everyone comes up with.

First, let’s take a look at the Design Tab. On the left side are the Tools in the software and on the right side are the Panels which control the properties of the objects created.

Silhouette Studio: Tools vs Panels copy

Check out the Let’s Explore v4 series (HERE) to see more information on the Panels on the right side and how they can be used.

And if you need a little more detailed diagram of the Design tab, don’t forget to grab the FREE PDF in this post – HERE.

Silhouette Studio: Let's Explore v4 diagram

Silhouette – Line Tools

Today, we are going to cover the Line Tools located on the left side of the Silhouette Studio software. This is available for all users, no matter if you have a software upgrade or not.

Silhouette Line Tools on left side

Here is a close up of the options available in the Line Tools menu – Draw a Line, Draw a Polygon, Draw a Curved shape, and Draw an Arc

Silhouette Line Tools Close Up

Draw a Line

This will draw a simple line from Point A to Point B. Holding down the Shift key will make it a vertical, 45 diagonal, or horizontal line.

Silhouette: Draw a Line

I often will draw a line if I have to separate designs when cutting without a mat to make it easier to weed.

Silhouette Line as Weeding Lines

Sometimes, I’ll use the Weeding Lines within the Silhouette software, but other times, it’s just as easy to draw my own line.

If you want to connect 2 separate lines together, check out this post on How to Connect Lines in Silhouette HERE.

Draw a Polygon

This tool will continue to draw lines until you connect the red dots together to close the shape or double click to end the line.
Holding down the Shift key will also make it a vertical, horizontal, or 45 degree angle line.

Silhouette Polygon Line Tool

Have some fun and see what kinds of shapes you can draw. Turning on the Snap to Grid found under the Page Setup Panel – Tab 2, can also help in making sure that you get even spacing and help with drawing objects.

I’ll use this tool or the Draw Curve Shape to create my own weeding lines around a detailed design or when I’m cutting multiple designs on a page.

Silhouette Polygon Line Tool as Weeding Lines

A combination of tools can make it easier to weed a detailed design or a page filled with designs like the one above by allowing you to weed smaller areas instead of having a full sheet of Oracal 651 stick back to itself.

Draw a Curve Shape

This tool will draw a line each time you click the mouse, but the point will be a curved point.

Silhouette Draw a Curved Shape

Continue clicking the mouse to add points and curves in the shape. Double click to end the line or connect back to the first red dot to complete the shape.

After the design is complete, double click on the line and the Edit Points will pop up and the design can be altered more.

Silhouette Edit Points

Each point has 2 blue squares that are handles that can be adjusted. Or select an option from the Point Edit Panel on the right hand side.

Silhouette Edit Point Demo

Draw an Arc

Select this tool and click onto the design mat, this will be the starting point of the Arc line. Move the mouse and the next click completes the Arc.

Silhouette Draw an Arc Tool

In the center of the arc, there is a grab handle that can be moved in or out to alter the Arc even more.

Click off of the design and an arc line is left.

Silhouette Arc Tool

There are so many fun things that can be created with the tools in the software. You can create your own shapes, add weeding lines, or add Text to the Path you have created.

Silhouette Line Tools Text to Path Demo

What will you use the Silhouette Line tools for?

Save this for future reference by pinning the image below.

Silhouette Line Tools Pinterest

Enjoy !

THANK YOU for your support! How can you help? Click HERE & buy a coffee.
Every little bit helps with the cost of running the site.

Silhouette Classes

Never stop learning! Let me help you take the anxiety out of learning with Silhouette and get to creating faster! My Silhouette classes are heavily focused on software, so you can take the skills & techniques taught and apply them to many future projects!

Silhouette step-by-step Classes by Silhouette Secrets+

Silhouette Secrets+ with EllyMae
**This post may contain affiliate links. What that means is that I may receive compensation if you purchase through the links I have provided. The price you pay for the product or service is not higher but I may get compensated for sharing.
Posted on 4 Comments

Let’s Explore v4 – Pixscan project

Pixscan Project

I get an email from my husband asking if I can make him a phone cover out of some skull vinyl he has found online.

Well, of course, challenge accepted!

I order the vinyl and sat down to cross this off my to list. I wanted to get it done because sometimes the projects that are closest to us always seem to get pushed down the list. This time I wanted it to be first on my list.
Take some time, create something for yourself, a loved one, or a friend.
Enjoy what you can create!

Now on to the project!

I grabbed my Pixscan mat for the Cameo and took a photo using my old Iphone 6.

Pixscan photo

Next, I emailed myself the photo and when it asked what size I wanted to email, I chose “Actual Size”. If the photo is compressed when it’s sent, then it may not be read by the Silhouette Software.

After I download and save the file, I then clicked on the Pixscan Panel in the top right corner of the Silhouette Software.

Import Image copy

Choose Load Pixscan Image from File and find the location the file was saved when downloaded.

Pixscan Panel copy

Once the photo pops up, I get a notice about no Calibration Profile.

Calibration

I just click on “Continue without calibration” and the photo will load onto the Silhouette Studio design mat. Now you should see the Pixscan mat on the screen.

Pixscan screen copy

Now that the Pixscan mat is in the software, there may be several ways to get the cut lines needed.

Trace

With a basic Trace, I can trace the outer edge of the phone case.

Trace copy

I increased the Threshold until the edges turned solid yellow and then chose “Trace Outer Edge”.

Trace cut line copy

Now, in this photo I have increased the line thickness so you can see the cut line better. You will notice that the right side of the cut line is not perfectly aligned with the bottom edge of the phone. That is due to the shadow and it traced around the shadow. This can easily be moved to the edge of the phone.

Edit Points copy

If you double click on the cut line, the Edit Points will pop up and you can see that there are more than are really necessary. Anytime you have a trace you will find that it adds edit points. These can be simplified in the Edit Points Panel by either clicking on “Simplify” or deleting unnecessary ones.

Edit Points Panel copy

For more information on Edit Points, check out this post HERE.

I mentioned above, that there may be several ways to get the cut lines needed. What works best is going to depend on what image you are working with. The Trace did a good job getting the outer edge of the shape I needed for the outer cut line of the case. However, I need to cut the 2 circles out of this for the back of the phone and the Drawing Tools will do the job here.

Drawing

On the left side are the Drawing Tools. I will need the Draw Ellipse Tool and will hold down the Shift key to draw a perfect circle for the 2 objects I need it for.

Draw Ellipse Tool copy

And I now have the cut lines for cutting vinyl to apply to my husband’s phone.

Cut Lines copy

Since I am only needing the shape cut out and not cutting onto a specific media or stamped image, I can copy this shape and paste it onto a new design mat to cut it.

I do not need to cut directly on the Pixscan mat in this case. However, you could if you have an image such as a design on a scrapbook paper that you want to cut out or a stamped image and want to cut it directly on the mat, like in this post explaining the Pixscan Panel.

Cutting vinyl copy

I use the Reveal option on the Page Setup Panel to measure where the design will fit on my cutting mat and then cut my materials down to size with a paper trimmer. Then I am only applying the material to that section of the cutting mat and I save the adhesive on the other areas that it is not applied. This is one way that I can get a Silhouette cutting mat to last a long time.
For other tips on Getting the Most out of the Silhouette cutting mat check out this post HERE.

Loaded mat image copy

It’s ready to cut! Click on the Send tab, choose my Vinyl Glossy Material and click on Send at the bottom.

Send tab copy

And remember the old saying “Measure twice cut once” or you end up with a piece of vinyl that wasn’t quite long enough. But it’s just a little vinyl and I put a 2nd piece on the cutting mat and cut again. It happens to us all at one point or another.

IMG_20190718_193445383 copy

Now it’s ready to apply the Oracal transfer tape and put it on the back of the phone.

Here is a quick video on how I apply the Oracal transfer tape. I have used this for years both personally and in my classes and my students have no issues with it.

And now by using the Pixscan mat, my husband has the custom phone cover he requested. He has a clear phone protective case on it, so that will protect the adhesive vinyl even more.

Phone cover copy

Keep in mind that each object or design that you are working with may be different in what is needed to accomplish the goal. I used the Trace Panel and drawing tools to get the shapes I needed for my cut lines. A different object may need another tool or a combination of tools too!

The best way to learn is to play, play, play!

Feel like this is something you might use?
Grab one at Swing Design or Silhouette America to play (I mean test).

Have you used the Pixscan? I would love to hear how!

Feel free to share your projects, questions, or comments below or on my Facebook group at Silhouette Secrets with EllyMae.

Enjoy!

SS_Signature copySS Logo snip it

**This post may contain affiliate links. What that means is that I may receive compensation if you purchase through the links I have provided. The price you pay for the product or service is not higher but I may get compensated for sharing.

Posted on 13 Comments

Let’s Explore v4 – Library Snapshot

Library Snapshot

One of the new features in the Silhouette Studio v4.2 software is a Library Snapshot.

Library Snapshot General copy

This takes a “Snapshot” of the library as it is right now and also allows you to revert back to this “snapshot” of the library if needed.

To access and setup the Library Snapshot, click on the Library tab in the top right corner.

Library tab copy

Then click on your name in the top left corner.
You will need to be logged in to the Silhouette library.
Then choose Settings.

Library Snapshot copy

A Library Snapshot Options window will pop up.

Snapshot details copy

At the top of the Library Snapshot Options box is the log of all the snapshots that are taken of the software.

Close up copy

The middle section gives you options to create, delete, browse, or revert snapshots manually.

The bottom section allows you to set up automatic snapshots of the Silhouette library.
I would recommend setting the Snapshot option to Daily.
It never hurts to have multiple copies.

The Library Snapshots are computer specific. Depending on how it is set up, the snapshot will occur when you open the software.
If I have my snapshots set to daily but I leave my software open on my computer overnight, it will not take a snapshot the next day until I have closed and reopened the software again.

These snapshots are only stored on the computer you are accessing at the moment. Each computer will create a snapshot when the software is opened on it. So if I access my software from my computer upstairs, that snapshot is saved on my upstairs computer only. It is not stored in the cloud and synced between computers.

Does this replace making a backup of the library? No!

I would still highly recommend making a backup of your library on a regular basis and I would also recommend having your personal files saved to an outside source, which is also backed up as well too. There is nothing that is 100% safe and just like a computer crash, you cannot predict when something will happen.

Do you remember years ago when typing in Word documents and we were taught to save often? It is still a great habit to get into.
Save & backup often and you will not regret it.

Exporting a Backup

To make a backup of your library in Silhouette Studio v4, open the Library tab.
Click on your name in the top left corner (must be logged in).
Choose Library Export.

Library Export copy

A “Select Location” pop up window will come up.

Library Backup copy.jpg

Choose Browse and then select a safe location to save the backup file to.

This is a backup file only. It cannot be opened outside of the software and only can be imported back into the software if needed.
It does not contain individual files.
If you want the files saved individually, you will need to open each file and choose File > Save As > Save to Hard Drive.

I add the date to the file name and save in a Backup folder that I can find if needed.
I’d recommend making a backup of the library on a regular basis, just in case because you just never know.

If you ever need to import the backup back in, click on your name in the top left and choose Library Import.

Library Import

The Library Snapshot is just one of the new features in the v4.2 software.
Hopefully, you will never need to use it, but it is great that it is there.

Now, it’s a great time to go make a backup of your Silhouette library, no matter what version you are using and if you are in v4.2, set up the snapshot to your specifications.

Have questions or comments feel free to post below or on my Facebook group at Silhouette Secrets with EllyMae.

Enjoy!

SS_Signature copySS Logo snip it

**This post may contain affiliate links. What that means is that I may receive compensation if you purchase through the links I have provided. The price you pay for the product or service is not higher but I may get compensated for sharing.

Posted on 4 Comments

Let’s Explore v4 – 3-D tank project

I love creating 3-D paper projects and my kids love to shop over my shoulder when I’m looking in the Silhouette Design Store. My son who loves army, tanks, and soldiers saw this Combat Tank 3D Box design in the store a few weeks back and has been asking me to build it ever since.

Tank design photo

I think his idea of building it was a bit different than mine. He was glued to my side while cutting all the pieces. He even helped unload the mat and remove some of the pieces off the cutting mat. Then he ran off, like little boys do.

When I’m working with a file that has many pieces to it, the first thing I do is open it up and take a look. I have to tell you when I first purchased this file, I opened it and then closed it. I wasn’t going to cut it that night.

Tank design copy

That is a lot of pieces, but it is a 3-D project after all and I love seeing it all come together.

The first thing I like to do when working with a 3-D file is to screen grab a photo of the design.

I am a PC gal, so I use the Snipping Tool. If you have a Windows computer, type Snipping Tool in the bottom left search bar and it will pop up.
I use this tool so often that I have it pinned to my bottom task bar for quick access.

Windows search bar

When it pops up, it looks like this.

Snipping Tool copy

Click on New and then draw a box around the object you want to “snip” on the page. Then choose to save that “snip” to the computer or copy and paste it into the Silhouette Design mat.

(On a MAC – Hold down the Command button, Shift & 4 – then drag the cursor around the object)

Tank scale up copy

This gives me a reference to look at when I’m working with the file.

Since I have the ability to cut 12″ wide, I scaled this file up to cut it as large as I could. I moved the largest piece that would be cut on top of the Silhouette virtual mat and used the bounding box in the corner to increase the size of the entire design.

Make sure if you resize a design, that you are resizing the entire design at the same time to keep it all at the same scale, or the pieces will not fit together.

Next, I ungroup the entire design if needed and then fill all the pieces with the color it will be cut out of. Then I move the same colors together to all be cut at the same time.

Tank colored copy

Now, you will see on the left side that those are not filled in. I did not have any Camouflage paper, so I went back to the Silhouette Design Store and found this Camouflaged Print Pattern by Nilmara Quintela.

Camo paper

By that time, my son had run back into the room and was excited to see how I was going to take this image on my screen and print it onto paper to cut out.

Now just like so many other things in the Silhouette software, there are a couple ways you can do this. Let’s Explore the difference between using the Modify Panel vs Pattern Fill.

Modify Panel

Step 1 – Open a new design mat.

Step 2 – From the Silhouette library, choose the Camouflaged Print Paper file.

Step 3 – Next, I scaled the paper down to fit on my 12 x 12 virtual design mat.

Step 4 – Copy the pieces from the 3-D design mat and paste them onto the new design file.

Modify Panel copy
*note – line thickness has been increased on the tank pieces for visual reference

Step 5 – Select all of the objects on the virtual design mat.

Step 6 – Open the Modify Panel and choose Crop.

Crop design copy
And I can still hear the gasp from my 7 year old son when he saw it change on the screen. That had to be the best part! I even had to do it over again and again for him to watch it.

Pattern Fill

Step 1 – Open a new Design mat.

Step 2 – Copy the 3-D file pieces and paste onto the new design mat.

Step 3 – Select all the pieces.

Pattern Fill copy

Step 4 – Open the Fill Color Panel and choose the 3rd tab = Fill Pattern.

Step 5 – Find the pattern in the fill pattern options and select it.

Pattern Fill 2 copy
This method looks a bit different and you have more options to Scale & Pan the Pattern. It is really a matter of personal preference on how you want the objects to be filled.

For this tank & camouflage pattern, I used the Modify Panel.

Next, I set this up as a Print and Cut file.

Print and Cut pattern paper copy.jpg

I follow the same steps every single time to setting up a print and cut and it works great. Check out this Print & Cut – Part I blog post for step by step setup and troubleshooting tips too!

Then, I printed it on my Canon 9521C large format printer. I have to say, I was hesitant to add this to my craft studio because it was more than I wanted to spend on a printer, but I am so glad I did. I purchased it after the November 2018 All Things Silhouette Conference and I have not regretted it since. I have printed so many high quality images for blog posts, classes, gifts, and more.

IMG_20190628_183626245 copy

Always double check that all the registration marks printed correctly and are not missing. For more tips on troubleshooting Print & Cut projects – click HERE.

Once all the pieces for the tank are cut, comes the assembly time.

The first thing I did was go look in the Silhouette Design Store and see if the designer had linked instructions in the description. This is a lot of pieces and having a tutorial is helpful in assembly.

Tank instructions copy

The link did not take me directly there, but a quick search of the blog and it popped right up.

Tank instruction search copy

Why does this happen? It can be for many reasons. Sometimes a link just doesn’t code correctly, a page was moved or renamed, etc. This was an easy one to find and often I find a quick search is all that is needed. But, when I find these things, I do let Silhouette know so they are aware.

And I have to say, this was a was great tutorial to put this tank together.

Tutorial copyFind the full tutorial for this Combat Tank 3-D Box by Snapdragon Snippets – HERE.

Now, some assembly photos.

Assembly photo 1 copy

I used a combination of Scrapbook Adhesives E-Z Runner and Liquid Glass by Close to My Heart to assemble these parts.

IMG_20190703_133734387 copy

For the smaller pieces, I used my Xyron Sticker maker which makes this so much easier.


Once it was all assembled it was time for photos.

IMG_20190703_144602281 copy

And of course he wanted to do some staging.

IMG_20190703_144854432 copy

It was a bit big for my photo box, but he didn’t care.

IMG_20190703_145258822 copy

And we had to take it for a test drive.

IMG_20190703_145455413 copy

And the Army guys definitely blend in. How many can you spot?

IMG_20190703_150129411 copy

He even set up a little battle, although I think one side was a bit overpowered.

IMG_20190709_105414284 copy

He was more than tickled to go put on his “Tank top” from last summer, his Camo pants and pose for this photo. I think this was a success!

Have you tried a 3-D project? Check out the 3-D section in the Silhouette Design Store for lots of fun projects.

3D projects copy

I would love to see what projects you create! Feel free to post on my Facebook group at Silhouette Secrets with EllyMae.

Enjoy!

SS_Signature copySS Logo snip it

**This post may contain affiliate links. What that means is that I may receive compensation if you purchase through the links I have provided. The price you pay for the product or service is not higher but I may get compensated for sharing.

Posted on 5 Comments

Let’s Explore v4 – Silhouette Studio PDF Diagram

Silhouette Studio Design Tab Diagram

Original post written in July 2019. Updated on May 21, 2020 with the current diagram link. Updated 5/31/25.

In January 2018, I started the “Let’s Explore v4” series with the intention of breaking down each of the panels on the right side of the Silhouette v4 software and explaining the parts of them. When I started, I had no idea how far it would go and it has grown to so much more than my original thought. I have learned so much by writing these posts and exploring other tools in the software that I have never used because I get stuck in the same old routines. It is so exciting to see something come to life in the Silhouette software and I love learning new things and being able to share those.

I do feel that the software is the key no matter what Silhouette machine you have. If you learn how to do something in the software, you can apply that to so many other projects that you create.

Today, I want to share a free PDF chart I created that maps out the Design tab of the Silhouette Studio v4 software.

Diagram of the Design Tab in Silhouette Studio v4 software, featuring various tools and panels labeled for user reference.

Click HERE or on the image above to download this PDF diagram.

This can either be printed as a reference guide or opened on a computer. When the file is opened on a computer with a PDF viewer, all of the blue titles have been linked to the blog post in the Let’s Explore v4 series that it corresponds with it.

I have had such great feedback on this series and I hope that it has helped you learn a little bit more about this powerful software by Silhouette!

Now, keep in mind that Silhouette is always adding new things into the software and I think this is awesome! What that means is that this chart is good for today and for users who are using a version of the Silhouette software that contain these features.

Just like many things in life, things change. Change can be hard for most of us, but it can also be good. I will update this free PDF with future changes, once I know those changes will be sticking around.

If you are not using the Silhouette Studio v4.2 software yet, I would highly encourage you to do so. You can download the current version of the software direct from the Silhouette America website HERE. I am using v4.2.279, which can be found under the Legacy section and it is what I’d recommend today.
As always with any software, they may be a “bug” or two in it. This happens with all software programs. There are 2 that are known in this version 4.2.279 I am recommending, but they are more just annoyances than anything.

I explain those “bugs” and how you can work with them in this post –
Let’s Explore v4 – Bugs.

And if you are considering updating or even if you are not, it is always a good time to backup the Silhouette library if you store personal files there – for more tips on the Silhouette Library prior to version 4.2 check out this post – Silhouette Library Tips.

Shape up your Silhouette Library copy

While you are exporting a backup, don’t forget to export your custom cut settings if you have those in the Silhouette software too! This is an awesome feature.
Check out how to do that in this post –  Add Cut Settings & Export.

Export Header copy

Don’t forget to grab the free PDF diagram of the Design Tab in the Silhouette Studio v4 software and save it some place safe on your computer to refer back to when needed.

Design Tab diagram

I’d love to hear your feedback or suggestions for things you would like to see in the future!

Enjoy !

THANK YOU for your support! How can you help? Click HERE & buy a coffee.
Every little bit helps with the cost of running the site.

Silhouette Classes

Never stop learning! Let me help you take the anxiety out of learning with Silhouette and get to creating faster! My Silhouette classes are heavily focused on software, so you can take the skills & techniques taught and apply them to many future projects!

Silhouette step-by-step Classes by Silhouette Secrets+

Silhouette Secrets+ with EllyMae

**This post may contain affiliate links. What that means is that I may receive compensation if you purchase through the links I have provided. The price you pay for the product or service is not higher but I may get compensated for sharing.