

Glass etching is a great way to make unique projects and combine that with a Silhouette cutting machine and you have endless possibilities of customization. In this blog post I’m sharing a look at custom etched martini glasses I made while creating the March 2026 exclusive video tutorial for the Creative Community.

Affiliate links may be present in the following blog post and as an Amazon Associate, I earn from qualifying purchases.
Steps to Etched Glass Projects
- Create a stencil for etching.
- Clean glass blank with alcohol and allow to dry.
- Apply stencil.
- Mask off edge of stencil to prevent bleeding
- Apply Etchall Etching Creme and allow to sit for 20 minutes.
- Remove any excess Etching Creme and place back in the bottle.
- Wipe off remaining excess with a paper towel and safely discard paper towel.
- Run water in the sink and rinse off decal thoroughly.
- Remove masking tape and adhesive vinyl under running water.
- Rinse blank thoroughly.
- Dry and Enjoy!
Glass Etching Supplies
- Silhouette Studio Designer Edition+ or Business Edition unlocks Conical Warp
- Etchall Etching Creme
- Martini glasses from Dollar Tree
- Adhesive Vinyl
- AT65 Transfer Tape
- Squeegee
- Silicone Mat
- Nitrile Gloves
- Popsicle Stick
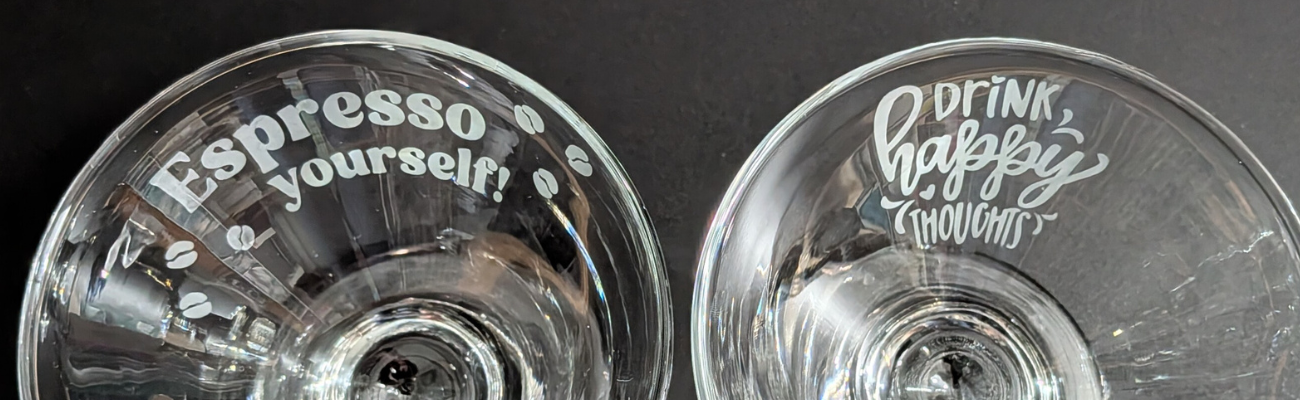
- Drink Happy Thoughts by Sarah Bailey – Design #436990
- Espresso Yourself by Lisa Anne Designs, LLC – Design #1271704
- Sip Sip Hooray! by Sophie Gallo – Design #164143
- Don’t Ask Just Pour by Petra Studio Art – Design #431985
Custom Glass Etched Martini Glasses
I started with created the stencil design in the Silhouette software using the Conical Warp Panel.
I shared an in-depth look at the Conical Warp Panel and step-by-step instructions for several projects, including these stencils in the March 2026 Creative Community exclusive video tutorial. For more details on the Creative Community, check it out HERE.

I wanted the design visible when drinking from the glass, so I flipped the design in the software prior to cutting the stencil.

Then sent the design to cut from Oracal 651 adhesive vinyl. Scraps are great for making stencils and I have a whole drawer full of adhesive vinyl scraps.

After weeding the design, I applied transfer tape and applied the adhesive vinyl as smooth as possible to the cleaned martini glass.

Here is a look at the stencil and how it will read after the design is etched.

Then, I created and cut a few more designs.

If I am etching one glass, might as well etch a few more at the same time.

Adding painters’ tape to the edges of the stencil can prevent any bleeding. Etching is permanent and it never fails that if the etching creme touches a spot you don’t want etched for even just a second, it will etch it. One of those craft project oopsies.

Apply the Etchall etching creme and let it sit for 20 minutes.

Carefully scrape off any excess Etchall etching creme and put it back in the bottle. It can be reused over and over again. Make sure not to scrape too hard to dislodge any small bits of the stencil or etching creme can get in areas that you don’t want to be etched.

I also like to take a paper towel and carefully remove any other excess etching creme and then discard the paper towel. Then I run water in the sink and begin rinsing and removing the painter’s tape and adhesive vinyl.
Rinse the glass thoroughly and dry.
Enjoy your custom etched martini glasses.


Save this for future reference by pinning the image below.

Enjoy !
THANK YOU for your support! How can you help? Click HERE & buy a coffee.
Every little bit helps with the cost of running the site.
Silhouette Classes
Never stop learning! Let me help you take the anxiety out of learning with Silhouette and get to creating faster! My Silhouette classes are heavily focused on software, so you can take the skills & techniques taught and apply them to many future projects!


**This post may contain affiliate links. What that means is that I may receive compensation if you purchase through the links I have provided. The price you pay for the product or service is not higher, but I may get compensated for sharing.
Discover more from Silhouette Secrets-Swift Creek Customs
Subscribe to get the latest posts sent to your email.


Fantastic tute EllyMae – top notch! Incorporating so many features. Thank you!!
You are welcome and thank you!