Posted on 2 Comments

Let’s Explore Silhouette v4 in 2018 & 2019

Wow! 2018 has sure gone by fast!

There has been so much that has happened – what a year!

I started the year with the goal to have a blog post every week and I only missed 1-2 weeks, so I’m counting that as a success! On to next year!

I started the year out with a series called Let’s Explore v4 and have learned so much going through the software in detail. There are some features that I had never used and I learned so much as I researched and played with it. This program is so powerful and it continues to amaze me all the time.

SS cover photo copy

This Let’s Explore v4 series has been so popular that I will continue it into 2019 and I’ve created a special section on the blog for it all. Find it HERE.

There is still so much more to explore and more new features coming with the v4.2 release.

In addition to the series, I added some projects in here and there that I used the tools in the Silhouette v4 software to complete.

Collage Projects 2019

Layered vinyl acrylic ornaments

Cutting cards with the Silhouette

Back to School bag tags

“Tank” top

SilhouetteShowcase

Vinyl, Glass etching, acrylic etching – oh my!

WM

Faux leather earrings with Silhouette Leatherette

Header photo

Custom Shadow box with the Silhouette

Copy of Collage projects 2018-2

Subtracting text to create word art

Using Multiple files to create a design

Pop up cards

Creating rhinestone designs

Cutting without a mat

Cutting without a mat

Copy of Copy of Collage projects 2018-3

Hot Mess with the Silhouette

Layering vinyl

Bus Driver Appreciation

Teacher gifts

What a year! My absolute favorite thing about the Silhouette is creating projects and being able to show others how to do it too!

Make sure to join my Facebook group – Silhouette Secrets+ with EllyMae and share your projects there – I love seeing what you are doing.

If you are looking for personal instruction – check out the Silhouette Instruction & Events tab at the top of the blog.

What coming in 2019?

Classes, workshops, TJC Hands on Silhouette Spring Retreat, Intermediate Curio Workshop at Craft Chameleon in St. Louis, All Things Silhouette Conferences in June & November, more Let’s Explore v4 and who knows what else will be added to the calendar.

Classes

Here are just a few that I held in 2018


Keep checking on the Silhouette Instruction & Events tab for future classes.

TJC Silhouette Spring Hands On Retreat

March 1-3, 2019
Woodbridge, VA
Staff & Instructor
Silhouette-Spring-Retreat
Find out more information and register HERE!

Intermediate Curio 1 day Workshop at Craft Chameleon

March 2019
St. Louis, MO
More details coming soon!

All Things Silhouette Conference 2019

June 8-9, 2019
Peachtree City, GA
Staff & Instructor

ATS-logo.slider.2019-1024x419

Find out more details & register HERE for the June All Things Silhouette Conference.
New this ATS – Pre-day hands on classes! The Ultimate ATS package!

Silhouette-Getaway_02-1024x597

Silhouette Getaway
September 6-8, 2019
Peachtree City, GA

ATS-logo-slider-11-2019-1024x419

All Things Silhouette Conference
November 9-10, 2019
Peachtree City, GA

I want to thank everyone for following Silhouette Secrets+ in 2018 and want to wish everyone a Happy New Year!

Looking forward to what 2019 brings!

Enjoy!

SS_Signature copySS Logo snip it

**This post may contain affiliate links. What that means is that I may receive compensation if you purchase through the links I have provided. The price you pay for the product or service is not higher but I may get compensated for sharing.

Posted on 3 Comments

Let’s Explore v4 – Tiling

The Tiling feature is a Business Edition upgrade feature that is found under the Media Setup Panel – Tab 4.

The Media Setup Panel is found on the right side of the Silhouette software at the bottom of the icon toolbar. Depending on the size of your computer monitor you may see all the icons or you may have an arrow for a fly out menu.

Tiling Panel double copy

Since the Cameo can only cut 12″ wide, the tiling feature can be used to break up a big design into smaller pieces to be placed together after the cut. While the knife feature could also be used, why not let the software work for you and break it up. This feature is available if you have the Business Edition upgrade of the software and is only accessible under the Media Layout Setup Panel and with the Media Layout View active.

In the Media Layout View, the original design stays intact and all changes take place on the side of the Media Layout View. Check out the post from last week on the Media Layout View here.

I am going to use this Scandinavian Snow Princesses by Erin Doran – Design #68466 from the Silhouette Design Store for my example.

Snow Princess design

First, I’m going to resize this so the silhouette is 5 feet tall. To do that, open the Transform Panel – Scale tab, lock the aspect ratio and change the Height to 60″.
For more information on the Transform Panel – Scale tab click HERE.

Resize copy

Now, I am only going to work with 1 of the princess designs at a time, so I’m going to right click and choose Ungroup and delete the princess on the right side.
In the case of this file, I ended up choosing Release Compound Path to separate the princesses. Then, I selected all the parts of each Princess, right clicked and chose Make Compound Path for each again.
Find out more about Compound Paths HERE.

If you plan to cut both, you can leave it as is or copy and paste the right side to a new design mat to use later.

Now, let’s look at the Tiling feature.

Tiling Panel detail copy

  1. Tiling Active – Check this box to activate the Tiling feature. The Media Layout View will adjust to show you the number of tiles (according to the Page Size set) that it will take to cut the design.Tiling ActiveYou will also see on the left side in the Design View, that it adds a grid over the design with dimensions of each tile, and numbers of tiles. It does not alter the design on the left side, but adds this visual as an overlay of how it would divide the design up.

    On the right side, in the Media Layout View, it shows each of the tiles in the order of the numbers shown on the left side.

    For this design to cut on a 12″ x 12″ mat, it would take 14 – 12″ x 12″ tiles.

  2. Configure Position and Size – Choose Relative to Job, Relative to Media or User Defined. Each of these options allows you to adjust the design even more.Relative to Job – This option is shown in the photo above and includes the entire design.Relative to Media – This option uses the current Media mat chosen. In this case, a 12″ x 12″ cutting mat is selected, so it uses that Media in how it changes the Tiling.

    Relative to Media copy
    You can see above, that it only includes the Media mat portion of the design in the Tiling.

    User Defined – Choose between the Origin X, Origin Y, Width, Height and Maintain Aspect. Each will change how the design is Tiled.

    User Defined Configure copy

  3. Panel Margin – Allows you to change the size of the Panel.Panel Margin copy.jpg
    I increased the Panel Margin to 1″ and the Panel dimensions on the Design View adjusted.
  4. Configure Regular Grid – Choose between Automatic, Custom or Regular Grid. These options allow you to make changes to the Tile spacing.
  5. Overlap – This feature gives the ability to add a bit of overlap to the cut image and is a great feature for giving yourself some extra space in lining the image up after the cut.Overlap copy
  6. Other Options – Show Dimensions – Allows the dimensions to be toggled off on the Design View.Show Dimensions
  7. Tiling – Choose which Tiles you would like to cut – All or selected ones only and choose the separation details between the tiles.Tiles copy
    Notice that since Selected Tiles Only is checked and I typed in 1-2, it highlights only 1 and 2 numbered Tiles and then places only the 1 and 2 numbered Tiles on the Media Layout View to cut.

The Tiling option is a great feature if you are cutting large decals and want the software to do the work for you in breaking up the design to cut.
Each design that you are cutting is going to vary in how it looks and how much material it will take to cut the design out to the size you want.

For instance, if I want to cut this Witch Silhouette by Sarah Bailey – Design #153652, you can see that the top of the broom covers the edges of the 12″ x 12″ mat.

Witch

That leaves a lot of unused space and each Silhouette user would need to decide if it’s worth cutting a full 12″ x 12″ piece of material for this design.

Witch demo

Here is another example:

Beach demo.JPG

If I want to cut a decal of this Beach Bum phrase by Silhouette 48″ long, it breaks it up into 8 panels that fit onto 6 tiles.

Beach demo1

I encourage you to just pick a design and play around with the Tiling feature. Every design you choose will react a bit differently in how it looks in the Tiling feature.

Hopefully this explains some of the features of the Tiling feature.
I would love to see what you create on my Facebook group if you do.
Find me here at Silhouette Secrets+ with EllyMae.

Enjoy!

SS_Signature copySS Logo snip it

**This post may contain affiliate links. What that means is that I may receive compensation if you purchase through the links I have provided. The price you pay for the product or service is not higher but I may get compensated for sharing.

Posted on 6 Comments

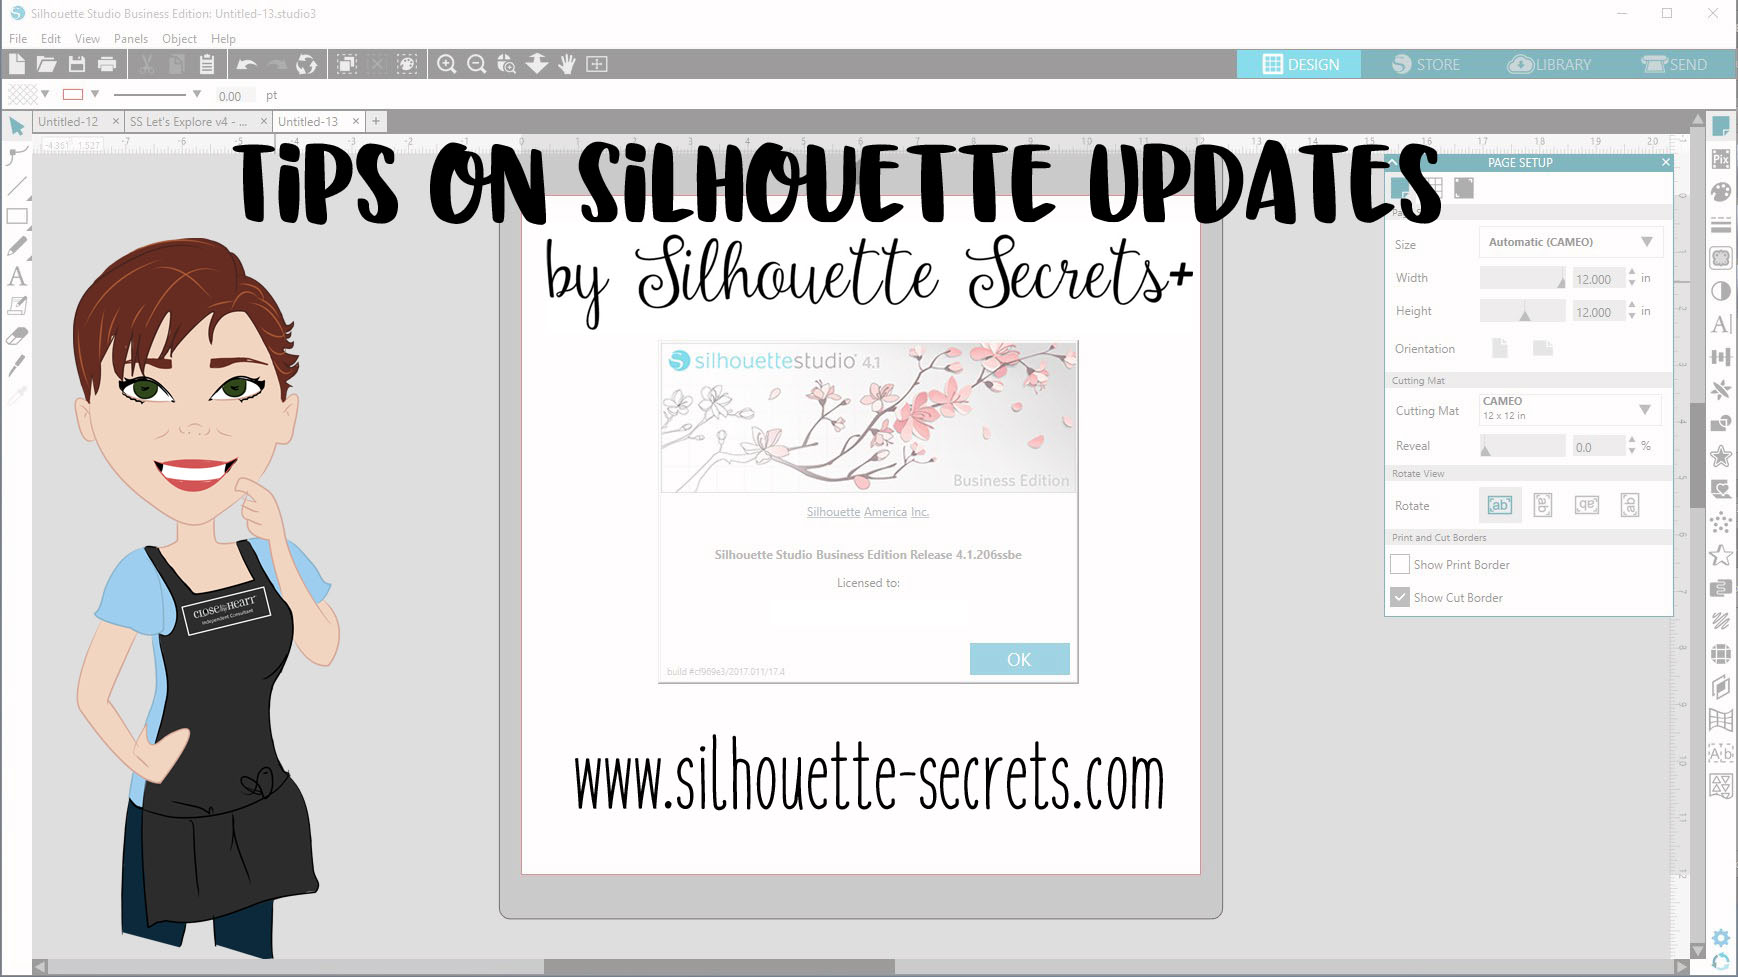
Tips on Silhouette Studio Updates

I see so many questions regarding Silhouette Studio Updates, so let’s discuss some information about a software update.

Update vs Upgrade

First, a Silhouette Studio update is different than a Studio upgrade.

Silhouette software upgrade is a product you can purchase that unlocks additional features in the Silhouette software. There are 3 levels: Designer Edition, Designer Edition Plus and Business Edition.

Upgrade

Check out this chart by Silhouette America on what features are unlocked with each upgrade. Click on the video camera icon next to each feature to see a short demo video.

Update chart

A software upgrade can be purchased from a Silhouette retailer such as Swing Design or direct from Silhouette America. The code can be either a digital code or a physical card mailed to you. I would suggest a digital code as it’s much faster and no shipping.

A software upgrade unlocks features that are already in the Silhouette software program. You can purchase the upgrade in steps or go directly to the one you want. For instance, if you have the Basic Software (free), you can go directly from Silhouette Studio to Business (the highest level) by purchasing the correct upgrade option.

A software update is something that makes changes to the actual program. An update is rolled out for many reasons such as adding new features or fixing a bug in a previous software version.

There is a lot of anxiety around a software update. So here are some tips about Silhouette software updates that I’ve picked up through using the software, teaching, and troubleshooting.

Tips for Silhouette Software Updates

  • Back up your Silhouette library. It is ALWAYS a good time to make a backup. Get in the habit of making a back up of the library monthly or weekly. This is especially important if you store your personal files in the Silhouette library.
    I highly recommend storing your personal files to an outside source or at the very least making a backup of the library. Just keep in mind that no place is 100% safe, so having multiple backups is a good idea too.

    This is direct from the Silhouette website regarding the Silhouette Cloud library “Silhouette America’s Cloud Storage is a syncing service rather than a backup service. Files deleted locally will be deleted on the cloud. We strongly recommend users save important and/or valuable files to another location outside of the cloud or local library, or to a third-party backup service.”

    I see so many users who say they’ve lost their designs and there can be many reasons for this happening.
    Another reason I highly recommend making a back up of your library and a back up of your external storage as well.Personally, I store all my files to an external hard drive which I also back up on a regular basis (probably should do it more than I do).

    To find out more information about the Silhouette cloud library click HERE to go directly to the Silhouette Cloud Overview.

    How do you backup the library in the v4.1 software?

    There are 2 sections of the Silhouette library – the Local User (computer specific) and the Cloud (email address & below). You must back these up separately.

    Local User

    Right click on the Local User section and choose Export. Save this file to a safe location. I like to save mine with the date included.

    Export Library1 copy

    Cloud (email address and below)

    Right click on the email address, choose Export and save this to a safe location. I add the date and ‘Cloud’ to the name of this file, so I can tell the difference in the files.

    Export Library copy

  • The “Check for Updates” option under the Help menu does not work. This will give you a message that there are No Updates available.Check for updates copy
  • Download the Silhouette updates direct from the Silhouette website. If you are prompted for an update through the software, I highly recommend that you choose Later and then when you are ready, update directly from the Silhouette website.Software update.JPG
    You can find the current software updates HERE on the Silhouette America site. Click on the option for MAC or Windows to download it to your computer.
  • Change how the software checks for updates. Under the Preferences you can change the Check for Updates option to Daily, Weekly, or Never.Preferences copy.jpgThe Preferences can also be found under the Edit menu in the top left corner or by using the keyboard short cut Ctrl + K.

    Preference menu

    Personally, I have mine set to “Never”. I can go out to the Silhouette America website and check if there are any software updates that have been released and download it directly.

    Once you change the Preference, then click the Apply and the Ok button.

    It is a complete personal preference on how you have the updates set to check.

Software updates are not bad.

There are many good reasons for an update. I love that the Silhouette software is such a powerful graphics program and it is amazing all that is included in this software. There are even more great things coming with the Silhouette Studio v4.2 release. It is still in the Beta testing phase and Silhouette is continuing to work to fix software bugs that pop up.

If you ever do get an update that has a bug you cannot live with or perhaps your software program updated to the Beta version, you can simply uninstall the Silhouette software from your Computer operating system and then reinstall the version you would like to roll back to.

Previous software versions can be found on the Silhouette America site under the Legacy section of the Software updates.

Legacy version copy

Do you have to update?

No.
You do not have to update your Silhouette software unless you want to. If you have the “Check for updates” set to Daily or Weekly, it will ask you when there is a new update if you want to update. If you are not paying attention or happen to share a computer with another person and the Ok gets pushed on the Update, the software will download the update.

If you choose not to update, you may not have access to all of the Silhouette features available to you. Features released are not retro-active, so if you would like access to new released features, you will need to update the software to at least the version where that feature was released.

Can you have multiple versions of the software installed?

Yes.
Something that not many do not know about is that you can have multiple versions of the Silhouette Studio installed on both a PC and a MAC.

I would not suggest this for the average user unless there is a specific reason that you want more than one version installed, such as downloading the Beta version to test it.

On a MAC, it will download another version with no additional steps needed. After the software downloads, you will need to make sure you change which Silhouette application is docked and make sure you are opening the correct version that you want.

On a PC, there are several steps and Kelly Wayment over at Finding Time to Create has a great post on this. You can find her post on “How to Install Multiple Versions of the Silhouette Studio – Windows 10” on her blog HERE.

I love how Kelly explains things. Kelly is also the voice behind many of the Silhouette America videos on Youtube, the writer behind the ebooks from Silhouette and many product videos for Silhouette.
If you have not seen the new Silhouette 101 blog, check it out HERE – there is lots of information on there.

Silhouette 101

Again, I would not recommend multiple versions for the average user. But, it can come in handy for certain reasons.

How do you have the Check for Updates set? Did you know you could change it?
I would love to hear – comment below or find me on my Facebook group at
Silhouette Secrets+ with EllyMae.

Enjoy!

SS_Signature copySS Logo snip it

**This post may contain affiliate links. What that means is that I may receive compensation if you purchase through the links I have provided. The price you pay for the product or service is not higher but I may get compensated for sharing.

Posted on 6 Comments

Let’s Explore v4 – Media Layout Setup Panel

Do you have the Business Edition upgrade? If not, there are so many neat features that are unlocked with it.
I have to admit that I have not used this much as all, but after today, that will be changing.

Media Layout Setup Panel

What is it? If you have the Business Edition upgrade this is an additional way to view your design to be cut and make some changes to it, without actually altering the design on the Design View.

So let’s explore the different views.

Design view is the normal view a user sees when the Silhouette software is opened.  The drawing tools are located on the left side, the panels are on the right side, and the document tools and Quick Access Tool bar are at the top.

Design view layout copy

Media view is an option if you have the Business Edition upgrade active on the software. This view shows how things are processed as they appear for a cut job. The Media view does not show color or patterns.

The Media Layout Setup Panel is found on the right side of the Silhouette Studio software, at the very bottom.

If you have a larger computer screen, you may see all the icons displayed on the right side like this.

Media view Panel copy

If you have a smaller computer screen, then you may have a fly out arrow to click on and then more icons will appear like this.

Media view small screen copy

The Media Layout view will open up with a split screen panel and you can choose between either side for which one is active and you are making changes in.

Media Layout View*Believe in the Magic of Christmas by Lori Whitlock – Design #162472

Now, let’s take a more detailed look at the Media Layout Setup Panel.

Media Layout Panel detail copy

  1. Show Media Layout Split – Screen – Check the box if you would like the Media layout to split screen with the Design View layout.
  2. Media Layout Setup Tabs – there are 4 tabs to chose from
    – Tab 1: Media Size, Cut Border & Orientation
    – Tab 2: Copy & Separation
    – Tab 3: Nesting
    – Tab 4: Tiling
  3. Media Size – Change the Page Size, Width & Height of the Media Layout ViewMedia Size
    You’ll notice that changes made on the Media Layout Screen do not change the Design View side on the left side. This is a way you can make changes to what will be cut without changing the actual Design mat itself.
  4. Cutting Mat – Change the Cutting mat size of the Media Layout View
  5. Reveal Mat – Slide the arrow over to reveal the cutting mat grid on the Media Layout ViewReveal mat copy
  6. Cut Border – Change the Cut border left, top, right, and bottom dimensions.Cut border copy.jpg

    As you can see above, on the right side the red cut border line changes as the measurements are changed under the Cut Border section.
    You could adjust these to where the material is placed on the mat or place it anywhere on the mat you like and it would only cut there.
    This might come in handy if the top left corner is no longer sticky but the middle of the cutting mat still has lots of stick left to it.

  7. Orientation – Rotate Cut Job – this will rotate the design on the cutting mat on the Media layout.Rotate cut
    Checking this box, will rotate the design 90 degrees on the cutting mat shown on the left side, but the original design stays in tact on the left side.While those features can be useful, I find the other tabs are even more interesting.

Media Layout Setup – Copy Tab

Next, is Tab 2 – the Copy Tab. Here is where you can tell the software to cut multiple copies of a design without actually adding images to the original Design mat.

Copies tab copy

  1. Copy rows – Add the number of rows you would like to cut and the Media Layout View will duplicate the design that many rows. It will show this on the right side in the Media Layout View only and leave the original design unchanged.Copy rows
  2. Copy columns – Add the number of columns you would like to cut and the Media Layout View will duplicate the design that many columns.Copy Columns
  3. Limit to Media – Click this button to limit the design to only the Media area selected, no matter how many columns or rows you enter, the software will change it to fit on only the Page Size and mat you have entered on the first tab.Limit Media
  4. Horizontal Separation – Increase or decrease the horizontal spacing between the designs on the selected media.Horizontal Separation copy
  5. Vertical Separation – Increase or decrease the Vertical spacing between the designs on the selected media.Vertical separation copy

This is another way you could tell the software to cut multiples of an image without actually having to Replicate the design on the Design view.

Either way will work, but it is another option and one I will be using in the future when cutting multiples of the same design.

Media Layout Setup – Nesting

And to add even more options to the Media Layout, the 3rd tab is the Nesting tab. This has several options in how it will nest the designs together before cutting.

Nesting tab copy

  1. Nesting Active – Check this box to turn the Nesting feature on.
  2. Interlock – The software looks for more paths to move shapes together. This works well for designs that are not square or hexagons.Here the Interlock is off:
    Interlocking off

    In this one, the Interlock has been turned on and you can see it Nests the design a little different.
    Interlocking on

  3. Maintain Grain – This option allows the design to rotate only 180 or not at all, in order to work with materials that may have a grain to them. So the design stays on the same grain of the material.
    For example, if you were cutting an object out of a wood grain paper and you wanted to make sure that the grain of the paper ran the length of a wood piece you were cutting instead of cross ways through it.
  4. Align – When align is on, the software will align the pieces of the design that are at an irregular angle.Here the Align is on:
    Interlocking on
    Notice the leaves are vertical.Here Align is off:
    Align option nesting
    Now the leaves are rotated to a different angle.
  5. Whole Words – Choose whether the software divides the text into a whole word or individual letters to place it for the cut.Here whole words is on:Whole words

    And here, whole words is off and it rearranges the individual letters:
    Whole words off

  6. Maintain Groups – When on, this maintains the items that are grouped together and treats it as one object. When off it will treat each piece as an individual object.Maintain Groups on:
    Maintain groups on

    Maintain groups off:
    Maintain groups off
    As you can see above, it treats it quite differently depending on what option you choose.

  7. Rotations Parameters – Tells the software how many rotations of an object is allowed when nesting it on the mat.This is 2 Rotations:
    Rotation parameters 2

    This is 4:
    Rotation parameters 4
    You can see above how it changes the spacing a bit when more rotations are allowed.

  8. Padding Parameters – This is the minimum distance between 2 shapes after it’s been nested.Here the padding is 1:Rotation parameters 4

    And here the padding is 3:

    Padding 3
    Once again, it changes how the nesting is done by the software.

This is just another way that shows the possibilities of the Silhouette software. I do learn new things everyday about what it is capable of.

So many projects to create, so little time to do it!

I hope you take advantage of the Media Layout Setup Panel in a future project.

I would love to see it on my Facebook group if you do.
Find me here at Silhouette Secrets+ with EllyMae.

Enjoy!

SS_Signature copySS Logo snip it

**This post may contain affiliate links. What that means is that I may receive compensation if you purchase through the links I have provided. The price you pay for the product or service is not higher but I may get compensated for sharing.

Posted on 6 Comments

Silhouette Studio – Adding cut settings & exporting

I just recently returned from the All Things Silhouette Conference and I always learn so many things. Even though I’ve been using the Silhouette software for over 6 years now, I learn all kinds of new things everyday. However, at ATS Conference, there is such a gathering of so many great instructors and students, that it just blows my mind how many things I pick up.

Even though I was on staff and an Instructor at this year’s ATS Conference, I learned things in all the classes whether I was a helper in or ones I taught.
That is what makes this so amazing!

IMG_6576

I attended Ben Wood’s – Tips Tricks and Troubleshooting class and even though I troubleshoot issues on many FB groups daily, I do not know it all and never will. I picked up so much from this class and many things I suggest when users have issues were reinforced in this class. Ben is the head of Silhouette support and we had a chance to ask him our questions.

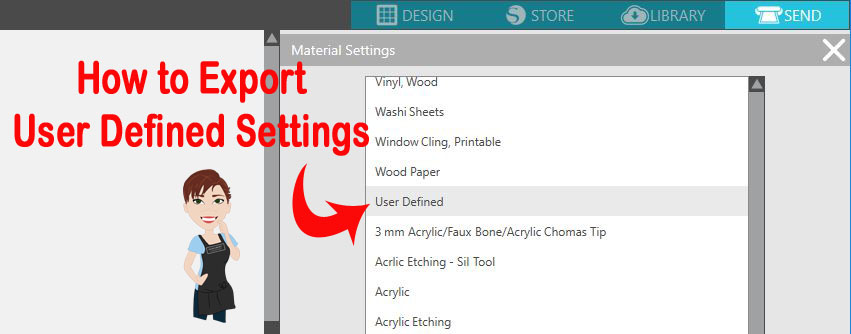
One thing (out of the many I learned) that stood out to me was how to Export User Defined Settings.

What are User Defined Settings?

This is when you create your own custom settings in the Silhouette software and save those settings. And now I know how to export those as well, just in case something happens either to the software or to load to a new computer.

First let’s look at the Material Settings under the Send tab in the Silhouette Studio version 4.
There are 2 sections to this area – Preset Settings and User Defined Settings.

Preset Settings

These are the settings that Silhouette has provided for us. The settings are what have been tested with Silhouette products. However, I find that the preset settings work for me about 98% of the time with other brands of materials. I always do a test cut first, just in case it does need to be tweaked.
But, you do pick up tips as you go, such as, I have always cut most cardstock with the Textured Cardstock setting and it works well for me.

These are found under the Send tab in the top right corner of Silhouette Studio & then under the Material drop down menu.

Material Settings copy copy

User Defined Settings

These are settings you can create and add to the Silhouette software for future use.

They are found at the bottom of the Materials drop down menu when you scroll down. When a new setting is added, it will appear at the very bottom of the list, but after the software is shut down and reopened, these settings will appear in alphabetical order under the User Defined section.

Material Settings - User Defined copy

Now, the next question is – how do you add a User Defined Setting and save it?

Adding User Defined Settings

  1. On the Send tab, click on the 3 dots for the Advanced Material Panel.Advanced cut setting copy
  2. Click on the + to Add New material
    Add New Material copy
  3. Type the name & hit Enter. Choose a name you will remember – include settings for quick reference.For example: Curio Platforms used – add that number at the end or if you are using multiple settings for a project with different Force settings, add the Force number at the end.New Material type copy
  4. Click on the Large + if you are adding a different action than Cut.
    The options are: Cut, Score, Emboss, Stipple and Etch. Each action tells the Silhouette machine to move the tools a bit differently.Actions added copy
  5. Click back on the Cut action and choose “Remove Action” – if it is not needed.
    It will depend on the project you are creating on what action you would use.
    For example: I taught the Acrylic Etching class at the November 2018 All Things Silhouette Conference, for class we added a specific setting to etch the acrylic with the Curio machine. When the Etch action is added, the Cut action is no longer needed because we are not using a cutting blade for the project. Since each action functions differently and tells the tools to work in a different pattern, the Cut action needs to be removed.
    Remove Cut Action copy
  6. Double check & verify the settings stay the same. Then click Save.
    If you type them sometimes they will revert or not hold vs using the arrows to adjust.
    Click Save copy
  7. Hit X to Exit Advanced Settings
    X out copy
  8. Then choose the new setting you have created in the Materials Drop down box and verify that the settings saved correctly.
    Verify settings saved

Now, what happens after you create these custom settings? What if your computer crashes, software has a glitch, you have to uninstall the software & reinstall, you get a new computer or you want to share these settings with students?

You can export these settings and save to safe location to be able to import them back in if needed.
Pretty amazing, right? I know!
This is only 1 thing I learned at the All Things Silhouette Conference that I didn’t know before.

Exporting User Defined Settings

  1. Click on the Advanced Materials Settings under the Send tab.Advanced cut setting copy
  2. Right click on the Material setting & choose Export.Export UDS copy copy
  3. If for some reason these settings disappear or you get a new computer, right click on the Advanced Materials Panel and choose Import.Import USD copy

How to Export Multiple User Defined Settings 

Export multiple settings copy copy

  1. Select the material setting.
  2. Hold down the Shift key and select additional material settings.
  3. Then right click and choose Export Selected Items.

This will come in handy on so many projects! Whether you have your own cut settings you like to use or have specialty products that are not in the presets.

Make sure that you go check out Terri Johnson Creates blog and sign up to get notified for new information released. The next All Things Silhouette Conference will be announced soon and I have it on my calendar for 2019.

Enjoy!

SS_Signature copySS Logo snip it

**This post may contain affiliate links. What that means is that I may receive compensation if you purchase through the links I have provided. The price you pay for the product or service is not higher but I may get compensated for sharing.

Posted on 3 Comments

Cutting Cards with the Silhouette

I started my Silhouette journey as a paper crafter and it has expanded from there. But, I always still love getting paper out and playing with it.

I love being able to make custom cards and unique items with my Silhouette machines.

It was my husband’s birthday last month, so I needed a card.

This year, while I was shopping for the perfect card idea, he was upstairs playing on the xbox and this one popped into my view – Happy Birthday Circuitry by Snapdragon Snippets – Design #78049.

Design file

When you open this file, here is how it looks.

File open

The first thing I do is ungroup the file and then use the Fill Color Panel to add color to the design to make it easier to work with.

Color fill.JPG

Now, I place one color on my mat, move the pieces of the design onto the virtual design mat and cut that color. Then I move those pieces off the virtual design mat and move another color on to cut, until I have all the pieces of my card cut out for assembly.

Normally, I don’t use a spray adhesive but this time, I thought it would be perfect since the card front had so many twists and turns.

IMG_6289

A quick spray and it was ready to smooth down on the card base.

It was the perfect time to test my new Portrait 2 out.

IMG_6290

I used Close to My Heart Cardstock, a Scrapbook Adhesive by 3L tape runner, spray adhesive and a silver brad to complete this card.

IMG_6291

There are so many projects you can complete using your Silhouette machines! I hope you try something new today!

I would love to see what projects you create! Feel free to post on my Facebook group at Silhouette Secrets with EllyMae.

Enjoy!

SS_Signature copySS Logo snip it

**This post may contain affiliate links. What that means is that I may receive compensation if you purchase through the links I have provided. The price you pay for the product or service is not higher but I may get compensated for sharing.

Posted on 2 Comments

Silhouette Showcase

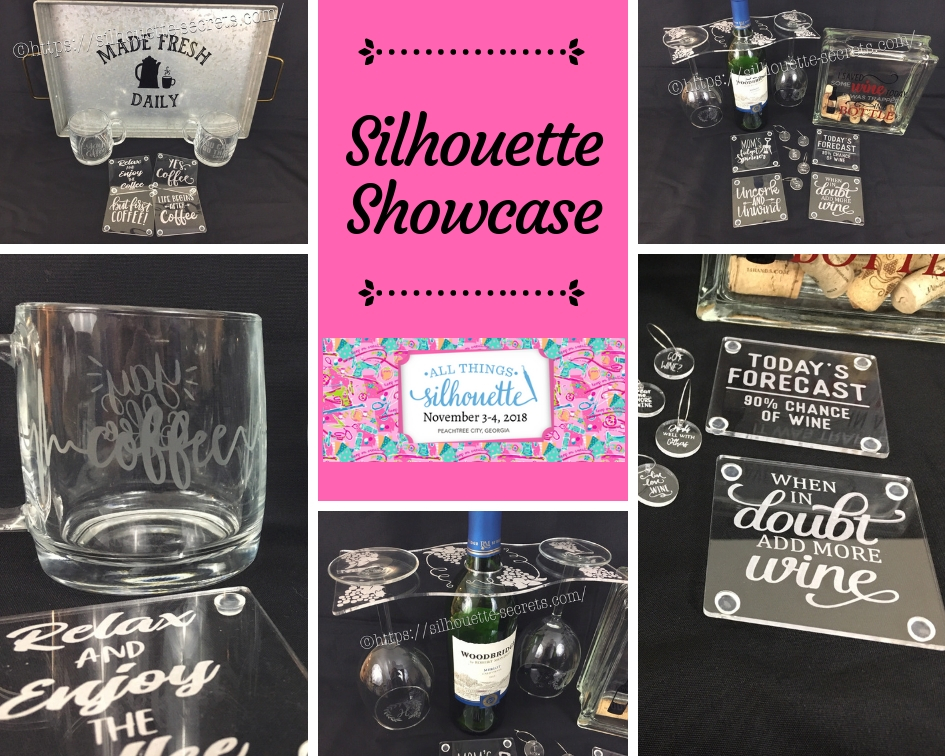
This year I am honored to be teaching several classes at the 2018 All Things Silhouette Conference hosted by Terri Johnson Creates. An option at the conference is participating in the Silhouette Showcase. This is a chance to show off things that you have made using your Silhouette machines or software and is open for all levels of users. Each person who enters gets an extra ticket to a prize drawing and while the staff is excluded from winning, we can display items in the hopes of inspiring others and showing all the possibilities with Silhouette.

I was so excited to be able to make up a few things to display during this event and wanted to share those with you.

Silhouette Showcase

Not sure what you start your day with, but mine is coffee.
So I started with this coffee inspired collection.

watermark_30-10-2018_05-07-37PM

Metal serving tray with Oracal 651 vinyl.
This design was created with Lori Whitlock’s Fresh Eggs fontDesign #263759 and Coffee Dingbats FontDesign #223050 using the Warp Feature in the Silhouette software. I use Oracal transfer tape for all my vinyl decal applications. Acrylic

Glass etched coffee mugs.
These glass mugs were purchased from Target and work well for etching. I used Oracal 651 vinyl for my etching stencil and Etchall cream for a great etch every time. For the mug on the left, I used Yay Coffee by Dawn Nicole Designs – Design #188578 and Coffee Pulse by Sophie Gallo – Design #149882. For the mug on the right, I used You Can Do This – Coffee by Jillibean Soup – Design #218802.

watermark_31-10-2018_10-58-37AM

Acrylic coasters etched with the Silhouette Curio machine.
I used the emboss panel in the Silhouette software to create the etched design.
These acrylic coasters can be found at Craft Chameleon and I would recommend purchasing the Curio template as well.
The designs used to create the coasters are:
Yes. Coffee by Kolette Hall – Design #171334
But First Coffee by Lilium Pixel SVG – Design #242962
Life Begins After Coffee Arrow Quote by Sarah Hurley – Design #258161
Relax and Enjoy the Coffee by Silhouette Secrets+ using History font by JumboDesign – Design #268580 and The Memories Sans Font Duo by Nursery Art – Design #276602.

watermark_31-10-2018_12-30-50PM

If you have followed me in my “Let’s Explore v4” series or on my Facebook page or group, you may know that I enjoy a glass of wine at the end of the day.
So of course, a wine collection set is right up my alley.

watermark_30-10-2018_05-07-06PM

Acrylic wine bottle caddy etched with the Silhouette Curio and the large Curio base.
This acrylic wine bottle caddy can be found at Craft Chameleon and the design file is included with the purchase of the acrylic blank. I would suggest the Curio large base template as well, it makes etching this blank so easy.

watermark_31-10-2018_11-00-00AM

Glass etched wine glasses.
For the etching stencil, I once again used the Oracal 651 vinyl and Etchall etching cream. The Monogram Wreath Font by Kristen Magee – Design #260225 was used to create these personalized glasses.

Wine cork collector.
This glass block was found in a craft store and Siser Easy PSV Merlot & black and Oracal 651 gray vinyl applied to the front.
The design is I Saved Some Wine Today Phrase by Kolette Hall – Design #131228 from the Silhouette Design Store.

watermark_31-10-2018_11-00-23AM

Acrylic wine charms etched with the Silhouette Curio.
These wine charms are 15/16″ clear acrylic circles and wine charm rings from Craft Chameleon.
Designs used to create the wine charms are:
Pour Me…. More Wine by Sophie Gallo – Design #203872
Live Love Wine by Kolette Hall – Design #158086
Drinks Well With Others by Kelly Lollar Design from SoFontsy
Screw It design – Freebie from Silhouette School
Got Wine design – created using the Buddy Mac font by Missy Meyer from SoFontsy

watermark_31-10-2018_10-59-39AM

Acrylic coaster etched with the Silhouette Curio machine.
These acrylic coasters from Craft Chameleon are a great way to personalize any gift.
The designs used on the coasters are:
Mom’s Fidget Spinner by Sweet Afton – Design #202772
Today’s Forecast 90% Chance of Wine by Jillibean Soup – Design #212800
Uncork and Unwind Arrow Quote by Sarah Hurley – Design #236620
Add More Wine by Megan Hardy Designs – Design #124514

For the Silhouette Showcase, a recipe is included with each display item.

I used the Silhouette Print and Cut feature to create recipes.

Print and Cut Coffee

Don’t forget when doing a print and cut, to select all the objects that you do not want to cut out and then choose the No Cut option on the Send Tab.
For instance, all I want is the outside edge to cut, so all the Cut lines except the outside edge need to be turned off.

Print and Cut coffee lines off

I started my Silhouette journey with paper crafting and continue to have a passion for it as well as all the other neat things you can do with it such as vinyl, glass etching & acrylic with the Curio, etc.

IMG_6482

I could have just left it at that, but of course, I didn’t. I added a little detail to the back that makes it stand up even more.

IMG_6483

This easel adds the perfect touch to my recipe, so I am easily able to transport it on the plane and display it at the Silhouette Showcase.
This is a file by Lori Whitlock called Easel for Back of CardDesign #76159 and I have used it many times when creating paper crafts.

SilhouetteShowcase

I hope you have enjoyed seeing the projects I created using my Silhouette software and machines for the Silhouette Showcase at the 2018 All Things Silhouette Conference.

Enjoy!

I love seeing what you are creating with your Silhouette machines!
Feel free to post on my Facebook group at Silhouette Secrets with EllyMae.

SS_Signature copySS Logo snip it

**This post may contain affiliate links. What that means is that I may receive compensation if you purchase through the links I have provided. The price you pay for the product or service is not higher but I may get compensated for sharing.

Posted on 8 Comments

Let’s Explore v4 – Weeding Lines

Weeding Lines

With the Silhouette Business Edition upgrade, there is a Weeding Lines feature. It can be found on the right side at the bottom of the Panels icons.
If you are on a smaller computer screen, click on the triangle for a fly out menu to open with more icons.

If you are new, the term “weeding” may be new to you. This is simply the removing the excess material around the design that you have cut. When you are using a material such as Oracal 651, it can be easier to remove in smaller sections.

What are weeding lines? These are lines or shapes you would use around a design to make it easier to weed the design. For instance, if you have a large decal cut out of Oracal 651 such as this 12″ x 12″ tile project, it can be much easier to weed it with smaller sections, since it is very sticky and easily sticks back to itself.

Tile photo

If you do not have the Business Edition upgrade to the Silhouette software, then you can create your own by drawing shapes or lines. For instance, in this design I drew 2 lines across the entire design, so it would cut the vinyl and break the design up into 3 smaller pieces to work with. A 3rd line could have been added between Cameo and the Established line as well.

Weeding Lines example*Ironwork Split Flourish Title by Kolette Hall – Design #93441

I usually forget to add weeding lines until I’m in the middle of weeding a large decal and then wonder why I don’t use this feature more often.

However, with the Business Edition upgrade, there is a feature that will set the weeding lines automatically for you. But, it may not work exactly how you think it should. Once you understand how it works, then it may work better for you.

Let’s take a look at the Weeding Lines Panel.

Weed Settings Panel

Weeding Lines Panel detail copy
  1. Weed Lines – Choose an option on how the weeding lines should act. There are 5 options: Off, Horizontal, Vertical, H/V, or Recursive.Weeding Lines options copy copy
    1. Off – no weeding lines applied to the Silhouette mat.

    2. Horizontal – weeding lines on a horizontal axis where clear paths occur.

    Horizontal weeding lines*I Drink Wine Like a Mother by Sophie Gallo – Design #2060693. Vertical – weeding lines on a vertical axis where clear paths occur.

    Vertical weeding lines*Periodic Table Wine by Suzanne Cannon – Design #220524

    4. H/V – Horizontal and vertical weeding lines applied, where clear paths occur.

    H V weeding lines

    *They Whine I Wine by Sophie Gallo – Design #204838

    5. Recursive – Adds weeding lines between letters, where clear paths occur.

    Recursive weeding lines
    *It’s Always Wine O’Clock by Sophie Gallo – Design #207704

  2. Padding – Adjusts the spacing between the weeding lines and the design.
    Here is the default setting with the padding at 0.394 in.

    Padding 1
    *Running Out of Wine Cardio by Megan Hardy Designs – Design #222003And here is the padding increased to 1″.

    Padding 2
    You can control how close or far away you want the weeding lines to the design.
  3. Weed settings – Only Shapes on Media – Choose whether the weeding lines should include designs that are placed off of the design mat or only the shapes on the mat.Here is how it should look with the Only Shapes on Media unchecked.

    Only Shapes on Media
    *This Might Be Wine by Sophie Gallo – Design #206771
    *Running Out Wine Cardio by Megan Hardy Designs – Design #222003

    It will place weeding lines around all the designs on your work space.

    Now, there are some versions of the software that this feature does not work properly and it will put weeding lines around all the images on the work space whether the box is checked or not. I have found that if you turn the cut lines off on the designs that are off the design mat, then it only sees the designs with the cut lines on and includes those in the automatic weeding lines.

    Here I have turned the cut lines off on the design that is off the mat and then the automatic weeding line feature only sees the design that is set to cut.
    Workaround shapes on media

    It will just depend on what version of the software you are using in how this part of the feature acts.

    What does clear path mean?

In all of the options of weeding lines, I mentioned that it has to have clear paths in order to create a weeding line. What this means is that it has to be a clear path from left to right or top to bottom in order for it to make a weeding line automatically.

No clear path example

Now, while we may “think” there is a clear path, sometimes the software sees the space around the design or font when selected and reads it as a blocked path.

For instance, with the ever popular Samantha font, there is lots of excess space around the text in the selection box. This is because it is accounting for every single character and glyph in the font file.

Selection boxes copy

If the weeding lines are turned on, even if it looks like there are clear paths for a weeding line, the software is reading the actual selection box around each text and it does not see a clear path.

Selection box weed lines on

In this case, before cutting, the text would need to be welded. Once you change the text in any way, it is no longer editable text, so I recommend making a copy of the original and pulling it off the design mat. If you have a font that does not overlap, then you can use the Convert to Path option and this will then only account for the letters in the design and not the entire font file for the selection box.
For more information on Text Style click HERE.

Selection box convert copy

Now, you can see the selection box around each text box has decreased in size to include only the letters that are in the design.

If the weeding lines are turned back on, you will see there are more clear paths.

Selection box clear path

I think the Automatic weeding lines feature that is available in the Business Edition upgrade can be very useful, once you understand how it works.

Save this for future reference by pinning the image below.

To see more in the “Let’s Explore v4” series, click HERE.

I would love to see what you are making with your Silhouette machines!
Feel free to post photos or questions on my Facebook group at 
Silhouette Secrets with EllyMae.

Enjoy!

SS_Signature copy
SS Logo snip it
**This post may contain affiliate links. What that means is that I may receive compensation if you purchase through the links I have provided. The price you pay for the product or service is not higher but I may get compensated for sharing.
Posted on 14 Comments

Let’s Explore v4 – Emboss Panel

The Emboss Panel is such neat feature. Currently, it is only available to those who have plugged in a Curio machine.

It can be found on the right side of the Silhouette Studio v4 software and looks like a star with a shadow.

Emboss panel copy

Since this is a currently a Curio feature only, if you have not plugged a Curio into your computer, the Panel will be grayed out. If you hover over the icon, you get this message.

Emboss warning

So keep that in mind if you are looking at it along with me.

Emboss detail copy
  1. Deboss – the design will be created as seen on the screen & will press the design down into the material exactly as seen on screen.
    For example, if using cardstock, it will create a valley where the design is.
    Emboss – the design is flipped horizontally so it is mirrored BUT it does not show this on the screen. You will place your material face down on the embossing mat and the design will be pressed mirrored. When it’s finished, you will flip it over and the design should be raised on the side that was face down on the mat.
  2. F – This tells you which way to put the material on the mat. For deboss, put the material face up.
    F Deboss
    For emboss, put the material face down.
    F Emboss
  3. Embossing Patterns – Choose between 5 options: none, lined, concentric, cross hatched, or spiral.
    Lined
    Line Pattern
    Concentric
    Concentric Pattern
    Cross hatched
    Cross hatched pattern.JPG
    Spiral
    Spiral
    Each design will vary in which pattern may look better for the emboss. Again it is a matter of personal preference. I prefer the look of the cross hatched pattern, especially when etching on acrylic. But, that is just my preference, you should play with the patterns and decide what you like.
  4. Spacing – Increase or decrease the grid spacing between the lines of the pattern. This is 0.005 spacing – a really tight DebossSpacing smallIf we zoom in on the design, you will see the pattern.
    Spacing small zoom

    Here the deboss is 0.025.

    Spacing larger

    This is another area where you are changing a lot of data at one time, so be patient with your computer if it is thinking.

    If the pattern spacing is smaller than what the Silhouette can process, then you will end up with a blue square or a square with an X in it.

    Error spacing
    Use the up arrow and increase the spacing just a bit or delete and type in a number just a bit higher than the current spacing, until the box disappears. Remember, be patient and go slow, it is processing a lot of data.


    Above 0.015 was too small but increasing to 0.025 there was no longer the error.

    Error spacing2
  5. Angle – Change the angle of the deboss or emboss pattern.
  6. Release Emboss – Releases the lines of the emboss pattern. When you are satisfied with the pattern, click on the Release Emboss button.Once the emboss/deboss is released, you could add another pattern on top if you chose to.

Here is the flower design (Floral Elements Design #191146) embossed on a piece of Silhouette Score & Emboss paper. This was embossed using the Silhouette fine tip embossing tool and 3 different embossing patterns.

Flower emboss

Now, while I have not been that impressed with the emboss ability on cardstock, it is just not deep enough for my liking,  I do love using the emboss features on materials such as metal and acrylic.

Silhouette Metal Etching Sheet
Metal etching 2
Home Sweet Home Montana by Jennifer Wambach Design #148502

Metal etching 1
Welcome Elk by Sophie Gallo Design #89012

Acrylic

acrylic etching
Acrylic coaster blanks from Craft Chameleon
Eat, Sleep, Coffee Repeat by Sophie Gallo Design #230872
Less Monday More Coffee by Tany Batrak Design #209927
Yes, Coffee by Kolette Hall Design #171334
But First Coffee by Lilium Pixel SVG Design #242962

I hope you have learned a little bit about the Emboss Panel today. The Curio machine very quickly because a favorite of mine and now I can’t put it away.

Here are a few more a things to help you get started on the Curio.
The Curio – Getting Started with the Curio
Silhouette Curio Beginner Metal Etching
Basic Acrylic Etching Video Class

I’d love to see what you are creating with your Silhouette machine.
Feel free to post over on my Facebook group at Silhouette Secrets with EllyMae.

Enjoy!

SS Logo snip it

**This post may contain affiliate links. What that means is that I may receive compensation if you purchase through the links I have provided. The price you pay for the product or service is not higher but I may get compensated for sharing.

Posted on 19 Comments

Let’s Explore v4 – Conical Warp Panel

Conical Warp – What is it?

Conical warp shapes your design given the dimensions that you enter to fit the conical object you are trying to place a design on.

A conical shape is one that is smaller at one end than the other, like a cup.

Cup

Have you ever tried to place a vinyl decal on a cup only to find that it doesn’t lay flat or line up? This is where the Conical Warp Panel will come in handy.

Conical Warp is a Designer Edition Plus feature or higher upgrade feature and can be found on the bottom right of the Silhouette Studio v4 software.

Conical Warp copy

So let’s take a look at what this panel means.

Conical warp detail copy.jpg

  1. Conical Warp Selected Shapes – Select the design to warp and then click on this to start warping the design.Conical Warp Selected Shapes
    *Be Your Own Crazy Self Phrase by Kolette Hall – Design #169936
    *Romantic Flourish Set by Sarah Bailey Design #75427

    When the design is being warped you will see the red box with curved lines on the top and bottom appear around the design.

  2. Diagram – Shows a diagram of the object you are entering the measurements for. As you add measurements the shape will change.
  3. Top Measurement – Measure and enter the top measurement of the object.IMG_6159
  4. Bottom Measurement – Measure and enter the bottom measurement of the object.IMG_6160
  5. Top to Bottom Measurement – Measure and enter the measurements from the top to the bottom.
    IMG_6161
  6. Size of Design – Increase or decrease the size of the design. Depending on the design you have, it not be a big difference you see on the screen. it will depend on the curvature of the object to be warped. As you enter the measurements, you should see it change on the screen.Size of Design
  7. Placement of design – Adjust the placement of the design from the top or bottom of the curvatures of the cup. As you can see, in this design it curves the arrows and that is noticeable.Placement of design
  8. Cancel or Apply – Choose to cancel or to keep the warp.Cancel will undo everything chosen.Apply will release the warp and the design will be ungrouped. Make sure to group it back together so it will move as one item.When you click on Apply, you may get a Processing pop up. This is a lot of data that it is changing, just be patient and it will depend on the computer processing power on how long it takes to finish.

    Apply design

Now, it is ready to cut with the warp that will help it apply straight onto the cup.

Decal.jpg

I used Black Oracal 651 for this decal and it cut beautifully. And then I used Oracal Transfer tape to apply it to the cup.

Finished cup

This feature makes it so much easier to apply a decal straight onto a conical object.

Now, I will let this decal sit for 72 hours for the adhesive to cure on the cup for best results.

I used Be Your Own Crazy Self by Kolette Hall Design #169936 and Romantic Flourish Set by Sarah Bailey Design #75427 from the Silhouette Design Store to create this.

I hope this helps you understand the Conical Warp Panel in the Silhouette Studio v4 software! It is such a fun feature to play with and I encourage you to just try it!

Enjoy!

SS_Signature copySS Logo snip it

**This post may contain affiliate links. What that means is that I may receive compensation if you purchase through the links I have provided. The price you pay for the product or service is not higher but I may get compensated for sharing.