Posted on Leave a comment

Silhouette “Secrets” – EllyMae’s Craft Supplies

Affiliate links may be present in the following blog post and as an Amazon Associate, I earn from qualifying purchases.

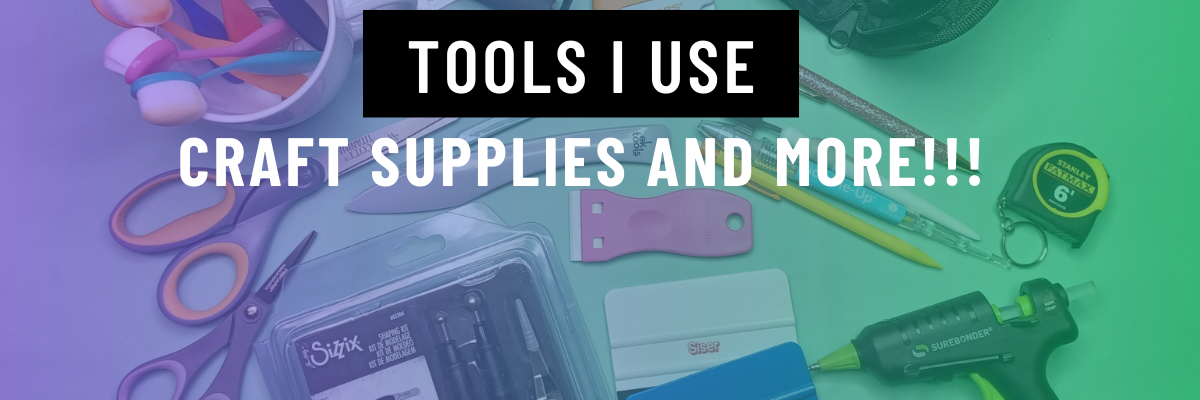
I think every project I start seems small at the beginning, but seems to grow bigger than I originally thought. It is no different with this list of supplies I use in my projects and have in my studio.

I am asked all the time what I recommend and use, so I have added a header on the website with a list of supplies that I have in my studio and use.

Check out “EllyMae’s Craft Supplies” header HERE.

I am a big fan of use what you have, so if you have your favorite tools, use them! I have found new favorites over the years of project creation and thought I’d share. Do you have to use the same exact tools as me? NO! Use what you have, what you love, and what works best for you! I am simply sharing what I use and will add to this list as I find new favorites!

I’d love to hear what are some of your favorite tools! Comment below and let me know!

Save this for future reference by pinning the image below.

Enjoy !

THANK YOU for your support! How can you help? Click HERE & buy a coffee.
Every little bit helps with the cost of running the site.

Silhouette Classes

Never stop learning! Let me help you take the anxiety out of learning with Silhouette and get to creating faster! My Silhouette classes are heavily focused on software, so you can take the skills & techniques taught and apply them to many future projects!

Silhouette step-by-step Classes by Silhouette Secrets+

**This post may contain affiliate links. What that means is that I may receive compensation if you purchase through the links I have provided. The price you pay for the product or service is not higher but I may get compensated for sharing.
Posted on 1 Comment

Silhouette Cameo 4 & Siser Juliet & Romeo

As many of you know, I was invited by Siser to Italy in September 2022 for a product launch. We were given a tour of the Siser headquarters in Italy and a first glance at their new cutting machines. I have been using the Siser Juliet and Romeo machines in my craft projects since last fall when they were released.

Siser Headquarters in Italy with Silhouette Secrets+ and Swift Creek Customs

Before we go farther, yes, I am still using my Silhouette machines too!
I am using both. Sometimes even together for some projects!

This opportunity presented itself at a great time for me and I’ve enjoyed the challenge of learning something new. For me, this is continuing education.
I love to find out how things tick and I love new tools!

If you want to see more about my trip seeing the Siser HQ, check out this post –
New Release from Siser HERE.
I love behind-the-scenes looks at how companies in the industry work!

Since returning from Italy last fall, I have been testing and putting these new machines through the paces. Basically, anything I do with my Silhouette machines, I then try with the Siser Juliet or Romeo. I dive in and really watch how the machine works and what it can do. I’ve learned a lot and feel comfortable sharing that now with others.
Check out the Swift Creek Customs YouTube channel to see that side of things!

But, one of the big questions that was asked from the very beginning was – how does it compare to the Silhouette or Cricut machines?

What is right for you? Siser Juliet, Romeo, or Silhouette Cameo

So the first thing I want to say is that it takes time to learn a new machine and the software that runs it. Opening the box and giving a comparison may not reflect accurately on either machine.
Now that Siser Juliet and Romeo have been out and I am very familiar with the machine and the Leonardo Design Studio software, I have a few things to share.

A few weeks back I published a new video on the Swift Creek Customs YouTube channel sharing a bit more information. Well, really, I focused on 5 specific topics and demonstrate the differences of each with both brands. I had an ever growing list, but I had to narrow it down to a few key factors.

Silhouette Cameo 4 and Siser Juliet & Romeo

Check out the new video HERE.

Do I think the Siser Juliet & Romeo machines are for everyone? No
Do I think the Silhouette Cameo machines are for everyone? No
To be honest, there are some users that do not have the patience to learn either one or any cutting machine for that matter.
Do I think that anyone can learn to use a Silhouette Cameo or Siser Juliet/Romeo machine?
YES! If you are willing to take the time to learn, anyone can do it!

But, and a big but here…. YOU are the only one that can determine what machine is good for you and your projects!!! That could be multiple brands of cutting machines that have their strengths in different areas or it could be one model machine only or it could be none at all. But only YOU can decide!

The 5 topics I cover in the video are:
– Craft Cutting Machine vs More Professional Machine
– Software
– Machine Rollers
– Print and Cut
– Blades, Tools & Cutting Mats

If you are interested in learning more, check out the
Silhouette Cameo 4 & Siser Juliet & Romeo video HERE.

I do have Facebook groups for both where users share their projects.
Silhouette Secrets+ with EllyMae
Creating with Siser – Juliet and Romeo Cutting Machine Users

No matter what machine you have, the most important thing is that you get it out of the box and use it!

Looking for a cutting machine?

Find either one at authorized retailers
Silhouette
Check out the deals at Crafter Cuts HERE
Use my coupon code SECRETS to save 10%

Siser Juliet & Romeo available at The Vinyl Spectrum HERE
Fast shipping!

I hope you will join me on my journey and continue to grow along with me!

Find me online at:
Silhouette Secrets+ Blog
Silhouette Secrets+ YouTube channel
Silhouette Secrets+ Facebook Page
Silhouette Secrets+ Facebook Group
Silhouette Secrets+ Instagram
Swift Creek Customs Facebook Page
Swift Creek Customs YouTube channel
Creating with Siser Juliet & Romeo Cutting Machine Users Facebook Group

Save this for future reference by pinning the image below.

Pinterest Silhouette Cameo 4 and Siser Juliet & Romeo

Enjoy !

THANK YOU for your support! How can you help? Click HERE & buy a coffee.
Every little bit helps with the cost of running the site.

Silhouette Classes

Never stop learning! Let me help you take the anxiety out of learning with Silhouette and get to creating faster! My Silhouette classes are heavily focused on software, so you can take the skills & techniques taught and apply them to many future projects!

Silhouette step-by-step Classes by Silhouette Secrets+

SS Logo snip it
**This post may contain affiliate links. What that means is that I may receive compensation if you purchase through the links I have provided. The price you pay for the product
Posted on 1 Comment

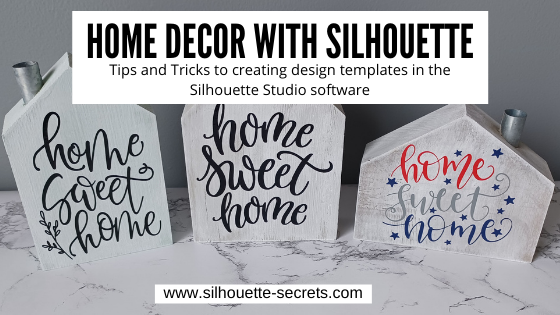
Home Decor with Silhouette

Using the Silhouette Software to Help Design Home Décor

I always have my eye out for things that I can use in creating with my Silhouette machine. Target had these little wooden houses available in their Dollar section.

After debating with my inner self, I finally picked up a set.
I always have this inner dialog on – can I make that? Will I make that?
Yes, I can cut the wood, but when will I get it done?
Right now, in the process of moving, our wood shop is not set up, so I did it.
I bought wood shapes.

If you have access to a saw, you could create your own shapes. This tutorial is not limited to these little house shapes, but think about the supplies you have on hand and you can use this same technique for any blanks you use.

Affiliate links may be present in the following blog post and as an Amazon Associate I earn from qualifying purchases.

Next, gather the rest of the supplies.
– Paint
– Foam brush
– Paint palette or small dish
– Sponge
– Painters Tape
– Adhesive Vinyl
– Transfer Tape
– Squeegee
– Weeding tool

Tape off any sections needed with the painters tape. In this case, each house has a metal chimney.

Paint the houses any color you want.
I chose to paint a solid color of gray, light blue, or dark gray as the first coat and then used the white chalk paint with the sponge on top of that to give it a distressed look.

Let the wood blanks dry completely.

Next, measure the space of each blank and write that down.

This is just a rough draft and does not have to be perfect or to scale.

Using the information from your measurements and drawing, draw shapes in the Silhouette software to design use as “design templates”.

For these houses I started by using a rectangle under the Drawing Tool on the left side and then used the Edit Points to pull up a point in the roof.

Check out this video tutorial showing the full process of drawing the shapes in Silhouette Studio.

Find this video on YouTube HERE

Once you have the template shapes, then you can decide on the designs to fill those shapes. Some designs will work better in the shapes than others.

I used the following designs on my double sided houses:
Home Sweet Home by Angele Camp – Design #233239
Hello Fall by Lilium Pixel SVG – Design #300125
Home Sweet Home by Diva Watts Designs – Design #346001
Home Sweet Home by Diva Watts Designs – Design #347923
Home Sweet Home by Design Hooked – Design #354446
Fall Bouquet by Tanya Batrak – Design #159397

Once all the designs are sized how you want them to cut, move the designs around on the virtual mat to cut out each color vinyl you want them in.

Then send to the Silhouette machine to cut all the adhesive vinyl pieces. I cut everything from Oracal 651 adhesive vinyl.
I have been having an issue with the vinyl cutting too deep into the backing using the preset settings, so I am using the settings of:
Blade depth – 2
Force – 5
Speed – 5
With a Silhouette Autoblade and it is cutting, weeding, and transferring beautifully.

Cut settings depend on many variables and test cuts will be the way to find out what is going to work best with your material and blade. For more tips on cut settings check out this post – Perfect Cut Setting in Silhouette.

Carefully weed the excess vinyl from around the designs.

This takes practice and the cut settings can make a big difference in the ease of weeding.
Do not rip it off like a bandaid.

After all the weeding is done, apply vinyl to blanks

Here is a quick real time video of the application process on one of the wood blanks.

In the above video, I reference a recent tutorial on the Smart Snapping lines. This can be a very helpful tool as shown in the video.
Check out the Let’s Explore v4 – Smart Snapping post HERE

And now you have some seasonal or year round décor.

Double sided means that they can pull double duty in your seasonal decorations.

And if I were to ever want to change the designs out, I would just carefully remove the vinyl. Sand it if needed and repaint, then cut and place new vinyl designs on them.

Keep in mind that you can use these tips & techniques for any blanks you might have!

I’d love see what you create & how you use the tools in Silhouette Studio
Feel free to post on the
Silhouette Secrets+ Facebook Group.

Save this for future reference by pinning the image below.

Enjoy!

This image has an empty alt attribute; its file name is logo.jpg

THANK YOU for your support! How can you help? Click HERE & buy a coffee.
Every little bit helps with the cost of running the site.

Or if you are looking for more in-depth, step-by-step classes, check out all of my online Silhouette classes on my Teachable site HERE.

SS Logo snip it
**This post may contain affiliate links. What that means is that I may receive compensation if you purchase through the links I have provided. The price you pay for the product or service is not higher but I may get compensated for sharing.
Posted on 11 Comments

How to Print & Cut Larger in Silhouette

I loved that the Silhouette Studio offers the feature of print and cut for projects. There are just some times that it is much easier to print out a detailed design than to layer it with adhesive vinyl or HTV. It also gives the project a little different look.

For the basics of this feature – check out the
Let’s Explore v4 – Print and Cut Basics” post HERE.
This is where I would encourage any new user to start or if you have been having issues getting an accurate cut.

Print and Cut Basics header

Do some test print projects and get that baseline developed for the print and cut. Just like any new project, I would encourage you to get a feel for how it works and turns out before you start adjusting things.

But, what if you want to print and cut larger? Is it possible? Yes! Let’s explore how.

This tutorial is written using the v4.3.370 Silhouette studio software. For versions prior to v4.3 you may see a few differences in the software, the steps will be the same. However, you may find this Print and Cut Part 1 tutorial to be helpful too.
Affiliate links may be present in the following blog post and as an Amazon Associate I earn from qualifying purchases.

What is the largest you can print and cut with the Silhouette?

Well, the first answer to that is – what size can you print?
Do you have a large format printer?

That is going to be the first limit you have. How large can you print?

I have the Canon TS9521C Crafting printer and I hesitated at first to invest in it. But, I have not regretted that purchase one bit. I have gotten great quality prints out of this printer and love it.

IMG_20200304_093422772 copy

You can find this printer on Amazon HERE.

Let’s start with a 12″ x 12″ print and cut project.
I am just using white Recollections cardstock from Michael’s. It works well.

First, I use the rear tray when I am printing on cardstock or for the larger formats. Even if I’m using letter size cardstock, I find that the rear tray where it feeds in straight and doesn’t have to curl inside the printer turns out better. I get less errors on the prints or jams in the printer.

Open a new design mat.
On the Page Setup Panel, choose the Media Size of the paper – in this case a 12″ x 12″ media size.

Check the box next to Show Print Border & Show Cut Border.

12 x 12 page setup copy

The gray outline that shows up on the design mat is the Print border. This is set by the default printer that is connected to your computer.
Currently the printer is set to print on a Letter size sheet of paper.

To print larger, that needs to be adjusted.
Click on File in the top left corner of the Silhouette software & choose Print.

File Print copy

This will open up a Printer menu. Note that the printer menus may be different depending on computer and printer model.
I am using a Windows PC with the Canon TS9521C printer.

File Print Preferences copy

Then click on the Preferences option
(could also say Advanced Options or another term – depending on the printer).

Print Preferences copy

If there is the option to “Preview before printing” I suggest choosing that. It can save you a lot of headache on a mis-print.

Then make sure there are no features checked such as “borderless printing” or “fit to page” – these can alter the page from printing accurately and can cause registration errors.

Choose the Media type – in this case it is Cardstock.

Set the Printer Paper Size. The list that pops up is going to be determined by the options  available for the current default printer chosen. I chose “Square – 12″ x 12”.

Set Paper Source. I selected “Rear Tray”.

Then click on Ok. And then click Apply.

Print Border copy

Now, notice that the Print Border has now adjusted to a 12″ x 12″ page.

Let’s set up the Print and Cut now.
Click on the Page Setup Panel – Registration Marks Tab.

Registration Marks copy

Choose “On” for the registration marks and then I highly recommend clicking on the “Restore Defaults” button. This will help you in establishing a baseline for your print and cut. I print almost all my projects at the default Registration Marks and I have no issues getting it to register.

While the registration marks can be moved, the farther they are moved increases the chances of an inaccurate cut. I recommend to start, use the defaults and as you get more comfortable, you can start changing things.

Notice the Cut border now changes to line up with the Registration Marks.

Now, let’s add designs to the page. If you are opening designs from the Library, right click on the image and choose “Merge” – this will place it on the current design mat we have set up. If you open a file from outside the library, go to File > Merge and then locate the file to open.

Llama card copy
Changing Scene Birthday Llama by Lori Whitlock – Design #304249

Double check that the cut lines have a line width of zero under the Line Style Panel before printing. And also that no part of your design appears in the cross-hatched area of the print and cut. This can affect the reading of the registration marks.
Check out more tips HERE.

Then choose File > Print and if you have set up the print preview it will spool the print job and a preview will pop up on the screen. This is a great habit to get into as you can often spot an error before you’ve sent the entire job to print.

Keep in mind that the time to spool from the computer to the printer can vary. This will depend on the amount of data you have in the file and also whether the printer is hard wired or wireless can affect it as well.

Print Preview copy

Double check that the bottom left registration mark shows it will print completely. This is one of the top errors I see with print and cut is the default registration marks may be outside of the printer margins. This will vary by printer, so some users may experience it more than others.

If you need to change something or it doesn’t look right, choose Cancel Printing.
If it all looks good, then click on Start Printing.

IMG_20200304_172713815 copy

Place it on the cutting mat, exactly as it shows on the design screen. Make sure you are lining the paper up so that it covers the grid lines on the Silhouette cutting mat.

IMG_20200304_193647789 copy

These turned out so cute! I will definitely be making more of Lori Whitlock’s changing scenes cards.

Now, let’s talk bigger.

I have a sheet of 11″ X 17″ media. I changed the cutting mat to a 12″ x 24″ mat and set the Printer Page Setup under File > Print the exact same way as outlined above, except I chose the 11″ x 17″ paper size.

11 x 17 PNC copy

Notice the Print border adjusts according to the page size set under the File > Print setup.

Turn the Registration Marks on and then add the design(s) to the page.

11 x 17 PNC print copy

Again, I always like to turn the Print Preview on as my last fail safe to catch an error before it prints the entire sheet.

Once it’s done printing, place it on your mat, choose your Cut settings and send it to cut.

IMG_20200304_211312196 copy

Print and cut can be used for so many different projects from cards, stickers, printable heat transfer, etc.

IMG_20200307_165626058 copy

Now, with the larger machines being released – Cameo Plus 15″ (available) and the Cameo Pro 20″ (coming soon) – the big question is “How big can you print and cut?”

Again, the 1st answer is – How big can you print? That will be the first limit.

And then, the 2nd answer is – How big is your media you are printing on?
That will be the next limit.

I printed on both a 12″ x 12″ piece of cardstock and then a sheet of 11″ x 17″ heat transfer paper. Is your media bigger than that? Both of these were cut on a Cameo 4 machine which has a cutting width of 12″ and it could also be cut on either of the larger machines coming out.

Here is an image of the design space of a Cameo Plus. If you are using higher than v4.3.370 of the Silhouette software, you would be able to change to this in the software even without owning a Cameo Plus.

Cameo Plus copy

Notice that the Print border stayed at my 11″ x 17″ size. I did not change it so, it stayed the same, as it recognizes what the default printer is set at. But, if I add the registration marks to the page, you can see that they will show up.

Again, it will depend on both the size of media you can print on and the size of media you have available to print on.

Have some time? Just sit down and play in the software. You never know when you will stumble across something new!

For more print and cut help check out these posts as well
Let’s Explore v4 – Print and Cut Basics
Print and Cut Part 1
Print and cut Part 2 – Text
Print and cut Part 3 – Images
Print and cut with Heat Transfer Paper

Save this for future reference by pinning the image below.

Pinterest 1

I would love to see what you create!
Feel free to post on my Facebook group at Silhouette Secrets with EllyMae.

Enjoy!

SS_Signature copySS Logo snip it

**This post may contain affiliate links. What that means is that I may receive compensation if you purchase through the links I have provided. The price you pay for the product or service is not higher but I may get compensated for sharing.

Posted on 1 Comment

Aloha Tuesday!

As this post is being published, I will be somewhere over the United States making my way from the East Coast to the islands of Hawaii to attend the Silhouette Summit!

Summit photo

I am so excited & honored to be attending the Silhouette Summit 2019 and it is a dream come true for me.

This will be my first time in Hawaii and I had to make a new tote to carry stuff to the beach in.

Honu Turtle by Suzanne Cannon Design #291495
Hibiscus Monogram by Sophie Gallo Design #135110
Monogram Script Arrow by Rivka Wilkins Design #82335

What is the Silhouette Summit?

It is Silhouette America’s annual partner event that is held in Honolulu, Hawaii. This year Silhouette, Inc. is celebrating it’s 10th year as a company and has exciting announcements planned.

I am so excited to meet many others in the Silhouette Industry and I love networking with others who share my same love for the Silhouette products.

As an attendee we will attend presentations and meetings about what is coming up this next year for Silhouette, Inc.
I can’t wait to share with you all that is coming!
And as soon as we have been given permission, I will share with all of you!

I will be traveling with several of my friends/colleagues and I know we are all so very excited for this opportunity.
While I’m away I encourage you to check out their sites as well.

Libby Ashcraft with Libby’s Loft
Libby's Loft

Lycia Evanoff with Caught By Design
Caught by Design

Julie Huggins with Sew Craft N’Spired
Sew Craft NSpired

and alphabetically last but not least is my good friend and mentor
Terri Johnson with Terri Johnson Creates
Terri Johnson Creates

And don’t forget to pop into the “Let’s Explore v4” series section at the top of this blog to get some tips on the Silhouette Studio v4.
My main focus in teaching Silhouette is the software. I believe learning the ins and outs of the software is key. It opens up endless possibilities.

What I have learned being in this Silhouette industry is that no one person can do it all. We each come from different backgrounds, which means that each one brings a new perspective to the wide, open world of what the Silhouette can do.

We can all learn from each other and I can’t wait to see what I can learn at this year’s Silhouette Summit.

While not everyone can be in Hawaii, there are still a few seats remaining at the All Things Silhouette Conference coming up in June. But hurry, it is almost sold out again. Only 3 weeks after returning from Summit, I’ll be headed for the ATS Conference!
I can’t wait to show everyone what I’ve been working on for classes!

ATS-logo.slider.2019-1024x419

This is an amazing conference with many Silhouette Industry leaders teaching lecture and hands on classes. Plus, attendees will be one of the first to see some of the new Silhouette products being released!! What a bonus!

The All Things Silhouette Conference is a gathering of Silhouette enthusiasts with lecture classes, hands on classes, vendor shopping, a Silhouette Showcase, T-shirt contest, make and takes, prizes, and so much more! I would highly recommend it to everyone!

Lots of information is this post! I hope you have time to check it out this week!

IMG_20190505_192203756
Hawaii Explosion Box by Daniela Moscone – Design #253510

Aloha for now!

Feel free to post your comments and questions below or on my Facebook group at Silhouette Secrets with EllyMae.

Enjoy!

SS_Signature copySS Logo snip it

**This post may contain affiliate links. What that means is that I may receive compensation if you purchase through the links I have provided. The price you pay for the product or service is not higher but I may get compensated for sharing.

Posted on 40 Comments

Mastering Edit Points in Silhouette Studio: A Guide

Silhouette Edit Points

Silhouette Secrets+ with EllyMae

Have you seen edit points pop up in Silhouette Studio before?
Do they intimidate you?
Well let’s see if we can change that.

Affiliate links may be present in the following blog post and as an Amazon Associate, I earn from qualifying purchases.

What are Edit points?

Edit points are basically the data points the Silhouette reads to make a particular shape of the object. Each edit point has qualities on how it is supposed to act such as straight line, corner, curved, etc. and this is how a shape is made up.

Edit Points copy

The edit points will come up on an object if you double click on the object or use the keyboard shortcut letter “A” with the object selected.

If you draw a circle, it is made up of 4 edit points.

Circle edit points copy

A square also has 4 edit points but the type of edit point are different than the above circle.

Square edit points copy

By clicking on an edit point, you can see what property it has in the Point Editing Panel.

Why Edit Points Might Not Show

In order for the edit points to appear, the object has to be a single object and an ungrouped object.

For instance, if I type out text, it is not treated as a design. So the edit points won’t appear.

If it is converted to a path, the edit points still will not appear because even though it’s acting as a design, it is still grouped together. If the design is ungrouped the edit points will appear because all the pieces are now separate.

Ungrouped copy

Or if the design is made into a Compound Path, then the edit points will appear.

Compound Path copy

Altering Edit Points

There are many ways to change the edit points.

By clicking on an existing point, it turns white, indicating that it is the point selected.

Selected point copy

It will tell you what kind of edit point it is. This one is a corner. Grab the blue squares on either end and this will adjust the outcome of this edit point.

Selected point moved copy

To select multiple edit points, hold down the Shift key & drag the selection box around all the points you would like to select. Then make changes to a group of edit points all at one time by moving or choosing a new property for those selected.

Select multiples copy

All edit points that are selected will show as white points.

Point Editing Panel

When the editing points are active, the Point Editing Panel should pop up or click on the Edit Points tool on the left side menu.

Point Edit Tool copy

This panel has many options for how you can alter an edit point(s). The name of each tells you exactly what behavior it will have.
Each design you work with will react differently to what is changed.

Edit Points Panel copy

Remember, edit points are the data points that your Silhouette software relays to your Silhouette machine to connect the cut.

The Cameo machine needs to hit every single one of those edit points in order to make the cut. Some files such as dxf files or traced images can have lots of edit points and this can make the Cameo sound odd when cutting. The Cameo is not broken, but has to connect each of those edit points to make the cut.

Simplifying Edit Points

Some files can have the edit points simplified without changing the look of the design.
For instance, this Leafy Mandala by Rhonna Farrer from the Silhouette Design Store has a lot of edit points when I first opened it.

Leafy Mandal edit points original copy

In the Edit Points Panel, select Simplify.

Simplify copy

You should notice less edit points in the design.

Leafy Mandal edit points simplified copy

In this case, the design did not change in the look at all, but the edit points are now much less.

Leafy Mandal comparison copy

The best way to learn how edit points act is to find a design and just play around with the different options.

While they can look intimidating when they pop up on the screen, once you understand their purpose and how they work, I think it makes it seems a lot less daunting when you see them.

Designs used in this post are from the Silhouette Design Store:
#MoreCoffee by Kolette Hall – Design #179647
Leafy Mandala by Rhonna Farrer – Design #215137

Feel free to post your comments and questions below or on my Facebook group at Silhouette Secrets with EllyMae.

Save this post for future reference by pinning the image below.

Enjoy !

THANK YOU for your support! How can you help? Click HERE & buy a coffee.
Every little bit helps with the cost of running the site.

Silhouette Classes

Never stop learning! Let me help you take the anxiety out of learning with Silhouette and get to creating faster! My Silhouette classes are heavily focused on software, so you can take the skills & techniques taught and apply them to many future projects!

Silhouette step-by-step Classes by Silhouette Secrets+

Silhouette Secrets+ with EllyMae
**This post may contain affiliate links. What that means is that I may receive compensation if you purchase through the links I have provided. The price you pay for the product or service is not higher but I may get compensated for sharing.
Posted on 2 Comments

Let’s Explore Silhouette v4 in 2018 & 2019

Wow! 2018 has sure gone by fast!

There has been so much that has happened – what a year!

I started the year with the goal to have a blog post every week and I only missed 1-2 weeks, so I’m counting that as a success! On to next year!

I started the year out with a series called Let’s Explore v4 and have learned so much going through the software in detail. There are some features that I had never used and I learned so much as I researched and played with it. This program is so powerful and it continues to amaze me all the time.

SS cover photo copy

This Let’s Explore v4 series has been so popular that I will continue it into 2019 and I’ve created a special section on the blog for it all. Find it HERE.

There is still so much more to explore and more new features coming with the v4.2 release.

In addition to the series, I added some projects in here and there that I used the tools in the Silhouette v4 software to complete.

Collage Projects 2019

Layered vinyl acrylic ornaments

Cutting cards with the Silhouette

Back to School bag tags

“Tank” top

SilhouetteShowcase

Vinyl, Glass etching, acrylic etching – oh my!

WM

Faux leather earrings with Silhouette Leatherette

Header photo

Custom Shadow box with the Silhouette

Copy of Collage projects 2018-2

Subtracting text to create word art

Using Multiple files to create a design

Pop up cards

Creating rhinestone designs

Cutting without a mat

Cutting without a mat

Copy of Copy of Collage projects 2018-3

Hot Mess with the Silhouette

Layering vinyl

Bus Driver Appreciation

Teacher gifts

What a year! My absolute favorite thing about the Silhouette is creating projects and being able to show others how to do it too!

Make sure to join my Facebook group – Silhouette Secrets+ with EllyMae and share your projects there – I love seeing what you are doing.

If you are looking for personal instruction – check out the Silhouette Instruction & Events tab at the top of the blog.

What coming in 2019?

Classes, workshops, TJC Hands on Silhouette Spring Retreat, Intermediate Curio Workshop at Craft Chameleon in St. Louis, All Things Silhouette Conferences in June & November, more Let’s Explore v4 and who knows what else will be added to the calendar.

Classes

Here are just a few that I held in 2018


Keep checking on the Silhouette Instruction & Events tab for future classes.

TJC Silhouette Spring Hands On Retreat

March 1-3, 2019
Woodbridge, VA
Staff & Instructor
Silhouette-Spring-Retreat
Find out more information and register HERE!

Intermediate Curio 1 day Workshop at Craft Chameleon

March 2019
St. Louis, MO
More details coming soon!

All Things Silhouette Conference 2019

June 8-9, 2019
Peachtree City, GA
Staff & Instructor

ATS-logo.slider.2019-1024x419

Find out more details & register HERE for the June All Things Silhouette Conference.
New this ATS – Pre-day hands on classes! The Ultimate ATS package!

Silhouette-Getaway_02-1024x597

Silhouette Getaway
September 6-8, 2019
Peachtree City, GA

ATS-logo-slider-11-2019-1024x419

All Things Silhouette Conference
November 9-10, 2019
Peachtree City, GA

I want to thank everyone for following Silhouette Secrets+ in 2018 and want to wish everyone a Happy New Year!

Looking forward to what 2019 brings!

Enjoy!

SS_Signature copySS Logo snip it

**This post may contain affiliate links. What that means is that I may receive compensation if you purchase through the links I have provided. The price you pay for the product or service is not higher but I may get compensated for sharing.

Posted on 3 Comments

Cutting Cards with the Silhouette

I started my Silhouette journey as a paper crafter and it has expanded from there. But, I always still love getting paper out and playing with it.

I love being able to make custom cards and unique items with my Silhouette machines.

It was my husband’s birthday last month, so I needed a card.

This year, while I was shopping for the perfect card idea, he was upstairs playing on the xbox and this one popped into my view – Happy Birthday Circuitry by Snapdragon Snippets – Design #78049.

Design file

When you open this file, here is how it looks.

File open

The first thing I do is ungroup the file and then use the Fill Color Panel to add color to the design to make it easier to work with.

Color fill.JPG

Now, I place one color on my mat, move the pieces of the design onto the virtual design mat and cut that color. Then I move those pieces off the virtual design mat and move another color on to cut, until I have all the pieces of my card cut out for assembly.

Normally, I don’t use a spray adhesive but this time, I thought it would be perfect since the card front had so many twists and turns.

IMG_6289

A quick spray and it was ready to smooth down on the card base.

It was the perfect time to test my new Portrait 2 out.

IMG_6290

I used Close to My Heart Cardstock, a Scrapbook Adhesive by 3L tape runner, spray adhesive and a silver brad to complete this card.

IMG_6291

There are so many projects you can complete using your Silhouette machines! I hope you try something new today!

I would love to see what projects you create! Feel free to post on my Facebook group at Silhouette Secrets with EllyMae.

Enjoy!

SS_Signature copySS Logo snip it

**This post may contain affiliate links. What that means is that I may receive compensation if you purchase through the links I have provided. The price you pay for the product or service is not higher but I may get compensated for sharing.

Posted on 2 Comments

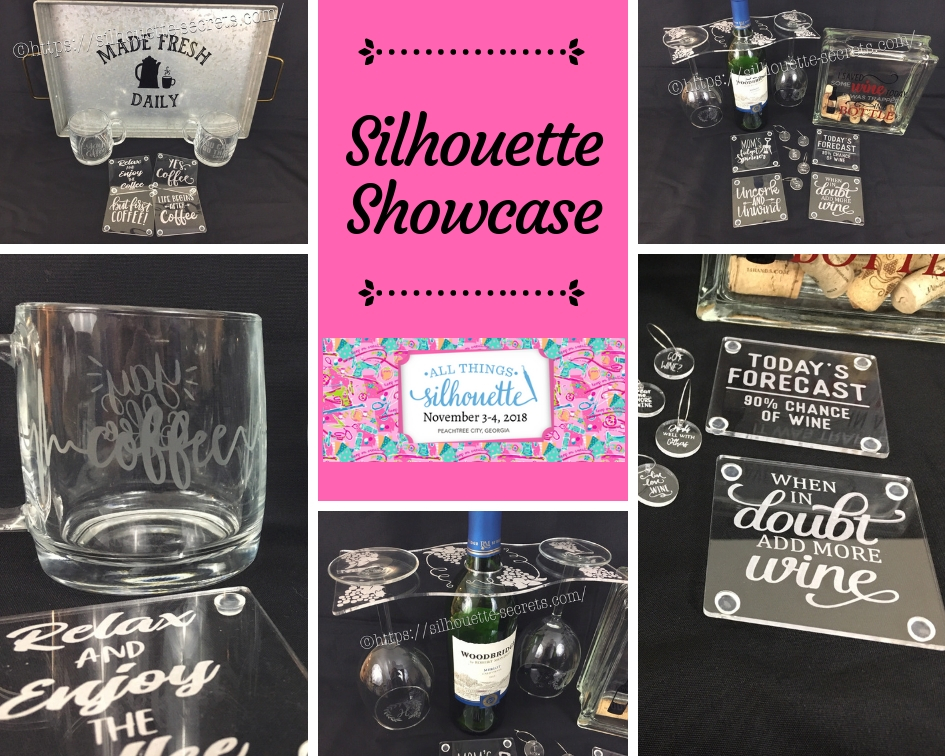
Silhouette Showcase

This year I am honored to be teaching several classes at the 2018 All Things Silhouette Conference hosted by Terri Johnson Creates. An option at the conference is participating in the Silhouette Showcase. This is a chance to show off things that you have made using your Silhouette machines or software and is open for all levels of users. Each person who enters gets an extra ticket to a prize drawing and while the staff is excluded from winning, we can display items in the hopes of inspiring others and showing all the possibilities with Silhouette.

I was so excited to be able to make up a few things to display during this event and wanted to share those with you.

Silhouette Showcase

Not sure what you start your day with, but mine is coffee.
So I started with this coffee inspired collection.

watermark_30-10-2018_05-07-37PM

Metal serving tray with Oracal 651 vinyl.
This design was created with Lori Whitlock’s Fresh Eggs fontDesign #263759 and Coffee Dingbats FontDesign #223050 using the Warp Feature in the Silhouette software. I use Oracal transfer tape for all my vinyl decal applications. Acrylic

Glass etched coffee mugs.
These glass mugs were purchased from Target and work well for etching. I used Oracal 651 vinyl for my etching stencil and Etchall cream for a great etch every time. For the mug on the left, I used Yay Coffee by Dawn Nicole Designs – Design #188578 and Coffee Pulse by Sophie Gallo – Design #149882. For the mug on the right, I used You Can Do This – Coffee by Jillibean Soup – Design #218802.

watermark_31-10-2018_10-58-37AM

Acrylic coasters etched with the Silhouette Curio machine.
I used the emboss panel in the Silhouette software to create the etched design.
These acrylic coasters can be found at Craft Chameleon and I would recommend purchasing the Curio template as well.
The designs used to create the coasters are:
Yes. Coffee by Kolette Hall – Design #171334
But First Coffee by Lilium Pixel SVG – Design #242962
Life Begins After Coffee Arrow Quote by Sarah Hurley – Design #258161
Relax and Enjoy the Coffee by Silhouette Secrets+ using History font by JumboDesign – Design #268580 and The Memories Sans Font Duo by Nursery Art – Design #276602.

watermark_31-10-2018_12-30-50PM

If you have followed me in my “Let’s Explore v4” series or on my Facebook page or group, you may know that I enjoy a glass of wine at the end of the day.
So of course, a wine collection set is right up my alley.

watermark_30-10-2018_05-07-06PM

Acrylic wine bottle caddy etched with the Silhouette Curio and the large Curio base.
This acrylic wine bottle caddy can be found at Craft Chameleon and the design file is included with the purchase of the acrylic blank. I would suggest the Curio large base template as well, it makes etching this blank so easy.

watermark_31-10-2018_11-00-00AM

Glass etched wine glasses.
For the etching stencil, I once again used the Oracal 651 vinyl and Etchall etching cream. The Monogram Wreath Font by Kristen Magee – Design #260225 was used to create these personalized glasses.

Wine cork collector.
This glass block was found in a craft store and Siser Easy PSV Merlot & black and Oracal 651 gray vinyl applied to the front.
The design is I Saved Some Wine Today Phrase by Kolette Hall – Design #131228 from the Silhouette Design Store.

watermark_31-10-2018_11-00-23AM

Acrylic wine charms etched with the Silhouette Curio.
These wine charms are 15/16″ clear acrylic circles and wine charm rings from Craft Chameleon.
Designs used to create the wine charms are:
Pour Me…. More Wine by Sophie Gallo – Design #203872
Live Love Wine by Kolette Hall – Design #158086
Drinks Well With Others by Kelly Lollar Design from SoFontsy
Screw It design – Freebie from Silhouette School
Got Wine design – created using the Buddy Mac font by Missy Meyer from SoFontsy

watermark_31-10-2018_10-59-39AM

Acrylic coaster etched with the Silhouette Curio machine.
These acrylic coasters from Craft Chameleon are a great way to personalize any gift.
The designs used on the coasters are:
Mom’s Fidget Spinner by Sweet Afton – Design #202772
Today’s Forecast 90% Chance of Wine by Jillibean Soup – Design #212800
Uncork and Unwind Arrow Quote by Sarah Hurley – Design #236620
Add More Wine by Megan Hardy Designs – Design #124514

For the Silhouette Showcase, a recipe is included with each display item.

I used the Silhouette Print and Cut feature to create recipes.

Print and Cut Coffee

Don’t forget when doing a print and cut, to select all the objects that you do not want to cut out and then choose the No Cut option on the Send Tab.
For instance, all I want is the outside edge to cut, so all the Cut lines except the outside edge need to be turned off.

Print and Cut coffee lines off

I started my Silhouette journey with paper crafting and continue to have a passion for it as well as all the other neat things you can do with it such as vinyl, glass etching & acrylic with the Curio, etc.

IMG_6482

I could have just left it at that, but of course, I didn’t. I added a little detail to the back that makes it stand up even more.

IMG_6483

This easel adds the perfect touch to my recipe, so I am easily able to transport it on the plane and display it at the Silhouette Showcase.
This is a file by Lori Whitlock called Easel for Back of CardDesign #76159 and I have used it many times when creating paper crafts.

SilhouetteShowcase

I hope you have enjoyed seeing the projects I created using my Silhouette software and machines for the Silhouette Showcase at the 2018 All Things Silhouette Conference.

Enjoy!

I love seeing what you are creating with your Silhouette machines!
Feel free to post on my Facebook group at Silhouette Secrets with EllyMae.

SS_Signature copySS Logo snip it

**This post may contain affiliate links. What that means is that I may receive compensation if you purchase through the links I have provided. The price you pay for the product or service is not higher but I may get compensated for sharing.

Posted on 7 Comments

Let’s Explore v4 – Layers Panel

Layers Panel in Silhouette Studio v4

Unless you’ve worked in another graphics program, like Photoshop, you may be wondering what layers are. In the Silhouette software, you can create a design in layers which allows you to do many things such as hide, lock, rename, cut by layer, etc.

The Layers Panel is an option if you have the Designer Edition software upgrade or higher for the Silhouette Studio.

If you open the Layers Panel on a blank design mat, you will see that there isn’t much in there.

Layers panel beginning

What this tells us is on the design mat I have open, there is 1 layer.  If I start drawing shapes or text, it will place all of those pieces on Layer 1.

For example, if I open this A2 Pop Up Owl card by Jamie Cripps from the Silhouette Design Store, it will tell us several things.

Owl o ween card example

Here is how the layers panel looks for this design.

Owl o ween card layers

On the right side is the Layers Panel and it shows 1 layer and that this layer is grouped together. If I un-group the design, it will show each shape on that layer or each grouping of shapes, depending on how the file was created. But, the entire design is still on the same layer.

Owl o ween card layers ungrouped

So let’s take a look at what all of this means and what you can do with the Layers Panel.

Layers panel copy

The layers panel can be found on the right side towards the bottom of the Silhouette Studio v4 software, if you have the Designer Edition upgrade to the Silhouette software.

There is a lot of information in this small panel, so let’s explore all the features.

Layers panel detail copy

  1. File name – This is the name of the file that is currently open.
  2. Layer details – The default name for each layer is “Layer 1” and then each proceeding one will be in numerical order, but you can change that by clicking on the word Layer and typing a new name or right clicking and choose Rename Layer.Layers right click options
    There are many options here including: add a layer under this layer, rename layer, delete layer, cut, copy, paste, select or deselect.In additional to those options, there are toggle options too.

    Eye and lock option copy

    The eyeball can be toggled on and off which hides or shows a layer.

    Eyeball on copy
    This can allow you to see how a design will look without moving the shape or object.

    The lock can be toggled on or off and allows a layer to be locked so it cannot be moved by accident. Again very helpful when designing if you want something to stay in place.

    Locked copy

    When a layer is locked, it cannot be selected, moved or altered. The layer can be hidden by clicking on the eyeball, but no changes can be made to the layer without toggling the lock off.

    Maximize and minimize the layer details by clicking on the circle next to the Layer name.

    Maximize copy

  3. Designs on layer – All objects that are on that layer will be listed below the layer title in the order they are on the mat.Designs on layersObjects can be grabbed and dragged to rearrange the order within the Layers Panel.
  4. Additional layers – Add as many layers as needed to a design. Having the parts of the design on separate layers allows more control over things while working with a design.
  5. Add or Remove Layers – Use these quick button to Add or Remove layers as needed.Add or Remove layers

Layers can be fun to play around with and can also serve many useful purposes when designing or using more complex designs.

The other option available once layers have been created is to Cut by Layer.

Cut by Layers copy

On the Send tab, choose the option to Cut by Layer and it will open up a window with all the Layer options. Now the cut lines can be turned on and off, depending on which part of the design is being cut.

I hope this helps explain the layers panel just a bit more!

Layers Panel

Enjoy!

Feel free to post questions or project photos on my Facebook group at
Silhouette Secrets+ with EllyMae.

SS_Signature copySS Logo snip it

**This post may contain affiliate links. What that means is that I may receive compensation if you purchase through the links I have provided. The price you pay for the product or service is not higher but I may get compensated for sharing.