Glass etching is a great way to make unique projects and combine that with a Silhouette cutting machine and you have endless possibilities of customization. In this blog post I’m sharing a look at custom etched martini glasses I made while creating the March 2026 exclusive video tutorial for the Creative Community.
Affiliate links may be present in the following blog post and as an Amazon Associate, I earn from qualifying purchases.
Steps to Etched Glass Projects
Create a stencil for etching.
Clean glass blank with alcohol and allow to dry.
Apply stencil.
Mask off edge of stencil to prevent bleeding
Apply Etchall Etching Creme and allow to sit for 20 minutes.
Remove any excess Etching Creme and place back in the bottle.
Wipe off remaining excess with a paper towel and safely discard paper towel.
Run water in the sink and rinse off decal thoroughly.
Remove masking tape and adhesive vinyl under running water.
I started with created the stencil design in the Silhouette software using the Conical Warp Panel.
I shared an in-depth look at the Conical Warp Panel and step-by-step instructions for several projects, including these stencils in the March 2026 Creative Community exclusive video tutorial. For more details on the Creative Community, check it out HERE.
I wanted the design visible when drinking from the glass, so I flipped the design in the software prior to cutting the stencil.
Then sent the design to cut from Oracal 651 adhesive vinyl. Scraps are great for making stencils and I have a whole drawer full of adhesive vinyl scraps.
After weeding the design, I applied transfer tape and applied the adhesive vinyl as smooth as possible to the cleaned martini glass.
Here is a look at the stencil and how it will read after the design is etched.
Then, I created and cut a few more designs.
If I am etching one glass, might as well etch a few more at the same time.
Adding painters’ tape to the edges of the stencil can prevent any bleeding. Etching is permanent and it never fails that if the etching creme touches a spot you don’t want etched for even just a second, it will etch it. One of those craft project oopsies.
Apply the Etchall etching creme and let it sit for 20 minutes.
Carefully scrape off any excess Etchall etching creme and put it back in the bottle. It can be reused over and over again. Make sure not to scrape too hard to dislodge any small bits of the stencil or etching creme can get in areas that you don’t want to be etched.
I also like to take a paper towel and carefully remove any other excess etching creme and then discard the paper towel. Then I run water in the sink and begin rinsing and removing the painter’s tape and adhesive vinyl. Rinse the glass thoroughly and dry.
Enjoy your custom etched martini glasses.
Drink Happy Thoughts Etched Martini Glass
Espresso Yourself Etched Martini Glass
Don’t Ask Just Pour & Sip Sip Hooray! Etched Martini Glass
Save this for future reference by pinning the image below.
Enjoy !
THANK YOU for your support! How can you help? Click HERE & buy a coffee. Every little bit helps with the cost of running the site.
Silhouette Classes
Never stop learning! Let me help you take the anxiety out of learning with Silhouette and get to creating faster! My Silhouette classes are heavily focused on software, so you can take the skills & techniques taught and apply them to many future projects!
**This post may contain affiliate links. What that means is that I may receive compensation if you purchase through the links I have provided. The price you pay for the product or service is not higher, but I may get compensated for sharing.
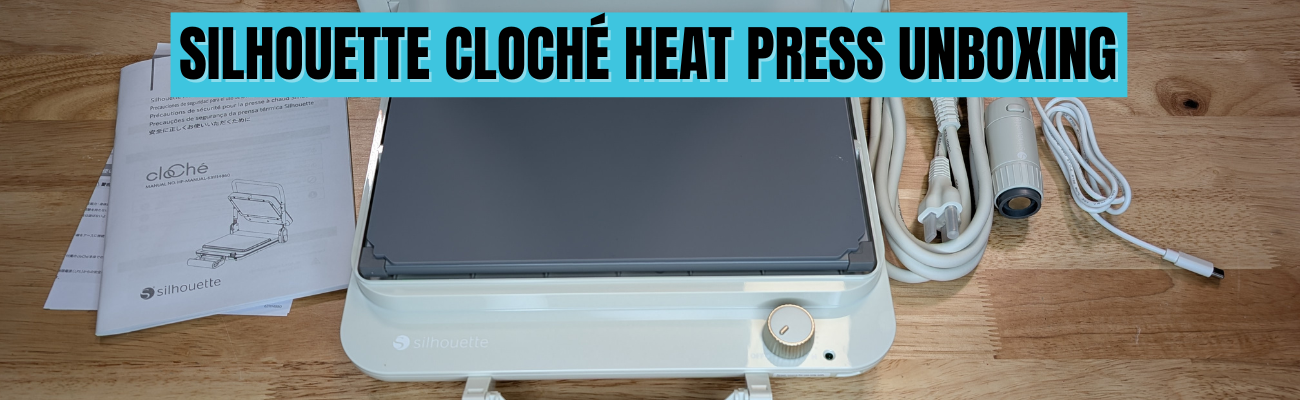
When the Silhouette cloChé Heat Press first arrived, I am so glad I didn’t rush to put out an unboxing. With time and testing, my first impression has changed. In this post, I’m sharing a full Silhouette cloChé heat press unboxing and in-depth review, including my initial impressions, the testing I did, the projects I completed, and my honest thoughts five months after unboxing. If you’re wondering whether the cloChé (or cloChé Petite) is worth adding to your craft room, this long-term, real-use review is designed to help you decide with confidence.
Affiliate links may be present in the following blog post and as an Amazon Associate, I earn from qualifying purchases.
In this blog post, I’m sharing my thoughts and recommendations along with some still shots below and full unboxing and review.
The Silhouette cloChé can be found at Silhouette America and is available in Milky White, Chiffon Pink, and Ice Green. Mine is Milky White.
In full disclosure, Silhouette America did send me the Silhouette cloChé Heat Press for testing. I was not paid to do this review and all results and opinions are my own.
Silhouette cloChé Heat Press Unboxing
This little Silhouette cloChé Heat Press is well packaged. In the box is the main heat press body, the power cord, the cloChé Petite with it’s power cable, and an instruction manual with supporting papers.
The Silhouette cloChé is small, compact, and weighs 11 lbs. It has a unique design that reminds many of a panini press. The heat press platen is 6″ x 10″.
The Silhouette cloChé Petite is an accessory that is only available with the Silhouette cloChé Heat Press. It comes packaged in a bag along with the Silhouette cloChé Heat Press power cord in the box. It can be stored on the underside of the Silhouette cloChé Heat Press.
The Silhouette cloChé Petite can be powered by plugging in the included cord to the front of the Silhouette cloChé Heat Press.
Silhouette cloChé Heat Press Unique Features
The Silhouette cloChé Heat Press has some unique features to it that makes it stand out. One is the handle on the front of the machine. This is how the heat press closes and creates the pressure.
Photo from Silhouette Summit 2024 taken by me
This handle design takes a bit to get used to locking and unlocking. While these features seem awkward at first, the more you use it the easier it gets.
The handle is composed of several moving parts and it can come apart. That doesn’t mean it’s broken. It can easily be put back together. Simply and carefully “pop” it back into place. I mention this because it can catch you off-guard if you don’t know before it happens. It happened when my friend and colleague, Sarah, first used it at the demo at Silhouette Summit 2024, which caused the Silhouette staff member to quickly fix it, so we were aware of this already. I’ve had it happen a couple times in the 5 months of testing before I write this.
Another unique feature is the lock when you raise the top platen of the Silhouette cloChé Heat Press. For me, this also takes some getting used to pressing the lock before you can lower the top platen again. This is a safety feature and just like the handle, just takes time to get used to.
The next unique feature is the On/Off switch. This is a dial that does not have temperatures. It does have several different settings indicated with a L-M-H setting dial.
This is very different than any other heat press and definitely takes time to get used to. For most regular HTV, I’ve been using the M setting. In the User Manual it does show this table.
The guide is in degrees Celsius. L is approximately 120 °C = 248 °F, M is approximately 160 °C = 320 °F, H is approximately 200 °C = 392 °F.
This definitely takes some getting used to and you just need to test with your materials. One thing I have found is that letting things cool a bit before peeling the carrier sheet can help.
The Silhouette cloChé also has a 45 second timer that begins when you close the press and lock the handle. I ignore the timer completely and just count myself. Then test. This is another area that will require some testing and seeing what works for you.
I did test a sublimation design which I’ll share later in this post and I cranked it up to the High setting and the blank only needed 45 seconds. If you are sublimating and the blank needs longer than 45 seconds, you will either need to listen to the beep or risk lifting the platen and closing the press again to reset the timer.
There are a couple disclaimers in the User Manual that I think are important to point out.
The first is that it requires a 30+ minute cool down period after 1 hour of usage.
The Silhouette User Manual states: “Do not use the machine continuously for more than 1 hour since it may lead to machine failure. If using the machine again, wait for more than 30 minutes before reconnecting the power cable.”
For this reason, I do not feel it is ideal for a business owner or use at an event. If the machine overheats, it can have issues. When at events, most don’t normally have time to give a 30 minute cool down period every hour when making personalized items.
This was stated at Silhouette Summit in 2024 when it was first announced, so it came as no surprise to me. I am glad to see that it made it into the User Manual, so it is clearly communicated to all users.
Silhouette cloChé Heat Press Initial Impression
My first day using the Silhouette cloChé Heat Press was a bit frustrating. This was due to user errors and simply that it is a new piece of equipment. Basically, I got in my own way which caused more frustration than it should have.
It is NOT like other heat presses and I was trying to compare it to others I use.
If I had released the unboxing video after Day 1, it would have been very different than what I’m sharing today. I did not like the Silhouette cloChé Heat Press the first day. However, I’ve been using it for many other projects and the more I use it, the more I do like it and believe it is useful for certain projects and uses.
I would NOT recommend starting with can koozies as a first project. I was looking for something small to create and ended up making my “quick” project much harder. Can koozies can be difficult with a normal press, but I did succeed.
Silhouette cloChé Heat Press Testing
I first started by testing the heat press platen with a digital thermometer. I did this over and over again the entire afternoon.
I tested all 4 corners and the center of the platform and wrote down each reading. The results were inconsistent every single time. Some of the readings would be close to the same temperature, but after repeated results over hours, I gave up on that.
Conclusion: it’s just a different type of press and it will not be a consistent reading across the platen. It can be close, but not perfect.
This is also referenced in the User Manual as well in the photo above – “The L to M to H ranges do not support fine temperature control, and should be used as a guide only.”
So I set it to M and began my first project. First project = first failure.
At least I got the failure out of the way right out of the gate. This was 100% user error. Like I mentioned above, can koozies probably are not the best first project. In general, I think it’s best to let it cool a bit before peeling the carrier sheet off. I did not and that equaled a project failure. I flipped it over and used the other side.
The good news after the frustrating afternoon is that I was successful with my project! Whether it was from determination or stubbornness – the end result was a success.
It worked once I started testing it and stopped trying to make it work like other heat presses. I just kept going.
I also used the Silhouette cloChé Petite to add some individual hot fix rhinestones to the can koozies. That worked too! Again, a little bit of a learning curve and referencing the User Manual to get the Silhouette cloChé Petite connected and powered up.
Once it was finished, I had to test it out with a can in the koozie and it worked. The HTV has stayed in place and the rhinestones were secured. I tried to pick them off with my fingernail and they didn’t budge.
Day 2 with the Silhouette cloChé Heat Press went much better. I came at it from a different mind set and just started playing, testing, and seeing what worked and what didn’t.
Next I tested a full design with Siser Easyweed Adhesive HTV. This is typically designed to be used with deco foils, but I wanted to see what it would look like just by itself on a black shirt.
And then I turned the dial up on the Silhouette cloChé and tested a sublimation project using Artesprix sublimation supplies and a luggage tag. This particular blank only required a 45 second press, so it was perfect to test with.
And then I did another t-shirt design.
For larger blanks such as a t-shirt, you do have to roll the bottom of it up in order to close the handle on the press. This is different and takes time to get used to, but it does work!
I’ve worn this shirt often since creating it and it’s been washed and dried and the HTV still looks great!
The Silhouette cloChé and I had made progress. Day 2 was a success with less frustration than Day 1.
More Silhouette cloChé Projects
Since I did not get the unboxing out right away, I’ve had time to create more projects with the Silhouette cloChé and find I do like/love it more than Day 1. It is a useful little machine, that is also light weight, and compact to store.
I tested Siser EasyPuff Glitter HTV on a canvas zipper bag. Puff HTV can be finicky at times. I used a small pressing pillow with the Silhouette cloChé to account for the seams and get pressure on the design area. It worked!
More faux leather with Siser Easyweed Adhesive HTV. As a note, some faux leather changes colors after being pressed, just in case you decide to try it.
I figured the longer it took me to get the unboxing video edited and the blog post written, the more projects I’d get done to share.
The faux rhinestone design above is with the Silhouette Heat Transfer Vinyl – Silver and is the most recent project as I write this and I had the Silhouette cloChé Heat Press set up on a flimsy folding table. Since the machine creates it’s own pressure with the handle on the front, you don’t have to have a heavy duty table to set the press on. It’s 11 lbs and doesn’t require you to press down to close the top platen, so a lighter table will do.
Pros and Cons of the Silhouette cloChé Heat Press
Pros of the Silhouette cloChé Heat Press
lightweight at 11 lbs
compact
stylish
heats up fast
can be used on a light weight table like a folding table
travels easily
easy to store
Silhouette cloChé Petite included for small projects
Cons of the Silhouette cloChé Heat Press
different than other heat presses
no temperature reading
45 second timer
timer cannot be changed
limited on thickness of items it can press (0.5 mm maximum thickness Silhouette stated)
larger items need rolled for the handle to close
6″ x 10″ platen may require multiple presses of large designs
1 hour usage and then 30+ minute cooldown
Who is the Silhouette cloChé for?
Please keep in mind that this is my opinion only from my background using larger, more industrial heat presses and testing the Silhouette cloChé.
I’d love to say the Silhouette cloChé is for everyone, but that’s simply not the reality. Of course, the same can be said for a large 15″ x 15″ heat press as well. There is no one product that will work for all users 100% of the time.
I would not recommend this for business use unless you are planning to use it for a specific project and can stick within the 1 hour usage time and let it cool down properly before powering on again.
I would say it’s a neat little press for traveling. It’s light-weight and compact, which means it can travel easier than an industrial heat press. I’ve had (2) 9″ x 12″ heat presses that I’ve used for classes and both weight in at 35 lbs. That can be manageable, but also has it’s negatives too when traveling with them. I’ve also traveled with my big presses that are 75 lbs and while it can be done, those suckers are heavy.
The Silhouette cloChé would be good for a crafter who is limited on space and does not need to use a press all day long.
I am loving it for smaller projects and the t-shirts I’ve done have all been successful so far. And now that I found out it will work on my little folding table, I no longer have to clear a spot off my work bench to use it.
It did work for sublimation, but it will have it’s limits on those types of projects due to temperature and press time.
Conclusion
This little Silhouette cloChé has grown on me since Day 1 when I started out frustrated with trying to make it fit into my own heat press idea box. Once I let that go, I’ve had a lot of fun creating with it. I do love that it heats up quickly.
I think you will either love it or hate it. Just like everything else in life. And only you can make that decision. Between the unboxing video and the information I shared above, hopefully it gives you an idea of what it’s all about and if you do get it, don’t judge it too quickly. Give it some time and you might find that the little thing grows on you too!
And additional details on the Silhouette cloChé from Silhouette Summit 2024 can be found HERE.
Save this for future reference by pinning the image below.
Enjoy !
THANK YOU for your support! How can you help? Click HERE & buy a coffee. Every little bit helps with the cost of running the site.
Silhouette Classes
Never stop learning! Let me help you take the anxiety out of learning with Silhouette and get to creating faster! My Silhouette classes are heavily focused on software, so you can take the skills & techniques taught and apply them to many future projects!
**This post may contain affiliate links. What that means is that I may receive compensation if you purchase through the links I have provided. The price you pay for the product or service is not higher but I may get compensated for sharing.
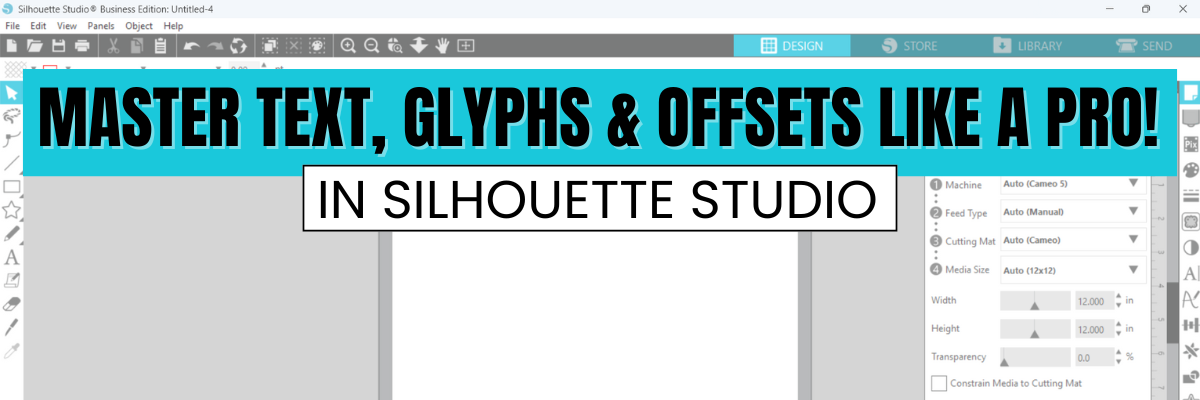
If you’ve ever struggled with text, glyphs, offsets, or edit points in Silhouette Studio, this video is for you! We hit a small bump during the LIVE tutorial, but I’ve recorded a brand-new video to ensure you get all the details without any interruptions. And by popular request, the original 39-minute Live replay is also staying up! Now you have two great resources to help you master these essential design techniques.
What You’ll Learn in This Video:
How to customize fonts and text in Silhouette Studio
Unlock glyphs & special characters for beautiful typography
Master internal & external offsets for layered designs
Edit points to refine & tweak your designs like a pro
Tips for creating custom designs with precision and ease
And catch the Live Replay (39 Minutes) with user interaction and questions Available HERE
I hope these videos help you feel more confident when designing in Silhouette Studio! Let me know in the comments if you have any questions or if there’s anything else you’d like to learn in future tutorials.
These techniques can be used for all kinds of projects from cake toppers, stickers, card, t-shirt designs, and more! Let us know in the comments below what you create.
THANK YOU for your support! How can you help? Click HERE & buy a coffee. Every little bit helps with the cost of running the site.
Silhouette Classes
Never stop learning! Let me help you take the anxiety out of learning with Silhouette and get to creating faster! My Silhouette classes are heavily focused on software, so you can take the skills & techniques taught and apply them to many future projects!
**This post may contain affiliate links. What that means is that I may receive compensation if you purchase through the links I have provided. The price you pay for the product or service is not higher but I may get compensated for sharing.
I am beyond excited to announce the launch of my brand-new Master Print and Cut with Silhouette class, now available! If you’ve ever struggled with misaligned cuts, tricky registration marks, or wasted materials, this class is for you. Whether you’re new to Silhouette or simply want to level up your skills, this course is designed to help you achieve accurate Print and Cut results every time. Plus, this class includes a special kit provided by Nitwit Collections, giving you everything you need to create stunning, professional-quality projects as you learn. Get ready to unlock your Silhouette’s full potential and take your crafting to the next level!
Take your Silhouette skills to the next level with this in-depth Mastering Print & Cut class! Using the provided class files from Nitwit Collections, you’ll follow a guided, step-by-step process to set up and execute Print & Cut projects with confidence.
✅ Learn expert techniques for tracing, registration marks, and precision cutting ✅ Troubleshoot common issues and avoid wasted materials ✅ Discover bonus resources to enhance your workflow ✅ See the electrostatic mat in action for improved material handling
Whether you’re a beginner or want to perfect your Print & Cut technique, this class gives you the tools and knowledge to createprojects with ease!
Take your Silhouette skills to the next level—start now – enroll HERE.
I hate to see Silhouette users struggling with their machines, so I’ve included all of my tips and tried and true methods that I use to get successful results.
Find more resources on the Silhouette Secrets+ A to Z Guide on the blog HERE.
Save this for future reference by pinning the image below.
Enjoy !
THANK YOU for your support! How can you help? Click HERE & buy a coffee. Every little bit helps with the cost of running the site.
Silhouette Classes
Never stop learning! Let me help you take the anxiety out of learning with Silhouette and get to creating faster! My Silhouette classes are heavily focused on software, so you can take the skills & techniques taught and apply them to many future projects!
**This post may contain affiliate links. What that means is that I may receive compensation if you purchase through the links I have provided. The price you pay for the product or service is not higher but I may get compensated for sharing.
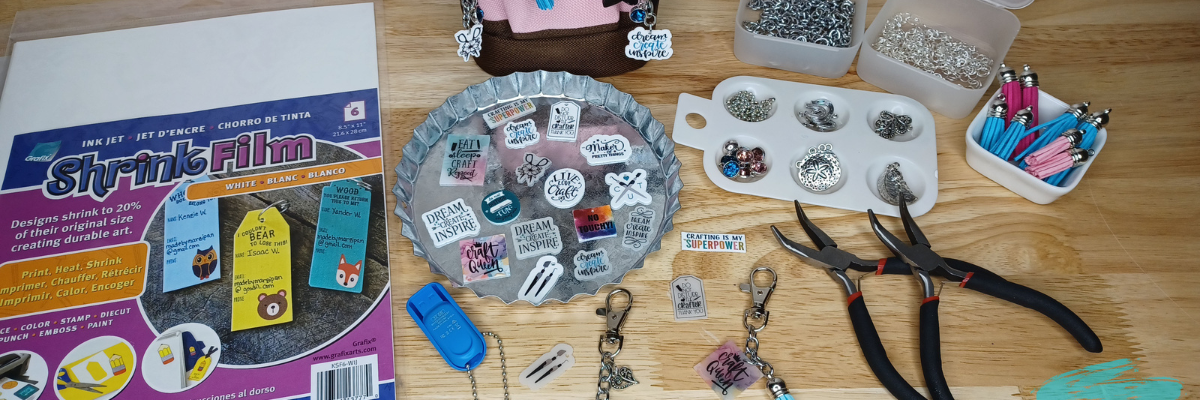
Creating unique tool charms is a fun and rewarding DIY project that allows you to personalize your tools and accessories. Using Grafix Shrink Plastic and a Silhouette cutting machine, you can craft intricate, customized charms that add a touch of creativity to your toolbox.
Affiliate links may be present in the following blog post and as an Amazon Associate, I earn from qualifying purchases.
Do you lose track of your tools when crafting? Or attend events where your table neighbor might have the same scissors as you? Tool charms are not only fun to make but can serve a functional purpose too!
Custom Tool Charm with Grafix Shrink Plastic
I had so much fun creating all of these tool charms! And I’m sharing how I created them as a contributing artist over on the Grafix Arts YouTube channel HERE.
All brands of shrink plastic can vary and the blade sharpness will affect the cut settings needed to cut completely through. I started with the Shrink Plastic setting in the software and increased the blade depth to a 7, force 33, and 2 passes. As the blade dulls, you will need to increase the settings.
DO NOT unload the cutting mat after the cut is complete. Check to see if it’s cut through and if not, send the cut again as needed.
This would be a fun project to set up for a kid’s party or a craft night with friends!!!
Save this for future reference by pinning the image below.
Enjoy !
THANK YOU for your support! How can you help? Click HERE & buy a coffee. Every little bit helps with the cost of running the site.
Silhouette Classes
Never stop learning! Let me help you take the anxiety out of learning with Silhouette and get to creating faster! My Silhouette classes are heavily focused on software, so you can take the skills & techniques taught and apply them to many future projects!
**This post may contain affiliate links. What that means is that I may receive compensation if you purchase through the links I have provided. The price you pay for the product or service is not higher but I may get compensated for sharing.
There are a few things I want to give you a heads up about this month for Silhouette users.
Affiliate links may be present in the following blog post and as an Amazon Associate, I earn from qualifying purchases.
New Silhouette software version 4.5.791 released
At this time, I cannot recommend v4.5.791 for users. Normally a version is released to Closed Beta testers for a bit prior to being pushed to release on the Silhouette website. Sometimes that “bit” is only a few hours, but we usually get a small heads up at least. This version went to public release and none of the Beta testers knew about it.
For the average user, I would suggest just staying where you are. If you get the notice to install a new version, click Later.
I always recommend downloading direct from the Silhouette website for any updates, for best results. In the past, there have been hang ups with the updates through the software, especially for MAC users. It seems to go much smoother if updates are completed direct through the website.
I would recommend v4.5.770 for most users, however, if you are experiencing no issues with the version you are on, stay there!
At this time, it is a wait and see how this new version affects users and what the bugs might be. We have asked for clarification from Silhouette, but have not had any updates so far. Here are the public release notes, which don’t really say much and are missing quite a few things that were updates between v4.5.770 and v4.5.791 that were being tested by Beta testers.
Hopefully we will find out more soon on what it includes.
I have started seeing issues posted by users, however, they are all a bit different and the only way to try to identify what might be causing them is to troubleshoot with each user. Not all users are willing to troubleshoot, which means it can take longer to identify the issues and get them fixed.
We cannot report issues unless we’ve done the troubleshooting first and have information and data to report with the claim. If we get the information needed, we can report direct to Silhouette. However, please understand, while we can report the issue, we have no control over the investigation time or the fix being released. We can only do the things that are in our control, which is collect information and report.
Silhouette America website and Silhouette Design Store
The Silhouette websites will be updating sometime in the near future. I do not have exact dates and it could be delayed even farther out, but that means we have time to prepare.
Anytime there are big updates to a website, there can be hiccups along the way. Technology is our friend, until it isn’t….. and I’d rather be prepared and help you prepare too!
So my motto going into this is… plan for the worst and hope for the best. Or be prepared! This is not to panic anyone, but to inform you of things YOU can do (and should be doing 😉 on a regular basis. I hate when any user has an issue and if there are some tips I can provide to help you out, that’s my goal.
What can you do?
Export User Design – if you store any personal files in the Silhouette library. This is super easy to do now if you are using software version v4.4.552 or higher. Details HERE
Set Up Library Snapshot – just in case, it’s a good fall back and a good idea to check that it’s working. Details HERE
Back up Silhouette Library – this is different than exporting user designs. The file that saves is a backup file only. It does not contain individual files and cannot be opened outside the software, but if needed can be imported back into the software. Details HERE.
I have the resources that can help and I’ve linked those above. So there really is no reason not to do it, right?
Again, I don’t know the exact dates of the website updates, but I can tell you, there are updates coming. While we do try to troubleshoot with users, there are limits too. We do NOT have access to your account. All account issues have to be handled by Silhouette Support.
Now, I would HIGHLY recommend that you add this to your calendar and start doing it on a regular basis. It can save you a lot of frustration down the road.
Silhouette Users: Log In Info
After the website update, you may need to log in again on all devices. This is pretty routine when a connection is interrupted. I would highly recommend that you make sure you know your Silhouette account information – this includes the email address and password to log in. Write it down! Do not rely on your computer’s auto fill. We have seen issues in the past few months with computer systems and their auto fill systems.
Silhouette Users: Sync the Silhouette Library
If you do store files to the Silhouette library, not only should you be backing those files up to an outside source, but I’d highly recommend that you are verifying that the files are synced completely with the current date and time after you save them.
If you are experiencing issues with the Silhouette library syncing at any time, please follow the steps in this tutorial EXACTLY and if you continue to have an issue, reach out to Silhouette Support with a detailed description and photos. The more information they have to start troubleshooting the better.
*as a note, during the update, the website and Silhouette Support may not be available – that is why I’m sharing this information in advance. I recommend you do it now, not later.
Just like weathering a storm…. it’s better to be prepared and not need it, then to be unprepared. Can you tell I live in the mid-west and it’s storm season – lol!
I hope those tips will help you. Now it’s your turn to take action!
Enjoy !
THANK YOU for your support! How can you help? Click HERE & buy a coffee. Every little bit helps with the cost of running the site.
Silhouette Classes
Never stop learning! Let me help you take the anxiety out of learning with Silhouette and get to creating faster! My Silhouette classes are heavily focused on software, so you can take the skills & techniques taught and apply them to many future projects!
**This post may contain affiliate links. What that means is that I may receive compensation if you purchase through the links I have provided. The price you pay for the product or service is not higher but I may get compensated for sharing.
I’m in love with these Layered Snowflake Arabesque Tile acrylic shapes from Craft Chameleon. They come in a wide variety of colors and I’ve been using them for testing. I want to share 3 methods I tested, my results with each, and which one is my favorite at the end – you might be surprised.
Affiliate links may be present in the following blog post and as an Amazon Associate, I earn from qualifying purchases.
I am calling these ornaments, but they can be so much more. Gift tags, ornaments, stand alone decor item, and more!
3 Ways to Customize Acrylic Shapes with Silhouette
Etching Acrylic with the Silhouette Curio 2 Power Engraver – Let It Snow Design
Etching Acrylic with the Silhouette Curio 2 Punch Tool – top left Snowflake saying (the Curio 1 and Silhouette etching tool can do this too – more info below)
Adhesive Vinyl Decal – any cutting machine can do this with good quality vinyl!
1 – Etching Acrylic with the Silhouette Curio 2 Power Engraver
I have had great results with the Silhouette Power Engraver. However, it is not a fine detail engraving tip. When you are working with it, you want to keep that in mind and may need to adjust the design to work with it.
I have a full step-by-step class the Silhouette Secrets+ Teachable site on setting up for etching/engraving on acrylic with the Silhouette Curio 2 including how to get exact placement on shapes. I share all the things that worked and those that did not in the class too! Find all the details and see more examples of my etching tests HERE.
The etch is pretty subtle on the colored acrylic. Acrylic blanks are also one of the most difficult things to photograph too! Right up there with glass objects.
I love the sparkle of the top layer of this acrylic shape.
For more details on etching with the Silhouette Cameo 5 and Punch Tool check out this post HERE. Note: etching on the Silhouette Cameo 5 is designed for Silhouette metal etching sheets and not for acrylics – more details in my blog post
The Silhouette Punch Tool is supposed to be the etching tool for finer details with the Silhouette Curio 2 and Cameo 5. While it does etch, it definitely is no where near the same quality of etch as the Silhouette Curio 1 was with the Silhouette etching tool.
If you have a Silhouette Curio 1, I would recommend hanging on to it and get that baby out to etch on acrylic. It does a fantastic job.
However, the Silhouette Curio 2 is here to stay. It is the new machine model and the Silhouette Curio 1 is no longer manufactured. Honestly, the Curio 1 had a really, really long lifespan for a machine model. I am surprised that it was manufactured for so long.
The Silhouette Curio 2 and the Silhouette Cameo 5 has a specialized Carriage 2 housing that allows not only for specialty tools, but also a higher force. While the Carriage 1 housing on Silhouette models is an up and down motor, the Carriage 2 housing on Silhouette model machines is a round and round motor. This means that it is different than the Silhouette Curio 1 machine that was designed over 10 years ago. Different machine, different results. I’ll have more details on the blog later about all of that.
I selected the Vinyl Glossy setting and increase the blade depth to a 2. Actual cut settings that will work for you will depend on your material, machine, and blade life. Test cuts are the only way you will know what works for you. Find more information on Perfect Cut Settings HERE.
One of the big key factors is you want high quality adhesive vinyl and good quality transfer tape for detail works. Low quality vinyl can just be a mess and more of a headache than the money it tricked you into saving. If you have ever cut low quality vinyl or old vinyl, you are nodding right now and know exactly what I mean!
Now, yes, I lost the dots to my i’s. But holy smokes! This is tiny details! At this size, I could care less about those little dots on the i’s. I can either cut more and add them or add in a different embellishment to the project.
One of the things that can help when cutting this small is adding Weeding Lines to the design and it definitely helped in this small detail cut. For more details on adding Weeding Lines click HERE. For designs like this, I prefer to draw my own weeding lines. It takes just a little more time in the setup and cutting process, but it can be 100% worth it to save you headache when weeding.
I have more tips on cutting small fonts & designs HERE too!
Out of all 3 methods, this one has to be my favorite because it really stands out. And the best part is, anyone with a cutting machine could do this method!
I hope that gives you some ideas how you can create and customize with acrylic shapes. You are not limited to Snowflake Arabesque Acrylics either! Craft Chameleon has a wide selection of acrylic blanks. The 3″ clear acrylic rounds are my favorite and I make sure to stock up each time I order.
Save this for future reference by pinning the image below.
Enjoy !
THANK YOU for your support! How can you help? Click HERE & buy a coffee. Every little bit helps with the cost of running the site.
Silhouette Classes
Never stop learning! Let me help you take the anxiety out of learning with Silhouette and get to creating faster! My Silhouette classes are heavily focused on software, so you can take the skills & techniques taught and apply them to many future projects!
**This post may contain affiliate links. What that means is that I may receive compensation if you purchase through the links I have provided. The price you pay for the product or service is not higher but I may get compensated for sharing.
In this tutorial, I’m going to share how I created what’s called an “Off the Edge” die cut card with my Silhouette machine. This can add an interesting element to any card design and is fun to create.
Affiliate links may be present in the following blog post and as an Amazon Associate, I earn from qualifying purchases.
I recently attended the Card Maker Success Challenge hosted by Brandi Mahon of Stamp Me Some Love and was so inspired by her card ideas. I took the card ideas she was sharing and modified them to be used with my Silhouette software and machine. If you are looking for card making inspiration, I recommend you check out her monthly Card Maker’s Success Subscription.
I have a Canon TS9521C that is a borderless printer, but you can do the same even without a borderless printer.
Then, I will use a paper trimmer to cut the page down to the size I need for my cards front. But, I won’t know the size until I have the other pieces cut out, so I just set this aside.
Designing in Silhouette Studio
Drawing the Card Pieces
Next, in the Silhouette software, using the Drawing Tools on the left side, draw out a rectangle and then scale it to 4.25″ x 5.5″ or whatever card size you are wanting. Unlock the lock to be able to change the height and width of the rectangle individually. Type the number and press Enter to set the dimension. Find more on the Scale Tools HERE.
Select the rectangle and then choose Align Left in the Alignment tools. With only 1 object selected it will align it to the left side of the page. This will help us in just a minute with our design.
Choosing a Sentiment
Next, open the sentiment design you want to use or with the Text Tool and type out the sentiment you want. If you type out the text, make sure to weld any overlapping pieces.
I used Hello by Diva Watts Designs found HERE for this card design.
Scale the hello down to fit within the card base and use the green dot at the top to rotate it to the desired angle. Or you can use the Rotate Panel and rotate to 45 degrees and adjust from there.
This is going to allow us to adjust the rectangle and maintain straight lines.
Double click on the red line of the rectangle to bring up the Edit Points. Drag the top left edit point (gray dot) down.
Grab the top right edit point and drag it down, so the top of the rectangle is angled as desired to run through the middle of the sentiment.
With the Snap to Grid tool activated, it snaps the edit points to specific locations and easily allows the design to be manipulated and maintain the straight lines of the card edges.
Once the edges are how we want, Show Grid and Snap to Grid can be toggled off on the Page Setup Panel – Tab 2 again. I find the grid lines distracting when designing, but they can easily be turned back on if needed.
Create a Copy for Future Templates
Make a copy of the card base and you can use it for future cards as a starting point.
Select both the card base and the sentiment and Align the Center in Silhouette. Depending on the design, center aligned may not look centered to the eye. Use the arrow keys to adjust if needed in small increments any direction.
Adding an Offset
Next, click on the sentiment to select it and open the Offset Panel on the right side. Click Offset and adjust the distance of the Offset as desired, then click Apply or press Enter. The distance of the offset will all depend on the sentiment and the size you are using. There is no magic number.
The offset should overlap the angled rectangle securely and not have too many tiny bits to be cut out.
Welding the Offset to the Card Front
After clicking on Apply, the offset will be selected. Hold the Shift key down and click on the angled rectangle so that both are selected, then right click and choose Weld.
This now combines the angled rectangle and the offset into 1 cut and creates the off-the-edge design. If there are any tiny bits like what the red arrow points to above, those are not needed in the design. Move the sentiment off of the design.
Then right click on the design and choose Release Compound path. Click off of it to deselect and click back on the little bit, press delete. When all the pieces you want are deleted, select the entire design again, right click and choose Make Compound Path.
Use the drag select method to select all the pieces at the same time. Left click the mouse and hold it down in the top left corner above the design and drag it all the way through the design to the bottom right corner. Anything that the selection box touches, should be selected.
Cutting the Card Pieces & Assembly
Now you have your pieces for the Off-the-Edge card design designed and ready to cut in Silhouette.
I cut the sentiments from Oracal 651 Black vinyl and applied it to the off-the-edge piece that I cut from white cardstock. I reused a piece of transfer tape to apply it and was careful that it didn’t stick to the cardstock too much. You could also cut from cardstock and glue to the front, but adhesive vinyl makes it a bit quicker to assemble and the glossy sentiment made it pop with the photo paper background too!
Then I took the printed sheet of the alcohol background paper and cut it to 4.25″ x approximately 3.5″ with my paper trimmer. This size depends on how far the left side of the off-the-edge cut comes down. I used a Scrapbook tape runner to adhered the alcohol background to the front of a card base at the top.
You can either buy ready made card bases or make your own. In this card tutorial HERE at 32:30, I show how I cut my own card bases from a letter size sheet of paper.
Then used foam tape to add the off-the-edge cut piece to the front of the card at the bottom.
Off-the-Edge Die Cut Cards with Silhouette
Once you have the basics of the card creation down, you can modify it for different sentiments. Save the angled rectangle as a template for future card cuts.
The first card will take the longest to design, but then you will have all the steps and if you save the files, you can easily open in the future and get to cutting.
You will also notice that a couple of mine got a bit close to the edge and really did go off-the-edge. For these I can just snip that part off before placing in the envelope, but in the future I’ll adjust the design a bit smaller so the offset doesn’t go outside the bounds. Something like that is easily corrected in the software when it happens to you.
Save this for future reference by pinning the image below.
Enjoy !
THANK YOU for your support! How can you help? Click HERE & buy a coffee. Every little bit helps with the cost of running the site.
Silhouette Classes
Never stop learning! Let me help you take the anxiety out of learning with Silhouette and get to creating faster! My Silhouette classes are heavily focused on software, so you can take the skills & techniques taught and apply them to many future projects!
**This post may contain affiliate links. What that means is that I may receive compensation if you purchase through the links I have provided. The price you pay for the product or service is not higher but I may get compensated for sharing.
Have you ever wondered what tools are compatible with the Silhouette Curio 2? The Silhouette Curio 2 flatbed cutting machine can use a few additional tools that are not designed for the Silhouette Cameo 5 models. Let’s take a look at those today!
Affiliate links may be present in the following blog post and as an Amazon Associate, I earn from qualifying purchases.
I have created a free PDF chart of all the tools that can be used in the Silhouette Curio 2 . This chart is available as a free download exclusively for confirmed newsletter subscribers.
I always recommend stocking up on extra blades and cutting mats to have on hand. It can be very frustrating to be in the middle of a project with a dull blade or and adhesive mat that is no longer sticky. It is also one of the fastest ways to rule out a cutting issue you might have.
For some of the specialty tools listed below I’ve also included links for tutorials and more information on their usage as well.
Silhouette Blades
Silhouette Autoblade – Type B Carriage 1 Used for paper, cardstock, sticker sheets, adhesive vinyl, HTV, Chipboard, Acetate, and select specialty materials. Materials under 1 mm thick Available at Silhouette America or Crafter Cuts *This is the blade I use most often. Most cut issues occurring with this blade can be fixed by following the steps in this video HERE – Troubleshooting Cut Issues
Silhouette 1 mm Manual Blade Carriage 1 Used for paper, cardstock, sticker sheets, adhesive vinyl, HTV, Chipboard, Acetate, and select specialty materials. Materials under 1 mm thick
Silhouette 2 mm Manual Blade Carriage 1 Used for paper, cardstock, sticker sheets, adhesive vinyl, HTV, Chipboard, Acetate, Craft Foam, and select specialty materials. Materials under 2 mm thick
Silhouette 2 mm Kraft Blade – Type B Carriage 1 Used for chipboard, acetate, craft Foam, leather, and select specialty materials Materials up to 2 mm thick *15+ Tips for using the Kraft blade foundHERE
Silhouette Tool Adapter Set Carriage 1 Adapters are color coded for specific blades/tools Black adapter = Silhouette blade (ratchet) & Premium blade White adapter = 2 mm Kraft blade Gray adapter = Deep Cut blade Blue adapter = Silhouette Sketch pens
Silhouette Blade – often referred to as a “ratchet” blade but the official name is Silhouette blade Carriage 1 with black adapter Used for paper, cardstock, sticker sheets, adhesive vinyl, HTV, Chipboard, Acetate, and select specialty materials. Materials under 1 mm thick
Silhouette Premium Blade Carriage 1 with black adapter Used for paper, cardstock, sticker sheets, adhesive vinyl, HTV, Chipboard, Acetate, and select specialty materials. Materials under 1 mm thick
Silhouette Deep Cut Blade Carriage 1 with gray adapter Used for paper, cardstock, sticker sheets, adhesive vinyl, HTV, Chipboard, Acetate, Craft Foam, and select specialty materials. Materials under 2 mm thick
Silhouette 2 mm Kraft Blade Carriage 1 with white adapter Used for chipboard, acetate, craft Foam, leather, and select specialty materials Materials up to 2 mm thick *15+ Tips for using the Kraft blade foundHERE
Silhouette 3 mm Kraft Blade Carriage 2 Used for chipboard, acetate, craft Foam, leather, and select specialty materials Materials up to 3 mm thick *15+ Tips for using the Kraft blade foundHERE
Silhouette Rotary blade Carriage 2 Used for fabrics, crepe paper, felt, wool, and select specialty materials *Rotary Blade TutorialHERE
Additional Silhouette Tools
Silhouette Pen Holder Type B Carriage 1 Use with a variety of pen styles to sketch onto materials such as cardstock, paper, faux leather paper, etc. *Step-by-step Sketching ClassHERE **More tutorials on sketchingHERE
Silhouette Punch Tool Carriage 2 Used with adhesive vinyl or HTV to punch a hole to designate where to weed the material out. Also used with the Cameo 5 for etching on Silhouette metal sheets. *12+ Tips for Etching with the Silhouette Cameo 5HERE
Silhouette black bodied sketch pens Carriage 1 with blue adapter Used to sketch onto materials such as cardstock, paper, faux leather paper, etc. *Step-by-step Sketching ClassHERE **More tutorials on sketchingHERE
Silhouette Pen Holder – Type C Carriage 2 Use with a variety of pen styles to sketch onto materials such as cardstock, paper, faux leather paper, etc. Type C Pen Holder has a broader barrel on the end so you can use wider bodied pens and markers
Silhouette Heat Pen Set – Powered Tool Carriage 2 Applies foil transfer material to surfaces of many materials such as cardstock, faux leather, etc. Cordless design and powered by the Cameo 5 Tool 2 housing *Heat Pen Setup & Foiling tutorials HERE
Silhouette Heat Pen Super-Fine Carriage 2 Applies foil transfer material to surfaces of many materials such as cardstock, faux leather, etc. Cordless design and powered by the Cameo 5 Tool 2 housing 0.5 mm Super Fine Tip
Silhouette Power Engraver Carriage 2 Surface engraves on materials such as metal sheets, acrylic, etc. To be used with the Silhouette Curio Debris Tray *Beginner Acrylic Etching Class with Power EngraverHERE **Additional Silhouette Curio 2 InformationHERE
Grab the free PDF chart of all the Silhouette Curio 2 tools for future reference when you subscribe to the Silhouette Secrets+ newsletter. *chart is the current tools available for the Silhouette Curio 2January 2024
Find even more information on the Silhouette Curio 2 HERE including an unboxing, setup, first cuts, and the Electrostatic Bed.
Please let me know if you have any questions in the comments below.
Save this for future reference by pinning the image below.
Enjoy !
THANK YOU for your support! How can you help? Click HERE & buy a coffee. Every little bit helps with the cost of running the site.
Silhouette Classes
Never stop learning! Let me help you take the anxiety out of learning with Silhouette and get to creating faster! My Silhouette classes are heavily focused on software, so you can take the skills & techniques taught and apply them to many future projects!
**This post may contain affiliate links. What that means is that I may receive compensation if you purchase through the links I have provided. The price you pay for the product or service is not higher but I may get compensated for sharing.
Let’s talk tools. Tools for the Silhouette Cameo 5 and Cameo 5 Plus model machines specifically in this post.
Affiliate links may be present in the following blog post and as an Amazon Associate, I earn from qualifying purchases.
With the release of the Silhouette Cameo 5, a couple new tools were released that can be used with the new machines. These include the Embossing tools, Heat Pen Set, and Pen Holder Type C.
I’ve created a free PDF chart listing all the tools compatible with the Silhouette Cameo 5 and Cameo 5 Plus. This chart is available as a free download exclusively for confirmed newsletter subscribers.
I always recommend stocking up on extra blades and cutting mats to have on hand. It can be very frustrating to be in the middle of a project with a dull blade or and adhesive mat that is no longer sticky. It is also one of the fastest ways to rule out a cutting issue you might have.
Let’s take a look at all the blades and tools that can be used in the Silhouette Cameo 5. For some of the specialty tools listed below I have also included links for tutorials and more information on their usage as well.
Silhouette Blades
Silhouette Autoblade – Type B Carriage 1 Used for paper, cardstock, sticker sheets, adhesive vinyl, HTV, Chipboard, Acetate, and select specialty materials. Materials under 1 mm thick Available at Silhouette America or Crafter Cuts *This is the blade I use most often. Most cut issues occurring with this blade can be fixed by following the steps in this video HERE – Troubleshooting Cut Issues
Silhouette 1 mm Manual Blade Carriage 1 Used for paper, cardstock, sticker sheets, adhesive vinyl, HTV, Chipboard, Acetate, and select specialty materials. Materials under 1 mm thick
Silhouette 2 mm Manual Blade Carriage 1 Used for paper, cardstock, sticker sheets, adhesive vinyl, HTV, Chipboard, Acetate, Craft Foam, and select specialty materials. Materials under 2 mm thick
Silhouette 2 mm Kraft Blade – Type B Carriage 1 Used for chipboard, acetate, craft Foam, leather, and select specialty materials Materials up to 2 mm thick *15+ Tips for using the Kraft blade foundHERE
Silhouette Tool Adapter Set Carriage 1 Adapters are color coded for specific blades/tools Black adapter = Silhouette blade (ratchet) & Premium blade White adapter = 2 mm Kraft blade Gray adapter = Deep Cut blade Blue adapter = Silhouette Sketch pens
Silhouette Blade – often referred to as a “ratchet” blade but the official name is Silhouette blade Carriage 1 with black adapter Used for paper, cardstock, sticker sheets, adhesive vinyl, HTV, Chipboard, Acetate, and select specialty materials. Materials under 1 mm thick
Silhouette Premium Blade Carriage 1 with black adapter Used for paper, cardstock, sticker sheets, adhesive vinyl, HTV, Chipboard, Acetate, and select specialty materials. Materials under 1 mm thick
Silhouette Deep Cut Blade Carriage 1 with gray adapter Used for paper, cardstock, sticker sheets, adhesive vinyl, HTV, Chipboard, Acetate, Craft Foam, and select specialty materials. Materials under 2 mm thick
Silhouette 2 mm Kraft Blade Carriage 1 with white adapter Used for chipboard, acetate, craft Foam, leather, and select specialty materials Materials up to 2 mm thick *15+ Tips for using the Kraft blade foundHERE
Silhouette 3 mm Kraft Blade Carriage 2 Used for chipboard, acetate, craft Foam, leather, and select specialty materials Materials up to 3 mm thick *15+ Tips for using the Kraft blade foundHERE
Silhouette Rotary blade Carriage 2 Used for fabrics, crepe paper, felt, wool, and select specialty materials *Rotary Blade TutorialHERE
Additional Silhouette Tools
Silhouette Pen Holder Type B Carriage 1 Use with a variety of pen styles to sketch onto materials such as cardstock, paper, faux leather paper, etc. *Step-by-step Sketching ClassHERE **More tutorials on sketchingHERE
Silhouette Punch Tool Carriage 2 Used with adhesive vinyl or HTV to punch a hole to designate where to weed the material out. Also used with the Cameo 5 for etching on Silhouette metal sheets. *12+ Tips for Etching with the Silhouette Cameo 5HERE
Silhouette black bodied sketch pens Carriage 1 with blue adapter Used to sketch onto materials such as cardstock, paper, faux leather paper, etc. *Step-by-step Sketching ClassHERE **More tutorials on sketchingHERE
Silhouette Pen Holder – Type C Carriage 2 Use with a variety of pen styles to sketch onto materials such as cardstock, paper, faux leather paper, etc. Type C Pen Holder has a broader barrel on the end so you can use wider bodied pens and markers
Silhouette Embossing Tool Set – Type C Carriage 2 Embosses onto materials such as cardstock, embossable foil, etc. Set includes a fine and wide tip.
Silhouette Heat Pen Set – Powered Tool Carriage 2 Applies foil transfer material to surfaces of many materials such as cardstock, faux leather, etc. Cordless design and powered by the Cameo 5 Tool 2 housing – 1 mm & 2.5 mm tip *Heat Pen Setup & Foiling tutorials HERE
Silhouette Heat Pen Super-Fine Carriage 2 Applies foil transfer material to surfaces of many materials such as cardstock, faux leather, etc. Cordless design and powered by the Cameo 5 Tool 2 housing 0.5 mm Super Fine Tip
Additional Supplies
There are a few additional supplies for use with some of the specialty tools listed above.
Silhouette 12″ x 12″ Embossing Mat For use with the Silhouette Embossing Tools
Silhouette Heat Transfer Foil – Gold & Silver For use with the Silhouette Heat Pen Set 2 heat foil rolls (3 in x 33 feet) *Heat Pen Setup & Foiling tutorials HERE
Silhouette Electrostatic Bed Uses static electricity to hold materials in place while being cut with the Cameo 5 models *Tips for using the Silhouette Electrostatic BedHERE
Silhouette Electrostatic Protection Sheet 12″ x 12″ – 2 per pack Protects the Electrostatic Bed from damage.
There are a lot of options now available with the Silhouette Cameo 5 and Cameo 5 Plus.
Grab the free PDF chart of all Silhouette Cameo 5 tools for future reference when you subscribe to the Silhouette Secrets+ newsletter. *chart is the current tools available for the Cameo 5 and Cameo 5 Plus January 2024
Find even more information on the Silhouette Cameo 5 HERE including an unboxing, setup, first cuts, and the Electrostatic Bed.
Please let me know if you have any questions in the comments below.
Save this for future reference by pinning the image below.
Enjoy !
THANK YOU for your support! How can you help? Click HERE & buy a coffee. Every little bit helps with the cost of running the site.
Silhouette Classes
Never stop learning! Let me help you take the anxiety out of learning with Silhouette and get to creating faster! My Silhouette classes are heavily focused on software, so you can take the skills & techniques taught and apply them to many future projects!
**This post may contain affiliate links. What that means is that I may receive compensation if you purchase through the links I have provided. The price you pay for the product or service is not higher but I may get compensated for sharing.
THANK YOU for your support! How can you help? Click the link to buy a coffee. Every little bit helps in the cost of running the site.