Creating a custom sublimation tumbler doesn’t have to be complicated! In this step-by-step DIY tutorial, I’m sharing an easy and creative way to make vibrant, one-of-a-kind tumblers using Artesprix Sublimation Inks. This project combines simple techniques like plastic wrap and heat resist mask to achieve stunning results—perfect for beginners, girls’ nights, craft nights, handmade gifts, or even small business projects. In this post, you’ll find the full video tutorial, a complete supply list, and helpful tips to confidently create your own custom sublimation tumblers from start to finish.
Affiliate links may be present in the following blog post and as an Amazon Associate I earn from qualifying purchases.
Want to know what I love about the Artesprix sublimation inks, paints, markers, and stamp pads. They make me step outside my comfort zone and accept what comes. That each project I create is unique and even if I did the same exact steps the next time, it would still look different.
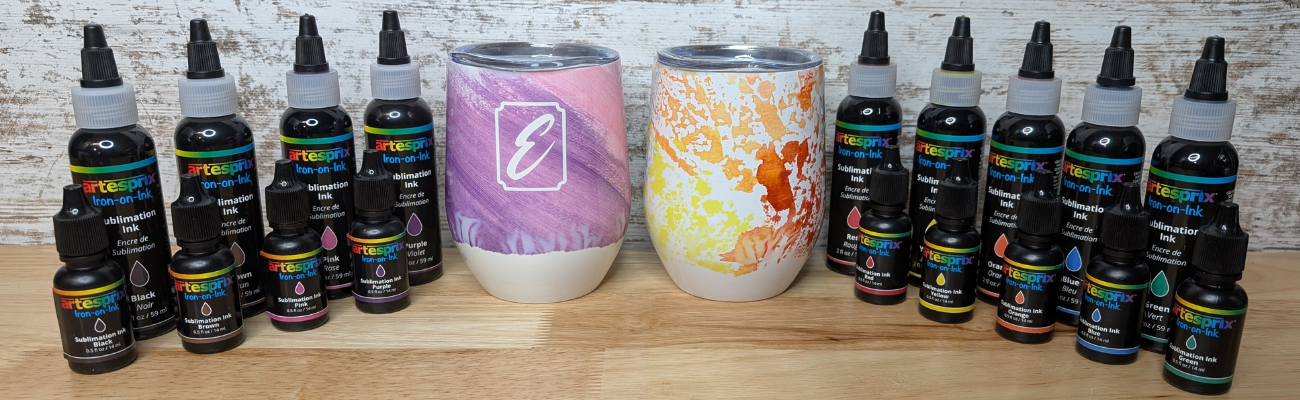
For these custom wine tumblers, I used the Artesprix Heat Resist Mask and cut a monogram out with my Silhouette.
Here is a look at my design file. The letter ‘E’ is one of those that can look really ugly in many fonts and always takes me forever to find one I really like. On the left side, I have the keepers, until I find the one that speaks to me the most.
In the video you’ll see that the first monogram I tried was just the letter and because I didn’t have a solid background it is a “hidden message” monogram. I couldn’t stop there and had to create another, so I added a frame around the letter too.
I have better luck with securing the Artesprix Heat Transfer Resist directly to the blank and then there is no space for the sublimation gases to leak in underneath during the process. For a design that has pieces like the second one with the frame, I used transfer tape to transfer it to the blank just like you do with adhesive vinyl.
The shape of the tumbler and the crinkled paper gave it a unique look on the bottom.
I think it turned out unique and it completely shows that sometimes you just have to take “control” and throw it out the window. Now, I kind of want to try the wrinkle, cloudy technique on purpose. While I cannot control the final outcome on colors and pattern, I was able to “fix” the monogram so it’s no longer a “hidden message” and it turned out so crisp.
I don’t waste any of the sublimation ink. Anytime there is extra paint or ink, I will grab a sheet of copy paper and make a new print, let it dry, and then add it to my stash. As long as the sublimation pages don’t get wet or aren’t subjected to high heat, you can use them for a year or longer after they’ve been made.
Here is a look at the “hidden message” monogram on the right.
Looking for the step-by-step video? It’s linked right below the supplies section.
THANK YOU for your support! How can you help? Click HERE & buy a coffee. Every little bit helps with the cost of running the site.
Silhouette Classes
Never stop learning! Let me help you take the anxiety out of learning with Silhouette and get to creating faster! My Silhouette classes are heavily focused on software, so you can take the skills & techniques taught and apply them to many future projects!
**This post may contain affiliate links. What that means is that I may receive compensation if you purchase through the links I have provided. The price you pay for the product or service is not higher but I may get compensated for sharing.
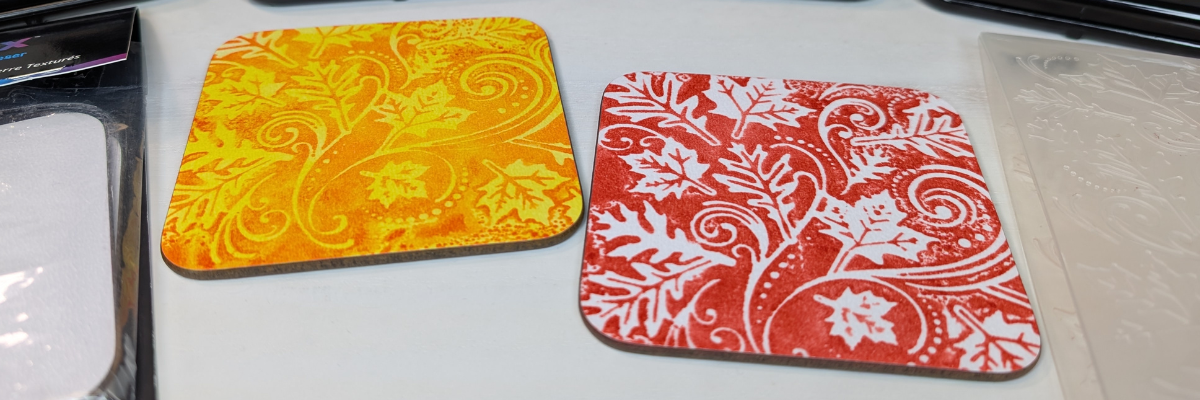
Looking for a fun and creative way to take your sublimation projects to the next level? In this tutorial, I’m sharing how to combine Artesprix Sublimation Inks with embossing folders to create beautiful, designs on textured sublimation coasters! 🎨 This unique technique adds incredible depth and dimension to your projects—perfect for gifts, décor, or one-of-a-kind keepsakes. I’ll walk you through the full process step-by-step in the video below, along with a complete list of the supplies you’ll need to get started. Grab your favorite embossing folders, your Artesprix inks, and let’s create something truly unique!
Affiliate links may be present in the following blog post and as an Amazon Associate I earn from qualifying purchases.
My favorite is the single color with the white of the textured coaster coming through. I think it really makes it pop, but there are so many different color options that you could do.
THANK YOU for your support! How can you help? Click HERE & buy a coffee. Every little bit helps with the cost of running the site.
Silhouette Classes
Never stop learning! Let me help you take the anxiety out of learning with Silhouette and get to creating faster! My Silhouette classes are heavily focused on software, so you can take the skills & techniques taught and apply them to many future projects!
**This post may contain affiliate links. What that means is that I may receive compensation if you purchase through the links I have provided. The price you pay for the product or service is not higher but I may get compensated for sharing.
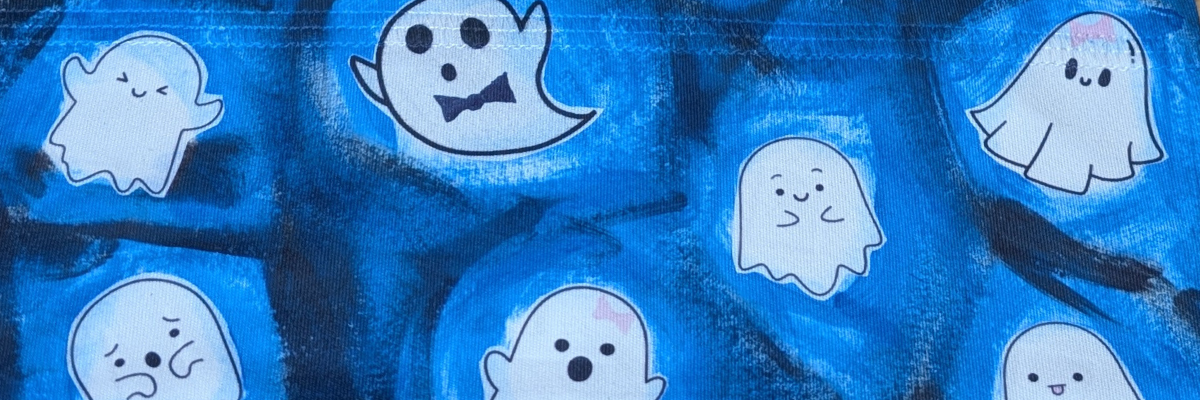
Halloween crafts are some of my absolute favorites, and this year I couldn’t resist making a Boo-tiful DIY Ghost Headband 👻 using Artesprix Sublimation Paints and Markers. Sublimation isn’t just for mugs and coasters—it’s a fun way to customize wearable accessories too! With just a few supplies, I transformed a plain Artesprix sublimation headband into a spooky-cute Halloween accessory that’s perfect for parties, trick-or-treating, or just getting into the festive spirit. Create your own ghostly design so you can rock a one-of-a-kind headband this Halloween.
Affiliate links may be present in the following blog post and as an Amazon Associate I earn from qualifying purchases.
In this video tutorial I shared how to use the new Artesprix Sublimation Coloring Books. These sublimation coloring books are available in 2 formats – a printed copy ($4.99) that you can order to be shipped to you or you can download the digital copy (free) and print with a sublimation printer at home.
While brainstorming for this video, I asked my youngest her thoughts and that is how the ghosts were chosen. This headband literally walked out the door this morning and I may never get it back.
Now she has requested one in orange for “Halloween” colors. I love all the options that can be created using the Artesprix sublimation paints, markers, and inks! So many possibilities to create unique creations.
THANK YOU for your support! How can you help? Click HERE & buy a coffee. Every little bit helps with the cost of running the site.
Silhouette Classes
Never stop learning! Let me help you take the anxiety out of learning with Silhouette and get to creating faster! My Silhouette classes are heavily focused on software, so you can take the skills & techniques taught and apply them to many future projects!
**This post may contain affiliate links. What that means is that I may receive compensation if you purchase through the links I have provided. The price you pay for the product or service is not higher but I may get compensated for sharing.
Looking for a fun and creative sublimation project? These DIY Sublimation Bookmarks made with Artesprix Coloring Books, Sublimation Paints, Markers, and a Gel Plate are the perfect mix of easy and artistic! Whether you’re crafting for yourself, making gifts for book lovers, or exploring new ways to use Artesprix products, this project is full of vibrant color and unique techniques. In this tutorial, I’ll show you how to use paints on a gel plate, add detail with sublimation markers, and transform coloring book pages into stunning sublimation bookmarks you’ll love to use or share.
Affiliate links may be present in the following blog post and as an Amazon Associate I earn from qualifying purchases.
Here’s a look at the supplies on my table ready to go. I am using the new(ish) Artesprix Sublimation Coloring books combined with Artesprix Sublimation Paints & a gel plate, plus breaking a “sublimation” rule in this new tutorial. I’ve included the supply list to create DIY Sublimation Bookmarks below.
Using the Artesprix Sublimation products opens up so many options to create and just let go and see where the art takes you. What kind of design or colors would you use on a DIY sublimation bookmark?
Check out more of my Artesprix sublimation creations HERE.
THANK YOU for your support! How can you help? Click HERE & buy a coffee. Every little bit helps with the cost of running the site.
Silhouette Classes
Never stop learning! Let me help you take the anxiety out of learning with Silhouette and get to creating faster! My Silhouette classes are heavily focused on software, so you can take the skills & techniques taught and apply them to many future projects!
**This post may contain affiliate links. What that means is that I may receive compensation if you purchase through the links I have provided. The price you pay for the product or service is not higher but I may get compensated for sharing.
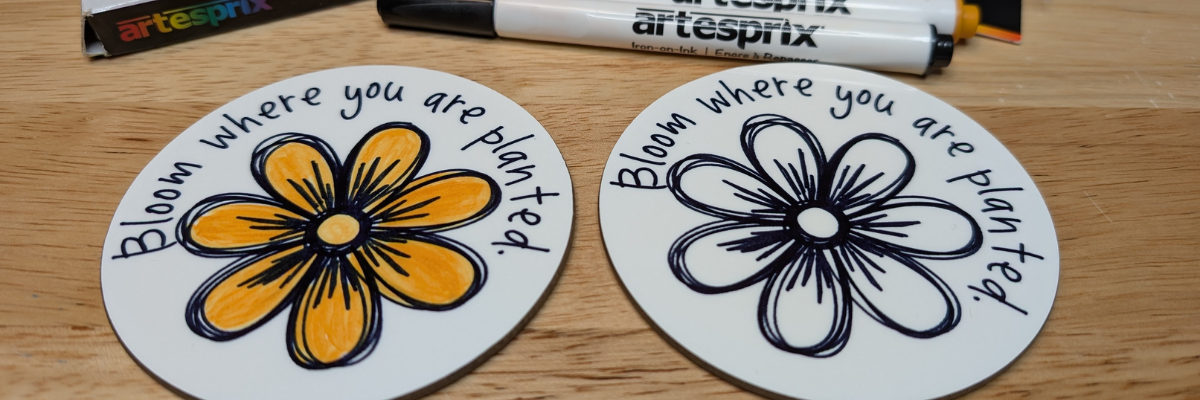
Want to start playing with sublimation but don’t have all the fancy tools? This easy sublimation charm tutorial using Artesprix markers is perfect for beginners! With just three Artesprix sublimation markers, a charm blank, and a few other supplies, you can create bold, personalized designs in minutes. Whether you’re making custom keychains, jewelry, or backpack tags, this simple project is a budget-friendly way to explore sublimation with minimal supplies and maximum creativity.
Affiliate links may be present in the following blog post and as an Amazon Associate I earn from qualifying purchases.
Hand drawn design on Artesprix Sublimation Charms
So here was the challenge – a sublimation project for less than $20. This is a great way to test the waters and get started. But, I will warn you, once you get started, it’s hard to stop and the ideas just start flowing.
Artesprix now sells individual sublimation markers, which means you don’t have to buy the entire set and you can mix and match the fine tip and chisel tips markers. Will you want the full set? YES! But, you can also get started with just a few, if you can decide on the colors.
For me, the black sublimation marker is a staple, so that is a must have. I chose yellow and blue for my other 2 colors, then I could make green as well, which I share how easy that is in the video tutorial below.
I mentioned above that once you start playing it can be hard to stop. My first charms were all free hand and I noticed my hand was not as steady as I would like. This is what happens when you are on camera and standing up to record. It was a bit better when I sat down and let things dry a bit better, but once I did that, new ideas just kept coming.
Did you know you can also use the markers in your cutting machine with the pen holders?
The Artesprix Sublimation Charms are small at 0.75″. Using the Silhouette Studio software, I drew out a circle that was 0.75″ and turned the cut line off on the Send tab for my circle template. Then I started filling the circles with designs and sizing them down to fit.
I knew that not all these designs would turn out. I made duplicates of the designs, just in case one worked better than the other and I would have a choice. Since it’s just a bit of ink and copy paper, if it doesn’t turn out, no big deal! This is a great way to test designs and see what will happen.
When sketching with a cutting machine, just like when writing by hand, the tip of the pen makes a difference in the thickness of the line. Felt tip pens will spread out more than a ball point pen tip. That can affect whether the lines bleed together or not.
I chose the designs that I wanted to use and then using only the 3 markers just like in the video below, I added color to the designs with a few different methods. I used the markers to color in some areas, then with a paint brush and a bit of water you can get a watercolor effect for a background, or combine ink and water on a slick surface and smoosh the paper onto top to get a splatter or color blotch effect.
Love them! And I satisfied that little voice in my head that said… “Hey, wait, you aren’t done – what about this idea?”
Use the tools in your craft space and see what you can create! Check out the supply list and video tutorial below.
Supplies for Custom Charms with Sublimation Markers:
THANK YOU for your support! How can you help? Click HERE & buy a coffee. Every little bit helps with the cost of running the site.
Silhouette Classes
Never stop learning! Let me help you take the anxiety out of learning with Silhouette and get to creating faster! My Silhouette classes are heavily focused on software, so you can take the skills & techniques taught and apply them to many future projects!
**This post may contain affiliate links. What that means is that I may receive compensation if you purchase through the links I have provided. The price you pay for the product or service is not higher but I may get compensated for sharing.
I have been creating with the Craft Pro Mug & Tumbler Press from Heat Press Nation, and I wanted to share how easy it was to use. In this post, I’m walking you through my process from start to finish, including how I set up the sublimation designs in Silhouette Studio, how simple the pressing process was, and the finished mugs and tumblers I created. I’ve also included an unboxing video at the end so you can see exactly what comes with the press and why I think it’s a great tool for beginners or anyone looking to simplify their sublimation workflow.
Affiliate links may be present in the following blog post and as an Amazon Associate, I earn from qualifying purchases.
I purchased the Craft Pro Mug & Tumbler Press last year during the Black Friday sales and I have to admit that I didn’t unbox it right away. It sat there… whispering my name every time I walked by. By mid-January, I finally gave in, unboxed it, and set it up—and I have no idea why I waited so long! It was super easy to get started and even easier to use. Total win!
These tumblers and coffee mugs could not be any easier. Literally, print and press the design and you have colorful, beautiful projects! I will say that equipment does make a difference. I also will admit that not all projects turn out 100% of the time, but there is usually a reason for that. In my case, it’s usually due to user error of some sort. I get in a hurry or grabbed the wrong blank that’s not in fact a sublimation blank, etc.
For these projects, I am using a Windows 11 computer and printing through Silhouette software to my Epson F170 with the full printer driver’s installed direct from the Epson website. I am not changing or adjusting anything. I then press the sublimation blanks according to the manufacturer’s instructions. All sublimation blanks can vary in time and temperature.
Creating Sublimation Tumblers
The first step for a successful full tumbler wrap is to measure your sublimation tumbler. They are not all created the same size. Even if you order several at once, it’s always a good idea to grab a tape measure and just check the size really quickly.
Next, open Silhouette Studio and draw a rectangle. Scale the rectangle to the size of the tumbler measurements and center it to the page.
I used a design called Sarcastic Birds Funny Tumbler Wrap. This particular design was created for a 20 oz tumbler and since I’m doing the full wrap, I simply dragged it from the saved location on my computer and held it over top of the rectangle in Silhouette Studio and it filled the entire rectangle.
I would recommend always checking the “Show Print Border” on the Page Setup Panel in Silhouette Studio. This will turn on a gray border around the page that shows you the maximum print border for the current printer and page size set by your computer/printer. This is also the first place where you can spot an issue, such as the wrong printer selected, etc. I switch between my Canon TS9521C and my Epson F170 printer all the time and the print borders are different for each printer.
Next, save your file. This is always a good habit to get into, especially when working with heavy graphic files. I recommend saving your files every so often to preserve your work.
Before you print, you want to make sure the correct printer is selected. Click on File > Print > Select Print on the Preview > Verify Printer selected.
In this photo above, my regular printer is selected. That means the print border shown above will be what is set by the Canon TS9521C printer settings, not the Epson F170 sublimation printer.
If you have to switch printers or change page size, make the changes, click Apply and then cancel out of the windows back to the Design tab in the Silhouette Studio software. This will reset the print borders and settings to the correct printer.
Then proceed with printing by clicking File > Print > Print – verify the information is correct and send to your printer.
Sublimation prints will print mirrored. If you are using a true sublimation printer, the default should be set to mirror it automatically. If you are using a converted printer for sublimation, then you may have to mirror the design yourself before printing.
After printing, make sure to let the ink dry completely before handling.
Applying Sublimation Transfer to Sublimation Tumblers
It’s always a good idea to test the pressure on the Craft Pro Mug & Tumbler Heat Press before you get it heated up. This will guarantee that your press is tight enough around the sublimation blank and it won’t heat up the blank in the process. If you add a sublimation print to a warm/hot surface, it has a chance of starting the ink transfer process.
Adjust the pressure on the press as needed and then turn the heat press on and set the time and temperature according the manufacturer’s instructions instructions for the sublimation blank.
While the press is heating, trim the sublimation prints down using a paper trimmer or straight edge.
Clean the tumbler with an alcohol swab and a lint roller. This will remove any dust or debris on the tumbler. Dust and debris particles will absorb the ink and leave blue spots on the sublimation blank that are permanent.
Once the tumbler is dry after cleaning, wrap the sublimation print around the tumbler tight and tape securely. Make sure to place the print the right side up so you don’t press the design upside down on the tumbler.
I have tried many different ways to tape tumblers and I have to say this is one of those things that you have to practice with and you will get better and find what method works for you, your designs, and your tumblers.
For these, I wrapped the sublimation print tight, matching up the paper edges and spinning it to tighten the paper around the tumbler. Then I taped completely around the tumbler in the middle, at the top, and at the bottom. You do not want any crinkles, wrinkles, bubbles, or uneven areas when wrapped. Any air that can get in between the paper and the tumbler when pressing can cause “ghosting”, which is blurred images and not a clean transfer.
Once the Craft Pro Mug & Tumbler Heat Press is up to temperature, I wrapped a sheet of parchment paper around the tumbler and slide it into the press. Then closed the press and pressed for the recommended time. Since it is a full wrap and the tumbler press does not completely surround the tumbler, it is rotated and pressed again so the entire surface is heat pressed.
Sublimation is science. It is the process of turning the sublimation ink printed on the paper into a gas with the high heat and pressure. This gas transfers to the sublimation blank and binds to the polyester coating. Any empty space, debris, air, etc. between the print and the blank can interfere with the transfer process.
The more you do it, the better you will get. And you might as well get a box out and label it “DUDS”, because you will have them! It’s all part of the process.
Sublimation blanks are typically white and the images will show up the best on white sublimation blanks because sublimation ink is transparent. The tumbler on the left side is a Holographic Glitter Sublimation Tumbler and you can see how the colors are a bit different than the other 3 white sublimation tumblers.
I love how they all turned out! The hardest part is getting good photos of a round object. Since it is a tumbler wrap, you cannot see the entire image in a photo. Make sure to check out the unboxing video below for some full 360° views of the finished tumblers.
Since I do not sell products, I don’t print as often as some who do daily sublimation projects. I was going several weeks without printing and was having a few issues. Sublimation ink is a different composition than regular inks, however, even with a regular inkjet printer, if it goes unused for some time, it can have issues and need maintenance.
After doing some maintenance to get my Epson F170 printing well again, I decided to try to make weekly prints, whether I have a project ready to press or not. A page printed weekly is less cost in maintenance than having to do multiple maintenance cycles.
Here is a look at one of the weekly test sheets I printed out a few weeks back.
I had no real plan for the projects, just opened up my Creative Fabrica folder in my saved designs and started looking for designs that I might like to add to a future projects, such as a coffee mug. On the left side in the photo above, you can see the template shapes I drew out to size some of them. While I didn’t have a specific plan, I was thinking 3″ coasters, 11 oz., and 15 oz. coffee mugs might be a possibility.
Sublimation prints can be printed and sit for some time as long as they are in a temperature controlled environment and not subjected to moisture that would affect the paper or ink.
I love my new Sunset Turtle Coffee Mug! So bright and colorful!
And the whole reason I swapped out the tumbler attachment for the mug attachment was to press a design I created for an upcoming event. The swap between attachments was so easy! 8 screws out, switch the tumbler attachment for the mug attachment, and 8 screws in. Don’t forget to plug the new attachment into the power box on the Craft Pro Mug & Tumbler Press or it won’t heat up. Seriously, these things happen to us all!
Here is a look at the entire reason for kicking my butt into gear to get this blog post and unboxing video done. Check out the Upcoming Events page HERE or sign up to be notified by email when a new event opens for registration HERE.
Since these designs are not full wraps, they do not need taped completely around the surface. I cleaned the sublimation coffee mugs, let them dry, then placed the sublimation print where I wanted it and secured the design with heat tape around the edges. You do want to get it tight against the mug so no air gets between the paper and mug.
Coffee mugs can be tricky near the handles. Again this just takes practice and depends on the blank itself. Make sure to secure the print as best you can for the best results.
And HAVE FUN creating!
A few of these tumblers have already found their way to friends and family as gifts and I have a couple tumblers and mugs for myself too!
Check out the unboxing video and a 360° view of the finished tumblers below.
Save this for future reference by pinning the image below.
Enjoy !
THANK YOU for your support! How can you help? Click HERE & buy a coffee. Every little bit helps with the cost of running the site.
Silhouette Classes
Never stop learning! Let me help you take the anxiety out of learning with Silhouette and get to creating faster! My Silhouette classes are heavily focused on software, so you can take the skills & techniques taught and apply them to many future projects!
**This post may contain affiliate links. What that means is that I may receive compensation if you purchase through the links I have provided. The price you pay for the product or service is not higher but I may get compensated for sharing.
Ready to take your Silhouette skills to the next level? In this step-by-step video tutorial, you’ll learn exactly how to create custom sketch designs in Silhouette Studio—perfect for sketch pens, foiling, sublimation markers, and more! Whether you’re personalizing cards, creating decorative outlines, or adding hand-drawn touches to your projects, this tutorial will show you how to design from scratch and prepare your file for sketching.
Affiliate links may be present in the following blog post and as an Amazon Associate, I earn from qualifying purchases.
This year I took a watercolor class from artist Tracey Weinzapfel and I’ve been creating all kinds of projects with the ideas from class. When I started designing a class for the Sublimation & Beyond Camp 2025, I wanted to see if I could recreate my designs in the Silhouette Software.
I had so much fun in the design process of these custom sketch designs and just kept on creating flower designs just to see if they would turn out.
I used the sketch designs to create sublimation coasters using the Artesprix sublimation markers. Since the class would be viewed by a variety of cutting machine owners, I designed in Silhouette Studio and then saved the file as a SVG.
Here is the supply list for the sublimation coasters in case you want to create too!
Watch the video belowand follow along as we unlock the creative power of sketching with your Silhouette machine! Can you spot my mistake I made in the video?
What custom sketch designs will you create? Let us know in the comments below.
Save this for future reference by pinning the image below.
Enjoy !
THANK YOU for your support! How can you help? Click HERE & buy a coffee. Every little bit helps with the cost of running the site.
Silhouette Classes
Never stop learning! Let me help you take the anxiety out of learning with Silhouette and get to creating faster! My Silhouette classes are heavily focused on software, so you can take the skills & techniques taught and apply them to many future projects!
**This post may contain affiliate links. What that means is that I may receive compensation if you purchase through the links I have provided. The price you pay for the product or service is not higher but I may get compensated for sharing.
Looking for a fun and easy sublimation project you can make at home? These custom magnets made with Artesprix Sublimation Ink Pads are the perfect DIY craft! Using your favorite stamp set, you can create unique designs, add color to the design, or play with ink backgrounds for a bold look. Whether you’re making personalized gifts or adding a pop of personality to your fridge or workspace, this project is a great way to explore sublimation with vibrant, professional-quality results. I’ll share how you can make your own custom sublimation magnets today!
Affiliate links may be present in the following blog post and as an Amazon Associate I earn from qualifying purchases.
Artesprix Sublimation products make it so easy to create many different projects. In the current line up of products Artesprix has sublimation markers, paints, ink pads, and ink refills. The possibilities are endless in what can be created with them and the only thing you have to do is GET STARTED!
You don’t even need a plan. Just start creating and see what happens. One of the great things about the Artesprix Sublimation products is that they only need copy paper to work. Yes! Copy paper! So if you decide you are not “feeling” what you’ve created, set it aside and try again.
I have been itching to use some new Arden Creative Studio stamp sets that I had ordered. These are designed by Katie Pertiet, who I recently met again at Creativation 2025 in Seattle. I love seeing the designer work with their products and I do wish I’d recorded more of that. On my list for next year!
Supplies for Custom Magnets with Sublimation Inks:
THANK YOU for your support! How can you help? Click HERE & buy a coffee. Every little bit helps with the cost of running the site.
Silhouette Classes
Never stop learning! Let me help you take the anxiety out of learning with Silhouette and get to creating faster! My Silhouette classes are heavily focused on software, so you can take the skills & techniques taught and apply them to many future projects!
**This post may contain affiliate links. What that means is that I may receive compensation if you purchase through the links I have provided. The price you pay for the product or service is not higher but I may get compensated for sharing.
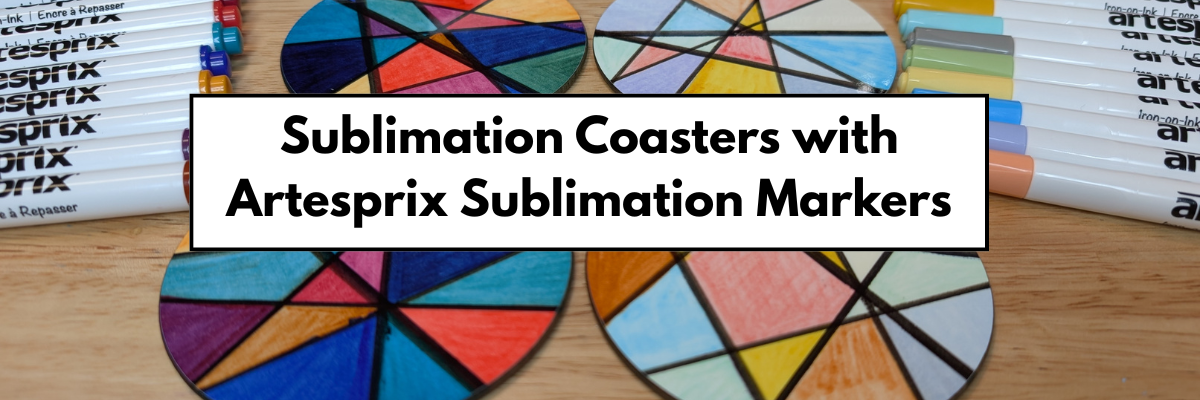
If you’ve been curious about trying sublimation, this is the perfect place to start! I’m sharing a beginner-friendly project —DIY abstract coasters using Artesprix Sublimation Markers. The Artesprix Sublimation markers make it so easy to play with color and design, no matter your skill level. Whether you’re brand new to sublimation or just looking for a quick, creative project, these coasters are a fun way to jump in. Grab your heat press and let’s create something bold, vibrant, and totally unique—no perfection required!
Affiliate links may be present in the following blog post and as an Amazon Associate I earn from qualifying purchases.
This is a project that anyone, even little ones, could do! There is no wrong way to do it.
This is a great way to see what all the colors in the marker sets will look like when heat pressed. With sublimation inks, they will appear duller until the high heat and pressure is applied and that is when the colors really pop.
Here is a closer look at the finished Artesprix polished sublimation coasters.
I would recommend letting the copy paper dry completely after adding in the colors. Mine was still a bit damp in areas from my coloring and you can see a few spots where the black bled a little bit. But, that’s what also makes it unique! It does not have to be perfect or match anyone else’s design.
THANK YOU for your support! How can you help? Click HERE & buy a coffee. Every little bit helps with the cost of running the site.
Silhouette Classes
Never stop learning! Let me help you take the anxiety out of learning with Silhouette and get to creating faster! My Silhouette classes are heavily focused on software, so you can take the skills & techniques taught and apply them to many future projects!
**This post may contain affiliate links. What that means is that I may receive compensation if you purchase through the links I have provided. The price you pay for the product or service is not higher but I may get compensated for sharing.
If you’ve ever created a design in Silhouette Studio and wanted to use it outside the software—whether for DTF (Direct to Film) printing, sublimation, print-and-cut, or any high-quality print project—this guide is for you! With just a few simple steps, you can save your design as a transparent PNG file directly from Silhouette Studio. This method is perfect for uploading to services like Siser®’s Easy® Transfers for vibrant, press-ready DTF prints, but it’s also a great option for any project that needs a clean, high-resolution image. In the video below, I’ll walk you through how to export your design as a PNG and show you exactly how to upload it to the Siser Easy Transfers site to order custom DTF transfers—plus, you’ll get tips to ensure your file is properly formatted for print success. You’ll also find written step-by-step instructions below the video in this post to make it even easier to follow along.
Affiliate links may be present in the following blog post and as an Amazon Associate, I earn from qualifying purchases.
In the video linked above, I show how I created the design featured. I am going to skip right to the steps of saving as a PNG from Silhouette Studio Business Edition. If you would like to see how I create the design, check it out in the video HERE.
When creating your own designs, make sure you are starting with high resolution images. Photos and digital files that are 72 dpi are designed for internet quality images and you want 300 dpi for print quality.
Note: if you are on a MAC, the screenshots below may look a bit different as I am using a Windows computer, however, the process is the same.
Select all parts of the design to be saved. This can be done by left clicking and dragging across the entire design to “rubber band” select everything the mouse moves across.
In the top left corner of Silhouette Studio, select File > Save Selection > Save to Hard Drive.
Using this method will save the design at the size created and not the entire art board. I explain and show a demonstration of why I recommend this method in the video tutorial HERE.
Choose the location you want the file to be saved, name the file, and change the Save as type at the bottom to PNG (or whatever other file type you’d like to save as).
Silhouette has a default DPI (Dots per inch), this is NOT print quality. Highlight the number and change it to 300, then press the Enter key. You will notice that the Pixels for both Width and Height increase. Pixel size is directly related to DPI.
Check the box next to Transparent background if you want a transparent background.
PNG and JPEG files are rectangle shaped files. If a PNG was not designed with a transparent background, it will show as a white rectangle behind the design. JPEG files do not have transparent backgrounds.
The maximum pixel size that can be saved for either width or height in Silhouette Studio is 10,000 pixels.
Make sure to press Enter after changing the DPI or the change will not take effect.
Click the Save button to save the file as a PNG.
Check the file in the saved location to make sure it saved as you want. On a Windows computer, in the Windows folder, move the mouse over the image and it will tell you the pixel size.
To change how you view files in the Windows Folder, select View at the top and select how you want to see those files in the folder.
When using those steps, the design should be saved at 300 DPI from Silhouette Studio.
Save this for future reference by pinning the image below.
Enjoy !
THANK YOU for your support! How can you help? Click HERE & buy a coffee. Every little bit helps with the cost of running the site.
Silhouette Classes
Never stop learning! Let me help you take the anxiety out of learning with Silhouette and get to creating faster! My Silhouette classes are heavily focused on software, so you can take the skills & techniques taught and apply them to many future projects!
**This post may contain affiliate links. What that means is that I may receive compensation if you purchase through the links I have provided. The price you pay for the product or service is not higher but I may get compensated for sharing.
THANK YOU for your support! How can you help? Click the link to buy a coffee. Every little bit helps in the cost of running the site.