Posted on Leave a comment

Custom Tumbler Sublimation Made Easy with Artesprix Inks | Step-by-Step DIY

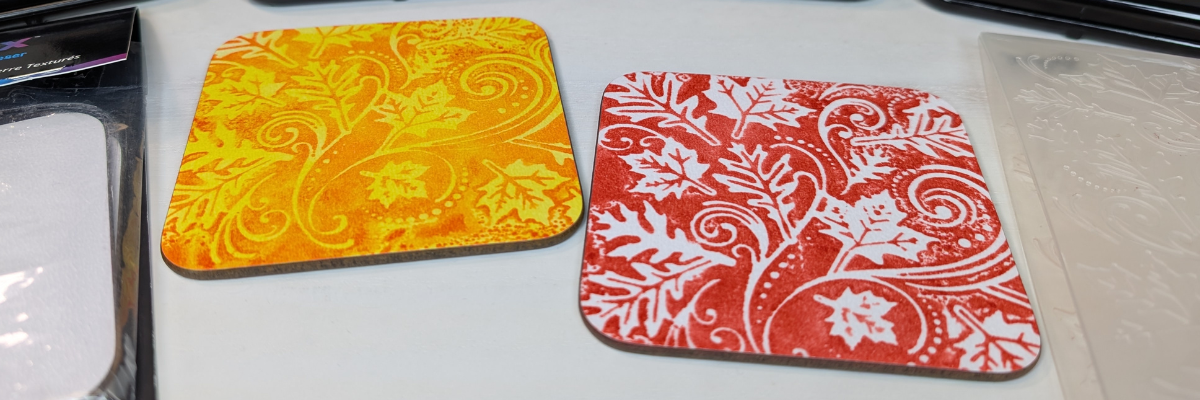
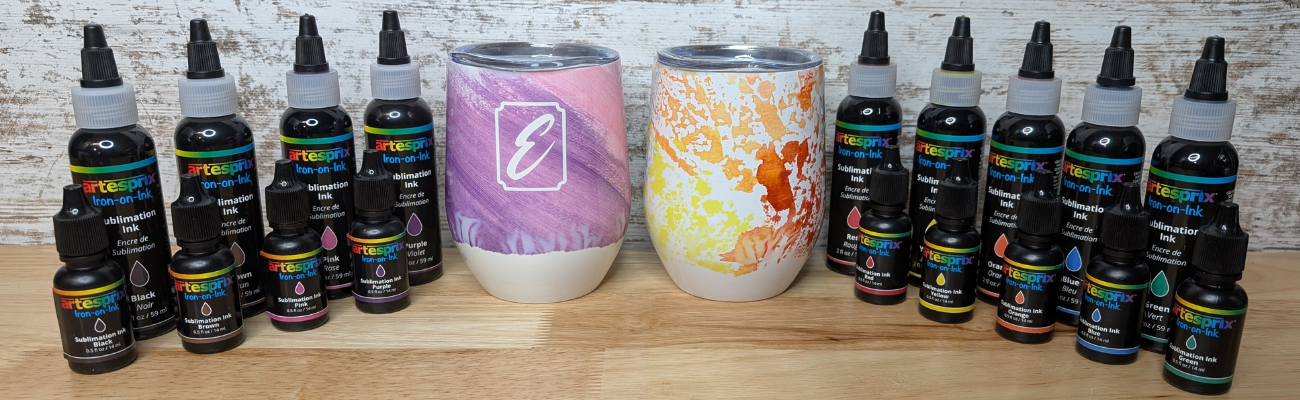
Creating a custom sublimation tumbler doesn’t have to be complicated! In this step-by-step DIY tutorial, I’m sharing an easy and creative way to make vibrant, one-of-a-kind tumblers using Artesprix Sublimation Inks. This project combines simple techniques like plastic wrap and heat resist mask to achieve stunning results—perfect for beginners, girls’ nights, craft nights, handmade gifts, or even small business projects. In this post, you’ll find the full video tutorial, a complete supply list, and helpful tips to confidently create your own custom sublimation tumblers from start to finish.

Affiliate links may be present in the following blog post and as an Amazon Associate I earn from qualifying purchases.

Two custom sublimation tumblers featuring vibrant colors and designs, surrounded by Artesprix sublimation inks in various shades.

Want to know what I love about the Artesprix sublimation inks, paints, markers, and stamp pads. They make me step outside my comfort zone and accept what comes. That each project I create is unique and even if I did the same exact steps the next time, it would still look different.

For these custom wine tumblers, I used the Artesprix Heat Resist Mask and cut a monogram out with my Silhouette.

Digital design workspace in Silhouette Studio featuring various monogram letters for a wine tumbler project.

Here is a look at my design file. The letter ‘E’ is one of those that can look really ugly in many fonts and always takes me forever to find one I really like. On the left side, I have the keepers, until I find the one that speaks to me the most.

In the video you’ll see that the first monogram I tried was just the letter and because I didn’t have a solid background it is a “hidden message” monogram. I couldn’t stop there and had to create another, so I added a frame around the letter too.

Close-up of hands applying a monogram letter 'E' to a white sublimation tumbler, on a black surface with a colorful background.

I have better luck with securing the Artesprix Heat Transfer Resist directly to the blank and then there is no space for the sublimation gases to leak in underneath during the process. For a design that has pieces like the second one with the frame, I used transfer tape to transfer it to the blank just like you do with adhesive vinyl.

A person holding a piece of plastic wrap above a custom sublimation tumbler with a purple design, in a crafting workspace.

The shape of the tumbler and the crinkled paper gave it a unique look on the bottom.

I think it turned out unique and it completely shows that sometimes you just have to take “control” and throw it out the window. Now, I kind of want to try the wrinkle, cloudy technique on purpose. While I cannot control the final outcome on colors and pattern, I was able to “fix” the monogram so it’s no longer a “hidden message” and it turned out so crisp.

Two custom sublimation tumblers side by side, one with a purple and pink swirl pattern featuring a white monogram 'E', and the other with an abstract orange and yellow design.

I don’t waste any of the sublimation ink. Anytime there is extra paint or ink, I will grab a sheet of copy paper and make a new print, let it dry, and then add it to my stash. As long as the sublimation pages don’t get wet or aren’t subjected to high heat, you can use them for a year or longer after they’ve been made.

Here is a look at the “hidden message” monogram on the right.

Two custom sublimation tumblers, one featuring a purple swirl design with a white monogram 'E', and the other showcasing a blue and red abstract design. Surrounding them are various bottles of Artesprix sublimation inks.

Looking for the step-by-step video?
It’s linked right below the supplies section.

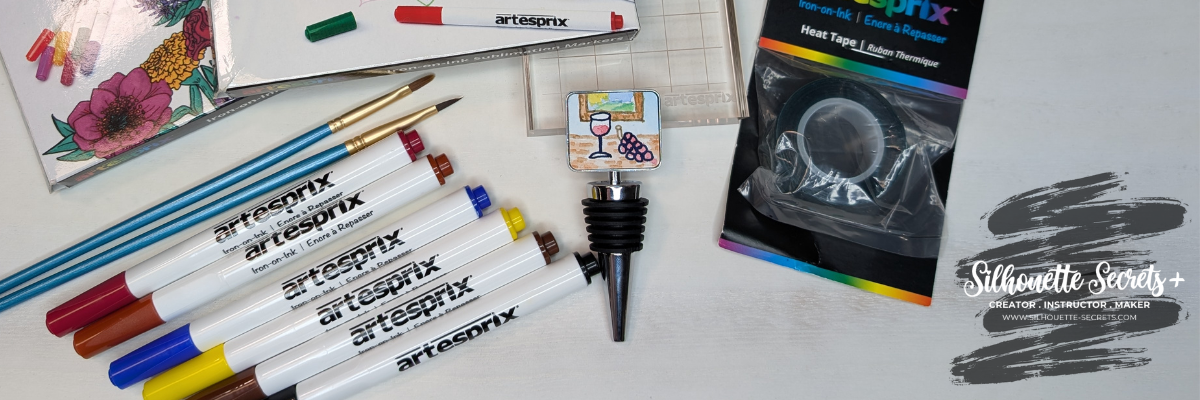
Supplies for Custom Sublimation Wine Tumblers:

Watch this tutorial on these sublimation wine tumblers HERE on the Artesprix YouTube channel.

Check out more of my Artesprix sublimation creations HERE.

I’ll be sharing more so make sure to follow Artesprix on social media to see more projects!
YouTube channel
Blog
Facebook Page
Iron-on-Ink Inspirational Facebook Group

Save this for future reference by pinning the image below.

Two custom sublimation wine tumblers, one featuring a purple and white marbled design with a monogram 'E', and the other with an orange and yellow gradient. Bottles of Artesprix sublimation inks are visible in the background.

Grab some Artesprix sublimation products and get to creating today!

Enjoy !

THANK YOU for your support! How can you help? Click HERE & buy a coffee.
Every little bit helps with the cost of running the site.

Silhouette Classes

Never stop learning! Let me help you take the anxiety out of learning with Silhouette and get to creating faster! My Silhouette classes are heavily focused on software, so you can take the skills & techniques taught and apply them to many future projects!

Silhouette step-by-step Classes by Silhouette Secrets+

Silhouette Secrets+ with EllyMae
**This post may contain affiliate links. What that means is that I may receive compensation if you purchase through the links I have provided. The price you pay for the product or service is not higher but I may get compensated for sharing.
Posted on Leave a comment

How to Create Unique Sublimation Coasters with Artesprix Inks and Embossing Folders

Looking for a fun and creative way to take your sublimation projects to the next level? In this tutorial, I’m sharing how to combine Artesprix Sublimation Inks with embossing folders to create beautiful, designs on textured sublimation coasters! 🎨 This unique technique adds incredible depth and dimension to your projects—perfect for gifts, décor, or one-of-a-kind keepsakes. I’ll walk you through the full process step-by-step in the video below, along with a complete list of the supplies you’ll need to get started. Grab your favorite embossing folders, your Artesprix inks, and let’s create something truly unique!

Affiliate links may be present in the following blog post and as an Amazon Associate I earn from qualifying purchases.

Two textured sublimation coasters, one orange with floral designs and one red with leaf patterns, displayed among various Artesprix inks.

My favorite is the single color with the white of the textured coaster coming through. I think it really makes it pop, but there are so many different color options that you could do.

Supplies for DIY Sublimation Coaster Creations:

Watch this tutorial HERE on the Artesprix YouTube channel.

Check out more of my Artesprix sublimation creations HERE.

I’ll be sharing more so make sure to follow Artesprix on social media to see more projects!
YouTube channel
Blog
Facebook Page
Iron-on-Ink Inspirational Facebook Group

Save this for future reference by pinning the image below.

Image showcasing colorful sublimation coasters created using Artesprix inks, textured coasters, and an embossing folder.

Grab some Artesprix sublimation products and get to creating today!

Enjoy !

THANK YOU for your support! How can you help? Click HERE & buy a coffee.
Every little bit helps with the cost of running the site.

Silhouette Classes

Never stop learning! Let me help you take the anxiety out of learning with Silhouette and get to creating faster! My Silhouette classes are heavily focused on software, so you can take the skills & techniques taught and apply them to many future projects!

Silhouette step-by-step Classes by Silhouette Secrets+

Silhouette Secrets+ with EllyMae
**This post may contain affiliate links. What that means is that I may receive compensation if you purchase through the links I have provided. The price you pay for the product or service is not higher but I may get compensated for sharing.
Posted on Leave a comment

Boo-tiful DIY Ghost Headband | Spooky Cute Halloween Sublimation with Artesprix

Halloween crafts are some of my absolute favorites, and this year I couldn’t resist making a Boo-tiful DIY Ghost Headband 👻 using Artesprix Sublimation Paints and Markers. Sublimation isn’t just for mugs and coasters—it’s a fun way to customize wearable accessories too! With just a few supplies, I transformed a plain Artesprix sublimation headband into a spooky-cute Halloween accessory that’s perfect for parties, trick-or-treating, or just getting into the festive spirit. Create your own ghostly design so you can rock a one-of-a-kind headband this Halloween.

Affiliate links may be present in the following blog post and as an Amazon Associate I earn from qualifying purchases.

Array of Artesprix sublimation paints and markers displayed on a wooden surface, featuring various colors, alongside a fabric swatch with ghost designs.

In this video tutorial I shared how to use the new Artesprix Sublimation Coloring Books. These sublimation coloring books are available in 2 formats – a printed copy ($4.99) that you can order to be shipped to you or you can download the digital copy (free) and print with a sublimation printer at home.

Display of various Artesprix sublimation coloring books available for purchase, showcasing covers featuring themes like Alphabet Print, Fall & Halloween, Floral, and more.

While brainstorming for this video, I asked my youngest her thoughts and that is how the ghosts were chosen. This headband literally walked out the door this morning and I may never get it back.

A girl wearing a blue headband featuring cute ghost designs, set against a backdrop of greenery.

Now she has requested one in orange for “Halloween” colors. I love all the options that can be created using the Artesprix sublimation paints, markers, and inks! So many possibilities to create unique creations.

Supplies for Custom Sublimation Headbands:

Watch this tutorial HERE on the Artesprix YouTube channel.

Check out more of my Artesprix sublimation creations HERE.

I’ll be sharing more so make sure to follow Artesprix on social media to see more projects!
YouTube channel
Blog
Facebook Page
Iron-on-Ink Inspirational Facebook Group

Save this for future reference by pinning the image below.

Sublimation headband with Artesprix paints, markers, and a ghost-themed design on a blue background, showcasing crafting supplies.

Grab some Artesprix sublimation products and get to creating today!

Enjoy !

THANK YOU for your support! How can you help? Click HERE & buy a coffee.
Every little bit helps with the cost of running the site.

Silhouette Classes

Never stop learning! Let me help you take the anxiety out of learning with Silhouette and get to creating faster! My Silhouette classes are heavily focused on software, so you can take the skills & techniques taught and apply them to many future projects!

Silhouette step-by-step Classes by Silhouette Secrets+

Silhouette Secrets+ with EllyMae
**This post may contain affiliate links. What that means is that I may receive compensation if you purchase through the links I have provided. The price you pay for the product or service is not higher but I may get compensated for sharing.
Posted on Leave a comment

DIY Sublimation Bookmarks with Artesprix Coloring Books, Paints, Markers & Gel Plate Techniques

Looking for a fun and creative sublimation project? These DIY Sublimation Bookmarks made with Artesprix Coloring Books, Sublimation Paints, Markers, and a Gel Plate are the perfect mix of easy and artistic! Whether you’re crafting for yourself, making gifts for book lovers, or exploring new ways to use Artesprix products, this project is full of vibrant color and unique techniques. In this tutorial, I’ll show you how to use paints on a gel plate, add detail with sublimation markers, and transform coloring book pages into stunning sublimation bookmarks you’ll love to use or share.

Affiliate links may be present in the following blog post and as an Amazon Associate I earn from qualifying purchases.

A display of various Artesprix sublimation products, including markers, a coloring book, and sublimation supplies on a wooden table. Supplies to create a DIY Sublimation Bookmark.

Here’s a look at the supplies on my table ready to go. I am using the new(ish) Artesprix Sublimation Coloring books combined with Artesprix Sublimation Paints & a gel plate, plus breaking a “sublimation” rule in this new tutorial. I’ve included the supply list to create DIY Sublimation Bookmarks below.

Supplies for Custom Sublimation Bookmarks:

A layout featuring two colorful DIY sublimation bookmarks with the words 'FUN' and 'READ' on a wooden surface, surrounded by various Artesprix sublimation markers and acrylic paints.

Watch this tutorial HERE on the Artesprix YouTube channel.

Using the Artesprix Sublimation products opens up so many options to create and just let go and see where the art takes you. What kind of design or colors would you use on a DIY sublimation bookmark?

Check out more of my Artesprix sublimation creations HERE.

I’ll be sharing more so make sure to follow Artesprix on social media to see more projects!
YouTube channel
Blog
Facebook Page
Iron-on-Ink Inspirational Facebook Group

Save this for future reference by pinning the image below.

Image showing colorful DIY sublimation bookmarks with the words 'FUN' and 'READ', surrounded by Artesprix supplies including sublimation markers and a guidebook.

Grab some Artesprix sublimation products and get to creating today!

Enjoy !

THANK YOU for your support! How can you help? Click HERE & buy a coffee.
Every little bit helps with the cost of running the site.

Silhouette Classes

Never stop learning! Let me help you take the anxiety out of learning with Silhouette and get to creating faster! My Silhouette classes are heavily focused on software, so you can take the skills & techniques taught and apply them to many future projects!

Silhouette step-by-step Classes by Silhouette Secrets+

Silhouette Secrets+ with EllyMae
**This post may contain affiliate links. What that means is that I may receive compensation if you purchase through the links I have provided. The price you pay for the product or service is not higher but I may get compensated for sharing.
Posted on Leave a comment

Easy Sublimation Charm Tutorial Using Artesprix Markers – Beginner Friendly

Want to start playing with sublimation but don’t have all the fancy tools? This easy sublimation charm tutorial using Artesprix markers is perfect for beginners! With just three Artesprix sublimation markers, a charm blank, and a few other supplies, you can create bold, personalized designs in minutes. Whether you’re making custom keychains, jewelry, or backpack tags, this simple project is a budget-friendly way to explore sublimation with minimal supplies and maximum creativity.

Affiliate links may be present in the following blog post and as an Amazon Associate I earn from qualifying purchases.

A collection of handmade charm pendants featuring floral and palm tree designs alongside Artesprix sublimation markers on a wooden surface.
Hand drawn design on Artesprix Sublimation Charms

So here was the challenge – a sublimation project for less than $20. This is a great way to test the waters and get started. But, I will warn you, once you get started, it’s hard to stop and the ideas just start flowing.

Artesprix now sells individual sublimation markers, which means you don’t have to buy the entire set and you can mix and match the fine tip and chisel tips markers. Will you want the full set? YES! But, you can also get started with just a few, if you can decide on the colors.

For me, the black sublimation marker is a staple, so that is a must have. I chose yellow and blue for my other 2 colors, then I could make green as well, which I share how easy that is in the video tutorial below.

I mentioned above that once you start playing it can be hard to stop. My first charms were all free hand and I noticed my hand was not as steady as I would like. This is what happens when you are on camera and standing up to record. It was a bit better when I sat down and let things dry a bit better, but once I did that, new ideas just kept coming.

Did you know you can also use the markers in your cutting machine with the pen holders?

A close-up of a cutting machine, with a white sheet of paper and an Artesprix sublimation marker placed in front of it on a wooden surface.

The Artesprix Sublimation Charms are small at 0.75″. Using the Silhouette Studio software, I drew out a circle that was 0.75″ and turned the cut line off on the Send tab for my circle template. Then I started filling the circles with designs and sizing them down to fit.

Screenshot of Silhouette Studio showing a design layout for sublimation charms, featuring various colorful circular designs.

I knew that not all these designs would turn out. I made duplicates of the designs, just in case one worked better than the other and I would have a choice. Since it’s just a bit of ink and copy paper, if it doesn’t turn out, no big deal! This is a great way to test designs and see what will happen.

A Silhouette cutting machine with a sheet of paper featuring various hand-drawn designs and an Artesprix sublimation marker placed next to it.

When sketching with a cutting machine, just like when writing by hand, the tip of the pen makes a difference in the thickness of the line. Felt tip pens will spread out more than a ball point pen tip. That can affect whether the lines bleed together or not.

A workspace featuring Artesprix sublimation markers, charm blanks, and printed designs on pieces of paper arranged on a wooden surface.

I chose the designs that I wanted to use and then using only the 3 markers just like in the video below, I added color to the designs with a few different methods. I used the markers to color in some areas, then with a paint brush and a bit of water you can get a watercolor effect for a background, or combine ink and water on a slick surface and smoosh the paper onto top to get a splatter or color blotch effect.

Colorful designs on sublimation paper alongside three Artesprix sublimation markers and a blank charm, laid out on a wooden surface.

Love them! And I satisfied that little voice in my head that said… “Hey, wait, you aren’t done – what about this idea?”

Three Artesprix sublimation markers in black, yellow, and blue are positioned above four small circular charm blanks, each featuring different colorful designs, on a wooden surface.

Use the tools in your craft space and see what you can create! Check out the supply list and video tutorial below.

Supplies for Custom Charms with Sublimation Markers:

Also mentioned in the video:

Sketching with Silhouette

Find additional resources on sketching with your Silhouette machines HERE

Watch this tutorial HERE on the Artesprix YouTube channel.

Check out more of my Artesprix sublimation creations HERE.

I’ll be sharing more so make sure to follow Artesprix on social media to see more projects!
YouTube channel
Blog
Facebook Page
Iron-on-Ink Inspirational Facebook Group

Save this for future reference by pinning the image below.

Image showcasing Artesprix sublimation markers and three colorful charm designs on a wooden surface.

Grab some Artesprix sublimation products and get to creating today!

Enjoy !

THANK YOU for your support! How can you help? Click HERE & buy a coffee.
Every little bit helps with the cost of running the site.

Silhouette Classes

Never stop learning! Let me help you take the anxiety out of learning with Silhouette and get to creating faster! My Silhouette classes are heavily focused on software, so you can take the skills & techniques taught and apply them to many future projects!

Silhouette step-by-step Classes by Silhouette Secrets+

Silhouette Secrets+ with EllyMae
**This post may contain affiliate links. What that means is that I may receive compensation if you purchase through the links I have provided. The price you pay for the product or service is not higher but I may get compensated for sharing.
Posted on Leave a comment

How to Make Custom Magnets with Artesprix Sublimation Ink Pads | Easy DIY Sublimation Craft

Looking for a fun and easy sublimation project you can make at home? These custom magnets made with Artesprix Sublimation Ink Pads are the perfect DIY craft! Using your favorite stamp set, you can create unique designs, add color to the design, or play with ink backgrounds for a bold look. Whether you’re making personalized gifts or adding a pop of personality to your fridge or workspace, this project is a great way to explore sublimation with vibrant, professional-quality results. I’ll share how you can make your own custom sublimation magnets today!

Affiliate links may be present in the following blog post and as an Amazon Associate I earn from qualifying purchases.

An assortment of Artesprix sublimation ink pads in various colors, displayed alongside hexagonal magnets featuring colorful butterfly designs.

Artesprix Sublimation products make it so easy to create many different projects. In the current line up of products Artesprix has sublimation markers, paints, ink pads, and ink refills. The possibilities are endless in what can be created with them and the only thing you have to do is GET STARTED!

You don’t even need a plan. Just start creating and see what happens. One of the great things about the Artesprix Sublimation products is that they only need copy paper to work. Yes! Copy paper! So if you decide you are not “feeling” what you’ve created, set it aside and try again.

I have been itching to use some new Arden Creative Studio stamp sets that I had ordered. These are designed by Katie Pertiet, who I recently met again at Creativation 2025 in Seattle. I love seeing the designer work with their products and I do wish I’d recorded more of that. On my list for next year!

A flat lay of crafting supplies for sublimation projects, including Artesprix ink pads in various colors, sublimation coasters, a clear stamp set labeled 'Ledger Wings', and a roll of heat tape.

Supplies for Custom Magnets with Sublimation Inks:

A display of custom hexagonal sublimation magnets featuring colorful butterfly designs created using Artesprix Sublimation Ink Pads, arranged on a wooden surface alongside the ink pads.

Watch this tutorial HERE on the Artesprix YouTube channel.

Check out more of my Artesprix sublimation creations HERE.

I’ll be sharing more so make sure to follow Artesprix on social media to see more projects!
YouTube channel
Blog
Facebook Page
Iron-on-Ink Inspirational Facebook Group

Save this for future reference by pinning the image below.

Flat lay of Artesprix sublimation ink pads, heat tape, and custom magnets featuring butterfly designs on a gradient background.

Grab some Artesprix sublimation products and get to creating today!

Enjoy !

THANK YOU for your support! How can you help? Click HERE & buy a coffee.
Every little bit helps with the cost of running the site.

Silhouette Classes

Never stop learning! Let me help you take the anxiety out of learning with Silhouette and get to creating faster! My Silhouette classes are heavily focused on software, so you can take the skills & techniques taught and apply them to many future projects!

Silhouette step-by-step Classes by Silhouette Secrets+

Silhouette Secrets+ with EllyMae
**This post may contain affiliate links. What that means is that I may receive compensation if you purchase through the links I have provided. The price you pay for the product or service is not higher but I may get compensated for sharing.
Posted on Leave a comment

DIY Abstract Sublimation Coasters with Artesprix Markers

If you’ve been curious about trying sublimation, this is the perfect place to start! I’m sharing a beginner-friendly project —DIY abstract coasters using Artesprix Sublimation Markers. The Artesprix Sublimation markers make it so easy to play with color and design, no matter your skill level. Whether you’re brand new to sublimation or just looking for a quick, creative project, these coasters are a fun way to jump in. Grab your heat press and let’s create something bold, vibrant, and totally unique—no perfection required!

Affiliate links may be present in the following blog post and as an Amazon Associate I earn from qualifying purchases.

A variety of Artesprix sublimation markers arranged next to colorful abstract coasters, featuring geometric designs, on a wooden surface.

This is a project that anyone, even little ones, could do! There is no wrong way to do it.

This is a great way to see what all the colors in the marker sets will look like when heat pressed. With sublimation inks, they will appear duller until the high heat and pressure is applied and that is when the colors really pop.

Here is a closer look at the finished Artesprix polished sublimation coasters.

A collection of four colorful abstract coasters decorated with various geometric patterns, created using Artesprix Sublimation Markers, arranged on a wooden surface alongside the markers.

I would recommend letting the copy paper dry completely after adding in the colors. Mine was still a bit damp in areas from my coloring and you can see a few spots where the black bled a little bit. But, that’s what also makes it unique! It does not have to be perfect or match anyone else’s design.

Supplies for DIY Abstract Sublimation Coasters:

Colorful DIY abstract coasters designed with Artesprix sublimation markers, arranged on a wooden surface with additional markers and supplies in the background.

Watch this tutorial HERE on the Artesprix YouTube channel.

Check out more of my Artesprix sublimation creations HERE.

I’ll be sharing more so make sure to follow Artesprix on social media to see more projects!
YouTube channel
Blog
Facebook Page
Iron-on-Ink Inspirational Facebook Group

Save this for future reference by pinning the image below.

A display of colorful abstract coasters created using Artesprix sublimation markers, featuring geometric designs, with a variety of marker colors and additional sublimation supplies in the background.

Grab some Artesprix sublimation products and get to creating today!

Enjoy !

THANK YOU for your support! How can you help? Click HERE & buy a coffee.
Every little bit helps with the cost of running the site.

Silhouette Classes

Never stop learning! Let me help you take the anxiety out of learning with Silhouette and get to creating faster! My Silhouette classes are heavily focused on software, so you can take the skills & techniques taught and apply them to many future projects!

Silhouette step-by-step Classes by Silhouette Secrets+

Silhouette Secrets+ with EllyMae
**This post may contain affiliate links. What that means is that I may receive compensation if you purchase through the links I have provided. The price you pay for the product or service is not higher but I may get compensated for sharing.
Posted on Leave a comment

DIY Watercolor Tote Bag with Artesprix Sublimation Inks

Silhouette Secrets+ with EllyMae

Looking for a fun and vibrant way to personalize your own tote bag? In this DIY project, I’m sharing how I combined techniques I recently learned from a class taught by my talented friend Tracy Weinzapfel to create a custom watercolor-inspired design using Artesprix Sublimation Inks. I took those creative watercolor techniques and transformed them into a one-of-a-kind sublimation design that pops with color on an Artesprix sublimation tote bag. Whether you’re new to sublimation or looking for fresh inspiration, this project is a perfect blend of art and function—let’s get creative and make something beautiful you can carry with pride!

Affiliate links may be present in the following blog post and as an Amazon Associate I earn from qualifying purchases.

You do not have to be an artist to do this! All you need is the ability to let yourself go and see what you can create. I share tips in the new video that help me create this and allow myself the freedom to just let it go.

Here is a look at watercolor image before I added in the black outlines with the Artesprix black sublimation marker.

The black sketched outline really makes it all pop and come together. Keep in mind that sublimation inks do not show their true colors until they are heat pressed for the full time and temperature. Once pressed, you will see those colors brighten and become vibrant.

Supplies for Custom DIY Watercolor Design Sublimation Tote:

Watch this tutorial HERE on the Artesprix YouTube channel.

I’m completely hooked on crafting with Artesprix products—every time I use them, my creativity sparks and fresh project ideas start flowing! Combine using Artesprix with your cutting machines or just allow yourself to play all on your own. There are so many possibilities.

I would highly recommend just playing around and see what you create, but if you just don’t feel comfortable drawing freehand, you can always set up your cutting machine to sketch with a pencil too.

Here is a sample I did using a mechanical pencil using a Flower Sketch design.

A Silhouette cutting machine set up on a table with a pencil in one of its slots, ready for sketching a design on paper.

Since it is pencil, it is harder to see. Here is a close up of this sketch flower design.

Close-up of a silhouette cutting machine, with a faint outline of a flower design on the paper below.

Since pencil does not transfer to the sublimation blank, I’m not worried about the drag marks, but you could adjust and play with settings to get it just right if you wanted. When using pencil, keep in mind that it will dull quickly, but you can always send it back through again as long as you do not unload the cutting mat.

Sketching with your machine can be done with any pen, marker, pencil that can fit in the pen adapters. Find more resources on sketching with Silhouette HERE and all about sketching supplies HERE.

A vibrant watercolor illustration featuring colorful flowers, including pink, red, and yellow blooms against a light blue background, created on a sublimation tote bag.

This hand drawn design was inspired by Tracy Weinzapfel and her amazing talent as an instructor. I am so glad I signed up for her Fresh Start in Art 5 Day challenge when I saw it.

Check out more of my Artesprix sublimation creations HERE.

I’ll be sharing more so make sure to follow Artesprix on social media to see more projects!
YouTube channel
Blog
Facebook Page
Iron-on-Ink Inspirational Facebook Group

Save this for future reference by pinning the image below.

A custom sublimation tote bag featuring a colorful watercolor design with various flowers, alongside Artesprix sublimation inks and a pen on a wooden surface.

Grab some Artesprix sublimation products and get to creating today!

Enjoy !

THANK YOU for your support! How can you help? Click HERE & buy a coffee.
Every little bit helps with the cost of running the site.

Silhouette Classes

Never stop learning! Let me help you take the anxiety out of learning with Silhouette and get to creating faster! My Silhouette classes are heavily focused on software, so you can take the skills & techniques taught and apply them to many future projects!

Silhouette step-by-step Classes by Silhouette Secrets+

Silhouette Secrets+ with EllyMae
**This post may contain affiliate links. What that means is that I may receive compensation if you purchase through the links I have provided. The price you pay for the product or service is not higher but I may get compensated for sharing.
Posted on Leave a comment

Create a Bright & Fun Custom Apron with Artesprix Sublimation Inks

Custom Apron with Artesprix Inks
Silhouette Secrets+ with EllyMae

Get ready to unleash your creativity with a one-of-a-kind project—no sublimation printer needed! In this tutorial, I’ll show you how I used Artesprix Sublimation Acrylic Paints, a Black Artesprix Sublimation Marker, and stencils to transform a plain apron into a bright, bold, and unique piece of wearable art. The best part? No two aprons will ever be the same, making this a truly custom creation. Whether you’re crafting for yourself or gifting it to a fellow maker, this vibrant apron is sure to make a statement in any creative space. Let’s explore the colorful world of sublimation painting and bring your artistic vision to life!

Affiliate links may be present in the following blog post and as an Amazon Associate I earn from qualifying purchases.

Artesprix Sublimation Acrylic Paints, Markers, and Stencils to Create a Custom Apron

I really wanted to go all in on this project and create a design across the entire white apron. And why not? Let yourself go and have some fun just creating and see what’s possible.

I’ll even admit that I messed up during the process and it wasn’t quite the same vision I has original started with, but it still worked out.

I used the Artesprix Heat Transfer Resist Mask, which has a lot of different ways it could be used. Each time I use it, I think of something new, but that usually is because I did it “wrong” and realize it too late. In this case, my goal was to have the area white underneath the Heat Resists Mask. However, I painted on top of the mask and then did not remove it before pressing, so the paint showed through. It was one of those moments that should have had a camera on my face when I realized what I did, but I just went with the flow and it’s unique.

However, it gave it an interesting and custom look in the end. It’s a good thing I added the sketched outline around it with the Artesprix Sublimation Marker or it wouldn’t have shown at all. That was another idea I was testing out to see how it would look.

Working with the Artesprix Sublimation products has been a great source of enjoyment & experimentation for me. I have learned to just go with the flow and not try to control things as much when creating. See what can happen and you never know… you might like the outcome better than you thought you would.

Here is a look at the full apron design

Artesprix Sublimation Apron Design by EllyMae

A bright colored, artistic art apron that is perfect to protect your clothes when making any mess. Oh wait – that might just be me that needs an apron full time.

Supplies for Custom Art Sublimation Apron:

Full Look at the Artesprix Custom Apron Design

And don’t throw away any extras!!! Save those and you can use that for future projects. Here is a look at my pages I picked up extra paint on and some of the extra stencil designs I had after making my apron.

Artesprix Sublimation Pages for Future Projects

Watch this tutorial HERE on the Artesprix YouTube channel.

I absolutely love crafting with Artesprix products—they never fail to ignite my creativity and inspire new project ideas! Check out more of my Artesprix sublimation creations HERE.

I’ll be sharing more so make sure to follow Artesprix on social media to see more projects!
YouTube channel
Blog
Facebook Page
Iron-on-Ink Inspirational Facebook Group

Save this for future reference by pinning the image below.

Sublimation Apron with Artesprix Sublimation Paints, Markers, and Stencils

Grab some Artesprix sublimation products and get to creating today!

Enjoy !

THANK YOU for your support! How can you help? Click HERE & buy a coffee.
Every little bit helps with the cost of running the site.

Silhouette Classes

Never stop learning! Let me help you take the anxiety out of learning with Silhouette and get to creating faster! My Silhouette classes are heavily focused on software, so you can take the skills & techniques taught and apply them to many future projects!

Silhouette step-by-step Classes by Silhouette Secrets+

Silhouette Secrets+ with EllyMae
**This post may contain affiliate links. What that means is that I may receive compensation if you purchase through the links I have provided. The price you pay for the product or service is not higher but I may get compensated for sharing.
Posted on Leave a comment

DIY Wine Stopper with Artesprix – Custom Design

DIY Sublimation Wine Stopper with Artesprix
Silhouette Secrets+ with EllyMae

Looking for a fun and easy way to create a custom DIY wine stopper? 🍷✨ In this project, I’m using Artesprix Sublimation Markers to design a one-of-a-kind personalized wine stopper with the Artesprix Sublimation Wine Stopper Blank! Whether you’re making a unique gift or adding a personal touch to your kitchen accessories, this shows you how easy it can be to create your own design.

Affiliate links may be present in the following blog post and as an Amazon Associate I earn from qualifying purchases.

DIY Wine Stopper with Custom Design using Artesprix Sublimation Markers

I recently took a 5 day challenge for a watercolor class held by Tracey Weinzapfel and it was so inspiring. Each night we had a 1 hour live class and she would show us some techniques to just play with. I loved it and sometimes my brain just would not stop thinking of new ideas. This one hit me in the middle of the night and I knew I wanted to try it out.

I can say that there is not another one like this in the world as it was custom drawn by me. But, you do not have to hand draw a design like I did. You can also use small stamps, add textures, paint a design, and more!

DIY Wine Stopper with Artesprix Sublimation Markers

Supplies for DIY Wine Stopper:

Watch this tutorial HERE on the Artesprix YouTube channel.

I absolutely love crafting with Artesprix products—they never fail to ignite my creativity and inspire new project ideas! Check out more of my Artesprix sublimation creations HERE.

I’ll be sharing more so make sure to follow Artesprix on social media to see more projects!
YouTube channel
Blog
Facebook Page
Iron-on-Ink Inspirational Facebook Group

Save this for future reference by pinning the image below.

DIY Sublimation Wine Stopper with Artesprix Markers

Grab some Artesprix sublimation products and get to creating today!

Enjoy !

THANK YOU for your support! How can you help? Click HERE & buy a coffee.
Every little bit helps with the cost of running the site.

Silhouette Classes

Never stop learning! Let me help you take the anxiety out of learning with Silhouette and get to creating faster! My Silhouette classes are heavily focused on software, so you can take the skills & techniques taught and apply them to many future projects!

Silhouette step-by-step Classes by Silhouette Secrets+

Silhouette Secrets+ with EllyMae
**This post may contain affiliate links. What that means is that I may receive compensation if you purchase through the links I have provided. The price you pay for the product or service is not higher but I may get compensated for sharing.