Posted on 5 Comments

Let’s Explore v4 – Activate an Upgrade

If you have used any sort of software in your lifetime, you know that there are always updates. In the Silhouette software updates and upgrades are 2 different things.

Updates are free and add features, fix bugs, allow new machines to be accessed, make changes, etc. I recommend downloading the updates direct from the Silhouette America website.

Upgrades are paid software codes that unlock additional features.

If you are reading this post, you probably already have an upgrade code. If you do not, I’d recommend checking out this post
Software Upgrades – My Favorite Features
In the post, I have listed my favorite features of each upgrade and have linked to the lowest prices to get the upgrades.

These 2 words – update vs upgrade – are often confusing for new users
(sometimes even experienced users don’t use them correctly either).
But, they are very important to understand the difference.

Updates reference the version of Silhouette Studio you are using. This information can be found in your Silhouette software.

How to find what software version you have

For Windows users, find your software version under Help > About Silhouette at the top of Silhouette Studio.
For MAC users, find your software version under Silhouette Studio in the top left and About Silhouette.

Note: I am a Beta tester and have a Beta testing version installed.

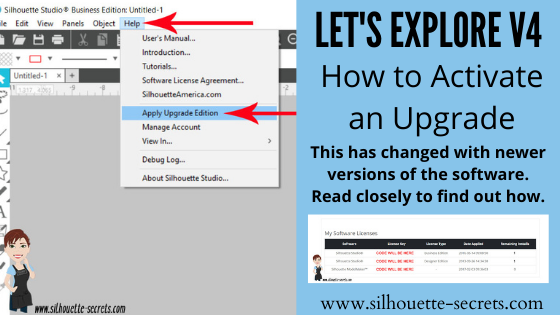
How to Activate an Upgrade

This process has changed recently so the following information is very specific to certain software versions and what you are using.

Please read the following very carefully!

This tutorial is published December 2021
updated on February 27, 2022

If you purchased an upgrade from an authorized Silhouette retailer, not direct at the Silhouette America site – follow Step 1 and 2
If you purchase direct from Silhouette America, skip to Step 2.

Step 1

If you just purchased a brand new upgrade code for the first time AND are using software of v4.4.554 or higher, you will go to the www.silhouette-america.com website.
Click on Software at the top.
Then choose Apply/Manage License Keys.
Then Sign In and follow the instructions.

Step 2

In the Silhouette Studio software, click Help > Apply Upgrade Edition
Enter your Silhouette America log in and click on
Apply a New License Key to your Account.
Enter your email address & password and click Sign In.
Do NOT click the blue arrow.
If the blue arrow is expanded, click to close it or it won’t work properly
Do NOT enter the code – it has already been applied to the Silhouette America website.
NOTE: this is for brand new upgrade purchases only!

If you already have an upgrade that has been applied in a prior software version the following applies:

If using software v4.4.554 or a higher version

You no longer have to enter the code on the computer you are using to activate it. The upgrade code is already activate on your account.

Open the Silhouette Studio software.
At the top choose Help > Apply Upgrade Edition

Then enter your Silhouette America account information and click on Sign In.
Do NOT click the blue arrow.
If the blue arrow is expanded, click to close it or it won’t work properly
Do NOT enter the code – it has already been applied to the Silhouette America website.

All codes that are connected to your Silhouette account will be activated on the computer.

A user is still only allowed to have 3 active computers associated with each upgrade code purchased. This means that if you log into a 4th computer, it will deactivate the upgrade on the computer that was used at the oldest timeframe.

What does that really mean?

As an example, if you have a computer that the upgrade was applied to that was used in January 2021. Then you have a 2nd computer that was used in March 2021. The 3rd computer was last used in November 2021. And now the you have a new computer you are trying to use the software on, a 4th computer, if you are using current software, when it activates, it will remove the code from the 1st computer that was last used in January 2021. It goes by the oldest date used.

Note: This only applies to computers that are using software versions of v4.4.554 or higher.

If you are using a Legacy version prior to v4.4.554

To activate the upgrade, open the Silhouette Studio software.
Click Help > Upgrade.
Enter the upgrade codes in the order you purchased them.
For instance, if you purchased it in steps, you would need to enter the Designer Edition upgrade first and then the Business Edition.

Don’t know what your codes are?

Go to the www.silhouette-america.com website
Sign in
Click on Account Settings in the top right corner (little person icon)

Then click on My Account and choose License Keys.

Scroll down on the page and you will see all the License Keys for your Silhouette upgrades you have activated on your account.

The Silhouette Studio software is always changing!
There are many, many neat features that have been released. However, I do not always recommend to update the software right away when it’s released. It will depend on each user’s situation and reasons they have for wanting to update.

This is one of those great features that will save the user and Silhouette Support time and frustration by being able to have it all automated and not have to manually reset the codes when a user hits 3 uses.

Keep in mind though that this new feature only affects users who are on software versions of v4.4.554 or higher.

Hope this helps you in your Silhouette journey!

I would love to see what you are creating with your Silhouette software or machines!
Feel free to post photos or questions on my Facebook group at 
Silhouette Secrets with EllyMae.

Save this for future reference by pinning the image below.

Enjoy !

This image has an empty alt attribute; its file name is logo.jpg

THANK YOU for your support! How can you help? Click HERE & buy a coffee.
Every little bit helps with the cost of running the site.

Or if you are looking for more in-depth, step-by-step classes, check out all of my online Silhouette classes on my Teachable site HERE.

SS Logo snip it
**This post may contain affiliate links. What that means is that I may receive compensation if you purchase through the links I have provided. The price you pay for the product or service is not higher but I may get compensated for sharing.
Posted on 1 Comment

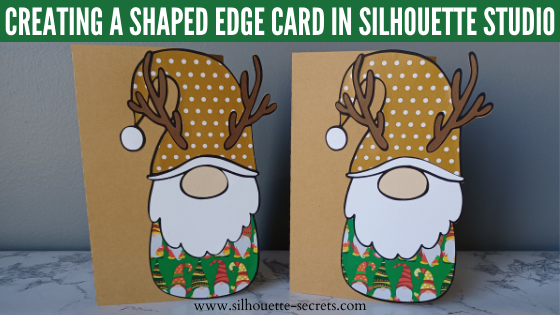
Create a Shaped Edge Card in Silhouette

Have you ever had a design that just kept “talking” to you and creating more ideas to be made with it?
My gnome design file took on a life of it’s own and one project after another came to mind. In this post I’m sharing how I created a Gnome Shaped Edge card. I am using the same design from the last post found HERE where I used this simple Reindeer Gnome design by Lilium Pixel SVG to create a layered cut file.

Affiliate links may be present in the following blog post and as an Amazon Associate I earn from qualifying purchases.

Then the ideas just kept coming and this shaped edge card came to life.

Gnome Shaped Edge Card Design

In just a few steps create a shaped edge card base.

Creating a Gnome Shaped Edge Card

Start with a card base.
The standard sizes for U.S. are 4.25″ x 5.5″ or a 5″ x 7″ card.
However, you can create the card base any size you want.
Keep in mind that you want it to fit in an envelope if mailing.

Silhouette Studio Create a Card Base

Here are 2 ways you can create the card base:
Draw your own using a rectangle and a line – check out how to do that HERE
or use the Project Wizard to create the card base – more on how to do that HERE.

Make sure that the score line is ungrouped from the outside edge of the card base.
In the photo above, you can see there is a gray selection box around both the outer edge and the score line in the middle. This means that they are no longer grouped together.

Open the design to use for card edge onto the same design mat as the card base.

Silhouette Studio Creating Gnome Shaped Edge Card
Gnome layered design created in this tutorial found HERE

Check out the tutorial on
Creating a Layered Cut File from an Outline HERE

Next, move the design to the right side of the card base so the right edge of the design is on the right edge of the card base.

Silhouette Studio Gnome Shaped Edge Card Creation

Scale the design to fit exactly from the top to bottom of the card base.
Use the corner bounding box to scale the design down. Keep the design within the boundaries of the card base you’ve created so you know it will fit in the envelope after it’s cut.

Gnome Shaped Edge Card Design Creation

Now that it is the size we need, make a copy and pull to one side.

Using the design that is still on the card base, ungroup it if necessary and move the pieces off. We only need to work with the background/outline of the design since we have a copy of the original.

Gnome Shaped Edge Card Design Outline

Double click on the card base outer edge to bring up edit points.
Edit points are the data points that create a design. The Silhouette machine “connects the dots” in order to complete the cut.

Silhouette Studio Edit Points

For more detailed information on edit points check out this post –
Let’s Explore v4 – Edit Points HERE.

With the Edit Points active, click at the top of the gnome shape to add an edit point.

Silhouette Studio Add Edit Points

Next, grab the top right corner and move it inside the gnome shape.

Silhouette Studio Move Edit Points

Now click at the bottom of the gnome shape to add an edit point.

Silhouette Studio Alter Edit Points

Next, grab the bottom right corner and move it inside the gnome shape.

Silhouette Studio Gnome Shaped Edge Card Design

Select both the card outer edge and the gnome shape.
Do not select the score line.
To select, click off the shapes to deactivate the edit points. Then click back on the gnome shape, hold the Shift key down, and click on the outer card base line.

Silhouette Studio Select Gnome Shape and Card Base

With both selected, right click and choose Weld.
If the shape was filled with color when welded, the entire shape will take on that color. It may also bring it to the front. Right click and choose Send to Back and/or change the fill color as needed.

Silhouette Studio Weld Gnome Shape to Card Base

Move the original copy of the design on top of the shaped edge and it should fit together.

Silhouette Studio Gnome Design Shaped Edge Card

Ta-da! You’ve created a shaped edge card.

Cut all the pieces and glue together to create a unique card.

Gnome Shaped Edge Card Finished Project

Check out the full video tutorial on my YouTube channel HERE.

I would love to see what you are creating with your Silhouette software or machines!
Feel free to post photos or questions on my Facebook group at 
Silhouette Secrets with EllyMae.

Save this for future reference by pinning the image below.

Gnome Shaped Edge Card Design Pinterest

Enjoy !

THANK YOU for your support! How can you help? Click HERE & buy a coffee.
Every little bit helps with the cost of running the site.

Silhouette Classes

Never stop learning! Let me help you take the anxiety out of learning with Silhouette and get to creating faster! My Silhouette classes are heavily focused on software, so you can take the skills & techniques taught and apply them to many future projects!

Silhouette step-by-step Classes by Silhouette Secrets+

Silhouette Secrets+ with EllyMae
**This post may contain affiliate links. What that means is that I may receive compensation if you purchase through the links I have provided. The price you pay for the product or service is not higher but I may get compensated for sharing.
Posted on 6 Comments

Get more out of your Silhouette designs

It all starts with 1 design.
And then you never know where it will take you.

Long story short, I volunteered to provide a craft for my son’s 4th grade class. He picked the design and then it just snowballed from there. One project after another.

Affiliate links may be present in the following blog post and as an Amazon Associate I earn from qualifying purchases.

Today I’m going to show you how I took this simple Reindeer Gnome design by Lilium Pixel SVG and created a layered cut file from it using a few tools in Silhouette Studio.

The Design

The first thing to start with is the design.
This one of the most important things to understand.

All files are created differently. Each designer creates differently. Each designer saves differently. Each design could be made up differently.

I will show you how I worked with this file and the more you do this, you will start to see patterns. The tools and steps I use may need to be done in a different order depending on how the file was created. That will make more sense after we get started and the more you work with files.

Gnome Example

Open the Reindeer Gnome design by Lilium Pixel SVG.

Change the Fill Color to transparent using the Fill Color Panel or the QAT Fill Color drop down.

This makes it easier to work with Compound Paths.
Compound Paths are one of the hardest design concepts for most users to understand.
The basics of a compound path are each design is made up of pieces. If you make or release a compound path, it will affect how those “pieces” act.
For more in-depth information on Compound Paths check out this post HERE.
They are a great tool to play around with as you will see farther down.

Next, right click and choose Release Compound Path.
This should break the design up into individual pieces.
However, you may also need to right click and choose Ungroup.
This will vary depending on each design. You may need to ungroup more than once or you may need to release compound path more than once.

What you are looking for is all those individual selection boxes around the “pieces” of the design. Each of those gray boxes is a selection box and now means that we can select those individual pieces and work with them.

Click off the design and then click back on 1 piece.
Now, fill each piece with color using the Fill Color Panel or QAT dropdown.

Note: You will need to click exactly on the red cut line for each piece to select it.
Using the Zoom tools at the top of the software can help to make it easier to click the lines.

Any pieces that are the same color can be selected together and then right click and choose Group.

Repeat this step for all the interior parts.

The more you do this, the more comfortable you will become with it, and start to recognize the patterns.

Don’t be afraid to push the buttons and the Undo button is your best friend!
I am very familiar with the keyboard short cut for Undo – Ctrl+Z is one of my most used tools.

Next comes the background color.

Notice if you select the outside edge and fill it with black, it fills in all the little pieces in the area of the hat. So we need to change that.

If you filled the outer edge with color, change it back to transparent or hit Undo.

In order to take out the inner bits of the hat, select the outside edge of the design, hold the Shift key down, select the inside bits of the hat around the reindeer antler, and then right click and choose Make Compound Path.

Now, fill it with color to check that the right pieces were selected for the Compound Path. If not, hit Undo and try again.

Note: when a Compound Path is made or pieces are grouped together, it can reorder how the pieces are stacked on top of each other.

Right click on the black layer and choose Send to Back.
This will send the black layer behind all the other colors.

Adjust the colors as desired to see how it will look.

Now you have a layered file that was created from the original black outline design.

The first project I did was cutting all the pieces from cardstock and creating craft kits for the 4th grade class.

Then I used the same layered file to create a shaped edge card.

And then my son asked how big I could make the gnome?
Challenge accepted and we settled on a 36″ tall gnome who he named “Ger-gnomio” that I cut with my Cameo Pro.
For more Cameo Pro tips, check out the header on the blog HERE.

One design turned into 3 different projects. I had no idea when I first started playing with the design that it would turn into several more projects. You never know when that creative bug will hit!

Check out the video tutorial on my YouTube channel HERE too!

I would love to see what you are creating with your Silhouette software or machines!
Feel free to post photos or questions on my Facebook group at 
Silhouette Secrets with EllyMae.

Save this for future reference by pinning the image below.

Enjoy!

THANK YOU for your support! How can you help? Click HERE & buy a coffee.
Every little bit helps with the cost of running the site.

Silhouette Classes

Never stop learning! Let me help you take the anxiety out of learning with Silhouette and get to creating faster! My Silhouette classes are heavily focused on software, so you can take the skills & techniques taught and apply them to many future projects!

Silhouette step-by-step Classes by Silhouette Secrets+

Silhouette Secrets+ with EllyMae

**This post may contain affiliate links. What that means is that I may receive compensation if you purchase through the links I have provided. The price you pay for the product or service is not higher but I may get compensated for sharing.

Posted on 1 Comment

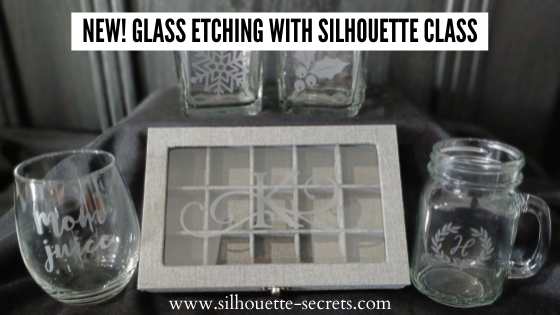
New Silhouette class – Glass Etching

Let me tell you, this class was challenging. Teaching how to use Silhouette is the easy part that I can do with my eyes closed (maybe most of the time). However, the tech issues, it was non-stop for me this round. And not Silhouette tech issues, but everything else, from recording software to the editing process.
It was driving me batty!
But 2 days and many hours later, I got it finished, with a few cuss words at the editing/recording software.

Glass etching is not difficult to do and I share my tips & tricks in this 1 hour 42 minute video class. In the class, I share cutting tips for measuring, sizing, and cutting 4 different stencils on 2 different materials. I cut from Oracal 651 and Oramask 813. Then I also demonstrated and provided tips to applying the stencils to 4 different shaped objects.
For the class, you do not have to use the same glass objects or do all of the projects, but it will give you ideas so you could use a wide variety of blanks.

The most difficult part of glass etching is getting a good photo of it due to the glass and glare.

Find all the details on the class

HERE

Affiliate links may be present in the following blog post and as an Amazon Associate I earn from qualifying purchases.

I’ve included the class supply list below to help prepare for what I used in the class.

Supplies needed:

– Silhouette machine
– Etchall Etching Cream – Amazon or – Etchall.com use code silhouettesecretsplus and save 10%
*This class uses Etchall cream. Using other brands of etching cream may not yield the same results. Etchall can be reused so is a great investment.
– Oracal 651 or 631
– Oramask 813
– Transfer tape
– Alcohol swabs
– Silhouette spatula or popsicle stick
– Painters Tape
– Rubber gloves
– Access to a sink & paper towels

Glass products demonstrated:
– Stemless wine glass
Mason jar drinking glass
– Jewelry box: Gray, White, or Burlap
– Glass Candle holders from Dollar Tree

*Not all glass items can be etched. Tempered glass cannot, cookware from Ikea cannot, etc. The only way to know is to test it out for sure.

**You do not have to have the same items that I am using for class, but I will share some tips for these different shaped objects using the items in the photo above.

Designs used in class demonstration:
– Holly from Christmas design by Sarah Hurley – Design #334881
Snowflakes by Erica Digital Designs – Design #379892
Monogram Wreath Font by Kristen Magee – Design #260225
Split & Full Flourish Monogram E (class demo) or Split & Full Flourish Monogram K (class photos) – by artist Kolette Hall
– Mom Juice created with a bold font
* These are just design examples and do not have to be exact. We will discuss design tips in the class and what can be easier to get a good etch with.

It is so fun to be able to customize glass items for gifts and Silhouette makes that easy.

Here are a few more things that I have etched with the same techniques as we cover in the class.

Glass coffee mug from Target
You Can Do This – Coffee design by Jillibean Soup – Design #218802

Glass Cookie Jar from Michaels etched for K pod storage
Coffee Canister Label by Chameleon Cuttable – Design #349557

More etched jewelry boxes I made for Christmas gifts
Split & Full Flourish Monogram – G by Kolette Hall – Design #128840
Split & Full Flourish Monogram – A by Kolette Hall – Design #128858

Glass etching is a great way you can personalize a gift too!

Like 25 glass mason jars from Michaels to be filled with candy as Thank You gifts.
Add a Print and Cut thank you note and ta-da!

Yes! Etchall etching cream works on glass and slate!

Slate serving trays from Johnson Plastics
Eat Drink and Be Thankful by Jillibean Soup – Design #280222
Monogram Family by Lori Whitlock – Design #271080

So many options! I hope that has given you some ideas.
Check out the Glass Etching with Silhouette class HERE and start perfecting your technique today!

Or check out the 19 other Silhouette classes available on my Teachable site HERE.

I’d love seeing what you are creating with your Silhouette machines or software.
Feel free to post photos or questions on my Facebook group at 
Silhouette Secrets with EllyMae.

Save this for future reference by pinning the image below.

Enjoy!

This image has an empty alt attribute; its file name is logo.jpg

THANK YOU for your support! How can you help? Click HERE & buy a coffee.
Every little bit helps with the cost of running the site.

Or if you are looking for more in-depth, step-by-step classes, check out all of my online Silhouette classes on my Teachable site HERE.

SS Logo snip it
**This post may contain affiliate links. What that means is that I may receive compensation if you purchase through the links I have provided. The price you pay for the product or service is not higher but I may get compensated for sharing.
Posted on 7 Comments

New feature – Export individual files

Quick post today sharing a new feature!
I had previously shared this in a post about getting a new computer- find that HERE.
But, I feel it also needs it’s own blog post as well.

Export User Designs from Silhouette Library – New Feature!

If you have downloaded the current version or a version higher than v4.4.552, there is now a new feature that allows you to export all User Designs from the library as individual files.

Click on your name in the top left corner of the library tab and choose Export User Created Designs.

While I do NOT recommend storing your personal files in the Silhouette library, there are times that it is handy when you are accessing files on multiple computers or using Pattern Fills in the Silhouette software.

Affiliate links may be present in the following blog post and as an Amazon Associate I earn from qualifying purchases.

One big thing to note

when exporting these User Designs, is that it will export the entire library folder structure.
However, any designs from the Silhouette Design Store, the folders will be empty.
Only the user created designs will be exported.
This is due to the proprietary nature of the .studio files and to protect the designers of those files from theft.

I would HIGHLY recommend using this export feature when you update to the software of v4.4.552 or higher because it is a really nice feature.
However, as a general note, I do not recommend that all users update to this version or higher. There are many factors that I consider before advising a user on whether they should update. It really comes down to the user’s choice, however, before I make a recommendation I do ask for more information.
If you would like to know what I’d recommend for your situation, feel free to post on the
Silhouette Secrets+ with EllyMae Facebook group and we can take a look at the factors.

If you are on an older software prior to v4.4.552 or before you plan to update the software, I would recommend making a backup of your library. Check out Tip #1 in this post for how to do a library backup in the older software versions of v4
5 Silhouette Studio Secrets HERE

Keep in mind that the Silhouette library is not designed as an all inclusive storage area but as a syncing device. This is one reason the Silhouette cloud storage is limited in size. All users get 1 GB of storage space, but if you are a Silhouette Club Member or a Silhouette Design Store Subscriber*, you get 5 GB of storage.
*no longer a benefit of a SDS subscription effective sometime in 2024? (updated 3/28/25)

Hope this tip helps!
This is an awesome new feature!

Update 3/2023: new video on the Silhouette Secrets+ YouTube channel HERE showing how to Export Individual Files

We love seeing what you are creating with your Silhouette machines or software.
Feel free to post photos or questions on my Facebook group at 
Silhouette Secrets with EllyMae.

Save this for future reference by pinning the image below.

Enjoy!

This image has an empty alt attribute; its file name is logo.jpg

THANK YOU for your support! How can you help? Click HERE & buy a coffee.
Every little bit helps with the cost of running the site.

Or if you are looking for more in-depth, step-by-step classes, check out all of my online Silhouette classes on my Teachable site HERE.
SS Logo snip it
**This post may contain affiliate links. What that means is that I may receive compensation if you purchase through the links I have provided. The price you pay for the product or service is not higher but I may get compensated for sharing.
Posted on 1 Comment

Cameo Pro Stand Options

The Cameo Pro is Silhouette’s 24 inch wide cutting machine that was released in November 2020. It is a big machine!

In order to have the ability to cut 24″ wide, it has to have a wide footprint.

One of the biggest things we see with cut issues on the Cameo Pro is not having it fully supported in order to cut properly.

Since it is a big machine, it HAS to have a big workspace.
It is NOT a machine that can work against gravity.

If you are using a 24″ cutting mat or cutting long lengths of vinyl with the machine I recommend your table surface be at least 40″ wide by 52″ long.
The machine CANNOT work against gravity, so the mat or materials have to be fully support in the FRONT and the BACK of the machine or you can experience cut issues.

When I received my Cameo Pro to test it for Silhouette, my husband immediately thought that we should build a custom stand/table for it and set to work on planning it. (It may have been motivated by the fact that I took over his gaming table.)
We completed the DIY Cameo Pro Stand and have shared those instructions for free HERE.

However, we also understand that not everyone has the ability to get the wood or pieces cut and assemble themselves, so I am also going to provide a few suggestions of work surfaces that could be alternatives for you.

Cameo Pro Workspace

Let me start by explaining what is needed and why I recommend this.

Keep in mind that any workspace for the Cameo Pro should be at least 40″ wide and I recommend 58″ long.

Why do I recommend this?

The Pro machine itself is 34.5″ wide, so you could probably get away with 36″, but the extra little bit means it’s more secure. I recommend 40″ wide for stability.
I have seen many, many photos where a user does not have it fully on a table and each end is hanging off. This is not fully supported and the Cameo Pro is too big of an investment to risk something happening to it. If the Pro is not fully supported, it can cause cut or feed issues.

For best cut results, the Pro should be used with the roll feeder/mat support set up at all times.

Why?

These roll feeder/mat support parts provide support for the cutting mat or vinyl to roll as flat as possible into the machine. If materials are hanging down in front (or behind) it can affect how the machine feeds, which will affect the cuts.

And the roll feeder/mat support NEEDS to be fully flat on a table. It should NOT be hanging off the table as it can cause stress on the points where the roll feeder/mat support attaches to the machine and can decrease the lifespan on the parts.
The roll feeder parts are not replaceable parts.

With the Cameo Pro set up properly with the roll feeder/mat support and stability bar installed, it is 14″ from front to back. So you will need a workspace that is one solid piece and I would suggest at least 15-17″ front to back. We built our stand 22″ front to back so it is stable and set up full time in that stable position.

Now, if you are planning to use the 24″ cutting mat or long lengths of vinyl, I recommend that you have at least 22″ of flat surface in front and behind the machine. This means that a flat, secure workspace of 58″ is necessary for the machine to function properly with a 24″ x 24″ cutting mat.
If the cutting mat is not fully supported, you can experience feed issues as the rollers cannot work against gravity to pull the weight of the mat into the machine.

If you are experiencing feed issues or cuts overlapping and you do not have this large workspace, I suggest placing it on the floor to cut with and see if that solves it.
If not, then there may be other factors at play and I would suggest taking a close look at this post
5 Steps to Setting Up & Troubleshooting the Cameo Pro

If the Pro is not set up properly, it will not cut properly and consistently.
These are the 2 biggest things we see when troubleshooting issues:
– workspace too small
– machine not set up properly

Affiliate links may be present in the following blog post and as an Amazon Associate I earn from qualifying purchases.

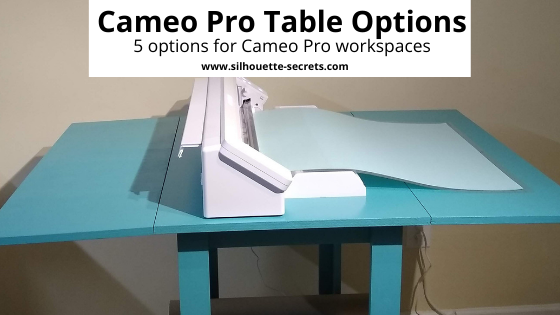
Cameo Pro Table Options

Make sure first off that you have the space to be able to expand the table as needed for the full workspace necessary.

Option 1 – Large table

Any large table such as a kitchen table or a large piece of plywood securely on top of a table would work as long as it is 36″- 40″ wide x 58″ long.

This is actually what I started with when I was testing the Pro. Well, to be honest, I first had it on my video table that you can see in this unboxing video. https://youtu.be/Qb6CsliXSlA
And I quickly found that it was not sufficient enough to use the 24″ cutting mat or long lengths of vinyl.

All of my recommendations are based on my real-time mis-cuts and feed issues during testing and my own cutting, due to the machine not being able to pull it in against gravity.

This plywood tabletop worked well for me during the hundreds of testing hours I performed from September – November 2020 before the machine was released to the public. It is not a smooth surface, so I did have to be careful not to get splinters. However, while not fancy, it got the job done.

Option 2 – Studio Design Sew Ready Adjustable Craft Table

This table would work with the dimensions of 58.75″ W x 36″ D x 30.25″-39.25″ tall with the Cameo Pro machine fully supported in the center panel. In order to have the roll feeder/mat support installed, one side would need to be extended at all times.

The wheels are smaller, so be careful if you have any uneven surfaces such as tile floors or plan to move this around often.

It also has a couple baskets and shelf that could be used for storage.

Option 3 – Sullivans Home Hobby Table

Sullivans Home Hobby Table
Note: screen shots are taken with a sales price

The table dimensions are 36″ L x 59″ W x 35″ H (open) and 36″ L x 13″ W x 35″ H (closed).

It is very similar to Option 2 and would need to have one side extended to have the setup correct. It also has smaller wheels as well. Only something to note to be careful with from someone who has broken wheels off furniture moving it around my tile floors.

Option 4 – Sullivans Adjustable Home Hobby Table

Sullivans Adjustable Home Hobby Table
Note: screen shots are taken with a sales price

This table measures 59″ L x 35.8 W x 29″-39″ H (open) or 17.5″ L x 35.8 W (closed). According to the description dimensions, the top is just barely large enough to have the Pro with the roll feeder/mat support setup without a side extended.
The Pro width is 34.5″ wide, so while I say I recommend 36″-40″, I think this would be stable enough.

This table also has 2 shelves below that could be used for storage.
The wheel size looks the same as previous options.

Option 5 – Drop leaf table

You can find these in used furniture shops, but they are also making a comeback. It is the idea we used for the design of our DIY Cameo Pro stand.

I have seen recommendations on one from Ikea, but in my search, the ones I found we not quite wide enough. Again, my recommendations is 36″-40″ wide so the Cameo Pro can sit securely without hanging over the edge of the table.

—–

Now, are these the only options? No.

But, they are a few that might work for you or at least give you some idea of what you are looking for.

If I were to choose between the options above, I would choose either Option 4 or Option 5. But, it really just depends on what will work best for you. For me, I will probably be using our DIY stand forever, but one of these other tables may find their way into my craft studio in the near future for another workspace.

The biggest thing that I want to emphasize is that you need an adequate workspace to have the Cameo Pro function properly. If the machine is not set up properly and on a large work space, it is NOT the machine’s fault if it’s not working right.
It HAS to be set up properly to cut properly.

We troubleshoot a lot of Silhouette issues each week. Hundreds into the thousands and in most cases we can get the user up and cutting again, no matter their Silhouette machine model, IF they are willing to troubleshoot with us.

If you have hung in there and are still reading, I hope you have gathered some tips and things to think about.

We would love to see what you are working on.
Feel free to post on the Silhouette Cameo Pro Tips & Troubleshooting or the
Silhouette Secrets+ with EllyMae FB groups.

Save this for future reference by pinning the image below.

Enjoy!

This image has an empty alt attribute; its file name is logo.jpg

THANK YOU for your support! How can you help? Click HERE & buy a coffee.
Every little bit helps with the cost of running the site.

Or if you are looking for more in-depth, step-by-step classes, check out all of my online Silhouette classes on my Teachable site HERE.

SS Logo snip it
**This post may contain affiliate links. What that means is that I may receive compensation if you purchase through the links I have provided. The price you pay for the product or service is not higher but I may get compensated for sharing.
Posted on Leave a comment

A Quick Gift Idea with Silhouette

This year I’m early. Last year I didn’t get the neighbor gifts completed until after Christmas. Check out the TP Snowmen & the file I shared a couple weeks ago from last year HERE.

This year, I decided to create something that I’ve seen pop up over and over the last few years. They are customized oven mitts with a cookie mix and spatula added to them.

I love that with the Silhouette machine you can customize anything and make it unique and your own.

Supplies used:
– Siser white HTV
– Pocket Oven Mitt – found mine at Dollar Tree
– Cookie mix
– Spatula
– Heat press or iron
Funny Christmas Pot Holder Bundle or other designs

How to Create

Measure the area where HTV would be applied.

Open the Silhouette Studio Software.
Using the Draw Rectangle Tool on the left side, draw a rectangle and then resize it to the size you measured. Use the Transform Panel – Scale Tab or Scale Tool in the Quick Access Toolbar at the top of the software to resize the rectangle.

This will give you an idea of the size you have for your design to fit in. I use basic shapes as templates all the time to gauge the size for my designs.

Open the design and then scale it down to fit in the template space you drew with the rectangle. Use the Align Tools to Center the design to get a feel for how it will look.

Now, we no longer need the rectangle that was drawn, unless you want to use it as your weeding box. This can make it easier to weed a design, especially when cutting multiples at a time. Check out more on Weeding Lines HERE.
You can either move the rectangle off the cutting mat or resize it to fit around the design better.

Duplicate your design as needed.
I like to start cutting with 1 or 2 of the design needed, just in case there are any issues I’ll run into, I can catch them before I’ve tried to cut 12 of the same design.
I also highly recommend test cutting prior to sending the design to cut.

Check out the “Silhouette Secrets Beginner HTV Tips and Tricks” post HERE for tips on cutting and creating your own test cut.

After my initial cuts and things were cutting well, I duplicated it a few more times for the number I needed.

This time, to maximize the HTV usage, I cut without a mat and used the roll feeder on the Cameo 4.

Check out tips for cutting without a mat in this post –
Let’s Explore the Silhouette Roll Feeder HERE
Or if you have an older model check out this post –
Cutting without a mat on the Cameo HERE

After cutting, weed out the design carefully. This means to remove the excess HTV from around the design.

If you happen to come across an area that didn’t cut well, don’t scrap the entire design. If you can save it, just recut the portion of the design that messed up.
This was the only part that didn’t weed well on this one cut piece. When I was finished weeding, I used a scrap of white HTV and cut just the part I needed.

I used a bin I had hanging around the house to keep them all in a quick location to be able to grab them as we need them.

And neighbor gifts are done for 2021.

I’d love seeing what you are creating with your Silhouette machines or software.
Feel free to post photos or questions on my Facebook group at 
Silhouette Secrets with EllyMae.

Save this for future reference by pinning the image below.

Enjoy!

This image has an empty alt attribute; its file name is logo.jpg

THANK YOU for your support! How can you help? Click HERE & buy a coffee.
Every little bit helps with the cost of running the site.

Or if you are looking for more in-depth, step-by-step classes, check out all of my online Silhouette classes on my Teachable site HERE.

SS Logo snip it
**This post may contain affiliate links. What that means is that I may receive compensation if you purchase through the links I have provided. The price you pay for the product or service is not higher but I may get compensated for sharing.
Posted on 29 Comments

Cutting Issues & Troubleshooting

Troubleshooting Cut Issues

In this post, it is important that you read through the entire post and all the steps are followed exactly as described or this will not help fix cutting issues.
The first place to start troubleshooting cut issues is at the beginning for all users.
We troubleshoot hundreds of issues daily and if you do not start at the beginning and work your way through the troubleshooting steps, you can spend hours trying to fix something that could have been fixed in a few minutes.

Blade Housing Reset

One of the main reasons I see for cut issues with Silhouette machines is due to the housing being out of alignment.

If the housing is out of alignment, this means that the Autoblade cannot hit the adjustment holes properly in order to adjust properly. You will experience inconsistent cuts.

It also means that the cut will not match the exact location on a Silhouette cutting mat as it shows on the virtual design mat, if the mat is loaded properly.
If you are using a 3rd party cutting mat, it may be a different size and will not match the virtual design mat spacing.

The housing can become out of alignment for several reasons.
A few of the most common are:
– blade not installed properly & locked in securely – until this is corrected, you will continue to have inconsistent cuts
– blade depth is too deep
– cut settings are too high
– blade has gotten stuck while cutting
– cutting thicker materials, glitter cardstock, faux leather, etc.
or
– using the Kraft or Rotary blades with the Cameo 4 models

*Note – these are the most common reasons but not an all inclusive list

A blade housing reset is considered part of machine maintenance, especially when you are cutting thicker materials or using the specialty tools.

It is NOT the same thing as Calibration.

I have confirmed with Silhouette Support that they do not refer to it as calibration. The correct terminology is Blade Housing Reset and many users are confused by other information they are reading that is not from Silhouette America.

Calibration is a completely different process and is for print and cut issues only. It is a diagnostic tool that is rarely needed and is only used as the last possible solution when troubleshooting print and cut issues.

If you are having print and cut issues, I would suggest following the steps below and then try a test print following the steps in this post
Let’s Explore v4 – Print and Cut Basics
Following these steps exactly will eliminate a lot of the possible reasons that print and cut is not cutting accurately.

Blade Housing Reset Steps

First, how do you know if your Autoblade is not adjusting properly?

The key factor you may notice is that it doesn’t cut properly.
It either cuts too deep or not enough.

The next factor you need to look for is the red line inside the window on the front of the Autoblade.

Does the red line match the blade depth you set on the Send tab in the software?
On the Send tab, the middle number on the black dial with the blue shading is the blade depth.

If your Autoblade is not adjusting properly or the blade (any style) is not cutting in the area of the cutting mat where it should, something is not right.

Step 1

Make sure the blade is installed properly & the lock is pushed in securely.

Cameo 4 & Portrait 3 Blade Installation – If using another blade type, the adapters should be installed the same way with no gap.
Cameo 3 Autoblade installation in Tool 1
Ratchet blade installation position for all machine models

There can be NO gap between the lip of the blade and the housing. And the lock has to be pushed in securely.

Note: the blue dot (or other color) on the lock mechanism means absolutely nothing except that the lock has been pushed in. It will show the color whether you have a blade installed or not, if the lock is pushed in.
It DOES NOT mean your blade is installed properly.

This is important for ALL Silhouette machine models. If the blade is not installed properly and locked in, you will experience inconsistent cuts until it is fixed.

This is the MOST IMPORTANT step otherwise the Blade Housing Reset will NOT fix cut issues.

Step 2

Unplug the Silhouette power cord from the machine.

Carefully move the blade housing all the way to the right and all the way to the left.
Do NOT push down on the Tool 1 housing when moving or it will drag.

Move the housing ALL the way to the left & ALL the way right – 3 times.

And leave it on the RIGHT side.

Plug the Silhouette power cord back into the machine securely.

Turn it on and the housing should reset to it’s proper location.

Note: proper location can vary by machine model, this is why we ask for a photo when troubleshooting cut issues because we can identify it based on the Silhouette machine model.

Step 3

Check the adjustment holes for debris.
Carefully remove any objects that can be blocking the adjustment holes.

How do I know a housing is out of alignment?

This is why I ask for a photo of the blade installed in the machine WITH the mat/vinyl loaded. The housing aligns to the same exact place each time, IF the housing is in alignment.

How did I learn this?

This is something I have learned through years of troubleshooting Silhouette machines, verifying with Silhouette Support, and by watching my Silhouette machines as they work.

Step 4

Load the cutting mat properly.

For Cameo 4, Cameo Plus, and all older models of Cameo machines, the left edge of the cutting mat should be next to the line on the left side, but NOT over top of it.

For Cameo 4 and Cameo Plus model machines, if it’s loaded over the top of the line or too far to the left, it will block the adjustment holes and not allow the blade to reach the adjustment holes.

Loading the Cameo Pro

For Cameo Pro owners, there are 2 ways mats or materials get loaded.

On the Cameo Pro, when using a 24″ x 24″ cutting mat, the left edge of the cutting mat gets loaded next to the line on the left side of the arrows.
This is the ONLY time this line is used to load materials.

When cutting without a mat or using ANY other size cutting mat on the Cameo Pro, the mat gets loaded next to the line on the right side of the arrows.

This is an important step when using the Cameo Pro, so things will line up properly on the mat or for print and cut projects.

Loading the Portrait machine

For the Portrait model machines, the mat gets loaded next to the line in the photo above. There is no gray line or arrows on the Portrait machines.
This photo is courtesy of my colleague Sarah Clark with Silhouette Made.
Find her complete post on loading the Portrait machine HERE.

For the Portrait 2 and 3 models, the mat cannot be loaded too far to the left or it will block the adjustment hole that you see to the left of the blade housing in the photo above.

Step 5

This is how your blade and housing should look on a Cameo 4 & Cameo Plus models.

The blade housing should be directly behind the left roller and the right roller should be on the edge of the cutting mat and not rolling across the adhesive on the mat or the material.

Here is how it should look on the Cameo Pro.

The blade housing should be lined up directly behind the right roller, which is located underneath the roller bar directly where the dot is on the front of the bar.
When using a cutting mat, the right roller should ALWAYS be on the edge of the cutting mat and not rolling across the adhesive or material on the mat.
The rollers are located underneath the roller bar and there is no easy way to access the rollers for cleaning. If the roller is rolling across the adhesive it can cause cutting issues, the mat to skew, or the mat to get stuck in the machine while cutting.
I also do NOT recommend 3rd party cutting mat with the Cameo Pro (I don’t recommend them in any model, but especially the Pro). This is a new roller design and in past models, 3rd party cutting mats have affected the lifespan on the machine and rollers.

Did it work?

The way to find out is to test it.

Type out a capital B, choose your material on the Send tab and send it to cut.

Does the red line inside the blade adjust to the correct number?

If yes, the housing reset worked.

If no, something else is happening.
We can continue troubleshooting on the
Silhouette Secrets+ with EllyMae FB group.
Please make a post with a photo of the blade installed in the machine WITH the mat loaded and describe your cutting issue in detail.

Did the red line adjust correctly but it did not cut?

If it didn’t cut well, increase the blade depth by clicking on the arrow on the right side of the black dial on the Send tab, move the capital B on the virtual design mat, and cut another test with the B.

For more tips on cut settings, check out this post
Perfect Cut Settings in Silhouette HERE

If you are still having cut issues, try a new blade.
Make sure it’s installed properly and does it adjust?
I always recommend having extra blades and mat on hand. This will save you frustration when you are in the middle of a big project.
A new blade and mat can make you do a happy dance when things aren’t going well.

If you are having any other issues when cutting, make sure to search the blog for past tutorials as well. I have an extensive list of troubleshooting tips, tricks, and tutorials from the last 5 years.

Check out the Troubleshooting video HERE on my YouTube channel too!

——–

Now that the blade is installed properly, the housing is aligned, and the blade is adjusting properly
Happy Cutting!

Hopefully these tips have helped you save some frustration!
Whether you have had cut issues recently or not, this is great information to save for future use because ALL users no matter their experience level run into issues from time to time.

If you are Beginner or have not touched your Silhouette machine in awhile, check out the Beginner Video Class I created after I saw so many users struggling with the same issues getting successful cuts.

I’d love seeing what you are creating with your Silhouette machines or software.
Feel free to post photos or questions on my Facebook group at 
Silhouette Secrets with EllyMae.

Save this for future reference by pinning the image below.

Enjoy!

This image has an empty alt attribute; its file name is logo.jpg

THANK YOU for your support! How can you help? Click HERE & buy a coffee.
Every little bit helps with the cost of running the site.

Or if you are looking for more in-depth, step-by-step classes, check out all of my online Silhouette classes on my Teachable site HERE.

SS Logo snip it
**This post may contain affiliate links. What that means is that I may receive compensation if you purchase through the links I have provided. The price you pay for the product or service is not higher but I may get compensated for sharing.
Posted on Leave a comment

2 Quick Cards to cut in Silhouette

I cannot believe it is December already!
I have been trying to get some projects done that have been on my list.
And time just seems to evaporate.
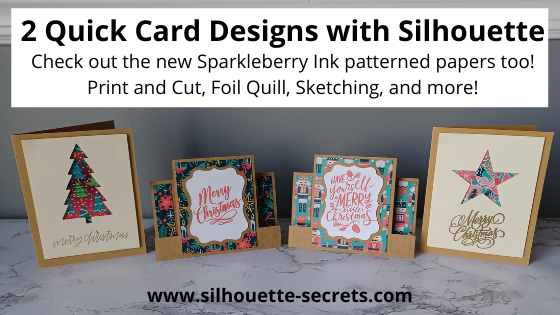
So today I’m going to share 2 quick cards that I’ve been working on.

And the best part about these 2 card designs is that they can be used all year long and for all occasions. Simply change the patterned paper, shapes used, and sentiments and you have birthday, wedding, anniversary, congratulations, or just because cards too!

Affiliate links may be present in the following blog post and as an Amazon Associate I earn from qualifying purchases.

I’ve been playing with the new Sparkleberry Ink patterned papers and I love them!
Now all of the fantastic Sparkleberry patterns are available in a cardstock media.
These are printed directly at the Sparkleberry Ink shop as they are ordered and I’d recommend having a paper trimmer on hand to square up the edges.
Check them out HERE and use my code SILSECRETS to save 10% on your order anytime.

Here are the supplies I used in both these card designs:
8.5″ x 11″ Kraft cardstock
12″ x 12″ Kraft cardstock
12″ x 12″ Sparkleberry Paper
(use code SILSECRETS to save 10% on your Sparkleberry Ink purchases)
Foam Tape
3L Adhesive Tape Runner

The first is a card design that I created using the Drawing Tools and Flexishapes tools in the Silhouette software.

I had hoped to have the full written tutorial on how I created this file, but time just escapes. In most cases, it takes longer to write the tutorial up than it does to create the project.
So I’m sharing the cut file with you, so you can just get to cutting.

Grab the cut file HERE

For the sentiment on the card, you can use any combination of things.

In the photo above, I used the Merry Christmas Vintage sentiment by Chameleon Cuttables – Design #390094 and then did a print and cut onto Kraft Cardstock.
I follow the same steps every single time I do a print and cut and it’s one of my favorite things to do. Check out this post “Let’s Explore v4 – Print and Cut Basics” for setup and tips to getting a successful Print and Cut.

You could also use the Foil Quill and add the sentiments.

For this set I added different sentiments to each card front.

For tips on how to use the Foil Quill check out this post –
Silhouette Cameo 4 – Beginner Foil Quill

I used the following designs on the cards above and below:
Sketch Merry Christmas Handwritten by Kristen Magee – Design #299750
Merry Christmas Horizontal by Chameleon Cuttables – Design #390085
Merry Christmas by Echo Park – Design #306724
Merry Christmas by Lori Whitlock – Design #280787
Merry Christmas with Flourishes by Lori Whitlock – Design #107539
Sketch Handwritten Merry Christmas Phrase by Kristen Magee – Design #301185

Or you could sketch on the card fronts too!

Sketch designs like Design #299750 or #301185 will be quicker to sketch out and are ready to go. In order to fill in text for the Foil Quill or when Sketching, you would use the Line Effects (Sketch) panel to create the fill. Keep in mind the tighter the Sketch fill, the longer it takes to complete the design as it has to sketch all the lines. I used a crosshatched sketch fill with a 0.020 spacing.

Sketching can be so much fun to create unique projects with.
For more in-depth training and a step-by-step class covering the aspects of Sketching, check out the
Sketch Pen & Sketch Pen Design Class on my Teachable site HERE

You could also use stamps and stamp the sentiment on the front of the card front too!

There are so many options with Silhouette!

The second card design is a quick card that any user could cut from beginner to advanced and put together. So it’s perfect for a new user or anyone who is just looking for a neat, quick card to cut and assemble.

Mix and match the patterned papers and sentiments and you have several different designs.

This is a Center Panel Step Card by Lori Whitlock – Design #39775.

The sentiment designs I used are:
Have Yourself A Merry Little Christmas Handlettering by Loni Harris – Design #232198
We Wish You A Merry Christmas by Chameleon Cuttables – Design #334183
Merry Christmas by Sophie Gallo – Design #309990
Merry Christmas by Echo Park – Design #306724

I added the sentiments to a print and cut page and had them done in no time.

Again, I use the same steps each time I set up a print and cut project and I rarely have any issues with it cutting properly.
Check out those tips HERE.

I hope that has given you a few ideas of how you could quickly complete a project. You may even have all the supplies on hand.

I’d love seeing what you are creating with your Silhouette machines or software.
Feel free to post photos or questions on my Facebook group at 
Silhouette Secrets with EllyMae.

Save this for future reference by pinning the image below.

Enjoy!

This image has an empty alt attribute; its file name is logo.jpg

THANK YOU for your support! How can you help? Click HERE & buy a coffee.
Every little bit helps with the cost of running the site.

Or if you are looking for more in-depth, step-by-step classes, check out all of my online Silhouette classes on my Teachable site HERE.

SS Logo snip it
**This post may contain affiliate links. What that means is that I may receive compensation if you purchase through the links I have provided. The price you pay for the product or service is not higher but I may get compensated for sharing.
Posted on 7 Comments

Create a Card Base in Silhouette

Being able to create your own designs in Silhouette is a great skill to know.
And it doesn’t have to be hard!
Any Silhouette user can do this!

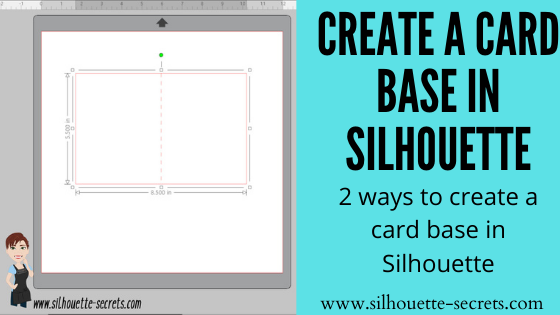
Today I want to share how you can make your own card base in Silhouette to cut.
You can use these same techniques to create any size card base you want.
And I’ll share a tip at the end for a quick template.

And once you create this file once, you can save it and reuse it over and over again for future projects.

The biggest thing I hope you take away from this tutorial is that knowing how to use the tools in the Silhouette software can be helpful for all future projects.
And that no matter your skill level – YOU CAN DO IT!

How to Create a Card Base

Create the card base using the Draw Rectangle tool on the left side.
Then use the Transform – Scale option, scale the rectangle to 8.5″ x 5.5″.

Next, draw a vertical line using the Line Drawing tool on the left side.
Hold the Shift key down and it will draw a straight line.
Using the Transform – Scale panel, scale the line to 5.5″.

Open the Line Style Panel and change the Line Style to a dashed line.

Select the rectangle and the line, choose Align Middle.
Then choose Align left.
This will move the line to the left side of the rectangle.

Click off the design to deselect it and click back on the line only to select it.
You can tell by the size of the selection box, what object is selected.

Next we will use a tool many don’t know about. It is called the “Move By” tool and when you want an object to move an exact distance, it is so handy.

Type in 4.25″ in the Distance box and then press the right arrow. This will move the line 4.25″ to the right of the left edge of the card base.
Note: you could also try using the Align Center, but it will depend on the design you are working with on if it will be where you need it.

Once the score line is centered, select both the rectangle and the score line, right click, and choose Group. Or use Ctrl + G as the shortcut (Command +G on a MAC).

Once objects are Grouped together, they will move as one item.
For more information on Grouping, check out the “Let’s Explore v4 – Group vs Ungroup” tutorial HERE

Save the file as your card base template for a 4.25″ x 5.5″ card.

Creating your own card bases is a great option if you don’t have access to purchase packs of card bases or if you want to use a specific color of card stock.

Creating a Quick 5″ x 7″ Card Base

If you want a 5″ x 7″ card, there is an even easier way to create one in the Silhouette Studio software.

Under File > New Project Wizard, there is a 5″ x 7″ card template.
Choose the Card option and press the Start button.

Ta-Da!

Now, this is a great, quick option to choose.
However, I do not like the score line being that fine together. Depending on your paper type, it could be too close and easily tear it apart.

Remember those tools we used above?
We can easily adjust this using those same techniques.

Right click on the design and choose Ungroup.

Click off the design to deselect it and then click back on the score line only.

Now there is a broader score line for the middle of the card.

Look closely at the perforated line.
Make sure that the cut line isn’t cutting the outside edge of the card.
If it is, then scale it down just a little bit by grabbing the corner bounding box and moving it in.
Select both the rectangle and the score line and choose Align – Middle.

If you find after cutting that the score line does not reflect the true middle, use the Move By tool as shown above in the first card base design to center the score line.

Save the file and you have a 5″ x 7″ card base template.

For more on the Project Wizard, check out the “Let’s Explore v4 – Project Wizard” tutorial HERE

Silhouette Studio Tools

Learning the Silhouette Studio tools is the key to it all!

In this tutorial, I have linked back to many tutorials on the tools in the Silhouette software from the “Let’s Explore v4” series.
You will pick up so many things by learning these tools and just using them.

I would encourage all users to take a bit of time. Go step-by-step in creating both of these card designs. The more you use the tools in the software, in no time, you will be creating things without even thinking about the tools you are using.

Grab this free PDF file HERE on the Silhouette Studio software to help navigate too!
Download it to the computer, open it, and click on each blue link to go to more information on that tool too!

I’d love seeing what you are creating with your Silhouette machines or software.
Feel free to post photos or questions on my Facebook group at 
Silhouette Secrets with EllyMae.

Save this for future reference by pinning the image below.

Enjoy!

This image has an empty alt attribute; its file name is logo.jpg

THANK YOU for your support! How can you help? Click HERE & buy a coffee.
Every little bit helps with the cost of running the site.

Or if you are looking for more in-depth, step-by-step classes, check out all of my online Silhouette classes on my Teachable site HERE.

SS Logo snip it
**This post may contain affiliate links. What that means is that I may receive compensation if you purchase through the links I have provided. The price you pay for the product or service is not higher but I may get compensated for sharing.