
Have you ever heard of an ATC? Or Artist Trading Card? They are a very popular thing to create to swap or pass out to other creatives at events or even through the mail. I had a good friend many years ago who collected them and would put them into trading card pockets. I thought it was such a neat idea. Then fast forward and I started attending Silhouette events and started making things to trade. Without even thinking about it, I was creating ATCs and swapping them. ATCs can be created with physical supplies or digital supplies and then printed. There is NO WRONG WAY to create one.
Affiliate links may be present in the following blog post and as an Amazon Associate, I earn from qualifying purchases.
When I’m traveling, I like to make digital ATCs, so they take up less room and are not bulky. And you don’t even need to own a Silhouette machine to create and print from Silhouette Studio. The Silhouette Studio software basic edition is free for anyone to download from Silhouette America.
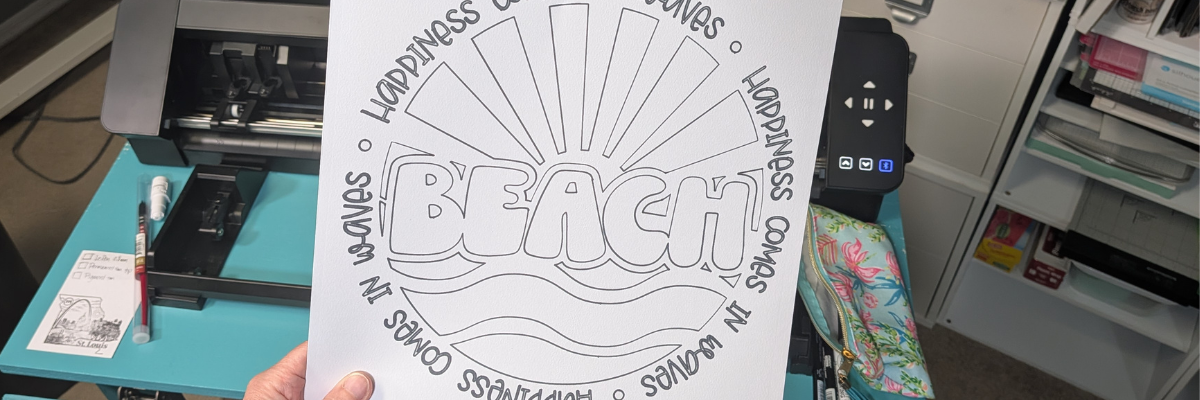
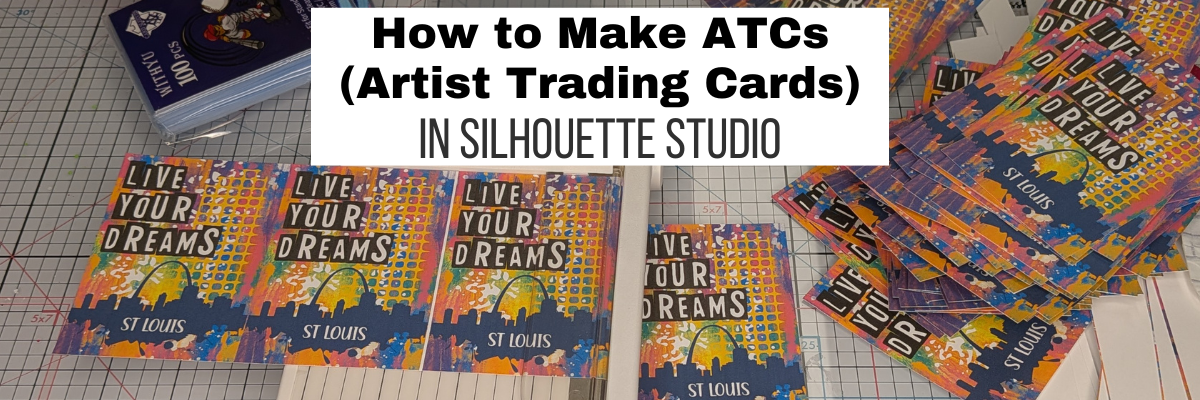
Here is a look at the ATC design in Silhouette Studio that I created for Creativation 2026 that was held in St Louis. I used a colorful background pattern, mixed media design, and a font by Sarah Hurley, along with a St Louis svg I found.

Now, one thing to note, if you want to open svg files in Silhouette Studio, it does require a software upgrade to Designer Edition or higher. Find more details on that HERE.
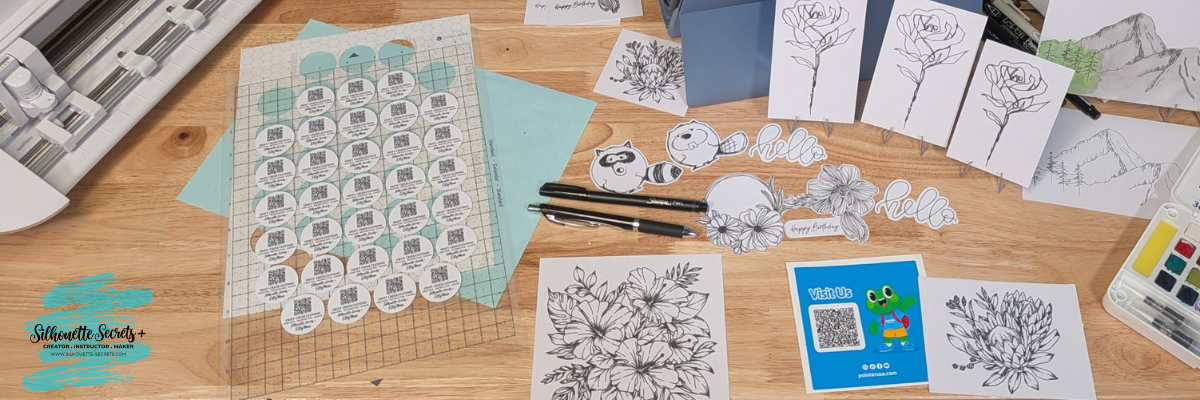
Once I had the design how I wanted, then I grouped it all together and replicated the design and centered them all to the page.

I also wanted this one to be a double-sided ATC so created a second page by using File > Save As, then deleting the details inside the rectangles and adding new information. This ensures that the design placement is exactly the same for both sides.

Now, the biggest thing about a double-sided print is figuring out how your printer loads, pulls the material through the machine, and which side it will print on. Every printer is different and the only way to know is to test it and make a few mistakes. It never fails every time I do this that I have a few I mess up.

Since my design is straight lines, I opted to not use print and cut and have the registration marks take up space or spend the time loading each page into the machine for it to be cut out. I grabbed 2 of my paper trimmers, a 12″ to cut the long lengths and then a smaller one to cut each card apart. It ended up being faster to do this than if I let the machine do it for me and I can get more to a page.
However, if I have a design that needs to be cut exactly around the design, then I definitely set up a print and cut project.

I share the full creation process of the ATCs in the video below or on the Silhouette Secrets+ YouTube channel.
Supplies to Create ATCs in Silhouette
- Silhouette Studio® Software
- Mixed Media Dingbat Font by Sarah Hurley – Design #290950
- St Louis Skyline by BerriDesign
- Bright Rainbow Mixed Media Grunge Background by Sarah Hurley – Design #440369
- Rustic Label Font by Sarah Hurley – Design #473465
- Canon TS9521C printer
- Neenah Cardstock
- Paper Trimmer
- Card Sleeves
Additional Resources:
- Replicate Panel
- How to Print in Silhouette Studio
- Silhouette Studio Upgrades – My Favorite Features
- A to Z Resources for Silhouette
What will you create today? Sometimes it’s fun to just play around and put things together to see what happens, even if you don’t have a purpose for it at the moment.
Save this for future reference by pinning the image below.

Enjoy !
THANK YOU for your support! How can you help? Click HERE & buy a coffee.
Every little bit helps with the cost of running the site.
Silhouette Classes
Never stop learning! Let me help you take the anxiety out of learning with Silhouette and get to creating faster! My Silhouette classes are heavily focused on software, so you can take the skills & techniques taught and apply them to many future projects!