Posted on Leave a comment

Silhouette Cameo5α (Alpha) Unboxing

Silhouette Secrets+ with EllyMae

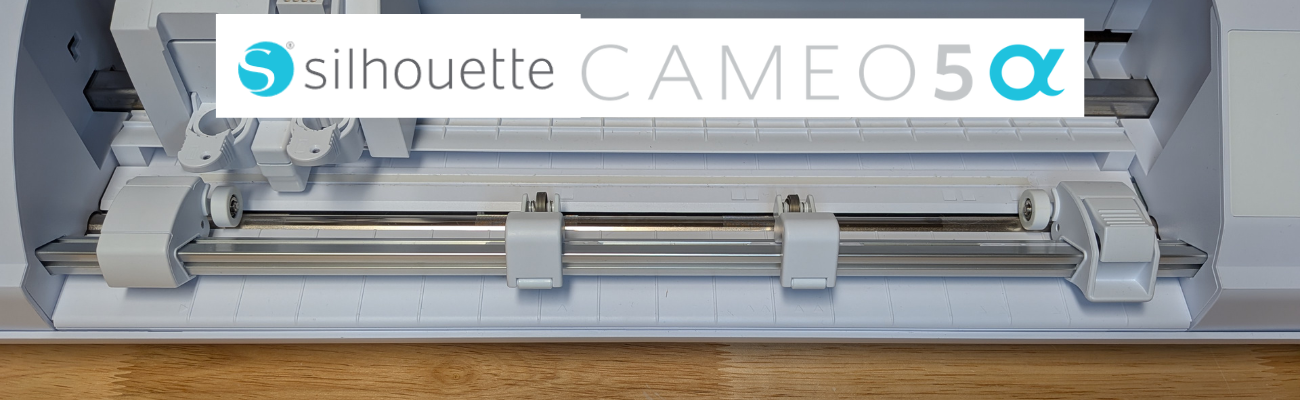
The Silhouette Cameo5α (Alpha) model is the latest machine released by Silhouette America. It was announced at the Silhouette Summit 2025 in Japan in September 2025 and was released shortly after the Summit.

A boxed Silhouette Cameo 5 cutting machine, labeled with dimensions and brand, placed on a concrete surface.

Affiliate links may be present in the following blog post and as an Amazon Associate, I earn from qualifying purchases.

I was not able to attend the Silhouette Summit in Japan, but did order the Silhouette Cameo5α as soon as it was available on the Silhouette America website. At the time of the release, only the white Silhouette Cameo5α models were available and there was no timeline on the other colors being released, so I grabbed it. However, if I would have had choices, I would have selected the Bianco Carrara pattern. When this pattern was first released, I was not impressed, until I had one in my hands and it is my new favorite pattern.

I released 2 unboxing videos on the Silhouette Secrets+ YouTube channel sharing a quick setup as well as an in-depth look at the new machine model. So far the in-depth unboxing and setup has been the most popular.

A person demonstrating the unboxing and setup of a Silhouette Cameo 5 cutting machine, surrounded by various craft supplies and a laptop on a desk.

Watch the Full Unboxing & Setup of the Silhouette Cameo5α video HERE

A woman wearing a hoodie stands in front of a desk with crafting supplies and a Silhouette Cameo 5 machine, with text overlay reading 'Quick Unboxing + Setup' and the Silhouette logo.

Watch the Quick Unboxing & Setup of the Silhouette Cameo5α HERE

I did not get a blog post out at the time of releasing the unboxing, but sometimes a delay can also be a good thing as I’ve had some time to work with the Silhouette Cameo5α and really test it out. This means that I can add more information and real world experience to the blog post.

Here is one of the first projects I cut out after unboxing the Silhouette Cameo5α.

Crafting materials laid out on a wooden table, including cutouts of a skeleton, coffin, and various decorative pieces, with a Silhouette cutting machine in the background.

This project had many intricate cuts from the wood layers to the small skeleton hands. At this size, the cardstock makes a huge difference too! The first one I cut, the cardstock paper layers were separating and I had to switch to a higher quality smooth cardstock for these details.

Three white paper cutouts of hands placed on a brown surface, with a crafting tool nearby.

Here is a close up look at this finished project of the 3-D Skeleton Coffin with all of the details.

A decorative wooden chest with chains and a padlock, featuring skull and bony hands, set against the backdrop of a cutting machine.

This was just one piece to my Halloween busted canvas project, but it was a great test to really see what the Silhouette Cameo5α was capable of.

A decorative coffin with a skeleton figure inside, resting next to a white cutting machine on a wooden surface.

But, of course, I couldn’t stop there! The coffin was only the first piece of my Halloween busted canvas project.

A Halloween-themed decoration featuring a skeleton seated in a spooky graveyard setting, surrounded by a decorative wreath made of black netting, yellow and black patterned ribbons, and faux bones, with a miniature coffin and tombstone that reads 'R.I.P.'

I continued to cut out pieces for the 3-D Tombstone and put the Silhouette Cameo5α to the test. Within a short amount of time from unboxing the machine, I had a lot of cut hours into testing it out.

Watch the video – 3D Tombstone & Skeleton Halloween Art | Creative Process with Silhouette HERE.

A 3D Halloween-themed display featuring a skull behind wooden planks with chains and a padlock on one side, and a gravestone marked 'R.I.P.' on the other side, surrounded by paint supplies.

How Is This Model Different?

The Silhouette Cameo5α is an updated model of the original Cameo 5. The original Silhouette Cameo 5 model is no longer manufactured.

The Silhouette Cameo5α features a new roller design and I do like how it is much more visible to see the rollers and if ever there is a need, easier to clean them as well. It also has a pinch pressure button locking mechanism on the right roller that is so much nicer than the original model design.

Close-up view of the interior of a Silhouette cutting machine, showcasing the rollers and blade holders on a wooden surface.

It also has an additional 0.3 mm clearance on the roller bar for the Silhouette Cameo5α. At the Silhouette Summit, they mentioned this in reference to use with the Silhouette Electrostatic Mat. With the Silhouette Electrostatic Mat, there is a protective sheet that goes on top of the mat before you place your materials on it to be cut. This protective sheet adds height to what is rolling through the machine. I have not had any issues with this, however, they must have received some feedback from users who were using multiple layers of materials, such as stickers with a laminate on top of it which is thicker than your average cardstock. So the clearance was increased a tad bit.

Keep in mind that when you are talking about clearance, the material also has to “clear” the bottom of the tool that is being used. So even if it clears the bottom of the roller bar, thicker materials also have to allow the blade or tool to clear it as well. And even if a material can clear both the roller bar and tool tip, that does not guarantee that it is a cuttable material with the Silhouette. There are many factors that go into whether a material is going to cut well with a Silhouette.

Close-up image of a cutting machine with a white exterior, displaying the interior components and cutting blade holder system.

With the Silhouette Cameo5α, you do have to use a Silhouette software version of 5.0.402 in order for the machine to be recognized. As I type this up, there are still many bugs and issues with version 5 and I am not recommending version 5 for all users. But, if you are a Silhouette Cameo5α owner, you do have to use version 5 and there is no way around that. I recommend using version 5.0.402 at this time and not the current version (5.0.414) as we have seen some issues with the current version. We have seen some issues of machines being bricked or recognized as a regular Cameo 5 and not a Silhouette Cameo5α. If you encounter any of those issues, please contact Silhouette Support and be as detailed as possible in your request for assistance. Including photos and video can help them help you faster as well.

The Silhouette Cameo5α also uses the 4 point registration marks for print and cut projects. This was first released with the Silhouette Cameo Pro MK II model and now is available with the Silhouette Cameo5α model. Silhouette states that this is supposed to improve accuracy of the print and cut results. However, I have not seen any significant improvements in my testing. The biggest issues we see with print and cut are still due to setup and user errors.

Screenshot of a design project in Silhouette Studio, featuring two card designs with floral and butterfly elements, along with text 'wishes' and 'for you'. The page setup settings are displayed on the right.

I shared a little more on using the 4 point registration marks and testing it with the same design on both the older style marks and the newer style marks in this video – Layered Card Design with Brilliant Living Digital Kit – a Step-by-Step Silhouette Tutorial.

Image shows two layered greeting cards featuring floral designs and butterflies, with crafting materials like tape and scissors in the background. The text above indicates a step-by-step tutorial using a digital kit.

This 4 point registration mark system is only available if the Silhouette software has recognized a Silhouette Cameo5α or a Silhouette Cameo Pro MK II has been connected.

What Do I Use?

I use both the Silhouette Cameo 5 original model and the Silhouette Cameo5α. It really just depends on what I am doing and what the project might be.

Anytime I get a new machine, I like to put it through the paces to see what works and what doesn’t. This means testing both the machine and the Silhouette Studio software.

Here are some print and cut projects I did while testing it.

A crafting workspace featuring a cutting machine, colorful papers, printed floral designs, and various crafting tools arranged on a wooden table.

I do love that I can create meaningful cards and gifts for friends and family, no matter what the circumstances are.

A greeting card featuring a floral design with the text: 'May you find comfort in sweet memories, strength in those you love & hope in each new day,' placed next to a crafting machine on a wooden table.

Check out more projects I cut using the Silhouette Cameo5α in this blog post – 5 Card Designs from One Template with Quietfire Designs.

A collage featuring five unique card designs made with one template, showcasing themes like winter, birthdays, flowers, Halloween, and a friendly ghost.

I really do wish cutting machines came with a cut hours timer. Within the first few weeks of owning the machine, I racked up a lot of cut hours.

Save this for future reference by pinning the image below.

A woman wearing a black shirt with the word 'create' is standing at a table, pointing towards a Silhouette Cameo 5 cutting machine. The background features various craft supplies and organizational tools.

Enjoy !

THANK YOU for your support! How can you help? Click HERE & buy a coffee.
Every little bit helps with the cost of running the site.

Silhouette Classes

Never stop learning! Let me help you take the anxiety out of learning with Silhouette and get to creating faster! My Silhouette classes are heavily focused on software, so you can take the skills & techniques taught and apply them to many future projects!

Silhouette step-by-step Classes by Silhouette Secrets+

Silhouette Secrets+ with EllyMae
**This post may contain affiliate links. What that means is that I may receive compensation if you purchase through the links I have provided. The price you pay for the product or service is not higher, but I may get compensated for sharing.

Posted on Leave a comment

Silhouette IPT (Intelligent Path Technology) – What Is It?

Silhouette Secrets+ with EllyMae

Silhouette IPT is short for Intelligent Path Technology and was first announced to us at the 2023 Silhouette Summit when the Silhouette Cameo 5, Curio 2, and Portrait 4 models were announced.

Affiliate links may be present in the following blog post and as an Amazon Associate, I earn from qualifying purchases.

In this blog post, I am sharing some of the details of the IPT setup and how it works. Read more details below and then watch the video tutorial with even more tips on the Silhouette Secrets+ YouTube channel HERE.

The Silhouette IPT is a patented cutting technology that changes the cut order of a design to “help” it stay in position and complete the cut. Depending on the design you have on the file, when it’s turned on, it will complete the cut of the design in segments versus a continuous cut around the entire design. The photo below shows the standard method of cutting on the left side, that would be from 1 starting point and cut around in one continuous cut back to the starting point on a heart. On the right side, the white dots are points of reference in how the design would be cut in segments, starting on the top right, then moving to the top left and then moving to complete the bottom on each side. This method is designed to “hold” the design in place and not have shifting as it’s being cut.

A graphic showing two versions of a heart shape: on the left, a hand is guiding a dotted outline of a heart, while the right shows a clearer representation with marked points.

This new technology was created to help delicate materials such as vellum be more successful when cutting out designs and to cut through multiple layers of materials at once, such as several sheets of vellum stacked on top of the Silhouette Electrostatic Mat.

Here is the video we were shown at Silhouette Summit 2023 to explain the process.

This is a setting you have to set up and turn on in order for it to use the IPT cutting method and is not an automatic setting. It is compatible with the Silhouette Cameo 5, Curio 2, and Portrait 4 models.

Silhouette IPT settings can be found under the advanced settings on a preset setting, or you can turn it on for a custom cut setting. On the Send tab in Silhouette Studio, select the MORE button and you will see a box next to “Intelligent Path Technology”.

Here is a look at Silhouette Studio version 5

Screenshot of Silhouette Studio Business Edition interface showing material settings and tool holder options with a red arrow pointing towards checkboxes for line segment overcut, track enhancing, and intelligent path technology.
Screenshot Silhouette Studio v5.0.402

And a look at the Advanced Settings in Silhouette Studio version 4

Screenshot of Silhouette Studio software displaying a design workspace with heart and flower shapes, along with material settings on the right panel.
Screenshot Silhouette Studio v4.5.815

If IPT is selected on a preset material setting, you will need to Save As to create a new material in order for it to be activated on the cut setting. If you simply check the box and X out of the preset material, it will not activate the IPT setting.

Screenshot of Silhouette Studio software showing design interface with heart and flower shapes, and material settings for various types of vinyl and vellum.
Screenshot Silhouette Studio v4.5.815

How Silhouette IPT (Intelligent Path Technology) Works

Let’s take a real world look at the IPT cut setting and the order that it takes. Keep in mind that the Silhouette software will change this order for every design, and you do not know what the order will be unless you watch and record the machine behavior.

I’ll be using the Silhouette Curio 2 for this demonstration, but it works the same for the Silhouette Portrait 4 and the Silhouette Curio 2. I am using Silhouette Vellum sheets for this test along with a brand new Silhouette Autoblade.

I used the same shape from the video by Silhouette from 2023. I drew the heart using the Flexishapes tool on the left side in Silhouette.

An interface of Silhouette Studio software displaying two heart shapes on the design canvas, alongside cutting settings for Carriage 1 and Carriage 2.

This was completed as a continuous cut, the blade never lifted.

Then I turned the cut lines off for the first heart and turned the cut lines on for the 2nd heart, which is an exact copy of the first one.

My first attempt at this IPT cut, I used the Vellum preset, checked the box, but then X’d out and found out that it did not activate the IPT setting. A new custom setting is required by clicking on Save As after checking the box.

So I made a 3rd copy of the heart and I clicked on the MORE button and checked the box next to Intelligent Path Technology and chose Save As. Then clicked the X in the top right and chose the new material of Vellum (1) as my setting. I then clicked on the MORE button to double check that IPT setting did save with the new material.

Screenshot of Silhouette Studio software displaying a design workspace with three heart shapes outlined in red. The software tool settings on the right show options for cutting vellum.

The IPT function did work and it cut the heart in 10 different line segments. However, the cut order was a bit different than the video by Silhouette from 2023 and I noticed it started the first cut in the bottom left area of the design. I am using Silhouette Studio version 4.5.815 for this demonstration. The order in which it cuts may vary by software version, which may be why the order is different than what the video shows from 2023.

Here is a diagram of the cut order using IPT with this heart shape

A heart shape template outlined on a piece of paper, with numbered markers around the edge for reference.

This heart with this specific material cut fine both ways. But, that won’t always be the case.

On a more complex design, such as this flower shape drawn with the Flexishapes and the control point adjusted to make a sharper petal, IPT did make a difference in the cut. Instead of tearing, smooshing, or ruining the corners on the interior of the petals, it was a clean sharp point and the design cut well.

Screenshot of Silhouette Studio software showing design tool interface with three heart shapes and a flower shape, and cutting settings for vellum material.

For this flower shape that is approximately 4.3″ tall and 4.2″ wide, it did 51 segmented cuts. I am not going to study the video to diagram all that out, however, it was pretty neat to watch. And it was a success, with no smooshed corners or tears. I did have to “pop” out the flower carefully, but for some designs that extra little bit of care is worth it!

Close-up of a cutting machine mat featuring various cut shapes, including hearts and a flower, with the cutting machine in the background.

Here is a close up look at the interior cuts on the flower shape. Look at those crisp, cut edges! No tearing or smooshing using the IPT feature in Silhouette.

Close-up view of a flower design cut from vellum using Silhouette IPT - Intelligent Path Technology.

Vellum is a very delicate material and can be difficult to cut, especially on an intricate cut. Vellum will also curl as you can see in this photo, the flower immediately started to curl. Humidity can also affect the success of cutting vellum, well, really any paper is affected by humidity. For best results, store vellum in a sealed envelope and completely flat. The Silhouette Electrostatic Mat is awesome for cutting vellum designs and I share even more in the Silhouette Curio 2 – Out of the Box class found HERE.

Here are a few more vellum products I’ve tested with:

Things to Know About the Silhouette IPT Method

  • It is not automatic.
  • It is a setting you can turn on for a preset material, then Save As a new material.
  • It is a setting you can turn on for a custom setting.
  • It does take longer to cut a design because the blade will lift, move, and cut in a different order.
  • It will take longer on the Silhouette Curio 2 versus a Silhouette Portrait 4 or Silhouette Cameo 5 model due to the slower movement of the arm on the Silhouette Curio 2. It may only be a few seconds longer, but it will.
  • IPT is compatible with the Silhouette Curio 2, Portrait 4, and Silhouette Cameo 5 models.
  • IPT setting can be used with both the Silhouette adhesive cutting mat and the Silhouette Electrostatic Mat.
  • Testing is the only way you will know if it will work for a design and material.
  • The Silhouette software decides the order of IPT based on the shape, size, and design. The user does not see the order or know how many segments a design will be cut out in.
  • Don’t believe AI answers on what IPT does or in general how to use a Silhouette. AI has no experience using Silhouette machine and will come back with some very bad advice. Experience using a cutting machine will beat AI hands down – literally.
  • This is NOT the same as Cut Order Sorting options found under the Settings (gear icon) on the Send Tab in Silhouette Studio.
Screenshot of Silhouette Studio Business Edition displaying cut settings on the right side, with options for layer sorting, feed options, and weeding settings. The cutting area is highlighted in red.
Screenshot from version 5 Silhouette Studio

Here is a look at where to find the Cut Order Sorting options in Silhouette Studio version 4

Screenshot of Silhouette Studio software showing design elements including hearts and a flower, with the advanced settings panel open for cut order sorting options.

I have included more details and real time demonstrations on the Silhouette Secrets+ YouTube channel too. Check out the video – Silhouette IPT (Intelligent Path Technology) Explained & Successful Cuts on Rolled Flower Demo HERE

A screenshot displaying settings for Silhouette Studio software, highlighting 'Intelligent Path Technology' with an arrow pointing to it.

It did take more time to cut, but I was able to successfully cut out a rolled flower design using the Silhouette Electrostatic Mat and IPT setting. This has been something I have troubleshot with users several times and the intricate design just couldn’t be held in place to complete the cut using the standard cutting methods with the electrostatic mat.

A crafting workspace featuring a black hole puncher, a yellow paper flower, and various crafting tools on a yellow patterned background.

I am thrilled with how this worked out!

Does Silhouette IPT Work?

Yes – but not for every design, material, or project. I thought it worked great with the flower design above as that is one of those highly likely designs to smoosh and tear on the sharp corners.

Personally, I do not typically like the little tabs it left, similar to pop out cutting. However, it might be beneficial for those materials or designs that just will not cut the standard way. The only way to know is to test it and see what happens. If you do use it, I would recommend a sharp pair of detail scissors to snip the little connections and care when separating it from the full sheet.

The second part of IPT method for cutting through multiple layers of materials, proved to be much more finicky with mixed results. I spent hours and hours testing and was never really impressed with the results. The more layers of material, the less desirable the cut results were. It is not something I’ve spent more time testing. Maybe someday I’ll try again.

I hope those tips give you a better idea of how this new cut path technology works. You never know until you try and hopefully that will help your trials go a bit easier.

Next time you have a design that is just giving you fits with a standard, continuous cut setup – you might try out the IPT setting and see if it makes a difference in the success with your material.

Good luck!

Save this for future reference by pinning the image below.

Screenshot showing the Silhouette software interface with options for Intelligent Path Technology highlighted.

Enjoy !

THANK YOU for your support! How can you help? Click HERE & buy a coffee.
Every little bit helps with the cost of running the site.

Silhouette Classes

Never stop learning! Let me help you take the anxiety out of learning with Silhouette and get to creating faster! My Silhouette classes are heavily focused on software, so you can take the skills & techniques taught and apply them to many future projects!

Silhouette step-by-step Classes by Silhouette Secrets+

Silhouette Secrets+ with EllyMae
**This post may contain affiliate links. What that means is that I may receive compensation if you purchase through the links I have provided. The price you pay for the product or service is not higher but I may get compensated for sharing.

Posted on Leave a comment

Beginner’s Guide to the Silhouette Cameo 5 Step-by-Step Class Now Available!

Silhouette Beginner's Guide to the Cameo 5
Silhouette Secrets+ with EllyMae

Are you ready to start crafting with your Silhouette Cameo 5 but don’t know where to begin? 🎉 Our brand-new Beginner’s Guide to the Silhouette Cameo 5: Crafting Made Easy is here to help! This step-by-step class is designed with beginners in mind, walking you through everything from unboxing your machine to mastering your first project. Whether you’re brand-new to Silhouette or want to boost your confidence with the Cameo 5, this class is packed with practical tips and easy-to-follow instructions to set you up for crafting success. Let’s get started on your creative journey today! 🌟

Beginner’s Guide to the Silhouette Cameo 5: Crafting Made Easy
step-by-step class
Click HERE

Take the guesswork out of using your Silhouette Cameo 5 with this hands-on, step-by-step class designed for beginners. You’ll learn how to set up your machine, navigate the essential features of Silhouette Studio, and master the basics of cutting with confidence. This class covers everything from opening the box to getting your first successful cuts, with expert tips all along the way. Perfect for new users, this guide will leave you equipped with the skills and knowledge to bring your creative ideas to life!

Portrait 4 owners: this video course can also be used for Portrait 4 machines as well. Most of the information is the same for both machine models, the main difference is the cutting width of each machine.
View an unboxing of the Portrait 4 here.

The supplies needed for this class are minimal. I used Oracal 651 adhesive vinyl, AT 65 Transfer Tape, and Cardstock.

Complete course outline below:

Introduction, Unboxing, and Proper Setup of the Silhouette Cameo 5 – 20 minutes

  • Unboxing the Silhouette Cameo 5
  • Explanation of all parts included in the box
  • Proper Setup of Silhouette Cameo 5 machine
  • Proper Installation of the included Roll Feeder on the Silhouette Cameo 5
  • Explanation & Tips to Autoblade Installation and Tool Housings

Silhouette Cameo 5 New Machine Setup & Warranty Registration – 15:53 minutes

  • Set up on the Silhouette America Website
  • Registration to Your Account
  • Silhouette Studio Software
  • Silhouette Cameo 5 Setup
  • Silhouette Cameo 5 Firmware Updates

Silhouette Studio Software: Important Information

  • Silhouette Studio software version information

Silhouette Cameo 5: First Cuts with Adhesive Vinyl & Cardstock – 56:40 minutes

  • Setting up a Design Using Text
  • Cut Settings on the Send Tab Explained
  • 2 Ways to Do Test Cuts
  • First Cuts from Adhesive Vinyl
  • Explanation of the Autoblade Adjustment
  • Removing materials from the cutting mat
  • Weeding Tips
  • Applying Transfer Tape
  • Removing the Backing off Adhesive Vinyl & Cutting Tips
  • Changing Blades & Reinstalling for Cardstock Cuts
  • Test Cuts on Cardstock
  • Drawing Basic Shapes & Adjusting a Polygon
  • Cutting Basic Shapes from Cardstock
  • Troubleshooting Tips for Cut Issues
  • Tips to Removing Materials, Saving Adhesive on the Mat, and Materials Not Curling When Removed
  • More Tips

Additional Resources
Terms of Use

This class will help get you up and cutting faster than figuring it out yourself! Help yourself get started quicker and be on your way to more fabulous projects in no time!

Beginner’s Guide to the Silhouette Cameo 5: Crafting Made Easy class found HERE
Check out all of the Silhouette classes HERE.

Save this for future reference by pinning the image below.

Silhouette Cameo 5 Beginner's Class

Find more Silhouette resources and tutorials on the A to Z section on the blog HERE.

Enjoy !

THANK YOU for your support! How can you help? Click HERE & buy a coffee.
Every little bit helps with the cost of running the site.

Silhouette Classes

Never stop learning! Let me help you take the anxiety out of learning with Silhouette and get to creating faster! My Silhouette classes are heavily focused on software, so you can take the skills & techniques taught and apply them to many future projects!

Silhouette step-by-step Classes by Silhouette Secrets+

Silhouette Secrets+ with EllyMae
**This post may contain affiliate links. What that means is that I may receive compensation if you purchase through the links I have provided. The price you pay for the product or service is not higher but I may get compensated for sharing.

Posted on 3 Comments

Master Perfect Silhouette Cuts: Top Tips for Electrostatic Mat

Master the Silhouette Electrostatic Mat
Silhouette Secrets+ with EllyMae

As a paper crafter I am loving the Silhouette Electrostatic (ES) Mat! This new technology is pretty darn cool and not having to remove the cut pieces from an adhesive cutting mat can save time. Especially when cutting for large projects! In this post, I’m sharing more tips on having successful results when using the Silhouette Electrostatic (ES) Mat.

Affiliate links may be present in the following blog post and as an Amazon Associate, I earn from qualifying purchases.

How Does the Silhouette Electrostatic Mat Work?

When the electrostatic mat is turned on, a static charge is built up between the electrostatic mat and the protective sheet. This holds the protective sheet in place and materials can be placed on top of it. The charge then builds between the protective sheet and the material, which holds it in place while it’s being cut. Once the design is cut simply break that charge by either lifting the protective sheet off the ES Mat or turning the ES mat off. The charge will dissipate and the material can easily be removed.

The Silhouette Electrostatic Mat is an accessory that is compatible with the Silhouette Cameo 5 models or Silhouette Portrait 4. The Silhouette Curio 2 comes with the Electrostatic Mat.

What materials does the Silhouette Electrostatic Mat Work With?

Materials that are smooth and completely flat are going to work best with the Silhouette ES Mat. The material has to be able to build up that electrostatic charge and be held in place the entire time it’s being cut. Textured materials, “breathable” materials such as fabric, or curled materials are not going to work well because it cannot build up a charge to hold it in place.

I have cut vellum, copy paper, sticker paper, 65 lb cardstock, 85 lb cardstock, 110 lb cardstock, adhesive vinyl, and I’m sure I’m probably forgetting a few others in the past year that I’ve been testing it.

I did try a thicker cardstock by Bazzill which was their smooth cardstock and it cut, but it was not as clean of a cut as I prefer. However, I have had the same results when using Bazzil on an adhesive cutting mat too. Some cardstocks are just a bit more difficult to cut cleanly with the Silhouette. I tend to stay away from those for cutting projects, but they work well when cut with a paper trimmer.

Tips for Successful Cuts with the Silhouette ES Mat

While cutting pieces for demo projects for an upcoming class, I knew I wanted to share the tips I’ve learned during testing to achieve successful cuts. The best way to learn what works and what doesn’t is often through the failures encountered along the way. And even though I’ve been using cutting machines for many years, there are still failures along the way.

Check out the new video on the Silhouette Secrets+ YouTube channel where I am sharing a look at the cutting process and sharing things that work and things that don’t work.

Silhouette Cutting Secrets: Master the Electrostatic Mat video tutorial

Don’t forget to like, subscribe, and click the bell for notifications on the Silhouette Secrets+ YouTube channel!

A Closer Look at the Final Cuts

Silhouette Electrostatic Mat cutting cardstock leaves

It is so nice to just lift off the cardstock after the cut and see the pieces laying there.

Silhouette ES Mat Cutting Cardstock Flowers

You will start to see the pieces pile up on the right side of the photos as I share the progression.

Silhouette Electrostatic Mat cutting cardstock pink flowers

These projects and cuts can also be successful on an adhesive cutting mat, but it was so nice to just be able to slide the finished cuts off and be ready for the next sheet of cardstock.

Silhouette ES Mat cutting detailed details

Especially when you have a million tiny pieces like on these film strips!

In the video, I also show how my first attempt at cutting these film strips was not successful. I had the design placed too close to the edge of the cardstock and a piece lifted during the cut and it pretty much ate my cardstock. I simply unloaded the ES Mat, cleaned all the bits up, reset the machine, and then moved my design down on the design mat a little bit and sent it again to cut. Perfect cuts!

Silhouette Electrostatic Mat detailed cuts

Now, this design cut beautifully. The ring design is 2 pieces cut for a background. However, I did have to babysit it a little bit more as some of the cavities of the design would lift as it was being cut with the movement under the roller bar. I carefully removed the pieces as they were lifting during the cut and showed that in the video too.

Silhouette ES Mat cutting cardstock

All of these designs were created in the Silhouette Studio software from scratch for an upcoming class. The cutting process is a bit of the behind-the-scenes of that class creation. Watch the Upcoming Events tab or sign up for the Upcoming Craft Events emails and I’ll send an email direct to your inbox when new events open for registration.

Silhouette ES Mat Cuts

Sometimes, the cut won’t stay in place when the excess is removed. This can happen with smaller designs as there is a smaller surface area to hold the electrostatic charge in place.

Master Perfect Silhouette Cuts: Top Tips for Electrostatic Mat

  • the ES Mat needs a secure connection that is completely flat to connect to the Silhouette Cameo 5 or Portrait 4 machine
  • materials need to be completely flat to maintain the charge
  • designs placed too close the edges can cause cut issues and/or lifting which can affect cut results
  • test cut, test cut, test cut!
  • make sure ES Mat is turned on and remains on during the entire cut
  • you will make mistakes!
  • take time to practice

Silhouette Supplies

A Look at the Finished Projects

Card Design #1

Card Design by EllyMae

Card Design #2

Card Design #2 by EllyMae

Scrapbook Layout #1

Scrapbook Layout #1 by EllyMae

Scrapbook Layout #2

Scrapbook Layout #2 by EllyMae

I was having so much fun in designing for these class projects and love how they turned out.

I hope the tips help you to be successful with the Silhouette ES Mat!

Additional Resources on the blog:

Save this for future reference by pinning the image below.

Silhouette ES Mat Pin

Enjoy !

THANK YOU for your support! How can you help? Click HERE & buy a coffee.
Every little bit helps with the cost of running the site.

Silhouette Classes

Never stop learning! Let me help you take the anxiety out of learning with Silhouette and get to creating faster! My Silhouette classes are heavily focused on software, so you can take the skills & techniques taught and apply them to many future projects!

Silhouette step-by-step Classes by Silhouette Secrets+

Silhouette Secrets+ with EllyMae
**This post may contain affiliate links. What that means is that I may receive compensation if you purchase through the links I have provided. The price you pay for the product or service is not higher but I may get compensated for sharing.
Posted on Leave a comment

Amazon Prime Day Deals 2024

Amazon Prime Day Deals
Silhouette Secrets+ with EllyMae

Affiliate links may be present in the following blog post and as an Amazon Associate, I earn from qualifying purchases.

The 2024 Amazon Prime Days are here!

I’ll be sharing more deals throughout the entire sale as I find them in my Amazon Storefront HERE.

I’ve found a few deals on Silhouette machines too!

Silhouette Cameo 5 Bundle

Silhouette Cameo 5 – Black Bundle – click HERE

Silhouette Cameo 5 - White bundle

Silhouette Cameo 5 – White Bundle – click HERE

Silhouette Cameo 5 - White

Silhouette Cameo 5 – White – machine only – click HERE

Silhouette Curio 2

Silhouette Curio 2 – click HERE

I’ll be adding more deals I find to the Silhouette Secrets+ Prime Day list in my Amazon storefront. Check it out HERE.
Deals change quickly during the Prime Days.

And one more deal I want to share. Siser has teamed up with Creative Fabrica for Christmas in July.

Creative Fabrica and Siser team up!!!

Christmas in July is back and Siser has teamed up with Creative Fabrica to offer a free gift along with the Creative Fabrica subscription.

Check it out HERE.

Creative Fabrica Christmas in July Siser

I am not normally a big subscription person, but I have to say that I have gotten a lot of use out of my Creative Fabrica subscription.

Grab this deal or extend your subscription during this promotion HERE. And then make sure to fill out the form to grab you free gift HERE – mine arrives quickly.

Enjoy !

THANK YOU for your support! How can you help? Click HERE & buy a coffee.
Every little bit helps with the cost of running the site.

Silhouette Classes

Never stop learning! Let me help you take the anxiety out of learning with Silhouette and get to creating faster! My Silhouette classes are heavily focused on software, so you can take the skills & techniques taught and apply them to many future projects!

Silhouette step-by-step Classes by Silhouette Secrets+

Silhouette Secrets+ with EllyMae
**This post may contain affiliate links. What that means is that I may receive compensation if you purchase through the links I have provided. The price you pay for the product or service is not higher but I may get compensated for sharing.
Posted on 2 Comments

3 Ways to Customize Acrylic Shapes with Silhouette

I’m in love with these Layered Snowflake Arabesque Tile acrylic shapes from Craft Chameleon. They come in a wide variety of colors and I’ve been using them for testing. I want to share 3 methods I tested, my results with each, and which one is my favorite at the end – you might be surprised.

Affiliate links may be present in the following blog post and as an Amazon Associate, I earn from qualifying purchases.

Layered Acrylic Shapes Snowflakes Craft Chameleon

I am calling these ornaments, but they can be so much more. Gift tags, ornaments, stand alone decor item, and more!

3 Ways to Customize Acrylic Shapes with Silhouette

  1. Etching Acrylic with the Silhouette Curio 2 Power Engraver – Let It Snow Design
  2. Etching Acrylic with the Silhouette Curio 2 Punch Tool – top left Snowflake saying
    (the Curio 1 and Silhouette etching tool can do this too – more info below)
  3. Adhesive Vinyl Decal – any cutting machine can do this with good quality vinyl!

1 – Etching Acrylic with the Silhouette Curio 2 Power Engraver

I have been doing a lot of testing with the Silhouette Curio 2 and just had to try this with the new Silhouette Power Engraver Tool.

Silhouette Curio 2 Power Engraver Acrylic Etching

I have had great results with the Silhouette Power Engraver. However, it is not a fine detail engraving tip. When you are working with it, you want to keep that in mind and may need to adjust the design to work with it.

I have a full step-by-step class the Silhouette Secrets+ Teachable site on setting up for etching/engraving on acrylic with the Silhouette Curio 2 including how to get exact placement on shapes. I share all the things that worked and those that did not in the class too!
Find all the details and see more examples of my etching tests HERE.

Silhouette Curio 2 Power Engraver Etched - Engraved Acrylic

The etch is pretty subtle on the colored acrylic. Acrylic blanks are also one of the most difficult things to photograph too! Right up there with glass objects.

I love the sparkle of the top layer of this acrylic shape.

Check out a quick look at the Silhouette Power Engrave Tool in action on the Silhouette Secrets+ YouTube channel HERE.

Supplies used:

Silhouette Curio 2, Curio Debris Tray, Silhouette Cutting Mat, Silhouette Power Engraver, Let It Snow by Jamie Lane Designs, Layered Snowflake Arabesque Tile acrylic shape, lint roller, super glue, craft clamps, ribbon
*use code SECRETS at CrafterCuts to save 10% on Silhouette supplies – does not apply to new machines

For more details on the Silhouette Curio 2 click HERE.

2 – Etching Acrylic with the Silhouette Curio 2 Punch Tool

With the release of Silhouette released version v4.5.760+, which means the Silhouette Punch Tool has been unlocked for etching with both the Silhouette Curio 2 and the Silhouette Cameo 5. I have been testing the Silhouette Punch Tool for etching with both models of machines.

For more details on etching with the Silhouette Cameo 5 and Punch Tool check out this post HERE.
Note: etching on the Silhouette Cameo 5 is designed for Silhouette metal etching sheets and not for acrylics – more details in my blog post

The Silhouette Punch Tool is supposed to be the etching tool for finer details with the Silhouette Curio 2 and Cameo 5. While it does etch, it definitely is no where near the same quality of etch as the Silhouette Curio 1 was with the Silhouette etching tool.

If you have a Silhouette Curio 1, I would recommend hanging on to it and get that baby out to etch on acrylic. It does a fantastic job.

However, the Silhouette Curio 2 is here to stay. It is the new machine model and the Silhouette Curio 1 is no longer manufactured. Honestly, the Curio 1 had a really, really long lifespan for a machine model. I am surprised that it was manufactured for so long.

The Silhouette Curio 2 and the Silhouette Cameo 5 has a specialized Carriage 2 housing that allows not only for specialty tools, but also a higher force. While the Carriage 1 housing on Silhouette models is an up and down motor, the Carriage 2 housing on Silhouette model machines is a round and round motor. This means that it is different than the Silhouette Curio 1 machine that was designed over 10 years ago. Different machine, different results.
I’ll have more details on the blog later about all of that.

Bottom line is – the Silhouette Punch Tool does etch.

Check out a quick look at the Silhouette Curio 2 & Punch Tool in action on the Silhouette Secrets+ YouTube channel HERE.

Supplies used:

Silhouette Curio 2, Curio Debris Tray, Silhouette Cutting Mat, Silhouette Punch Tool, Snowflake Kisses Holiday Wishes Design, Layered Snowflake Arabesque Tile acrylic shape, lint roller, super glue, craft clamps, ribbon
*use code SECRETS at CrafterCuts to save 10% on Silhouette supplies – does not apply to new machines

For more details on the Silhouette Curio 2 click HERE.

3 – Adhesive Vinyl Decal

I used Oracal 651 white adhesive vinyl and cut this with the Silhouette Cameo 5 using the Silhouette Autoblade.

Yes! The Silhouette Autoblade!

Silhouette Cameo 5 Detailed Vinyl Cut with Autoblade

I selected the Vinyl Glossy setting and increase the blade depth to a 2. Actual cut settings that will work for you will depend on your material, machine, and blade life. Test cuts are the only way you will know what works for you. Find more information on Perfect Cut Settings HERE.

One of the big key factors is you want high quality adhesive vinyl and good quality transfer tape for detail works. Low quality vinyl can just be a mess and more of a headache than the money it tricked you into saving. If you have ever cut low quality vinyl or old vinyl, you are nodding right now and know exactly what I mean!

Silhouette Oracal 651 Vinyl Cut with Autoblade

Now, yes, I lost the dots to my i’s. But holy smokes! This is tiny details! At this size, I could care less about those little dots on the i’s. I can either cut more and add them or add in a different embellishment to the project.

Silhouette Oracal 651 Fine Detail Cut with Autoblade

One of the things that can help when cutting this small is adding Weeding Lines to the design and it definitely helped in this small detail cut.
For more details on adding Weeding Lines click HERE.
For designs like this, I prefer to draw my own weeding lines. It takes just a little more time in the setup and cutting process, but it can be 100% worth it to save you headache when weeding.

I have more tips on cutting small fonts & designs HERE too!

Silhouette Oracal 651 Vinyl Fine Detail Cut with Autoblade

Check out a quick look at weeding this design on the Silhouette Secrets+ YouTube channel HERE.

Supplies used:

Silhouette Cameo 5, Silhouette Autoblade – Type B, Silhouette Cutting Mat, Oracal 651 White adhesive vinyl, AT65 Transfer Tape, Snowflake Kisses Holiday Wishes Design, Layered Snowflake Arabesque Tile acrylic shape, super glue, craft clamps, ribbon
*use code SECRETS at CrafterCuts to save 10% on Silhouette supplies – does not apply to new machines

My Favorite

Out of all 3 methods, this one has to be my favorite because it really stands out. And the best part is, anyone with a cutting machine could do this method!

Silhouette Cameo 5 Detailed Adhesive Vinyl Decal with Autoblade

I hope that gives you some ideas how you can create and customize with acrylic shapes. You are not limited to Snowflake Arabesque Acrylics either! Craft Chameleon has a wide selection of acrylic blanks. The 3″ clear acrylic rounds are my favorite and I make sure to stock up each time I order.

Save this for future reference by pinning the image below.

Enjoy !

THANK YOU for your support! How can you help? Click HERE & buy a coffee.
Every little bit helps with the cost of running the site.

Silhouette Classes

Never stop learning! Let me help you take the anxiety out of learning with Silhouette and get to creating faster! My Silhouette classes are heavily focused on software, so you can take the skills & techniques taught and apply them to many future projects!

Silhouette step-by-step Classes by Silhouette Secrets+

**This post may contain affiliate links. What that means is that I may receive compensation if you purchase through the links I have provided. The price you pay for the product or service is not higher but I may get compensated for sharing.
Posted on 2 Comments

A Guide to Silhouette Cameo 5 Blades and Tools + Free PDF Chart

Let’s talk tools. Tools for the Silhouette Cameo 5 and Cameo 5 Plus model machines specifically in this post.

Affiliate links may be present in the following blog post and as an Amazon Associate, I earn from qualifying purchases.

With the release of the Silhouette Cameo 5, a couple new tools were released that can be used with the new machines. These include the Embossing tools, Heat Pen Set, and Pen Holder Type C.

I’ve created a free PDF chart listing all the tools compatible with the Silhouette Cameo 5 and Cameo 5 Plus. This chart is available as a free download exclusively for confirmed newsletter subscribers.

Join the Newsletter

Subscribe to get our latest content by email.
    We respect your privacy. Unsubscribe at any time.

    I always recommend stocking up on extra blades and cutting mats to have on hand. It can be very frustrating to be in the middle of a project with a dull blade or and adhesive mat that is no longer sticky. It is also one of the fastest ways to rule out a cutting issue you might have.

    You can find blades & tools at Silhouette America, Crafter Cuts, or check out the other retailers in the Silhouette Secrets+ Recommended Retailers list HERE.
    *use code SECRETS at CrafterCuts to save 10% off supplies and free shipping on orders over $35

    Let’s take a look at all the blades and tools that can be used in the Silhouette Cameo 5. For some of the specialty tools listed below I have also included links for tutorials and more information on their usage as well.

    Silhouette Blades

    Silhouette Autoblade Type B

    Silhouette Autoblade – Type B
    Carriage 1
    Used for paper, cardstock, sticker sheets, adhesive vinyl, HTV, Chipboard, Acetate, and select specialty materials.
    Materials under 1 mm thick
    Available at Silhouette America or Crafter Cuts
    *This is the blade I use most often. Most cut issues occurring with this blade can be fixed by following the steps in this video HERE – Troubleshooting Cut Issues


    Silhouette 1 mm Manual Blade
    Carriage 1
    Used for paper, cardstock, sticker sheets, adhesive vinyl, HTV, Chipboard, Acetate, and select specialty materials.
    Materials under 1 mm thick

    Silhouette 1 mm Manual Blade

    Silhouette 2 mm Manual Blade

    Silhouette 2 mm Manual Blade
    Carriage 1
    Used for paper, cardstock, sticker sheets, adhesive vinyl, HTV, Chipboard, Acetate, Craft Foam, and select specialty materials.
    Materials under 2 mm thick


    Silhouette 2 mm Kraft Blade – Type B
    Carriage 1
    Used for chipboard, acetate, craft Foam, leather, and select specialty materials
    Materials up to 2 mm thick
    *15+ Tips for using the Kraft blade found HERE

    Silhouette Kraft blade 2 mm - Type B

    Silhouette Adapter Set

    Silhouette Tool Adapter Set
    Carriage 1
    Adapters are color coded for specific blades/tools
    Black adapter = Silhouette blade (ratchet) & Premium blade
    White adapter = 2 mm Kraft blade
    Gray adapter = Deep Cut blade
    Blue adapter = Silhouette Sketch pens


    Silhouette Blade – often referred to as a “ratchet” blade but the official name is Silhouette blade
    Carriage 1 with black adapter
    Used for paper, cardstock, sticker sheets, adhesive vinyl, HTV, Chipboard, Acetate, and select specialty materials.
    Materials under 1 mm thick

    Silhouette ratchet blade

    Silhouette Premium blade

    Silhouette Premium Blade
    Carriage 1 with black adapter
    Used for paper, cardstock, sticker sheets, adhesive vinyl, HTV, Chipboard, Acetate, and select specialty materials.
    Materials under 1 mm thick


    Silhouette Deep Cut Blade
    Carriage 1 with gray adapter
    Used for paper, cardstock, sticker sheets, adhesive vinyl, HTV, Chipboard, Acetate, Craft Foam, and select specialty materials.
    Materials under 2 mm thick

    Silhouette Deep Cut blade

    Silhouette Kraft Blade 2 mm

    Silhouette 2 mm Kraft Blade
    Carriage 1 with white adapter
    Used for chipboard, acetate, craft Foam, leather, and select specialty materials
    Materials up to 2 mm thick
    *15+ Tips for using the Kraft blade found HERE


    Silhouette 3 mm Kraft Blade
    Carriage 2
    Used for chipboard, acetate, craft Foam, leather, and select specialty materials
    Materials up to 3 mm thick
    *15+ Tips for using the Kraft blade found HERE

    Silhouette 3 mm Kraft blade

    Silhouette Rotary Blade

    Silhouette Rotary blade
    Carriage 2
    Used for fabrics, crepe paper, felt, wool, and select specialty materials
    *Rotary Blade Tutorial HERE

    Additional Silhouette Tools

    Silhouette Pen Holder Type B
    Carriage 1
    Use with a variety of pen styles to sketch onto materials such as cardstock, paper, faux leather paper, etc.
    *Step-by-step Sketching Class HERE
    **More tutorials on sketching HERE

    Silhouette Pen Holder - Type B

    Silhouette Punch Tool

    Silhouette Punch Tool
    Carriage 2
    Used with adhesive vinyl or HTV to punch a hole to designate where to weed the material out.
    Also used with the Cameo 5 for etching on Silhouette metal sheets.
    *12+ Tips for Etching with the Silhouette Cameo 5 HERE


    Silhouette black bodied sketch pens
    Carriage 1 with blue adapter
    Used to sketch onto materials such as cardstock, paper, faux leather paper, etc.
    *Step-by-step Sketching Class HERE
    **More tutorials on sketching HERE

    Silhouette Sketch Pens

    Silhouette Pen Holder Type C

    Silhouette Pen Holder – Type C
    Carriage 2
    Use with a variety of pen styles to sketch onto materials such as cardstock, paper, faux leather paper, etc.
    Type C Pen Holder has a broader barrel on the end so you can use wider bodied pens and markers


    Silhouette Embossing Tool Set – Type C
    Carriage 2
    Embosses onto materials such as cardstock, embossable foil, etc.
    Set includes a fine and wide tip.

    Silhouette Embossing Tools

    Silhouette Heat Pen Set

    Silhouette Heat Pen Set – Powered Tool
    Carriage 2
    Applies foil transfer material to surfaces of many materials such as cardstock, faux leather, etc.
    Cordless design and powered by the Cameo 5 Tool 2 housing – 1 mm & 2.5 mm tip
    *Heat Pen Setup & Foiling tutorials HERE

    Silhouette Heat Pen Super-Fine
    Carriage 2
    Applies foil transfer material to surfaces of many materials such as cardstock, faux leather, etc.
    Cordless design and powered by the Cameo 5 Tool 2 housing
    0.5 mm Super Fine Tip

    Additional Supplies

    There are a few additional supplies for use with some of the specialty tools listed above.

    Silhouette 12″ x 12″ Embossing Mat
    For use with the Silhouette Embossing Tools

    Silhouette Embossing Mat

    Silhouette Heat Transfer Foil

    Silhouette Heat Transfer Foil – Gold & Silver
    For use with the Silhouette Heat Pen Set
    2 heat foil rolls (3 in x 33 feet)
    *Heat Pen Setup & Foiling tutorials HERE


    Silhouette Electrostatic Bed
    Uses static electricity to hold materials in place while being cut with the Cameo 5 models
    *Tips for using the Silhouette Electrostatic Bed HERE

    Silhouette Electrostatic Bed

    Silhouette Electrostatic Protector Sheet

    Silhouette Electrostatic Protection Sheet
    12″ x 12″ – 2 per pack
    Protects the Electrostatic Bed from damage.

    There are a lot of options now available with the Silhouette Cameo 5 and Cameo 5 Plus.

    Grab the free PDF chart of all Silhouette Cameo 5 tools for future reference when you subscribe to the Silhouette Secrets+ newsletter.
    *chart is the current tools available for the Cameo 5 and Cameo 5 Plus January 2024

    Join the Newsletter

    Subscribe to get our latest content by email.
      We respect your privacy. Unsubscribe at any time.

      Find even more information on the Silhouette Cameo 5 HERE including an unboxing, setup, first cuts, and the Electrostatic Bed.

      Please let me know if you have any questions in the comments below.

      Save this for future reference by pinning the image below.

      Image of a tool chart for the Silhouette Cameo 5 and Cameo 5 Plus, featuring various cutting tools and their specifications, along with a 'Free PDF' label.

      Enjoy !

      THANK YOU for your support! How can you help? Click HERE & buy a coffee.
      Every little bit helps with the cost of running the site.

      Silhouette Classes

      Never stop learning! Let me help you take the anxiety out of learning with Silhouette and get to creating faster! My Silhouette classes are heavily focused on software, so you can take the skills & techniques taught and apply them to many future projects!

      Silhouette step-by-step Classes by Silhouette Secrets+

      **This post may contain affiliate links. What that means is that I may receive compensation if you purchase through the links I have provided. The price you pay for the product or service is not higher but I may get compensated for sharing.
      Posted on Leave a comment

      Cutting Faux Leather with Your Silhouette: Essential Tips

      I’ve wanted to write a faux leather tutorial with tips for Silhouette for a long time, but other things seemed to jump in front of it on my to-do list. So when Amy announced her Faux Leather event, I made it a goal to really dive in and create with some faux leather.

      Affiliate links may be present in the following blog post and as an Amazon Associate, I earn from qualifying purchases.

      Amy Romeu, hailed as the Queen of Faux Leather by many, recently hosted an event that I attended. I had a great time crafting along with her videos and picked up a lot of great tips that can help in being successful in cutting faux leather with any cutting machine.

      Before we get too far in, let’s cover a few things about faux leather that will help in the process.

      Faux Leather Information

      Can Silhouette machines cut faux leather? Yes!
      Can Silhouette machines cut ALL faux leather? NO!
      Can all cutting machines cut ALL faux leather? NO!

      Faux leather is such a broad term, just like “genuine” leather is. Cutting some faux leathers is easy, some pose greater difficulty, and others simply do not cut well at all.

      Factors influencing whether a Silhouette or another machine can cut faux leather include:

      • Color – Yes! Many users don’t know this, but color affects how materials cut. Different colors go through different processes in the production and that can affect how it cuts. Some can be tougher than others due to coloring.
      • Backing – Faux leathers can have a variety of backing on it. Some don’t have any and are soft and pliable. While others can have a mesh, woven backing which can be difficult to cut through.
      • Texture – Faux leathers can come in all kinds of textures such as embossed, glitter, sequins, etc. This will affect how it cuts. Just think of a blade trying to bounce over a texture material to cut a clean line. Texture affects it! The texture also influences the ease of cutting by hand. The same is true for a cutting machine.
      • Thickness – There is a wide array of thicknesses for faux leather. Super thin ones can be too pliable and just smoosh around on the cutting mat. Thicker ones may need multiple passes to cut through and a longer blade such as the Deep Cut blade.
      • Composition – Faux leather is such a broad term. The definition of “faux” is artificial or fake. So keep in mind that faux leather is fake leather.
        What it is made of?
        A wide variety of things. Plastic mostly. For instance, I ordered some leather on Amazon and it is PU Leather. It is by definition, artificial leather, crafted from a thermoplastic polymer commonly employed in the production of furniture or shoes.
        Faux leather = fake leather = plastic

      Supplies I Used:

      Faux Leather Varieties
      Craft Chameleon Warehouse Faux Leather Supply

      So the first place to start is to gather your supplies for whatever you are working on. I was so excited for these projects and I knew I would be creating several, so I pulled out all my faux leathers and my scrap HTV. I have several boxes of scrap HTV and it’s a great way to use it by adding it to faux leather projects.

      Supplies for Faux Leather Projects

      Keep it a secret, but I actually obtained more faux leather than shown because I needed to test several during these projects. And once I went down that rabbit hole, I found many patterns I wanted to collect.

      Faux Leather Variety
      Faux leather from The Polka Dotted Peach

      Tips for Cutting Faux Leather with Silhouette

      • Cut the faux leather down to size and give yourself some extra space for taping down the edges to the cutting mat.
      • Place the faux leather front facing down on the cutting mat, so you are cutting through the backside first.
        **NOTE: if cutting real leather, DO NOT place it face down or you can ruin the finish on the real leather. That can be a very expensive mistake!
      Tape Faux Leather to a Silhouette Cutting Mat

      • Utilize a reliable sticky cutting mat to secure the materials in place during the cutting process. Using a brayer to smooth the materials down to secure it. If the materials shift during the cut, the cut may fail, or your blade might become stuck.
      • Securely tape down the material edges. I found that using longer pieces of tape not only ensured a better hold but also reduced the risk of it getting caught in the machine during cutting. You can also reuse painter’s tape if removed carefully at the end.
      • For best results, keep the painters tape away from the edges of the cutting mat so it is not going under the rollers. Any change in the surface area under the rollers and it can cause it to lose grip or the left and right roller to not move at the same rate, which can cause issues.
      • When using a Silhouette cutting mat, you can use the grid for exact placement for lining up your materials and your design. If you load the mat properly, the on-screen design will align with the Silhouette cutting mat. Third party cutting mats may not line up and it will be a guessing game for design placement and alignment.
      Faux Leather Tips for Silhouette

      • Give yourself a good allowance and grace because you may still mess up, just like I did in the photo above. I would recommend that you cut a little bit excess of the faux leather and not try to cut through the painters tape as it can affect the cut results. The cut was ok in this instance, but it went off my faux leather, so I ended up cutting another truck piece.
      • For tips on lining things up check out this tutorial HERE. I use this method all the time and still make mistakes. Remember to “measure twice, cut once.” But, I find I make the most mistakes if I’m rushing or I tell myself it will be just a quick project.
      • Test cut, test cut, test cut!!!
      • I used a 2 mm Manual blade for all of my faux leather cuts. This blade is the equivalent of the older style Premium blade, it’s just redesigned to fit directly into the newer model machines housing without needing an adapter.
        The 2 mm Manual blade (or Deep Cut blade) allows you to go from 1-20 in the blade depth settings. All faux leather will vary and some can be cut with a regular blade that is 1-10 settings, while others may need a higher blade depth than 10. Test cuts are the way you will know.
      • Do not unload the mat after you cut!!! Check to see how well it cut.
        Having a thread or two is not a bad thing! Grab a sharp pair of scissors and simply snip it.
      Check the cut on the Faux Leather after Silhouette cuts

      • If it does not lift easily or has more than just a few threads hanging on, send the cut again. If you have not unloaded the cutting mat, it should cut again in the exact same place. If you unload the cutting mat, it will be a hope and a prayer trying to get it lined up perfectly again to cut in the same place.
      Clean cuts on Faux Leather with Silhouette

      • Some faux leathers may take more than 1 pass and this is why test cutting is such an important step. I write down the settings that worked for each of the materials I test and keep a log so I can refer back to it. It is not a bad thing to use more than 1 pass with certain projects. I find with thicker materials, you can get a cleaner cut when you are not trying to force the machine to do it all at once time. However, for thinner materials such as adhesive vinyl or regular cardstock, multiple passes shouldn’t be necessary if the blade is installed properly.

      For more details on what blade depth and force are, check out this in-depth tutorial on the Silhouette Send tab HERE.

      Cut Success with Silhouette and Faux Leather

      • Once the cut is successful, unload the mat, remove the painter’s tape – it can be reused and carefully peel away the excess. Snip any threads as you carefully remove the excess so you do not stretch the design.
      • When cutting, check the blade regularly for debris stuck to it or inside the cap. The fibers of the faux leather can hinder the cut results.
      • It is perfectly normal to have to increase the settings of the blade as you cut materials. A blade cutting any material is going to dull with usage. Keep in mind that you are cutting through plastic and fibers. That will cause a blade to wear differently than other materials.

      For this design I used the Red Truck Ornament file from Amy Romeu and there is a front and back layer cut from faux leather that will be glued together. The rest of the design is cut from HTV, so I swapped out my blade for my HTV blade and set up my cutting mat to cut different colors of scraps at the same time.

      Cut by Color in Silhouette Studio

      I used the Cut by Fill Color so I could set up different cut settings for my Smooth HTV versus my Glitter HTV. The Autoblade did all the work to change the settings once set up. Check out this tutorial HERE for tips on cutting by line or fill color – they are the same.

      Cut multiple colors at once on a Silhouette Cutting Mat

      And then I set up my cutting mat to match exactly what I had set up on the Silhouette software. Check out tips on cutting multiple colors at the same time HERE.

      Red Truck Faux Leather Ornament

      Then I simply weeded the design and pressed the pieces on according to Amy’s instructions. I also cut this design out of cardstock and adhesive vinyl too! The faux leather ornament is on the left and the cardstock ornament is on the right.

      Check out Amy Romeu’s YouTube video HERE for instructions on the assembly. Even though she is using a Cricut machine to cut, the process and tips are useful.

      I was having so much fun cutting faux leather that I couldn’t stop and wanted to test more!

      Next, I used this Silver Embossed Leather from Craft Chameleon with the Initial Ornament file.

      Embossed Faux Leather Initial

      I followed the same tips as above and taped it securely to my cutting mat.

      Secure Faux Leather with Painters Tape on a Silhouette Cutting Mat

      If you compare this photo to the first one, you’ll notice that the backing differs on the white versus this silver embossed piece. That can affect the cut settings and results. The woven backing texture can be a bit more difficult to cut and may require higher settings and more passes to cut cleanly.

      I used the 2 mm Manual blade (equivalent of the Deep Cut blade).
      Blade depth – 9
      Force – 30
      Passes – 2-3
      however, that was still not a clean cut, so I then increased the Blade depth to 11 and did 2 more passes.

      In this case, the Embossed texture on the front is uneven and can affect the cut.

      Embossed Faux Leather Initial Ornament

      I did not have all the supplies to finish this out as Amy did, so I used what I had on hand and made my own holly berries and leaves. The holly leaves are drawn from scratch in Silhouette Studio. If you want to learn how, I show step-by-step in the Designing in Silhouette Studio – Creating Keepsake Ornaments class HERE. I cut the leaves from cardstock, painted some small craft balls, and then glued it all onto the ornament.

      Check out Amy Romeu’s Initial Faux Leather Ornament YouTube video HERE for more details on this project. I picked up a neat trick for tying bows and ornament hangers in Amy’s videos, so make sure to check that out too!

      In both the designs shown above, the faux leather was cut for the front and the backside and then glued together so it had a finished look. But for this next project, I used Siser Metal HTV and adhered it to the backside of the white faux leather from Craft Chameleon before cutting.

      Faux Leather with HTV backing

      I pressed it once with the carrier sheet on and then a second time without the carrier sheet for just a few seconds. The second press allows the texture of the faux leather to show through and it is gorgeous! Photos do not do it justice.

      Faux Leather Earrings with Silhouette

      But keep in mind, anytime you add something to a material, that can change the cut settings.

      I used the 2 mm Manual blade (equivalent to the Premium blade).
      Blade depth – 10
      Force – 30
      Passes – 1
      And I probably could have done one more pass.

      Now, what you’ll notice is that all of the pieces are still attached. However, they easily popped out and I only had a few threads to snip. This actually worked better for the next steps as I could keep it all organized in one place until I was ready to press.

      Snowflake Faux Leather Earrings

      I loved the finished look of the Siser Metal HTV on the backside! And I used up a few scraps of Glitter HTV, not much, but it is the perfect project for those scraps that you might have.

      Check out the video on these Faux Leather Holiday Earrings HERE by Amy Romeu.

      And here is one more faux leather design cut with my Silhouette.

      Cardinal Faux Leather Ornament

      This was using the Cardinal Christmas Ornament Design and a piece of blue patterned faux leather from The Polka Dotted Peach.

      Find the Faux Leather Cardinal Ornament video HERE on Amy’s YouTube channel.

      I had so much fun creating along with this event and now have faux leather for many more projects.

      I hope those tips help you to be successful with cutting faux leather with your Silhouette machine.

      You can still purchase the VIP package for the Faux-La-La Crafting Fun and join in on the fun. You get the files for all the projects, all the videos in one place, a printable guide, and more! Check it out HERE for all the details.

      Faux Leather Event

      Save this for future reference by pinning the image below.

      Pinterest Faux Leather with Silhouette

      Enjoy !

      THANK YOU for your support! How can you help? Click HERE & buy a coffee.
      Every little bit helps with the cost of running the site.

      Silhouette Classes

      Never stop learning! Let me help you take the anxiety out of learning with Silhouette and get to creating faster! My Silhouette classes are heavily focused on software, so you can take the skills & techniques taught and apply them to many future projects!

      Silhouette step-by-step Classes by Silhouette Secrets+

      Silhouette Secrets+ with EllyMae
      **This post may contain affiliate links. What that means is that I may receive compensation if you purchase through the links I have provided. The price you pay for the product or service is not higher but I may get compensated for sharing.
      Posted on Leave a comment

      DIY Custom Wine Bag with Artesprix Sublimation Inks

      Let’s Celebrate with a bit of Cheers!

      Whether you are celebrating on New Years or for some other event throughout the year, bring a little something with you and add a special touch. This month I’m sharing how to create a custom wine bag with Artesprix Sublimation supplies in a few easy steps on the Artesprix YouTube channel.

      Affiliate links may be present in the following blog post and as an Amazon Associate I earn from qualifying purchases.

      For this project, I designed the files in Silhouette Studio and cut the stencils with the Silhouette Cameo 5 using Grafix Ultra Clear .007 Plastic.

      Silhouette Cameo 5 Stencil with Grafix

      Stencils are great for text with using the Artesprix sublimation products because text needs to be mirrored, so it will be correct when pressed onto the sublimation blank. A stencil can easily be used on either side, so is very versatile for many projects.

      I used the Artesprix Sublimation Black Ink pad to fill in the design using my stencil, but this project could be done with the Artesprix sublimation paints or markers too!

      Now, to decide which I like better? The text running top to bottom?

      Artesprix Sublimation Wine Bottle Tote

      Or bottom to top?

      Artesprix Sublimation Wine Bottle Tote

      When I asked Google, one reference said, “If the text is to be read above eye level, then it should run from bottom to top. If the text is to be read below eye level, it should run top to bottom.” – Paxton Signs

      So I guess it’s all a matter of how high you hold the wine bottle in the bag when looking at it? Or maybe if you drink the wine in the bag, it really won’t matter?

      Just have fun and create!

      Check out the video tutorial HERE on the Artesprix YouTube channel.

      Artesprix Sublimation Supplies

      Here is a list of the supplies I mentioned and demonstrated in the new YouTube video:

      I created my own stencils and used the following:

      Now, let’s have some fun and Celebrate!

      Custom Wine Sublimation Tote Bag

      I’ll be sharing more so make sure to follow Artesprix on social media to see more projects!
      Artesprix YouTube channel
      Artesprix Blog
      Artesprix Facebook Page
      Artesprix Iron-on-Ink Inspirational Group

      Save this for future reference by pinning the image below.

      Sublimation Custom Wine Tote Bag Artesprix

      Grab some Artesprix sublimation products and get to creating today!

      Enjoy !

      THANK YOU for your support! How can you help? Click HERE & buy a coffee.
      Every little bit helps with the cost of running the site.

      Silhouette Classes

      Never stop learning! Let me help you take the anxiety out of learning with Silhouette and get to creating faster! My Silhouette classes are heavily focused on software, so you can take the skills & techniques taught and apply them to many future projects!

      Silhouette step-by-step Classes by Silhouette Secrets+

      Silhouette Secrets+ with EllyMae
      **This post may contain affiliate links. What that means is that I may receive compensation if you purchase through the links I have provided. The price you pay for the product or service is not higher but I may get compensated for sharing.
      Posted on 8 Comments

      12+ Tips for Etching with the Silhouette Cameo 5

      Can you etch with the Silhouette Cameo 5?

      With the release of software version v4.5.760, the answer is now yes.
      Silhouette Studio v4.5.760 was released to the current version as of December 12, 2023 and it now has the capabilities to use the Silhouette Punch Tool to etch from the Carriage 2 housing. It is designed for etching on the Silhouette Metal Etching sheets and that is the preset that is in now in software v4.5.760.

      Affiliate links may be present in the following blog post and as an Amazon Associate, I earn from qualifying purchases.

      You can read all the release notes for Silhouette Studio v4.5.750 HERE.

      I have tested this and it does work. While I am glad there is finally a good use for the Silhouette Punch Tool, I’d recommend reading through this completely for more information. I didn’t find the Silhouette Punch Tool particular efficient or effective. It took more time to setup and actually complete the “punch” action on adhesive vinyl or HTV than it would take to weed the design. But, that is also a personal preference as well. Those of us who have been working with those materials for a longer period of time have developed more efficient ways to just “get things done.”

      Now, the first thing I will say is that it is slow. It is not a fast process to etch. The default settings for the Silhouette Metal Etching Sheets in the Silhouette Studio v4.5.760 software are Force 1 and Speed 1. This is what I tested at.

      Does it etch? Yes!

      Is this what users wanted? Yes! So Silhouette listened and implemented it.

      As far as what it can etch? My recommendations are thin materials. Thin as in the same thickness as the Silhouette Metal Etching Sheets thin. I did test with a 3 mm piece of acrylic and it was a no-go. To my surprise, the material just barely cleared the roller bar. I could hear it skim the bottom of the inside of the machine as I fed the mat in and out. The Silhouette Punch Tool did clear the top of the acrylic. These are the first 2 factors that I looked at before even attempting to set up an etch.

      Silhouette Cameo 5 Etch Acrylic

      However, when I sent a simple sketch design to etch, the force of 1 was too great for that thickness of material and it went all wonky. I immediately pressed the Emergency Stop (power button) and cancelled the job.

      Silhouette Cameo 5 Etch Acrylic Fail

      Recommendations & Tips for Etching with the Cameo 5

      Tip #1

      Read this entire post first before you decide to update to the v4.5.760. This will depend on when you are reading this post.
      On November 28, 2023, Silhouette Studio v4.5.760 entered Open Beta. At the time that I write this post, this version has not been out long and there are not many users using it. I always recommend waiting when any new version is released until we see how it’s going to affect users. At this moment, as I write this, I have no idea what could pop up and only time will tell. I am part of the Silhouette Beta testing team and can report issues directly to them. This version skipped the Beta testing team and was released directly to the Open Beta, so there hasn’t been much user testing yet.

      Tip #2

      I would suggest starting out with a simple design to test it first. I first used the Joy, Love, Peace, Christmas Tree sketch design by Kristen Magee with the recommended Silhouette Metal Etching Sheets if you can find them or another thin metal blank designed for etching.

      Silhouette Cameo 5 Etching Metal Sheets

      Tip #3

      If the etch goes off course or gets stuck at any time or if you notice that your Autoblade is not adjusting properly or the cut is not in the correct placement after you have etched, you may need to do a blade housing reset.

      If the housing is not in proper alignment, it will not hit the alignment holes to adjust the blade properly.

      Unplug the machine, then carefully move the blade housing all the way to the right and all the way to the left. Do this 3 more times and leave it on the right side. Plug it back in and turn it on. The housing should align to the correct location.
      This is called a blade housing reset and it is a regular part of machine usage since the Cameo 3 and the Autoblade was first introduced.

      Check out this video HERE for more troubleshooting tips that solve most cut issues.

      Tip #4

      Use thin blanks to start and to test with. The etch settings released for v4.5.760 are designed for the Silhouette Metal Etching sheets and the force default is as low as it will go. If you use thicker materials, it may not work well as I mentioned above with my testing on the 3 mm acrylic.

      Tip #5

      Don’t expect speed. The default setting for Silhouette Metal Etching Sheets in the software is a speed of 1. While it does allow you to increase the speed, higher speed is not always better for etching projects.
      As I was doing a large etch project, I felt it was slow, but when I compared it to my older etchings on the Silhouette Curio 1 with the Metal Etching Sheet defaults, the speed was the same.

      Tip #6

      Stay close to your Silhouette Cameo 5. If needed, you can quickly press the Emergency Stop (power button) on the Cameo 5 for the project to immediately stop. The job is lost, but it can prevent a bigger mess from happening.

      Tip #7

      Draw shapes as templates to design within for getting the best possible alignment of the design on the blank. I drew a rectangle 5″ x 7″ in the software and placed it at the 2″ x 2″ grid line on the virtual cutting mat. Then I placed my blank on the cutting mat with the top left corner at the 2″ x 2″ mark.

      Silhouette Studio Etching Setup

      This will only work for proper placement if you are using a Silhouette cutting mat and you load the mat properly. The on screen virtual mat and the Silhouette machine are calibrated for the exact dimensions and margins on a Silhouette cutting mat. Third party cutting mats will not line up and may be thicker, which can also affect the results of etching as well, as it will increase the height of the project.

      Silhouette Metal Etching Sheet Setup

      Make sure after you have drawn the shape for alignment, that you click on the Send tab and choose No Cut under Carriage 1 so it will not cut or etch that shape. It is simply a template to design within and how to line up your blank on the cutting mat.

      Silhouette Cameo 5 Etch

      Tip #8

      Secure your blank to be etched with painters tape. Any movement in the blank on the cutting mat during etching will result in the etch being off. Etching is permanent and there is no way to “fix” when an etch is off.

      Tip #9

      Create templates when using smaller metal blanks that are not as easy to place. Place cardstock on the cutting mat, draw a shape that fits your size blank, cut that shape from the cardstock, DO NOT remove the cutting mat from the machine and secure your blank in place.
      If the cutting mat is unloaded from the machine, it most likely will not line up exactly right again.

      Silhouette Cameo 5 Template for Etching

      Tip #10

      If you are etching a large project such as a full 5″ x 7″ Silhouette metal etching sheet, plug in the USB cord and use it with a direct connection!!! I sent this job to etch and it said it would be 114 minutes.

      After almost 2 hours etching, it stopped and I got a notice on the software that it had lost the connection with my computer. This project is lost. There is no way to restart it.

      Silhouette Metal Etching Sheet Fail

      To be honest, I should know better! The Curio 1 was hardwired to the computer and I would etch projects that took hours on it. Bluetooth is great, but there are so many things that can interfere with it.
      If you are etching, plug in by USB cord and choose that connection so it’s a hard wire connection.

      Tip #11

      Do not trust the timer. The timer is rarely ever correct. I mentioned the estimate was 114 minutes. I started the job at 11:04 am and at 12:56 pm it lost the connection and it still had a ways to go to finish up.

      Tip #12

      I used the Emboss/Deboss Panel using the Deboss option with the crosshatched pattern at a 0.004″ spacing. This panel is unlocked to me because I have a Curio 1 and Curio 2. It may not be available for all users if you do not have a Curio model machine. If it’s not, you would need to use the Sketch Panel as a fill option.

      Test – Test – Test! The only way to know if something is going to work for you is to test it!

      Even though this was a lost etched project, it helped me to see how the machine would do and I now have my Silhouette Cameo 5 plugged in by USB cord for my next project.

      Oh and two last tips!!!

      Protect your cutting mat! Be careful unloading and removing any etch piece. Etching creates a dust or shavings that have been removed from the surface. Those stick very, very well to a cutting mat and will affect the lifespan of your cutting mat. A dirty mat will not hold materials well.

      Silhouette Metal Etching Dust

      Keep your machine clean! The debris created from etching could cause future issues if the machine is not kept clean. Especially with the optical eye and print and cut if the debris is getting under the housing. Here is my blade housing after etching the test subjects this afternoon.

      Silhouette Metal Etching Debris

      You can see debris sticking to the bottom of the housing. I will be cleaning my machine after this etching. A can of compressed air may be worth having on hand if you decide to etch with your machine. Be careful not to get any of the debris in your eyes or to inhale it.

      Silhouette Metal Etching Clean Up

      And a lint roller works great for picking up the debris before it spills onto the cutting mat too!

      Additional Projects I tested

      Metal 1″ Disc

      Silhouette Metal Etching Charm

      This is a 1″ metal disc from Amazon. You can see the tool marks in the metal blanks from the etch fill. It is a pretty rough texture when you run your fingers across it. This photo shows an up close look at that. For all of the etchings I used the crosshatch fill at the 0.004″ spacing.

      Metal Business Card

      Silhouette Metal Etching Business Card

      This is an Anodized Metal Business Card blank with my logo etched using the same settings. I prefer a much smoother etch and feel the solid platform of the Curio machines does a better job for stability. But, this may also be the quality of the etch using the Silhouette Punch Tool on the Curio 2 as well. I will be testing that in the future and will update once I know more.

      Silhouette Metal Etching Sheet #2

      But, of course, I couldn’t stop there. Now that my machine is plugged in by the USB cord and won’t lose the connection, I decided to have another go at it while I finished up the details on the blog post.

      Silhouette Metal Etching Prep

      This time I used Dream Create Inspire Arrow Quote by Sarah Hurley to set up for the etch. The timer estimated 92 minutes and 28 seconds for the complete etch.

      Silhouette Metal Etching Dream Create Inspire

      It ended up taking 101 minutes to complete.

      Silhouette Metal Etching Success

      One other thing to mention that did happen on this project is to keep in mind that any debris build up during the project can cause areas not to be etched well.

      Silhouette Metal Etching Skipping

      This is only visible up close on the blank, but if you get blank areas, this could be why. There is no real easy way to prevent that since you cannot pause and remove the blank like you could with the Curio 1. So just something to keep in mind when etching.

      Here’s a look at all the projects that I completed for this blog post that were successful.

      Silhouette Cameo 5 Metal Etching Projects

      Supplies I used:

      Do I recommend it?

      While the Silhouette Cameo 5 has the ability to etch, I still feel the Silhouette Curio 2 is the better machine and provides a much cleaner etch quality. The Silhouette Curio 2 with the Power Engraver has a pretty smooth finish to the etching versus the rough edges of the Punch Tool in the Cameo 5. However, the Power Engrave tool is a broader tipped engraving tool, like a Dremel tool. For more details on the Silhouette Curio 2 click HERE.

      While it is not my preferred method, it is now an option in the Silhouette Studio software and I know many users will be wanting to test it out.

      If you have any questions please let me know in the comments below.

      Save this for future reference by pinning the image below.

      12+ Tips for Etching with the Silhouette Cameo 5

      Enjoy !

      THANK YOU for your support! How can you help? Click HERE & buy a coffee.
      Every little bit helps with the cost of running the site.

      Silhouette Classes

      Never stop learning! Let me help you take the anxiety out of learning with Silhouette and get to creating faster! My Silhouette classes are heavily focused on software, so you can take the skills & techniques taught and apply them to many future projects!

      Silhouette step-by-step Classes by Silhouette Secrets+

      Silhouette Secrets+ by EllyMae
      **This post may contain affiliate links. What that means is that I may receive compensation if you purchase through the links I have provided. The price you pay for the product or service is not higher but I may get compensated for sharing.