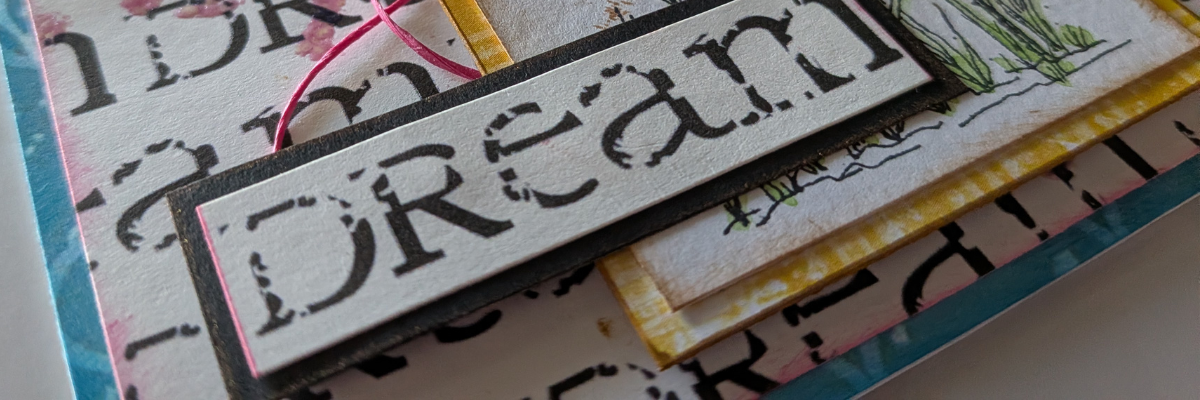
Have you ever made a hybrid card before? If you have made a card, you probably have but didn’t even think about it when you did. It is a card combining digital and physical elements in the creation. I am on the Emerald Creek Design Team the June theme was “Tiny joy, simple things.” I’m sharing the details of this card creation below including a supply list for the materials used in the creation.
Affiliate links may be present in the following blog post and as an Amazon Associate, I earn from qualifying purchases.
Creating the Hybrid Dream Card
First, I started with the Dreams Live Here PNG by Pam Bray and brought it into Silhouette. I only wanted to use the Dream part of it, so I used the knife to cut the design apart. Then repeated the pattern to fill the size I wanted for my card front. I did play around with a couple different layouts with this as you can see in the photo below.
While I could use the Silhouette machine to cut around the design and even set it up as a print and cut, it is sometimes easier just to use a paper trimmer, especially when it’s straight lines.
Next, I used a stencil that I cut with my Silhouette from a mixed media design by Sarah Hurley in a recent Crafting Creativity project, and drew in the stencil with embossing pens.
Then added the Magical Mysteries Kiss of the Fairy Emerald Creek embossing powder and heated that up to melt the embossing powder onto the Dream background. Next, I cut a larger background from the Lemoncello Paper by Pam Bray for the card base and inked the edges of it.
And then adhered the Dream background on top of the blue background.
Then I adhered the Dream background onto the card base and then used foam tape to adhere the matted flowers to the bottom right. For a bit of dimension, I added some pink twine behind the flowers before securing it down. Then I cut just the word Dream from the other pattern I had printed and matted it on black cardstock. I used foam tape on the left side to keep it even with the flower elements.
And the final step was to add 3 clear rhinestones in the top left of the card.
Here are some close up looks at the finished Dream card.
The embossing powder is so cool when it reflects the light.
I love how this card turned out combining digital elements with physical stamping, watercoloring, and inking.
I hope this post on the hybrid card I created gives you some ideas of what you could create. See what supplies you have on hand and what you can combine to create a unique card, tag, mixed media creation and more!
Save this for future reference by pinning the image below.
Enjoy !
THANK YOU for your support! How can you help? Click HERE & buy a coffee. Every little bit helps with the cost of running the site.
Silhouette Classes
Never stop learning! Let me help you take the anxiety out of learning with Silhouette and get to creating faster! My Silhouette classes are heavily focused on software, so you can take the skills & techniques taught and apply them to many future projects!
**This post may contain affiliate links. What that means is that I may receive compensation if you purchase through the links I have provided. The price you pay for the product or service is not higher, but I may get compensated for sharing.
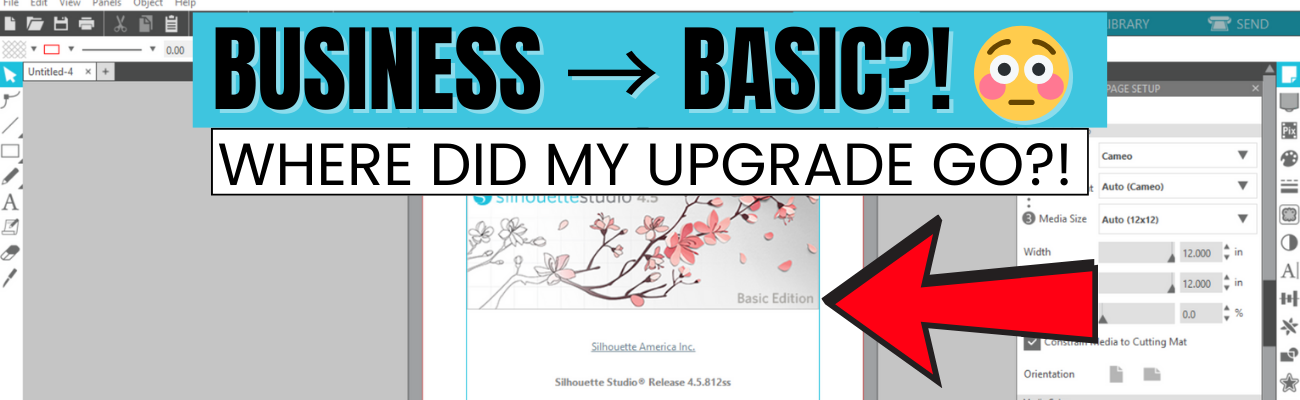
If you’re suddenly seeing Silhouette Studio revert from Business to Basic (or Designer Edition or Designer Edition Plus to Basic) and panicking because your Silhouette upgrade is missing, take a deep breath—you’re not alone, and you didn’t lose your purchase. This is one of the most common Silhouette software issues users run into, and it usually comes down to account login and/or activation, hiccups. In this post, I’ll break down why this happens, what to check first, and how to get your paid features back where they belong. Check out the video below where I walk through the fixes step by step and share additional troubleshooting tips.
Affiliate links may be present in the following blog post and as an Amazon Associate, I earn from qualifying purchases.
Why Silhouette Studio software upgrades disappear?
The most common reasons for a software upgrade to disappear are:
Silhouette Software version update – this does not happen every time you update software versions, but can happen
Computer OS (Operating System) updates – this is on both Windows and MAC computers. Computer OS updates can happen in the background without a user knowing it.
New computer – software upgrade activations are not automatically loaded when you install the software on a new computer
How to Activate a Silhouette Software Upgrade Easily
If you previously had a upgrade active and the Silhouette upgrade is missing, you can easily activate this again simply by going to the top left menu in Silhouette Studio, select Help > Apply Upgrade Edition.
Enter your email address and password associated with your Silhouette account.
At the time I am writing this and recorded the video, I am not recommending Silhouette Studio version 5 due to many bugs in it. If you have a Silhouette Cameo5α (Alpha), then you HAVE to use version 5 and we would recommend v5.0.402 as there a some major issues we’ve seen with v5.0.414. For most Silhouette users, I am recommending v4.5.812 which the screenshots are from above.
Here is a look at Silhouette v5.0.402 and you can see you’ll find it in the same location, however, there is a new splash screen when you open version 5 that you cannot bypass. You can find the Help menu on the new Home Page or on the other tabs in the version 5 software.
If you have never activated a Silhouette software upgrade and you purchased it from a Silhouette retailer, you will first need to apply the upgrade to your Silhouette Account. Please follow these steps to apply the code.
Move to the top right and move the mouse over the person icon, select My Account.
On the left side menu, choose License Keys and apply the Silhouette software upgrade code.
Then follow the instruction shown above to activate the code in the Silhouette Studio software.
This new method of easily activating the Silhouette software upgrades is available in any version of Silhouette v4.4.552 or higher.
Missing Tools & Features in Silhouette Studio?
This is the most common reason Silhouette users notice that a software upgrade has reverted to Basic Edition.
You can easily check what software version and upgrade is active on your Silhouette Studio software and determine if your Silhouette upgrade is missing and not active.
Instructions for Windows users:
Click on Help in top left menu
Then choose About Silhouette Studio
Instructions for MAC users:
Navigate to the top left of Silhouette Studio and select Silhouette Studio in the menu
Then select About
This About window will tell you what version is open and the upgrade that’s active.
If you have a Silhouette software upgrade and it is currently showing Basic Edition in this window, please follow the instructions above to activate the upgrade on your computer.
Silhouette Studio Upgrade Information
Silhouette Studio software upgrades are a one time fee and you do not have to purchase again if it disappears.
The Silhouette upgrades can be active on up to 3 computers or 3 active devices.
With this new system, if you have 3 devices active and log into a new device or Silhouette Web, it will deactivate the software upgrade on the device that is oldest used date. This means you can easily activate the software upgrade on multiple devices, but it will only be active on up to 3 devices at one time.
Something new to mention here is that the new Silhouette Web (still being developed and in beta as I write this), that counts as one of the activations of the software upgrade license. This technically means that if you are logged into Silhouette Studio on your device and you log into the Silhouette web (web based software) on the same device, that it will use 2 software upgrade codes, even though it is the same device.
This is not an issue, but it can catch you off guard when you see the message that one device will be deactivated if you exceed the 3 upgrade log ins.
Silhouette Web is a web based program that allows users who do not have a full computer operating system, such as a Chromebook to connect to a Bluetooth enabled Silhouette machine. It does not have the full Silhouette Studio software option. However, it does have some different features than Silhouette Studio and some of these are only available with a software upgrade. At the time I am writing this, it is still being developed and is changing.
I don’t feel it is stable and there are bugs and issues with it, so I have not done any tutorials with it. To be honest, if you have a computer with Silhouette Studio, I would recommend that to design in.
Another thing to mention here is, if you do decide to try it out, for MAC users, please note that you cannot cut directly from Silhouette Web. This is due to restrictions from Apple that it will not allow a web browser to connect to any outside systems. For Apple users, you would design in Silhouette Web, then open in Silhouette Go (mobile app) in order to connect to a Bluetooth enabled Silhouette machine in order to cut.
Troubleshooting Silhouette Upgrade Activation
If you encounter issues when trying to activate a Silhouette software upgrade, there are a few steps you can do before contacting Silhouette Support.
Try again to log in with the email and password to make sure there was no mistypes or missed keystrokes.
Log into the Silhouette America website HERE. Select My Account under the person icon in the top right > License Keys and do you see your software upgrades?
Log into the Silhouette Design Store website HERE. Can you log in at both websites? The email and password has to be the same on both sites and in the Silhouette library.
If you cannot log in to those 2 websites or the information is not the same on both sites, you can try resetting your password. The password reset is supposed to send a OTP (One Time Password) to your email account. Since the website migration (May 2024), there are issues with this and the OTP does not always come through.
If you still cannot log in or cannot reset your password, then you will need to contact Silhouette Support – support@silhouetteamerica.com
Tips for Contacting Silhouette Support
If you encounter any issues with your Silhouette account and the steps above have not resolved those, you will need to contact Silhouette Support.
Silhouette Support is the only one that can access your account information and investigate or reset things for you.
Here are some tips to help you get resolutions faster:
Email Silhouette Support at support@silhouetteamerica.com – we often have seen users complain they are not getting responses and they didn’t actually contact Silhouette, but had a mistype in their email submission
Provide as much information about the issue you are encountering as possible. Be clear and concise and provide the exact issue encountered as well as the steps you have tried already.
Do not email simply stating “I can’t log in.” That will not get a quick resolution and can be a million different issues.
Provide photos of what you are seeing so the support agent will hopefully understand what you are experiencing.
Follow any instructions and respond to the Support agent with descriptive information on what you did.
Continue to contact Silhouette Support until the issue is resolved.
Don’t be surprised if you get an AI response. This is new and it is Silhouette Supports “quick response”. It will be sent on to an agent after the AI response has been sent. Follow the instructions sent and reply back to their communication.
Don’t be surprised if the Silhouette Support Agent responds with the same response as the AI bot. This is not unusual. Both the AI bot and Support Agent use the Silhouette FAQ to provide initial responses. This is why it’s so important that a user provides as much information as they can when they first contact Support.
Remember that contacting Silhouette Support and stating a basic issue such as “I can’t log in.” or “My machine isn’t cutting.” does not give the Support agent enough information to provide a good troubleshooting answer and they have to start at a million reasons and narrow it down to 1. That can take time and a lot of back and forth with Support. The more information you can provide, the faster your resolution will be … hopefully.
This is one of the most common issues we see users encounter. I hope those tips have helped!
Looking for additional Silhouette Troubleshooting? I have been teaching Silhouette and troubleshooting Silhouette issues since 2016. We have seen a lot of changes and have helped a lot of users. I have launched the new Creative Community with EllyMae where I provide troubleshooting assistance and exclusive monthly tutorials. Find more details on that HERE.
I also have step-by-step classes to help you learn the Silhouette software and your machine – find those HERE.
Save this for future reference by pinning the image below.
Enjoy !
THANK YOU for your support! How can you help? Click HERE & buy a coffee. Every little bit helps with the cost of running the site.
Silhouette Classes
Never stop learning! Let me help you take the anxiety out of learning with Silhouette and get to creating faster! My Silhouette classes are heavily focused on software, so you can take the skills & techniques taught and apply them to many future projects!
**This post may contain affiliate links. What that means is that I may receive compensation if you purchase through the links I have provided. The price you pay for the product or service is not higher but I may get compensated for sharing.
Looking for a fast and easy way to jump into designing with Silhouette Studio? In this quick tutorial, I’ll show you how to create a custom design in under 1 minute! Whether you are brand new to Silhouette or just short on time, this step-by-step guide is perfect for beginners and seasoned crafters alike. From shape tools to compound paths, you’ll learn how to make a project-ready design in no time—ideal for faux leather, fabric, vinyl, HTV, paper crafts, and more. Let’s get designing in 60 seconds or less!
Quick Design in Silhouette Studio
Open Silhouette Studio and grab the teardrop shape from the Flexishapes menu on the left side of Silhouette Studio.
Left click on the design mat and drag down to create the teardrop shape to create approximately a 2″ tall shape. It does not have to be perfect. Then right click and choose Convert to Path.
With the tear drop selected, in the top QAT (Quick Access Toolbar), highlight the numbers in the H box and change it to 2″. Press Enter.
Double click on the tear drop shape to activate the Edit Points. Click on the edit point at the top of the tear drop and 2 blue nodes will appear.
Grab the blue node on the left and drag it out so it is even with the red cut line on the left side.
Grab the blue node on the right side and move it to the right so it’s even with the red cut line.
Ta-da! Ok. It probably took longer than a minute to read the steps and follow them, but you can do this again and could design this shape in less than a minute. But you don’t have to! It’s not a speed test.
If you want to create the hole for the top of the earrings. Grab the Draw Ellipse tool on the left side, hold the Shift key down to draw a perfect circle. Let the mouse button go before you let the Shift key up and you will have a perfect circle. Decide what size you would like and adjust as needed. Place the circle at the top, select both the circle and the tear drop and Align Center.
With both the circle and the tear drop selected, right click and choose Make Compound Path. Fill the design with color and you will see the hole is “punched out” of the tear drop shape.
Quick Video of Designing in Silhouette Studio
Check out this quick video below showing these steps in less than 1 minute.
Save this for future reference by pinning the image below.
Enjoy !
THANK YOU for your support! How can you help? Click HERE & buy a coffee. Every little bit helps with the cost of running the site.
Silhouette Classes
Never stop learning! Let me help you take the anxiety out of learning with Silhouette and get to creating faster! My Silhouette classes are heavily focused on software, so you can take the skills & techniques taught and apply them to many future projects!
**This post may contain affiliate links. What that means is that I may receive compensation if you purchase through the links I have provided. The price you pay for the product or service is not higher but I may get compensated for sharing.
Looking for a creative way to level up your handmade jewelry packaging? In this DIY tutorial, I’ll show you how to create custom earring cards using Silhouette Sketching and vibrant Sakura Gelly Roll pens. These unique earring display cards not only showcase your earrings beautifully but also add a professional, artistic touch to your small business or handmade gifts. Using Silhouette Studio software and your Silhouette cutting machine, you can sketch intricate designs, logos, or text with ease. Whether you’re selling on Etsy, prepping for a craft fair, or making gifts for friends, these handmade earring cards are the perfect finishing touch!
Affiliate links may be present in the following blog post and as an Amazon Associate, I earn from qualifying purchases.
Have you ever made custom earring cards with Silhouette? How about sketched with your Silhouette machine? Why not combine the two and create custom earring cards? I created the projects shown in this post to send with a gift to a friend.
Customize your designs for your specific project, a gift, or just because!
Keep in mind the software and machines are designed as cutting machines, so the red “cut” lines on the screen are exactly how a sketch pen will sketch out. It will sketch the outer lines of a “cut” file. If a design or font is not filled in, the sketch pen will not magically fill things in unless it’s told to.
If you want a design or font to be filled in by a pen, you can use the Sketch Panel/Line Effects Panel to add a fill. Keep in mind that the sketch fill pattern will affect the time to sketch the design. When a design or font is filled in with a small sketch fill pattern, that pen is going over and over an area just like if you were filling in a design or font by hand with a pen. That can mean that it cements the paper to the cutting mat, so be careful removing the materials from the mat.
Sketch designs, fonts, or single line fonts can work better for sketching without having to do much to alter the designs.
However, not all sketch designs or fonts are truly designed for sketching. The file name may simply include sketch, so it’s always good to click on the Send tab and take a closer look to see where the pen may travel to get an idea of what it will turn out like.
Install the pen in the Silhouette machine and test.
The Silhouette pen holders allow for a wide variety of pens to be used in the machines. The installation process is the same no matter if using the Silhouette Type A, Type B, or Type C Pen Holders. Find the collar that fits the best for the size pen you are using and make sure it’s secure.
Did you know that the cap on the Silhouette pen holder has a purpose? Keep the cap! Place the cap on the pen holder when you install the pen and when the tip of the pen touches the cap, that is your pen depth. This should work for most pen types and all Silhouette pen holders.
If needed, you can also use a popsicle or craft stick placed underneath the pen tip when you insert the pen holder in the machine. This will show you if the pen is too far down in the adapter or installed at the correct height. Pens installed too low in the adapter have a greater chance of drawing drag marks.
Silhouette Cameo 3 with Type A Pen Holder
If the pen is too low, simply remove it and lift it up in the pen holder a bit before tightening the collars. Proper setup and testing will save you frustration and drag lines across your project.
If you are working on a project with specific materials such as envelopes, etc. Test on cardstock first to save your more expensive materials.
Sketching a Designwith Silhouette
If sketching and cutting a project, set up the design to Cut by Line Color. I use red lines for the cut lines and blue lines for sketch lines.
I recommend sketching first and then cutting, so there is less chance that the design will move. Do NOT unload the cutting mat after the design has sketched.
Uncheck the sketch lines and check the box next to the cut color, install a blade, and send the job to cut.
Add you earrings and you have DIY custom earrings cards that can be used as gifts and more!
Just get started! Set it up to sketch and just start selecting designs and sketching. It is so much fun to just play around with it, even if you do not have a specific project or purpose in mind. Grab some cardstock and set up the machine to sketch and just play!
Save this for future reference by pinning the image below.
Enjoy !
THANK YOU for your support! How can you help? Click HERE & buy a coffee. Every little bit helps with the cost of running the site.
Silhouette Classes
Never stop learning! Let me help you take the anxiety out of learning with Silhouette and get to creating faster! My Silhouette classes are heavily focused on software, so you can take the skills & techniques taught and apply them to many future projects!
**This post may contain affiliate links. What that means is that I may receive compensation if you purchase through the links I have provided. The price you pay for the product or service is not higher but I may get compensated for sharing.
If you’ve ever created a design in Silhouette Studio and wanted to use it outside the software—whether for DTF (Direct to Film) printing, sublimation, print-and-cut, or any high-quality print project—this guide is for you! With just a few simple steps, you can save your design as a transparent PNG file directly from Silhouette Studio. This method is perfect for uploading to services like Siser®’s Easy® Transfers for vibrant, press-ready DTF prints, but it’s also a great option for any project that needs a clean, high-resolution image. In the video below, I’ll walk you through how to export your design as a PNG and show you exactly how to upload it to the Siser Easy Transfers site to order custom DTF transfers—plus, you’ll get tips to ensure your file is properly formatted for print success. You’ll also find written step-by-step instructions below the video in this post to make it even easier to follow along.
Affiliate links may be present in the following blog post and as an Amazon Associate, I earn from qualifying purchases.
In the video linked above, I show how I created the design featured. I am going to skip right to the steps of saving as a PNG from Silhouette Studio Business Edition. If you would like to see how I create the design, check it out in the video HERE.
When creating your own designs, make sure you are starting with high resolution images. Photos and digital files that are 72 dpi are designed for internet quality images and you want 300 dpi for print quality.
Note: if you are on a MAC, the screenshots below may look a bit different as I am using a Windows computer, however, the process is the same.
Select all parts of the design to be saved. This can be done by left clicking and dragging across the entire design to “rubber band” select everything the mouse moves across.
In the top left corner of Silhouette Studio, select File > Save Selection > Save to Hard Drive.
Using this method will save the design at the size created and not the entire art board. I explain and show a demonstration of why I recommend this method in the video tutorial HERE.
Choose the location you want the file to be saved, name the file, and change the Save as type at the bottom to PNG (or whatever other file type you’d like to save as).
Silhouette has a default DPI (Dots per inch), this is NOT print quality. Highlight the number and change it to 300, then press the Enter key. You will notice that the Pixels for both Width and Height increase. Pixel size is directly related to DPI.
Check the box next to Transparent background if you want a transparent background.
PNG and JPEG files are rectangle shaped files. If a PNG was not designed with a transparent background, it will show as a white rectangle behind the design. JPEG files do not have transparent backgrounds.
The maximum pixel size that can be saved for either width or height in Silhouette Studio is 10,000 pixels.
Make sure to press Enter after changing the DPI or the change will not take effect.
Click the Save button to save the file as a PNG.
Check the file in the saved location to make sure it saved as you want. On a Windows computer, in the Windows folder, move the mouse over the image and it will tell you the pixel size.
To change how you view files in the Windows Folder, select View at the top and select how you want to see those files in the folder.
When using those steps, the design should be saved at 300 DPI from Silhouette Studio.
Save this for future reference by pinning the image below.
Enjoy !
THANK YOU for your support! How can you help? Click HERE & buy a coffee. Every little bit helps with the cost of running the site.
Silhouette Classes
Never stop learning! Let me help you take the anxiety out of learning with Silhouette and get to creating faster! My Silhouette classes are heavily focused on software, so you can take the skills & techniques taught and apply them to many future projects!
**This post may contain affiliate links. What that means is that I may receive compensation if you purchase through the links I have provided. The price you pay for the product or service is not higher but I may get compensated for sharing.
Are you ready to start crafting with your Silhouette Cameo 5 but don’t know where to begin? 🎉 Our brand-new Beginner’s Guide to the Silhouette Cameo 5: Crafting Made Easy is here to help! This step-by-step class is designed with beginners in mind, walking you through everything from unboxing your machine to mastering your first project. Whether you’re brand-new to Silhouette or want to boost your confidence with the Cameo 5, this class is packed with practical tips and easy-to-follow instructions to set you up for crafting success. Let’s get started on your creative journey today! 🌟
Beginner’s Guide to the Silhouette Cameo 5: Crafting Made Easy step-by-step class Click HERE
Take the guesswork out of using your Silhouette Cameo 5 with this hands-on, step-by-step class designed for beginners. You’ll learn how to set up your machine, navigate the essential features of Silhouette Studio, and master the basics of cutting with confidence. This class covers everything from opening the box to getting your first successful cuts, with expert tips all along the way. Perfect for new users, this guide will leave you equipped with the skills and knowledge to bring your creative ideas to life!
Portrait 4 owners: this video course can also be used for Portrait 4 machines as well. Most of the information is the same for both machine models, the main difference is the cutting width of each machine. View an unboxing of the Portrait 4 here.
The supplies needed for this class are minimal. I used Oracal 651 adhesive vinyl, AT 65 Transfer Tape, and Cardstock.
Complete course outline below:
Introduction, Unboxing, and Proper Setup of the Silhouette Cameo 5 – 20 minutes
Unboxing the Silhouette Cameo 5
Explanation of all parts included in the box
Proper Setup of Silhouette Cameo 5 machine
Proper Installation of the included Roll Feeder on the Silhouette Cameo 5
Explanation & Tips to Autoblade Installation and Tool Housings
Silhouette Cameo 5: First Cuts with Adhesive Vinyl & Cardstock – 56:40 minutes
Setting up a Design Using Text
Cut Settings on the Send Tab Explained
2 Ways to Do Test Cuts
First Cuts from Adhesive Vinyl
Explanation of the Autoblade Adjustment
Removing materials from the cutting mat
Weeding Tips
Applying Transfer Tape
Removing the Backing off Adhesive Vinyl & Cutting Tips
Changing Blades & Reinstalling for Cardstock Cuts
Test Cuts on Cardstock
Drawing Basic Shapes & Adjusting a Polygon
Cutting Basic Shapes from Cardstock
Troubleshooting Tips for Cut Issues
Tips to Removing Materials, Saving Adhesive on the Mat, and Materials Not Curling When Removed
More Tips
Additional Resources Terms of Use
This class will help get you up and cutting faster than figuring it out yourself! Help yourself get started quicker and be on your way to more fabulous projects in no time!
Save this for future reference by pinning the image below.
Find more Silhouette resources and tutorials on the A to Z section on the blog HERE.
Enjoy !
THANK YOU for your support! How can you help? Click HERE & buy a coffee. Every little bit helps with the cost of running the site.
Silhouette Classes
Never stop learning! Let me help you take the anxiety out of learning with Silhouette and get to creating faster! My Silhouette classes are heavily focused on software, so you can take the skills & techniques taught and apply them to many future projects!
**This post may contain affiliate links. What that means is that I may receive compensation if you purchase through the links I have provided. The price you pay for the product or service is not higher but I may get compensated for sharing.
Have you ever seen the message stating materials not found when opening a design in Silhouette Studio? Encountering the “Materials Not Found” message in Silhouette Studio can leave you wondering “What is wrong?”. Whether you’re working on a vinyl project, heat transfer design, or a print and cut masterpiece, this error can be frustrating and confusing. But don’t worry! In this post, we’ll explain why it happens and what to do next.
Affiliate links may be present in the following blog post and as an Amazon Associate, I earn from qualifying purchases.
Materials Not Found Message– Silhouette Studio
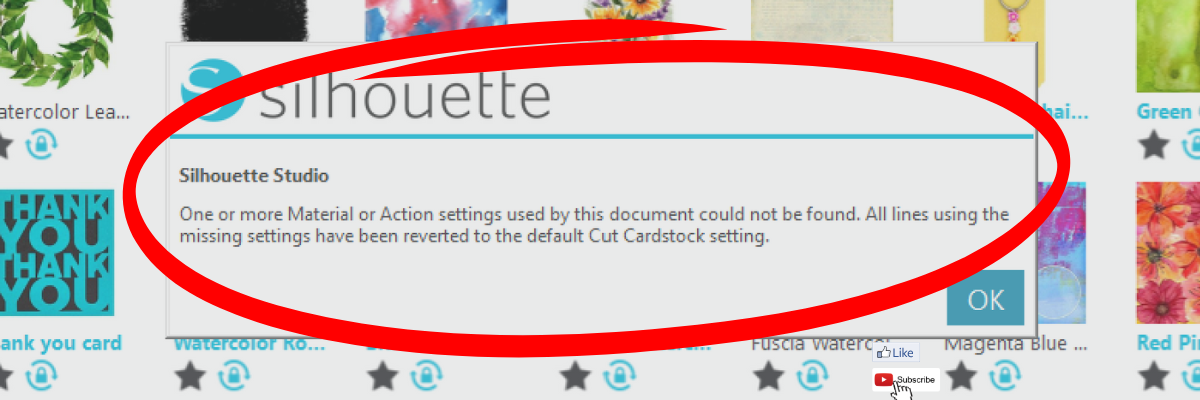
This is what the materials not found message can look like in Silhouette Studio on the Design Tab.
It can also appear when you are opening from the library tab before the image is placed on the design mat.
This materials not found message is not something to be alarmed about. It simply means that the cut setting that the person who created the file had on their software is not found within the Silhouette Studio software on your computer. This could be for several reasons.
The most common reason is that the designer has their own custom setting created and when they saved the design, those cut settings were saved with the file. When opened, if that cut setting is not on your Silhouette Studio software, it triggers this message.
Whether cut settings are saved with a file in Silhouette Studio is dependent on the software version that the design is saved with.
Another reason is that Silhouette has made changes to the cut settings menu and changed names or added/removed cut settings. With the release of newer model Silhouette machines, more cut settings have been added over time to the Silhouette preset menu.
This message is just letting you know that the cut setting has been switched back to the default of Cardstock. Click OK and proceed as usual.
When it comes time you cut the design, select the material that best fits your project and test cut.
While the idea of having a cut setting that works for all users perfectly is appealing, that is not reality. Materials vary worldwide and many factors go into getting a clean cut such as blade life, machine model, cutting mat adhesion, etc.
Here is a quick video clip demonstrating the ‘Materials Not Found’ message that appears when opening a design file in Silhouette Studio.
Save this for future reference by pinning the image below.
Enjoy !
THANK YOU for your support! How can you help? Click HERE & buy a coffee. Every little bit helps with the cost of running the site.
Silhouette Classes
Never stop learning! Let me help you take the anxiety out of learning with Silhouette and get to creating faster! My Silhouette classes are heavily focused on software, so you can take the skills & techniques taught and apply them to many future projects!
**This post may contain affiliate links. What that means is that I may receive compensation if you purchase through the links I have provided. The price you pay for the product or service is not higher but I may get compensated for sharing.
Are you ready to take your wall art to the next level? Or just want to try something new? A busted canvas project is the perfect way to add a bold, trendy touch to your home decor. This creative technique combines texture, dimension, and artistic flair to transform a plain canvas into a statement piece that’s truly one of a kind. Whether you’re a seasoned crafter or new to DIY projects, this guide will walk you through every step of creating your own stunning busted canvas.
First, I don’t think there is a “wrong” way you can do this! Look around your supplies and use what you have and then just keep going. Start with an idea and let it take you from there.
Affiliate links may be present in the following blog post and as an Amazon Associate, I earn from qualifying purchases.
I’m going to share the steps I took, but you can do some of these in any order.
Step 1 – Prep the canvas frame.
With a paint brush or foam brush, add an even layer of Mod Podge to the inside of the back of the canvas frame as a base coat.
Step 2 – Cut the pattern material down to size.
Using scissors, cut the pattern material down to size. This does not have to be exact, but get as close from frame edge to frame edge. You want to make sure the center of the canvas is fully covered.
If using napkins, separate the ply of the napkin so you are only using 1 layer that is the patterned piece. This will ensure that the layers don’t separate later on in the process.
With the pattern face up, smooth down on top of the Mod Podge layer. Use a squeegee to help smooth it down onto the backside of the canvas.
Step 3 – Add an even layer of Mod Podge on top of patterned material.
I used the Mod Podge Sparkle on this one and love it, but of course, not every design will need bling.
Allow it to dry completely.
Step 4 – Measure the backside of the frame.
Measure the inside of the frame and the outer edge of the frame, so you know how large to create the design. Keep in mind that you want the design to be centered and if it’s too big, the canvas edges may hide part of the design.
Step 5 – Pick a background design
For this one, I printed a digital patterned background by Clikchic Designs of the Christmas tree. I started by opening the design in the Silhouette Studio software, set my page to letter size for the Koala Inkjet Glossy Paper, and then drew some rectangles using the measurements I took. This way I knew how large to size the design and what would be seen within the frame.
Then I printed the design.
Step 6 – Trim the background design down to canvas size.
I used a paper trimmer to trim the background design down to the 8″ x 10″ size of the frame.
Step 7 – Decorate the front side of the canvas however you desire.
For this one, I decided I wanted to try to replicate the outer edge design of the patterned background with the blue sky, stars, and snow.
I started with a base layer of a blue metallic paint. Then sponged on a darker blue on top of that. And then added some lighter blue & white paint splatters for the stars. I added a bit of water to the acrylic paints to thin them out and give it some dimension too!
I just kept going to see how it would turn out. I’m learning to do that more and more and just see where it takes me and I’ve been thrilled with almost all the results.
Let that dry completely before moving on to the next step.
Step 8 – Cut the canvas from the backside
Using a sharp utility knife on a safe surface such as a self healing cutting mat, find the center of the backside of the canvas and make slices from the center out towards the frame randomly. The farther back you cut, the deeper the curl will be on the front of the frame.
Step 9 – Secure the background photo to the backside of the frame
Add hot glue along the edges of the frame and line up the background image to secure it to the backside of the canvas frame.
Gluing down the opposite corners to start can help get it aligned properly before you are too committed and the fine tip glue gun can come in handy. Use a squeegee to run along the edges of the background paper and smooth it down to the glue.
Step 10 – Roll back the cut pieces on the front of the canvas
Flip the canvas over and gently roll back the cut pieces. Training the curls by rolling it a bit before gluing can help to prevent lifting after it’s glued down. Once curled as desired, add a bit of hot glue to the end and press it down to the canvas. I found using the end of my paint brush worked well to hold it in place while the glue dried and I didn’t burn my fingers.
Continue around the entire frame until all of the sections are curled and securely glued in place.
Step 11 – Admire your new DIY Busted Canvas artwork
Each diy busted canvas will be a unique creation!
I love how this turned out!
Like I mentioned at the beginning, I don’t think there is any “wrong” way to do this. I’m definitely hooked on the busted technique.
Step 12 – Start planning your next creation
I hope this has given you some creative ideas! Look around your stash and see what you could use to create your own DIY Busted Canvas.
Save this for future reference by pinning the image below.
Find more project ideas and tutorials on the blog HERE.
Enjoy !
THANK YOU for your support! How can you help? Click HERE & buy a coffee. Every little bit helps with the cost of running the site.
Silhouette Classes
Never stop learning! Let me help you take the anxiety out of learning with Silhouette and get to creating faster! My Silhouette classes are heavily focused on software, so you can take the skills & techniques taught and apply them to many future projects!
**This post may contain affiliate links. What that means is that I may receive compensation if you purchase through the links I have provided. The price you pay for the product or service is not higher but I may get compensated for sharing.
The Silhouette Studio software allows you to print directly from the program to any printer that is setup on your computer. This action can be performed easily by going to File > Print and selecting the printer you are using once the design is ready to print. However, the colors you see on the computer screen may not be the actual results that print out from your printer.
Affiliate links may be present in the following blog post and as an Amazon Associate, I earn from qualifying purchases.
Factors That Can Affect Printed Colors
A computer monitor is not calibrated to print colors. Each brand of computer monitor can vary in the visual representative that you see. If you were sitting next to someone else using the exact same Silhouette Studio software version, your colors may not appear the same on screen as that person next to you simply because you are using different computers.
Computer monitors display in RGB (Red Green Blue) versus printers that are CYMK (Cyan, Yellow, Magenta, black) – this can affect the actual printed results versus what is seen on the screen.
There are many different brands and models of printers out there on the market being used worldwide. Different brands and models of printers can yield different results.
Printer ink can vary by brand and yield different results.
The material being printed on can affect the colors. Different materials absorb the ink and the final color you see can vary depending on the material. For instance, plain cardstock will absorb more ink into the paper versus a glossy photo paper. This can make the color appear muted on the cardstock versus a more vibrant print on a shiny gloss of photo paper.
The printer settings selected when printing can affect color outcome. Each printer model has different settings it can print at and what you select for the print job sent can affect the final outcome of colors. For example, draft settings versus normal versus photo quality.
Printer drivers can affect the outcome of colors and other options available, such as print page size, etc. For best results, install the full printer drivers direct from the printer manufacturer’s website for your specific printer model. Simply plugging in a printer or connecting it to your computer does not usually install the full printer drivers. While it may print, it may not have all the options of the full print driver as it’s using a default driver that’s in the computer operating system to perform basic print functions.
Computer operating systems (OS) and updates. Print quality can vary by Windows versus MAC and also by the OS updates on those computer systems. We have seen print color output change overnight with a computer OS update.
Different software programs can have different print color results.
Now that we’ve covered a few things that can make the difference, how can you test what colors you see versus what colors you get when printing?
Silhouette Studio: Color Test Print
Draw out 1-inch squares (or larger if needed) and replicate to fill the page
Open the Fill Color Panel and fill each square with a color that you want to test print.
The full Fill Color Panel on the right side of the Silhouette software has several options for adding colors. Use the preset colors, add your own custom color, or add in colors by HEX, HSL, or RGB codes. Create your own custom color palettes too for easy access on future projects.
I used the Color Cubes by Sarah Renae Clark to fill in a page of color combinations that I want to test print. The color cards give 5 colors with the HEX code for each color and also have shades of that color shown on the card.
In the Silhouette Studio software, at the bottom of the Fill Color Panel, you can adjust the color to another shade easily by moving the custom color dot around on the color palette.
Once page is filled as desired, then select File > Print in top left corner.
Verify on the Print Preview that everything will be printed as desired. The print preview is where you can catch errors before you waste ink printing. For instance, if the design is not showing completely and is cut off, that can indicate the wrong printer is selected or the page size is incorrect. There is still time to make changes before you commit to printing and using ink. If you are doing a print and cut project, verify that all 3 registration marks show as printing completely on the page before you click print.
When ready, click Print. The printer menu will pop up and you can select what options you would like to print at and where to print from. I use the rear tray on my printer when printing any specialty materials or cardstock.
If you make any changes such as the actual printer being used or the page size, you will need to apply those changes and then cancel out to the main design screen to reset those settings completely.
Once printed, you can see how the colors will print on that particular material. It’s always best to test on the actual material you will be using to know for sure.
I printed this on higher quality copy paper using the regular print settings from my printer. I was also notified that one ink cartridge was low on ink, so I know that will affect the colors that are printed as well.
Additional Tips for Printing:
Objects or designs need to be filled with color to print.
Silhouette Studio is designed as a cutting software. That means the red lines you see on the design mat are cut lines for a Silhouette machine to follow. When a shape is drawn or text typed out, it is generally not filled with any color and the software sees it as empty. Which is exactly how it will print to a printer if sent. This is one great thing about utilizing print preview, you can catch issues before you’ve actually tried to print the project.
Cut lines do not print unless told to do so.
There are 2 options if you want the line of an object to print.
1 – Increase line thickness above 0. Any line thickness above 0 will print on the material.
Here is what the text above will show on the Print Preview when the top text line is set to 0 line width and the bottom is set to 1.75.
2 – Select the objects you want the lines to print on and check the Print Lines of Selected Shapes box on the bottom of the Line Style Panel.
Here is what the text above will show on the Print Preview when the top text has the print lines of selected shapes chosen.
There is also an italic note stating: This will display your 0 pt cut lines as 0.1 pt lines in prints and in SVG and PDF exports.
Sublimation prints need to be pressed to show true color.
If you are printing using sublimation inks, the true colors will not show until the design has been pressed. A sublimation print will always look dull or muted prior to pressing. For best results and the most accurate colors, press onto 100% polyester. This will show the final colors
New equipment may not function the same as old equipment.
Getting a new, updated printer model can be a great thing! However, users can be quickly frustrated when things do not work the same or the new printer doesn’t print the same colors the same as the old one did. It can take some getting used to for all new equipment.
Low ink of any cartridge or tank can affect the color outcome.
Most home printers have a set of color cartridges or tanks, for instance, my Canon TS9521C has 3 colors and 2 black cartridges. To make up the colors you are asking it to print, the printer combines those inks in order to make the color output. If a color cartridge or tank is low on ink, it may not yield the desired results.
The results that each user sees and has when printed can vary simply because we all have different equipment we are using.
Save this for future reference by pinning the image below.
Enjoy !
THANK YOU for your support! How can you help? Click HERE & buy a coffee. Every little bit helps with the cost of running the site.
Silhouette Classes
Never stop learning! Let me help you take the anxiety out of learning with Silhouette and get to creating faster! My Silhouette classes are heavily focused on software, so you can take the skills & techniques taught and apply them to many future projects!
**This post may contain affiliate links. What that means is that I may receive compensation if you purchase through the links I have provided. The price you pay for the product or service is not higher but I may get compensated for sharing.
Using patterns in the Silhouette Studio software can give your projects a unique look. Whether you are doing a print and cut project or creating a digital graphic image. Digital patterns can be a great asset to your toolbox. As with many tools in the Silhouette Studio software, there can be multiple ways to do it. I’m sharing 4 ways that patterns can be opened in Silhouette Studio below, but first what is a pattern?
A digital pattern is a photo file. It is typically a JPEG, PNG, or TIFF file format. Before we get too far into it, one thing to note about digital patterns is that they can be quite large. A digital pattern, when designed properly should be 300 dpi for print quality. That means the file size is much greater than your average SVG file. Since every user has a different computer with different specifications, that also means that each user’s computer may handle data differently. When working with heavy data files, close any programs that are not necessary and any tabs within Silhouette that are not needed. I’d also recommend clearing out any Recovered Documents and keep that cleared out as well. This will help your computer and software run as smooth as it can.
4 Ways to Open Patterns in Silhouette Studio
1 – Open the pattern from the Silhouette Library Patterns Folder. If you want to open the full pattern on the design mat, double click on the pattern in the Silhouette Library Patterns folder. If you want to fill a particular shape, click on the shape to select it on the design mat. Then click on the Library Tab, Patterns folder and single click on the pattern. Click back on the Design tab and the shape will be filled with the pattern selected. If you double click with a shape selected, it will fill the shape and then also open the full pattern on top of that too.
2 – Select a pattern from the Fill Color Panel – Tab 3.
3 – Click on the Show/Hide Library icon in the bottom left corner of the design tab. This will open a split screen showing the library and the design tab. This can be much easier to see larger images of thumbnails and design with instead of having to swap back and forth between the Design and Library tabs. Select a pattern the same way as in #1.
4 – Drag and drop a pattern from a folder saved on your computer or storage device. When dragging and dropping, drag the pattern to the shape you want to fill and hold it until the pattern has filled the shape. If you move too fast and release the mouse button too quick a little white rectangle will appear and not go away. The only way to get it to disappear is to close and reopen the software.
I hope these tips have helped give you some ideas on how to work with patterns and create unique projects in Silhouette Studio. Check out the additional resources below to learn even more!
Save this for future reference by pinning the image below.
Enjoy !
THANK YOU for your support! How can you help? Click HERE & buy a coffee. Every little bit helps with the cost of running the site.
Silhouette Classes
Never stop learning! Let me help you take the anxiety out of learning with Silhouette and get to creating faster! My Silhouette classes are heavily focused on software, so you can take the skills & techniques taught and apply them to many future projects!
**This post may contain affiliate links. What that means is that I may receive compensation if you purchase through the links I have provided. The price you pay for the product or service is not higher but I may get compensated for sharing.
THANK YOU for your support! How can you help? Click the link to buy a coffee. Every little bit helps in the cost of running the site.