The Silhouette Studio software allows you to print directly from the program to any printer that is setup on your computer. This action can be performed easily by going to File > Print and selecting the printer you are using once the design is ready to print. However, the colors you see on the computer screen may not be the actual results that print out from your printer.
Affiliate links may be present in the following blog post and as an Amazon Associate, I earn from qualifying purchases.
Factors That Can Affect Printed Colors
A computer monitor is not calibrated to print colors. Each brand of computer monitor can vary in the visual representative that you see. If you were sitting next to someone else using the exact same Silhouette Studio software version, your colors may not appear the same on screen as that person next to you simply because you are using different computers.
Computer monitors display in RGB (Red Green Blue) versus printers that are CYMK (Cyan, Yellow, Magenta, black) – this can affect the actual printed results versus what is seen on the screen.
There are many different brands and models of printers out there on the market being used worldwide. Different brands and models of printers can yield different results.
Printer ink can vary by brand and yield different results.
The material being printed on can affect the colors. Different materials absorb the ink and the final color you see can vary depending on the material. For instance, plain cardstock will absorb more ink into the paper versus a glossy photo paper. This can make the color appear muted on the cardstock versus a more vibrant print on a shiny gloss of photo paper.
The printer settings selected when printing can affect color outcome. Each printer model has different settings it can print at and what you select for the print job sent can affect the final outcome of colors. For example, draft settings versus normal versus photo quality.
Printer drivers can affect the outcome of colors and other options available, such as print page size, etc. For best results, install the full printer drivers direct from the printer manufacturer’s website for your specific printer model. Simply plugging in a printer or connecting it to your computer does not usually install the full printer drivers. While it may print, it may not have all the options of the full print driver as it’s using a default driver that’s in the computer operating system to perform basic print functions.
Computer operating systems (OS) and updates. Print quality can vary by Windows versus MAC and also by the OS updates on those computer systems. We have seen print color output change overnight with a computer OS update.
Different software programs can have different print color results.
Now that we’ve covered a few things that can make the difference, how can you test what colors you see versus what colors you get when printing?
Silhouette Studio: Color Test Print
Draw out 1-inch squares (or larger if needed) and replicate to fill the page
Open the Fill Color Panel and fill each square with a color that you want to test print.
The full Fill Color Panel on the right side of the Silhouette software has several options for adding colors. Use the preset colors, add your own custom color, or add in colors by HEX, HSL, or RGB codes. Create your own custom color palettes too for easy access on future projects.
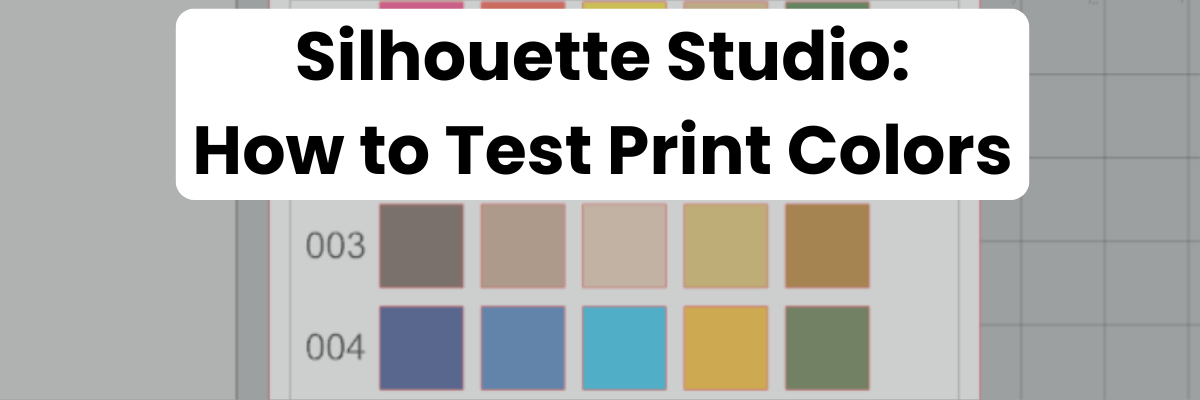
I used the Color Cubes by Sarah Renae Clark to fill in a page of color combinations that I want to test print. The color cards give 5 colors with the HEX code for each color and also have shades of that color shown on the card.
In the Silhouette Studio software, at the bottom of the Fill Color Panel, you can adjust the color to another shade easily by moving the custom color dot around on the color palette.
Once page is filled as desired, then select File > Print in top left corner.
Verify on the Print Preview that everything will be printed as desired. The print preview is where you can catch errors before you waste ink printing. For instance, if the design is not showing completely and is cut off, that can indicate the wrong printer is selected or the page size is incorrect. There is still time to make changes before you commit to printing and using ink. If you are doing a print and cut project, verify that all 3 registration marks show as printing completely on the page before you click print.
When ready, click Print. The printer menu will pop up and you can select what options you would like to print at and where to print from. I use the rear tray on my printer when printing any specialty materials or cardstock.
If you make any changes such as the actual printer being used or the page size, you will need to apply those changes and then cancel out to the main design screen to reset those settings completely.
Once printed, you can see how the colors will print on that particular material. It’s always best to test on the actual material you will be using to know for sure.
I printed this on higher quality copy paper using the regular print settings from my printer. I was also notified that one ink cartridge was low on ink, so I know that will affect the colors that are printed as well.
Additional Tips for Printing:
Objects or designs need to be filled with color to print.
Silhouette Studio is designed as a cutting software. That means the red lines you see on the design mat are cut lines for a Silhouette machine to follow. When a shape is drawn or text typed out, it is generally not filled with any color and the software sees it as empty. Which is exactly how it will print to a printer if sent. This is one great thing about utilizing print preview, you can catch issues before you’ve actually tried to print the project.
Cut lines do not print unless told to do so.
There are 2 options if you want the line of an object to print.
1 – Increase line thickness above 0. Any line thickness above 0 will print on the material.
Here is what the text above will show on the Print Preview when the top text line is set to 0 line width and the bottom is set to 1.75.
2 – Select the objects you want the lines to print on and check the Print Lines of Selected Shapes box on the bottom of the Line Style Panel.
Here is what the text above will show on the Print Preview when the top text has the print lines of selected shapes chosen.
There is also an italic note stating: This will display your 0 pt cut lines as 0.1 pt lines in prints and in SVG and PDF exports.
Sublimation prints need to be pressed to show true color.
If you are printing using sublimation inks, the true colors will not show until the design has been pressed. A sublimation print will always look dull or muted prior to pressing. For best results and the most accurate colors, press onto 100% polyester. This will show the final colors
New equipment may not function the same as old equipment.
Getting a new, updated printer model can be a great thing! However, users can be quickly frustrated when things do not work the same or the new printer doesn’t print the same colors the same as the old one did. It can take some getting used to for all new equipment.
Low ink of any cartridge or tank can affect the color outcome.
Most home printers have a set of color cartridges or tanks, for instance, my Canon TS9521C has 3 colors and 2 black cartridges. To make up the colors you are asking it to print, the printer combines those inks in order to make the color output. If a color cartridge or tank is low on ink, it may not yield the desired results.
The results that each user sees and has when printed can vary simply because we all have different equipment we are using.
Save this for future reference by pinning the image below.
Enjoy !
THANK YOU for your support! How can you help? Click HERE & buy a coffee. Every little bit helps with the cost of running the site.
Silhouette Classes
Never stop learning! Let me help you take the anxiety out of learning with Silhouette and get to creating faster! My Silhouette classes are heavily focused on software, so you can take the skills & techniques taught and apply them to many future projects!
**This post may contain affiliate links. What that means is that I may receive compensation if you purchase through the links I have provided. The price you pay for the product or service is not higher but I may get compensated for sharing.
Using patterns in the Silhouette Studio software can give your projects a unique look. Whether you are doing a print and cut project or creating a digital graphic image. Digital patterns can be a great asset to your toolbox. As with many tools in the Silhouette Studio software, there can be multiple ways to do it. I’m sharing 4 ways that patterns can be opened in Silhouette Studio below, but first what is a pattern?
A digital pattern is a photo file. It is typically a JPEG, PNG, or TIFF file format. Before we get too far into it, one thing to note about digital patterns is that they can be quite large. A digital pattern, when designed properly should be 300 dpi for print quality. That means the file size is much greater than your average SVG file. Since every user has a different computer with different specifications, that also means that each user’s computer may handle data differently. When working with heavy data files, close any programs that are not necessary and any tabs within Silhouette that are not needed. I’d also recommend clearing out any Recovered Documents and keep that cleared out as well. This will help your computer and software run as smooth as it can.
4 Ways to Open Patterns in Silhouette Studio
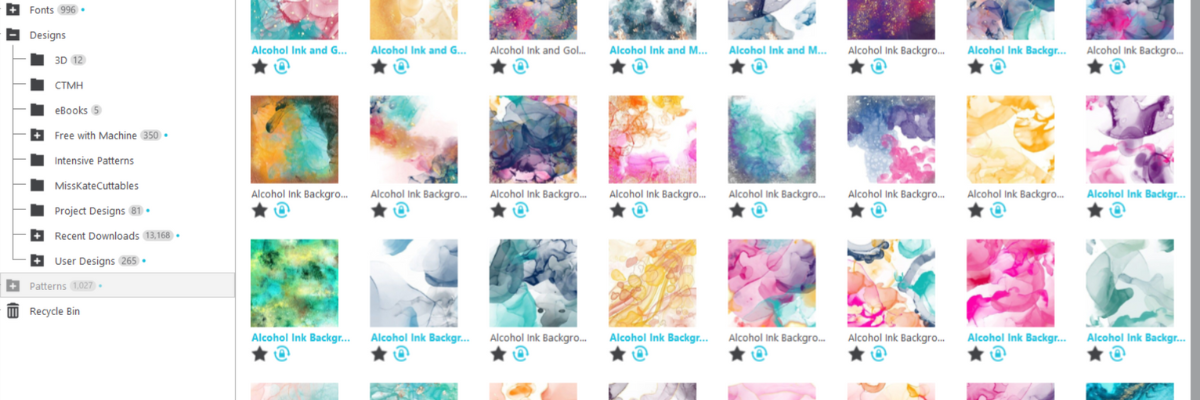
1 – Open the pattern from the Silhouette Library Patterns Folder. If you want to open the full pattern on the design mat, double click on the pattern in the Silhouette Library Patterns folder. If you want to fill a particular shape, click on the shape to select it on the design mat. Then click on the Library Tab, Patterns folder and single click on the pattern. Click back on the Design tab and the shape will be filled with the pattern selected. If you double click with a shape selected, it will fill the shape and then also open the full pattern on top of that too.
2 – Select a pattern from the Fill Color Panel – Tab 3.
3 – Click on the Show/Hide Library icon in the bottom left corner of the design tab. This will open a split screen showing the library and the design tab. This can be much easier to see larger images of thumbnails and design with instead of having to swap back and forth between the Design and Library tabs. Select a pattern the same way as in #1.
4 – Drag and drop a pattern from a folder saved on your computer or storage device. When dragging and dropping, drag the pattern to the shape you want to fill and hold it until the pattern has filled the shape. If you move too fast and release the mouse button too quick a little white rectangle will appear and not go away. The only way to get it to disappear is to close and reopen the software.
I hope these tips have helped give you some ideas on how to work with patterns and create unique projects in Silhouette Studio. Check out the additional resources below to learn even more!
Save this for future reference by pinning the image below.
Enjoy !
THANK YOU for your support! How can you help? Click HERE & buy a coffee. Every little bit helps with the cost of running the site.
Silhouette Classes
Never stop learning! Let me help you take the anxiety out of learning with Silhouette and get to creating faster! My Silhouette classes are heavily focused on software, so you can take the skills & techniques taught and apply them to many future projects!
**This post may contain affiliate links. What that means is that I may receive compensation if you purchase through the links I have provided. The price you pay for the product or service is not higher but I may get compensated for sharing.
Compound paths are one of the things in Silhouette Studio that can take the longest to grasp. We see compound paths every day but are not always really “seeing” them. Most often the initial experience with compound paths leaves you saying, “What the heck?” or something along those lines. Or “Why did it do that?
Affiliate links may be present in the following blog post and as an Amazon Associate, I earn from qualifying purchases.
Compound Paths in Silhouette Studio
In this month’s LIVE YouTube tutorial we covered compound paths and I walked through several different demonstrations starting with simple compound paths and working our way up to a little more complex designs with compound paths.
Those who attended live were able to ask questions and I answered those on the spot and showed additional demonstrations.
Make sure to check out the Events Tab HERE for upcoming LIVE tutorials and more events too!
Save this for future reference by pinning the image below.
Enjoy !
THANK YOU for your support! How can you help? Click HERE & buy a coffee. Every little bit helps with the cost of running the site.
Silhouette Classes
Never stop learning! Let me help you take the anxiety out of learning with Silhouette and get to creating faster! My Silhouette classes are heavily focused on software, so you can take the skills & techniques taught and apply them to many future projects!
**This post may contain affiliate links. What that means is that I may receive compensation if you purchase through the links I have provided. The price you pay for the product or service is not higher but I may get compensated for sharing.
If you have not seen the many thousands of posts on social media, then this may be news to you. Silhouette has been updating their websites. Both the Silhouette America website and the Silhouette Design Store website have been undergoing a major update where all the data has to be transferred from one system to another. Silhouette has run into issues with the site updates.
Updated 7/9/24 10:30 am CDT – Website & Library issues
User’s are starting to receive this email from Silhouette about a “fix” for the library (photo below). It is a slow roll out as described in the email dated 6/25/24.
Silhouette version 4.5.807 that is referenced, was released on Friday, July 5, 2024 as the “fix” under Open Beta version on the Silhouette website. This is all new territory for all of us and we have no idea what will happen or what will come in the future. So far we’ve seen mixed results.
RECOMMENDATIONS:
Do nothing until you get an email from Silhouette that your account is enabled. If you do try to sync before getting the email, then most likely your account is not enabled yet and it won’t work anyhow.
if you decide to test v4.5.807 – turn off and unplug all of your Silhouette machines and DO NOT connect to them until you decide if you are going to keep this version. v4.5.971+ have firmware updates required for newer model machines and is another reason we were not recommending that update. Neither v4.5.791 or v4.5.807 have much testing by users and we reported several bugs in .791. If you decide to keep v4.5.807 – you will need to process those firmware updates if it notifies you. There is no way around that unless you use older software – which means the library and new files may not successfully sync.
or wait and see what happens going forward
I honestly don’t like the fact that a software update is released and users are forced to update if they want their library to sync, but it’s not my call.
If you received the email and after following Silhouette’s instructions still have issues with the library syncing, files not downloading, download failed, logging into the websites, credit balances, subscriptions, or shopping in the Silhouette Design Store you will need to email Silhouette at support@silhouetteamerica.com as the email instructs.
For the best results you can expect from Support, be as detailed in the email and explain the steps that you have taken and provide any photos that help explain your issue as well as what you currently see. This will hopefully help them understand what your particular issue is.
I wish this were different, but please understand we are all experiencing the issues together.
Even if your library is still not syncing, I do have resources that can help for you to still be able to use your Silhouette software and machines….
How to Direct Download from the Design Store video HERE
Library Extractor for Windows and MAC Please read all the notes. This will extract library files that were synced to the computer prior to the website issues. It will not contain any files that have not successfully synced to the library. However, it does extract user created files too! I have tested this and it worked for me.
Please continue reading below for additional information that has been shared during this entire process. It has been a long 50 days as I type this of the mess, but we are all experiencing the issues together.
*****
Silhouette users who are signed up for email notifications were sent an email on May 21, 2024 notifying them of this update. Here is a copy of the email notice I received.
Affiliate links may be present in the following blog post and as an Amazon Associate, I earn from qualifying purchases.
Update: email sent to users on 6/24/24 5 pm CDT
Update: email sent to users on 6/14/24
Update: email sent to users on 5/30/24 “We are aware of the issues being encountered with the new websites. We apologize for any inconvenience and frustration this may have caused. Rest assured we are working diligently to resolve these problems and will have everything up and running smoothly soon. Our intent with this upgrade is to improve your experience and the offerings we provide. We thank you for your patience and understanding.”
The emails are only be sent out to those subscribed to receive their emails. Many users also found that the email ended up in their spam or junk folder, or the email provider marked it as spam and it was not received.
Silhouette also put up a notice on the websites that they were under maintenance starting at midnight on 5/22/24 and hoped it would be complete at 7 am MST on 5/22/24.
Unfortunately, technology did not follow their schedule and we are now (7) 9 days out and it is still not functioning properly.
So here we are…
I am going to provide some information below and will continue to update this post as things progress, so it may be a good one to bookmark for future reference.
Now “hold onto your butts” because this is a lot of information to share below…. (side note: we saw a car decorated as a Jurassic Park tour car last weekend and that saying was on the back window. The entire vehicle was decked out including a dinosaur riding on the dash – so it’s fresh in my mind)
Silhouette Website Updates
Updates 6/14/24 from Silhouette Secrets+ – Recommendations
Do NOT try to sync the library! Syncing has been turned off the past week or so, so it will not work while they continue to work on it.
Turn the library to “Working Offline”. Click the Library tab. Click your name in the top left. Make sure there is a red checkmark next to Working Offline. No red checkmark = not set to work offline.
Do not click the Sync button. I know that is a repeat but we’ve been repeating ourselves thousands of times.
Download any files directly from the Silhouette Design Store – video on how to do that HERE
If you are getting an error accessing the Design Store – type “Silhouette Design Store” into a Google search and use that link that comes up. Do not use auto suggested links as some are not working since the change over.
You can continue to use your Silhouette software and machines!!! Find out how HERE
Start thinking about storage options for the future!!! Once this is over and we see how things will be in real time, I will put out information on “What to Do Now”. But, I cannot begin to do that until I know how the changes will affect the Design Store and what the functionality will be. I use an external hard drive, well actually, I use 2. One is my everyday working hard drive and the other is my backup of that hard drive and I try to backup weekly. It will depend on how many files you save and how much you save on the size of storage you need or how often you back up your files, but I’d recommend at least once a month. Find out more on backups HERE *this is good information to save for the future!!!
UPDATE 6:00 PM CDT 6/9/24 Please read entirely.
Updates are still in process and they do not expect them to be fixed until sometime later this week….. that’s an estimate at this point.
DO NOT try to sync your libraries – it will not work as it’s been turned off while they are trying to fix it. If your library happens to sync, it’s a fluke and they might be testing things and have turned it back on for a short time. We have recommended this entire time to keep the library at Working Offline. That means you should see a red check mark next to Working Offline in the Library menu when you click on your name. If there is no red checkmark, it is NOT set to Working Offline completely.
Sales tax – sales tax charged “should” be fixed. Sales tax will be charged in all states that require that sales tax be charged in. It’s the law!!! It should only apply to purchases made with a credit card or Paypal. Anything covered by your subscription credit completely, should not be charged sales tax. If you go over your credit balance, you will be charged tax on that because it’s over the credit balance. There may still be issues here and there because they are NOT done fixing it.
Design Store sale – is 50% off but you may need to click on the actual item and the Quick Add to cart in order to see the sale price accurately. I did report that. Check out how to direct download your files from the Silhouette Design Store while these updates are being fixed HERE.
Free files – do NOT use the link in the email that Silhouette sent. It is not showing properly. I reported that too. Go directly to silhouettedesignstore.com and log in, then it should show properly.
Silhouette Design Store Access – we’d recommend that you DO NOT use the button in the Silhouette software to access the Design Store. Use a web browser and log in for best results. There are issues with accessing it through the button in the software.
Logging in to the Design Store – you WILL need to log in each and every time you visit the Design Store. Yes, we all know it’s a pain in the butt…. but it’s better than it was before during this mess, so I count that as a win right now. We need the little wins!!! Type in your email and password each time. DO NOT use the computer’s autofill for best results as we’ve seen issues with that too.
Cannot log in – you can try a password reset but there are no guarantees. If you cannot log in, then you will most likely have to wait until the mess is fixed.
Please continue reading below for additional information and specifics on the issues users are encountering during these updates.
Update 6/24 10:00 am CDT updates ongoing….. New video on how to direct download Silhouette Design Store files on the Silhouette Secrets+ YouTube channel HERE.
Update 6/5/24 8:30 am CDT Updates are still ongoing. Issues reports are listed below.
Update 6/4/24 5:30 am CDT Updates are still ongoing. Many different issues reported and being experienced by users and myself. – new designs not downloading properly – Silhouette library will not sync – maximum number of devices reached error – passwords not working (make sure you are accessing the Silhouette Design Store from a web browser, not the button in the software. And do not use an autofill on the computer for the password for best results) – credits and subscriptions not showing properly (they will address this as soon as the updates are functioning properly and they can get into the system to start fixes)
I do feel that a lot of the issues will resolve themselves once the websites are fully functional and stable. Right now, it’s having a major issue syncing the massive amounts of user data to each user’s Silhouette software.
Currently, I have 2 computers that the library is all messed up. I try to sync each day and it gives me a new error. I have tried every trick in my tool box to see if it will work and some have just made it worse. If your Silhouette library is showing up, I’d recommend turning it to Working Offline (instructions below) and do not try to sync it until this is all over. If your Silhouette library is not showing properly, I do not have a solution for a “fix” at this time. I’ve tried it all and it has just made my 2 computer libraries worse.
I will continue to update when I start seeing things change.
Update 6/2/24 4:20 pm CDT The updates are still in process and I am still seeing as well as experiencing issues. Lots of issues reported by users and they are not all the same. I hope for more progress this week.
I was able to shop in the Silhouette Design store last night and it was faster, however, I had mixed results on syncing to my library on 2 computers. My test computer, is a mess. It did say it was synced but only shows the new files I purchased as Download failed and 200 free with machine designs. The 2nd computer I tried to sync, which before had my full library synced on, has not deleted everything but the free with machine and the new files I bought last night. However, those files all show as fully synced and do not show as Download failed. My 3rd working computer is set to work offline and I am not risking it at this moment.
I am recommending that users do not try to sync their libraries or it can have a mixed result.
Update 6/1/24 11:00 am CDT As I type this to try to provide more information, the Design Store is not loading for me at all – I get a 504 error…. but if you can get it to load, the following information may be relevant.
Seeing all kinds of odd behaviors as listed below. Nothing is consistent and users should expect to see odd things if they are trying to sync, buy designs, or download designs. There is nothing we can do but wait to see what happens.
NEW!!! Direct Download option of Silhouette Designs. Click on heart or person icon in the top right of site. On the left side, select Downloads. Click on the thumbnail of design and it should open the downloads window. However, it is not easy to search through your designs for a specific file and you may spend more time scrolling and waiting on pages to load. Might work in a pinch, but will take time to process.
However, note that the site is super slow and the more users try to access it will affect the results. This is a catch 22 – it’s not functioning properly yet, but they also need traffic in order to see how that function is working and to be made aware that it is not going to hold up to the “normal” flow of user traffic. Please be aware of this and understand that at this moment, all I can guarantee is that it is NOT working properly and is super SLOW, if you can get the site to even load.
At this point, the only thing we can count on is…. it is going to take time for it to all be “normal” again.
Update 5/31/24 6:00 pm CDT We are starting to see some changes occurring. Some users have been able to log in and see their designs. However, we are also seeing a lot of strange and misfit information too! I do not think it’s over, but at least a step in the right direction. Some of the things we are currently seeing are: – file names not matching thumbnails – only free files showing – some not able to log in – download failed on files when library syncs – new files are not showing download failed – Silhouette Design Store is slow – syncing is super slow – website in and out at time I don’t think it’s over, but a few more good reports than there were earlier today!!!
——–
What we do know:
the websites are currently undergoing updates
anything that “talks” to the Silhouette servers can be affected
Silhouette is aware and is continuously working on it
Silhouette Support has been bombarded with complaints & user issues
Silhouette Support cannot “fix” anything at the moment until the website updates are finished
No one can do anything to “fix” it at the moment until the website updates are completed and stable
I have been reassured that the data is still there and Silhouette can see it, but we as a user may not be able to “see” it during this update because of the issues they are working through
I do believe that most of the issues we are seeing will be resolved when the Silhouette websites are 100% fully functional and stable. Most of the issues “should” work themselves out on their own once the systems are stable.
What is affected?
It might be easier to list what is not affected. Currently anything that has to “talk” to the Silhouette server to receive data may be affected. This includes the Silhouette library, Silhouette Design Store, and everything in between.
The Silhouette Design Tab and the cutting machine capabilities are all offline, so they should be able to still be used. However, we’ve already had reports starting today that the software is crashing when the library is trying to log back in or sync.
What can you do?
First, don’t panic. It won’t help anything and it will not “fix” it.
I am going to list some things that you can do to hopefully continue working in your Silhouette software below and I will update this as it progresses.
1 – If it’s possible, turn off the WIFI/internet from your computer for the next step. This will ensure that it will not try to “talk” to the servers before you complete the next step.
2 – With WIFI/internet disabled on the computer, open the Silhouette software, click on the Library tab in the top right corner and then click on your name in the top left corner of the library. Check the box next to Work Offline.
Now you “should” be able to use the Silhouette software without it trying to connect to the servers. You should be able to turn on the WIFI/Internet on your computer again.
Continue using your Silhouette Studio software and machines to cut projects as needed. You will be able to open any .studio files that you have saved from an external source such as your hard drive. If you have the Silhouette Studio Designer Edition upgrade or higher, you will be able to also open other file types such as a SVG file, which is a cut file as well.
If your Silhouette library is still showing, you will be able to use any files currently in the library (if it’s not showing at all, please continue reading below)
Save any files you are designing to an external source by using File > Save As > Save to Hard Drive and select a location.
3 – Click on your name in the top left corner and select Library Export. Save that file to your computer or an external source with the current date.
4 – Click on your name in the top left corner and select Export User Created Files. Save that file to your computer or external source with the current date.
Both steps 3 & 4 can be performed if your library is still showing and I am only recommending as a precaution. As a note, these are 2 steps that we recommend users are doing on a regular basis anyhow.
5 – Do NOT log out of the Silhouette library.
6 – Do NOT try to sync the Silhouette library.
7 – At this time, I do NOT recommend shopping in the Silhouette Design Store. The more users who are trying to access the Design Store website or trying to sync their accounts is bogging down the system. Having multiple web pages open on your computer trying to access designs “faster” in the Silhouette Design Store is not helping anyone.
8 – At this point and time, Silhouette Support cannot do anything to “fix” the issue. They are in the same boat as we are while we wait for the company in charge of the migration to figure their stuff out. Silhouette Support has received thousands of emails, many of which are complaints about how users don’t like the colors, the headers, the look in general, etc. All of those emails will take time to answer, but currently there are no answers until the websites are functioning properly again.
Silhouette Support is responding to the thousands of emails and here is an example that does confirm they are aware of the issues and continuing to work on it.
“Thank you for your email. We are sorry to hear of the issue encountered. Thank you for your continued patience. we have worked diligently over the weekend to get the website back to normal operation. Some things may still be non-functioning as the data that is being transferred from our old website to the new one is massive. Rest assured , none of your libraries have disappeared and will soon be functional once all of the data is transferred. You can expect some functions to be back to normal while others are not. The website will be very slow while all of the data is still transferring as well as the web traffic we are experiencing from customers trying to log in, change passwords and sync their libraries. We apologize for the delay in getting the website back to 100%. We are continuing working on this behind the scenes and we have a dedicated team that has worked through the weekend, the holiday and nights in order to move this process along. Again, we appreciate your patience and hope to have all sites back up and functioning as normal soon. We hope this information is helpful. Please let us know if you have any other questions.” Silhouette Support Team
9 – Do NOT uninstall and reinstall the Silhouette software. At this point, if you do, you may not be able to get it reinstalled and set up again. It will not “fix” this issue.
At this time there is nothing anyone can do to speed this up. The company in charge of the migration is working on it and we just have to wait. It is 15+ years of data that is being moved and stabilized onto a new system.
No one wants to be in this situation, especially Silhouette. But, at the moment we are in it and there is absolutely nothing you can do about it.
What to do if your Silhouette library has disappeared?
Updated Information 5/31/24 We have received reports that some users have been able to get their libraries to sync. However, reports go back and forth on it will sync and then kick them out again, and then they get error notifications. Users are still having issues and behavior is unknown.
If your library does sync, we would highly recommend that once that is complete, change the Silhouette library to “Working Offline” as explained above. We would recommend not trying to sync again until the websites are completely functioning and stable or you risk losing the library again.
—–
5/29/24 – original publication Unfortunately, there is nothing that can be done right now.
The Silhouette library “talks” to the Silhouette servers and if it cannot communicate with the server, it cannot pull the data it needs to show you the library.
I have been told that Silhouette can see the user information and all the information is still out there, but users just cannot “see” it in the library currently due to the upgrades.
I know it won’t help at all and will just make some users angry, but try not to panic. Panicking will not help the situation and it will only add to your stress. Silhouette is aware and they are trying to fix it.
I do believe that once the Silhouette website updates are complete that a lot of these issues will “fix” themselves and we can get back to our projects.
At this time, I am NOT recommending that users import a backup of the library into the Silhouette software simply because I have no idea how that might be treated once the Silhouette websites begin functioning again. It is possible it could duplicate the entire library, throw an error because it “thinks” the cloud storage is full, or freak it out altogether and do something different. It may cause more issues and take longer to resolve than if we just wait it out.
What to do if your Silhouette upgrade disappeared?
Unfortunately, the answers don’t get any happier. At the moment, there isn’t much you can do. In order to activate the upgrade, the software has to “talk” to the Silhouette server to get that data.
Your choices are:
try to activate the upgrade again under Help > Apply Upgrade – enter only your email and password
wait until the Silhouette websites are functioning again
If you do try to log in and activate the software upgrade again, please be aware that it may or may not work. If it cannot connect to the Silhouette servers to get that information, then it won’t work and you do risk the Silhouette library trying to sync and disappearing.
But, if you are trying to activate the upgrade to open SVG files, it may be worth the risk to still continue to work with the Silhouette software. Only you can make that decision.
What to do if you received an email that there was an error with your payment
With the systems down and not functioning properly, I know many have received emails that there was an error with their payment. This is probably not something to do with your actual payment method, but caused by the updates. At this point, we don’t know
Here is how I suggest you proceed:
1 – I would check with your payment source and see if the payment did actually go through. If it did grab a screen shot or photo of that. Gather the information you can from your payment source.
2 – Contact Silhouette Support with the information & provide a detailed description of what has happened. However, understand that Silhouette Support is backlogged with user emails and they currently cannot do anything to “fix” the issue until the system is back completely. At this time, all they can really do is respond with a message like I showed above.
So my recommendation is to add this to your to-do list to contact Silhouette Support when the websites are back online, functioning, and stable if you do not see that the issue has been resolved under your Account on the website.
Please understand that it will take time for all the issues to work out once the Silhouette websites are updated, functioning, and stable. The more information you can provide in your email to Support the faster the issue can be addressed.
What to do if you had credits expire during this down time?
At this point and time, there is nothing that anyone can do to fix that during this migration time frame. Silhouette is waiting on the company who is migrating all the data to get it stabilized and they cannot make any changes during that time.
Once the Silhouette websites are functioning properly and stable, they will begin addressing these issues and the expired credits is on their list. I have submitted the issue to several at Silhouette and they are aware. They want to fix it, but have to wait just like we do.
As mentioned, Silhouette Support is bogged down with complaints about everything from hating the new colors to actual real issues. I’d recommend making an note of what credits expired and once this is all said and done, compose a nice email to Silhouette providing the information you have.
Two things to remember here: 1. Silhouette Support agents have no control over this either, but they are taking the brunt of all the nasty emails and people yelling at them 2 – “You catch more flies with honey than vinegar.” – a please and thank you can go a long way. I’ve seen some of the emails that are being sent as users share online, they are not nice at all. Your email may make all the difference in that person’s day! I understand we are all frustrated, but it’s not their fault, they are just doing their job to respond to as many support requests as they can in their work day, including all the ones complaining about the colors of the website.
When will the updates be done?
At this point, we are on day (7) 9 and they had hoped it would be done overnight on 5/22. That did not happen, so the best answer I have for that is something I say to my kids when they ask when dinner will be ready….
It will be done when it’s done.
It is not what any of us want to hear, believe me – I know!
I am just as frustrated, if not MORE than you are! We have fielded thousands and thousands of comments, posts on social media, emails, and messages in regards to this. We CANNOT fix it either and all we can do is provide the information that we are seeing and experiencing.
I have been a Silhouette user for 11+ years now and this is the first time this has ever happened. They are changing system completely and things happen. It is not the norm and rarely are we ever down this long.
Now, a bit of humor because if I don’t laugh at something I might scream….
A few designs from my Silhouette library that you may want to grab once everything is back to “normal”.
This pretty much describes the last week as we have tried to navigate these issues and respond to thousands of user posts, comments, emails, and messages.
As a note, I grabbed that design before the typo could be fixed in the Silhouette Design Store a long time ago and have kept for my own use. I had planned to make a sign for my studio with it at some point. It fits in with the Swift Creek Customs logos I designed.
And after this is all over and done with, we might all need badges.
Note: I have NOT linked these designs as I am staying off the Silhouette Design Store website until the issues are resolved as I advised above.
We are all in the same boat… up a creek without a paddle…. we will get through it! Hopefully the information provided above can help most users.
I have also compiled a long list of issues we have seen or experienced and have sent that off to several of my contacts at Silhouette. They are aware of the issues and will continue to work through them as they can. The most important factor right now is getting the Silhouette websites functioning and stable, then other issues can be addressed. Hopefully, many of those issues will be resolved simply by the website functioning properly again.
Note: this blog post will be updated as information changes
I don’t even know how to sign off on this post…. to all my fellow Sh*t Creek members – hopefully we will have a resolution soon!
THANK YOU for your support! How can you help? Click HERE & buy a coffee. Every little bit helps with the cost of running the site.
Silhouette Classes
Never stop learning! Let me help you take the anxiety out of learning with Silhouette and get to creating faster! My Silhouette classes are heavily focused on software, so you can take the skills & techniques taught and apply them to many future projects!
**This post may contain affiliate links. What that means is that I may receive compensation if you purchase through the links I have provided. The price you pay for the product or service is not higher but I may get compensated for sharing.
In this Let’s Explore v4 tutorial, we will cover the Silhouette Cut by Fill option. The Silhouette Studio software, has 4 options on the Send Tab on how to send the design to be cut – in the top right corner of the Send tab you will find the options Simple, Line, Fill, and Layers.
Affiliate links may be present in the following blog post and as an Amazon Associate, I earn from qualifying purchases.
The Silhouette Cut by Fill option allows you to cut a project by fill color. The Silhouette software generates the list shown under the Fill option based on the colors that you (or the designer) has filled the design with.
In this example using the Mardi Gras Mask file by Cut Files Makers, the file is already filled with color. If a design is not, you would need to select the pieces you want to fill and then select the color you want designated for that piece from the Fill Color Panel on the right or the Fill Color icon in the QAT in the top left of the Silhouette Studio software.
In this Send – Fill option, you have each fill color separated out in it’s own line and you can adjust the settings accordingly.
If you see an option that has a crosshatched pattern in it, that means there is no fill color for that cut line. This can happen when shapes haven’t been filled with a color or there is an image such as a png or jpeg on the file.
Details of the Silhouette Cut by Fill Color
Let’s take a look at what the actions are at the top of the Send tab in Silhouette for Cut by Fill Color.
Tool No. Choose whether you will be using Tool 1 or Tool 2, also called Carriage 1 and Carriage 2
On/Off Checked = Cut lines On Unchecked = Cut lines Off
Bold color lines will be around the design that the cut lines are turned ON for. Notice the purple and yellow lines are not bold since they are turned OFF. Some colors are more difficult to see the bold edge, such as white.
Weld The outer edge of overlapping objects of the color selected will be cut. Welding typically combines objects, but in this instance, the objects remain separate and the Cut Edge is activated.
Fill Color The same colors of the fill that were set up on the Design Tab, should all show in the list under Fill Color. Different shades of a color will show up as different options.
Material Choose the Material type you are using for each color. Each fill color will need to be changed separately if you did not select the material on the Simple tab before clicking on the Cut by Fill Color option.
Action Choose what action you will want to perform.
Tool/Carriage Choose what tool you will be using to perform the action.
If you were to keep all of the colors checked and have the cut lines ON, the order in which they appear in the list is the order in which the action will be done. For instance in my photo that would mean, the green would cut first, then the yellow, and then the purple.
You can rearrange the order by clicking and grabbing a color and move it up or down in the list as shown in the video below demonstrating with the line color option.
Moving down the right side of the Send tab – Fill Option, you will see that the cut settings are expanded further down to show what the settings are for each option you have chosen.
The color that is highlighted (selected) at the top of the panel will be the settings that you see at the bottom. In my photo, the green color is highlighted, so it shows the settings for the green lines in the bottom.
Here is where you can adjust the settings as needed. The key here is to make sure that the color you want to change is the one highlighted at the top AND the color shows on the bottom. We are seeing many users changing the settings for the wrong color.
You can also add a Pause in between the difference color actions if you would like to do that versus unchecking the box to turn the cut lines off. Each user is going to vary in what they prefer to do. I prefer to check and uncheck the boxes as needed, just in case I have to step away from my machine. But you can test out which way works best for you. See a quick demo of Adding a Pause HERE.
Now, the rest of this panel is the same as when using the Simple tab. Check out the in-depth tutorial on the Send Tab – Simple Option HERE for all those details.
Save this for future reference by pinning the image below.
Enjoy !
THANK YOU for your support! How can you help? Click HERE & buy a coffee. Every little bit helps with the cost of running the site.
Silhouette Classes
Never stop learning! Let me help you take the anxiety out of learning with Silhouette and get to creating faster! My Silhouette classes are heavily focused on software, so you can take the skills & techniques taught and apply them to many future projects!
**This post may contain affiliate links. What that means is that I may receive compensation if you purchase through the links I have provided. The price you pay for the product or service is not higher but I may get compensated for sharing.
Affiliate links may be present in the following blog post and as an Amazon Associate, I earn from qualifying purchases.
One of the most asked questions we see is about software upgrades and unlocking features in the Silhouette Studio software.
Silhouette Software Upgrades
Software upgrades can be purchased through an authorized Silhouette retailer. Please be careful buying through sites like Etsy, etc. as they can sometime not be the real deal or exactly as advertised. Look for reviews first.
Sales happen often – check each one to see where you might score the best deal!
What is an upgrade?
A software upgrade is a code you purchase that unlocks additional features in the software. It is a one-time fee that can be active on up to 3 computers per code.
I highly recommend at least the Designer Edition upgrade for all of my students. It makes life easier and saves you time and headache. Just being able to open a SVG file and cut is well worth it.
But I LOVE the Business Edition upgrade because it unlocks it ALL and I never have to question if some tool/feature is available to me. Both are well worth the investment!
Don’t let the name “Business” edition fool you though – you do not have to have a business to use it or have it be useful. There are just some features that are helpful to those that run a business such as using multiple machines.
If you have the basic (free) software, you will want to purchase 1 of 3 options depending on what upgrade you want to go to: Option 1 – Silhouette Studio to Designer Edition (highly recommend at least this) Option 2 – Silhouette Studio to Designer Plus (unlocks a few more features – see below) In all honesty, if you are upgrading to Designer Edition Plus, you might as well go all the way and unlock it all Option 3 – Silhouette Studio to Business Edition (unlocks it all)
Now here is the important part, if you already have an upgrade, you only need to purchase the step up to the next level you want.
For instance, if you already have the Designer Edition upgrade but you want to go to Business Edition, you want to buy the Designer Edition to Business Edition upgrade. You do not need to buy the full upgrade. You would purchase the level that you need to go from to the level you want to be at. On the Silhouette website, you simply select the Business Edition upgrade, and it will recognize which upgrade(s) you already have when you are logged in and only show the price for the upgrade you need.
Now, keep in mind, if you purchase the upgrades in steps it is no different than purchasing the upgrade all together.
What does each level of upgrade do?
Here are a few of my favorite features and the ones I find most might use in the software:
Designer Edition unlocks:
Ability to open SVG and pdf file directly in the software
Edition Toggle (this is great for those of us who teach, so we can see exactly what the students see in their version) And more…
Now, the list above is not the extensive list of all the features unlocked with each upgrade. However, it is a list of the features I find the most useful in each upgrade. For the complete comparison chart click HERE to go look at Silhouette America.
I want you to be successful and use your Silhouette software to the fullest!
How to activate the upgrade
It is now easier than ever to activate an upgrade!
I have all the details outlined in this post depending on what software version you are currently using.
Additional Resources on Silhouette Upgrades & Troubleshooting:
If you have question about an upgrade just let me know in the comments below.
Save this for future reference by pinning the image below.
Sign up for the Silhouette Secrets+ Newsletter for more information delivered to your inbox each week!
Silhouette Secrets+ Newsletter
Never miss out on the news, tips, “secrets”, deals, classes, and more that I share on Silhouette Secrets+. Sign up for the newsletter and get information delivered to your inbox every Friday. Unsubscribe at any time.
THANK YOU for your support! How can you help? Click HERE & buy a coffee. Every little bit helps with the cost of running the site.
Silhouette Classes
Never stop learning! Let me help you take the anxiety out of learning with Silhouette and get to creating faster! My Silhouette classes are heavily focused on software, so you can take the skills & techniques taught and apply them to many future projects!
**This post may contain affiliate links. What that means is that I may receive compensation if you purchase through the links I have provided. The price you pay for the product or service is not higher, but I may get compensated for sharing.
Designing in Silhouette Studio does not have to be difficult or complicated. With a few basic tools, you can create your own designs to use in projects.
Anyone can do this! Yes – that means you! Let me show you how!
This technique could be used for a variety of projects from adhesive vinyl, heat transfer vinyl, cardstock and more! It is how I created the Swift Creek Customs logo that my husband and I use for our shirts, social media logos, project creations, watermarks, and more!
What would you use it for? Let us know below.
————————–
Updates and News
As social media evolves and followers are seeing less and less of what they want, there are 2 additional ways you can follow along with Silhouette Secrets+ and get information direct to your inbox.
Blog Notifications
Subscribe to the blog below – this means you will get notified by email each time a new blog post is published on the Silhouette Secrets+ website.
Enter your email address to follow this blog and receive notifications of new posts by email.
Weekly Newsletter
– Subscribe to the weekly newsletter – New! Subscribe HERE Every Friday I will publish a newsletter that features tips, “secrets”, tutorials, and more. Sign up for the weekly newsletter and get information delivered straight to your inbox. No more relying on social media to show you information I share!
Enjoy !
THANK YOU for your support! How can you help? Click HERE & buy a coffee. Every little bit helps with the cost of running the site.
Silhouette Classes
Never stop learning! Let me help you take the anxiety out of learning with Silhouette and get to creating faster! My Silhouette classes are heavily focused on software, so you can take the skills & techniques taught and apply them to many future projects!
**This post may contain affiliate links. What that means is that I may receive compensation if you purchase through the links I have provided. The price you pay for the product or service is not higher but I may get compensated for sharing.
Over the years the Silhouette Studio software has changed. If you’ve been using Silhouette for a while, you may have seen it, but if you are new, you may not have noticed these changes.
I’m sharing an updated tutorial today on the Page Setup Panel in the Silhouette Studio software v4.5+. With new versions, new features are added or moved. This means the panels change and sometimes they can change quickly.
If you are still using an older version of software or yours looks a bit different, that is ok – you do NOT need to update. Check out these older tutorials HERE for more details. This is all dependent on your software version. Again, I DO NOT recommend you update just so it looks like this tutorial, especially if your software is running just fine.
From this screen we can tell what the exact software version is and what level of upgrade the user has. This helps immensely in troubleshooting issues with users as some bugs can be version specific.
Let’s Explore v4 – Page Setup Panel
The Page Setup Panel is found in the top right corner of the Silhouette Studio software and it opens automatically when you open the software.
It is one of the most important panels in the software because it’s where you tell the program, and ultimately your Silhouette machine, exactly what you are doing.
Simply click the top right icon if you need the Page Setup Panel to open again.
Now, let’s take an in-depth look at what is included on this panel. As I mentioned above, it is one of the most important panels in the setup for your projects.
At the top of the Page Setup Panel is the Design Area Setup.
This is where you tell the software and machine exactly what you are using.
#1 – Machine This where you tell the software what machine you will be using.
With the release of v4.4 software, several changes were added and you have more options in the machines selection, even if you do not own that particular model machine.
#2 Feed Type This one you may or may not see. It is completely dependent on what Silhouette model machine you have. This option will show up when the Cameo 4, Cameo Plus, Cameo Pro, or Portrait 3 models are selected. This is only an option for the Silhouette Auto Sheet Feeder.
#3 – Cutting Mat This is where you tell the software & machine what size cutting mat you are using or if you are not using a cutting mat.
When a cutting mat is selected, you will see the cutting mat appear on the screen. Notice the gray border around the cuttable area. The Silhouette software virtual mat is calibrated exactly to a Silhouette cutting mat. This is how the machine knows how far in to pull the cutting mat before it starts the cut.
The black arrow is ALWAYS the top of the cutting mat that is the leading edge going into the machine, no matter what direction it is turned on the screen.
When no mat is selected, you will only see a white page and you are telling the machine to start the cut at the top of the material.
#4 – Media Size This means your page size or your material size. Media = material.
Select from the preset option in the drop down or set your own custom size in the width and height boxes.
Transparency Slide the transparency slider over to reveal the cutting mat below the media page.
At 0.0% it means the media will be white* (*read below for additional information)
As you slide the Transparency up, it reveals the cutting mat below. The media becomes more transparent on the mat. The photo above shows at 65% transparency.
I use this option all the time when making projects. It is how I line up multiple colors of material on one cutting mat and send it through the machine to cut once. Check out this tutorial on Cutting Multiple Colors at Once HERE. It also is how I make my mats last longer and save the adhesive on my cutting mat. Shhhh don’t tell anyone!
Constrain Media to Mat This was introduced in v4.4 and it is often confusing for users. Basically it means with this option checked that the media will not go outside of the cutting mat borders, no matter what the user sets it to.
As as example, if I set the media size to 14″ wide and 11″ height, with the Constrain Media not checked, the page/media will hang off the edge of the cutting mat as shown in the photo.
With the Constrain Media to mat, it will not allow you to set the custom media size to larger than the cutting mat size. It will automatically recalculate that based on the machine selected and cutting mat selected.
Orientation This is in reference to your media size. Portrait Orientation is vertical and Landscape is horizontal. Here is an example of Portrait Orientation.
With the release of v4.4 software versions there was a bug released that we call the “orientation bug”. It is a bit difficult to explain in photos and this tutorial is already photo heavy, so I would recommend checking out the video tutorial HERE for more details on that. At the time I write this, the “orientation bug” has been present since July 2020, so I don’t really see it going away. I explain in the video how it works and why.
Now let’s take a look at the bottom half of the Page Setup Panel.
Media Color This is new and was introduced somewhere around v4.4.8xx.
This was implemented as a user request to make it easier to see what a design might look like on top of a particular color instead of drawing a rectangle behind the design and filling it with color.
It does not print or cut, but simply changes the color of the background of the media set in #4 at the top of the Page Setup Panel.
Rotate View This is a visual reference only! Rotate the cutting mat or material (set to no mat) on the screen for better viewing while you are designing.
No matter what direction you rotate the mat on the screen, the black arrow is ALWAYS the top of the cutting mat or leading edge of the material that gets fed into the machine.
Show Print Border Check this option and a gray box appears around the area that is set by the current printer set up with your computer. I recommend checking this box anytime you are doing a print and cut project or printing from the Silhouette Studio software.
The Print border does NOT affect your cutting ability. It only affects printing and if your design is outside of your print border, it will not print. This is especially important if your registration marks for a print and cut are outside of this area and do not print properly.
Show Cut Border Check this option to see a red border for the maximum cuttable area on the media size you have setup.
If you do not see your Cut Border extended to the edge of the page and you want it to, click the gear icon in the bottom right corner to open the Preferences Panel. Then select the Defaults tab and check the box to Cut to Edge of Page. Click Apply (if available) and OK.
I work with my Cut Border on the majority of the time. It is especially handy when you are cutting without a mat and need to know the space you have to place your design so it will cut.
Look at where the red cut border is adjusted to when cutting without a mat. This is for a very specific reason! The left and right margins and the 1″ on the backside are for the rollers on the machine to securely grip the materials as it’s being cut. If you try to “trick” the machine, you risk the material falling out of the machine when it’s cutting. It’s an easy way to waste a good piece of vinyl.
Whew! Who knew the Page Setup Panel contained so much information! It is one of the most important panels as it’s where you start with the setup of your project!
Save this for future reference by pinning the image below.
Enjoy !
THANK YOU for your support! How can you help? Click HERE & buy a coffee. Every little bit helps with the cost of running the site.
Silhouette Classes
Never stop learning! Let me help you take the anxiety out of learning with Silhouette and get to creating faster! My Silhouette classes are heavily focused on software, so you can take the skills & techniques taught and apply them to many future projects!
**This post may contain affiliate links. What that means is that I may receive compensation if you purchase through the links I have provided. The price you pay for the product or service is not higher but I may get compensated for sharing.
Eclipse cards – have you seen them? This is a technique that has been around the card making community for quite some time and seems to be making a comeback lately.
In April, I released a video tutorial on the Swift Creek Customs YouTube channel sharing how you can create these cards in the Siser Leonardo Design Studio software and now am sharing the new video tutorial showing step-by-step in the Silhouette Studio software. Not just 1 card though, I have 4 (well, actually I made more than that) eclipse cards to share with you. You’ll see in the video why I ended up with more.
I have to say that these cards are definitely better in person than a photo can capture, so I recommend you give it a try and see what you think.
Let’s take a closer look at some photos and I’ll share the supply list below too!
Affiliate links may be present in the following blog post and as an Amazon Associate I earn from qualifying purchases.
This is the first style of eclipse cards I share how to create in the tutorial. I share some tips for working with print and cut graphic files in Silhouette too!
Photographing the cards from an angle gives you an idea of the dimension of the card. Some cards can be difficult to see the effect when looking straight at the card.
In this card, I used circles to give it a new dimensional look. You could use any shape you want. I’ve seen many variations out there and it gives it a unique look. My husband saw this one and said, “That would look good with a bubble pattern.” So guess what I bought? Watch for some new cards coming soon!
And you can also use text. In the tutorial, I show how you can use text in 2 ways to give each card a different look. Again, photos do not do these justice, especially looking straight on.
But coming at it from the side, you can see the dimension in the card. I share some tips and tricks to working with the text to create these 2 opposite effects of the cards with text.
I think this one might photograph the best from this angle, so you can really see the dimension.
Make sure to like, subscribe, and click that bell for notifications of future content on the Silhouette Secrets+ YouTube channel! Thanks for your support! I’d love to hear what you thought in the comments on the video tutorial too! Thanks for your feedback and engagement on the video!
Save this for future reference by pinning the image below.
Enjoy !
THANK YOU for your support! How can you help? Click HERE & buy a coffee. Every little bit helps with the cost of running the site.
Silhouette Classes
Never stop learning! Let me help you take the anxiety out of learning with Silhouette and get to creating faster! My Silhouette classes are heavily focused on software, so you can take the skills & techniques taught and apply them to many future projects!
**This post may contain affiliate links. What that means is that I may receive compensation if you purchase through the links I have provided. The price you pay for the product or service is not higher but I may get compensated for sharing.
I am so glad I added a sublimation printer into my craft studio!
It can be an investment and while I don’t use it daily, it does come in handy. Especially for gifts!
If you are not familiar with the sublimation process, I have several tutorials on the website HERE that explain it more in-depth. But in reality, it basically is creating the design, printing, and pressing that design to the blank or substrate.
Flat objects are much easier to press on than curved surfaces, but as with everything, it all just takes practice!
Sublimation does require special equipment such as a sublimation printer, paper, ink, and blanks that are all made for this process. But, it can also be a great way to add graphics that are difficult to cut with a cutting machine to objects for customization.
Affiliate links may be present in the following blog post and as an Amazon Associate I earn from qualifying purchases.
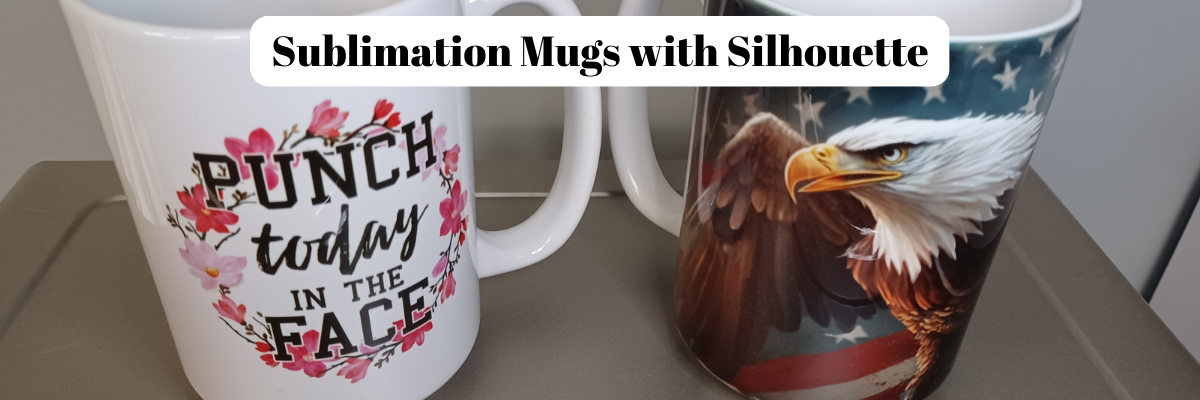
Once I’ve decided on the design, I measure the coffee mugs to see how much space I have to work with.
Then I draw a basic shape in the Silhouette Studio software to create a “template” to design within.
If I have extra space on the page, I’ll try to fill it up with another design. But, sometimes that takes me too long to decide on what I want to print, so I just go ahead and get my project started. In this case, I tried to print a couple pen wrap designs. That didn’t work out in the end as my pen template wasn’t quite long enough, but it was worth a shot.
Then I trimmed them down to size with my paper trimmer.
Next, I cleaned the mugs first with an alcohol swab to get any oils, dust, or debris off. Dust or debris can cause discoloration and odd spots on the finished project.
Then I clean with a lint roller for any fibers. Most times, you cannot see these fibers until after an object has been pressed, which can affect your final outcome.
Once it’s clean, I try not to touch the outside of the mug or blank, so there is no debris or oils transferred. Once it’s completely dry, I wrap or place the design on the mug and secure with heat tape. Make sure to get it secure on the mug and as centered as you can. Sublimation is permanent.
The parchment paper is very important otherwise the ink can transfer to your silicone wrap. That ink could transfer to a future project. I ended up ordering a 2nd set because I didn’t think to protect my first 15 oz wrap and it now has ink on it.
I preheated the Oster oven I have to 400 degrees. Once preheated, I carefully placed the mugs inside for 12 minutes. Make sure to check your specific sublimation mugs for the time and temperature that you should use.
Once cool enough to handle, I removed the sublimation paper and heat tape to reveal the design.
And they were ready to mail to my folks. Unfortunately, the eagle mug did not make it to Montana in one piece. I had saved my file in the Silhouette Studio software and all I had to do was print and press again. Now to get it in the mail and hopefully this time it arrives safely.
It took me longer to write out this post than it did to make the actual project.
I am loving having all the options. I do find that I still need to print from my Epson F170 printer at least every couple weeks or I end up having to do a print head cleaning. Sublimation ink is different than inkjet inks and if left too long without use the printer lines can get clogged up.
Hope this has given you some ideas of the possibilities with a sublimation printer and how easy it can be.
Save this for future reference by pinning the image below.
Enjoy !
THANK YOU for your support! How can you help? Click HERE & buy a coffee. Every little bit helps with the cost of running the site.
Looking for more in-depth, step-by-step classes, check out all of my online Silhouette classes on my Teachable site HERE.
**This post may contain affiliate links. What that means is that I may receive compensation if you purchase through the links I have provided. The price you pay for the product or service is not higher but I may get compensated for sharing.
THANK YOU for your support! How can you help? Click the link to buy a coffee. Every little bit helps in the cost of running the site.