Using patterns in the Silhouette Studio software can give your projects a unique look. Whether you are doing a print and cut project or creating a digital graphic image. Digital patterns can be a great asset to your toolbox. As with many tools in the Silhouette Studio software, there can be multiple ways to do it. I’m sharing 4 ways that patterns can be opened in Silhouette Studio below, but first what is a pattern?
A digital pattern is a photo file. It is typically a JPEG, PNG, or TIFF file format. Before we get too far into it, one thing to note about digital patterns is that they can be quite large. A digital pattern, when designed properly should be 300 dpi for print quality. That means the file size is much greater than your average SVG file. Since every user has a different computer with different specifications, that also means that each user’s computer may handle data differently. When working with heavy data files, close any programs that are not necessary and any tabs within Silhouette that are not needed. I’d also recommend clearing out any Recovered Documents and keep that cleared out as well. This will help your computer and software run as smooth as it can.
4 Ways to Open Patterns in Silhouette Studio
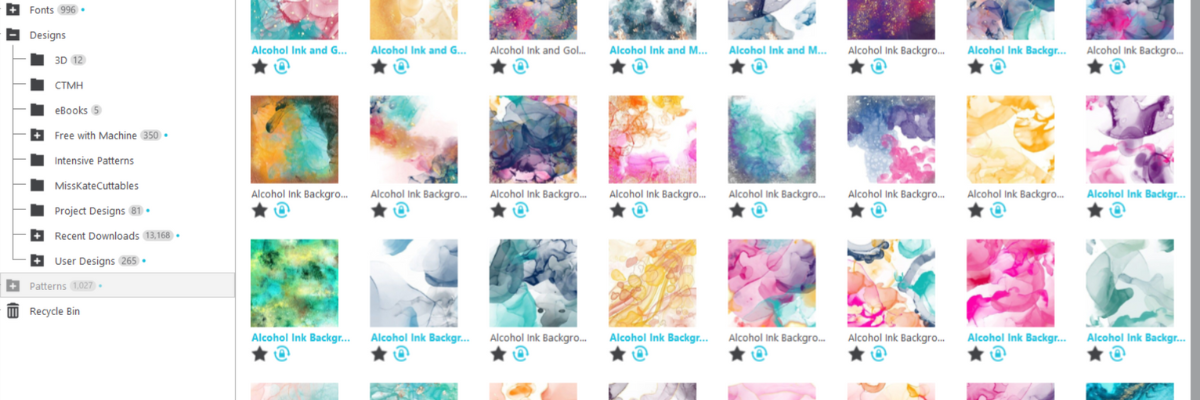
1 – Open the pattern from the Silhouette Library Patterns Folder. If you want to open the full pattern on the design mat, double click on the pattern in the Silhouette Library Patterns folder. If you want to fill a particular shape, click on the shape to select it on the design mat. Then click on the Library Tab, Patterns folder and single click on the pattern. Click back on the Design tab and the shape will be filled with the pattern selected. If you double click with a shape selected, it will fill the shape and then also open the full pattern on top of that too.
2 – Select a pattern from the Fill Color Panel – Tab 3.
3 – Click on the Show/Hide Library icon in the bottom left corner of the design tab. This will open a split screen showing the library and the design tab. This can be much easier to see larger images of thumbnails and design with instead of having to swap back and forth between the Design and Library tabs. Select a pattern the same way as in #1.
4 – Drag and drop a pattern from a folder saved on your computer or storage device. When dragging and dropping, drag the pattern to the shape you want to fill and hold it until the pattern has filled the shape. If you move too fast and release the mouse button too quick a little white rectangle will appear and not go away. The only way to get it to disappear is to close and reopen the software.
I hope these tips have helped give you some ideas on how to work with patterns and create unique projects in Silhouette Studio. Check out the additional resources below to learn even more!
Save this for future reference by pinning the image below.
Enjoy !
THANK YOU for your support! How can you help? Click HERE & buy a coffee. Every little bit helps with the cost of running the site.
Silhouette Classes
Never stop learning! Let me help you take the anxiety out of learning with Silhouette and get to creating faster! My Silhouette classes are heavily focused on software, so you can take the skills & techniques taught and apply them to many future projects!
**This post may contain affiliate links. What that means is that I may receive compensation if you purchase through the links I have provided. The price you pay for the product or service is not higher but I may get compensated for sharing.
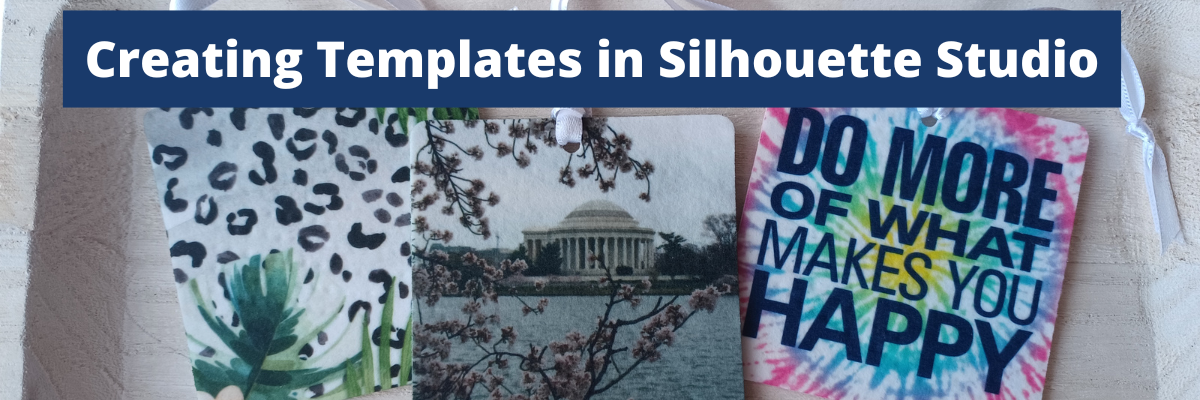
In today’s tutorial I’m going to share how I create a template file in Silhouette Studio that can be reused for future projects. In this particular example, I’ll be using an air freshener sublimation blank. But, this same technique can be applied for all kinds of future projects. This is a great trick to have in your toolbox, especially if you are using the same blanks over and over.
Affiliate links may be present in the following blog post and as an Amazon Associate I earn from qualifying purchases.
With sublimation it is a good idea to make your print a bit larger than actual size, so you have a little wiggle room when placing your image on the blank. Add a small extra border to the exact measurement you took of the blank and use that as your template.
If you plan to print several on the same page, make copies of the template shape. If needed, check the Show Print Border option on the Page Setup Panel – Tab 1 to see where your printer page margins are and make sure your design won’t get cut off.
When you have the shape, save the file as your template file that can be reused in the future.
When you are ready to use the template file, open it, then choose File > Save As and rename it for your current project.
Now, we can fill the template shapes with the images or patterns for the project. If your sublimation blanks are double sided, you will need patterns for both sides.
How to Fill in Template Shapes
With Silhouette Studio you have so many options to design within your template shapes. Here are a couple ways.
Or access larger images of the Patterns folder from the Show/Hide library option by clicking the folder icon in the bottom left corner of the Silhouette Studio Design Tab.
This will open up a split screen between the library and the design area. It can be easier to view things from the library, especially patterns at a larger size.
Or drag and drop a photo from your computer into the shape too!
If you do add elements and you want both sides to match exactly, make a copy of the one you altered and delete the template. Then they will match exactly.
Make sure to save your file often and keep in mind that the more graphics you add to a file it increases the size of that file. If you find your computer taking longer to process, it could be due to large photos and patterns.
When you are ready to print, go to File > Print and follow the direction for printing to the sublimation printer you have.
Check that the print came out properly. Any text should be mirrored when it prints because it’s an ink transfer.
Sublimation on Air Freshener Blanks
Cut the printed designs apart and secure the print to the sublimation blank with heat tape.
Even though these are double sided, you still want to press each side separately. The side with the print should be the side that is against the top platen of the heat press, so it gets the adequate heat for a full transfer.
Use a piece of parchment paper on the bottom of the heat press surface to protect it. Then place the sublimation blank on top with paper side up. Cover with another piece of parchment paper to protect the top platen of the press.
Press the sublimation blank according to the manufacturer’s instructions. For these air fresheners it calls for 400 degrees F for 60 seconds with medium to firm pressure. Hot peel!
Be very careful when removing the items after pressing as they will be hot. Throw out any parchment paper that has ink on it as it can transfer to the next blanks or your press. These are a hot peel and you better be quick about it! I would recommend having heat safe gloves ready to go. I had to run get mine the first time and it was not quick enough.
I found it much easier to press 1 at a time and then after remove the sublimation paper quickly and press it down on my Artesprix Heat Safe Protective Mat to help it stay flat and not curl.
I learned several things during this process. At first I tried to press 3 at a time. I wasn’t fast enough to remove the paper before they cooled and the paper stuck to the blank. I’ll work on ways to remove that in the future and see if I can save those blanks.
Once cooled, secure the sublimation print to the blank with heat tape on the other side of the blank. Press again at the recommended time and temperature and quickly remove the sublimation paper.
Important Tips
Follow the instructions for any sublimation blank or material you are using. These specified “hot peel” and I definitely found that out the hard way. The first 3 I did, did not turn out because I wasn’t fast enough.
Get extra blanks. Especially if it’s the first time you are working with a material! Extra blanks are always a good idea.
Only press one air freshener at a time so you can work quickly. Unless you are pressing the entire sheet of fresheners with the same pattern. Then you can do the full sheet with a full printed sheet as Heat Transfer Warehouse showed in this tutorial HERE. They also share how to scent the fresheners there too!
Keep in mind that when you are pressing a print to a surface, the surface can affect the final colors as well. You can see in my projects that my darker photo of Washington D.C. looks a bit darker and not as bright as the others. That is due to how the photo started and the surface of the blank too!
I think this might be my favorite one!
Save this for future reference by pinning the image below.
Enjoy !
THANK YOU for your support! How can you help? Click HERE & buy a coffee. Every little bit helps with the cost of running the site.
Looking for more in-depth, step-by-step classes, check out all of my online Silhouette classes on my Teachable site HERE.
**This post may contain affiliate links. What that means is that I may receive compensation if you purchase through the links I have provided. The price you pay for the product or service is not higher but I may get compensated for sharing.
Affiliate links may be present in the below and as an Amazon Associate I earn from qualifying purchases.What that means is that I may receive compensation if you purchase through the links I have provided. The price you pay for the product or service is not higher but I may get compensated for sharing.
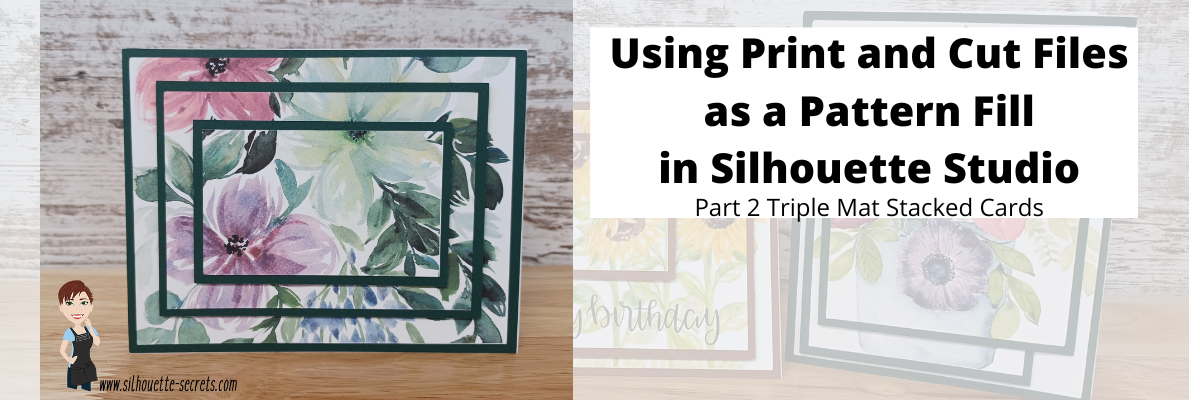
In Part 2, I am sharing how you can use a print and cut file and use it as a pattern fill.
I hope you get into the Silhouette software and play today!
I would love to see what you are creating with your Silhouette software or machines! Feel free to post on my Facebook group at Silhouette Secrets with EllyMae.
Save this for future reference by pinning the image below.
Enjoy !
THANK YOU for your support! How can you help? Click HERE & buy a coffee. Every little bit helps with the cost of running the site.
Or if you are looking for more in-depth, step-by-step classes, check out all of my online Silhouette classes on my Teachable site HERE.
**This post may contain affiliate links. What that means is that I may receive compensation if you purchase through the links I have provided. The price you pay for the product or service is not higher but I may get compensated for sharing.
I love being able to recreate just about anything in the Silhouette Studio software!
I’ve seen the triple mat technique in the stamping community for many, many years and even created cards with stamps using this same effect. Today we are going to take a look at how we can easily recreate this look with any pattern in the Silhouette Studio software.
First, a great big Thank You to Teresa P. for inspiring and helping with this tutorial.
I also have a video tutorial on my YouTube channel HERE.
Blue words in this tutorial are linked to more information on that particular topic. Click on the word and it will open a new window with a tutorial on that subject.
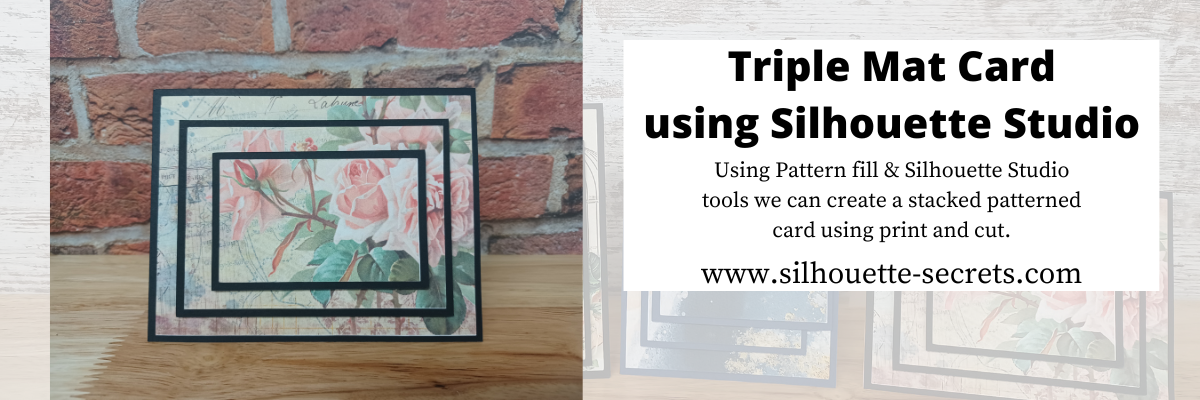
Creating a Triple Mat Card with Silhouette Studio
Open Silhouette Studio and set up the Page Setup Panel. Select Letter size media or the size page you will be printing on. Select Portrait Orientation. I have the best results with print and cut on Portrait orientation.
I will be using a standard U.S. card size in the tutorial, however, you can adjust this to your desired card size. Create along with me for the technique and then play around with the sizes you normally create a card in.
Using the Drawing Tools on the left side, draw a rectangle any size.
Make a copy of the rectangle. There are about 10 different ways (or more) to copy and paste in the Silhouette Studio software. A couple are Ctrl+C and Ctrl+V, right click choose copy & paste, or right click and choose duplicate. My favorite shortcut is to hold down the Alt key (Option on a MAC) then move the mouse over the red cut line and the cursor changes to a +. Left click on the mouse and drag a copy away.
Resize the 2nd rectangle to 5.25″ W x 4″ H.
Do this 4 more times and resize each rectangle as shown below.
Rectangle Copy 3 – 4.5″ W x 3.25″ H Rectangle Copy 4 – 4.25″ W x 3″ H Rectangle Copy 5 – 3.5″ W x 2.25″ H Rectangle Copy 6 – 3.25″ W x 2″ H
You should end up with 6 rectangles all at different sizes that will make up the stacked technique.
Select Rectangle #1, hold the Shift key down and click Rectangle #3 & #5 to select them all at once. Move those off the design mat area to the gray holding area. Next, with all 3 selected, fill those with black using the Fill Color in the QAT or the Fill Color Panel on the right side. These are the mats that will be cut out of black cardstock or any other color you desire.
With the 3 rectangles centered and selected, right click and choose Make Compound Path. Compound paths are one of the most difficult concepts for a Silhouette user to understand. However, in this case, we are using the Compound Path option in a little bit different way. Check it out below.
Next, click on the Show/Hide Library option in the bottom left corner.
This opens up a split screen of the Library and the Design tab.
Click on the Patterns folder in the library.
Affiliate links may be present in the below and as an Amazon Associate I earn from qualifying purchases.What that means is that I may receive compensation if you purchase through the links I have provided. The price you pay for the product or service is not higher but I may get compensated for sharing.
Now, it may look a bit odd right now, but hang tight and you’ll see the magic happen on the screen.
Click the Show/Hide library button to close the split screen library.
Now, we can adjust the pattern a bit before we move on. Open the Fill Color Panel and click on the 3rd tab at the top. Then click on the Advanced section to open up more options.
Under the Advanced section, you can Scale the pattern up and also Pan the pattern around. Just be careful to watch for white lines to appear as the pattern is “tiled”. The white lines indicate the edge of the pattern page. If you see those on the screen, it will print that way as well.
Adjust the settings to your liking.
Now, are you ready for the magic?
Right click on the rectangles and choose Release Compound Path.
Ta-da! Move the rectangles away and you can see that the pattern fill is now in all 3 rectangles in the exact location that it was when it was stacked together.
What a nifty little trick!
Now that we have our card design, it’s time to set up the print and cut.
Open the Page Setup Panel & make sure the page is setup properly if needed. Choose Letter size (or the size you are printing on). Choose Portrait Orientation.
Then click on the Tab 3 at the top of the Page Setup Panel for the Registration Marks. Choose On. Click the Restore Defaults button. *This is an important step if you have ever had issues with print and cut or are just getting started. The default registration marks are where the machine can read the most accurately.
Arrange the designs on the page within the red cut border and stay away from the cross-hatched area. If needed, use the Transform Panel – Rotate Tab to rotate the design to fit within the red cut border of the print and cut page.
The cross-hatched area is very, very important in the success of the accuracy in the print and cut! The optical eye is a laser eye that turns on when registration marks are on the project. This eye searches for those black registration marks and any part of the design that is in the cross-hatched area can interfere with an accurate reading. It may look like it read the marks, but if it picked up part of the design instead of the edge of the registration mark, it can affect where it cuts. Dark colors in, near, or between the cross-hatched areas can interfere with the reading. If you have every had an issue, look at where your design is placed and are you using the defaults to give the machine the best chance to read?
Some users can successfully adjust the print and cut boundaries, but NOT ALL! The most accurate results with print and cut are with the default registration marks. Once you have established a baseline with the defaults, then you can start changing things and see what works. It does NOT work for all users to adjust.
Print and Cut is an amazing feature on the Silhouette software! Here are some tips on how to set up a basic print and cut Let’s Explore v4 – Print and Cut Basics Starting with the basics will give you the most accurate print and cut results.
Once your page is ready, send it to print using File > Print.
Printed on a Canon TS9521C Craft Printer
I am often asked what printer to buy for print and cut. Any good quality printer will work. Start with the one you have and start with the Basics of Print and Cut, test it and see how it does.
Place the printed page on the cutting mat, exactly as it shows on the Silhouette Design screen in the top left corner and covering the grid lines on the mat.
Using a Silhouette cutting mat will also be the greatest chance of an accurate print and cut. Other 3rd party cutting mats are not the same dimensions and can affect the accuracy of a print and cut project.
Load the cutting mat in the Silhouette machine. On a Cameo, the left edge of the cutting mat should be next to the line on the left and not over top of it. Hold the cutting mat flat as it registers the marks for best results.
Click on the Send tab in the top right corner. Select the material type and adjust the cut settings as needed for your material. Click the Send button in the bottom right corner when ready to cut.
After it’s cut, unload the cutting mat, flip the mat over and carefully peel the mat away from the cardstock.
Add the black cardstock (or other color) to the cutting mat. Click on the Design tab again in Silhouette Studio. Select all 3 of the black rectangles, copy and paste to a new design mat and arrange to cut.
Send to cut.
After it’s cut, unload the cutting mat, flip the mat over and carefully peel the mat away from the cardstock.
Now that the pieces are cut, gather the supplies for assembly.
And since you are already setting up a print and cut, you can also add a sentiment that could either be added directly to the pattern area or create your own shape as well. Print it right along with your pattern pieces.
I would love to see what you are creating with your Silhouette software or machines! Feel free to post on my Facebook group at Silhouette Secrets with EllyMae.
Save this for future reference by pinning the image below.
Enjoy !
THANK YOU for your support! How can you help? Click HERE & buy a coffee. Every little bit helps with the cost of running the site.
Or if you are looking for more in-depth, step-by-step classes, check out all of my online Silhouette classes on my Teachable site HERE.
**This post may contain affiliate links. What that means is that I may receive compensation if you purchase through the links I have provided. The price you pay for the product or service is not higher but I may get compensated for sharing.
It is so neat what you can do in the Silhouette Studio software and with just a few clicks can have a completely different look.
Today we are going to explore the Pattern Fill in the Silhouette Studio software.
Tutorial written in Silhouette Studio v4.4.552 Affiliate links may be present in the following blog post and as an Amazon Associate I earn from qualifying purchases.
What would you use a digital pattern for?
This is a great option for being able to print your own projects. A digital pattern can be added to a shape to cut or even an entire page printed of that pattern.
There are so many options you have for projects that you can complete with it. Stickers, cards, scrapbook pages, patterned cardstock, sublimation, etc.
Check out the end of this post for more tutorials on using patterns in projects.
Software upgrade feature
Adding custom patterns to the Silhouette Studio library is a Designer Edition upgrade feature. If you are currently using the Basic Silhouette software, you will be able to use patterns from the Silhouette Design store in this same manner, but will not be able to add custom patterns directly to the library as shown below.
With the Silhouette Basic software, you can open a jpeg or a png file directly into the software and then use the Crop tool to crop the pattern to your shape. More details on the Crop tool HERE
Digital Patterns
I had previously cut a pattern out of Sparkleberry Ink Bubble Up HTV and it turned out fantastic, so I contacted the owner at Sparkleberry Ink and asked if it was possible to get a digital version to be able to use for printing.
Thank you Sparkleberry Ink for adding this set to your digital pattern options!
Grab it HERE at Sparkleberryink.com. Make sure if you are planning to use this for business or selling products that you grab the Commercial Use license!
Adding Patterns to the Silhouette Library
Open Silhouette Studio.
Download and unzip the patterns. Open the folder where the patterns are located. I am using Windows Explorer folder to view the file location.
Now, select the patterns in the folder and drag them into the Patterns folder on the Silhouette Library tree. They can either be added to the main Patterns folder or into a sub-folder you have created.
The Silhouette library will need to sync and then Ta-da! The patterns should now show in the folder that you moved them to.
Now I have 2 new patterns to play with in my Silhouette software.
There are a couple things to be aware of when using digital patterns.
Digital patterns are photo files. This means that they can be large data files.
Adding digital patterns to your library does take up Silhouette cloud storage space. There is a limit to Silhouette cloud storage, so be mindful of that when adding patterns to the library.
Since they are large photographic images, it can take longer for them to sync, open, and manipulate in the software. This in some part will vary by each user and how their computer can handle those large amounts of data.
Save your files often, especially if trying to add a lot of patterns to 1 file.
How to Use Patterns in Silhouette Studio
Open the design you want to use in the Silhouette software.
There are a couple things I want to mention about this file in particular. I am using it because it is one I’ve previously used and I loved it. However, I did have to do some work to the file to use it as it was shown and have 2 separate colors. I will have a future tutorial on how I altered it in order to achieve the look I wanted.
The other thing I want to mention on this file is….. holy edit points!
Edit points are the data points that the Silhouette software and machine read in order to cut. It has to connect the dots (edit points) to make the cut. In this particular file and can be common in mandala designs, it has a LOT of edit points.
You could try to click the Simplify button in the Edit Points panel, but sometimes it changes the look of the design or doesn’t make a big enough difference.
In this case, the file cuts fine at the size it opens, but if you were to scale it down and try to cut it, you may not have great results. This is because those edit points then are just squished into a smaller area. It still has to hit every single one of them to cut.
If you have ever experienced a file that you have scaled down and it just tears up the material or doesn’t cut right, this may be why.
Learn more about Edit Points HERE. They are a great tool to know how to use.
In this tutorial, we are using digital patterns for printing, so I do not need to cut it, but wanted to mention it for future reference.
Select the part of the design that you want the fill applied to by clicking on it.
Next, click on this little icon in the bottom left corner of the Design Tab screen. This is the Show/Hide Library and when you are working with patterns it helps to view the patterns at a larger size.
This will open up the library in a split screen with the Design Tab. I prefer to look at my patterns this way but you can also find them under the Fill Color Panel – Tab 3.
Look at the difference in the size of the pattern icons in the Pattern Fill Panel vs using the Show Library tab. It’s easier on my eyes to use the split screen.
With the part of the design you want to fill selected, click on the pattern and it will fill with the pattern you selected.
So cool! And you would never know that this pattern is actually made up of bubbles.
But that’s not all – there is more!
Click on the Show/Hide Library icon again to collapse the library split screen.
Once the design is filled with the digital pattern, it can be adjusted.
You can adjust several things about the pattern that can give you a different look – angle, scale, pan pattern, etc. I was just playing around with this Bubble Up pattern and it was amazing how a few changes could give it a different look.
On the left, the pattern is scaled up 295% and on the right the pattern is at 100%.
Such neat options!
Now, you may have guessed…. that’s not all!
Use the Fill Color Panel eye dropper to pick up a color from the pattern to fill in the 2nd part of the design.
And you have a custom colored design using a digital pattern in the Silhouette Studio software.
I would love to see what you are creating with your Silhouette software or machines! Or if you have any questions, feel free to post photos or questions on my Facebook group at Silhouette Secrets with EllyMae.
Save this for future reference by pinning the image below.
Enjoy !
THANK YOU for your support! How can you help? Click HERE & buy a coffee. Every little bit helps with the cost of running the site.
Or if you are looking for more in-depth, step-by-step classes, check out all of my online Silhouette classes on my Teachable site HERE.
**This post may contain affiliate links. What that means is that I may receive compensation if you purchase through the links I have provided. The price you pay for the product or service is not higher but I may get compensated for sharing.
No matter what kind of print and cut project you are doing, I recommend starting with all the basics. I have several posts on print and cut and wanted to give you one landing page to check them all out at and decide which one is going to be the best for your situation.
Print and cut with the Silhouette is one of my favorites and it is often the one issue I troubleshoot a lot with users. Most often it is something that needs to be tweaked on the user’s end on why the Silhouette is not reading the marks. And there is no one solution fits all when it comes to troubleshooting and it’s not always what the user wants to hear, but the first step is to start at the beginning. Otherwise, it’s like throwing mud against a wall and seeing if it sticks. You can try all kinds of things and still end up with the same issue.
Print and Cut Basics is where I would suggest starting if you are new to Silhouette, new to print and cut, or are having problems getting the Silhouette to read your printed page. It is a step-by-step to doing a test print and cut to make sure it’s all working properly.
Print and Cut – Part 1 is a great place to start with setting up a design made for print and cut. It gives tips and tricks to getting the design set up correctly, printing within all the borders, and also several troubleshooting steps if you are having issues.
Print and Cut – Part 2 – Text will show you how to create text and discuss whether you want the text to cut, or how to change it so that text does not cut each piece out.
Want to cut larger than letter size? If you have a large format printer, you can cut several larger sizes. The main limit is how large the printer can print. Check out tips on How to Print & Cut Larger with Silhouette HERE.
With the release of v4.3, the Registration Marks Panel has had a little bit of a change. There is no longer options, but you can turn them on and off. Find out more here in Registration Marks & Print and Cut in v4.3.
Print and cut is another great option if you don’t have the exact paper pattern on hand to create a project. You can make your own and then cut it for your project. Check out how to use the Pattern Fill Panel HERE.
With the options of Pattern Fill in the software, it can definitely keep a project alive versus having to wait on finding that perfect piece of cardstock in the store. I used the Pattern Fill in this 3D Tank project also.
Pattern Fills
Affiliate links may be present in this blog post.
I see it asked often what the patterns in the Silhouette Design Store could be used for. They are a great option for creating unique projects or work in a pinch when you don’t have the right pattern to fit your projects.
Check out all the options for all kinds of patterns in the Silhouette Design Store HERE and then how to use them in the Let’s Explore v4 – Pattern Fills. I love that you don’t have to print the entire page with the pattern, but can fill any section of the design and manipulate that pattern to your liking by adjusting the pan and zoom.
Hopefully this has opened up some new doors to Silhouette projects for you!
I would love to see what you creating with your Silhouette machine! Feel free to post on my Facebook group at Silhouette Secrets with EllyMae.
Enjoy!
**This post may contain affiliate links. What that means is that I may receive compensation if you purchase through the links I have provided. The price you pay for the product or service is not higher but I may get compensated for sharing.
In the past several weeks I have been using the Fill Pattern option in the Silhouette software to create my own papers for projects that I needed. While I have a large paper collection, there are just times I do run into a project, that I want a specific paper for and I don’t have it – like this 3D Tank project I complete a few weeks back.
Last week, I started a project with my daughter and we only had wood patterned paper to make 1 of the project. So the Silhouette Design Store, my Silhouette software and my Canon printer came to the rescue.
This Lath Decorative Board is created completely out of cardstock. Paper A is a retired patterned paper from my Close to My Heart collection and paper B is one that I filled with the pattern fill option and printed through my Canon printer onto white cardstock.
I posted this on my Silhouette Secrets+ Facebook page when I was working on the project and asked for guesses on which one was printed. Almost all the guesses were for A as the printed paper. This is a great option if you do not have the specific pattern in your stash that you need.
If I don’t have the supplies on hand, it usually means that this project would have been put on hold for the time being, but now with the option to print and cut my own paper designs, I can get to crafting.
The project above is a Lath Board with Flowers Project by Nilmara Quintela from the Silhouette Design Store.
Let’s take a look at how you can use the Pattern Fill option to expand your options in Silhouette Projects.
The Fill Pattern tab is found on the right side under the Fill Color Panel – Tab 3.
This short video shows how easy it is to fill shapes with patterns from the Silhouette library.
Once you have your design set up with the pattern fill, you can use the Print and Cut feature to print the design out with your home printer and then cut on the Silhouette machine.
Check out this post Print & Cut – Part I for my tips for a successful Print and Cut.
I hope you learned something new today in the “Let’s Explore v4” series!
There are so many options in the Silhouette Software and the only way to learn is one thing at a time! I hope you get a chance to play around with this and more soon!
**This post may contain affiliate links. What that means is that I may receive compensation if you purchase through the links I have provided. The price you pay for the product or service is not higher but I may get compensated for sharing.
THANK YOU for your support! How can you help? Click the link to buy a coffee. Every little bit helps in the cost of running the site.