Posted on 2 Comments

Custom Etched Monogram Gifts & Decor with Glass Etching

Silhouette Secrets+ with EllyMae

I love being able to create custom gifts for friends, family, and for events I attend. When I was brainstorming the 5th project for the month of July’s weekly newsletter I had several options. The one that beat out the other ideas was because it can be used as a gift for a family friend for the holidays. The winner? A custom etched monogram on a glass container with Etchall etching creme. This could be used for a candy dish, candle holder, home decor, or many other things. I’ll leave that up to the recipient to decide what to do with it.

Affiliate links may be present in the following blog post and as an Amazon Associate, I earn from qualifying purchases.

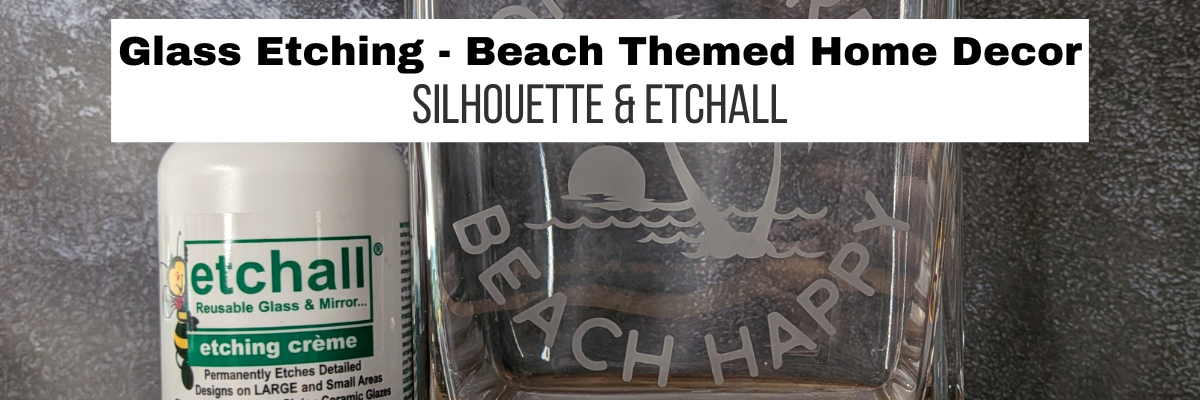
Photo shows a look at a finished project with glass etching using Etchall Etching Creme.

Steps to Etched Glass Projects

  1. Create a stencil for etching.
  2. Clean glass blank with alcohol and allow to dry.
  3. Apply stencil.
  4. Mask off edge of stencil to prevent bleeding
  5. Apply Etchall Etching Creme and allow to sit for 20 minutes.
  6. Remove any excess Etching Creme and place back in the bottle.
  7. Wipe off remaining excess with a paper towel and safely discard paper towel.
  8. Run water in the sink and rinse off decal thoroughly.
  9. Remove masking tape and adhesive vinyl under running water.
  10. Rinse blank thoroughly.
  11. Dry and Enjoy!

Glass Etching Supplies

Gather the supplies. I started by grabbing a sheet of Oracal 651 adhesive vinyl in a color that I don’t really use often, however, I ended up using a scrap from my scrap pile because the design fit on it and I have a drawer full of scraps.

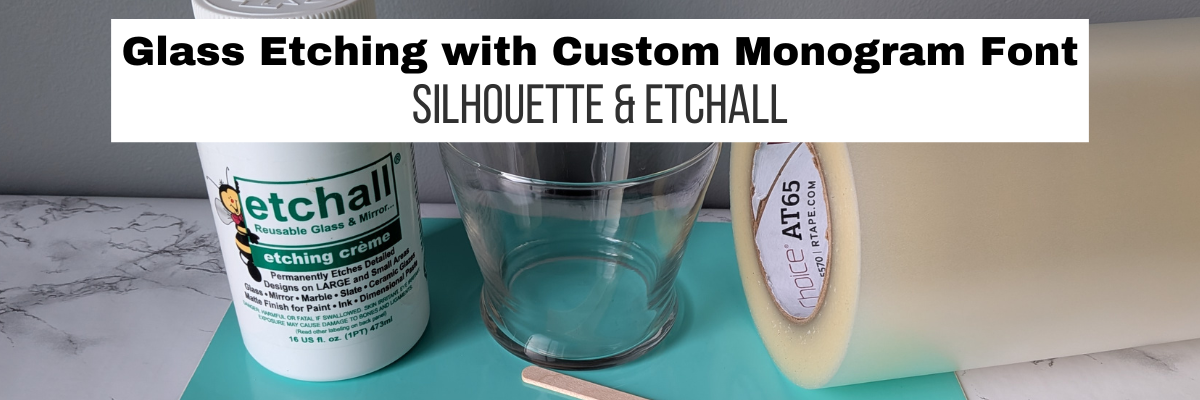
Photo shows supplies being used for glass etching with Etchall Etching creme that includes a craft stick, adhesive vinyl, transfer tape, and a glass dish.

Enlist a helper, whether you really want their help or not. Supervisor Goldy decided she was going to test out the tools and if I turned my back she would have taste tested the adhesive vinyl and transfer tape too!

Photo shows a yellow cat helping with the supplies for the project.

Measure the blank and create the design to cut for the stencil. For this project it does have a bit of a conical shape to the widest part of the vase, so I used the Conical Warp tool with the etched monogram design to help with that. I shared this technique in the March 2026 Crafting Community member exclusive tutorial when making etched martini glasses.
See more on the etched martini glasses HERE.

Photo shows a look at the Silhouette Studio software showing the glass etching design on the virtual mat.

Then I grabbed a scrap of adhesive vinyl and cut it with the Silhouette Cameo. Any Silhouette model machine can cut adhesive vinyl for stencils.

Photo shows a look at the Silhouette Cameo machine with a mat loaded with adhesive vinyl on it for the glass etching stencil.

Glass etching is permanent. So I do like to add a little bit of heat to the glass etching stencil when it has fine details. I do this carefully so not to burn myself and then let the glass and stencil cool completely. This step can help the adhesive vinyl adhere a bit better and smooth out any areas that may have had allowed etching creme to seep underneath. And then I add a layer of painter’s tape around the edges just in case any etching creme dribbles or runs.

Photo shows a look at the adhesive vinyl stencil applied to the glass container with painter's tape around the edges and a heat gun on the work space.

While you could cut a larger piece of adhesive vinyl with the stencil to avoid using the painter’s tape, then you run the risk of more wrinkles and the stencil not adhering completely flat on a curved surface.

I then cover the entire stencil area where the design is with Etchall etching creme and wait 20 minutes.

Photo shows a workspace with Etchall etching creme applied to a glass container.

When 20 minutes is up, I carefully scrap the Etchall etching creme off and put it back in the jar. It can be reused. Then I will carefully wipe the design with a paper towel before running water in the sink and rinsing off any remaining creme. At this step, you do want to be careful not to dislodge any pieces of the design. It never fails that when an oops happens and the creme touches an area you do not want to etch, it will happen in seconds.

Once the Etchall etching creme has been rinsed, removed the stencil and painter’s tape, and then carefully dry the glass container. Then admire the custom glass etched monogram project.

Photo shows a look at the finished etch when the glass is cleaned up.

I love how this turned out! A perfect gift idea with a custom etched monogram. And it was a very economical project to complete too! Glass jar from the Dollar Tree (which isn’t a dollar anymore, but still reasonable) and reusable Etchall etching creme that can make many, many more projects!

Photo shows a look at the finished custom glass etched monogram container with Etchall etching creme next to it.

Save this for future reference by pinning the image below.

Photo shows a finished glass etching project in a Pinterest format photo.

Enjoy !

THANK YOU for your support! How can you help? Click HERE & buy a coffee.
Every little bit helps with the cost of running the site.

Silhouette Classes

Never stop learning! Let me help you take the anxiety out of learning with Silhouette and get to creating faster! My Silhouette classes are heavily focused on software, so you can take the skills & techniques taught and apply them to many future projects!

Silhouette step-by-step Classes by Silhouette Secrets+

Silhouette Secrets+ with EllyMae
**This post may contain affiliate links. What that means is that I may receive compensation if you purchase through the links I have provided. The price you pay for the product or service is not higher, but I may get compensated for sharing.

Posted on Leave a comment

Creative Projects that Sparkle with Clikchic Designs

Time to Sparkle Header

Silhouette Secrets+ with EllyMae

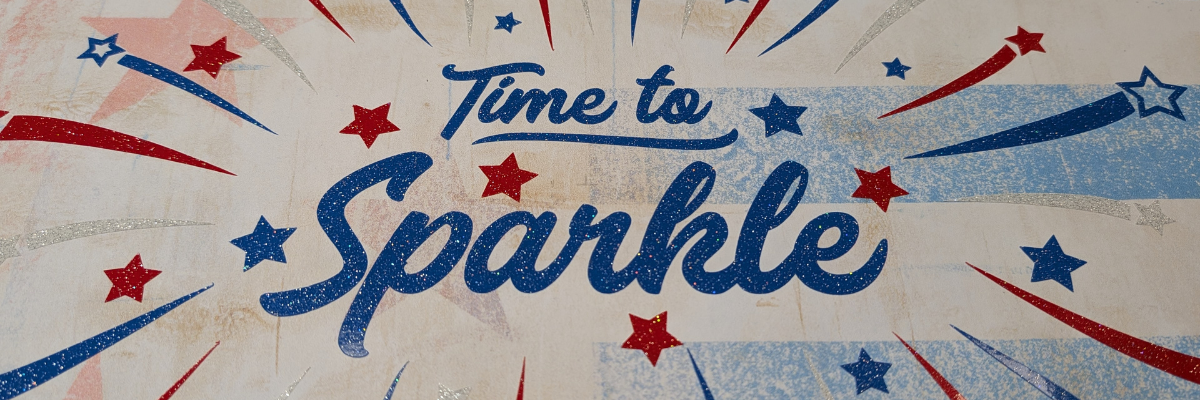
Preview of Time to Sparkle Design by Clikchic Designs.

The Crafting Creativity series is designed exactly for sharing inspiration, designs, and showing how to make your designs go farther or think outside the box. Find more Crafting Creativity inspiration HERE.

Crafting Creativity video preview of the projects created with Time to Sparkle by Clikchic Designs. Additional photos, details, tips, tutorials, and supply lists can be found by scrolling under the video.

I am a Creative Professional with NAMTA and every year they host Creativation which is a large gathering of craft industry businesses, retailers, and brands from around the world. This year the Creative Professionals had the chance to display art in the entrance hall of the event. We were given the parameters of a 12″ x 12″ canvas and a red, white, and blue theme and told to create to share our skills and talents. I love to be able to make unique creations and start with something flat and give it dimension.

Photo shows a 3-D Mixed Media Canvas project with a red, white, and blue theme. Projects features several 3-D papercraft designs.

This project was several weeks in the making. I believe we found out we were going to do this in January or February with the conference happening in May. Once a topic is given to me my brain just starts with throwing out ideas. I try to keep a running list, usually in my phone, but often times I find a physical list in my creative journal is what really gets ideas flowing and allows me to narrow things down.

This is one of those projects that is built as it goes along and I continued to add things to it over the entire process.

Photos shows a shimmer sublimation tumbler with a colorful design and Time to Sparkle on the front along with the Craft Pro Tumbler Press from Heat Press Nation.

I started by measuring the tumbler then drew a rectangle in Silhouette Studio for the template size. Then the process of filling the design with patterns began. After testing many options I decided I loved this pattern with the ombre blues and having the design in white.

Photo is a screenshot of the Silhouette Studio software showing a rectangle template for the sublimation print with a background design and Time to Sparkle in the center.

I love how it turned out and now have another custom tumbler I can use.

Photo shows a custom sublimation tumbler with a bright background and Time to Sparkle on the tumbler. This design was created in Silhouette Studio and printed with an Epson F170 Sublimation Printer.

Additional Resources:

This card design was created by first setting the Time to Sparkle up for sketching and then cutting out the stars and swooshes from the card front.

Photo shows a card created by cutting parts of the background out and sketching Time to Sparkle on the front of the card.

This design works perfectly for a going away card, new adventure, best wishes, congratulations, and more!

I set the text to sketch and used a crosshatch sketch fill of 0.015″. Then used the “cut” by Line Color on the Send tab to tell it what action I wanted each line color to do.

Photo shows a screenshot of the Silhouette Studio software with the Sketch set up on the Send tab to complete on the front of the card.

After the sketching and the cut out was complete on the front of the card, I added a layer of glitter cardstock behind to give it more sparkle.

Additional Resources:

I added the Time to Sparkle design cut from glitter adhesive vinyl onto a clear transparency layer for this cake topper.

Photo shows a Lighted Cake Topper that was custom made in Silhouette Studio using the Time To Sparkle Design by Clikchic Designs

This design was created using the Draw Shapes tool in Silhouette Studio and creating several layers.

Photo shows a screenshot from the Silhouette Studio software showing the layers created for the lighted cake topper design featuring Time to Sparkle.

Supplies Used:

I love how one design can be used to create so many projects. The possibilities are endless!

Find more designs by Clikchic Designs

Follow along with Clikchic Designs on her websiteFacebook, and Instagram.

Here are a few Instagram links to get you started – make sure when you visit to like and leave a comment too! Creators love to hear from real people who enjoy their work.

Sign up for the Silhouette Secrets+ newsletter HERE so you don’t miss out on future collaborations.

Photo shows a collage of projects for the Crafting Creativity blog post featuring Clikchic Designs - Time to Sparkle Design. Projects shown include a 3D Mixed Media Canvas, Sublimation Tumbler, Custom Card, and Lighted Cake Topper.

Silhouette step-by-step Classes by Silhouette Secrets+

Silhouette Secrets+ with EllyMae
**This post may contain affiliate links. What that means is that I may receive compensation if you purchase through the links I have provided. The price you pay for the product or service is not higher but I may get compensated for sharing.

Posted on Leave a comment

3D Mixed Media Canvas Creation with Silhouette

Silhouette Secrets+ with EllyMae

When we were told as Creative Professionals with NAMTA that we would have the opportunity to display our artwork at the 2026 Creativation event, my brain immediately started thinking of ideas and I started a list in my phone. We were allowed to have 2 – 12″ x 12″ canvases on display in the entrance hall for the conference and were given a theme of red, white, and blue. This was an opportunity to display our art and share our skills. I love building things, so a 3D mixed media design was a no brainer for me. This was one of those projects that I started with a few basic ideas and built the project as I went. Sometimes that’s just how it goes. Some things might work together along the way and some things might not.

I love building 3D projects! There is just something about taking flat materials and molding them into a final 3D project. Having a cutting machine like a Silhouette or Siser Juliet or Romeo opens up a lot of possibilities to cut designs for 3D creations. The biggest factor that goes into it all is – TIME! It takes time to design, build, and modify things as you go along in the process.

Affiliate links may be present in the following blog post and as an Amazon Associate, I earn from qualifying purchases.

In this blog post, I’m sharing a look at the behind the scenes of creating this 3D Mixed Media Canvas: Time to Sparkle with a few still photos & the supply list. Check out the video at the end of the blog post for additional shots of the process as well.

First, here is a look at the finished project.

Photos shares a look at the finished Time to Sparkle 3-D Mixed Media Canvas project completed by EllyMae at Silhouette Secrets+ by Swift Creek Customs.

I started by gathering some supplies to get started. I had to order new inks to print the background papers. These 3 are designs by Clikchic Designs and can be found in the supply list below. I am able to print borderless with the Canon TS9521C printer. I ordered Oracal 851 glitter adhesive vinyl in red, white, and blue from Vinyl Spectrum. The entire theme of this canvas is to sparkle, so I embraced that fully.

Photos shows supplies on a desk that includes printed backgrounds, glitter adhesive vinyl, Mod Podge, a 12" x 12" canvas, TCW Stencil Butters, and tools that will be used to create a 3D Mixed Media Canvas.

I first started by cutting down the background paper for the backside of the canvas to fit within the frame. Then added layer of Mod Podge to the canvas and to the backside of the blue patterned paper. Smooth that down as much as possible. Adding the Mod Podge to both the canvas and the back of the paper helps it to adhere smoothly. Once it’s down flat, then I added another layer of Mod Podge Sparkle on the front of the blue paper. Let this dry completely.

Photo shows a bottle of Mod Podge and Mod Podge Sparkle that has been applied to the backside of the 12" x 12" canvas for the 3D Mixed Media project.

While that was drying I set up the design for cutting from Oracal 851 Glitter Adhesive Vinyl in Silhouette Studio.

Photo shows a screenshot of Silhouette Studio and the design set up to cut multiple layers of adhesive vinyl using layering marks.

Then I cut each color of glitter adhesive vinyl. For each layer, I cut the color and the green rectangles. The green rectangles are designed as layering marks that are used to line up the layers exactly. While it might use a little more material when using these marks, I find I get a much more accurate layering. This is one of those techniques that no matter how you do it, practice makes it better.

Photo shows a look at the layered adhesive vinyl design with 3 colors using layering marks to line up each layer.

While this design is not technically layered, the colors are in a specific location to each other, so I used the same technique with the layering marks and it worked out great!

Then I carefully applied the adhesive vinyl to the front of the patterned paper. This will be the background that shows through on the busted canvas.

Photo shows a look at the adhesive vinyl design applied to the patterned paper background for the 3D Mixed Media Canvas project.

Once the backside of the canvas was dry, I flipped it over and applied a layer of Mod Podge to the front of the canvas and to the backside of the pattern paper for the front. Once it was flat on the canvas, I applied a layer of Mod Podge Sparkle to cover the entire paper on the front. Let that dry completely before moving on to the next step.

Photo showing the patterned paper attached to the front of the canvas with Mod Podge and the background paper completed for the 3D Mixed Media Project.

Once it’s dry, then I flipped the canvas over and used a box cutter with a ruler to slice through the paper & canvas layers in multiple directions. This will allow the front to be rolled out for the “busted” canvas technique.

Photo shows a look at the front of the canvas after it's been cut and the edge rolled back to create the busted look for the 3D Mixed Media project.

I have made several of these busted canvas projects and I found that it was much easier to glue the rolled edges down and have them stay if the pieces were “trained” first before gluing down. To do this carefully roll the sections back and hold for a little bit. Then let it sit for awhile. Repeat this step as needed. I found I was much more successful in having the curls hold with hot glue when I did this as the paper didn’t lift or try to go back to it’s original shape. Since there are several layers of glue, paper, and canvas, it can be a bit stiff.

Once it has sat in “training” for a bit, then I glued each end down onto the canvas with hot glue and held it in place until it cooled. Repeat for any stubborn sections.

I have several other pieces to this project so while it’s in “training” or things are waiting to dry, I would move on to the next element of the design.

Photo shows a work space with craft supplies and cut pieces from cardstock to create 3D sparklers along with an assembled firecracker box for the 3D mixed media project.

I did not get any photos of the first 3D firecracker I created that’s shown in the top left corner of the photo above. As you can see, I have 2 copies. The first was a proto type that I cut and assembled to see if it would work with the layout. Then I decided to cut the box out of glitter cardstock while I was cutting the pieces for the sparklers too. These sparkler designs by Paper Beats Dynamite are fantastic with excellent written instructions.

The rectangles of color are glued to a bamboo stick and then once the glue is set, are rolled and glued around the stick.

Photo shows a close up look at creation of the 3D Sparklers for the 3D Mixed Media project. Hot glue was added to the ends of the bamboo skewers to look like it was melting.

On the end of each skewer, hot glue is drizzled from where the cardstock strip ends to the end of the skewer to make it appear like it’s melted.

Photo shows a look at creating 3D Sparklers using embossing powder on the ends to make it look like it's melting and on fire for the 3D Mixed Media project.

A layer of gray acrylic paint was applied over top of the hot glue and the cardstock. Then I used black and red embossing powders on the end of the sparklers to make it look burnt and burning or hot.

Next I cut more glitter cardstock for additional firecrackers to add to the canvas.

Photo shows glitter cardstock squares on a table with some rolled and some flat. These will be used to create 3D Firecrackers for the 3D Mixed Media Canvas.

These squares are rolled up and glued together to create a firecracker and I found it was easier to “train” them first and let them hold that shape a bit before gluing together. Once the glue was set, I could start adding them randomly to the bottom of the busted canvas section using hot glue.

Photo shows a bunch of assembled glitter cardstock 3D firecrackers on a work space. These will be elements added into the 3D Mixed Media Canvas.

Now, I will admit that I don’t typically like to cut glitter cardstock. It literally eats blades and can be difficult. But this project it was worth the effort it took. However, I am shocked that I actually got it all cut without issues because this is what my blade looked like after I was done cutting all these pieces.

Photo shows a look close up of a Silhouette blade with the cap off and the glitter debris that is filled inside the blade after cutting lots of glitter cardstock for the 3D Mixed Media project.

Next, I wanted to add another element in – beading. I even had my supervisor, Goldy in on this one. She wasn’t much real “help” but she made sure to keep me focused.

Photo shows a cat supervising and "helping" with wire and beads on a board.

Since this is a 3D mixed media art piece, I added another hobby of mine – beading – into the design elements. I strung beads in red, white, and blue on a wire and then bundled the colors together to create 3 different firework bursts. The one thing I did not take into account on this element was the weight of the beads and wire when finished. It all worked out and a LOT of hot glue held them in place.

Photo shows a workspace with a variety of craft supplies on the table that are being used to create the 3D Mixed Media Canvas. With 3 beaded bundles in red, white, and blue in the foreground.

I love how this all came together and the entire process of creating it piece by piece. 3D creations are one of my favorite things to do, but I don’t always take the time to do it.

This 3D Mixed Media Canvas may not be a project that you recreate, but I hope it inspires you to think outside the box and to combine and create ideas that reflect you as an artist. Every individual reading this has the creative spirit inside of them whether you believe it’s there or not. Sometimes you just have to let it out and let it flow, not try to control it or have the exact plan at the beginning.

Want to see a little bit more? I’ve created a video sharing even more of the photos behind the scenes in creating this process.

I love seeing what others are creating and their talents and skills. Check out this video I did from the Creativation 2026 entrance hall sharing a look at all the canvas creations by the Creative Professionals on Instagram or Facebook.
Each canvas is unique and no two are alike!

Save this for future reference by pinning the image below.

Photo shows a completed 3D Mixed Media Canvas project Pinterest pin layout.

Enjoy !

THANK YOU for your support! How can you help? Click HERE & buy a coffee.
Every little bit helps with the cost of running the site.

Silhouette Classes

Never stop learning! Let me help you take the anxiety out of learning with Silhouette and get to creating faster! My Silhouette classes are heavily focused on software, so you can take the skills & techniques taught and apply them to many future projects!

Silhouette step-by-step Classes by Silhouette Secrets+

Silhouette Secrets+ with EllyMae
**This post may contain affiliate links. What that means is that I may receive compensation if you purchase through the links I have provided. The price you pay for the product or service is not higher, but I may get compensated for sharing.

Posted on Leave a comment

Easel Card Design with Silhouette

Silhouette Secrets+ with EllyMae

Emerald Creek Design Team – July 2026

Today I’m sharing a card design where I combined a stamp from Emerald Creek and used it with an easel card cut file from Lori Whitlock. I cut all of the pieces for the easel card and then added special touches to it with stamping, watercolors, and a little bit of sketching with a pen. One easel card cut file can be used to create so many different kinds of cards. Or scale the card file up and use it as home decor too!

Photo contains an image of an easel card with a flower stamp from Emerald Creek.

Affiliate links may be present in the following blog post and as an Amazon Associate, I earn from qualifying purchases.

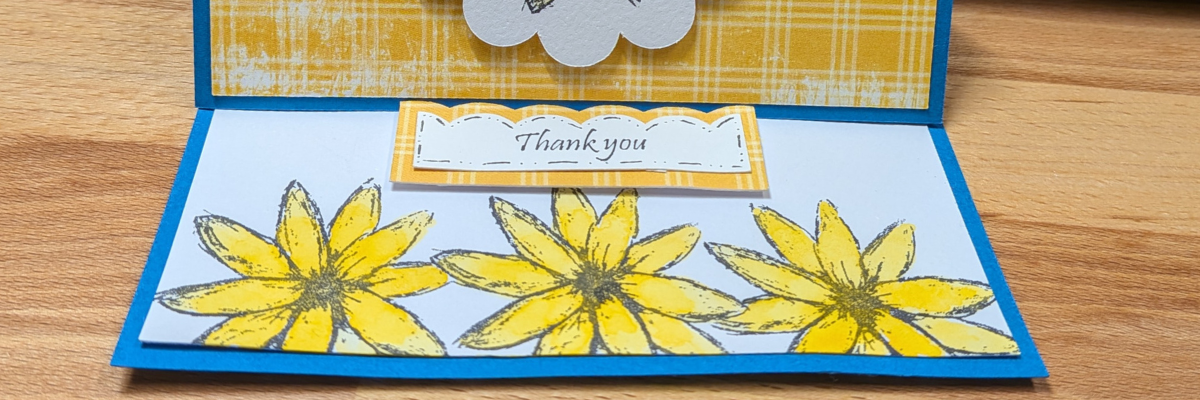
Rather than keep the base of the card plain white, I chose to use the same flower stamp and stamp a few more along the bottom edge. I first stamped onto a sticky note and then cut around the stamped image to use it as a mask over top of the center flower, so the side flowers look like they are behind the middle image.

Close up look at the front of an easel card with a flower stamp from Emerald Creek and a Thank you sentiment.

Then I used a small Thank You stamp from Emerald Creek on the sentiment cut piece and then did a little bit of pen work around the edges to make it stand out. It is matted onto the same background paper as the top card piece and then popped up with foam tape. This little piece gives the card the support to create the easel part.

Photo contains an image of an easel card with a flower stamp from Emerald Creek.

Change it up with different flowers or focal designs and mix and match sentiments. One card cut file can open up a world of possibilities.

Photo contains an image of an easel card with a flower stamp from Emerald Creek.

It is great to have the option to be able to print and cut sentiments, but often times if I’m only making up a card or two, I know it will take me longer to find more designs to fill the page. Having a few key sentiment stamps can be very handy to finish up the card quickly.

This easel card style is one that you could easily have all the pieces cut and customize it as needed whenever you need a quick card to send out too!

The original file has holes around the scalloped edges, and I didn’t want those for this design. It was an easy modification to do by selecting the scallop piece, right clicking on it, and choosing release compound path. It may also need to be ungrouped too. Then I could move the large scallop piece away and deleted the small circles.

Supplies Used for Easel Card:

Save this for future reference by pinning the image below.

Enjoy !

THANK YOU for your support! How can you help? Click HERE & buy a coffee.
Every little bit helps with the cost of running the site.

Silhouette Classes

Never stop learning! Let me help you take the anxiety out of learning with Silhouette and get to creating faster! My Silhouette classes are heavily focused on software, so you can take the skills & techniques taught and apply them to many future projects!

Silhouette step-by-step Classes by Silhouette Secrets+

Silhouette Secrets+ with EllyMae
**This post may contain affiliate links. What that means is that I may receive compensation if you purchase through the links I have provided. The price you pay for the product or service is not higher, but I may get compensated for sharing.

Posted on Leave a comment

Create More: Creative Projects with Wispy Willow Designs

Silhouette Secrets+ with EllyMae

For this project, I did some stickers and was testing it with some adhesive photo paper that says it’s waterproof. While the image itself was waterproof, the paper itself was not and the stickers did not last.

Photo contains a water bottle with a decal, a Silhouette machine in the background with a print and cut page on the table. 
Create More with Silhouette

While this project failed as a water bottle decal, I still found I love the adhesive photo paper for other projects. I have been using it for cards, home decor signs, and more!

Here is a look at my setup in Silhouette Studio for this print and cut page. I try to maximize the space when I do a print and cut project. However, I do use the default registration marks for the most accurate print and cut results.

Photo shows an screenshot of the Silhouette software print and cut page setup. 
Create More

When I created the print and cut sheet design, I was thinking ahead to projects and included a size of the image that I could use on a wood round for a tiered tray sign.

Photo shows a printed page for print and cut loaded in the Silhouette machine.

Wood is a natural surface, so it can be tricky sometimes to get things to stick. I did add a coat of Mod Podge to the wood and let that dry before applying the adhesive photo paper to it.

Photo shows a finished project for a tiered tray using a print and cut design. Create more with Silhouette.

This project was a failure! Big fat failure! The design itself turned out fabulous but the rest went into the trash.

Photo shows a close up of a print and cut sticker using the Happiness Comes in Waves design by Wispy Willow Designs. Create more with Silhouette.

I printed 2 copies of the beach design and then added them to a cardstock backer to make a double sided piece that was supposed to go inside a round clear ornament. I mentioned above that I like to maximize my print and cut space, so I included extra designs that I can use on cards in the future too!

Photo shows another print and cut page with multiple designs on it on a table with a Silhouette Cameo 5. 
Create more!

I wanted to add in sand and shells to the bottom of the ornament, but the glue didn’t look right when dry.

Photo shows a failed project with glue showing in an ornament with sea shells.

Back to the drawing board on this one. I tossed the ornament in the trash.

It was just not the look I was hoping for, but I do have a double sided design that is looking for a new project to be used in.

The previous project may have failed, but this one turned out FANTASTIC!

Photo shows a finished project with a fantastic HTV design using the Happiness Comes in Waves design by Wispy Willow Designs. 
Create more with Silhouette!

I cut each layer out of Siser Easyweed HTV and then pre-pressed the tote bag. Then each layer was placed and pressed for 3-5 seconds, just enough to get it secure and to be able to remove the carrier sheet. After the last layer give the entire design a press. I did 10 seconds at the end, but it really just depends on the layers and the material being used. This is a canvas tote bag with some texture, so I wanted to make sure it was well secured.

Supplies Used:

Tips For Working with HTV

Cutting Multiple Colors at Once

When cutting different colors of the same material, you can usually cut more than one color at a time. I do this with cardstock, adhesive vinyl, HTV, etc.

Here is a look at my setup for cutting this design, then I will cut my HTV colors down to the size I need and place them exactly where they are shown on the screen.

Photo shares a screenshot of Silhouette Studio software with multiple colors of the design on the design mat. Create more!

If using a Silhouette cutting mat and the mat is loaded properly, then the designs should cut in the exact location they show on the screen. If using a 3rd party cutting mat, they may not line up the same since the margins on the mat edges can vary from a true Silhouette cutting mat.

Cutting multiple colors at once, not only can save you time, but it can also make your mats last longer too because you are cutting the materials down to the size needed and not ripping a full piece of material off the entire mat each time.

Here is a look at the pieces after I cut and weeded each one.

Photo shows the cut design pieces from HTV on the table with a Silhouette machine.

Mirror the Design Yourself

Flip the design manually, by right clicking on the design and selecting Flip > Horizontal on the Design tab and then when you Send the design to cut, select “Send As Is” and the design will cut out exactly where you have it placed on the screen.

Photo shows a screenshot of Silhouette Studio showing how to choose Send As Is for an HTV design after it's been manually flipped. 
Create More!

If you let the Silhouette software mirror the design, then you may end up wasting materials and not having the material in the right location to cut. The software flips the entire mat, not just the design and does not show that on the screen. So you think it will cut on the left side, but it flips the entire mat and then cuts on the right.

Now, here is the humdinger on this one – the software flipping the entire mat can vary by software version. They added this “new feature” in and then it did not work the way a real user works, so many users wasted vinyl. After several years, they tried to “fix” it in the software so it would just flip the design and not the entire mat. Then in later versions, it was reverted back to flipping the entire mat again. It’s one of those things that I guess you’d say was implemented by an engineer and not someone who actually uses the Silhouette to cut HTV daily.

Pressing Multiple Layers and Colors

When pressing multiple colors, typically each color is pressed separately unless the pieces can be lined up WITHOUT any overlapping cover sheets. If the cover sheet of the HTV piece overlaps, it can interfere with the design being pressed.

Place one color of the design, then press for 3-5 seconds to “tack” it down, then remove the carrier sheet and repeat for all the layers.

Unless the carrier sheet of each layer covers the entire design, make sure to only press long enough to tack it down and then remove the carrier sheet for that piece. If you press it too long the carrier sheet can leave an indent in the other pieces of HTV that are already pressed.

For instance, if I left the carrier sheet for Beach on too long, it might leave a line impressed into the sunshine rays.

Photo shows several layers of HTV pressed onto a canvas tote bag.

Use a protective layer on top of the HTV when pressing each layer, unless the carrier sheet covers all of the HTV each time. This will protect the HTV and prevent it from sticking to the top platen of the heat press. I use a Teflon sheet or a piece of parchment paper depending on what’s handy and what material I’m using.

Oh and another one – parchment paper and wax paper are not the same. Wax paper in a heat press can leave a big mess.

Project #5 – Sketch & Mixed Media Design

This project was a test, well, actually several tests.

Testing pens to see if they were waterproof, sketching with the Silhouette Cameo Pro MK II with no mat, and mixing watercolor backgrounds with acrylic paint markers.

This idea just would not go away and for some reason, I really wanted to sketch out this month’s design. I can’t pinpoint why, but sometimes you just don’t know what will turn out until you give it a try. And sometimes you just have to let yourself play.

Photo shows a look at a sketched design that has been colored with watercolors and acrylic markers with multiple craft supplies on the table.

And it worked!
The pens were waterproof and did not bleed.
The Silhouette machine sketched the design as it should without a cutting mat.
The watercolor background turned out fantastic – LOVE IT!
The acrylic markers on top = worked!

It is unique! It also gave me a bunch more ideas too.

And I put together a video of this project below.

Supplies Used:

It is amazing how one design or creative idea can be the spark for so many more projects!

Find more designs by Wispy Willow Designs

Follow along with Wispy Willow Designs on her websiteFacebook, and Instagram.

A great big thank you to Hannah at Wispy Willow Designs for collaborating with us this month!

Sign up for the Silhouette Secrets+ newsletter HERE so you don’t miss out on future collaborations.

Photo is a Pinterest photo for pinning this project that states Crafting Creativity with Wispy Willow Designs. 1 Design = 5 projects. 
Create More with Silhouette!

Silhouette step-by-step Classes by Silhouette Secrets+

Silhouette Secrets+ with EllyMae
**This post may contain affiliate links. What that means is that I may receive compensation if you purchase through the links I have provided. The price you pay for the product or service is not higher but I may get compensated for sharing.

Posted on Leave a comment

Easy Summer Craft Camp for All Ages

Silhouette Secrets+ with EllyMae

Creating a “craft camp” does not have to be complex or require a high level of skill. What do you need? Paper and craft supplies – DONE! I’m sharing how easy it is to create your own little craft camp and have a little fun. This is fun for all ages and skill levels. If you have a Silhouette cutting machine, you can use it to cut blanks, stencils, and more to use in the craft camp, but it can be done without a cutting machine too!

Affiliate links may be present in the following blog post and as an Amazon Associate, I earn from qualifying purchases.

Watch the video below and then scroll under it for more details and a supply list too.

I cut several shapes from mixed media paper and then set up a random selection of craft supplies from Pointer USA. I am a Creative Professional with NAMTA (National Art Materials Trade Association) and was contacted by Pointer USA to test out some of their craft supplies. I have been impressed with the supplies I’ve tested so far and the best part is that they are economical too! Especially if you are getting started with a new medium!

First, I’m going to brag on the Art Pro Mixed Media paper. It cuts fantastic with a cutting machine, which is not always the case with mixed media papers because of the fibrous make up. Often times the fibers will tear and smoosh rather than cut cleanly. But I have now ordered 2 more Art Pro pads because I’ve used it so much.

Photo shows a Silhouette Cameo 5 machine with mixed media shapes that were cut with the machine. Bookmarks, notecards, and card fronts all cut from Art Pro Mixed Media Paper.

I also cut out some shaped dragonfly stencils and butterflies with the mixed media paper too.

Photo shows butterfly and dragonfly stencils cut from the Art Pro Mixed Media Paper using a Silhouette Cameo 5.

Here are a couple photos from Round 1 of Craft Camp.

Photo shows artwork created during Craft Camp using the dragonfly and butterfly stencils and mixed media paper blanks.
Designs by A

The butterfly and dragonfly stencils were put to use quickly.

Photo shows more artwork created during Craft Camp using the dragonfly and butterfly stencils and mixed media paper blanks.
Designs by C

And seeing their creations just made me want to create too. After all, I didn’t need to record the entire time. I love to simply add the watercolors to my Glassboard mat and then work with them from there. The smooshing technique is by far my favorite because no two are alike and I have no control over what it might turn out like. Simply scribble, add water, and then place the mixed media paper on top to pick up the color.

Photo shows a Glassboard Magnetic Craft mat with Art Pro Mixed Media paper and Watercolor Crayons on top of the glassboard with a paint brush along with several watercolored bookmarks.
Designs by EllyMae

Craft Camp Round 2

Here’s a look at the blanks I cut for Round 2. This time I added in some tags as well to the shapes I cut.

Photo shows a Silhouette Cameo 5 and bookmarks, notecards, card fronts, and tags cut from Art Pro Mixed Media paper.

And the creativity just continues. I love how they mixed all the colors around. I would turn around and a new creation would be in progress. I’m not sure who was more excited about them creating – them or me. It was so fun to see how they just picked up the craft supplies and turned it into something.

Photo shows artwork created at Craft Camp with the Pointer USA craft supplies.
Designs by A

Every creation is different. The hardest part is the letting go and not thinking it has to be perfect. Each one is unique and just have fun. Anyone can do this! Fun for all ages.

Photo shows more artwork created at Craft Camp with a stars stencil and dragonfly design.
Designs by F

My oldest and I had the idea about the same time. It was probably the tree silhouette stencil that prompted the creative thoughts, but I just had to try out some Northern Lights inspired images. I made the first one and recorded the process to create the second one and shared that in the video. If you missed it, check out the video HERE.

Photo shows artwork by EllyMae of Northern Lights Inspired mixed media card fronts using watercolor crayons and a black permanent marker.

Here is a look at the Craftermath after Craft Camp Round 2. I’ll do a bit of clean up and resetting. But I’ll keep this set up for anyone who feels the urge to create.

Photo shows the craftermath after Round 2 of Craft Camp with all of the craft supplies on the table and a selection of the finished artwork drying.

I know my creativity sometimes is squashed simply by the thought of pulling out the craft supplies I want to use or having to move things around to get started. This might help me too!

Supplies Used for Craft Camp Setup

Photo shows art supplies from Pointer USA that include colored pencils, watercolor crayons, scented markers, alcohol markers, and permanent markers.

I am loving the quality of the Pointer USA craft supplies. They are not only reasonably priced but also good quality for all ages. Check out the Pointer USA Amazon shop HERE for more options or visit them direct HERE.

If you are looking for a mixed media paper that cuts well with a cutting machine like Silhouette, grab the Art Pro Mixed Media paper by Pointer USA and give it a try.

Save this for future reference by pinning the image below.

Pinterest photo showing mixed media project that is northern lights inspired with watercolors and a permanent marker.

Enjoy !

THANK YOU for your support! How can you help? Click HERE & buy a coffee.
Every little bit helps with the cost of running the site.

Silhouette Classes

Never stop learning! Let me help you take the anxiety out of learning with Silhouette and get to creating faster! My Silhouette classes are heavily focused on software, so you can take the skills & techniques taught and apply them to many future projects!

Silhouette step-by-step Classes by Silhouette Secrets+

Silhouette Secrets+ with EllyMae
**This post may contain affiliate links. What that means is that I may receive compensation if you purchase through the links I have provided. The price you pay for the product or service is not higher, but I may get compensated for sharing.

Posted on Leave a comment

Hybrid Card Design with Silhouette

Silhouette Secrets+ with EllyMae

Have you ever made a hybrid card before? If you have made a card, you probably have but didn’t even think about it when you did. It is a card combining digital and physical elements in the creation. I am on the Emerald Creek Design Team the June theme was “Tiny joy, simple things.” I’m sharing the details of this card creation below including a supply list for the materials used in the creation.

Photo contains a full image of the Dream Hybrid card created by EllyMae at Silhouette Secrets+ as a Design Team member for Emerald Creek Co

Affiliate links may be present in the following blog post and as an Amazon Associate, I earn from qualifying purchases.

Creating the Hybrid Dream Card

First, I started with the Dreams Live Here PNG by Pam Bray and brought it into Silhouette. I only wanted to use the Dream part of it, so I used the knife to cut the design apart. Then repeated the pattern to fill the size I wanted for my card front. I did play around with a couple different layouts with this as you can see in the photo below.

Photo shows a screenshot of Silhouette Studio software with the Dream background creation by EllyMae at Silhouette Secrets+

While I could use the Silhouette machine to cut around the design and even set it up as a print and cut, it is sometimes easier just to use a paper trimmer, especially when it’s straight lines.

Photo shows a printed page of the Dream background created by EllyMae at Silhouette Secrets+

Next, I used a stencil that I cut with my Silhouette from a mixed media design by Sarah Hurley in a recent Crafting Creativity project, and drew in the stencil with embossing pens.

Photo shows a stencil on top of the Dream background for the next step in the hybrid card creation by EllyMae at Silhouette Secrets+

Then added the Magical Mysteries Kiss of the Fairy Emerald Creek embossing powder and heated that up to melt the embossing powder onto the Dream background. Next, I cut a larger background from the Lemoncello Paper by Pam Bray for the card base and inked the edges of it.

Photo shows a selection of craft supplies being used in the hybrid card creation by EllyMae with Silhouette Secrets+

And then adhered the Dream background on top of the blue background.

Photos shows a look at the embossed technique on the Dream background in the hybrid card creation by EllyMae at Silhouette Secrets+.

I then used the Providence Florals – Prairie Crocus Stamp with Ranger archival black ink on mixed media paper. The flowers were colored in with watercolors and the edges of the paper inked using Lisa Horton Cloud 9 Color Shifting inks. I cut another piece of the Lemoncello papers in yellow for the mat and inked the edges of that too.

Photo shows the card elements and craft supplies being used in the hybrid Dream card creation.

Then added a layer of Simon Hurley Pity Party Solar Paste on top of the watercolored flowers and it gives it a bit of shimmer and shine.

Photo shows an up close look at watercolored flowers with a layer of Simon Hurley Solar Paste added to the top.

Then I adhered the Dream background onto the card base and then used foam tape to adhere the matted flowers to the bottom right. For a bit of dimension, I added some pink twine behind the flowers before securing it down. Then I cut just the word Dream from the other pattern I had printed and matted it on black cardstock. I used foam tape on the left side to keep it even with the flower elements.

Photo contains a full image of the Dream Hybrid card created by EllyMae at Silhouette Secrets+ as a Design Team member for Emerald Creek Co

And the final step was to add 3 clear rhinestones in the top left of the card.

Here are some close up looks at the finished Dream card.

Photo contains a close up of the Dream Hybrid card created by EllyMae at Silhouette Secrets+ as a Design Team member for Emerald Creek Co

The embossing powder is so cool when it reflects the light.

Photo contains another close up angle of the Dream Hybrid card created by EllyMae at Silhouette Secrets+ as a Design Team member for Emerald Creek Co

I love how this card turned out combining digital elements with physical stamping, watercoloring, and inking.

Photo contains a another look at the details of the Dream Hybrid card created by EllyMae at Silhouette Secrets+ as a Design Team member for Emerald Creek Co

Hybrid Card Supply List

Photo contains a look at the supplies used to create they hybrid card.

I hope this post on the hybrid card I created gives you some ideas of what you could create. See what supplies you have on hand and what you can combine to create a unique card, tag, mixed media creation and more!

Save this for future reference by pinning the image below.

Photo is an image of the full card design in the Pinterest photo format.

Enjoy !

THANK YOU for your support! How can you help? Click HERE & buy a coffee.
Every little bit helps with the cost of running the site.

Silhouette Classes

Never stop learning! Let me help you take the anxiety out of learning with Silhouette and get to creating faster! My Silhouette classes are heavily focused on software, so you can take the skills & techniques taught and apply them to many future projects!

Silhouette step-by-step Classes by Silhouette Secrets+

Silhouette Secrets+ with EllyMae
**This post may contain affiliate links. What that means is that I may receive compensation if you purchase through the links I have provided. The price you pay for the product or service is not higher, but I may get compensated for sharing.

Posted on Leave a comment

From the Trade Show to Craft Room | Glassboard Studio Demo – Project Remakes

Silhouette Secrets+ with EllyMae

Come along with me and see what I shared in the Glassboard Studio booth at Creativation 2026. In this video I’m recreating what I shared and demonstrating how I use the Glassboard magnetic craft mats in my studio and projects. I enjoyed my demo time in the Glassboard booth at Creativation 2026 so much because I was able to share different projects and collect things on the trade show floor to add in as well. Plus, in this video, I share some bonus projects that just did not work out to share on the show floor too!

Affiliate links may be present in the following blog post and as an Amazon Associate, I earn from qualifying purchases.

Glassboard Studio Demo – Project Remakes with Glassboard Mat

I would love to hear what your favorite project shared was or your favorite tip. Let me know in the comments below.

Behind-the-scenes look – Glassboard Mat Demo

I always forget to take photos when I’m busy teaching, creating, or doing demos. Thank you to Julie McGuffee for snapping a photo of me in the Glassboard Studio booth!

EllyMae from Silhouette Secrets+ demonstrating at a table displaying crafting materials and tools, with a sign for Glassboard Studios in the background. Featuring the Glassboard Studio mat.

Here is the one and only photo that I took while I was doing the actual demos.

A crafting workspace featuring Glassboard Studio mat, watercolor paints, colorful ink, and various art supplies, including a St. Louis illustration on paper.

For this one, I was creating with a custom stamps designed specifically for Creativation 2026 by Photocentric and then watercoloring the images in with a watercolor palette by Pointer USA. This has become one of my favorite items to collect on the trade show floor!

One neat thing about this was that I was able to leave my paints exactly as you see on the glassboard mat and break for lunch. Then when I came back for my second demo shift, I simply reactivated the colors with a bit of water and continued creating.

Here are a couple photos from the demo remake. This shows the stamped image from the video and then I added with Lindy’s Gang Magical Shakers for the colors. I love the sparkle it has, but it may not come through well in the photo.

A close-up of a hand-drawn floral illustration featuring blue and yellow flowers on white paper, with a faint green grass detail at the bottom. In the background, a purple object is visible, along with a grid surface.

And then a sample of just the colors themselves from the video demo.

A close-up image of a watercolor art piece featuring colorful floral sketches including a pink flower and yellow flowers, alongside splashes of blue and green watercolors on textured paper.

In the video demo remake I was able to share multiple projects and show how I use the Glassboard Studio tools when I create. I lost track of how many different projects I was able to share, but here is a look at what was on my work space for this video.

A creative workspace featuring art supplies including Glassboard Studio mat, watercolor palettes, markers, and ink. It showcases various handmade cards with floral designs and decorative items like a hat and small pots.

I spy with my little eye… Stamped and watercolored images, custom faux wax seals – hot glue – print and cut images – Posca gold marker for accents, beaded pots of personality, sketching with Sharpie, painted faces with Liquitex, swatching and coloring with Lindy’s Gang Magical Shakers.

If you watch the video demo, you will hear me say that a year ago I did not own a Glassboard magnetic craft mat. I had to really talk myself into spending the money and ordering one. Now, I have 5+ in my craft studio and I do use them all. I have a couple on dedicated work spaces such as my beading & jewelry table, my main work space where I record videos, and a couple set up for a summer “craft camp”. I move them around as needed and I will admit, this is one of those situations where I purchased a couple of them simply because I loved the pattern and it made me happy. Impulse buy – probably!!! And not only have I added the magnetic mat to my work space, but the accessories like the Craft Catcher’s are right beside it too! I use them all the time.

After Creativation and doing the demo, I also added the HexaFlex Organizer Set to my work station as well. There is something about using a tool or storage accessory that gets me every time. Each year of Creativation I seem to add another new tool to my studio.

Supplies Shown in the Glassboard Mat Video Demo:

During the event, I like to be in the moment and I often get too busy & forget to post on social media and then after I get so far behind in posting and compiling video and photos, but there is lots to be shared and I hope to have more soon.

If you are on Instagram, I did put up a couple quick reels from the event.

And I also demonstrated in the Pointer USA booth with my Silhouette Portrait 4 and sketching on their mixed media paper. If you missed it, here is the remake of that demo too and also what failed on the show floor.

Want to see more from the Creativation Tradeshow floor? Check out these videos by my fellow NAMTA Creative Professionals that I was able to hang out with.

Save this for future reference by pinning the image below.

EllyMae from Silhouette Secrets+ sharing demos with Glassboard Studio mats - Pinterest Photo.

Enjoy !

THANK YOU for your support! How can you help? Click HERE & buy a coffee.
Every little bit helps with the cost of running the site.

Silhouette Classes

Never stop learning! Let me help you take the anxiety out of learning with Silhouette and get to creating faster! My Silhouette classes are heavily focused on software, so you can take the skills & techniques taught and apply them to many future projects!

Silhouette step-by-step Classes by Silhouette Secrets+

Silhouette Secrets+ with EllyMae
**This post may contain affiliate links. What that means is that I may receive compensation if you purchase through the links I have provided. The price you pay for the product or service is not higher, but I may get compensated for sharing.

Posted on 2 Comments

Creative Community with EllyMae Updates – June 2026

Silhouette Secrets+ with EllyMae

The Creative Community with EllyMae | Crafting & Troubleshooting subscription kicked off this year and is going strong. There are 2 parts to the Community: a private Facebook group where we troubleshoot issues and answer questions for users and the Community Forum where exclusive member content is posted each month. Each month we’ve covered a new topic in-depth and I share all the information I can on the topic to help user’s get to know their Silhouette software and machines and use them to their full potential. Video tutorials have a heavy focus on the Silhouette software and showing how to create and use the tools in the software for many different applications.

In the private Facebook group, we have helped to diagnose Silhouette machine issues and solve Silhouette software questions for users as they are posted. Myself and the admins in the group have many years of troubleshooting experience and can usually identify the issues quickly and get users up and running.

Affiliate links may be present in the following blog post and as an Amazon Associate, I earn from qualifying purchases.

A workspace setup featuring a laptop with design software open, a Silhouette cutting machine, a notebook, and a pen on a wooden desk.

Creative Community Recap January – June 2026

Every month is a new in-depth topic posted to the Community Forum vault. Here are the topics so far in 2026:

January 2026 – Core Silhouette Studio Design Skills Using Planner Stickers

In this video tutorial I show how to create your own design from scratch in Silhouette. From simple shapes to even drawing out a drinking glass design using the tools in the Silhouette software. These techniques can be used for more than planner stickers – to do lists, tags, stickers, pages, and more!

A silhouette cutting machine on a workspace, with two sheets of printed designs featuring lined layouts and blue patterns placed in front.

I really tried to keep it to an hour but it ended up being 1 hour & 30 minutes packed with information, tips, and troubleshooting…. Plus, a 6 minute bonus video with additional info.

A planner open to a weekly layout with empty sections for each day, accompanied by a pen and a craft machine in the background.

February 2026 – Text Secrets in Silhouette Studio: From Fonts to Finished Designs

This Silhouette video tutorial took on a life of its own and I created several project examples of what could be created with the techniques taught.

Designing with text in Silhouette Studio goes far beyond typing words on the screen—and this in-depth class shows you exactly how to turn fonts into polished, professional designs you’ll actually use.

Text Secrets in Silhouette Studio: From Fonts to Finished Designs is a 95-minute, step-by-step video class that goes into everything you need to know about working with fonts and text inside Silhouette Studio. From understanding where fonts live to creating finished designs ready for cutting, printing, or sharing, this class walks you through the entire process.

In this exclusive Crafting Community with EllyMae tutorial, you’ll watch 10 complete designs created using text, giving you real-world examples you can immediately apply to cards, vinyl projects, print and cut, apparel, signage, and more.

In this class, you’ll learn:

  • Font Basics – what you really need to know (and what you don’t)
  • Where Fonts Are Found & How They’re Installed
  • Fonts in the Silhouette Library Explained
  • How to Use Fonts from the Silhouette Library
  • Font Organization in Silhouette Studio
  • EllyMae’s “Secret” to Font Storage (no more lost fonts!)
  • Designing with Glyphs in Silhouette Studio
  • Creating 4 Designs Using Glyphs
  • An Additional Way to Use Glyphs

Here is a gallery look at a few of the projects I created using the techniques taught in this 95-minute video tutorial.

March 2026 – Conical Warp WOW! From Basic Decals to Conical Stencils

This video tutorial is all about the Conical Warp tool in Silhouette Studio. We cover all the options of the Conical Warp Panel and how each option can affect a design. Then we will put those steps to use by taking measurements of a conical shaped blank and inputting the information to make a decal to fit the blank. I created decals for several different shaped objects and share a look at the design, weeding, and application process. This tutorial shares tips along the way for issues you might encounter as well as taking it to the next level.

Three colorful coffee cups on a marble surface. The left cup is pink with the text 'FUED BY Coffee and Chaos.' The middle cup is turquoise with the text 'COFFEE MAKES ME GO' in pink. The right cup is also turquoise with the text 'COFFEE MAKES ME GO' in black.

One thing leads to another and during the basic decal creation process I had an idea I wanted to test out.
It was a success and I’m thrilled to share with you how to up your conical warp game with a conical warp stencil to create a WOW project with glass etching.

Two decorative glass cups with etched phrases: one reads 'DON'T ASK just pour' and the other 'sip sip HOORAY'.

I am sharing how I created the stencil design to fit the conical shaped martini glass and how I made the permanent design so you can read it while using the glass to enjoy your beverage.

Two etched glass bowls, one reads 'Espresso yourself!' and the other reads 'Drink happy thoughts.'

April 2026 – Follow the Path with Text and Objects in Silhouette

The text to path feature in Silhouette can be so much fun to create unique designs with. A path can be any cut line in Silhouette Studio and when you add text to that path it can bring a new level to the project. In this Silhouette video tutorial, we start with some of the basics, add in a few tricks to make it easier to work with difficult designs, and then take it to an advanced level with a bit of a spin. As a bonus, we will also cover Objects to Path too! 

Two handmade greeting cards with colorful designs and circular text patterns, one reading 'Happy Birthday' and the other 'Congratulations'. Accompanied by two circular cards featuring similar text. The cards are displayed on a wooden table with a craft machine in the background.

Here is an example of a spinner card created with the text to path techniques taught in the video tutorial.

A card with the text 'JUST FOR YOU!' displayed on a cutting machine, featuring a circular design that says 'Congratulations!' with phrases 'Way to go!' and 'Great job!' along with a green arrow.

And another example of using text to path for acrylic etching with the Silhouette Curio 2.

A round acrylic plaque featuring the phrase 'CREATE THE LIFE YOU LOVE' and a decorative illustration of scissors and a flower.

Take the techniques taught in the video tutorial and use them to create a wide variety of projects. And then keep the fun going with the bonus video on Objects to Path in Silhouette too!

A close-up view of a cutting machine with three measuring tapes in different colors (purple, blue, and pink) placed on the wooden table next to three printed designs, displaying different shapes and the phrase 'Measure Twice Cut Once.'

May 2026 – Deep Dive into Silhouette Studio Software – Preferences

Deep Dive into the Silhouette Studio Software – Preferences video tutorial covers everything about the Preferences in Silhouette Studio. In this 1 hour and 42 minutes tutorial we cover it all! The things you may already be aware of, as well as the things you may not need when things go wrong, but just in case you do, it’s covered. What does it all mean? I go through each topic and where I can show a demonstration of exactly what the preference changes or how it behaves.

There are 7 different tabs under the Preferences Panel, and each one can give you options to customize how your Silhouette software reacts. Discover what tools make your workflow easier or what settings might make the software run smoother for you.

Some of these options you may be familiar with, but some you may have never seen before or know when or what you might need it for. Let’s take the mystery out of the Preferences and set the software up for how YOU will use it for your workflow. 

Screenshot of the Silhouette Studio application showing the Preferences menu with options for language, default save location, unit of measurement, and print resolution.

June 2026 – Silhouette & Rhinestone Designs – Create, Customize, and Sparkle!*

*class creation in progress – topic & class name may be altered as needed

This month’s tutorial will focus on creating your own rhinestone design from scratch. We will start with something simple to get the hang of how things look and work, then explore even more under the Rhinestone features. The rhinestone features in Silhouette Studio can be used for so much more than just rhinestone designs. Some additional ideas are faux rhinestone designs with holographic HTV (my favorite!), journey/travel signs, outlines, and more! 

Graphic design software interface showing an oval shape outlined with rhinestones on a black background, with rhinestone settings displayed on the right.

Creative Community with EllyMae | Crafting & Troubleshooting Subscription

Want to learn more about your Silhouette and join the Creative Community?

Check out all the details HERE and I hope you will join us!

Save this for future reference by pinning the image below.

A glass bowl etched with the phrase 'Espresso yourself!' alongside a bottle of cleaning solution and a bucket with a humorous message about house elves. The bottom left features a colorful greeting card with circular patterns, a black tote bag displaying the word 'Create' in bright green, and a printed sheet showcasing various 'Create' designs.

Enjoy !

THANK YOU for your support! How can you help? Click HERE & buy a coffee.
Every little bit helps with the cost of running the site.

Silhouette Classes

Never stop learning! Let me help you take the anxiety out of learning with Silhouette and get to creating faster! My Silhouette classes are heavily focused on software, so you can take the skills & techniques taught and apply them to many future projects!

Silhouette step-by-step Classes by Silhouette Secrets+

Silhouette Secrets+ with EllyMae
**This post may contain affiliate links. What that means is that I may receive compensation if you purchase through the links I have provided. The price you pay for the product or service is not higher, but I may get compensated for sharing.

Posted on 1 Comment

Creative Projects with Mixed Media Designs

Silhouette Secrets+ with EllyMae

Often times I think users get a cut file and think of only one possible project for it and then it might sit in our digital resources forever and not be used again. But, there is so much more that can be created with just one design. For more inspiration and ideas, check out the Crafting Creativity series HERE.

Shaker cards can be very simple to make and assemble. It’s all about layers and creating a “pocket” to hold the shaker bits in place.

A crafting workspace featuring greeting cards with decorative designs, a color palette card showing a cake with icing, a purple glitter pen, tape, and a bag of small heart embellishments.

I used some glitter cardstock hearts that I’ve kept in a little baggie from when I was testing the Silhouette Electrostatic Mat cutting glitter cardstock. They have just been waiting for the right project.

I wanted to see how the design would look in 2 ways – with the mixed media design on top and as the background.

Here is a closer look at the design with the mixed media layer on top of the shaker bits.

A decorative card featuring a cut-out design of buildings with a pink background, showcasing the word 'Be' in a stylish font surrounded by empowering words like 'Thoughtful,' 'Happy,' 'Strong,' and 'Fearless.' Glittery accents and heart shapes add detail, enhancing the overall inspirational theme.

And a close up look at the design with the mixed media layer as a background behind the shaker bits.

A greeting card featuring a pink and teal design with glittery hearts, a message circle that says 'You are' surrounded by positive adjectives, and crafting materials in the background.

Watch the video tutorial below on how I created these designs.

This was such a random idea that popped into my head and I decided to try it and see what happened. I love how it turned out!

Wooden plaque featuring a butterfly design with inspirational text about growth and embracing change.

In the Silhouette software, I released the compound path and deleted some of the bits in the middle to make it a little more successful in cutting and create a larger space for the design in the middle. Then selected the entire mixed media design and made a compound path again.

Here is a look at the design before I saved as a svg to send to my Glowforge.

An open design software window displaying a decorative butterfly design with text, set up for a wood sign project.

I still need to finish this out and I’m not sure if I’ll add stain or just a protective sealer to it.

I then scaled the design down a bit and made a business sign too.

A decorative wooden sign displaying the name 'EllyMae', the business 'Swift Creek Customs', and the phrase 'Silhouette Secrets + Creator, Instructor, Maker'. It features a QR code on one side.

Additional Resources:

Use mixed media designs to create unique stencils that can be used for many different purposes.

Two craft stencils held by hands, one with an abstract speckled pattern and the other with a series of circular cutouts, displayed on a grid background.

This project uses the mixed media files in 3 different ways

  • as stencils
  • as physical elements cut
  • as digital backgrounds
A colorful canvas featuring motivational phrases such as 'Be You, Be Unique, Be Unstoppable' and 'You Are Amazing, Brave, Thoughtful, Kind, Smart, Fearless, Loved, Talented, Unique, Strong'. The background has abstract paint splashes and patterns.

This project came together layer by layer. A collage of different mediums and materials. I love how it has turned out so far. I am not sure it’s completely finished, but I’m sure it will tell me one of these days.

Here is a close up look at some of the layered details on this canvas collage showing 3 different methods of using the mixed media designs.

Close-up of a colorful mixed media artwork featuring an inspirational quote that reads "YOU ARE Amazing, Brave, Thoughtful, Kind, Smart, Fearless, Loved, Talented, Loyal, True, Strong" on a pink background with various artistic textures and patterns.

I also used the stencils in a mixed media journal to practice with before adding to my canvas. My first attempt on the canvas the paint was a bit watery and ran under the stencil, so I set that aside and practiced a bit in the journal.

An artist's workspace featuring an open sketchbook with colorful paint strokes and a stencil. Various paint bottles are arranged in the background alongside paintbrushes and tools, indicating an active creative process.

Use the mixed media designs and cut the design from cardstock or other materials to create a physical element. Layer and add this to the canvas for even more uniqueness and interest.

A close-up of crafting materials on a wooden table, featuring two black butterfly cutouts and several black patterned overlays, alongside a cutting machine and a blue cutting mat.

Add a digital pattern to the mixed media design, print it out, and cut out in a shape to add another layer to the canvas.

A close-up of printed motivational phrases on a sheet of paper, featuring the text 'You Are' followed by positive adjectives like 'Brave,' 'Kind,' and 'Talented,' with colorful watercolor backgrounds in orange and pink.

Mixed media designs have so much potential on what they can be used for and in this case I layered the different elements and just kept building the canvas project.

I created a couple different shirt designs using the mixed media designs and then cut out of HTV. The first one is cut from Siser Tiger Lily Puff Metallic HTV and another one of my favorites. I made one similar to this last year and it still looks great!

A navy blue t-shirt featuring the word 'create' in a stylish pink font, positioned over a patterned background of pink circles.

Next, I swapped out the Metallic Puff HTV and used a pattern HTV that’s in my stash along with a Siser Glitter Puff HTV. Although the glitter puff didn’t really puff up that much, it still looks great on the shirt.

Navy blue t-shirt featuring the word 'create' in bright green, surrounded by colorful confetti.

And one more creation. I’m not sure how I feel about this color combination, but I think it’s growing on me. I used Siser Glitter Puff HTV in orange and it didn’t puff up much either, but still looks great on the shirt.

A blue t-shirt with a colorful watercolor design featuring the word 'create' in bold, stylish lettering.

All of these shirts were created using the same techniques of an offset of the text and subtracting the offset from the mixed media design.

Supplies Used:

Project #5 – ATC (Artist Trading Cards)

Each year for Creativation I’ve made ATCs (Artist Trading Cards) and pass these out to others at the show. I used 2 of the mixed media designs on the background of the ATCs. These techniques could be applied to many other projects such as cards, bookmarks, stickers, etc.

A crafting workspace displaying a stack of colorful business cards with the text 'LIVE YOUR DREAMS' and 'ST LOUIS', alongside a card indicating creator information and a logo for Silhouette Secrets.

Watch the step-by-step tutorial on creating these ATC (Artist Trading Cards) below.

And check out the blog post on the ATCs (Artist Trading Cards) HERE.

Supplies Used:

It is amazing how one design or creative idea can be the spark for so many more projects!

Find more designs by Sarah Hurley at the ​Silhouette Design Store​

Follow along with Sarah Hurley on her ​website​, ​Facebook​, and ​Instagram​.

Sarah also launched Stella Nova this past year too and I’ve enjoyed following along on that journey as well. ​Check that out HERE​.

A great big thank you to Sarah Hurley for collaborating with us this month!

Sign up for the Silhouette Secrets+ newsletter HERE so you don’t miss out on future collaborations.

A collection of mixed media projects including a colorful notebook cover, personalized wooden sign, and various fabric designs featuring the word 'create' and positive affirmations.

Silhouette step-by-step Classes by Silhouette Secrets+

Silhouette Secrets+ with EllyMae
**This post may contain affiliate links. What that means is that I may receive compensation if you purchase through the links I have provided. The price you pay for the product or service is not higher but I may get compensated for sharing.