Posted on Leave a comment

Creative Projects that Sparkle with Clikchic Designs

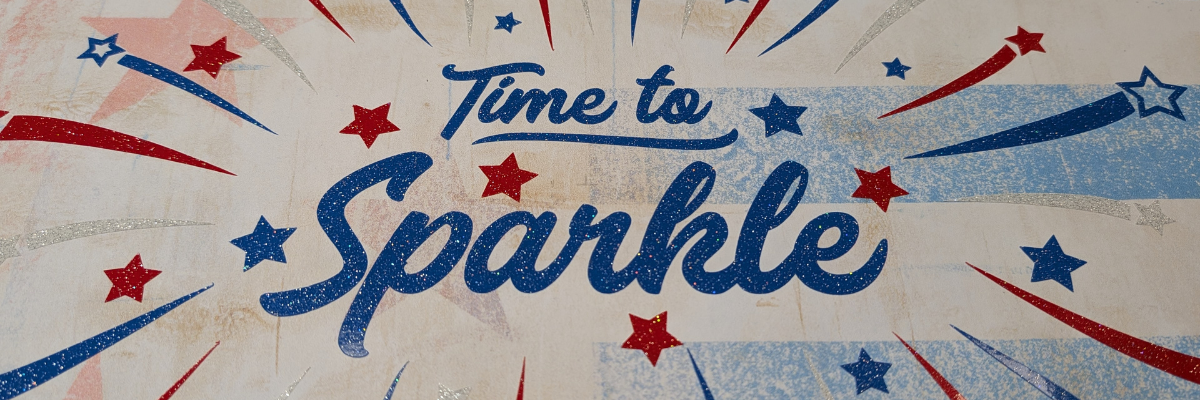
Time to Sparkle Header

Silhouette Secrets+ with EllyMae

Preview of Time to Sparkle Design by Clikchic Designs.

The Crafting Creativity series is designed exactly for sharing inspiration, designs, and showing how to make your designs go farther or think outside the box. Find more Crafting Creativity inspiration HERE.

Crafting Creativity video preview of the projects created with Time to Sparkle by Clikchic Designs. Additional photos, details, tips, tutorials, and supply lists can be found by scrolling under the video.

I am a Creative Professional with NAMTA and every year they host Creativation which is a large gathering of craft industry businesses, retailers, and brands from around the world. This year the Creative Professionals had the chance to display art in the entrance hall of the event. We were given the parameters of a 12″ x 12″ canvas and a red, white, and blue theme and told to create to share our skills and talents. I love to be able to make unique creations and start with something flat and give it dimension.

Photo shows a 3-D Mixed Media Canvas project with a red, white, and blue theme. Projects features several 3-D papercraft designs.

This project was several weeks in the making. I believe we found out we were going to do this in January or February with the conference happening in May. Once a topic is given to me my brain just starts with throwing out ideas. I try to keep a running list, usually in my phone, but often times I find a physical list in my creative journal is what really gets ideas flowing and allows me to narrow things down.

This is one of those projects that is built as it goes along and I continued to add things to it over the entire process.

Photos shows a shimmer sublimation tumbler with a colorful design and Time to Sparkle on the front along with the Craft Pro Tumbler Press from Heat Press Nation.

I started by measuring the tumbler then drew a rectangle in Silhouette Studio for the template size. Then the process of filling the design with patterns began. After testing many options I decided I loved this pattern with the ombre blues and having the design in white.

Photo is a screenshot of the Silhouette Studio software showing a rectangle template for the sublimation print with a background design and Time to Sparkle in the center.

I love how it turned out and now have another custom tumbler I can use.

Photo shows a custom sublimation tumbler with a bright background and Time to Sparkle on the tumbler. This design was created in Silhouette Studio and printed with an Epson F170 Sublimation Printer.

Additional Resources:

This card design was created by first setting the Time to Sparkle up for sketching and then cutting out the stars and swooshes from the card front.

Photo shows a card created by cutting parts of the background out and sketching Time to Sparkle on the front of the card.

This design works perfectly for a going away card, new adventure, best wishes, congratulations, and more!

I set the text to sketch and used a crosshatch sketch fill of 0.015″. Then used the “cut” by Line Color on the Send tab to tell it what action I wanted each line color to do.

Photo shows a screenshot of the Silhouette Studio software with the Sketch set up on the Send tab to complete on the front of the card.

After the sketching and the cut out was complete on the front of the card, I added a layer of glitter cardstock behind to give it more sparkle.

Additional Resources:

I added the Time to Sparkle design cut from glitter adhesive vinyl onto a clear transparency layer for this cake topper.

Photo shows a Lighted Cake Topper that was custom made in Silhouette Studio using the Time To Sparkle Design by Clikchic Designs

This design was created using the Draw Shapes tool in Silhouette Studio and creating several layers.

Photo shows a screenshot from the Silhouette Studio software showing the layers created for the lighted cake topper design featuring Time to Sparkle.

Supplies Used:

I love how one design can be used to create so many projects. The possibilities are endless!

Find more designs by Clikchic Designs

Follow along with Clikchic Designs on her websiteFacebook, and Instagram.

Here are a few Instagram links to get you started – make sure when you visit to like and leave a comment too! Creators love to hear from real people who enjoy their work.

Sign up for the Silhouette Secrets+ newsletter HERE so you don’t miss out on future collaborations.

Photo shows a collage of projects for the Crafting Creativity blog post featuring Clikchic Designs - Time to Sparkle Design. Projects shown include a 3D Mixed Media Canvas, Sublimation Tumbler, Custom Card, and Lighted Cake Topper.

Silhouette step-by-step Classes by Silhouette Secrets+

Silhouette Secrets+ with EllyMae
**This post may contain affiliate links. What that means is that I may receive compensation if you purchase through the links I have provided. The price you pay for the product or service is not higher but I may get compensated for sharing.

Posted on Leave a comment

Create More: Creative Projects with Wispy Willow Designs

Silhouette Secrets+ with EllyMae

For this project, I did some stickers and was testing it with some adhesive photo paper that says it’s waterproof. While the image itself was waterproof, the paper itself was not and the stickers did not last.

Photo contains a water bottle with a decal, a Silhouette machine in the background with a print and cut page on the table. 
Create More with Silhouette

While this project failed as a water bottle decal, I still found I love the adhesive photo paper for other projects. I have been using it for cards, home decor signs, and more!

Here is a look at my setup in Silhouette Studio for this print and cut page. I try to maximize the space when I do a print and cut project. However, I do use the default registration marks for the most accurate print and cut results.

Photo shows an screenshot of the Silhouette software print and cut page setup. 
Create More

When I created the print and cut sheet design, I was thinking ahead to projects and included a size of the image that I could use on a wood round for a tiered tray sign.

Photo shows a printed page for print and cut loaded in the Silhouette machine.

Wood is a natural surface, so it can be tricky sometimes to get things to stick. I did add a coat of Mod Podge to the wood and let that dry before applying the adhesive photo paper to it.

Photo shows a finished project for a tiered tray using a print and cut design. Create more with Silhouette.

This project was a failure! Big fat failure! The design itself turned out fabulous but the rest went into the trash.

Photo shows a close up of a print and cut sticker using the Happiness Comes in Waves design by Wispy Willow Designs. Create more with Silhouette.

I printed 2 copies of the beach design and then added them to a cardstock backer to make a double sided piece that was supposed to go inside a round clear ornament. I mentioned above that I like to maximize my print and cut space, so I included extra designs that I can use on cards in the future too!

Photo shows another print and cut page with multiple designs on it on a table with a Silhouette Cameo 5. 
Create more!

I wanted to add in sand and shells to the bottom of the ornament, but the glue didn’t look right when dry.

Photo shows a failed project with glue showing in an ornament with sea shells.

Back to the drawing board on this one. I tossed the ornament in the trash.

It was just not the look I was hoping for, but I do have a double sided design that is looking for a new project to be used in.

The previous project may have failed, but this one turned out FANTASTIC!

Photo shows a finished project with a fantastic HTV design using the Happiness Comes in Waves design by Wispy Willow Designs. 
Create more with Silhouette!

I cut each layer out of Siser Easyweed HTV and then pre-pressed the tote bag. Then each layer was placed and pressed for 3-5 seconds, just enough to get it secure and to be able to remove the carrier sheet. After the last layer give the entire design a press. I did 10 seconds at the end, but it really just depends on the layers and the material being used. This is a canvas tote bag with some texture, so I wanted to make sure it was well secured.

Supplies Used:

Tips For Working with HTV

Cutting Multiple Colors at Once

When cutting different colors of the same material, you can usually cut more than one color at a time. I do this with cardstock, adhesive vinyl, HTV, etc.

Here is a look at my setup for cutting this design, then I will cut my HTV colors down to the size I need and place them exactly where they are shown on the screen.

Photo shares a screenshot of Silhouette Studio software with multiple colors of the design on the design mat. Create more!

If using a Silhouette cutting mat and the mat is loaded properly, then the designs should cut in the exact location they show on the screen. If using a 3rd party cutting mat, they may not line up the same since the margins on the mat edges can vary from a true Silhouette cutting mat.

Cutting multiple colors at once, not only can save you time, but it can also make your mats last longer too because you are cutting the materials down to the size needed and not ripping a full piece of material off the entire mat each time.

Here is a look at the pieces after I cut and weeded each one.

Photo shows the cut design pieces from HTV on the table with a Silhouette machine.

Mirror the Design Yourself

Flip the design manually, by right clicking on the design and selecting Flip > Horizontal on the Design tab and then when you Send the design to cut, select “Send As Is” and the design will cut out exactly where you have it placed on the screen.

Photo shows a screenshot of Silhouette Studio showing how to choose Send As Is for an HTV design after it's been manually flipped. 
Create More!

If you let the Silhouette software mirror the design, then you may end up wasting materials and not having the material in the right location to cut. The software flips the entire mat, not just the design and does not show that on the screen. So you think it will cut on the left side, but it flips the entire mat and then cuts on the right.

Now, here is the humdinger on this one – the software flipping the entire mat can vary by software version. They added this “new feature” in and then it did not work the way a real user works, so many users wasted vinyl. After several years, they tried to “fix” it in the software so it would just flip the design and not the entire mat. Then in later versions, it was reverted back to flipping the entire mat again. It’s one of those things that I guess you’d say was implemented by an engineer and not someone who actually uses the Silhouette to cut HTV daily.

Pressing Multiple Layers and Colors

When pressing multiple colors, typically each color is pressed separately unless the pieces can be lined up WITHOUT any overlapping cover sheets. If the cover sheet of the HTV piece overlaps, it can interfere with the design being pressed.

Place one color of the design, then press for 3-5 seconds to “tack” it down, then remove the carrier sheet and repeat for all the layers.

Unless the carrier sheet of each layer covers the entire design, make sure to only press long enough to tack it down and then remove the carrier sheet for that piece. If you press it too long the carrier sheet can leave an indent in the other pieces of HTV that are already pressed.

For instance, if I left the carrier sheet for Beach on too long, it might leave a line impressed into the sunshine rays.

Photo shows several layers of HTV pressed onto a canvas tote bag.

Use a protective layer on top of the HTV when pressing each layer, unless the carrier sheet covers all of the HTV each time. This will protect the HTV and prevent it from sticking to the top platen of the heat press. I use a Teflon sheet or a piece of parchment paper depending on what’s handy and what material I’m using.

Oh and another one – parchment paper and wax paper are not the same. Wax paper in a heat press can leave a big mess.

Project #5 – Sketch & Mixed Media Design

This project was a test, well, actually several tests.

Testing pens to see if they were waterproof, sketching with the Silhouette Cameo Pro MK II with no mat, and mixing watercolor backgrounds with acrylic paint markers.

This idea just would not go away and for some reason, I really wanted to sketch out this month’s design. I can’t pinpoint why, but sometimes you just don’t know what will turn out until you give it a try. And sometimes you just have to let yourself play.

Photo shows a look at a sketched design that has been colored with watercolors and acrylic markers with multiple craft supplies on the table.

And it worked!
The pens were waterproof and did not bleed.
The Silhouette machine sketched the design as it should without a cutting mat.
The watercolor background turned out fantastic – LOVE IT!
The acrylic markers on top = worked!

It is unique! It also gave me a bunch more ideas too.

And I put together a video of this project below.

Supplies Used:

It is amazing how one design or creative idea can be the spark for so many more projects!

Find more designs by Wispy Willow Designs

Follow along with Wispy Willow Designs on her websiteFacebook, and Instagram.

A great big thank you to Hannah at Wispy Willow Designs for collaborating with us this month!

Sign up for the Silhouette Secrets+ newsletter HERE so you don’t miss out on future collaborations.

Photo is a Pinterest photo for pinning this project that states Crafting Creativity with Wispy Willow Designs. 1 Design = 5 projects. 
Create More with Silhouette!

Silhouette step-by-step Classes by Silhouette Secrets+

Silhouette Secrets+ with EllyMae
**This post may contain affiliate links. What that means is that I may receive compensation if you purchase through the links I have provided. The price you pay for the product or service is not higher but I may get compensated for sharing.

Posted on 1 Comment

Creative Projects with Mixed Media Designs

Silhouette Secrets+ with EllyMae

Often times I think users get a cut file and think of only one possible project for it and then it might sit in our digital resources forever and not be used again. But, there is so much more that can be created with just one design. For more inspiration and ideas, check out the Crafting Creativity series HERE.

Shaker cards can be very simple to make and assemble. It’s all about layers and creating a “pocket” to hold the shaker bits in place.

A crafting workspace featuring greeting cards with decorative designs, a color palette card showing a cake with icing, a purple glitter pen, tape, and a bag of small heart embellishments.

I used some glitter cardstock hearts that I’ve kept in a little baggie from when I was testing the Silhouette Electrostatic Mat cutting glitter cardstock. They have just been waiting for the right project.

I wanted to see how the design would look in 2 ways – with the mixed media design on top and as the background.

Here is a closer look at the design with the mixed media layer on top of the shaker bits.

A decorative card featuring a cut-out design of buildings with a pink background, showcasing the word 'Be' in a stylish font surrounded by empowering words like 'Thoughtful,' 'Happy,' 'Strong,' and 'Fearless.' Glittery accents and heart shapes add detail, enhancing the overall inspirational theme.

And a close up look at the design with the mixed media layer as a background behind the shaker bits.

A greeting card featuring a pink and teal design with glittery hearts, a message circle that says 'You are' surrounded by positive adjectives, and crafting materials in the background.

Watch the video tutorial below on how I created these designs.

This was such a random idea that popped into my head and I decided to try it and see what happened. I love how it turned out!

Wooden plaque featuring a butterfly design with inspirational text about growth and embracing change.

In the Silhouette software, I released the compound path and deleted some of the bits in the middle to make it a little more successful in cutting and create a larger space for the design in the middle. Then selected the entire mixed media design and made a compound path again.

Here is a look at the design before I saved as a svg to send to my Glowforge.

An open design software window displaying a decorative butterfly design with text, set up for a wood sign project.

I still need to finish this out and I’m not sure if I’ll add stain or just a protective sealer to it.

I then scaled the design down a bit and made a business sign too.

A decorative wooden sign displaying the name 'EllyMae', the business 'Swift Creek Customs', and the phrase 'Silhouette Secrets + Creator, Instructor, Maker'. It features a QR code on one side.

Additional Resources:

Use mixed media designs to create unique stencils that can be used for many different purposes.

Two craft stencils held by hands, one with an abstract speckled pattern and the other with a series of circular cutouts, displayed on a grid background.

This project uses the mixed media files in 3 different ways

  • as stencils
  • as physical elements cut
  • as digital backgrounds
A colorful canvas featuring motivational phrases such as 'Be You, Be Unique, Be Unstoppable' and 'You Are Amazing, Brave, Thoughtful, Kind, Smart, Fearless, Loved, Talented, Unique, Strong'. The background has abstract paint splashes and patterns.

This project came together layer by layer. A collage of different mediums and materials. I love how it has turned out so far. I am not sure it’s completely finished, but I’m sure it will tell me one of these days.

Here is a close up look at some of the layered details on this canvas collage showing 3 different methods of using the mixed media designs.

Close-up of a colorful mixed media artwork featuring an inspirational quote that reads "YOU ARE Amazing, Brave, Thoughtful, Kind, Smart, Fearless, Loved, Talented, Loyal, True, Strong" on a pink background with various artistic textures and patterns.

I also used the stencils in a mixed media journal to practice with before adding to my canvas. My first attempt on the canvas the paint was a bit watery and ran under the stencil, so I set that aside and practiced a bit in the journal.

An artist's workspace featuring an open sketchbook with colorful paint strokes and a stencil. Various paint bottles are arranged in the background alongside paintbrushes and tools, indicating an active creative process.

Use the mixed media designs and cut the design from cardstock or other materials to create a physical element. Layer and add this to the canvas for even more uniqueness and interest.

A close-up of crafting materials on a wooden table, featuring two black butterfly cutouts and several black patterned overlays, alongside a cutting machine and a blue cutting mat.

Add a digital pattern to the mixed media design, print it out, and cut out in a shape to add another layer to the canvas.

A close-up of printed motivational phrases on a sheet of paper, featuring the text 'You Are' followed by positive adjectives like 'Brave,' 'Kind,' and 'Talented,' with colorful watercolor backgrounds in orange and pink.

Mixed media designs have so much potential on what they can be used for and in this case I layered the different elements and just kept building the canvas project.

I created a couple different shirt designs using the mixed media designs and then cut out of HTV. The first one is cut from Siser Tiger Lily Puff Metallic HTV and another one of my favorites. I made one similar to this last year and it still looks great!

A navy blue t-shirt featuring the word 'create' in a stylish pink font, positioned over a patterned background of pink circles.

Next, I swapped out the Metallic Puff HTV and used a pattern HTV that’s in my stash along with a Siser Glitter Puff HTV. Although the glitter puff didn’t really puff up that much, it still looks great on the shirt.

Navy blue t-shirt featuring the word 'create' in bright green, surrounded by colorful confetti.

And one more creation. I’m not sure how I feel about this color combination, but I think it’s growing on me. I used Siser Glitter Puff HTV in orange and it didn’t puff up much either, but still looks great on the shirt.

A blue t-shirt with a colorful watercolor design featuring the word 'create' in bold, stylish lettering.

All of these shirts were created using the same techniques of an offset of the text and subtracting the offset from the mixed media design.

Supplies Used:

Project #5 – ATC (Artist Trading Cards)

Each year for Creativation I’ve made ATCs (Artist Trading Cards) and pass these out to others at the show. I used 2 of the mixed media designs on the background of the ATCs. These techniques could be applied to many other projects such as cards, bookmarks, stickers, etc.

A crafting workspace displaying a stack of colorful business cards with the text 'LIVE YOUR DREAMS' and 'ST LOUIS', alongside a card indicating creator information and a logo for Silhouette Secrets.

Watch the step-by-step tutorial on creating these ATC (Artist Trading Cards) below.

And check out the blog post on the ATCs (Artist Trading Cards) HERE.

Supplies Used:

It is amazing how one design or creative idea can be the spark for so many more projects!

Find more designs by Sarah Hurley at the ​Silhouette Design Store​

Follow along with Sarah Hurley on her ​website​, ​Facebook​, and ​Instagram​.

Sarah also launched Stella Nova this past year too and I’ve enjoyed following along on that journey as well. ​Check that out HERE​.

A great big thank you to Sarah Hurley for collaborating with us this month!

Sign up for the Silhouette Secrets+ newsletter HERE so you don’t miss out on future collaborations.

A collection of mixed media projects including a colorful notebook cover, personalized wooden sign, and various fabric designs featuring the word 'create' and positive affirmations.

Silhouette step-by-step Classes by Silhouette Secrets+

Silhouette Secrets+ with EllyMae
**This post may contain affiliate links. What that means is that I may receive compensation if you purchase through the links I have provided. The price you pay for the product or service is not higher but I may get compensated for sharing.

Posted on 4 Comments

Step-by-Step Tutorial: Mastering Tracing & Image Clean-Up in Silhouette Studio

Master Tracing in Silhouette Studio
Silhouette Secrets+ with EllyMae

Mastering Tracing in Silhouette Studio

Have you ever tried tracing an image in Silhouette Studio only to find the result wasn’t as clean or precise as you’d hoped? You’re not alone! Many users struggle with getting a smooth, accurate trace that leads to a successful cut file. We see questions about this all the time, and that’s why I’ve created an in-depth tutorial to help you master tracing and cleaning up your designs in Silhouette. Whether you’re working with complex images or simple shapes, these tips and techniques will help you put the tools in the Silhouette Studio software to work for you!

Master Tracing & Clean Up in Silhouette Studio Video Class

Find this FREE in-depth video tutorial on the Silhouette Secrets+ YouTube channel HERE.

Every single image that you trace can be different because each one is made up of different colors, gradients, shading, etc. In the video tutorial, I take you along for the journey and it is step-by-step exactly how I would work with a file that needs clean up. The only way to actually know if the file will be a successful cut file in the end is to cut it, so I included my tips after cutting and shared exactly what I would change after I finished the cut to make it even more successful for the final project.

Master Tracing Silhouette Studio

The original traced image started with 24,528 edit nodes and through the clean up process, I was able to get that down to 1,848. That makes a huge difference in the cuttability of a file.

Master Tracing Silhouette Studio - Edit Nodes

My goal through the entire process was to maintain as much of the character of the image as possible. This makes a great way to make unique projects & gift ideas.

Check out the full in-depth video to learn more about how you can make the tools in the Silhouette Studio software do what you want.

Distressed Truck Image cut from Siser EasyWeed HTV

I hope you pick up a few tips to mastering tracing in Silhouette Studio and how to clean up a file for a cuttable design!

Master Tracing & Clean Up in Silhouette Studio Video Class

Silhouette Tutorial: In-Depth Guide to Tracing & Cleaning Up Detailed Images – Step-by-Step Video on the Silhouette Secrets+ YouTube channel
HERE

For more in-depth tutorials and inspiring projects, explore our comprehensive A to Z of Silhouette section on the website HERE, where you’ll find years of creative resources to help you master your Silhouette skills!

Save this for future reference by pinning the image below.

Master Tracing and Clean Up in Silhouette Studio Pin

Enjoy !

THANK YOU for your support! How can you help? Click HERE & buy a coffee.
Every little bit helps with the cost of running the site.

Silhouette Classes

Never stop learning! Let me help you take the anxiety out of learning with Silhouette and get to creating faster! My Silhouette classes are heavily focused on software, so you can take the skills & techniques taught and apply them to many future projects!

Silhouette step-by-step Classes by Silhouette Secrets+

Silhouette Secrets+ with EllyMae
**This post may contain affiliate links. What that means is that I may receive compensation if you purchase through the links I have provided. The price you pay for the product or service is not higher but I may get compensated for sharing.
Posted on 3 Comments

Silhouette Summit 2024 – Part 1 – cloChé Heat Press

Silhouette cloChé Heat Press
Silhouette Secrets+ with EllyMae

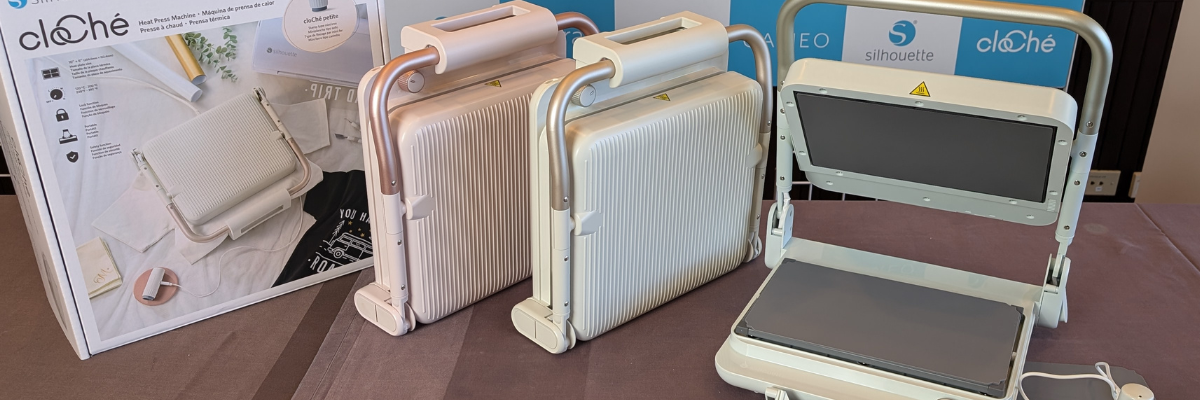
I’m back from the Silhouette Summit 2024 event and will be sharing more information that I learned in the demo room and classes at the Summit event. There is a lot of information so it will be a series of blog posts to share all the details. Part 1 will include details about the new Silhouette cloChé (clo-shay) Heat Press and cloChé Petite.

Affiliate links may be present in the following blog post and as an Amazon Associate, I earn from qualifying purchases.

Silhouette cloChé Heat Press and cloChé Petite

It is cute, stylish, and has a slim line design that can be stored on a shelf when not in use. It is a heat press designed for the hobby crafter.

Silhouette cloChé Heat Press

Silhouette cloChé Heat Press

It will be released in 3 colors – Milky White, Chiffon Pink, and Ice Green. Additional colors may become available if retailers choose to have an exclusive option in the 7 additional options.

You can get a glimpse of those colors in the live video I shared walking the Silhouette Summit demo floor found HERE.

Details on the Silhouette cloChé Heat Press

Silhouette cloChé Heat Press Open

  • 6″ x 10″ heat platen
  • Approximately 10-11 lbs
  • L – M – H heat settings with options in between
    L – 250° F
    M – 320° F
    H – 400° F
    There is no digital display. In order to gauge the actual temperature, you would need a digital thermometer to read the temperature of the top platen.
  • 45 second timer
    There is no digital display and the timer is not adjustable.
  • 0.5 mm maximum thickness of materials pressed
  • Locking mechanism on the front
  • Voltage setting on backside of heat press
  • Silhouette cloChé Petite hand held press included with Silhouette cloChé Heat Press
  • Retail price $249.99 (price given at Summit ’24)
  • Release Date – Coming Soon
cloChé Heat Press Temperature Dial

Here is a look at the temperature dial on the Silhouette cloChé heat press. It has a L, M, and H setting, but can also be set in between those as well. (L = 250° F, M = 320° F, H = 400° F)

cloChé Heat Press Front View

Here is a look at the front locking mechanism. When the lid is closed, then it will fold up over top of the top platen handle and lock into place. Be gentle with the handle and do not force it closed or open. It will take some practice to get the hang of how it locks and unlocks.

Heat Press Side View

Here is a view from the side of the Silhouette cloChé Heat Press. The maximum thickness for materials is 0.5 mm. I would not recommend using thicker materials than what is recommended in the press.

cloChé heat Press Closed

Heating

To turn machine on, open heat press and then turn the dial. The Silhouette cloChé heats up with the lid open and comes to temperature fairly quickly from what we saw in the Summit demo.

Pressing Time

In the demos shown at the Silhouette Summit, the Silhouette cloChé they pressed the garment with HTV for 45 seconds as the first press, then said to cold peel the carrier sheet, then add a parchment paper on top and press another 45 seconds for a finishing press.

We did question this length of time and why they are using 45 seconds when most HTV is 15 seconds on average. There was never really a definite answer except, that’s what worked for the Silhouette cloChé heat press. We did not see the product packaging for the HTV they were using.

If you are using other brands of HTV, please test your garments and I’d recommend starting with the recommended settings for the actual HTV you are using. Grab a timer and set it for the recommended setting of the HTV brand.

I’d also recommend getting a digital thermometer so you can check the heat platen for an accurate temperature reading.

Auto Shut Off

There is an auto shut off when the Silhouette cloChé heat press is not in use. If the lid is open, after 15 minutes it will auto shut off. If the lid is closed, it will shut off after 2 minutes.

Duration of Use

It was stated that the Silhouette cloChé heat press was designed with a use time of 1 hour and then it needs a 30 minutes cool down period.

Silhouette cloChé Petite Handheld Press

Silhouette cloChé Petite

The Silhouette cloChé Petite shown on the right side of the photo above that is plugged into the heat press is a handheld press that has a heat platen approximately 1/2″ in diameter. It is designed for usage with small designs or rhinestones.

The Silhouette cloChé Petite comes with the Silhouette cloChé Petite Heat Press and can be stored on the backside of the heat press.

The Silhouette cloChé Petite is not sold separately at this time. We did recommend that it be considered as an option to sell separately.

cloChé Petite Storage on back of Heat Press

The Silhouette cloChé Petite does have to be plugged when using. It can be plugged directly into the Silhouette cloChé Heat Press or other suitable power sources. Please read the instructions that come with the Silhouette cloChé Petite for specific instructions.

It comes with a USB C to USB C cord that also can be stored on the backside of the Silhouette cloChé Heat Press. The Silhouette cloChé Heat Press does not have to be turned on for the Silhouette cloChé Petite to be used, but the heat press does need to be plugged in to an electrical outlet.

Recommended Usage of the Silhouette cloChé Petite

The Silhouette cloChé Petite does include instructions in the box and I would recommend reading through those thoroughly before use.

For use with HTV, cover the HTV with a protective sheet such as parchment paper and then tap the cloChé Petite on the HTV until adhered. For use with rhinestones, cover the rhinestone with protection and press the Silhouette cloChé Petite down until rhinestone is adhered. It is recommended to use a silicone mat or heat safe surface to press on top of with the Silhouette cloChé Petite. The silicone mat that comes with the Silhouette heat press can be used or I would recommend the Artesprix Protective Mat as well. I use the protective mat for many different projects.

Silhouette Summit Gift

We did receive a Silhouette cloChé Petite at the Silhouette Summit.

Overall, the new Silhouette cloChé Heat Press is cute and light weight. I’ve had several group members already comment with ideas for how to use it in their hobby craft business. It is designed for the hobby crafter and I would not recommend it for commercial use.

I have also created a Silhouette Summit playlist on the Silhouette Secrets+ YouTube channel that can be found HERE. I have a couple more to add to the video playlist on YouTube once they are edited, so make sure to like, subscribe, and click that bell for notifications.

Silhouette Summit 2024 – Part 2 – Cameo Pro MK II found HERE.

Save this for future reference by pinning the image below.

Silhouette Summit Announcements

Find more Silhouette tutorials and information under the A to Z to Silhouette section on the website HERE.

Silhouette Press Release found HERE.

Enjoy !

THANK YOU for your support! How can you help? Click HERE & buy a coffee.
Every little bit helps with the cost of running the site.

Silhouette Classes

Never stop learning! Let me help you take the anxiety out of learning with Silhouette and get to creating faster! My Silhouette classes are heavily focused on software, so you can take the skills & techniques taught and apply them to many future projects!

Silhouette step-by-step Classes by Silhouette Secrets+

Silhouette Secrets+ with EllyMae
**This post may contain affiliate links. What that means is that I may receive compensation if you purchase through the links I have provided. The price you pay for the product or service is not higher but I may get compensated for sharing.
Posted on Leave a comment

Cutting Faux Leather with Your Silhouette: Essential Tips

I’ve wanted to write a faux leather tutorial with tips for Silhouette for a long time, but other things seemed to jump in front of it on my to-do list. So when Amy announced her Faux Leather event, I made it a goal to really dive in and create with some faux leather.

Affiliate links may be present in the following blog post and as an Amazon Associate, I earn from qualifying purchases.

Amy Romeu, hailed as the Queen of Faux Leather by many, recently hosted an event that I attended. I had a great time crafting along with her videos and picked up a lot of great tips that can help in being successful in cutting faux leather with any cutting machine.

Before we get too far in, let’s cover a few things about faux leather that will help in the process.

Faux Leather Information

Can Silhouette machines cut faux leather? Yes!
Can Silhouette machines cut ALL faux leather? NO!
Can all cutting machines cut ALL faux leather? NO!

Faux leather is such a broad term, just like “genuine” leather is. Cutting some faux leathers is easy, some pose greater difficulty, and others simply do not cut well at all.

Factors influencing whether a Silhouette or another machine can cut faux leather include:

  • Color – Yes! Many users don’t know this, but color affects how materials cut. Different colors go through different processes in the production and that can affect how it cuts. Some can be tougher than others due to coloring.
  • Backing – Faux leathers can have a variety of backing on it. Some don’t have any and are soft and pliable. While others can have a mesh, woven backing which can be difficult to cut through.
  • Texture – Faux leathers can come in all kinds of textures such as embossed, glitter, sequins, etc. This will affect how it cuts. Just think of a blade trying to bounce over a texture material to cut a clean line. Texture affects it! The texture also influences the ease of cutting by hand. The same is true for a cutting machine.
  • Thickness – There is a wide array of thicknesses for faux leather. Super thin ones can be too pliable and just smoosh around on the cutting mat. Thicker ones may need multiple passes to cut through and a longer blade such as the Deep Cut blade.
  • Composition – Faux leather is such a broad term. The definition of “faux” is artificial or fake. So keep in mind that faux leather is fake leather.
    What it is made of?
    A wide variety of things. Plastic mostly. For instance, I ordered some leather on Amazon and it is PU Leather. It is by definition, artificial leather, crafted from a thermoplastic polymer commonly employed in the production of furniture or shoes.
    Faux leather = fake leather = plastic

Supplies I Used:

Faux Leather Varieties
Craft Chameleon Warehouse Faux Leather Supply

So the first place to start is to gather your supplies for whatever you are working on. I was so excited for these projects and I knew I would be creating several, so I pulled out all my faux leathers and my scrap HTV. I have several boxes of scrap HTV and it’s a great way to use it by adding it to faux leather projects.

Supplies for Faux Leather Projects

Keep it a secret, but I actually obtained more faux leather than shown because I needed to test several during these projects. And once I went down that rabbit hole, I found many patterns I wanted to collect.

Faux Leather Variety
Faux leather from The Polka Dotted Peach

Tips for Cutting Faux Leather with Silhouette

  • Cut the faux leather down to size and give yourself some extra space for taping down the edges to the cutting mat.
  • Place the faux leather front facing down on the cutting mat, so you are cutting through the backside first.
    **NOTE: if cutting real leather, DO NOT place it face down or you can ruin the finish on the real leather. That can be a very expensive mistake!
Tape Faux Leather to a Silhouette Cutting Mat

  • Utilize a reliable sticky cutting mat to secure the materials in place during the cutting process. Using a brayer to smooth the materials down to secure it. If the materials shift during the cut, the cut may fail, or your blade might become stuck.
  • Securely tape down the material edges. I found that using longer pieces of tape not only ensured a better hold but also reduced the risk of it getting caught in the machine during cutting. You can also reuse painter’s tape if removed carefully at the end.
  • For best results, keep the painters tape away from the edges of the cutting mat so it is not going under the rollers. Any change in the surface area under the rollers and it can cause it to lose grip or the left and right roller to not move at the same rate, which can cause issues.
  • When using a Silhouette cutting mat, you can use the grid for exact placement for lining up your materials and your design. If you load the mat properly, the on-screen design will align with the Silhouette cutting mat. Third party cutting mats may not line up and it will be a guessing game for design placement and alignment.
Faux Leather Tips for Silhouette

  • Give yourself a good allowance and grace because you may still mess up, just like I did in the photo above. I would recommend that you cut a little bit excess of the faux leather and not try to cut through the painters tape as it can affect the cut results. The cut was ok in this instance, but it went off my faux leather, so I ended up cutting another truck piece.
  • For tips on lining things up check out this tutorial HERE. I use this method all the time and still make mistakes. Remember to “measure twice, cut once.” But, I find I make the most mistakes if I’m rushing or I tell myself it will be just a quick project.
  • Test cut, test cut, test cut!!!
  • I used a 2 mm Manual blade for all of my faux leather cuts. This blade is the equivalent of the older style Premium blade, it’s just redesigned to fit directly into the newer model machines housing without needing an adapter.
    The 2 mm Manual blade (or Deep Cut blade) allows you to go from 1-20 in the blade depth settings. All faux leather will vary and some can be cut with a regular blade that is 1-10 settings, while others may need a higher blade depth than 10. Test cuts are the way you will know.
  • Do not unload the mat after you cut!!! Check to see how well it cut.
    Having a thread or two is not a bad thing! Grab a sharp pair of scissors and simply snip it.
Check the cut on the Faux Leather after Silhouette cuts

  • If it does not lift easily or has more than just a few threads hanging on, send the cut again. If you have not unloaded the cutting mat, it should cut again in the exact same place. If you unload the cutting mat, it will be a hope and a prayer trying to get it lined up perfectly again to cut in the same place.
Clean cuts on Faux Leather with Silhouette

  • Some faux leathers may take more than 1 pass and this is why test cutting is such an important step. I write down the settings that worked for each of the materials I test and keep a log so I can refer back to it. It is not a bad thing to use more than 1 pass with certain projects. I find with thicker materials, you can get a cleaner cut when you are not trying to force the machine to do it all at once time. However, for thinner materials such as adhesive vinyl or regular cardstock, multiple passes shouldn’t be necessary if the blade is installed properly.

For more details on what blade depth and force are, check out this in-depth tutorial on the Silhouette Send tab HERE.

Cut Success with Silhouette and Faux Leather

  • Once the cut is successful, unload the mat, remove the painter’s tape – it can be reused and carefully peel away the excess. Snip any threads as you carefully remove the excess so you do not stretch the design.
  • When cutting, check the blade regularly for debris stuck to it or inside the cap. The fibers of the faux leather can hinder the cut results.
  • It is perfectly normal to have to increase the settings of the blade as you cut materials. A blade cutting any material is going to dull with usage. Keep in mind that you are cutting through plastic and fibers. That will cause a blade to wear differently than other materials.

For this design I used the Red Truck Ornament file from Amy Romeu and there is a front and back layer cut from faux leather that will be glued together. The rest of the design is cut from HTV, so I swapped out my blade for my HTV blade and set up my cutting mat to cut different colors of scraps at the same time.

Cut by Color in Silhouette Studio

I used the Cut by Fill Color so I could set up different cut settings for my Smooth HTV versus my Glitter HTV. The Autoblade did all the work to change the settings once set up. Check out this tutorial HERE for tips on cutting by line or fill color – they are the same.

Cut multiple colors at once on a Silhouette Cutting Mat

And then I set up my cutting mat to match exactly what I had set up on the Silhouette software. Check out tips on cutting multiple colors at the same time HERE.

Red Truck Faux Leather Ornament

Then I simply weeded the design and pressed the pieces on according to Amy’s instructions. I also cut this design out of cardstock and adhesive vinyl too! The faux leather ornament is on the left and the cardstock ornament is on the right.

Check out Amy Romeu’s YouTube video HERE for instructions on the assembly. Even though she is using a Cricut machine to cut, the process and tips are useful.

I was having so much fun cutting faux leather that I couldn’t stop and wanted to test more!

Next, I used this Silver Embossed Leather from Craft Chameleon with the Initial Ornament file.

Embossed Faux Leather Initial

I followed the same tips as above and taped it securely to my cutting mat.

Secure Faux Leather with Painters Tape on a Silhouette Cutting Mat

If you compare this photo to the first one, you’ll notice that the backing differs on the white versus this silver embossed piece. That can affect the cut settings and results. The woven backing texture can be a bit more difficult to cut and may require higher settings and more passes to cut cleanly.

I used the 2 mm Manual blade (equivalent of the Deep Cut blade).
Blade depth – 9
Force – 30
Passes – 2-3
however, that was still not a clean cut, so I then increased the Blade depth to 11 and did 2 more passes.

In this case, the Embossed texture on the front is uneven and can affect the cut.

Embossed Faux Leather Initial Ornament

I did not have all the supplies to finish this out as Amy did, so I used what I had on hand and made my own holly berries and leaves. The holly leaves are drawn from scratch in Silhouette Studio. If you want to learn how, I show step-by-step in the Designing in Silhouette Studio – Creating Keepsake Ornaments class HERE. I cut the leaves from cardstock, painted some small craft balls, and then glued it all onto the ornament.

Check out Amy Romeu’s Initial Faux Leather Ornament YouTube video HERE for more details on this project. I picked up a neat trick for tying bows and ornament hangers in Amy’s videos, so make sure to check that out too!

In both the designs shown above, the faux leather was cut for the front and the backside and then glued together so it had a finished look. But for this next project, I used Siser Metal HTV and adhered it to the backside of the white faux leather from Craft Chameleon before cutting.

Faux Leather with HTV backing

I pressed it once with the carrier sheet on and then a second time without the carrier sheet for just a few seconds. The second press allows the texture of the faux leather to show through and it is gorgeous! Photos do not do it justice.

Faux Leather Earrings with Silhouette

But keep in mind, anytime you add something to a material, that can change the cut settings.

I used the 2 mm Manual blade (equivalent to the Premium blade).
Blade depth – 10
Force – 30
Passes – 1
And I probably could have done one more pass.

Now, what you’ll notice is that all of the pieces are still attached. However, they easily popped out and I only had a few threads to snip. This actually worked better for the next steps as I could keep it all organized in one place until I was ready to press.

Snowflake Faux Leather Earrings

I loved the finished look of the Siser Metal HTV on the backside! And I used up a few scraps of Glitter HTV, not much, but it is the perfect project for those scraps that you might have.

Check out the video on these Faux Leather Holiday Earrings HERE by Amy Romeu.

And here is one more faux leather design cut with my Silhouette.

Cardinal Faux Leather Ornament

This was using the Cardinal Christmas Ornament Design and a piece of blue patterned faux leather from The Polka Dotted Peach.

Find the Faux Leather Cardinal Ornament video HERE on Amy’s YouTube channel.

I had so much fun creating along with this event and now have faux leather for many more projects.

I hope those tips help you to be successful with cutting faux leather with your Silhouette machine.

You can still purchase the VIP package for the Faux-La-La Crafting Fun and join in on the fun. You get the files for all the projects, all the videos in one place, a printable guide, and more! Check it out HERE for all the details.

Faux Leather Event

Save this for future reference by pinning the image below.

Pinterest Faux Leather with Silhouette

Enjoy !

THANK YOU for your support! How can you help? Click HERE & buy a coffee.
Every little bit helps with the cost of running the site.

Silhouette Classes

Never stop learning! Let me help you take the anxiety out of learning with Silhouette and get to creating faster! My Silhouette classes are heavily focused on software, so you can take the skills & techniques taught and apply them to many future projects!

Silhouette step-by-step Classes by Silhouette Secrets+

Silhouette Secrets+ with EllyMae
**This post may contain affiliate links. What that means is that I may receive compensation if you purchase through the links I have provided. The price you pay for the product or service is not higher but I may get compensated for sharing.
Posted on 1 Comment

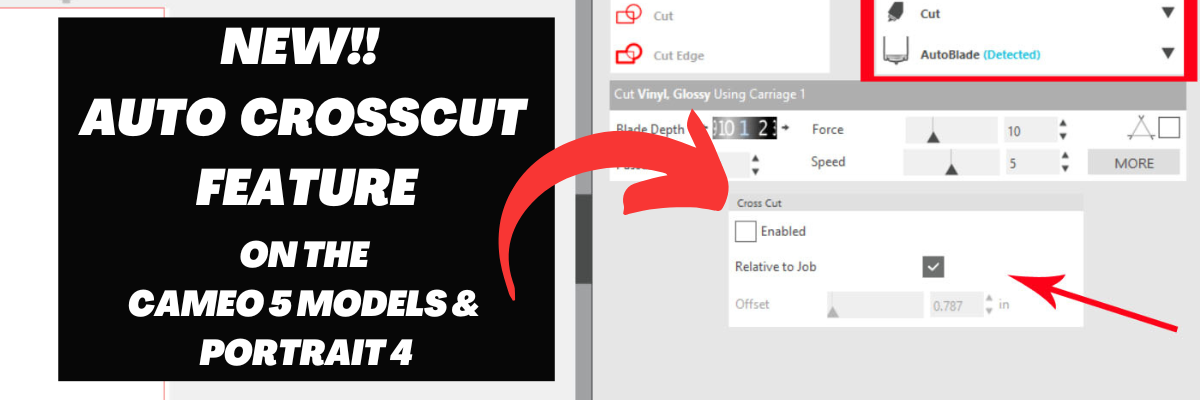
Silhouette Auto Crosscut Feature – Cameo 5 & Portrait 4

New!!! Auto Crosscut Feature

Check out the new video on the Silhouette Secrets+ YouTube channel HERE showing how to set up in the Silhouette Studio software for the auto crosscut and watch the machine in action and continue reading below for more information below the video link.

Affiliate links may be present in the following blog post and as an Amazon Associate, I earn from qualifying purchases.

The Silhouette Portrait 4 and Silhouette Cameo 5 models are now equipped to cut the vinyl off using the Autoblade after a cut has been completed for certain materials when set up properly.

The setup for the Auto Crosscut is very specific. It is for use with the Autoblade and when cutting off of a material roll such as adhesive vinyl or HTV.

Note: you should never cut completely through a material such as cardstock, etc. without the proper setup for pop-out cutting or when using the Auto Crosscut feature. Cutting through a material without the proper setup can damage your machine. The reason you can cut matless with adhesive vinyl, HTV, and kiss-cut sticker sheets is because you are only cutting through the top layer and not completely through.

On the Page Setup Panel – Tab 1, choose No Mat under #3 and set the custom media height size to the length of the roll you are cutting from on #4.

Silhouette Studio Software Auto Crosscut Setup

Click on the Send tab in the top right corner.

Silhouette Send Tab Auto Crosscut Setup

Then the following will need to be set up in order for this feature to show up:

  • Silhouette Portrait 4 turned on and recognized by the software
  • Silhouette Autoblade Type B recognized
  • Compatible material selected such as Vinyl – Glossy or Heat Transfer Vinyl

Once those things are completed, you will see a Cross Cut window show up below the cut settings on the Simple Tab where this feature can be enabled and adjusted.

Note: if a custom cut setting is used, the Crosscut option will show under the Cut Settings area when setup to cut without a mat.

After the cut is complete, the Silhouette Autoblade will adjust the blade depth for a complete cut through. The Crosscut action will be performed in several cuts so it can keep the material in place while it cuts through. Once complete, the cut vinyl can be pulled from the backside of the machine.

The Silhouette Portrait 4 is then set up for the next cut to be sent.

Silhouette Portrait 4

The Crosscut feature is performed in the channel that runs underneath the blade housing, so it does not damage the machine when it cuts completely through.

More Silhouette Portrait 4 resources:

Save this for future reference by pinning the image below.

Silhouette Auto Crosscut Pinterest

Enjoy !

THANK YOU for your support! How can you help? Click HERE & buy a coffee.
Every little bit helps with the cost of running the site.

Silhouette Classes

Never stop learning! Let me help you take the anxiety out of learning with Silhouette and get to creating faster! My Silhouette classes are heavily focused on software, so you can take the skills & techniques taught and apply them to many future projects!

Silhouette step-by-step Classes by Silhouette Secrets+

Silhouette Secrets+ by EllyMae
**This post may contain affiliate links. What that means is that I may receive compensation if you purchase through the links I have provided. The price you pay for the product or service is not higher but I may get compensated for sharing.
Posted on Leave a comment

Siser Glow HTV – Part 2- Loving it more!

I’ve had so much fun with the Siser Glow HTV! If you missed Part 1 – check it out HERE. Siser Glow HTV can be cut with any cutting machine and I was swapping back and forth in my creations between Silhouette and Siser machines. Sometimes I had both going at the same time.

Affiliate links may be present in the following blog post and as an Amazon Associate I earn from qualifying purchases.

I had Siser Juliet set up in one room cutting away, while my Silhouette Cameo was cutting next to my computer (shown in Siser Glow HTV Part 1). With the Siser Juliet connected through WIFI, I regularly cut from one room to the next. The Juliet roll holder came in handy for these projects and my rolls of Siser Glow HTV.

One of the most important steps you can do is – test cut, test cut, test cut. It seems like such a basic step, but it can save you!!! Siser machines make it so easy to perform this simple action directly on the touchscreen and it will save you so much in time, materials, and frustration.

For more tips on getting your Siser machine and blade set up for perfect cuts, check out these videos on the Swift Creek Customs YouTube channel.
Siser Blade Depth & Installation
Siser Test Cut & Force Test
Siser Cut Settings & Presets
Siser Area Test – a material saver, just like test cut!!!

I think I found my new favorite shirt for awhile. I’ve been collecting these designs by Sophie Gallo just waiting for the perfect projects. Find this design HERE.
Here is a look at the back of the shirt.

I don’t know why I have never really decorated the back of my shirts and I hadn’t ever though about it until I started following MammaBearKay and watching her post her shirts. She runs an awesome business with adult humor shirts.

Here is a look at the Siser Glow HTV in the dark.

And the same shirt under the blacklight.

I’ve already several compliments on it when I have worn it out. Everyone gets a good laugh.

Here is a look at the front. I just took the little guy out of the original design and cut him smaller for the front. If I did this over, I think I’d put him on the other side, but it’s done now and I can always make another.

Let’s light him up!

After dark

And under the blacklight.

But I didn’t stop there…..

My son loves games, so this design from Leonardo Design Studio was perfect!

What kid doesn’t like a glow-in-the-dark shirt? Unless they are playing hide-and-seek or kick the can of course!

I was having so much fun creating. Little green men should glow right?

And I couldn’t leave Siser Romeo out of the fun! As soon as I had the Siser Glow HTV in my hands I had a BIG idea. It was only after I created the design that I realized I didn’t have Siser Glow HTV in the size I needed. So I called in a special request at The Vinyl Spectrum and ordered larger sizes.

I grabbed 16″ x 20″ Black Canvas frame at Michaels and had it ready to go when my Siser Glow HTV order arrived.

I created the design in the Siser Leonardo Design Studio software using basic drawing tools and the ES Neon Light font by Erik Studio.

I love how it has a different look depending on the blacklight or in the dark.

I’ll be sharing more about this project in the future so stay tuned on the blog and the Swift Creek Customs YouTube channel too!

Grab some Siser Glow HTV and I would love to see what you create with it no matter what cutting machine you have!

Supply list:
Siser Easy Glow HTV from any authorized retailer
– Cutting machine of choice – Silhouette, Siser
– Heat press
Don’t Make Me Go Voodoo on You by Sophie Gallo – Design #421322
– Level Up Design in Siser Leonardo Design Studio Library
– Alien design created with free image from pixabay and text
ES Neon Light font by Erik Studio
Blacklight

Save this for future reference by pinning the image below.

If you missed Part 1 of the Siser Glow HTV – check it out HERE.

Enjoy !

THANK YOU for your support! How can you help? Click HERE & buy a coffee.
Every little bit helps with the cost of running the site.

Silhouette Classes

Never stop learning! Let me help you take the anxiety out of learning with Silhouette and get to creating faster! My Silhouette classes are heavily focused on software, so you can take the skills & techniques taught and apply them to many future projects!

Silhouette step-by-step Classes by Silhouette Secrets+

**This post may contain affiliate links. What that means is that I may receive compensation if you purchase through the links I have provided. The price you pay for the product or service is not higher but I may get compensated for sharing.
Posted on 2 Comments

Siser Glow HTV – Love it! Part 1

I have been having a lot of fun…. maybe too much, but once I get started, it’s hard to stop.

Here is a little behind-the-scenes look at what my studio looked like a few weeks back when I was in the middle of all my creations.

Affiliate links may be present in the following blog post and as an Amazon Associate I earn from qualifying purchases.

Siser Easy Glow HTV arrived and I went creative crazy! So many ideas came to mind and I just started designing and cutting. I have lots I want to share with you, but I’ll have to split it into 2 parts to share it all. I may have also made myself my new favorite shirt too! (see Siser Glow Part 2)

Siser Easy Glow HTV can be cut with any cutting machine. I used both Silhouette and Siser cutting machines and it cut beautifully!

The first thing to do is test cut! Let me say it again so it sinks in – test cut, test cut, test cut. I started with the recommended settings on the Siser website for Easy Glow and did my test cuts. Your machine, blade life, and many other factors go into what cut settings will work for you in that moment.

For tips more tips that will save you time and frustration check out this post on Test Cuts and also Perfect Cut Settings.

And then I was off and cutting once I knew I wouldn’t waste materials. My kids are getting older and Trick or Treating is still big in our area, no matter their age. But the little cute plastic buckets aren’t doing it anymore.

Siser Easy Glow + Black Canvas Tote Bags = FUN!!!!
I wanted each bag to be different and used the following designs:
Trick or Treat by Echo Park – Design #226065
Trick or Treat by Megan Hardy Designs – Design #223278
Trick or Treat by Jamie Lane Designs – Design #386658

Siser Easy Glow HTV when charged works in the dark or with a blacklight. The photo above is after dark.

And blacklight makes it pop too! Who knew I’d be adding a blacklight to my crafting tools.

Then I asked each one to pick out a design for the other side that they wanted.
They picked out the following designs:
Skeleton by Erica Digital Designs – Design #447512
Pumpkin by FoxSister – Design #273879
Pumpkin by FoxSister – Design #273881

A look at the dancing skeleton after dark with his pumpkin friends.

And playing in the blacklight.

And this little dancing skeleton is not alone.

Check out this awesome video from Siser North America – I love it!

Grab some Siser Glow HTV and see what creative ideas you can come up with! It is currently available in 5 colors. I’ve included my supply list below for these new trick or treat bags.

Supply list:
Siser Easy Glow HTV from any authorized retailer
Black Canvas Tote
– Cutting machine of choice – Silhouette, Siser
– Heat press
Trick or Treat by Echo Park – Design #226065
Trick or Treat by Megan Hardy Designs – Design #223278
Trick or Treat by Jamie Lane Designs – Design #386658
Pumpkin by FoxSister – Design #273879
Pumpkin by FoxSister – Design #273881
Skeleton by Erica Digital Designs – Design #447512
Blacklight

Check out Part 2 of the Siser Glow HTV HERE when it goes live.

Save this for future reference by pinning the image below.

Want more tips, projects, and tutorials delivered right to your inbox? Never miss out of information by signing up for the Silhouette Secrets+ Newsletter.
Every Friday (or that’s my goal), I will have a new newsletter released sharing Silhouette information that can help you in your projects and learning more!
Sign up below and make sure to confirm your subscription to get the newsletter!

Silhouette Secrets+ Newsletter

Never miss out on the news, tips, “secrets”, deals, classes, and more that I share on Silhouette Secrets+. Sign up for the newsletter and get information delivered to your inbox every Friday.
Unsubscribe at anytime.

Enjoy !

THANK YOU for your support! How can you help? Click HERE & buy a coffee.
Every little bit helps with the cost of running the site.

Silhouette Classes

Never stop learning! Let me help you take the anxiety out of learning with Silhouette and get to creating faster! My Silhouette classes are heavily focused on software, so you can take the skills & techniques taught and apply them to many future projects!

Silhouette step-by-step Classes by Silhouette Secrets+

**This post may contain affiliate links. What that means is that I may receive compensation if you purchase through the links I have provided. The price you pay for the product or service is not higher but I may get compensated for sharing.
Posted on 2 Comments

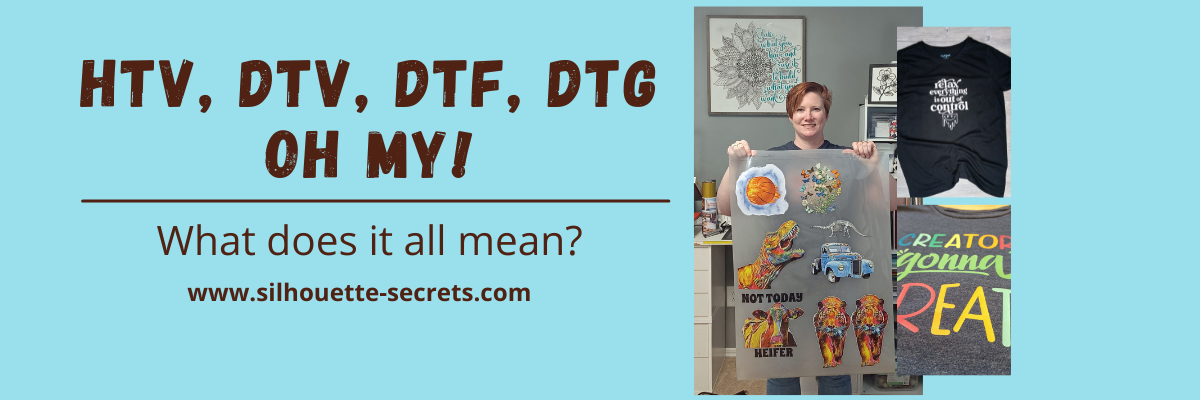
HTV, DTV, DTF, DTG, Oh my! – What does it all mean?

There are a lot of letters out there floating around in the industry right now and lots of places to get confused about what they all mean.

So let’s take a look at the basics of what each of these terms mean and then you may have a better idea if you want to look into each one a little bit further.

Affiliate links may be present in the following blog post and as an Amazon Associate I earn from qualifying purchases.

What is what?

HTV = Heat Transfer Vinyl

Heat transfer vinyl is a product that can be applied to fabric. The adhesive on heat transfer vinyl is heat activated and the adhesive melts into the fabric.

Siser Easyweed HTV Design - Relax Everything is Out of Control

Relax Everything Is Out of Control by Sophie Gallo – Design #436898

There are many brands and types on the market worldwide.
I use Siser Easyweed HTV and other Siser specialty HTV the most in my projects.

The primary purpose of HTV is for fabric and materials, however, you will see some apply it to other surfaces as well. I see mixed results with these methods and it is always good to test what you plan to do.

For more details, tips, tutorials, projects, and classes on HTV
Click HERE

Siser Easyweed HTV White - Cat Mom Design

Cat Mom by Erica Digital Design – Design #377246
Peeking Cat by Erica Digital Design – Design #353053

DTV = Direct to Vinyl

Siser EasyColor DTV is a product that was released in the Fall of 2022. It is a heat transfer vinyl that can be printed on with an inkjet printer.

Siser EasyColor DTV - Sarcasm Loading Printable HTV

Periodic Table Sarcasm design by Suzanne Cannon – Design #298890

I love Siser DTV!!!
I’ve had great success and my shirts have been washed well over 20+ times.

For more details on Siser EasyColor DTV
CLICK HERE

Creators Gonna Create design with Siser EasyColor DTV - printable HTV

Creators Gonna Create design by Jamie Lynn Designs – Design #295352

Siser DTV is great for being able to add graphics or multi-color designs using a home printer without having to cut and layer multiple colors of HTV.
Grab some Siser EasyColor DTV in a variety of sizes at The Vinyl Spectrum HERE.

Make sure to follow the instructions from Siser on printing, pressing, and washing for best results!

DTV is not the same as Heat Transfer Paper.
Heat Transfer Paper was an alternative before Siser EasyColor DTV was released. But it is not vinyl, even though many use the terms interchangeably.
Find more on Heat Transfer Paper HERE.

DTF = Direct to Film

Direct to Film is a printer that prints onto a film that is used to transfer the design to a blank. This can be a great for heavy graphic images that you do not want to layer or if you have a lot of one design that you are using for a project.

DTF designs ordered from 143Vinyl

Here is a sheet of DTF prints I ordered to test from 143Vinyl.com.
Cut them apart and heat press to your shirt or blank.
Done!

Backside of a DTF print ordered from 143Vinyl

Here is a look at the backside of a DTF print.

This is not your everyday at home printer, but can be useful if you run a business.
If you are interested in investing in a DTF printer, you can find more details on printers and supplies at Heat Transfer Warehouse or Swing Design.

If you are like me and don’t want to invest in a DTF printer or have no need to, then I’d recommend ordering some DTF prints to try out.
Check out 143vinyl.com and order today!
(Note: 143Vinyl is currently upgrading equipment as this post is published and DTF ordering is on hold)

Butterfly DTF design from 143Vinyl

You can either upload your own image or use their image library. I chose to use the Image library for my first round to test it out, but mostly because it takes me forever to decide on a design that I want and even longer to create it.

Make sure to follow all their instructions for submissions if you upload your own images.

Vintage Truck DTF print from 143Vinyl

I have also seen a lot of mention about DTF “hacks”. Keep in mind that it may or may not have the same results or longevity. It is all a process of experimentation.
The only way to know is to test it, if you decide to go down that road.

DTG = Direct to Garment

Direct to garment is another specialized printer and not your ordinary, average home printer. This printer type allows you to print directly onto a shirt or other blank.

Both a DTF or a DTG printer are a serious investment, so I would recommend doing a bit of research before diving into that, but it can be a great option for a small business that is growing.

Check out more on DTG printers at Swing Design HERE.

For me as an everyday crafter, a DTF or DTG printer are not in my list of must haves for my studio as I do not think they would be utilized enough.

Vinyl

Vinyl is a general term that can be used in reference to many different products.
Often times it is used so generically, that we have to clarify what the user is wanting to do before we can advise on information they are looking for.

There is adhesive vinyl, HTV, specialty vinyl, and also things like sticker paper and heat transfer paper that get lumped into the “vinyl” category.

Oracal 651 Adhesive Vinyl Intricate Mandala Design - Take what you have and use it to build what you want

If you are looking for more on adhesive vinyl, check out these tutorials HERE.

I wanted to keep this very basic in explaining what each meant. It can be very confusing when you see the terms thrown out there and sometimes used incorrectly.

I hope this information helps to give you an idea if you would like to explore more on a certain area that might be helpful to your future projects or business!

Save this for future reference by pinning the image below.

HTV, DTV, DTF, DTG what does it mean

Enjoy !

THANK YOU for your support! How can you help? Click HERE & buy a coffee.
Every little bit helps with the cost of running the site.

Silhouette Classes

Never stop learning! Let me help you take the anxiety out of learning with Silhouette and get to creating faster! My Silhouette classes are heavily focused on software, so you can take the skills & techniques taught and apply them to many future projects!

Silhouette step-by-step Classes by Silhouette Secrets+

SS Logo snip it
**This post may contain affiliate links. What that means is that I may receive compensation if you purchase through the links I have provided. The price you pay for the product or service is not higher but I may get compensated for sharing.