When we were told as Creative Professionals with NAMTA that we would have the opportunity to display our artwork at the 2026 Creativation event, my brain immediately started thinking of ideas and I started a list in my phone. We were allowed to have 2 – 12″ x 12″ canvases on display in the entrance hall for the conference and were given a theme of red, white, and blue. This was an opportunity to display our art and share our skills. I love building things, so a 3D mixed media design was a no brainer for me. This was one of those projects that I started with a few basic ideas and built the project as I went. Sometimes that’s just how it goes. Some things might work together along the way and some things might not.
I love building 3D projects! There is just something about taking flat materials and molding them into a final 3D project. Having a cutting machine like a Silhouette or Siser Juliet or Romeo opens up a lot of possibilities to cut designs for 3D creations. The biggest factor that goes into it all is – TIME! It takes time to design, build, and modify things as you go along in the process.
Affiliate links may be present in the following blog post and as an Amazon Associate, I earn from qualifying purchases.
In this blog post, I’m sharing a look at the behind the scenes of creating this 3D Mixed Media Canvas: Time to Sparkle with a few still photos & the supply list. Check out the video at the end of the blog post for additional shots of the process as well.
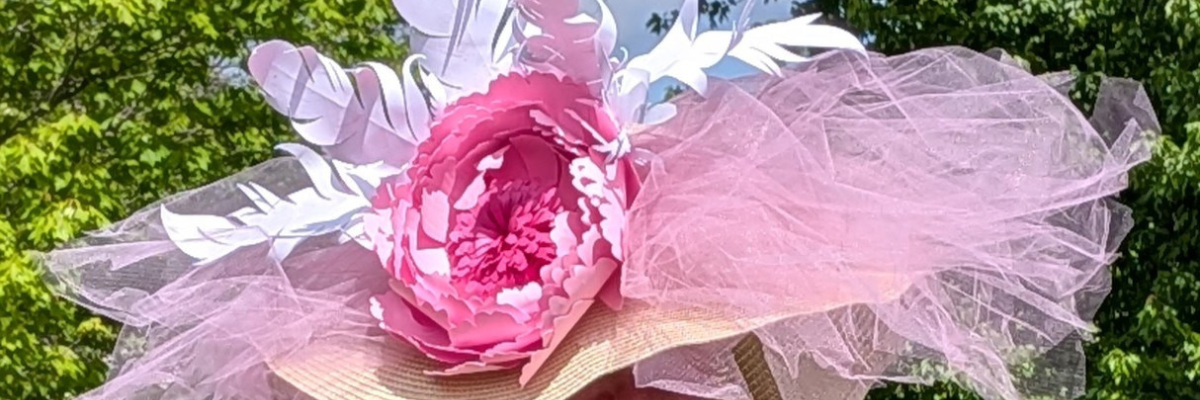
First, here is a look at the finished project.

I started by gathering some supplies to get started. I had to order new inks to print the background papers. These 3 are designs by Clikchic Designs and can be found in the supply list below. I am able to print borderless with the Canon TS9521C printer. I ordered Oracal 851 glitter adhesive vinyl in red, white, and blue from Vinyl Spectrum. The entire theme of this canvas is to sparkle, so I embraced that fully.

I first started by cutting down the background paper for the backside of the canvas to fit within the frame. Then added layer of Mod Podge to the canvas and to the backside of the blue patterned paper. Smooth that down as much as possible. Adding the Mod Podge to both the canvas and the back of the paper helps it to adhere smoothly. Once it’s down flat, then I added another layer of Mod Podge Sparkle on the front of the blue paper. Let this dry completely.

While that was drying I set up the design for cutting from Oracal 851 Glitter Adhesive Vinyl in Silhouette Studio.

Then I cut each color of glitter adhesive vinyl. For each layer, I cut the color and the green rectangles. The green rectangles are designed as layering marks that are used to line up the layers exactly. While it might use a little more material when using these marks, I find I get a much more accurate layering. This is one of those techniques that no matter how you do it, practice makes it better.

While this design is not technically layered, the colors are in a specific location to each other, so I used the same technique with the layering marks and it worked out great!
Then I carefully applied the adhesive vinyl to the front of the patterned paper. This will be the background that shows through on the busted canvas.

Once the backside of the canvas was dry, I flipped it over and applied a layer of Mod Podge to the front of the canvas and to the backside of the pattern paper for the front. Once it was flat on the canvas, I applied a layer of Mod Podge Sparkle to cover the entire paper on the front. Let that dry completely before moving on to the next step.

Once it’s dry, then I flipped the canvas over and used a box cutter with a ruler to slice through the paper & canvas layers in multiple directions. This will allow the front to be rolled out for the “busted” canvas technique.

I have made several of these busted canvas projects and I found that it was much easier to glue the rolled edges down and have them stay if the pieces were “trained” first before gluing down. To do this carefully roll the sections back and hold for a little bit. Then let it sit for awhile. Repeat this step as needed. I found I was much more successful in having the curls hold with hot glue when I did this as the paper didn’t lift or try to go back to it’s original shape. Since there are several layers of glue, paper, and canvas, it can be a bit stiff.
Once it has sat in “training” for a bit, then I glued each end down onto the canvas with hot glue and held it in place until it cooled. Repeat for any stubborn sections.
I have several other pieces to this project so while it’s in “training” or things are waiting to dry, I would move on to the next element of the design.

I did not get any photos of the first 3D firecracker I created that’s shown in the top left corner of the photo above. As you can see, I have 2 copies. The first was a proto type that I cut and assembled to see if it would work with the layout. Then I decided to cut the box out of glitter cardstock while I was cutting the pieces for the sparklers too. These sparkler designs by Paper Beats Dynamite are fantastic with excellent written instructions.
The rectangles of color are glued to a bamboo stick and then once the glue is set, are rolled and glued around the stick.

On the end of each skewer, hot glue is drizzled from where the cardstock strip ends to the end of the skewer to make it appear like it’s melted.

A layer of gray acrylic paint was applied over top of the hot glue and the cardstock. Then I used black and red embossing powders on the end of the sparklers to make it look burnt and burning or hot.
Next I cut more glitter cardstock for additional firecrackers to add to the canvas.

These squares are rolled up and glued together to create a firecracker and I found it was easier to “train” them first and let them hold that shape a bit before gluing together. Once the glue was set, I could start adding them randomly to the bottom of the busted canvas section using hot glue.

Now, I will admit that I don’t typically like to cut glitter cardstock. It literally eats blades and can be difficult. But this project it was worth the effort it took. However, I am shocked that I actually got it all cut without issues because this is what my blade looked like after I was done cutting all these pieces.

Next, I wanted to add another element in – beading. I even had my supervisor, Goldy in on this one. She wasn’t much real “help” but she made sure to keep me focused.

Since this is a 3D mixed media art piece, I added another hobby of mine – beading – into the design elements. I strung beads in red, white, and blue on a wire and then bundled the colors together to create 3 different firework bursts. The one thing I did not take into account on this element was the weight of the beads and wire when finished. It all worked out and a LOT of hot glue held them in place.

I love how this all came together and the entire process of creating it piece by piece. 3D creations are one of my favorite things to do, but I don’t always take the time to do it.
This 3D Mixed Media Canvas may not be a project that you recreate, but I hope it inspires you to think outside the box and to combine and create ideas that reflect you as an artist. Every individual reading this has the creative spirit inside of them whether you believe it’s there or not. Sometimes you just have to let it out and let it flow, not try to control it or have the exact plan at the beginning.
Supplies Used for 3D Mixed Media Canvas:
- Silhouette Studio® Software
- Time to Sparkle by Clikchic Designs – Design #377930
- Silhouette Cameo, Silhouette Autoblade, Silhouette Cutting Mat
- 12″ x 12″ Canvas
- Mod Podge
- Mod Podge Sparkle
- Foam Brush
- Oracal 851 Glitter Adhesive Vinyl – red, blue, white
- AT65 Transfer Tape
- Red White and Blue Grunge Stars and Stripes Background by Clikchic Designs – Design #413762
- Red White Blue Grunge Stars and Stripes Background Pattern by Clikchic Designs – Design #413766
- Blue Grunge Coarse Linen Monoprint Background Pattern by Clikchic Designs – Design #393591
- Twinkly Stars Stencil by Uniquely Creative
- TCW Stencil Butter White
- Palette Knife
- White Cardstock
- Canon TS9521C Printer & Canon Ink
- Sparkler by Paper Beats Dynamite – Design #413610
- 4th of July Firecracker by Lori Whitlock – Design #412066
- Medium 3D Firecracker Box by Paper Closet Designs – #413718
- Glitter Cardstock
- Cardstock – colors of choice
- Bamboo Skewers
- Precision Glue Press
- Glue Gun
- Glue Sticks
- Acrylic Paint – colors of choice
- Embossing Ink Refill
- Embossing powder – red & black
- Star Banner created in Silhouette using Drawing Tools
- Twine
- Mini Stapler
- Beading Wire
- Beads – red, white, blue
Want to see a little bit more? I’ve created a video sharing even more of the photos behind the scenes in creating this process.
I love seeing what others are creating and their talents and skills. Check out this video I did from the Creativation 2026 entrance hall sharing a look at all the canvas creations by the Creative Professionals on Instagram or Facebook.
Each canvas is unique and no two are alike!
Save this for future reference by pinning the image below.

Enjoy !
THANK YOU for your support! How can you help? Click HERE & buy a coffee.
Every little bit helps with the cost of running the site.
Silhouette Classes
Never stop learning! Let me help you take the anxiety out of learning with Silhouette and get to creating faster! My Silhouette classes are heavily focused on software, so you can take the skills & techniques taught and apply them to many future projects!