Posted on 2 Comments

Off the Edge Die Cut Card with Silhouette

Off the Edge Die Cut Card with Silhouette

In this tutorial, I’m going to share how I created what’s called an “Off the Edge” die cut card with my Silhouette machine. This can add an interesting element to any card design and is fun to create.

Affiliate links may be present in the following blog post and as an Amazon Associate, I earn from qualifying purchases.

Off the Edge Die Cut Card with Silhouette

I recently attended the Card Maker Success Challenge hosted by Brandi Mahon of Stamp Me Some Love and was so inspired by her card ideas. I took the card ideas she was sharing and modified them to be used with my Silhouette software and machine. If you are looking for card making inspiration, I recommend you check out her monthly Card Maker’s Success Subscription.

Supplies Used:

Creating an Off-the-Edge Die Cut Card with Silhouette

The Background

First, I opened up an Alcohol Ink Background by Sarah Hurley and printed that as a full letter size page for my card backgrounds. I printed this onto Koala Glossy Photo Paper and it turned out awesome!

Alcohol Ink Background by Sarah Hurley Silhouette

I have a Canon TS9521C that is a borderless printer, but you can do the same even without a borderless printer.

Alcohol Ink Glossy Photo Paper

Then, I will use a paper trimmer to cut the page down to the size I need for my cards front. But, I won’t know the size until I have the other pieces cut out, so I just set this aside.

Designing in Silhouette Studio

Drawing the Card Pieces

Next, in the Silhouette software, using the Drawing Tools on the left side, draw out a rectangle and then scale it to 4.25″ x 5.5″ or whatever card size you are wanting. Unlock the lock to be able to change the height and width of the rectangle individually. Type the number and press Enter to set the dimension. Find more on the Scale Tools HERE.

Silhouette Drawing Tools and Scale Tools

Select the rectangle and then choose Align Left in the Alignment tools. With only 1 object selected it will align it to the left side of the page. This will help us in just a minute with our design.

Silhouette Studio Align Tools

Choosing a Sentiment

Next, open the sentiment design you want to use or with the Text Tool and type out the sentiment you want. If you type out the text, make sure to weld any overlapping pieces.

I used Hello by Diva Watts Designs found HERE for this card design.

Open Hello Design by Diva Watts Designs

Scale the hello down to fit within the card base and use the green dot at the top to rotate it to the desired angle. Or you can use the Rotate Panel and rotate to 45 degrees and adjust from there.

Editing the Card Front

Next, open the Page Setup Panel – Tab 2 and check the Show Grid and Snap to Grid boxes.

Silhouette Snap to Grid

This is going to allow us to adjust the rectangle and maintain straight lines.

Double click on the red line of the rectangle to bring up the Edit Points. Drag the top left edit point (gray dot) down.

Silhouette Edit Points

Grab the top right edit point and drag it down, so the top of the rectangle is angled as desired to run through the middle of the sentiment.

Silhouette Edit Points

With the Snap to Grid tool activated, it snaps the edit points to specific locations and easily allows the design to be manipulated and maintain the straight lines of the card edges.

Once the edges are how we want, Show Grid and Snap to Grid can be toggled off on the Page Setup Panel – Tab 2 again. I find the grid lines distracting when designing, but they can easily be turned back on if needed.

Create a Copy for Future Templates

Make a copy of the card base and you can use it for future cards as a starting point.

Silhouette Make Copies

Select both the card base and the sentiment and Align the Center in Silhouette. Depending on the design, center aligned may not look centered to the eye. Use the arrow keys to adjust if needed in small increments any direction.

Silhouette Center Align

Adding an Offset

Next, click on the sentiment to select it and open the Offset Panel on the right side. Click Offset and adjust the distance of the Offset as desired, then click Apply or press Enter. The distance of the offset will all depend on the sentiment and the size you are using. There is no magic number.

Silhouette Offset Panel

The offset should overlap the angled rectangle securely and not have too many tiny bits to be cut out.

Silhouette Weld

Welding the Offset to the Card Front

After clicking on Apply, the offset will be selected. Hold the Shift key down and click on the angled rectangle so that both are selected, then right click and choose Weld.

Silhouette Compound Path

This now combines the angled rectangle and the offset into 1 cut and creates the off-the-edge design. If there are any tiny bits like what the red arrow points to above, those are not needed in the design. Move the sentiment off of the design.

Then right click on the design and choose Release Compound path. Click off of it to deselect and click back on the little bit, press delete. When all the pieces you want are deleted, select the entire design again, right click and choose Make Compound Path.

Silhouette Compound Path

Use the drag select method to select all the pieces at the same time. Left click the mouse and hold it down in the top left corner above the design and drag it all the way through the design to the bottom right corner. Anything that the selection box touches, should be selected.

Cutting the Card Pieces & Assembly

Now you have your pieces for the Off-the-Edge card design designed and ready to cut in Silhouette.

Off the Edge Die Cut Card

I cut the sentiments from Oracal 651 Black vinyl and applied it to the off-the-edge piece that I cut from white cardstock. I reused a piece of transfer tape to apply it and was careful that it didn’t stick to the cardstock too much. You could also cut from cardstock and glue to the front, but adhesive vinyl makes it a bit quicker to assemble and the glossy sentiment made it pop with the photo paper background too!

Oracal Adhesive Vinyl 651 Cut Sentiments

Then I took the printed sheet of the alcohol background paper and cut it to 4.25″ x approximately 3.5″ with my paper trimmer. This size depends on how far the left side of the off-the-edge cut comes down. I used a Scrapbook tape runner to adhered the alcohol background to the front of a card base at the top.

You can either buy ready made card bases or make your own. In this card tutorial HERE at 32:30, I show how I cut my own card bases from a letter size sheet of paper.

Off the Edge Die Cut Card

Then used foam tape to add the off-the-edge cut piece to the front of the card at the bottom.

Off the Edge Die Cut Card

Off-the-Edge Die Cut Cards with Silhouette

Once you have the basics of the card creation down, you can modify it for different sentiments. Save the angled rectangle as a template for future card cuts.

Off the Edge Die Cut Card with Silhouette

I also created this with a Happy Birthday design by Erica Digital Designs, a Thank You design by Erica Digital Designs, and a Thank You design by Dresden Carrie.

Off the Edge Die Cut Card with Silhouette

The first card will take the longest to design, but then you will have all the steps and if you save the files, you can easily open in the future and get to cutting.

You will also notice that a couple of mine got a bit close to the edge and really did go off-the-edge. For these I can just snip that part off before placing in the envelope, but in the future I’ll adjust the design a bit smaller so the offset doesn’t go outside the bounds. Something like that is easily corrected in the software when it happens to you.

Save this for future reference by pinning the image below.

Off the Edge Die Cut Card with Silhouette Pinterest

Enjoy !

THANK YOU for your support! How can you help? Click HERE & buy a coffee.
Every little bit helps with the cost of running the site.

Silhouette Classes

Never stop learning! Let me help you take the anxiety out of learning with Silhouette and get to creating faster! My Silhouette classes are heavily focused on software, so you can take the skills & techniques taught and apply them to many future projects!

Silhouette step-by-step Classes by Silhouette Secrets+

**This post may contain affiliate links. What that means is that I may receive compensation if you purchase through the links I have provided. The price you pay for the product or service is not higher but I may get compensated for sharing.
Posted on Leave a comment

Join me to Create Unique Designs in Silhouette Studio

I have just released a new class and I’m so excited to share with you as we use many tools in the Silhouette Studio software to create unique designs.

New Silhouette Class!!!

Creating Unique Designs in Silhouette Studio – Choose Your Own Project

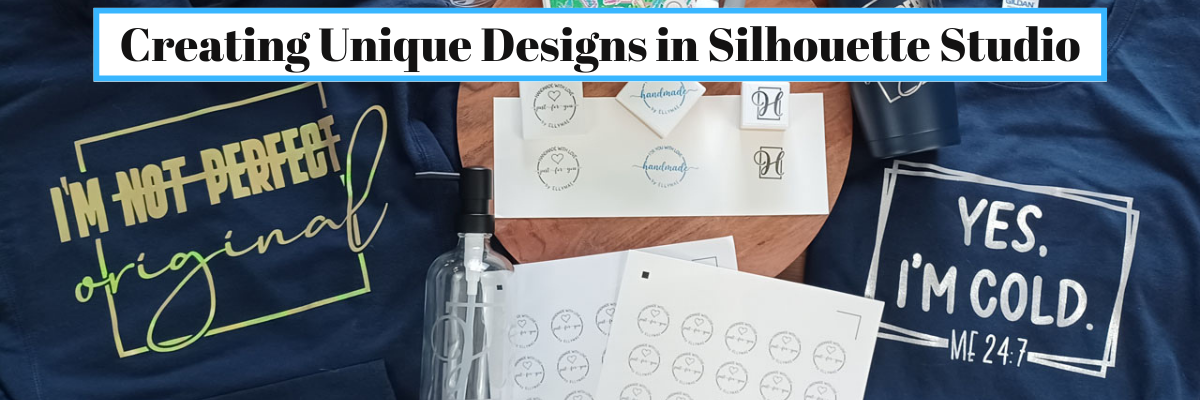
In this class you will learn how to create all of these designs in the photo above and you can choose what you want to create as a finished project.
Choose to make one or choose them all!

In this step-by-step class, we put the Silhouette Studio tools to work for us! This class is designed for all levels of users to follow along and create. A few of the tools we will discuss and use are: drawing tools, compound paths, text, offset, knife, glyphs, text to path, and more!

This is a custom design created by YOU could be used for all kinds of projects from adhesive vinyl, HTV, Mint stamps, stencils, and more!

I share examples of different finished projects with the techniques used and include optional supplies for additional projects on the class supply list.

As a bonus, I have also included a demonstration of Citristrip etching on a powder coated tumbler using a design created as the stencil.

Check out all of the details for this class HERE

Here are a few closer photos of the projects I created when testing and developing the class.

Affiliate links may be present in the below and as an Amazon Associate I earn from qualifying purchases. What that means is that I may receive compensation if you purchase through the links I have provided. The price you pay for the product or service is not higher but I may get compensated for sharing.

Sweatshirt created with:
Siser Aurora HTV – Goldish
I’m Not Perfect by Tanya Batrak – Design #326840

Long Sleeve Shirt
Siser Sparkle – Snowstorm White Glitter
BFC Magic Marker Font by Blush Fonts
BFC Shiplap Bold font by Blush Fonts

Mint Stamps
Mint Stamp Machine
Mint Stamp Kit
Mint Stamp Ink color of choice

Stickers
– Silhouette Sticker Paper – Silhouette or Amazon
Staples Sticker Paper

Fonts
BFC Basically Semi Bold Handwriting Font by Blush Fonts
Dahlia by Graphix Line Studio

Glass Etching soap dispensers
Babylone Script font by Almeera Studio

And another Citristrip etched tumbler that turned out AMAZING!
Supplies:
Powder Coated Tumbler – not all tumblers work
– Oracal 651
– Transfer Tape
Citristrip Paint Stripper
Painters Tape
– Gloves, paper towels, water, weeding tool
– Optional:
Artesprix Project Mat mentioned in the demo video – 2 size available

While those are the projects I created, you could do anything you want! I’ve provided a list of supplies depending on what you would choose to do or you might even have other ideas after working through the class design portion.

CLICK HERE FOR MORE CLASS INFORMATION

Or check out all the Silhouette classes on my Teachable site HERE.

I’d love to see what you create!
Feel free to post on the Silhouette Secrets+ with EllyMae Facebook Group HERE.

I also put out 2 new videos on the Silhouette Secrets+ YouTube channel with supporting information to this class.

Setting up Stickers in Silhouette for Print and Cut

Check it out HERE

Silhouette Mint Stamp Machine – Step-by-step to Creating a Stamp

Check it out HERE

There are so many possibilities that you can do in the Silhouette Software!
Get started today!

Save this for future reference by pinning the image below.

Enjoy !

THANK YOU for your support! How can you help? Click HERE & buy a coffee.
Every little bit helps with the cost of running the site.

Silhouette Classes

Never stop learning! Let me help you take the anxiety out of learning with Silhouette and get to creating faster! My Silhouette classes are heavily focused on software, so you can take the skills & techniques taught and apply them to many future projects!

Silhouette step-by-step Classes by Silhouette Secrets+

Silhouette Secrets+ with EllyMae
**This post may contain affiliate links. What that means is that I may receive compensation if you purchase through the links I have provided. The price you pay for the product or service is not higher, but I may get compensated for sharing.
Posted on Leave a comment

Silhouette “Secret” to Working with an Uncolored Design

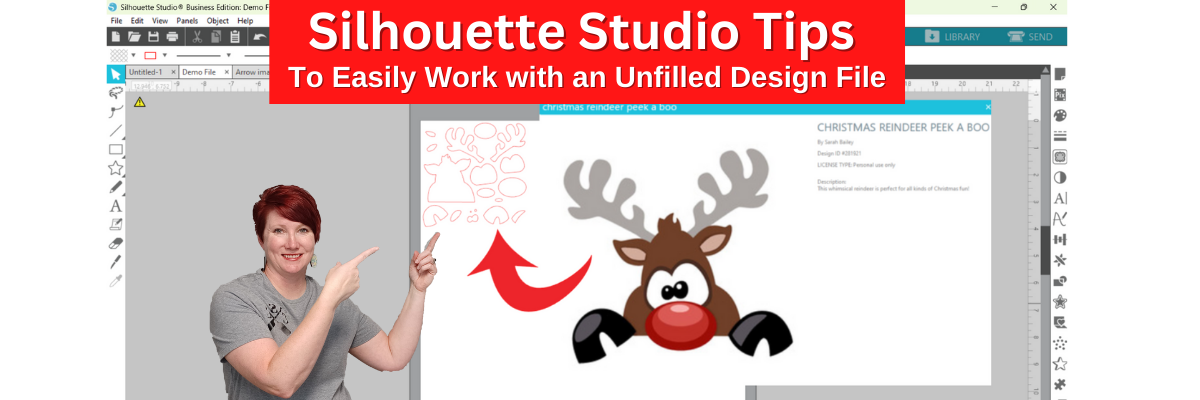
Have you ever opened up a design file and it was not filled with color or did not look like the thumbnail image of the design?

Today I’m sharing a quick video tutorial on the Silhouette Secrets+ YouTube channel on how you can easily work with these types of files and why they may open like this.

Check it out HERE

I hope you are getting crafty today!

Share below what projects you are working on currently!

I would love to see what you are creating with your Silhouette software or machines!

Feel free to post on my Facebook group at 
Silhouette Secrets with EllyMae.

Save this for future reference by pinning the image below.

Enjoy !

This image has an empty alt attribute; its file name is logo.jpg

THANK YOU for your support! How can you help? Click HERE & buy a coffee.
Every little bit helps with the cost of running the site.

Or if you are looking for more in-depth, step-by-step classes, check out all of my online Silhouette classes on my Teachable site HERE.

SS Logo snip it
**This post may contain affiliate links. What that means is that I may receive compensation if you purchase through the links I have provided. The price you pay for the product or service is not higher but I may get compensated for sharing.
Posted on Leave a comment

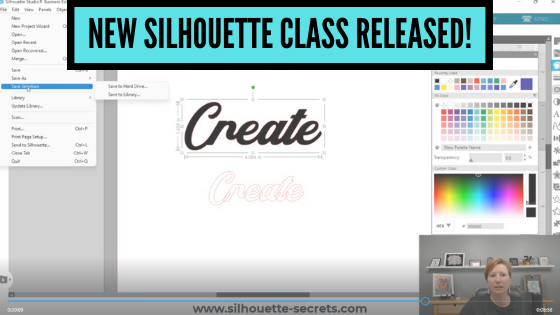
New Silhouette Class Released!

This class has been in creation for a long while and I first want to send a great big THANK YOU to Marjorie DiFiore with Atlanta Stylish Point!

Marjorie contacted me last year about a need she was seeing in brand new Silhouette Studio software users who did not necessarily own a Silhouette cutting machine, but were using the Silhouette Studio Business Edition to create for use in other programs or machines. We have worked together and she has answered my numerous questions regarding svg files, specifically in use with a GlowForge laser machine.
THANK YOU Marjorie!

Due to our big move, the class creation was delayed a bit, but I am excited to announce it is now available on my Teachable site!
With more to come in the future!

Check out the new class HERE

Silhouette Studio Software Basics to Create SVG Files

In this Silhouette Studio software class we use basic tools to create and export a svg file. We will discuss the important factors to know before creating svg files, how to install fonts, use basic tools to create a svg file, demonstrating using the exported file in the Glowforge App, and a bonus video on 3 additional tools in Silhouette Studio that can help in your design creations.

Who is this class for?
This class is for
– those who are laser machine owners and want to get started learning to use the Silhouette Studio software to design and export files in svg format to use with the laser machine
– if you are a beginner Silhouette user who wants to learn how to create svg files, this class is going to cover the basics of getting started with Silhouette and creating a simple svg file
– beginners to Silhouette Studio in general – the class covers several of the basic tools to get started creating your own designs using fonts. The class also discusses more advanced features of exporting as a svg file.

What if you do not own a laser machine can you still take the class?
Of course! The information will be relevant to anyone who wants to get started creating in the Silhouette software with the option to export as a svg file using the Silhouette Studio Business Edition upgrade.

Affiliate links are present in the following supply list and as an Amazon Associate, I earn from qualifying purchases
The cost to you is no different, but I may earn a commission by you using the links provided.

Class Supplies:

– Silhouette Studio Software
– Silhouette Studio Business Edition Upgrade
*this is discussed in class why it’s needed and how to get it
Optional fonts used in class:
– Radicals Font by Plusstore – main class demo
– Bohemian Script font – Silhouette Design Store or Creative Fabrica – Bonus class demo photo

Class Content

Section 1 – Important Factors Supporting PDF download
Section 2 – Important Factors to Create a SVG File – 20 minutes
Section 3 – Installing Fonts – 6 minutes
Section 4 – Creating a SVG Design in Silhouette Studio – 39 minutes
Section 5 – Demonstration of Exported Design in the Glowforge App – 16 minutes
Section 6 – Bonus: Additional Tools in Silhouette Studio – 16 minutes
Additional Resources
Class Conclusion

This class is available on my Teachable site

HERE

I currently have 22 different Silhouette classes available on Teachable.
These are all step-by-step video classes that are taught just like an in-person class.
The best part about being available online is that you can view the class anytime and as many times as needed to practice the technique.
Check out all the available classes

HERE

I would love to see what you are creating with your Silhouette software or machines!
Feel free to post on my Facebook group at 
Silhouette Secrets with EllyMae.

Save this for future reference by pinning the image below.

Enjoy !

This image has an empty alt attribute; its file name is logo.jpg

THANK YOU for your support! How can you help? Click HERE & buy a coffee.
Every little bit helps with the cost of running the site.

SS Logo snip it
**This post may contain affiliate links. What that means is that I may receive compensation if you purchase through the links I have provided. The price you pay for the product or service is not higher but I may get compensated for sharing.
Posted on 2 Comments

“Tank” top

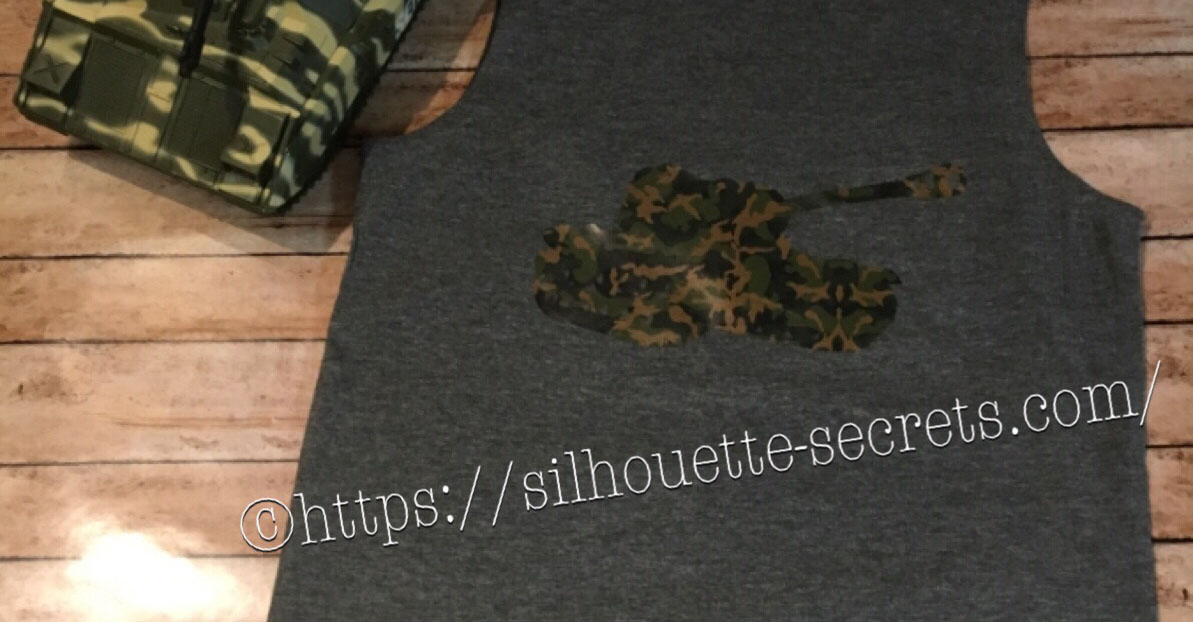
I created this shirt for my son to wear on vacation. He is all about Army and tanks at 6 years old and picked out this Military Set by Studio Ilustrado – Design #83790 in the Silhouette Design Store.

Design Store file

When this file is opened there are multiple designs so I had to right click on it then chose  ungroup and deleted the designs I did not want.

Design file ungroup copy

Then I always fill my design with color, so I can see how it will look when it’s cut.

Fill with color

And now came time to add this Camo Sparkleberry Ink HTV my cutting mat.

Sparkleberry ink camo

It turned out perfect.

temp

And as you can see, he loved it.

He told everyone the entire weekend of camping “Look at my Tank Top – get it? Tank Top”

IMG_4733

Feel free to share the creations you make on my Facebook group at Silhouette Secrets+ with EllyMae.

Enjoy !

THANK YOU for your support! How can you help? Click HERE & buy a coffee. Every little bit helps with the cost of running the site.

Looking for more in-depth, step-by-step classes, check out all of my online Silhouette classes on my Teachable site HERE.

SS Logo snip it

**This post may contain affiliate links. What that means is that I may receive compensation if you purchase through the links I have provided. The price you pay for the product or service is not higher but I may get compensated for sharing.