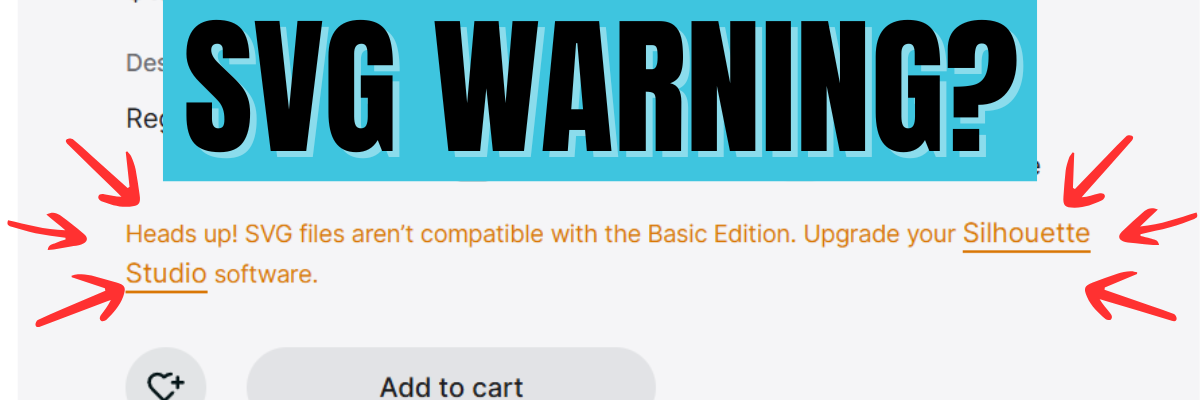
If you’ve clicked the SVG file option in the Silhouette Design Store recently, you may have noticed a message pop up that says: “Heads up! SVG files aren’t compatible with the Basic Edition. Upgrade your Silhouette Studio software.” Don’t worry—you’re not alone! This Silhouette SVG warning notice appears for everyone, even if you already own Designer Edition, Designer Edition Plus, or Business Edition. In this video, I’m breaking down exactly what this message means, why you’re seeing it, and how to confidently purchase SVG files from the Silhouette Design Store without confusion.
Watch the video below.
Affiliate links may be present in the following blog post and as an Amazon Associate, I earn from qualifying purchases.
Understanding the “Heads Up!” Silhouette SVG warning in the Silhouette Design Store can save you a lot of confusion (and unnecessary upgrades). Now that you know why it appears for everyone, you can shop for SVG files with confidence and focus on creating! 🎨✨ Be sure to watch the full video above for a step-by-step explanation, and don’t forget to subscribe to the Silhouette Secrets+ YouTube channel for more tips, tricks, and tutorials to help you get the most out of Silhouette Studio. Have you seen this message pop up? Share your experience in the comments below—I’d love to hear how you’re using SVG files in your projects!
Save this for future reference by pinning the image below.
Enjoy !
THANK YOU for your support! How can you help? Click HERE & buy a coffee. Every little bit helps with the cost of running the site.
Silhouette Classes
Never stop learning! Let me help you take the anxiety out of learning with Silhouette and get to creating faster! My Silhouette classes are heavily focused on software, so you can take the skills & techniques taught and apply them to many future projects!
**This post may contain affiliate links. What that means is that I may receive compensation if you purchase through the links I have provided. The price you pay for the product or service is not higher but I may get compensated for sharing.
This class has been in creation for a long while and I first want to send a great big THANK YOU to Marjorie DiFiore with Atlanta Stylish Point!
Marjorie contacted me last year about a need she was seeing in brand new Silhouette Studio software users who did not necessarily own a Silhouette cutting machine, but were using the Silhouette Studio Business Edition to create for use in other programs or machines. We have worked together and she has answered my numerous questions regarding svg files, specifically in use with a GlowForge laser machine. THANK YOU Marjorie!
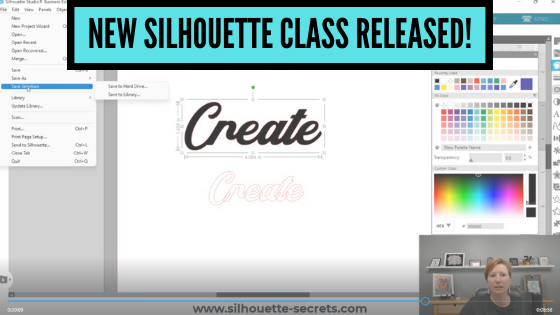
Due to our big move, the class creation was delayed a bit, but I am excited to announce it is now available on my Teachable site! With more to come in the future!
Silhouette Studio Software Basics to Create SVG Files
In this Silhouette Studio software class we use basic tools to create and export a svg file. We will discuss the important factors to know before creating svg files, how to install fonts, use basic tools to create a svg file, demonstrating using the exported file in the Glowforge App, and a bonus video on 3 additional tools in Silhouette Studio that can help in your design creations.
Who is this class for? This class is for – those who are laser machine owners and want to get started learning to use the Silhouette Studio software to design and export files in svg format to use with the laser machine – if you are a beginner Silhouette user who wants to learn how to create svg files, this class is going to cover the basics of getting started with Silhouette and creating a simple svg file – beginners to Silhouette Studio in general – the class covers several of the basic tools to get started creating your own designs using fonts. The class also discusses more advanced features of exporting as a svg file.
What if you do not own a laser machine can you still take the class? Of course! The information will be relevant to anyone who wants to get started creating in the Silhouette software with the option to export as a svg file using the Silhouette Studio Business Edition upgrade.
Affiliate links are present in the following supply list and as an Amazon Associate, I earn from qualifying purchases The cost to you is no different, but I may earn a commission by you using the links provided.
Class Supplies:
– Silhouette Studio Software – Silhouette Studio Business Edition Upgrade *this is discussed in class why it’s needed and how to get it Optional fonts used in class: – Radicals Font by Plusstore – main class demo – Bohemian Script font – Silhouette Design Store or Creative Fabrica – Bonus class demo photo
Class Content
Section 1 – Important Factors Supporting PDF download Section 2 – Important Factors to Create a SVG File – 20 minutes Section 3 – Installing Fonts – 6 minutes Section 4 – Creating a SVG Design in Silhouette Studio – 39 minutes Section 5 – Demonstration of Exported Design in the Glowforge App – 16 minutes Section 6 – Bonus: Additional Tools in Silhouette Studio – 16 minutes Additional Resources Class Conclusion
I currently have 22 different Silhouette classes available on Teachable. These are all step-by-step video classes that are taught just like an in-person class. The best part about being available online is that you can view the class anytime and as many times as needed to practice the technique. Check out all the available classes
I would love to see what you are creating with your Silhouette software or machines! Feel free to post on my Facebook group at Silhouette Secrets with EllyMae.
Save this for future reference by pinning the image below.
Enjoy !
THANK YOU for your support! How can you help? Click HERE & buy a coffee. Every little bit helps with the cost of running the site.
**This post may contain affiliate links. What that means is that I may receive compensation if you purchase through the links I have provided. The price you pay for the product or service is not higher but I may get compensated for sharing.
Silhouette Studio can open a variety of file types. This is a list of the most common file types that Silhouette Studio uses, but may not be all inclusive.
Basics of file types Silhouette Studio use
The following is a brief list and basic description of the most common file types you may encounter. You will notice as you look at the following list, the software upgrades (Designer Edition, Designer Edition Plus, Business Edition) allow additional file types to be opened and used. I have broken it down into those levels so you know exactly what you may have access to.
Affiliate links may be present in the following blog post and as an Amazon Associate I earn from qualifying purchases.
Silhouette Studio Basic Edition (free)
.Studio file type
.Studio files are the Silhouette files that download to the library direct from the Silhouette Design Store or if you download them to your computer direct, they will show like the photo below where ever you have saved them.
File downloaded direct to computer
.Studio are proprietary files and cannot be opened in other programs. This is a cut file and opens directly in the Silhouette Studio software. If by chance when you click on the Send tab it doesn’t have bold red cut lines, simply click on the design to select it and choose Cut. Bold red cut lines should turn on around the design.
.GST
gst file format example
.gst files are older Silhouette files. These will still open in the Silhouette software and are compatible. You will only see this file type if you do a direct download to your computer of the files in the Silhouette Design Store. You may or may not see both a .studio or .gst file type in the download. It just depends on when the file was added to the Silhouette Design Store.
PNG
Png files are a photo file that can have a transparent background. This will depend on how the original image was created. It is a single layer graphic file and does not contain cut lines typically.
png file format example
However, in the v4.4 software there is now the option to Autotrace a transparent png. What this means is that it will trace the outer edge of a transparent png. It does not trace individual layers and colors, but only the outside edge of the design. There are still a few bugs in this Autotrace feature depending on what version of v4.4 you are using. For more information on Autotrace, check out this post HERE.
If you experience issues with png files taking a long time to open or the software crashing, try turning off the Autotrace option and see if it changes for you. With Autotrace turned off, you will need to manually trace a png file using the Trace Tools.
JPEG
Jpeg files are also photo files. They have a white background, are not cut files, and do not contain individual layers.
jpeg file format example
If you want to turn a jpeg into a cut file, it would need to be traced to get cut lines. Each file may take some different trace techniques as each image is composed of different elements. For more on tracing check out these posts HERE.
Note: Since jpeg and png files are graphic images, they are made up of pixels. They are a flattened graphic image and the resolution is set in how it opens up. Scaling a jpeg or png file up or down can affect the image quality.You may notice this if you enlarge a jpeg or png and the edges become blurry or you get a little yellow triangle in the top left corner of the Silhouette design mat that indicates a low quality print.
DXF
Dxf files are a file type that was created in 1982 for AutoCad program. Which just means computer assisted design. So basically a computer drawing program. It really wasn’t designed as a “cut” file. While the Silhouette software can open a dxf file, the file itself can be larger, which can cause delayed responses when opening and working with the file. Or it can cause the software to crash as the processor on the computer cannot handle the data in the file. Dxf files can be very data heavy. For more information on dxf file, check out this post HERE.
I would always recommend choosing a svg file over the dxf file for better cut results.
Silhouette Studio Designer Edition Upgrade
All of the file types listed below can be accessed with a Silhouette Studio upgrade of Designer Edition or higher. For more information on software upgrades, check out the Software Upgrades – My Favorite Features post HERE
SVG
SVG stands for scalable vector graphic. This means that they are a file type that can be scaled up or down without losing image quality.
If you are using files from outside the Silhouette Design Store, this is the file type I would recommend using. It is the higher quality cut file – Designer dependent of course.
Note: if a SVG file is opening in a web browser first, it is losing the svg properties. Computers default to a web browser for opening the SVG file type. Check out either post linked above on how to change the default on your computer to open a SVG file directly in the Silhouette Software. Or use File > Open in the software to open it direct.
PDF
PDFs are a common file type that we are used to seeing in other aspects of our lives, but they can also be cut files.
PDFs can be opened in the software and depending on how it was created will determine if it has cut data with it or not. The only way to know is to use File > Open and choose Vector, then click on the Send tab and see if it comes in with cut lines. Check out this post on Opening a PDF file in Silhouette HERE
Silhouette Studio Designer Edition Plus Upgrade
Embroidery file types – PES, DST, EXP, JEF, and XXX
Embroidery files can be fun to play with for certain projects. When opening embroidery files, keep in mind that every stitch opens as a cut line, which means that the file may need some clean up in order to be a good cut file. It can also mean that it takes your computer longer to process and open the file. This is due to every single stitch is now a cut line which equals more data on the file. Each embroidery file may require different aspects to clean up or make it the cut file that you would like since they are all designed differently.
Silhouette Studio Business Edition
Ai/CDR/EPS
Ai/CDR/EPS Files are files designed in other graphic design programs such Illustrator or Corel Draw. One thing to keep in mind these file types can be data heavy and it may depend on your computer on how long it take to process, open, and work with these file types.
Personally, I have only used the EPS file if I do not have the SVG option for a cut file. Even my computer which is higher specs that the average Silhouette user, takes a bit longer to process those data heavy files. Be patient with your computer if opening these graphic files.
I hope now you understand a little bit more about the different file types that the Silhouette Studio software can utilize.
Save this for future reference by pinning the image below.
Enjoy!
THANK YOU for your support! How can you help? Click HERE & buy a coffee. Every little bit helps with the cost of running the site.
Or if you are looking for more in-depth, step-by-step classes, check out all of my online Silhouette classes on my Teachable site HERE.
**This post may contain affiliate links. What that means is that I may receive compensation if you purchase through the links I have provided. The price you pay for the product or service is not higher but I may get compensated for sharing.
Today we are going to explore the difference between a dxf and svg file.
So let’s first look at the definition of each.
DXF files are a file type that was created in 1982 for AutoCad program. Which just means computer assisted design. So basically a computer drawing program. It really wasn’t designed as a “cut” file.
SVG files are scalable vector graphics. These are vector files that can be resized without losing image quality. These are “cut” files. They were created in 1999.
When you compare the 2 file types, there can be a BIG difference in the quality of a cut. While you can open DXF files with the Basic software, it can also be a big headache to cut a file. Because of the way DXF files are create, they can have massive amounts of edit points. Edit points are the data points that the Silhouette reads to complete a cut.
All these little gray dots are edit points that the Silhouette has to read to connect the dots. For more on edit points, check out this post here – Let’s Explore v4 – Edit Points.
Here are a couple things you may experience when opening and cutting a DXF file:
It may take a lot longer to open Let’s take a look at an example of opening a dxf file vs a svg file. This video shows opening the above mandala file in dxf format versus svg format. The dxf file took 38 seconds versus the svg file took just a couple seconds. This will also vary depending on the user’s computer and the dxf file. I have a higher than normal spec gaming computer that is used in the video below.
The software may crash or lock up when trying to open a dxf since it’s such a large data file. Due to the data size of a dxf file versus a svg file, the software may just crash as it’s working to try to open the dxf file. This will vary by dxf file and computer.
Software is slow to respond and the computer is “thinking” more with dxf files. Since it is a data heavy file it may take longer to make edits, resize, or work with the file in general.
A design takes forever to cut. Since it has massive amounts of edit points, the Silhouette has to hit every single one of those to complete the cut.
The machine sounds odd cutting, like it’s stuttering. This is because it is making short movements to connect the dots between those edit points.
The cut not completing cleanly because it has open edit points (red dots) and not complete lines If you double click on a design, no matter the file type and you see red dots in it, there is a problem. This means that the cut lines are not complete and it is a broken line. This will affect how it cuts and in turn how it weeds. I have drawn a simple rectangle below as an example- the red dot is a broken point. The cut line does not completely connect to complete a cut.
Those broken edit points will need to be connected in order to close the shape. If the points are close together, double clicking on the red dot can close it, but if they are not, then you will need to connect the dots to close that cut line.
Shapes that have broken edit points cannot be filled with color as they really are not a “shape” but a line since it is not completely closed.
More on edit points on a dxf file
Since a dxf may have massive amounts of edit points, let’s take a look at what happens to those edit points when you scale the design down.
M
Here is what the file looks like when it’s originally opened & edit points are activated. It opens at 9.528″ wide
Now if we scale that down, all of those edit points get squished closer together. They are still there but now you’ve taken those data points and squished them into a smaller space of 4.163″ wide. Since there was already more edit points than necessary in a small space, you’ve now crowded them in even more.
In most cases, cutting this dxf file will just result in a mess of your material.
In the Edit Points Panel, there is the option to “Simplify” and you can try that, but it doesn’t always work or it may change the shape of the actual design.
Each file will be different in how it responds and reacts because they are created differently and are made up of different data. Let’s compare another dxf file and svg file side by side.
On the left is the dxf file and the right is the svg file. In this example, the edit points are not too crazy, however, you can still tell a noticeable difference between the dxf and the svg. The svg file is a much cleaner cut file. Depending on the size you were to cut this file at, you may or may not notice a difference.
I highly recommend at least the Designer Edition upgrade to all Silhouette users and this is just one of the reasons why. The upgrade will save you time, headache, and frustration in the long run.
I hope this has made the differences between working with dxf and svg files a little bit clearer. In my experience, the svg file is almost always the cleaner cut file to use.
Save this for future reference by pinning the image below.
Enjoy!
THANK YOU for your support! How can you help? Click HERE & buy a coffee. Every little bit helps with the cost of running the site.
Or if you are looking for more in-depth, step-by-step classes, check out all of my online Silhouette classes on my Teachable site HERE.
**This post may contain affiliate links. What that means is that I may receive compensation if you purchase through the links I have provided. The price you pay for the product or service is not higher but I may get compensated for sharing.
Let’s Explore v4 – Saving a file as a svg from Silhouette
Did you know that you can save a file as an svg file directly from the Silhouette Studio software if you have the Business Edition upgrade?
So first, what is a svg file?
A .svg is a Scalable Vector Graphic. This means that it is an image that can be scaled up or down without losing image quality.
In general, it is a common cut file that can be used by many different programs and platforms.
Affiliate links may be present in the following blog post and as an Amazon Associate, I earn from qualifying purchases.
There are a couple of things that have to be considered before you can save as a svg file.
1 – You must be using a software version of v4.1.197 or higher. This was the version released in August 2017, so it’s been available for quite some time.
2 – You must have the Business Edition upgrade in order to export from the Silhouette Studio as a svg file. For more information and specifics on software upgrades check out this post HERE.
3 – The design cannot contain any pieces or parts of a file from the Silhouette Design Store. If you try to export as a svg file with a part from the Design Store, it will give you an error message.
But, you can purchase the svg file from the Silhouette Design Store if it is an option and then download it direct to your computer and use it. This can be opened in Silhouette Studio to be added to and then exported as a svg or used direct in another program. If you have already purchased the .studio file for a design, you are only charged the difference from the .studio to .svg price when you checkout in the Silhouette Design Store for that svg.
How do you save as a svg?
Well, this is the easy part. As long as you meet the #1-3 above, then it’s as simple as File > Save As in the Silhouette software.
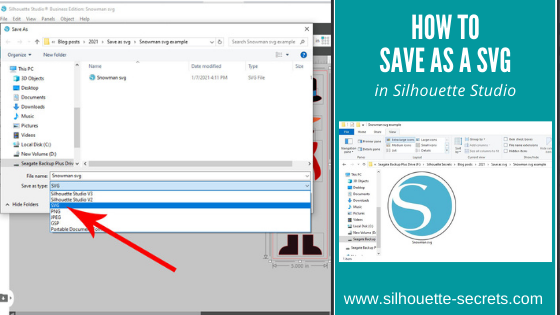
Design the file or open the file that you may have previously designed. Then choose File > Save As > Save to Hard Drive in the top left corner of the Silhouette Studio software.
Then choose the location to save the svg file to. Choose the File Name and then change the File Type to whatever you want to save it as. In this case, choose svg.
And you are done! View the svg in the folder where you saved it as.
If your svg files are showing with a different icon than a Silhouette icon, it is most likely that your computer’s default program is not set to open a svg file direct with Silhouette. You can change that! Find step-by-step instructions on how to change that here in this post – Reasons svg files are not opening in Silhouette Studio.
Now, something to note here is that a user may need to turn the cut lines on when they open a svg file if they are using some versions of the Silhouette software. This is normal and not that the file has been saved wrong. It is just how it is and a simple step to turn them on.
Select the object by clicking directly on it or the red cut line.
Note: I’ve moved the pieces around to cut out of each color.
You can tell an object is selected because a gray selection box will appear around all selected objects.
Then click on the Send tab in the top right corner. If the cut lines are off, you will not see bold red cut lines around the design. The cut line designation is set to No Cut or they are turned off.
With the object selected, choose Cut and the bold red cut lines will turn on.
The BIGGEST factor here is that the object has to be selected in order to change the cut lines on or off. If nothing on the screen is selected you will not be able to change the Cut Action setting.
Make sure the object is selected by clicking on it first.
And you have created your own svg file that could be used in many other programs. I am seeing more and more users get the Silhouette Studio Business Edition to be able to design and save using the features of the Silhouette software, but use the files in other ways, such as with a Glowforge as an example.
I would love to see what you are creating! Feel free to post on my Silhouette Secrets+ Facebook group! Have questions? That is the best place to start troubleshooting too!
Save this for future reference by pinning the image below.
Enjoy!
THANK YOU for your support! How can you help? Click HERE & buy a coffee. Every little bit helps with the cost of running the site.
Or if you are looking for more in-depth, step-by-step classes, check out all of my online Silhouette classes on my Teachable site HERE.
**This post may contain affiliate links. What that means is that I may receive compensation if you purchase through the links I have provided. The price you pay for the product or service is not higher but I may get compensated for sharing.
THANK YOU for your support! How can you help? Click the link to buy a coffee. Every little bit helps in the cost of running the site.