Posted on Leave a comment

How to Save As PNG in Silhouette Studio

Silhouette Secrets+ with EllyMae

If you’ve ever created a design in Silhouette Studio and wanted to use it outside the software—whether for DTF (Direct to Film) printing, sublimation, print-and-cut, or any high-quality print project—this guide is for you! With just a few simple steps, you can save your design as a transparent PNG file directly from Silhouette Studio. This method is perfect for uploading to services like Siser®’s Easy® Transfers for vibrant, press-ready DTF prints, but it’s also a great option for any project that needs a clean, high-resolution image. In the video below, I’ll walk you through how to export your design as a PNG and show you exactly how to upload it to the Siser Easy Transfers site to order custom DTF transfers—plus, you’ll get tips to ensure your file is properly formatted for print success. You’ll also find written step-by-step instructions below the video in this post to make it even easier to follow along.

Affiliate links may be present in the following blog post and as an Amazon Associate, I earn from qualifying purchases.

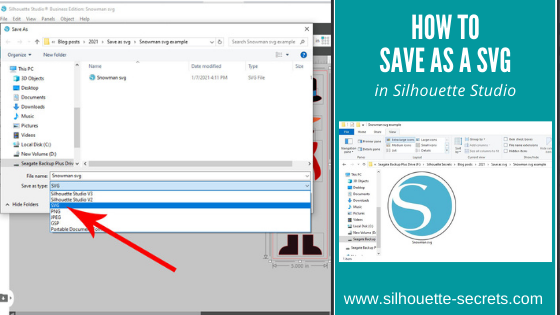
Find the video – How to Save as PNG in Silhouette Studio + Upload to Siser® Easy® Transfers for DTF Prints on the Silhouette Secrets+ YouTube channel HERE or click the image below.

Screenshot of Silhouette Studio showing a colorful 'create' design with export settings for saving as a transparent PNG file.

In the video linked above, I show how I created the design featured. I am going to skip right to the steps of saving as a PNG from Silhouette Studio Business Edition. If you would like to see how I create the design, check it out in the video HERE.

When creating your own designs, make sure you are starting with high resolution images. Photos and digital files that are 72 dpi are designed for internet quality images and you want 300 dpi for print quality.

How to Save As a High Resolution PNG File

In order to save as a PNG file type or any other file type, the Silhouette Studio Business Edition upgrade is needed. Find more details on Silhouette software upgrades HERE and how to activate an upgrade on the Silhouette software HERE.

Note: if you are on a MAC, the screenshots below may look a bit different as I am using a Windows computer, however, the process is the same.

Select all parts of the design to be saved. This can be done by left clicking and dragging across the entire design to “rubber band” select everything the mouse moves across.

Silhouette Studio workspace displaying a colorful 'create' design with a gradient background and the text in pink. The interface is shown with tools and options available.

In the top left corner of Silhouette Studio, select File > Save Selection > Save to Hard Drive.

Screenshot of Silhouette Studio showing the steps to save a design as a PNG, including the menu options 'File', 'Save Selection', and 'Save to Hard Drive'. The design features colorful text that says 'create'.

Using this method will save the design at the size created and not the entire art board. I explain and show a demonstration of why I recommend this method in the video tutorial HERE.

Choose the location you want the file to be saved, name the file, and change the Save as type at the bottom to PNG (or whatever other file type you’d like to save as).

Screenshot of the Silhouette Studio save selection window, showing options to save a design as different file types including PNG.

Silhouette has a default DPI (Dots per inch), this is NOT print quality. Highlight the number and change it to 300, then press the Enter key. You will notice that the Pixels for both Width and Height increase. Pixel size is directly related to DPI.

Check the box next to Transparent background if you want a transparent background.

Silhouette Studio export settings window showing options for width, height, dots per inch, and transparent background.

PNG and JPEG files are rectangle shaped files. If a PNG was not designed with a transparent background, it will show as a white rectangle behind the design. JPEG files do not have transparent backgrounds.

The maximum pixel size that can be saved for either width or height in Silhouette Studio is 10,000 pixels.

Make sure to press Enter after changing the DPI or the change will not take effect.

Click the Save button to save the file as a PNG.

Screenshot of Silhouette Studio showing the Export Bitmap settings with options for width, height, and DPI, along with a colorful design in the background.

Check the file in the saved location to make sure it saved as you want. On a Windows computer, in the Windows folder, move the mouse over the image and it will tell you the pixel size.

Screenshot of a computer window showing a file directory with a saved PNG design titled 'Create Shirt Demo Silhouette'. The design features a colorful gradient background with the word 'create' in pink cursive font.

To change how you view files in the Windows Folder, select View at the top and select how you want to see those files in the folder.

When using those steps, the design should be saved at 300 DPI from Silhouette Studio.

Upload your high resolution designs and order Siser® Easy® Transfers DTF prints HERE.

Supplies I used in the design featured:

Save this for future reference by pinning the image below.

Instructional graphic showing the steps to save a design as a PNG file in Silhouette Studio, with highlighted options for width, height, DPI, and a 'Save' button.

Enjoy !

THANK YOU for your support! How can you help? Click HERE & buy a coffee.
Every little bit helps with the cost of running the site.

Silhouette Classes

Never stop learning! Let me help you take the anxiety out of learning with Silhouette and get to creating faster! My Silhouette classes are heavily focused on software, so you can take the skills & techniques taught and apply them to many future projects!

Silhouette step-by-step Classes by Silhouette Secrets+

Silhouette Secrets+ with EllyMae
**This post may contain affiliate links. What that means is that I may receive compensation if you purchase through the links I have provided. The price you pay for the product or service is not higher but I may get compensated for sharing.

Posted on 6 Comments

Let’s Explore v4 – Save As a Svg file

Let’s Explore v4 – Saving a file as a svg from Silhouette

Did you know that you can save a file as an svg file directly from the Silhouette Studio software if you have the Business Edition upgrade?

So first, what is a svg file?

A .svg is a Scalable Vector Graphic.
This means that it is an image that can be scaled up or down without losing image quality.

In general, it is a common cut file that can be used by many different programs and platforms.

Affiliate links may be present in the following blog post and as an Amazon Associate, I earn from qualifying purchases.

There are a couple of things that have to be considered before you can save as a svg file.

1 – You must be using a software version of v4.1.197 or higher. This was the version released in August 2017, so it’s been available for quite some time.

2 – You must have the Business Edition upgrade in order to export from the Silhouette Studio as a svg file.
For more information and specifics on software upgrades check out this post HERE.

3 – The design cannot contain any pieces or parts of a file from the Silhouette Design Store. If you try to export as a svg file with a part from the Design Store, it will give you an error message.

But, you can purchase the svg file from the Silhouette Design Store if it is an option and then download it direct to your computer and use it.
This can be opened in Silhouette Studio to be added to and then exported as a svg or used direct in another program.
If you have already purchased the .studio file for a design, you are only charged the difference from the .studio to .svg price when you checkout in the Silhouette Design Store for that svg.

How do you save as a svg?

Well, this is the easy part. As long as you meet the #1-3 above, then it’s as simple as File > Save As in the Silhouette software.

I am going to use the Snowman design that I created using the tools in the Silhouette Studio software in this post – Designing in Silhouette – Snowman Pieces.

Design the file or open the file that you may have previously designed.
Then choose File > Save As > Save to Hard Drive in the top left corner of the Silhouette Studio software.

Then choose the location to save the svg file to.
Choose the File Name and then change the File Type to whatever you want to save it as.
In this case, choose svg.

And you are done!
View the svg in the folder where you saved it as.

If your svg files are showing with a different icon than a Silhouette icon, it is most likely that your computer’s default program is not set to open a svg file direct with Silhouette.
You can change that!
Find step-by-step instructions on how to change that here in this post
Reasons svg files are not opening in Silhouette Studio.

Now, something to note here is that a user may need to turn the cut lines on when they open a svg file if they are using some versions of the Silhouette software.
This is normal and not that the file has been saved wrong.
It is just how it is and a simple step to turn them on.

Select the object by clicking directly on it or the red cut line.

Note: I’ve moved the pieces around to cut out of each color.

You can tell an object is selected because a gray selection box will appear around all selected objects.

Then click on the Send tab in the top right corner.
If the cut lines are off, you will not see bold red cut lines around the design.
The cut line designation is set to No Cut or they are turned off.

With the object selected, choose Cut and the bold red cut lines will turn on.

The BIGGEST factor here is that the object has to be selected in order to change the cut lines on or off.
If nothing on the screen is selected you will not be able to change the Cut Action setting.

Make sure the object is selected by clicking on it first.

And you have created your own svg file that could be used in many other programs.
I am seeing more and more users get the Silhouette Studio Business Edition to be able to design and save using the features of the Silhouette software, but use the files in other ways, such as with a Glowforge as an example.

I would love to see what you are creating!
Feel free to post on my Silhouette Secrets+ Facebook group!
Have questions? That is the best place to start troubleshooting too!

Save this for future reference by pinning the image below.

Enjoy!

This image has an empty alt attribute; its file name is logo.jpg

THANK YOU for your support! How can you help? Click HERE & buy a coffee.
Every little bit helps with the cost of running the site.

Or if you are looking for more in-depth, step-by-step classes, check out all of my online Silhouette classes on my Teachable site HERE.

SS Logo snip it
**This post may contain affiliate links. What that means is that I may receive compensation if you purchase through the links I have provided. The price you pay for the product or service is not higher but I may get compensated for sharing.

Posted on 8 Comments

Using multiple Silhouette machines

Using multiple Silhouette machines simultaneously

One of the great features of the Silhouette Business Edition upgrade is being able to run multiple Silhouette machines at the same time. The Business Edition upgrade has many great features and you do not have to have a business to use it or have a need for it. However, if you do have a business it has several features that may come in handy.

Check out the Silhouette Edition Comparison chart for all the features that are available with each software upgrade.

Now let’s jump in to how do you use multiple machines at once.

First, plug all the Silhouette machines in to the computer and then turn them on. With the Business Edition upgrade active, the software will recognize the machines that are plugged in.

Set up the file(s) you want to be sent to the Silhouette machines.

Once it is ready to go, then click on the Send tab in the top right corner.

Cameo job multiple machine copy

The file that is active on the design mat is what will be sent to the machine selected.

Click on the machine icon in the bottom right corner of the Send tab.

Machine icon copy
Note: depending on the software version being used, the machine icon may be farther on the right side of the tool bar. Screen shots are in v4.2.279

This will bring up a list of all the Silhouette machines that are recognized by the Silhouette software.

Icon definition copy

There are 2 connection designations – Bluetooth or USB.

There are several more things that you can see here too.
Status – Under the machine name, it will tell you the status of the machine – Available, Unavailable, Ready, etc.
Firmware – what version of firmware is on the Silhouette machine.

Status Firmware copy

Choose the machine that you want the design on the screen to be sent to.

The machine menu will disappear and the machine selected will now be the active machine.

Name change copy

Another neat feature is that you can name the machine. This is very helpful if you are running multiple machines and trying to keep track of which a job is being sent to.

Double click on the name above the machine photo and it will allow you to type a new name or right click and choose Rename from the menu.

Rename copy.jpg

I am sure you can come up with a cool name for your Cameo. I was in the middle of a big project when I named mine and just went with the color of my machine. One of these days I’ll rename it something different, but this works to help me keep track of which machine I am sending my job to.

Next, verify that all the cut settings are how they should be, do a test cut if needed and it is ready to Send the job to the Pink Cameo.

If you are cutting the same design and want to change to another machine, click on the machine icon again to select the next machine and verify everything is set up properly and click Send. You can do this for as many machines as you have ready to go.

Don’t forget to load your mat or material in the machine before you click on the Send button.

IMG_20190520_101723193 copy

Tip: If I am using a mat, then I cut my materials down with a paper trimmer to the size I need, this helps extend the life of my Silhouette mats as I’m not covering the full adhesive and pulling a material off of it each time. Check out this post with more tips on Getting the Most out of the Silhouette mat – HERE.

The above works if you are sending the same design to multiple machines, but what if you want to send different jobs to different machines?

Sending a new design to another Silhouette machine

I mentioned above that the design that is showing on the design mat is the one that will be sent to the machine selected.

If you want to send a different design job to a new machine, click back on the Design tab in the top right corner, open a new design mat & place the design on it, set it up how you like and click back on the Send tab. Repeat the steps above.

New design copy

Now, a difference here is if when switching between a Cameo or Portrait and the Curio. Currently, the software is set up that the machine that is selected on the Send tab, is the current Page Size and Cutting mat selection options on the Page Setup Panel.

This is changing with the upcoming v4.3 software updates and it is in Closed Beta testing now.

I love having this option to send to multiple machines with the Business Edition because I can set up one job to etch on my Curio and while it’s etching, I can still be using my Cameo, Portrait or even another Curio.

There is no numerical limit to the number of machines that you can running with the Silhouette Business Edition, however, you may be limited by the processing power of the computer. Keep in mind that each design sent to cut is sending data back and forth the Silhouette machines, the more files that are working equals more data being sent.

Curio etching copy

For instance, when etching a file, that has a lot more data involved than just a regular cut job. If the computer can handle the amount of data being processed, then you are all good. If it gets bogged down, you may experience the Silhouette machine stuttering or slowing down. Most times this will still cut or etch just fine. However, if you reach a certain point and the computer is maxed out, it could lead to a software crash. Make sure to save the file often. The only way to know what a computer can handle is to test it.

Etch fill zoom copy

When you do an etch or sketch fill, each of the red lines is now the equivalent of a cut line, the more cut lines (etch lines) the more data is in the file. For best results when using the Sketch or Emboss features, save often.

For tips on getting started with your Curio, check out this post –
The Curio – Getting Started.

This is amazing for large projects like wedding favors, cutting for classes or events like the All Things Silhouette Conference.

Note: in the process of writing this blog post, I did find that there is no difference when you are using the same type of Silhouette machine. However, the mat size does change to the current machine selected when you switch to a different machine. For instance, when I switched to my Curio, my cut border changed to the Curio cut border on all the projects open in my software. Even if I had already sent the file to be cut, it changed the cut border & the project did not cut outside of the border.
In the past, I have never had an issue with this and used my Curio & Cameo both simultaneously. But, it is something to make a note of because it could affect the way a Cameo cuts a project, if a smaller machine is activated at the same time.
The good news on this is that a solution is coming to this issue with the release of the v4.3 software, which is currently in closed Beta testing.

This is a time lapse video of using multiple Cameo 3 machines at the same time to cut cardstock. This works great when you have 100 wedding favor boxes to cut out.

These 2 projects below were created simultaneously from 1 computer with the Silhouette Studio v4.2.279 Business Edition upgrade.

On the left side, the HTV for this Cotton Canvas Garden flag was cutting on a Cameo 3, while the Curio was etching the circle acrylic.

Designs used:
American Flag of United States by Echo Park printed on ColorJet III Dark Printable Heat Transfer Paper by Specialty Materials
Home of the Free Because of the Brave by BasicGrey
Sunflower Mandala by Sweet Afton

Have you tried cutting with multiple machines? Did you know you could?
What would you use this feature for?

Feel free to post your comments and questions below or on my Facebook group at Silhouette Secrets with EllyMae.

Enjoy!

SS_Signature copySS Logo snip it

**This post may contain affiliate links. What that means is that I may receive compensation if you purchase through the links I have provided. The price you pay for the product or service is not higher but I may get compensated for sharing.