I have been troubleshooting with Silhouette users since 2016, and we have answered a lot of questions during the years. One of the most common questions is “What is this?” and “Why did it just appear?” In this blog post, I’m sharing more details on 4 of the tools that are often confused with each other, how they get turned on, how to turn them off, and where to find more information on each of the tools. These 4 tools can be useful when designing in Silhouette Studio, but not all users utilize them or will use them all of the time. That is one of the great things about Silhouette is the choice of having the options to use a tool or feature. This is also one of those cases where if a user doesn’t know what a tool does specifically, they may never know that it can actually be really useful to them in their workflow.
Affiliate links may be present in the following blog post and as an Amazon Associate, I earn from qualifying purchases.
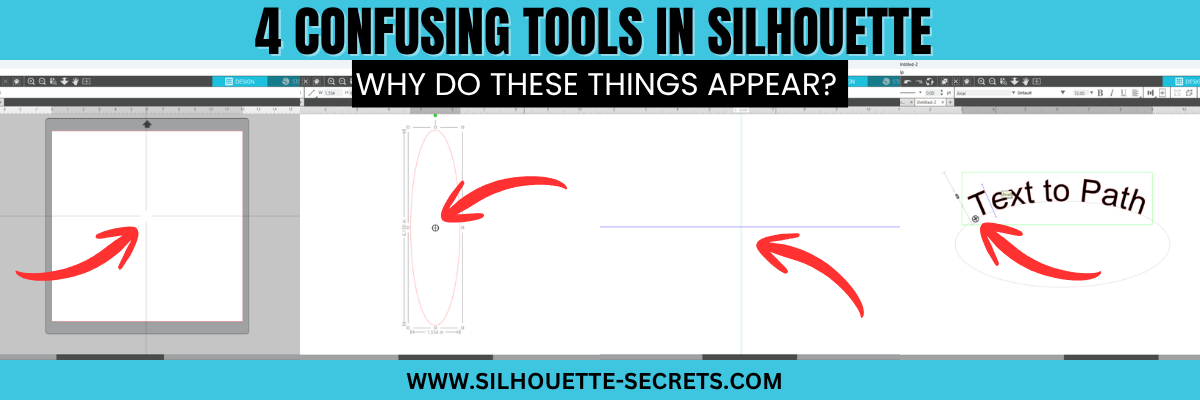
The 4 tools in Silhouette Studio that are often confused are:
Crosshairs
Center of Rotation
Guides
Text to Path Control Point
Watch the YouTube video on this topic below and keep on scrolling down to see additional information on each as well.
Crosshairs in Silhouette Studio
Crosshairs usually appear for 2 reasons.
Pressing the letter ‘H’ on the keyboard toggles it on and off.
A file is opened that the designer saved it with crosshairs on.
Typically we see crosshairs appear because a user thinks that they have activated Text Mode and it did not take. So when the letter ‘H’ is pressed on the keyboard, it toggles it on.
Crosshairs can be turned on and off 3 ways:
Press the letter ‘H’ key. If they don’t turn on and off, click on the design mat and then press ‘H’ again.
Open the Page Setup Panel, click on Tab 2, and click the Crosshairs button.
In the top left menu, under View, select Turn on Crosshairs.
Crosshairs are a Designer Edition upgrade feature and those on Basic will not see this available.
Guides can be pulled from the rulers on the top or right side of Silhouette Studio. Guides are a Designer Edition upgrade feature along with Rulers.
These can be accidentally activated if clicking the mouse on top of the rulers or click & pull from the ruler area onto the design mat.
Guides can be deleted by clicking on one to activate it, it will turn dark blue, then press delete. Light blue color means it is not the active Guide selected.
Guide settings can be found under the Page Setup Panel, under Tab 2. Snap to Guides is by default always active, but unless you have a Guide placed on the file, you won’t see it work. Guides can be toggled on and off under this tab too.
Guides can also be found in the top left menu under View, then select the option desired.
This control point appears any time there is editable text activated.
This is the control handle that is used to drag text to a path and have it snap to the path. This feature is always available on editable text and there is no way to turn it off.
The April 2026 member exclusive tutorial for the Creative Community is an in-depth tutorial on Text to Path with advanced techniques too! Check out more details on the Creative Community HERE.
*Creative Community members watch for a cheat sheet on these tools coming soon to April’s forum!
Save this for future reference by pinning the image below.
Enjoy !
THANK YOU for your support! How can you help? Click HERE & buy a coffee. Every little bit helps with the cost of running the site.
Silhouette Classes
Never stop learning! Let me help you take the anxiety out of learning with Silhouette and get to creating faster! My Silhouette classes are heavily focused on software, so you can take the skills & techniques taught and apply them to many future projects!
**This post may contain affiliate links. What that means is that I may receive compensation if you purchase through the links I have provided. The price you pay for the product or service is not higher, but I may get compensated for sharing.
Have you ever had this little bullseye pop up in Silhouette Studio? Has it ever annoyed you? The Center of Rotation is its official name, but many simply refer to it as a bullseye or target-shaped feature that appears on an object in Silhouette.
Affiliate links may be present in the following blog post and as an Amazon Associate, I earn from qualifying purchases.
What if I told you this Silhouette bullseye was a really useful tool when you get to creating your own designs?
And what if I told you that it is easy to turn on and off?
Silhouette Center of Rotation
In this quick video tutorial on the Silhouette Secrets+ YouTube channel, I demonstrate how to turn it on, turn it off, and utilize it. Or continue reading below for more details.
The Center of Rotation can be turned on for several reasons in Silhouette. Center of Rotation is available in the Designer Edition upgrade or higher. We see users ask about this a lot and it wasn’t until recently that we found out that it is not on the upgrade list, but it is in fact an upgrade feature. When a user upgrades to Designer Edition or higher, it can be turned on in the software by default.
The Center of Rotation might turn on for other reasons, such as if you open a file and the designer had previously activated it, or, most commonly, if the letter “O” on the keyboard has been pressed. The letter “O” is the keyboard shortcut for Center of Rotation.
To toggle the Center of Rotation on and off using the keyboard shortcut, you need to select the design.
Or you can find the Center of Rotation under the Preferences Panel, under the Defaults tab.
Preferences Panel
You can find the Preferences panel in several ways:
Click the gear icon in the bottom right corner
Click the Edit menu in the top left corner & Preferences is at the bottom of the menu
There are probably 2 things that are the most annoying about this little bullseye in Silhouette.
The first is merely the sight of it. If you do not know what it is, what it does, or how to turn it off, it can be distracting or just a visual eyesore.
The second is that when you are trying to move an object, the Center of Rotation wants to play. When you think you are grabbing the design to move it, the Center of Rotation moves and not the design.
But, once you know what it is and how to turn it off, you can easily make it disappear.
What purpose does the Center of Rotation serve?
It is exactly as the name says. It is the Center Point of Rotation, whether you are rotating a single object or you are replicating an object.
The default for the Center of Rotation is exactly in the center of an object. If you rotate the object as is, it is going to act as you would normally see with it turned off.
If you move the Center of Rotation away from the center point of the design and then rotate the object, it will rotate around wherever you placed the Center of Rotation bullseye.
Round and round she goes!
Now, what would you use this for?
The most common way I use it is for creating designs such as flowers or snowflakes. I am sure you can think of many other applications as well.
If I move the Center of Rotation to the bottom of the design as shown below.
I can then open the Replicate Panel and replicate the shape around the Center of Rotation.
And I have the beginnings of a snowflake design.
Or if I use a different shape, like an oval, then a beginning shape of a flower.
While it can be an annoying little thing that pops up, it is also a very useful tool too!
I hope you will take some time today and just play! See what you can create using basic shapes and the Center of Rotation. Keep in mind that designing is simply placing shapes together to make new shapes. Just like a beginners drawing book!
Save this for future reference by pinning the image below.
Enjoy !
THANK YOU for your support! How can you help? Click HERE & buy a coffee. Every little bit helps with the cost of running the site.
Silhouette Classes
Never stop learning! Let me help you take the anxiety out of learning with Silhouette and get to creating faster! My Silhouette classes are heavily focused on software, so you can take the skills & techniques taught and apply them to many future projects!
**This post may contain affiliate links. What that means is that I may receive compensation if you purchase through the links I have provided. The price you pay for the product or service is not higher, but I may get compensated for sharing.
Affiliate links may be present in the following blog post and as an Amazon Associate, I earn from qualifying purchases.
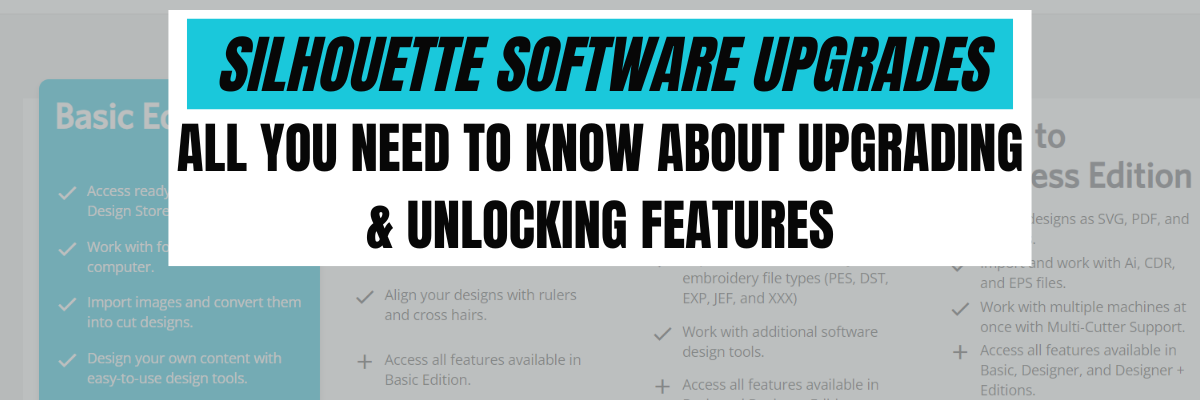
One of the most asked questions we see is about software upgrades and unlocking features in the Silhouette Studio software.
Silhouette Software Upgrades
Software upgrades can be purchased through an authorized Silhouette retailer. Please be careful buying through sites like Etsy, etc. as they can sometime not be the real deal or exactly as advertised. Look for reviews first.
Sales happen often – check each one to see where you might score the best deal!
What is an upgrade?
A software upgrade is a code you purchase that unlocks additional features in the software. It is a one-time fee that can be active on up to 3 computers per code.
I highly recommend at least the Designer Edition upgrade for all of my students. It makes life easier and saves you time and headache. Just being able to open a SVG file and cut is well worth it.
But I LOVE the Business Edition upgrade because it unlocks it ALL and I never have to question if some tool/feature is available to me. Both are well worth the investment!
Don’t let the name “Business” edition fool you though – you do not have to have a business to use it or have it be useful. There are just some features that are helpful to those that run a business such as using multiple machines.
If you have the basic (free) software, you will want to purchase 1 of 3 options depending on what upgrade you want to go to: Option 1 – Silhouette Studio to Designer Edition (highly recommend at least this) Option 2 – Silhouette Studio to Designer Plus (unlocks a few more features – see below) In all honesty, if you are upgrading to Designer Edition Plus, you might as well go all the way and unlock it all Option 3 – Silhouette Studio to Business Edition (unlocks it all)
Now here is the important part, if you already have an upgrade, you only need to purchase the step up to the next level you want.
For instance, if you already have the Designer Edition upgrade but you want to go to Business Edition, you want to buy the Designer Edition to Business Edition upgrade. You do not need to buy the full upgrade. You would purchase the level that you need to go from to the level you want to be at. On the Silhouette website, you simply select the Business Edition upgrade, and it will recognize which upgrade(s) you already have when you are logged in and only show the price for the upgrade you need.
Now, keep in mind, if you purchase the upgrades in steps it is no different than purchasing the upgrade all together.
What does each level of upgrade do?
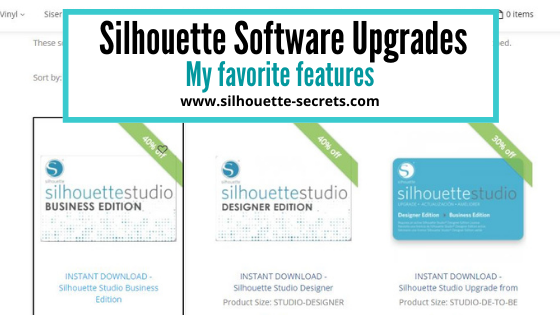
Here are a few of my favorite features and the ones I find most might use in the software:
Designer Edition unlocks:
Ability to open SVG and pdf file directly in the software
Edition Toggle (this is great for those of us who teach, so we can see exactly what the students see in their version) And more…
Now, the list above is not the extensive list of all the features unlocked with each upgrade. However, it is a list of the features I find the most useful in each upgrade. For the complete comparison chart click HERE to go look at Silhouette America.
I want you to be successful and use your Silhouette software to the fullest!
How to activate the upgrade
It is now easier than ever to activate an upgrade!
I have all the details outlined in this post depending on what software version you are currently using.
Additional Resources on Silhouette Upgrades & Troubleshooting:
If you have question about an upgrade just let me know in the comments below.
Save this for future reference by pinning the image below.
Sign up for the Silhouette Secrets+ Newsletter for more information delivered to your inbox each week!
Silhouette Secrets+ Newsletter
Never miss out on the news, tips, “secrets”, deals, classes, and more that I share on Silhouette Secrets+. Sign up for the newsletter and get information delivered to your inbox every Friday. Unsubscribe at any time.
THANK YOU for your support! How can you help? Click HERE & buy a coffee. Every little bit helps with the cost of running the site.
Silhouette Classes
Never stop learning! Let me help you take the anxiety out of learning with Silhouette and get to creating faster! My Silhouette classes are heavily focused on software, so you can take the skills & techniques taught and apply them to many future projects!
**This post may contain affiliate links. What that means is that I may receive compensation if you purchase through the links I have provided. The price you pay for the product or service is not higher, but I may get compensated for sharing.
Have you seen all the possibilities with rhinestone designs?
In this post, I’ll share 3 ways you can work with rhinestones.
Affiliate links may be present in the following blog post and as an Amazon Associate I earn from qualifying purchases.
Enter your email address to follow this blog and receive notifications of new posts by email.
Let’s Add Bling! 3 Ways to Work with Rhinestones
1. Create Your OwnRhinestone Designs
If you have the Silhouette Studio software Designer Edition upgrade (or higher), you can easily create your own rhinestone designs that can be cut out of rhinestone flock.
I share how the Rhinestone Panel in Silhouette Studio Designer Edition works in this tutorial in the Let’s Explore v4 series Let’s Explore v4 – Rhinestones
I also have a step-by-step class where I share how to create 4 different rhinestone designs and give tips for working with pre-made rhinestone designs, how to make your own, and how make faux rhinestone designs as well!
And there are even more options! If you have the Silhouette Studio Business Edition upgrade, you can also create the rhinestone design and export as a svg file. This means that other cutting machine users could also use the svg file or you could use a different machine to cut the rhinestone flock for the template as needed. As always, you would need to test with your specific cutting machine to find out the cut settings that work best.
To create your own rhinestone designs does require some additional supplies. Here is a list of the supplies I used in the Designing with Rhinestones class.
These are as easy as ordering and pressing according to the instructions. Bing, bang, bling!
The most difficult part about rhinestone designs is getting a good photograph. It is so hard to capture the sparkle and bling on these designs. I have more to apply in the future too!
Do you have a custom design you want to have made with rhinestones? Maybe you don’t have all the colors of the rhinestones you need or it is just too complex or it is cheaper to purchase than to create?
And have fun! So many projects on my list for the future! Hope you’ll continue on this journey with me!
Save this for future reference by pinning the image below.
Enjoy !
THANK YOU for your support! How can you help? Click HERE & buy a coffee. Every little bit helps with the cost of running the site.
Silhouette Classes
Never stop learning! Let me help you take the anxiety out of learning with Silhouette and get to creating faster! My Silhouette classes are heavily focused on software, so you can take the skills & techniques taught and apply them to many future projects!
**This post may contain affiliate links. What that means is that I may receive compensation if you purchase through the links I have provided. The price you pay for the product or service is not higher but I may get compensated for sharing.
Are you a Silhouette owner and just got a new computer? Not sure where to go from there?
It is pretty easy to get setup and running with a new computer and I’m going to share a few tips.
First when you get a new computer, be prepared that it will take a little bit for it to be ready for you to start using. There will be some computer setup instructions for you to follow. And if you are a PC owner, you may find that you have a lot of Windows updates that need to install in order to get it ready for use. Be patient and let it setup correctly. I know you are excited, believe me, I was too when I got my new computer last year. But, there really is no rushing it. The updates will finish when they finish.
Silhouette Studio Software Installation
When you get a new computer, you will first need to download the software on to the new computer. This can be found on the Silhouette America website. Click on Software & then Get Software
Next, you will see a web page that will show all the software from Silhouette that’s available.
For the Silhouette cutting machines, you will select the Silhouette Studio option.
You will need to start with the Basic software. The current version is listed at the top.
For Legacy versions, continue scrolling down the page.
Choose the current version and then click on the either the Mac or the Windows option. This will download the installer to your computer and you will open that to start the installation.
Click HERE to go directly to the Software download page.
There may be some pop ups that come up that need approval in order to proceed. Watch the bottom task bar for any flashing shields if the pop up doesn’t actually pop up.
If a flashing shield appears, click on it and then approve all the pop ups.
Once the installation is complete, you can open the Silhouette Software.
If by chance you have a new Windows PC and it is running in S mode, it will not let any program that is outside of the Microsoft Store install on the computer. You will need to take it out of S mode in order to install any programs, including the Silhouette software. For more information on how to take it out of Windows S mode click HERE.
Silhouette Studio Upgrades
Affiliate links may be present in the following blog post and as an Amazon Associate I earn from qualifying purchases.
If you are using a software version of v4.4.554 or higher, you do not need to enter your upgrade codes in the software. Click on Help – Apply Upgrade Edition and enter your log in information. Do NOT enter your upgrade codes. Once you log in with your Silhouette account info, your upgrade should be active on any computer you log in to.
This is a new feature and is only available in software versions of v4.4.554 or higher. The upgrade can only be active on 3 computers at a time. If you log into a 4th computer, it will deactivate on the oldest computer that has not been active.
For older software, software upgrades do not automatically activate when you download the Silhouette software to a new computer. If you have ever entered an upgrade code, you will need enter the upgrade codes in the order that you purchased them for it to activate on the new computer. So if you purchased the Designer Edition and then the Business Edition later, you would need to enter the code for Designer first and then Business next. If you try to enter Business Edition first, you will get an error and it will not activate.
If you are a brand new user, there is a new system that is in process and you can activate the upgrade on the Silhouette America website to be used on any computer you log into. This is still very new and only available for those that are brand new and have never entered an upgrade code as of 10/15/21.
If you do not remember what the codes were, you can easily access them under your Silhouette account information in the Silhouette Design Store. Open the Silhouette Design Store, make sure you are signed in, move the mouse over the person icon in the top right corner, and then choose Account Settings.
Then click on the License Keys section.
Log into the Silhouette Library
Once the software is open, click in the top right corner on the Library tab.
Enter your Silhouette Account information and all of the files that are in the Silhouette Cloud should Sync up. It will depend on how many files you have in your Silhouette library on how long it will take to fully sync. Another hurry up and wait moment.
Plug in Silhouette machines to computer & turn on
If you have an older model Silhouette machine of a Cameo 3 or older, the free files download to the library once the machine is recognized. Plug in the Silhouette machine, turn it on, and click on the Send tab. Once it has recognized the machine, then the files will download to the library. You will need to do this for ALL machines that you have had plugged into your software to get those free files to download.
If you have multiple machines, click on the little machine icon in the bottom right corner of the Send tab to choose the machine you want active.
This will also unlock any panels that are associated with a particular machine such as the Emboss Panel for the Curio or the Stipple Panel for the Cameo 4, Cameo 3, Portrait 2, and Curio machines.
Exporting files on old computer
Note: this is only needed if files cannot be recovered in another way
If there are files that did not show up when you logged in and the library synced, the first reason would be they are the free with machine and I would suggest looking at the above information again. If you have done that, then it could be because those files were only stored on the Local User section of the old computer. This will be dependent on the Silhouette software version you were using before. If you were using a version prior to v4.1, you will find more tips on exporting the library in this post – Library Tips (v4.1).
If you have a library backup file, it can then be imported into the Silhouette library by clicking on your name in the top left of the Library and choose Library Import, then select the location of the file backup.
Screenshot from v4.4.892
But this only needs to be done if files are missing and you cannot get them to sync up any other way.
Install fonts on the new computer
Keep in mind that when you set up a new computer, you are starting from scratch. That means you will need to install any program or file that you were using on the old computer, if you want it on the new computer. This includes fonts. The new computer comes loaded with the default fonts only and these can vary by computer.
While I have heard of others being able to copy and paste the entire font file from their computer programs folders on the old computer and then pasting it into the new computer fonts folder, I was unable to do this on my new computer. I had to right click on the font and choose “Install for All Users”.
Luckily, I had saved all my font files that I’ve collected onto a folder in my external hard drive, so I could access them direct from the external drive. While I still had to install over 500 fonts, I did get to also pick and choose which ones I really “needed” on the new computer.
I have had 2 new computers in the last several years and on one I had to install each font and on the other, some worked by copy and paste.
Keep in mind that if you created designs using certain fonts, when you open the design file, if that font is not installed on the computer you are using to open the file, the font will revert to the default font style on that computer.
Export User Designs from Silhouette Library – New Feature!
If you have downloaded the current version or a version higher than v4.4.552, there is also a new feature that allows you to export all User Designs from the library as individual files.
Click on your name in the top left corner of the library tab and choose Export User Created Designs.
While I do NOT recommend storing your personal files in the Silhouette library, there are times that it is handy when you are accessing files on multiple computers or using Pattern Fills in the Silhouette software.
One big thing to note
when exporting these User Designs is that it will export the entire library folder structure. However, any designs from the Silhouette Design Store, the folders will be empty. Only the user created designs will be exported. This is due to the proprietary nature of the .studio files and to protect the designers of those files from theft.
I would HIGHLY recommend using this export feature when you update to the software of v4.4.552 or higher because it is a really nice feature. However, as a general note, I do not recommend that all users update to this version or higher. There are many factors that I consider before advising a user on whether they should update. It really comes down to the user’s choice, however, before I make a recommendation I do ask for more information. If you would like to know what I’d recommend for your situation, feel free to post on the Silhouette Secrets+ with EllyMae Facebook group and we can take a look at the factors.
Keep in mind that the Silhouette library is not designed as an all inclusive storage area but as a syncing device. This is one reason the Silhouette cloud storage is limited in size. All users get 1 GB of storage space, but if you are a Silhouette Club Member or a Silhouette Design Store Subscriber, you get 5 GB of storage.
I hope this helps you start enjoying that new computer and your Silhouette software a little bit quicker! The biggest tip I can say is to be patient! I am not the most patient person when it comes to setting up a new computer, but if I tell myself that in the beginning sometimes it helps.
We love seeing what you are creating with your Silhouette machines or software. Feel free to post photos or questions on my Facebook group at Silhouette Secrets with EllyMae.
Save this for future reference by pinning the image below.
Enjoy!
THANK YOU for your support! How can you help? Click HERE & buy a coffee. Every little bit helps with the cost of running the site.
Or if you are looking for more in-depth, step-by-step classes, check out all of my online Silhouette classes on my Teachable site HERE.
**This post may contain affiliate links. What that means is that I may receive compensation if you purchase through the links I have provided. The price you pay for the product or service is not higher but I may get compensated for sharing.
Today we are going to explore the difference between a dxf and svg file.
So let’s first look at the definition of each.
DXF files are a file type that was created in 1982 for AutoCad program. Which just means computer assisted design. So basically a computer drawing program. It really wasn’t designed as a “cut” file.
SVG files are scalable vector graphics. These are vector files that can be resized without losing image quality. These are “cut” files. They were created in 1999.
When you compare the 2 file types, there can be a BIG difference in the quality of a cut. While you can open DXF files with the Basic software, it can also be a big headache to cut a file. Because of the way DXF files are create, they can have massive amounts of edit points. Edit points are the data points that the Silhouette reads to complete a cut.
All these little gray dots are edit points that the Silhouette has to read to connect the dots. For more on edit points, check out this post here – Let’s Explore v4 – Edit Points.
Here are a couple things you may experience when opening and cutting a DXF file:
It may take a lot longer to open Let’s take a look at an example of opening a dxf file vs a svg file. This video shows opening the above mandala file in dxf format versus svg format. The dxf file took 38 seconds versus the svg file took just a couple seconds. This will also vary depending on the user’s computer and the dxf file. I have a higher than normal spec gaming computer that is used in the video below.
The software may crash or lock up when trying to open a dxf since it’s such a large data file. Due to the data size of a dxf file versus a svg file, the software may just crash as it’s working to try to open the dxf file. This will vary by dxf file and computer.
Software is slow to respond and the computer is “thinking” more with dxf files. Since it is a data heavy file it may take longer to make edits, resize, or work with the file in general.
A design takes forever to cut. Since it has massive amounts of edit points, the Silhouette has to hit every single one of those to complete the cut.
The machine sounds odd cutting, like it’s stuttering. This is because it is making short movements to connect the dots between those edit points.
The cut not completing cleanly because it has open edit points (red dots) and not complete lines If you double click on a design, no matter the file type and you see red dots in it, there is a problem. This means that the cut lines are not complete and it is a broken line. This will affect how it cuts and in turn how it weeds. I have drawn a simple rectangle below as an example- the red dot is a broken point. The cut line does not completely connect to complete a cut.
Those broken edit points will need to be connected in order to close the shape. If the points are close together, double clicking on the red dot can close it, but if they are not, then you will need to connect the dots to close that cut line.
Shapes that have broken edit points cannot be filled with color as they really are not a “shape” but a line since it is not completely closed.
More on edit points on a dxf file
Since a dxf may have massive amounts of edit points, let’s take a look at what happens to those edit points when you scale the design down.
M
Here is what the file looks like when it’s originally opened & edit points are activated. It opens at 9.528″ wide
Now if we scale that down, all of those edit points get squished closer together. They are still there but now you’ve taken those data points and squished them into a smaller space of 4.163″ wide. Since there was already more edit points than necessary in a small space, you’ve now crowded them in even more.
In most cases, cutting this dxf file will just result in a mess of your material.
In the Edit Points Panel, there is the option to “Simplify” and you can try that, but it doesn’t always work or it may change the shape of the actual design.
Each file will be different in how it responds and reacts because they are created differently and are made up of different data. Let’s compare another dxf file and svg file side by side.
On the left is the dxf file and the right is the svg file. In this example, the edit points are not too crazy, however, you can still tell a noticeable difference between the dxf and the svg. The svg file is a much cleaner cut file. Depending on the size you were to cut this file at, you may or may not notice a difference.
I highly recommend at least the Designer Edition upgrade to all Silhouette users and this is just one of the reasons why. The upgrade will save you time, headache, and frustration in the long run.
I hope this has made the differences between working with dxf and svg files a little bit clearer. In my experience, the svg file is almost always the cleaner cut file to use.
Save this for future reference by pinning the image below.
Enjoy!
THANK YOU for your support! How can you help? Click HERE & buy a coffee. Every little bit helps with the cost of running the site.
Or if you are looking for more in-depth, step-by-step classes, check out all of my online Silhouette classes on my Teachable site HERE.
**This post may contain affiliate links. What that means is that I may receive compensation if you purchase through the links I have provided. The price you pay for the product or service is not higher but I may get compensated for sharing.
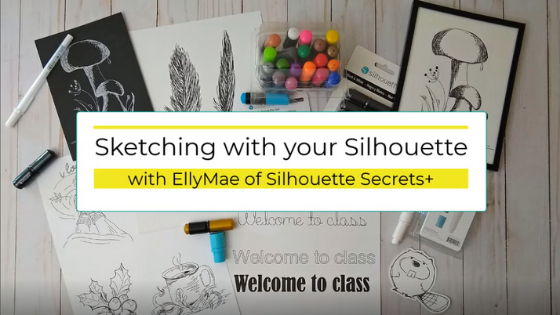
Just released! New online video class with tips, tricks, and troubleshooting for sketching with your Silhouette.
I had no idea how popular this class would be when I submitted it for the May All Things Silhouette Conference. I had a limited window of opportunity right after conference to get this recorded and edited, but I’m happy to announce that after 18 hours of video production – IT’S HERE!!!
This is a total video time of around 2 hours, however, the class will take approximately 3 hours to complete with all the sketching and design time.
In this class you will learn all about sketch pens & creating sketch designs. We discuss different pen styles, adapters, sketch designs, fonts, filling designs, and trouble-shooting too. We will be doing some testing, demos, and finished projects. At the end of the class, you will have a better understanding of what works and doesn’t work for sketching with your Silhouette machine. This class can be completed with a Portrait, Cameo, or Curio machine.
Affiliate links may be present in the following blog post and as an Amazon Associate, I earn from qualifying purchases.
There are some differences between the different Silhouette model machines on the supplies you might need for this class, so I am including the class supply information below.
Sketching Supplies:
Cameo 4, Cameo Plus, Cameo Pro, and Portrait 3 owners
Save this for future reference by pinning the image below.
Enjoy !
THANK YOU for your support! How can you help? Click HERE & buy a coffee. Every little bit helps with the cost of running the site.
Silhouette Classes
Never stop learning! Let me help you take the anxiety out of learning with Silhouette and get to creating faster! My Silhouette classes are heavily focused on software, so you can take the skills & techniques taught and apply them to many future projects!
**This post may contain affiliate links. What that means is that I may receive compensation if you purchase through the links I have provided. The price you pay for the product or service is not higher, but I may get compensated for sharing.
Let’s Explore v4 Silhouette Studio Software Upgrades
Affiliate links may be present in the following blog post and as an Amazon Associate I earn from qualifying purchases.
I am seeing a bunch of new Silhouette user’s join us and there is so much information out there. Today let’s talk about software upgrades. I highly recommend this. Don’t be overwhelmed by all the options though! You do not have to learn it all at once, but if you upgrade it will be ready for you when you are ready to learn about it.
What is an upgrade?
A software upgrade is an code you purchase that unlocks additional features in the software. It is a one time fee that can be active on up to 3 computers per code.
I highly recommend at least the Designer Edition upgrade for all of my students. It makes life easier and saves you time and headache. Just being able to open a svg file and cut is well worth it.
But I LOVE the Business Edition upgrade because it unlocks it ALL and I never have to question if some tool/feature is available to me. Both are well worth the investment!
Don’t let the name “Business” edition fool you though – you do not have to have a business to use it or have it be useful. There are just some features that are helpful to those that run a business such as using multiple machines.
If you have the basic (free) software, you would want to purchase 1 of 3 options depending on what upgrade you want to go to: Option 1 – Silhouette Studio to Designer Edition (highly recommend at least this) Option 2 – Silhouette Studio to Designer Plus (unlocks a few more features – see below) In all honesty, if you are upgrading to Designer Edition Plus, you might as well go all the way and unlock it all Option 3 – Silhouette Studio to Business Edition (unlocks it all)
Now here is the important part, if you already have an upgrade, you only need to purchase the step up to the next level you want.
For instance, if you already have the Designer Edition upgrade but you want to go to Business Edition, you want to buy the Designer Edition to Business Edition upgrade. You do not need to buy the full upgrade. You would purchase the level that you need to go from to the level you want to be at.
Now, keep in mind, if you purchase the upgrades in steps it is no different than purchasing the upgrade all together, except that you will need to enter the codes in that same order if you install it on another computer or have to re-enter your codes for any reason.
What does each level of upgrade do?
Here are a few of my favorite features and the ones I find most might use in the software:
Business Edition unlocks all of the above and ….. – Import Ai/CDR/EPS Files – Weed Line Feature – Multi-cutter Support (I use this one all the time) – Multiple Undo/Redo (one of my favorites) – Export SVG, PDF, JPG – Edition Toggle (this is great for those of us who teach, so we can see exactly what the students see in their version) And more…..
Now, the list above is not the extensive list of all the features unlocked with each upgrade. However, it is a list of the features I find the most useful in each upgrade. For the complete comparison chart click HERE to go look at Silhouette America.
I want you to be successful and use your Silhouette software to the fullest! The Vinyl Spectrum has the upgrades to Designer Edition, Business Edition and from Designer to Business at a great price. These are digital codes, so are emailed directly to you after purchase. Check them out HERE. If you are in need of extra supplies too, I have been impressed with their super fast shipping too!
How to activate the upgrade
In the Silhouette software, click on Help in the top left menu. Then choose Upgrade and a pop up window will show up. Enter the information in the window and type the upgrade code exactly as you received it. Make sure you are entering the codes in the order that you purchased them in.
For example, if you ordered Designer Edition and then the Business Edition upgrade later. To activate it on a computer, you would need to enter it in that order. First the Designer Edition code and then the Business Edition code.
If for some reason the digital codes are “out of stock” at one retailer, you can buy the upgrades from another retailer. See my list of recommended retailers and sites HERE. Yes! Digital codes do go out of stock too because it is all an inventory item. The retailer has to purchase the codes from Silhouette America, just like any other product. So it’s not uncommon to see things go in and out of stock as more people buy it.
If you have question about an upgrade just let me know. Comment below or post on my Facebook group at Silhouette Secrets with EllyMae. I would love to see what you creating with your Silhouette machine!
Save this for future reference by pinning the image below.
Enjoy!
THANK YOU for your support! How can you help? Click HERE & buy a coffee. Every little bit helps with the cost of running the site.
Or if you are looking for more in-depth, step-by-step classes, check out all of my online Silhouette classes on my Teachable site HERE.
**This post may contain affiliate links. What that means is that I may receive compensation if you purchase through the links I have provided. The price you pay for the product or service is not higher but I may get compensated for sharing.
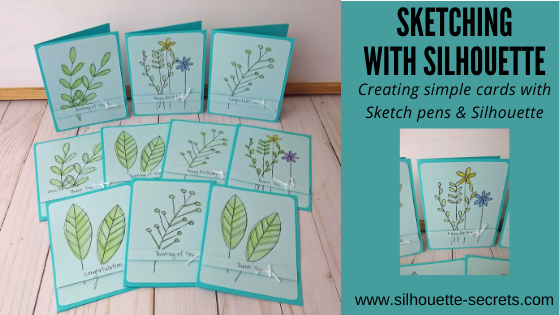
Have you seen the classes that Silhouette and Michael’s have been hosting online?
I’ve been attending the Silhouette and Michael’s online classes when I see one that is of interest. In the most recent one that I attended, Kelly Wayment with Finding Time to Create showed how to create some simple cards by using sketch pens in the Silhouette software.
In these classes, I prefer to watch when they do the class live and then complete the project later at my own pace. I decided to make a couple sets to have on hand for different occasions.
Affiliate links may be present in the following blog post and as an Amazon Associate, I earn from qualifying purchases.
Check out this class on the Michael’s YouTube channel HERE. Grab a cup of your favorite drink and sit back and watch Kelly create. Then gather your supplies and make up a few cards to have on hand.
Check out all of the upcoming classes on the Michael’s website HERE.
It is always fun to learn something new and to expand on your skills and Silhouette techniques.
I would love to see what you create with your Silhouette! Feel free to post on my Facebook group Silhouette Secrets with EllyMae. If you have questions feel free to post below or on the Facebook group too!
Save this for future reference by pinning the image below.
Enjoy!
THANK YOU for your support! How can you help? Click HERE & buy a coffee. Every little bit helps with the cost of running the site.
Or if you are looking for more in-depth, step-by-step classes, check out all of my online Silhouette classes on my Teachable site HERE.
**This post may contain affiliate links. What that means is that I may receive compensation if you purchase through the links I have provided. The price you pay for the product or service is not higher but I may get compensated for sharing.
This year has definitely been an interesting one. I haven’t really felt like pulling all of the Christmas decorations out, but still wanted to do something.
While cruising on Pinterest one night, I saw this and thought it would be perfect for a bit different look on our buffet in our dining area this year.
Affiliate links may be present in the following blog post and as an Amazon Associate, I earn from qualifying purchases.
This is a Christmas village that is constructed out of black cardstock and the window inserts on printable vellum. So it was fairly easy to put together. The file can be found HERE – on the Adventure in a Box website. I purchased the full file so I was able to get right to the project instead of creating my own images.
Now, they hand cut all of the files, but I’m not much up for that. Since you can open PDF files in the Silhouette software directly with the Designer Edition upgrade or higher, you can bring it right into the Silhouette software to set up to cut for you.
Let’s take a look at how that is done.
Make sure you are using the PDF file for this design. I used the png images for the silhouette parts and it was not the same size as the PDF file silhouettes, so they were a little bit big for the cutouts of the houses.
First, like I said above, you will need at least the Designer Edition upgrade or higher to open the pdf file.
Download the file, save it to a safe place, and then unzip/extract the file. Next, in the top left corner of the software choose File > Open in the Silhouette software and choose the PDF file.
When you open a PDF file, it will give you a couple of options. I always try the “Import as vector” first because in some cases, depending on how the file was created, it may open up with cut lines already done. The only way to know is to open as a vector and click on the Send tab to see if the cut lines are there.
If the PDF file has more than 1 page to it, you will want to choose which page to open first.
In this case, the first 3 pages are instructions, so we don’t need those at the moment. They can be handy for assembly if you need them. I chose Page 4 and then click on Import in the bottom right corner to open the file.
Now, use the Basic Trace, increase the threshold until it turns as smooth of yellow on the black as possible.
Now click Trace and then move the original design away. Since the original design does not have “score” lines to fold the building on for it to stand up, I added those in myself.
Using the Line Drawing tool on the left side, hold the Shift key down and draw a line that almost touches from one end to the next. I didn’t want the score line to cut edge to edge, so I made the line a little bit smaller. Next, on the Line Style Panel on the right side, change the Style of the line to a dashed line. This will act like a score line and not be fully cut through and the cardstock can easily be folded on this line. Adjust the line between the outer cut lines as needed.
Select the entire design and the score lines and then right click and choose Group, so the entire design moves as one piece. Using the Transform Panel – Rotate Tab, rotate the design 90 degrees on the page.
Fill it with color to see what it will look like when cut. Now, save the design.
You will do this for all of the pages with the house designs. Then I cut each out of black cardstock.
Next, we will open the next page of the PDF file for the silhouettes in the windows. Using File > Open once again, choose the PDF file, then page 5, and choose open as a vector.
This is how it will open up.
Next, using the Draw Rectangle tool on the left side, draw a rectangle around each of these window images. We do not need all of the black grid lines to print, only the images. Make sure to give yourself some clearance around the images so there is area to add glue to.
Now, select the entire design and drawn rectangles. You can either hit Ctrl+A to select all on the page or left click and hold the mouse button down and drag it across the entire design touching each object you want to select. Then open the Modify Panel on the right side and choose Crop.
I then opened up all of the silhouette files and cropped the images down. Then copied and pasted them all onto one design mat. And then we can set this file up as a Print and Cut project. I would suggest saving each Print and Cut page as a new design, just in case you have to go back and recut the pieces for some reason.
For tips on setting up a Print and Cut projects, check out this Print and Cut Basics post HERE. I recommend printing using all of the defaults for the print and cut, for the best results.
Once you have the page setup with the registration marks, print each page on printable vellum. I used this I found on Amazon HERE. I printed using the photo quality for matte paper. Printing at photo quality allows the ink to be laid down on the paper at a slower rate and allows it to dry better when working with specialty papers.
The first 2 pages I cut with had no issues what so ever and then the 3rd page would not cut correctly. I ended up printing it 5 times, just trying it over and over. When I should have done this little trick in the first place. Place white paper underneath the registration marks in each corner. This allows the optical eye a better chance at picking up only the registration marks printed and not other interference. Make sure the white paper is cut large enough that it would be the same size as the cross-hatched area for best results.
Keep in mind that the Silhouette optical eye is just a laser that turns on when you have registration marks on your page. This laser eye is looking for black marks on the page. However, it’s just a laser eye, it will pick up any black marks on the page. This includes the Silhouette grid lines if the paper is translucent or clear. This is also why the cross-hatched area around the registration marks is so important! And why, for the best results you should not have your design or cut lines in the cross-hatched area. As I said, it worked for the first 2 pages, but it didn’t like that 3rd page.
And that little trick was all it took for it to pick up the registration marks and cut accurately. Again, this is only something that might need to be added if the paper you are using is translucent or clear.
Once it’s all cut out of the black paper and the printable vellum, I used a bit of Scrapbook tape runner adhesive to glue it to the backside of the black cardstock, folded the score lines, and set it up.
I added some tea lights behind the designs to let it shine through and I have a new piece of holiday décor in our dining room.
Whether you create the same file, design your own silhouette images to fit in the Christmas Village, or follow the same techniques as I used above for another project; I hope you will share that on my Facebook group here Silhouette Secrets with EllyMae. If you have questions feel free to post below or on the Facebook group too!
Save this for future reference by pinning the image below.
Enjoy!
THANK YOU for your support! How can you help? Click HERE & buy a coffee. Every little bit helps with the cost of running the site.
Or if you are looking for more in-depth, step-by-step classes, check out all of my online Silhouette classes on my Teachable site HERE.
**This post may contain affiliate links. What that means is that I may receive compensation if you purchase through the links I have provided. The price you pay for the product or service is not higher but I may get compensated for sharing.
THANK YOU for your support! How can you help? Click the link to buy a coffee. Every little bit helps in the cost of running the site.