Posted on Leave a comment

4 Confusing Silhouette Studio Tools that Surprise Users Most

Silhouette Secrets+ with EllyMae

I have been troubleshooting with Silhouette users since 2016, and we have answered a lot of questions during the years. One of the most common questions is “What is this?” and “Why did it just appear?” In this blog post, I’m sharing more details on 4 of the tools that are often confused with each other, how they get turned on, how to turn them off, and where to find more information on each of the tools. These 4 tools can be useful when designing in Silhouette Studio, but not all users utilize them or will use them all of the time. That is one of the great things about Silhouette is the choice of having the options to use a tool or feature. This is also one of those cases where if a user doesn’t know what a tool does specifically, they may never know that it can actually be really useful to them in their workflow.

Affiliate links may be present in the following blog post and as an Amazon Associate, I earn from qualifying purchases.

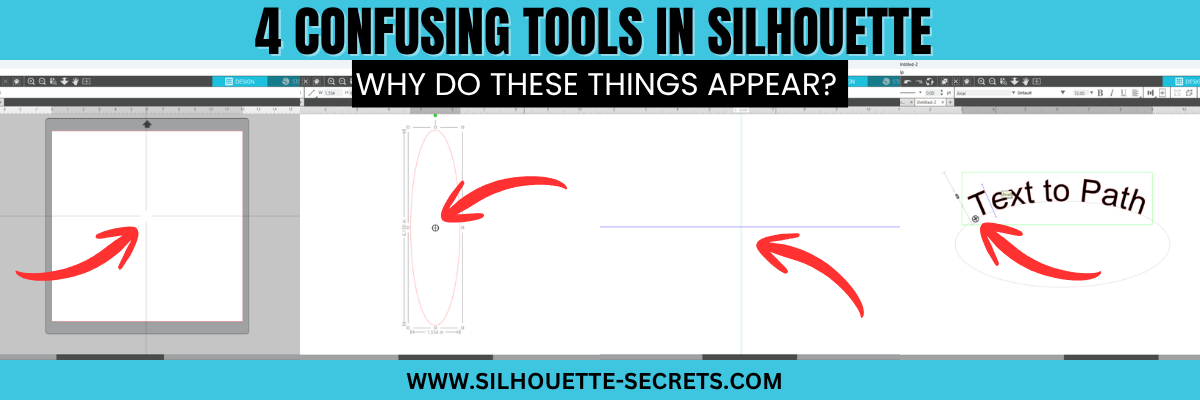
The 4 tools in Silhouette Studio that are often confused are:

  • Crosshairs
  • Center of Rotation
  • Guides
  • Text to Path Control Point

Watch the YouTube video on this topic on the Silhouette Secrets+ YouTube channel HERE and scroll down below to see additional information on each as well.

Crosshairs in Silhouette Studio

Crosshairs usually appear for 2 reasons.

  1. Pressing the letter ‘H’ on the keyboard toggles it on and off.
  2. A file is opened that the designer saved it with crosshairs on.

Typically we see crosshairs appear because a user thinks that they have activated Text Mode and it did not take. So when the letter ‘H’ is pressed on the keyboard, it toggles it on.

Crosshairs can be turned on and off 3 ways:

  1. Press the letter ‘H’ key. If they don’t turn on and off, click on the design mat and then press ‘H’ again.
  2. Open the Page Setup Panel, click on Tab 2, and click the Crosshairs button.
  3. In the top left menu, under View, select Turn on Crosshairs.

Crosshairs are a Designer Edition upgrade feature and those on Basic will not see this available.

Find additional details on Crosshairs in Silhouette in this tutorial HERE.

Center of Rotation in Silhouette Studio

Center of Rotation looks like a little circle with crosshairs in the middle of it and appears in the center of a design typically.

This tool typically appears for 2 reasons also:

  1. It can be toggled on and off by pressing the letter ‘O’ key with a design selected.
  2. A design was saved with Center of Rotation on and was opened.

Again, if a user thinks they are in text mode and a design was selected, if the letter ‘O’ key is pressed it will toggle it on and off.

Center of Rotation is a Designer Edition feature and those using Basic will not have this option.

Center of Rotation can be activated or deactivated in 2 ways:

  1. Press the letter ‘O’ key with an object selected.
  2. Under Preferences, in the Defaults tab, Center of Rotation can be toggled on and off.

See additional information on the Center of Rotation in Silhouette Studio HERE.

Preferences can be found in 2 places in Silhouette:

  1. On the Design tab, gear icon in the bottom right corner.
  2. Top left menu, under Edit, then Preferences.

Additional information on Preferences can be found in these tutorials:

Guides in Silhouette Studio

Guides can be pulled from the rulers on the top or right side of Silhouette Studio. Guides are a Designer Edition upgrade feature along with Rulers.

These can be accidentally activated if clicking the mouse on top of the rulers or click & pull from the ruler area onto the design mat.

Guides can be deleted by clicking on one to activate it, it will turn dark blue, then press delete. Light blue color means it is not the active Guide selected.

Guide settings can be found under the Page Setup Panel, under Tab 2. Snap to Guides is by default always active, but unless you have a Guide placed on the file, you won’t see it work. Guides can be toggled on and off under this tab too.

Guides can also be found in the top left menu under View, then select the option desired.

Additional details on Guides in Silhouette can be found HERE.

Text to Path Control Point in Silhouette Studio

This control point appears any time there is editable text activated.

This is the control handle that is used to drag text to a path and have it snap to the path. This feature is always available on editable text and there is no way to turn it off.

Find more details on Text to Path HERE.

The April 2026 member exclusive tutorial for the Creative Community is an in-depth tutorial on Text to Path with advanced techniques too! Check out more details on the Creative Community HERE.

*Creative Community members watch for a cheat sheet on these tools coming soon to April’s forum!

Graphic showcasing the interface of Silhouette Studio with the title '4 Confusing Tools in Silhouette Studio', highlighting design tools and features.

Save this for future reference by pinning the image below.

Enjoy !

THANK YOU for your support! How can you help? Click HERE & buy a coffee.
Every little bit helps with the cost of running the site.

Silhouette Classes

Never stop learning! Let me help you take the anxiety out of learning with Silhouette and get to creating faster! My Silhouette classes are heavily focused on software, so you can take the skills & techniques taught and apply them to many future projects!

Silhouette step-by-step Classes by Silhouette Secrets+

Silhouette Secrets+ with EllyMae
**This post may contain affiliate links. What that means is that I may receive compensation if you purchase through the links I have provided. The price you pay for the product or service is not higher, but I may get compensated for sharing.

Posted on 4 Comments

Step-by-Step Tutorial: Mastering Tracing & Image Clean-Up in Silhouette Studio

Master Tracing in Silhouette Studio
Silhouette Secrets+ with EllyMae

Mastering Tracing in Silhouette Studio

Have you ever tried tracing an image in Silhouette Studio only to find the result wasn’t as clean or precise as you’d hoped? You’re not alone! Many users struggle with getting a smooth, accurate trace that leads to a successful cut file. We see questions about this all the time, and that’s why I’ve created an in-depth tutorial to help you master tracing and cleaning up your designs in Silhouette. Whether you’re working with complex images or simple shapes, these tips and techniques will help you put the tools in the Silhouette Studio software to work for you!

Master Tracing & Clean Up in Silhouette Studio Video Class

Find this FREE in-depth video tutorial on the Silhouette Secrets+ YouTube channel HERE.

Every single image that you trace can be different because each one is made up of different colors, gradients, shading, etc. In the video tutorial, I take you along for the journey and it is step-by-step exactly how I would work with a file that needs clean up. The only way to actually know if the file will be a successful cut file in the end is to cut it, so I included my tips after cutting and shared exactly what I would change after I finished the cut to make it even more successful for the final project.

Master Tracing Silhouette Studio

The original traced image started with 24,528 edit nodes and through the clean up process, I was able to get that down to 1,848. That makes a huge difference in the cuttability of a file.

Master Tracing Silhouette Studio - Edit Nodes

My goal through the entire process was to maintain as much of the character of the image as possible. This makes a great way to make unique projects & gift ideas.

Check out the full in-depth video to learn more about how you can make the tools in the Silhouette Studio software do what you want.

Distressed Truck Image cut from Siser EasyWeed HTV

I hope you pick up a few tips to mastering tracing in Silhouette Studio and how to clean up a file for a cuttable design!

Master Tracing & Clean Up in Silhouette Studio Video Class

Silhouette Tutorial: In-Depth Guide to Tracing & Cleaning Up Detailed Images – Step-by-Step Video on the Silhouette Secrets+ YouTube channel
HERE

For more in-depth tutorials and inspiring projects, explore our comprehensive A to Z of Silhouette section on the website HERE, where you’ll find years of creative resources to help you master your Silhouette skills!

Save this for future reference by pinning the image below.

Master Tracing and Clean Up in Silhouette Studio Pin

Enjoy !

THANK YOU for your support! How can you help? Click HERE & buy a coffee.
Every little bit helps with the cost of running the site.

Silhouette Classes

Never stop learning! Let me help you take the anxiety out of learning with Silhouette and get to creating faster! My Silhouette classes are heavily focused on software, so you can take the skills & techniques taught and apply them to many future projects!

Silhouette step-by-step Classes by Silhouette Secrets+

Silhouette Secrets+ with EllyMae
**This post may contain affiliate links. What that means is that I may receive compensation if you purchase through the links I have provided. The price you pay for the product or service is not higher but I may get compensated for sharing.
Posted on 1 Comment

Snowman TP File

At the beginning of this year I did a a couple blog posts on how to create these TP Snowman.
These were such a fun neighbor gift to create!
And they were a big hit!

In the first post I published – Designing in Silhouette, I show how you create your own snowman using the tools in the Silhouette Studio software. This is a great way to learn how to use your software and the tools available.
I shared the steps in both written and video format for the post.

A group member requested the file I created, so I have made it available to download
If you would like to use the exact file I created for your own TP Snowman, you can download that file
HERE

In the second blog post tutorial – Building a TP Snowman, I shared how I embellished my TP snowman with a 3-D top hat, different snowman faces, and added a custom print and cut tag to the backside.

I’d love seeing what you are creating with your Silhouette machines or software.
Feel free to post photos or questions on my Facebook group at 
Silhouette Secrets with EllyMae.

Save this for future reference by pinning the image below.

Enjoy!

This image has an empty alt attribute; its file name is logo.jpg

THANK YOU for your support! How can you help? Click HERE & buy a coffee.
Every little bit helps with the cost of running the site.

Or if you are looking for more in-depth, step-by-step classes, check out all of my online Silhouette classes on my Teachable site HERE.

SS Logo snip it
**This post may contain affiliate links. What that means is that I may receive compensation if you purchase through the links I have provided. The price you pay for the product or service is not higher but I may get compensated for sharing.
Posted on 1 Comment

Home Decor with Silhouette

Using the Silhouette Software to Help Design Home Décor

I always have my eye out for things that I can use in creating with my Silhouette machine. Target had these little wooden houses available in their Dollar section.

After debating with my inner self, I finally picked up a set.
I always have this inner dialog on – can I make that? Will I make that?
Yes, I can cut the wood, but when will I get it done?
Right now, in the process of moving, our wood shop is not set up, so I did it.
I bought wood shapes.

If you have access to a saw, you could create your own shapes. This tutorial is not limited to these little house shapes, but think about the supplies you have on hand and you can use this same technique for any blanks you use.

Affiliate links may be present in the following blog post and as an Amazon Associate I earn from qualifying purchases.

Next, gather the rest of the supplies.
– Paint
– Foam brush
– Paint palette or small dish
– Sponge
– Painters Tape
– Adhesive Vinyl
– Transfer Tape
– Squeegee
– Weeding tool

Tape off any sections needed with the painters tape. In this case, each house has a metal chimney.

Paint the houses any color you want.
I chose to paint a solid color of gray, light blue, or dark gray as the first coat and then used the white chalk paint with the sponge on top of that to give it a distressed look.

Let the wood blanks dry completely.

Next, measure the space of each blank and write that down.

This is just a rough draft and does not have to be perfect or to scale.

Using the information from your measurements and drawing, draw shapes in the Silhouette software to design use as “design templates”.

For these houses I started by using a rectangle under the Drawing Tool on the left side and then used the Edit Points to pull up a point in the roof.

Check out this video tutorial showing the full process of drawing the shapes in Silhouette Studio.

Find this video on YouTube HERE

Once you have the template shapes, then you can decide on the designs to fill those shapes. Some designs will work better in the shapes than others.

I used the following designs on my double sided houses:
Home Sweet Home by Angele Camp – Design #233239
Hello Fall by Lilium Pixel SVG – Design #300125
Home Sweet Home by Diva Watts Designs – Design #346001
Home Sweet Home by Diva Watts Designs – Design #347923
Home Sweet Home by Design Hooked – Design #354446
Fall Bouquet by Tanya Batrak – Design #159397

Once all the designs are sized how you want them to cut, move the designs around on the virtual mat to cut out each color vinyl you want them in.

Then send to the Silhouette machine to cut all the adhesive vinyl pieces. I cut everything from Oracal 651 adhesive vinyl.
I have been having an issue with the vinyl cutting too deep into the backing using the preset settings, so I am using the settings of:
Blade depth – 2
Force – 5
Speed – 5
With a Silhouette Autoblade and it is cutting, weeding, and transferring beautifully.

Cut settings depend on many variables and test cuts will be the way to find out what is going to work best with your material and blade. For more tips on cut settings check out this post – Perfect Cut Setting in Silhouette.

Carefully weed the excess vinyl from around the designs.

This takes practice and the cut settings can make a big difference in the ease of weeding.
Do not rip it off like a bandaid.

After all the weeding is done, apply vinyl to blanks

Here is a quick real time video of the application process on one of the wood blanks.

In the above video, I reference a recent tutorial on the Smart Snapping lines. This can be a very helpful tool as shown in the video.
Check out the Let’s Explore v4 – Smart Snapping post HERE

And now you have some seasonal or year round décor.

Double sided means that they can pull double duty in your seasonal decorations.

And if I were to ever want to change the designs out, I would just carefully remove the vinyl. Sand it if needed and repaint, then cut and place new vinyl designs on them.

Keep in mind that you can use these tips & techniques for any blanks you might have!

I’d love see what you create & how you use the tools in Silhouette Studio
Feel free to post on the
Silhouette Secrets+ Facebook Group.

Save this for future reference by pinning the image below.

Enjoy!

This image has an empty alt attribute; its file name is logo.jpg

THANK YOU for your support! How can you help? Click HERE & buy a coffee.
Every little bit helps with the cost of running the site.

Or if you are looking for more in-depth, step-by-step classes, check out all of my online Silhouette classes on my Teachable site HERE.

SS Logo snip it
**This post may contain affiliate links. What that means is that I may receive compensation if you purchase through the links I have provided. The price you pay for the product or service is not higher but I may get compensated for sharing.
Posted on 5 Comments

Let’s Explore v4 – How to Thicken a Knife Line

The Knife Tool in Silhouette Studio can be an awesome tool to add into created and editing designs.

One thing to keep in mind is that the Knife tool can be data heavy because you are asking the software to reorganize all the data of the file or the area that you are trying to “cut” through.

If you are not familiar with using the Knife Tool, I recommend reading through this tutorial explaining all of the features on the Knife Tool
Let’s Explore v4 – Knife Tool post HERE

Depending on the project that you are working on you may want to increase the size of the Knife Line that is going to be cut. For instance, if you are cutting a “bridge” for a stencil, you could increase the Knife Line width in order to make it a little wider “bridge”.

I am going to use the stencil project as an example.

If I want to create a “bridge” on the R and the A in the word CREATE, I can use the Knife Tool to draw a line. By holding the Shift key down when using the Knife Tool, it draws a straight line.
When increasing the Knife line thickness, make sure to uncheck the Auto Apply box. This will allow us to make changes to the Knife line before they actually “cut” through the design.

Let’s take a closer look at the size of the default Knife line.

The width of this line is really small. If we were to cut this line, it would just make a slice through the R and not create an actual “bridge” with any width to it.

With the Knife line selected, open the Line Style Panel on the right side.

Next to the Thickness in the Panel, increase pt size and you will see the Knife line grow in thickness.

Next, click Apply in the top Knife Toolbar.

It will now “cut” a thicker line where we have placed the Knife line.

Here is a comparison of the default knife size versus the thicker line we created.

On the left is the thicker knife line we just created and on the right is the default line.

Play with the pt thickness of the line. Each design or project may vary. Larger designs may need larger size “bridges” or cut lines.

Try different line thicknesses or even rotate the line in order to create different effects for your design.

Once you are done editing the text, make a copy of everything and pull it off to the side. It’s always a good idea to have an original. Then select the entire design and text, right click and choose Make Compound Path, then fill it with color. It will give you an idea of what the stencil will look like.

I challenge you to just open the software and just play!
We would love to see what you are creating or learning with!
Feel free post on the
Silhouette Secrets+ Facebook Group.

Save this for future reference by pinning the image below.

Enjoy!

This image has an empty alt attribute; its file name is logo.jpg

THANK YOU for your support! How can you help? Click HERE & buy a coffee.
Every little bit helps with the cost of running the site.

Or if you are looking for more in-depth, step-by-step classes, check out all of my online Silhouette classes on my Teachable site HERE.

SS Logo snip it
**This post may contain affiliate links. What that means is that I may receive compensation if you purchase through the links I have provided. The price you pay for the product or service is not higher but I may get compensated for sharing.
Posted on 7 Comments

Designing in Silhouette – Snowman pieces

Designing in Silhouette

So you want to learn to design in the Silhouette software?
I see user’s asking how to create their own designs in Silhouette often. And it can be done. The more familiar you can become with the tools in the software, the easier things will be for you to create designs.
The more you do it the more you will start to use those tools without even knowing you are doing it! The absolute best thing you can do to learn the software is to dive in.
Follow this step-by-step, even if you never make the finished physical project.
You will have created the design yourself, used many tools in the Silhouette software, and learn new things as you do it.

Affiliate links may be present in the following blog post and as an Amazon Associate, I earn from qualifying purchases.

A group member had sent a message asking if I knew where to buy a file. I did not find the exact file, but I started looking at it and decided it was a great way to show how you can create your own designs. After all, if you think about it, designs are just shapes combined to make up an image.
This little snowman are created from stacking toilet paper on a new toilet plunger. It has a cellophane gift bag that the adhesive vinyl is applied to and then it is slid down over top of the toilet paper rolls.

The first one I created, I wanted it to be all from creating the entire design in Silhouette.

First, measure the 4 rolls of TP or the blank that you are going to be applying it to.
My TP rolls are 5″ x 17.25″ when stacked on top of each other.
Using the Draw Rectangle tool & Scale tab, draw a rectangle 5″ x 17.25″ so you know what area you have to design within.

Next, let’s draw the boots.
Using the drawing tools again, draw a rectangle.
Then using the Flexishape tools, draw a half circle.
Flexishapes are a Designer Plus or Business Edition upgrade feature.
It is one reason I would highly recommend upgrading the software.
Hold the Shift key down when you draw the flexishape and it will snap to 0 degrees.
Align the half circle with the bottom of the rectangle using the Align tools.
Select both shapes and make a copy.
Move it off to the side, just in case it is needed later.
Select both the original rectangle and the half circle. Right click and choose weld.
Fill with color using the Fill color Panel.

Use the Replicate Mirrored tool to make a 2nd copy. Then use the Align tools to line the boots together at the bottom. Once aligned, right click and choose Group.

Now let’s draw the buttons.
Choose the Draw Ellipse tool on the left side.
Then hold the Shift key down to draw a perfect circle.
Fill the circle with black using the Fill Color Panel or QAT (Quick Access Toolbar).
Duplicate the circle 3 times up. Move the top circle up a bit.
Select all 4 circles – choose Align Center. Then choose Vertical Spacing.
Group together once Aligned.

Working up, the scarf is next.
Under the Flexishapes, click on the draw arc tool. Then click in the middle of the rectangle and draw a line to the right a little ways. Move the mouse to the left and it will draw the arc. Adjust the middle arrows to make it thinner or wider.

Once done, right click and choose Convert to Path.
Double click on the design to bring up edit points.
Click on the corners of the arc and choose Make Curve in the Edit Points Panel.

Choose the Draw a Curved Shape tool.
Then draw a “tail” for the scarf. Play around with it until you like it.
When finished, select both the arc and the tail, right click and choose Weld.

Fill it with red color from the Fill Color Panel on the right side or in the QAT (Quick Access Toolbar).

Next, let’s draw the mouth.
Using the Draw Ellipse tool on the left side, hold down the Shift key and draw a small circle.
Fill the circle with black using the Fill Color Panel.
Use the Replicate Panel to replicate the circle 5-6 times.

Arrange the circles in the shape of a smile by clicking on each and moving.
Select all of mouth pieces. Use the Align tools to space them Horizontally from each other.
Arrange how you like. Select all the mouth pieces, right click and choose group.

Now let’s draw the carrot nose shape.
Click on the Flexishape lighting bolt. Draw a small shape.
Then adjust using the red dots as desired.
Right click on the shape and choose Convert to Path.

Then double click to bring up the Edit Points.
Hold the Shift key down and drag to select across the entire design.
This will select all of the edit points at once.
Choose Make Curve.

Click on individual edit points to delete a few on the inside. Adjust the design as desired.

Fill with Orange from the Fill Color Panel.

And now the eyes, choose the Draw Ellipse tool and draw a small oval.
Fill it with black from the Fill Color Panel/QAT.
Then duplicate and move to the right.
Select both of the ovals, use the Align Middle tool and group them together.

The final piece to design is the hat.
To do this we will use the Draw ellipse and rounded rectangle tool.
Draw one oval for the bottom brim.
Make a copy and move it above the first.
Scale the 2nd oval down for the top of the hat by grabbing the corner bounding box and moving it in.
Use the Align tools to center the ovals together.
Then draw a rounded rectangle between the ovals.
Use the Align tools to center the shapes together.

Make a copy and pull it off to the side.
Select both ovals and the rounded rectangle, right click and choose Weld.

Make a copy of the welded design and pull it to the side.
Then fill the original design with black using the Fill Color Panel.

Next, make a copy of the bottom oval on the hat shapes copy.
Bring it over to the and place it were the brim meets the stack of the hat as shown.

Select the hat and the 2nd oval and use the Align tools to align the middle.

Next, with both objects still selected, open the Modify Panel and choose Crop.

Make a copy of the bottom oval again and drag it to the top of the cropped section. Use the Align tools to align the middle of the 2 shapes.

With both shapes selected, choose Subtract under the Modify Panel.

Fill the hat band with color and move it on top of the original hat.
Use the Align tools to make sure it’s aligned middle.

Arrange the snowman pieces as desired to see how it will fit on your space.

Congratulations! You created your own design!
Now, that may seem like a lot of steps or using a lot of tools, but like I said above, it is a design you have drawn yourself and the more you use the tools in the software, you will start to use them without even thinking about it.
Hopefully you picked up on the fact that we continued to use the same basic tools over and over.

If you are cutting the finished design, arrange all the pieces to cut out of the different colors of vinyl.

Check out this video showing all of the steps to create the snowman as well.

If viewing by email, please click the photo to open up the YouTube video.

Supplies used:
4 rolls of TP per snowman
New plunger – Target $4.99
Clear gift basket bag
Adhesive Vinyl
Silhouette Studio Software

The more you use the tools, the better you will get. And sometimes, I’ll be honest, the only way to know what is going to work for the design you are creating is to push the buttons and use the UNDO button.

Or use Ctrl+Z on PC or Command+Z on Mac for the keyboard shortcut

I would highly recommend getting into the software and just start creating!

Even if you do not cut the snowman, I would love to see the snowmen design that you make or any other design you have created using the tools in the software!

Feel free to post on my Facebook group at 
Silhouette Secrets with EllyMae.
If you have questions feel free to post below or on the Facebook group too!

Save this for future reference by pinning the image below.

Enjoy!

SS Logo snip it
**This post may contain affiliate links. What that means is that I may receive compensation if you purchase through the links I have provided. The price you pay for the product or service is not higher but I may get compensated for sharing.
Posted on 6 Comments

Scanning & Tracing in Silhouette Studio

Silhouette & School Projects

*this post was created using v4.3.353 of the Silhouette Studio software

My daughter came home from school and said, “Mom, I have homework and it says to do it as a family.”

Gingerbread homework copy

Permission granted. Silhouette to the rescue!
Note: affiliate links may be present in this post

The hardest part of this project was getting my 6 year old to decide what she wanted to disguise the gingerbread man as.

We went shopping in the Silhouette Design Store for disguises. She thought about a reindeer, an elf, Santa, a boy elf, a girl elf, and about a hundred other options. Guess what she settled on? A reindeer – the very first choice. Of course!

Of all the designs we viewed in the store, she chose one that I had already collected in my library. Santa & Friends Photo Props by Kolette Hall – Design #35760 was perfect.

Santa props file.JPG

Sometimes picking out the design is the longest part of a project.

But, once she settled on the reindeer she said, “But he won’t have a costume on the rest of his body.”

Well, we can fix that.

I took the Gingerbread man page, slipped it into my scanner and clicked scan. This saved the file to my computer as a PDF document. Then my little one was amazed when I used File > Open and found the PDF file and it opened up in my Silhouette software.
To open a PDF file, the Designer Edition upgrade or higher is required.

Gingerbread Scan copy.jpg

Once the design was in my Silhouette Software, I used the Basic Trace feature to trace around the outer edge of the Gingerbread man.

Basic Trace copy

I increased the threshold on the trace to get the design to show as much yellow on the outer edge of the design and keep it as smooth as possible.

Keep in mind that each design you work with will be different and there is no magic number for the threshold or adjustments to the features under the Trace Panel. Adjust it until you feel you have the best yellow around the area you want to trace as you can get.

Then, I clicked on the Trace Outer Edge because I only needed the outside edge of the Gingerbread Man.

Trace copy

Now you may notice a few extra things traced. This will depend on the image you are tracing. These artifacts should be removed or they will cut with your image. Again, each design you trace is going to react a little different. This image is a photocopy of a design, so it picks up the little shadows and such on the paper.

Right click on the design and choose Release Compound Path. Now, you will see each artifact in this design is now broken into separate objects.

Release Compound Path copy

While all of the pieces are selected, hold down the Shift key on the keyboard and click on the main part of the Gingerbread Man. This will deselect him and all the other artifacts will remain selected. Press the Delete key on the keyboard and the artifacts will be no more.

Delete artifacts copy.jpg

Next, I told my daughter I was going to cut his head off. She gasped and then started laughing.

I double clicked on the Gingerbread Man to bring up the Edit Points. These little gray dots may look intimidating when they show up, but they are very useful.
Check out the “Let’s Explore v4 – Edit Points” post for more information HERE.

The first thing I noticed is that there are a lot of edit points. This can happen on any object you trace. In the Edit Points Panel, click on the Simplify option and see if it helps decrease the edit points without changing the shape of the design too much.

Edit Points Simplify copy

Again, each design is going to vary in how it reacts.

Simplified copy.jpg

Keep in mind a few things when you trace. First, it traces each design around the edges of the yellow that you have on the screen when you do a trace. This means if the image is pixelated, then will trace all those pixels.
And, each of those edit points is a data point that the Silhouette machine has to hit when it is cutting. It is how it tells the machine how to cut around the design you send to it. If there are a lot of edit points, it can sound odd cutting and take a long time as it makes it’s way connecting all those dots.

Now, that I have fewer edit points, I can move the edit points, delete the ones not needed, and adjust their directional nodes to bring the neckline down on the reindeer costume.

Reindeer neckline copy

And there is our reindeer/gingerbread man body.

Next, we discussed that reindeer have a white stomach. I tried using the Line Drawing tool – Draw a Polygon to draw my own ruffly white belly, but I just wasn’t feeling it.

But, the Santa beard from the Santa & Friends Photo Props was ruffly. I copied it from my other file and pasted it into this design.

Knife tool copy.jpg

I then held the Shift key down and drew my knife across the beard to cut the mustache off. I selected the mustache and deleted it. Then I double clicked on the beard to bring up the edit points and deleted the ones in the center as those are not necessary.

To select multiple edit points at the same time, hold down the Shift key and drag the mouse across all the ones you want to select. This will select multiples at a time and you can then adjust or delete them.

Santa beard edited copy

Now, let’s add this to our reindeer.

Reindeer white copy

I used the bottom middle bounding box to elongate the white of the belly.

Next, I wanted the neckline to match with the brown reindeer part of the costume. Select both the brown and the white of the reindeer and make a copy. Drag this copy off the design mat. Select the brown and white reindeer on the design mat again and open the Modify Panel and choose Crop.

Modify - Crop copy.jpg

The new shape has taken on the color of the bottom layer. Change the color back to white using the Fill Color Panel and you have 2 pieces that will fit back together.

Reindeer body copy

Want to see how it will look as a finished design?

This is what is commonly referred to as a “mock up”. Taking the design you have creating and layering it on top of the original photo.

Mock Up copy

We cut all the pieces out of cardstock and my 6 year old helped with each part. She enjoyed taking the mat off the cardstock.
Tip: To help the cardstock to release from the mat, flip the mat over and peel the mat away from the cardstock. This will help the adhesive release, keep the paper from curling, and keep the adhesive on the mat.
Check out this post “Tips to Get the Most out of the Silhouette Mat” for more tips.

IMG_20191205_102446498 copy

Then my daughter used her scissor skills to cut out the gingerbread man and I asked if she wanted to go find a glue stick to attach the pieces and she says, “Mom, can you just use your good glue?” I had to laugh at that as I pulled out my Scrapbook Adhesives EZ Tape Runner. Of course, I’d much rather use that than a glue stick.

Check out this video below to go through the same steps I have walked through above.

And we had our cleverly disguised Gingerbread Man that we created together. I am amazed at the Silhouette software all the time. While I am no designer, once in awhile I may have an idea or two. And you never known when you will want to take a Santa beard and turn it into reindeer fur.

So for a recap of the tools used in the Silhouette software:
Basic Trace
Release Compound Path
Edit Points
Line Drawing Tool – Draw Polygon
– Knife Tool
Modify Panel – Crop
Fill Color Panel

It didn’t seem like that many as we worked through the project, but we covered a lot. The best way to learn is to continue to create and do things in the software.
All of the above features are linked to detailed posts in the “Let’s Explore v4” series. When you get a chance take a look and then play with something new that you learned.

I would love to see what you create, feel free to post on my Facebook group at Silhouette Secrets with EllyMae.

Enjoy!

SS_Signature copySS Logo snip it

**This post may contain affiliate links. What that means is that I may receive compensation if you purchase through the links I have provided. The price you pay for the product or service is not higher but I may get compensated for sharing.

Posted on 3 Comments

Let’s Explore v4 – Designing with shapes

In October of 2018, I put up a vinyl skeleton on our front door. After Halloween, my kids & husband asked me to leave it up because they thought it would be fun to decorate all year long.
They tell me the ideas that they would like to accessorize the skeleton with and I cut and apply it from vinyl.

Silhouette_Secrets_skeleton

While I was cutting the eggs for the door, I had 3 shapes from the Silhouette Design Store but I wanted a fourth egg with a different design.

With the Silhouette software and the tools in it, you can create pretty much anything you can imagine.

Part 1 – Drawing the Egg

Let’s start with the egg shape.

Now, the easiest way would be to use the Flexi-shapes with the v4.2 software. But, we will discuss both ways.

Drawing with Flexi-shapes

Flexi-shapes are a newly released feature with the v4.2 software and are available if you have the Designer Edition Plus or Business Edition upgrade.

The Flexi-shape option is in the toolbar on the left side of the v4 software.

Flexi shapes copy

Check out all these shapes!

Flexi shapes 2 copy

Click on the oval shape and then click and drag the mouse on the design mat.

Egg flexishape copy

To adjust the shape after the original drawing, grab one of the white circles and move it. The shape will adjust as these points are moved.

Once the shape is to your liking, right click on it and choose Convert to Path.

Convert to Path copy

Now, that is one way to get an oval shape.

Using the Drawing Tools to create shapes

For those that do not have v4.2 or the Designer Edition Plus or Business Edition upgrade, let’s use the drawing tools and draw an egg shape.

Since the egg is wide at the bottom than at the top, I am going to use 2 shapes.
First, on the left toolbar, select the Draw Ellipse tool.

Draw Ellipse tool copy

Hold down the Shift key and drag the mouse to draw a perfect circle.

Choose the Draw Ellipse tool again and draw an oval.

Draw Oval copy

Select both the circle and the oval, using the Transform Panel – Align Tab to align the horizontal centers.

Align Oval copy

Then right click and choose Weld.

Weld copy

Next, double click on the welded shape and this will bring up the edit points. By deleting a few edit points we can change the shape of this design.

Delete Edit points copy

Alter the edit points to achieve the desired effect.

Delete Edit points2 copy.jpg

Still not the exact shape or as symmetrical as you’d like? Take it one step farther.

Alignment for knife copy

Open the Page Setup – Panel Grid Options.
Move the oval shape so that the top bounding box is centered on one of the grid lines.
Click on the Knife Tool on the left tool bar.
Make sure the Solid option is selected in the Quick Access Toolbar at the top left.

Knife tool copy

Hold down the Shift key and draw a line from the top to the bottom on the grid line with the bounding box.

Select the right side of the oval and delete it.

Open the Replicate Panel. Select the left side of the oval and choose Mirror Right.

Replicate Panel copy

Select the right side and press the left arrow key 1 time. This will move the design slightly so it is overlapping the left side of the oval.

Select both sides, right click and choose Weld.
The weld option can also be found under the Modify Panel on the right side too.

Weld2 copy

Now you have a symmetrical shape.

This can be done with all kinds of designs. You can create and draw anything in the software by breaking it down into basic shapes or using the Flexi-shapes.

How about a heart? Draw your own with 2 circles & a square and then edit using the same techniques listed above or use the Flexi-shape if available.

Heart shape copy

Or a flower?
Draw an oval and use the Advanced Replicate Panel to replicate and rotate the oval.
I chose 8 copies and 30 degrees for the rotation.

Flower copy

In the next blog post, we will take a look at how to create shapes to decorate the egg.
Part II – Decorating the Egg Shape

Eggs photo

What will you use the software to draw and experiment with today?

Feel free to post your comments and questions below or on my Facebook group at Silhouette Secrets with EllyMae.

Enjoy!

SS_Signature copySS Logo snip it

**This post may contain affiliate links. What that means is that I may receive compensation if you purchase through the links I have provided. The price you pay for the product or service is not higher but I may get compensated for sharing.

Posted on 1 Comment

Creating designs in Silhouette Studio v4

This week let’s take a look at how to create your own design in the Silhouette Studio software using basic shapes and text.

We will create an overlay that could be cut out of cardstock or other materials. I most often see these at trade shows cut by big, fancy laser cutters.
But, why can’t you create your own?
You can!
With just a few basic shapes and tools, you can open up so many doors.

Paris Overlay demo copy

Let’s Explore how to create this overlay in the Silhouette Studio v4. 

Start by drawing a square using the Draw a Rectangle Tool on the left side.

Draw Rectangle copy

To draw a perfect rectangle, hold down the Shift key while drawing the shape.

Do not worry about drawing an exact rectangle dimension.
Use the Scale Tab (2nd tab) located under the Transform Panel on the right side, click on the lock to lock the Aspect so that the dimensions of the object change proportionally. Then type 12 inches in the width and hit enter.
Since the lock was closed, the height will automatically change keeping the proportion of the design.

Select the Square by clicking on it and then choose the Center to Page option. This is found in the QAT (Quick Access Toolbar) or under the Transform Panel – Align Tab.

Center to Page copy.jpg

Now, draw 2 more rectangles and resize them using the Transform Panel – Scale Tab to 3.8″ x 5.8″ and 4.8″ x 6.8″.
These are the sizes for a 4″ x 6″ and 5″ x 7″ photo, the overlay will overlap the photos by just a little bit when it sits on top of it.

Make a copy of the 3.8″ x 5.8″ rectangle and move it to the bottom left side.
My favorite way to make a copy is to hold down the Alt key and drag a copy off of the design.

Make another copy of the 3.8 x 5.8″ rectangle and move it to the top right corner. Resize this rectangle using the Scale Tab to 3.8″ x 5.8″.

Draw more rectangles copy

Next, use the Transform Panel – Align Tab to align the rectangles.

Align tool copy.jpg

Select the top right and bottom right rectangles, choose Align Right.
Select the top left and top right rectangles, choose Align Top.
Select the top left and bottom left rectangles, choose Align Left.
Select the bottom left and bottom right rectangles, choose Align Bottom.

Align options copy

For the next step, select all the rectangles including the 12″ x 12″ rectangle.
To select everything on the page, left click and drag the cursor across all the objects or on the keyboard hold down the Ctrl + A buttons.

 With all the rectangles selected, click on the Fill Color Panel and fill it with black.

Fill Color Panel copy

Now, what you have created is 4 rectangles on top of the 12″ x 12″ rectangle.

We are going to take those 5 separate objects and combine them into 1 object by making a compound path.

With all 5 rectangles selected, right click and choose Make Compound Path.

Make Compound Path copy

This combines those 5 objects into 1 layer.
Check out this post on Compound Paths for more information.

Make Compound path complete copy

With those basic shapes you have created the overlay base.
You can create any combination of layouts you want using any shapes you want for the overlay.

Now, let’s add a few more things to this.

Click on the Text Tool on the left side, then click on the design mat to get a text cursor and type “Paris”.
Click off of the text to deselect it and then back on it once to select it.
Open the Fill Color Panel and fill the text with black.
Then open the Text Style Panel on the right side and choose the Text Style you prefer.

Paris Text copy.jpg

Each text style you choose may be different. I chose LW Kaylee’s Script by Lori Whitlock. Resize the text to your liking.
Because of the slight angle of the text from left to right, I also rotated the text to sit straighter on the frame. This is a personal preference and each user may vary in what they like.

Move the Paris text so it overlaps the bottom section on the top left rectangle.

Paris text position copy

Next, let’s add one more element to this. I have an Eiffel tower image from the Silhouette Design Store by Samantha Walker – Design #41675.
From the Silhouette library, double click on the image and it will add to the design mat.
If it does not and opens onto another design mat, either copy and paste it to the previous work space or go back into the library and right click and choose Merge.

Click on the Eiffel tower to select it, then using the Fill Color Panel, fill it with black.
Then resize it to your liking and place it in the bottom left rectangle overlapping at the bottom.

Eiffel tower copy

And now the final step. Select the overlay background, the Paris text and the Eiffel tower design and right click and choose Weld.

Weld copy

Keep in mind that once you weld or change text in any way, it is no longer editable text, so you might want to make a copy or use the Sticky Note feature to make yourself a note on the Text Style used. For more information on Text tips, check out this post HERE.

And we have now used basic shapes, text and a design to create a overlay.
Click on the Send tab and it will show us how this will cut. It will all cut as 1 piece except the dot of the i, since it was not overlapping any other piece, it does not weld to the frame.

Send tab copy

What will you create today?

Check out the video of creating this overlay here:

I would love to see what you create – feel free to post on my Facebook group at
Silhouette Secrets+ with EllyMae.

Enjoy!

SS_Signature copySS Logo snip it

**This post may contain affiliate links. What that means is that I may receive compensation if you purchase through the links I have provided. The price you pay for the product or service is not higher but I may get compensated for sharing.