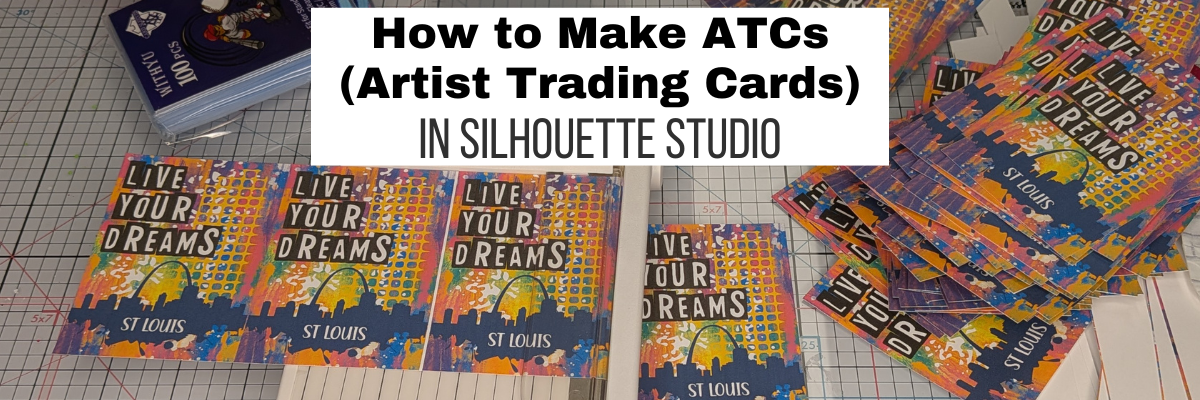
Have you ever heard of an ATC? Or Artist Trading Card? They are a very popular thing to create to swap or pass out to other creatives at events or even through the mail. I had a good friend many years ago who collected them and would put them into trading card pockets. I thought it was such a neat idea. Then fast forward and I started attending Silhouette events and started making things to trade. Without even thinking about it, I was creating ATCs and swapping them. ATCs can be created with physical supplies or digital supplies and then printed. There is NO WRONG WAY to create one.
Affiliate links may be present in the following blog post and as an Amazon Associate, I earn from qualifying purchases.
When I’m traveling, I like to make digital ATCs, so they take up less room and are not bulky. And you don’t even need to own a Silhouette machine to create and print from Silhouette Studio. The Silhouette Studio software basic edition is free for anyone to download from Silhouette America.
Here is a look at the ATC design in Silhouette Studio that I created for Creativation 2026 that was held in St Louis. I used a colorful background pattern, mixed media design, and a font by Sarah Hurley, along with a St Louis svg I found.
Now, one thing to note, if you want to open svg files in Silhouette Studio, it does require a software upgrade to Designer Edition or higher. Find more details on that HERE.
Once I had the design how I wanted, then I grouped it all together and replicated the design and centered them all to the page.
I also wanted this one to be a double-sided ATC so created a second page by using File > Save As, then deleting the details inside the rectangles and adding new information. This ensures that the design placement is exactly the same for both sides.
Now, the biggest thing about a double-sided print is figuring out how your printer loads, pulls the material through the machine, and which side it will print on. Every printer is different and the only way to know is to test it and make a few mistakes. It never fails every time I do this that I have a few I mess up.
Since my design is straight lines, I opted to not use print and cut and have the registration marks take up space or spend the time loading each page into the machine for it to be cut out. I grabbed 2 of my paper trimmers, a 12″ to cut the long lengths and then a smaller one to cut each card apart. It ended up being faster to do this than if I let the machine do it for me and I can get more to a page.
However, if I have a design that needs to be cut exactly around the design, then I definitely set up a print and cut project.
I share the full creation process of the ATCs in the video below or on the Silhouette Secrets+ YouTube channel.
What will you create today? Sometimes it’s fun to just play around and put things together to see what happens, even if you don’t have a purpose for it at the moment.
Save this for future reference by pinning the image below.
Enjoy !
THANK YOU for your support! How can you help? Click HERE & buy a coffee. Every little bit helps with the cost of running the site.
Silhouette Classes
Never stop learning! Let me help you take the anxiety out of learning with Silhouette and get to creating faster! My Silhouette classes are heavily focused on software, so you can take the skills & techniques taught and apply them to many future projects!
**This post may contain affiliate links. What that means is that I may receive compensation if you purchase through the links I have provided. The price you pay for the product or service is not higher, but I may get compensated for sharing.
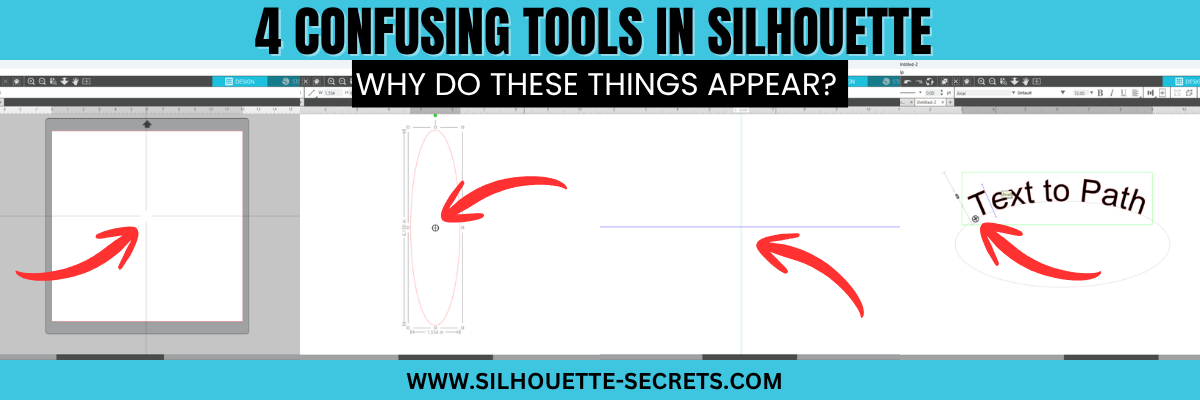
I have been troubleshooting with Silhouette users since 2016, and we have answered a lot of questions during the years. One of the most common questions is “What is this?” and “Why did it just appear?” In this blog post, I’m sharing more details on 4 of the tools that are often confused with each other, how they get turned on, how to turn them off, and where to find more information on each of the tools. These 4 tools can be useful when designing in Silhouette Studio, but not all users utilize them or will use them all of the time. That is one of the great things about Silhouette is the choice of having the options to use a tool or feature. This is also one of those cases where if a user doesn’t know what a tool does specifically, they may never know that it can actually be really useful to them in their workflow.
Affiliate links may be present in the following blog post and as an Amazon Associate, I earn from qualifying purchases.
The 4 tools in Silhouette Studio that are often confused are:
Crosshairs
Center of Rotation
Guides
Text to Path Control Point
Watch the YouTube video on this topic below and keep on scrolling down to see additional information on each as well.
Crosshairs in Silhouette Studio
Crosshairs usually appear for 2 reasons.
Pressing the letter ‘H’ on the keyboard toggles it on and off.
A file is opened that the designer saved it with crosshairs on.
Typically we see crosshairs appear because a user thinks that they have activated Text Mode and it did not take. So when the letter ‘H’ is pressed on the keyboard, it toggles it on.
Crosshairs can be turned on and off 3 ways:
Press the letter ‘H’ key. If they don’t turn on and off, click on the design mat and then press ‘H’ again.
Open the Page Setup Panel, click on Tab 2, and click the Crosshairs button.
In the top left menu, under View, select Turn on Crosshairs.
Crosshairs are a Designer Edition upgrade feature and those on Basic will not see this available.
Guides can be pulled from the rulers on the top or right side of Silhouette Studio. Guides are a Designer Edition upgrade feature along with Rulers.
These can be accidentally activated if clicking the mouse on top of the rulers or click & pull from the ruler area onto the design mat.
Guides can be deleted by clicking on one to activate it, it will turn dark blue, then press delete. Light blue color means it is not the active Guide selected.
Guide settings can be found under the Page Setup Panel, under Tab 2. Snap to Guides is by default always active, but unless you have a Guide placed on the file, you won’t see it work. Guides can be toggled on and off under this tab too.
Guides can also be found in the top left menu under View, then select the option desired.
This control point appears any time there is editable text activated.
This is the control handle that is used to drag text to a path and have it snap to the path. This feature is always available on editable text and there is no way to turn it off.
The April 2026 member exclusive tutorial for the Creative Community is an in-depth tutorial on Text to Path with advanced techniques too! Check out more details on the Creative Community HERE.
*Creative Community members watch for a cheat sheet on these tools coming soon to April’s forum!
Save this for future reference by pinning the image below.
Enjoy !
THANK YOU for your support! How can you help? Click HERE & buy a coffee. Every little bit helps with the cost of running the site.
Silhouette Classes
Never stop learning! Let me help you take the anxiety out of learning with Silhouette and get to creating faster! My Silhouette classes are heavily focused on software, so you can take the skills & techniques taught and apply them to many future projects!
**This post may contain affiliate links. What that means is that I may receive compensation if you purchase through the links I have provided. The price you pay for the product or service is not higher, but I may get compensated for sharing.
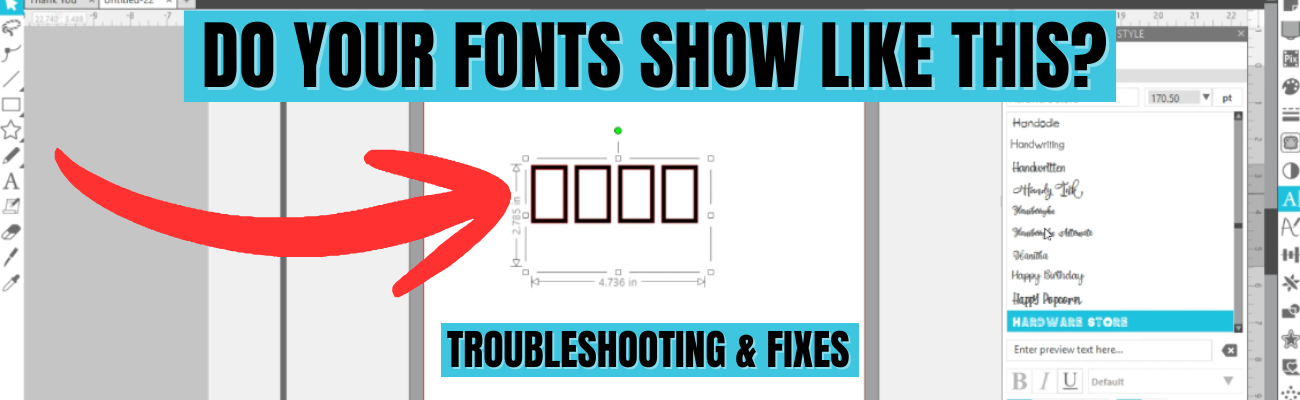
Have you ever opened Silhouette Studio, started designing with text, and instead of a beautiful font you’re greeted with rectangles, boxes, or missing letters? Font issues in Silhouette Studio are a common frustrations that we see when troubleshooting with users—whether fonts don’t show up at all, won’t display correctly, or refuse to work the way you expect. The good news? These problems usually have simple explanations and easy fixes once you know what to look for.
Affiliate links may be present in the following blog post and as an Amazon Associate, I earn from qualifying purchases.
Watch the video below or the Silhouette Secrets+ YouTube channel and it walks you through exactly why font issues happen in Silhouette Studio and how to troubleshoot them. In this tutorial, you’ll learn why fonts show up as rectangles, a glimpse at previewing fonts, why fonts can go missing or seem like they are missing, and how to reinstall fonts correctly—including whether OTF or TTF files work best. If you’ve ever wondered “Why is my font doing that?” this video will help you get back to designing quickly and show how to avoid some of these issues.
If you’re ready to go beyond troubleshooting and really learn how to use fonts to create your own designs in Silhouette Studio, come join us in the Creative Community with EllyMae | Crafting & Troubleshooting site. Our February 2026 exclusive member video covers working with text, fonts, and design techniques so you can move from simply typing words to confidently creating custom designs with fonts. It’s the perfect next step if you want to unlock the creative power of text in Silhouette Studio and design projects that are truly your own. In the 96 minutes step-by-step video tutorial I cover everything from where fonts are stored, font storage, designing with glyphs, offsets, compound paths, combining shapes, and more! Create 10 unique designs in less than 2 hours and then take and use those techniques to create even more!
Save this for future reference by pinning the image below.
Enjoy !
THANK YOU for your support! How can you help? Click HERE & buy a coffee. Every little bit helps with the cost of running the site.
Silhouette Classes
Never stop learning! Let me help you take the anxiety out of learning with Silhouette and get to creating faster! My Silhouette classes are heavily focused on software, so you can take the skills & techniques taught and apply them to many future projects!
**This post may contain affiliate links. What that means is that I may receive compensation if you purchase through the links I have provided. The price you pay for the product or service is not higher but I may get compensated for sharing.
If you love layered paper projects and clever cutout designs, you’re going to enjoy today’s Silhouette Studio tutorial! In this step-by-step guide, I’m sharing how to create a Peekaboo Layered Calendar—a cutout-style design where the background shows through for unique look. This tutorial walks you through the full design process in Silhouette Studio, along with a supply list, and helpful tips with your Silhouette software. Whether you’re crafting a calendar for home décor, gifts, or adding unique designs to your shop, this project is simple, fun, and perfect for any skill level.
Affiliate links may be present in the following blog post and as an Amazon Associate, I earn from qualifying purchases.
I absolutely love how this lotus flower design cut out and the pink and yellow holographic cardstock seemed just perfect for it.
The brand-new Peekaboo Layered Calendar video tutorial is now live! Watch the video below or on the Silhouette Secrets+ YouTube channel below to see the full step-by-step guide and learn how to design this cutout-style calendar in Silhouette Studio. After watching, be sure to scroll down — you’ll find a complete supply list, in-progress photos of this project, and additional project ideas too!
Here is a look at my original design file showing all of the calendar pages.
When I am working with a multi-page print and cut project, I will create separate files for each page. With print and cut, it is very specific and you do not want to move anything on the screen after the page is printed.
Having each page in a separate file will allow me to be able to easily recreate the project again if I want and also allows me to setup and print page 2 and 3 while the first page is cutting. I simply copied and pasted the next set of calendar sheets onto a new design mat and saved that file as Pg 2.
The holographic cardstock was thinner than my 110 lb cardstock, so I did cut an additional backing and then used an adhesive tape runner to secure the background to it. This gave it a bit more weight so it would hold the straight shape more. I also did that on the next one too because I printed the graphics on Epson Presentation Paper – Matte, so it is a lighter weight paper, but has an excellent print quality to it and I love using it.
I can’t just print one image on a page though, so I did make some variations on this one and printed several.
Now I can swap out the images through the year if I want to and have these bright, colorful faces to look at throughout 2026.
And once I started with these projects, it really is hard to stop. And this is why the video tutorials or blog posts are delayed. I love creating new projects and have to force myself to stop to get other things done.
And then I go and ask my daughter what kind of design she would want. “A whale shark, of course, Mom!”
This peekaboo calendar turned out awesome too! I had to order a bit taller easel for this design though as it measured about 5″ tall and my smaller easels didn’t work well. My daughter loves this Whale Shark design by La La Shiba and I’ve used it on quite a few projects from temporary tattoos, water bottle decals, and shirts too!
I have so many additional ideas for the calendar designs. I’ll come back and update when I get more of the peekaboo designs made.
There are so many different design ideas you can create using the same tools shown in this video. I hope you take the tools I shared and put them to use and start creating.
Here is another example of a layered desktop calendar design.
Save this for future reference by pinning the image below.
Enjoy !
THANK YOU for your support! How can you help? Click HERE & buy a coffee. Every little bit helps with the cost of running the site.
Silhouette Classes
Never stop learning! Let me help you take the anxiety out of learning with Silhouette and get to creating faster! My Silhouette classes are heavily focused on software, so you can take the skills & techniques taught and apply them to many future projects!
**This post may contain affiliate links. What that means is that I may receive compensation if you purchase through the links I have provided. The price you pay for the product or service is not higher but I may get compensated for sharing.
If you love creating interactive cards, this JOY Spinner Card is a must-try holiday project! In this tutorial, I’ll walk you through how to design and assemble this layered spinner card using Silhouette Studio, along with a complete supply list and helpful tips and additional resources. Watch the full video, grab the supplies below, and let’s create a festive card that’s sure to impress!
Affiliate links may be present in the following blog post and as an Amazon Associate, I earn from qualifying purchases.
This card design was first shared in my Silhouette Secrets+ Facebook group and my admin did a bit of sleuth work and found who we believe is the original designer for this spinner card idea. This card design was inspired by Dress My Craft. Make sure to grab the Dress My Craft spinners linked in the supply list below.
One thing leads to another… down the rabbit hole I went and Dress My Craft has so many neat ideas to create with the spinners.
Watch the full design tutorial below.
Create the layered look with the same colors of cardstock or mix it up and do multiple colors. I cut both to see what it would look like, but I think I prefer the white layered on top of each other with the offset. I am so glad I saw my admin (Teresa’s) card ideas and included that into the video tutorial. I think it really makes it stand out.
I love being able to create designs in the Silhouette software, and projects like this JOY Spinner Card truly show how versatile it can be! If you haven’t already, be sure to watch the full video tutorial on the Silhouette Secrets+ YouTube channel for step-by-step instructions and extra tips. I hope this inspires you to create your own interactive card and continue learning even more about what Silhouette can do!
Save this for future reference by pinning the image below.
Enjoy !
THANK YOU for your support! How can you help? Click HERE & buy a coffee. Every little bit helps with the cost of running the site.
Silhouette Classes
Never stop learning! Let me help you take the anxiety out of learning with Silhouette and get to creating faster! My Silhouette classes are heavily focused on software, so you can take the skills & techniques taught and apply them to many future projects!
**This post may contain affiliate links. What that means is that I may receive compensation if you purchase through the links I have provided. The price you pay for the product or service is not higher but I may get compensated for sharing.
Creating custom card designs in Silhouette Studio is easier than you might think, and today I’m excited to share a step-by-step Tri-Fold Shaped Edge Card tutorial now live on the Silhouette Secrets+ YouTube channel! This project is perfect for any occasion, and once you learn the process, you can customize it with your own text, images, and themes. You’ll find the full supply list conveniently located right below the video link, so you can gather everything you need and craft along with me.
Affiliate links may be present in the following blog post and as an Amazon Associate, I earn from qualifying purchases.
Watch the full step-by-step tutorial below. I walk you through each part of creating a Tri-Fold Shaped Edge Card so you can follow along at your own pace and customize it to match any theme or occasion. And while you’re there, I’d love your support—click the Like button, leave a comment to share what design you plan to create, and make sure to subscribe for more Silhouette tips and project inspiration. Don’t forget to tap the bell so you’re notified as soon as new tutorials are released!
Ready to design your own? Once you’ve watched the tutorial and are inspired to start creating, here are the supplies I used for my Tri-Fold Shaped Edge Card. Feel free to follow along with the same materials or customize your project with what you have on hand—either way, you’ll be crafting a unique card in no time!
This is a card design that can be used all year long and for many different situations.
Here are a couple more designs that I created too!
Mix and match different paper patterns with the same designs to create different looks.
This is a great way to use up scraps papers or smaller sheets too!
Save this for future reference by pinning the image below.
Enjoy !
THANK YOU for your support! How can you help? Click HERE & buy a coffee. Every little bit helps with the cost of running the site.
Silhouette Classes
Never stop learning! Let me help you take the anxiety out of learning with Silhouette and get to creating faster! My Silhouette classes are heavily focused on software, so you can take the skills & techniques taught and apply them to many future projects!
**This post may contain affiliate links. What that means is that I may receive compensation if you purchase through the links I have provided. The price you pay for the product or service is not higher but I may get compensated for sharing.
Ready to unlock the full potential of your Silhouette machine? Whether you’re a seasoned crafter or just starting out, stenciling is a fun and versatile technique that can transform almost any project. In this post, I’m sharing creative stencil ideas you can cut right now with your Silhouette—think custom doormats, etched glass, painted wood signs, fabric decor, layered art journaling, and more. You’ll also find must-know tips for designing stencils, multiple stencil materials that can be cut, and step-by-step tutorials below too! This blog post is packed with Silhouette information, tips, and tutorials—so make sure to bookmark it for future reference.
Affiliate links may be present in the following blog post and as an Amazon Associate, I earn from qualifying purchases.
Stencils can be created from many different materials. Cardstock, adhesive vinyl, plastic stencil materials, and more! I’m sharing some of those materials below with tips and tutorials to help you design and create in Silhouette Studio.
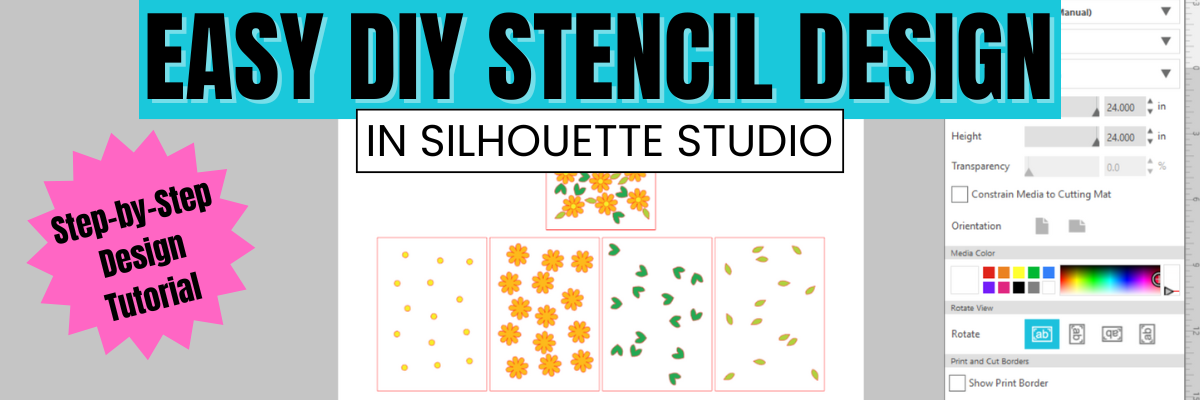
Project #1 – Custom Stencils with Silhouette Stencil Material
Create your own stencils with basic shapes and patterns in the Silhouette Studio software.
I created these 2 stencil patterns and cut them from the Silhouette non-adhesive stencil material using the Silhouette Autoblade.
Silhouette has both adhesive backed and non-adhesive backed stencil material as shown above. One might work better for your projects versus another. Since my plan was to use the stencil on a flat material like mixed media paper, I didn’t really need it to be sticky on the backside.
I also kept all the negative bits that were cut out from this stencil for a possible future project. They could be used as elements on a card, creating a pattern on a card, as a stencil by itself, and more!
Then I pressed a piece of bubble wrap into the stencil butter to give it even more texture.
Make sure to let the stencil butter dry completely before touching it. I sometimes get impatient, so having a heat gun can be handy to help speed up the process too.
I shared how I created these stencil designs in the video below.
I use adhesive vinyl for many different projects as a stencil such as glass etching, painting, or in this project below – I was trying it with a Scorch marker for wood burning.
When creating a stencil with adhesive vinyl, weed out the design and that creates the stencil. In the photo below, I have weeded the flower design out of the black adhesive vinyl. I use basic shapes such as a rectangle around the design to create the outer edge of the stencil. The actual project I’m creating will determine the size of the shape I place around my design for the stencil outer edge. For projects such as painting or glass etching, I will give myself plenty of space around the design. For something smaller, as shown below, I don’t need as much extra space since it will be close to the edge of the blank being used.
Now, in this case, my project failed, but I’m still sharing it with you because it happens! Projects don’t turn out, projects fail and what you see on social media is not always reality.
These wood earring blanks were a bit too porous, and the Scorch marker liquid just bled too much. It looks more like those therapy cards – What shape do you see?
And that’s just how it goes sometimes. Some projects fail!
Here is another example of adhesive vinyl cut for stencils that I was using for glass etching.
And this one turned out fabulous!
Additional Resources for the tools I used to create the design:
Project #3 – Layered Stencil with Plastic Stencil Material
We see a lot of questions by users on cutting stencil materials. Typically, it is in reference to plastic materials that a user is trying to cut. While Silhouette machines can cut a lot of different materials, there are limits and it is not just about thickness, but also density and composition.
Another thing to keep in mind is that stencil material is plastic and plastic will dull the blade quicker than other materials. It is perfectly normal to have to increase the blade settings or passes the more that is cut. And if you are cutting this material a lot, you may go through more blades than other thinner, easier to cut materials.
I cut this 6 mil stencil material using the preset for Stencil Material in the Silhouette Studio software. All I changed was to increase the passes to 2 and then when that started having a few hang ups, I increased it to 3 passes.
The settings that work for you will depend on the blade sharpness, material, and your machine. There is no perfect setting that works for all users magically.
I do recommend cutting one stencil design at a time. This way you can catch any issues before you’ve wasted time and materials.
Do not unload the cutting mat before you check the cut and if it did not cut through you can send it again.
I was using the same Autoblade that I used with the Silhouette Stencil material mentioned above and it’s still going strong with the settings pictured above on the 6 mil stencil material.
The hardest part for me was that I had to stop the design and creation process and move on to other things. Once you get started cutting, it is easy to get wrapped up in the projects. Here are a couple more I cut before I moved on to the next phase – using the stencils.
Want to learn even more on how I designed the layered stencil used to create the design pictured above? Check out video tutorialbelow or on the Silhouette Secrets+ YouTube channel.
And there is more!!! A follower asked for more design tutorials after seeing the video above. So, I also shared how to quickly design a flower and a heart in Silhouette too!
Click the images above or the links below to watch these quick tutorials:
When working with stencils whether it is a design or a font, the pieces have to all remain in the stencil somehow. If a piece is completely cut out, it will fall out of the stencil.
For instance, for letters A, B, D, O, P, Q, and R, they all have “counters”, which are the centers of the design that would fall out when cut. In order to cut as a stencil and remain in place, the letter needs a “bridge” so it can be held in place when cut.
I typed in “stencil font” to the Silhouette Design Store search and many options come up. All kinds of styles and the perfect one will vary based on your project and taste.
You can see my taste varies and some of these will cut better at larger sizes than smaller. Each project may vary and you never really know until you test it.
The fastest way to create a stencil font is to use a premade font file, but you can also create your own from a font. This works best with a bold font where you can make “bridges” to help hold the centers (counters) of the letters in place.
I used a font style called Grossura to create the stencil quote shown above.
Once you see how easy it is to alter a font, you may not want to stop creating and the ideas may just continue to flow. See how easy it is in this video tutorial below or on the Silhouette Secrets+ YouTube channel HERE.
There is so many different projects you can create with stencils! And you can apply the same techniques and design steps to other projects as well. I hope you’ve picked up a few new ideas and techniques!
Looking for more creative ideas and inspiration? Check out the Crafting Creativity blog posts for a treasure trove of fun and unique projects! Each month, I share a fresh collection of craft ideas designed to spark your imagination and help you expand your skills with confidence. Don’t miss out—your next favorite project could be just a click away!
Save this for future reference by pinning the image below.
Enjoy !
THANK YOU for your support! How can you help? Click HERE & buy a coffee. Every little bit helps with the cost of running the site.
Silhouette Classes
Never stop learning! Let me help you take the anxiety out of learning with Silhouette and get to creating faster! My Silhouette classes are heavily focused on software, so you can take the skills & techniques taught and apply them to many future projects!
**This post may contain affiliate links. What that means is that I may receive compensation if you purchase through the links I have provided. The price you pay for the product or service is not higher but I may get compensated for sharing.
Ready to take your Silhouette skills to the next level? In this step-by-step video tutorial, you’ll learn exactly how to create custom sketch designs in Silhouette Studio—perfect for sketch pens, foiling, sublimation markers, and more! Whether you’re personalizing cards, creating decorative outlines, or adding hand-drawn touches to your projects, this tutorial will show you how to design from scratch and prepare your file for sketching.
Affiliate links may be present in the following blog post and as an Amazon Associate, I earn from qualifying purchases.
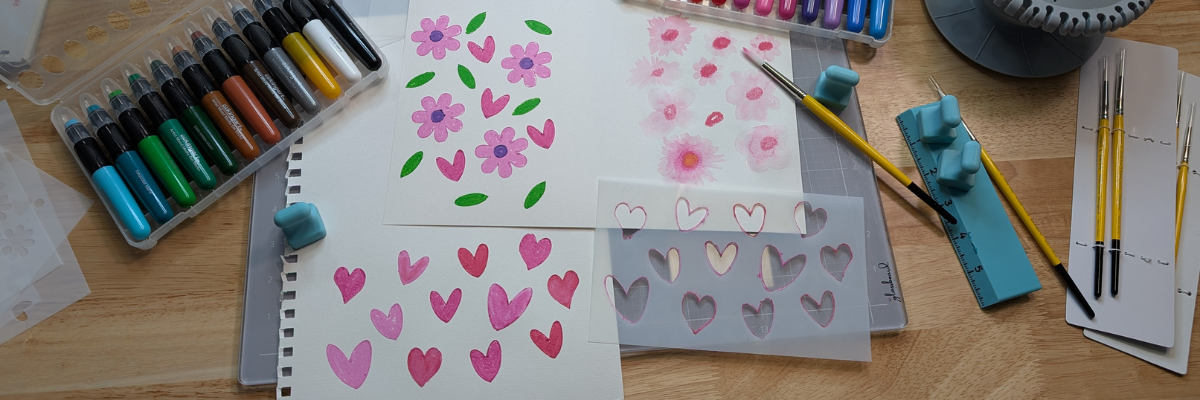
This year I took a watercolor class from artist Tracey Weinzapfel and I’ve been creating all kinds of projects with the ideas from class. When I started designing a class for the Sublimation & Beyond Camp 2025, I wanted to see if I could recreate my designs in the Silhouette Software.
I had so much fun in the design process of these custom sketch designs and just kept on creating flower designs just to see if they would turn out.
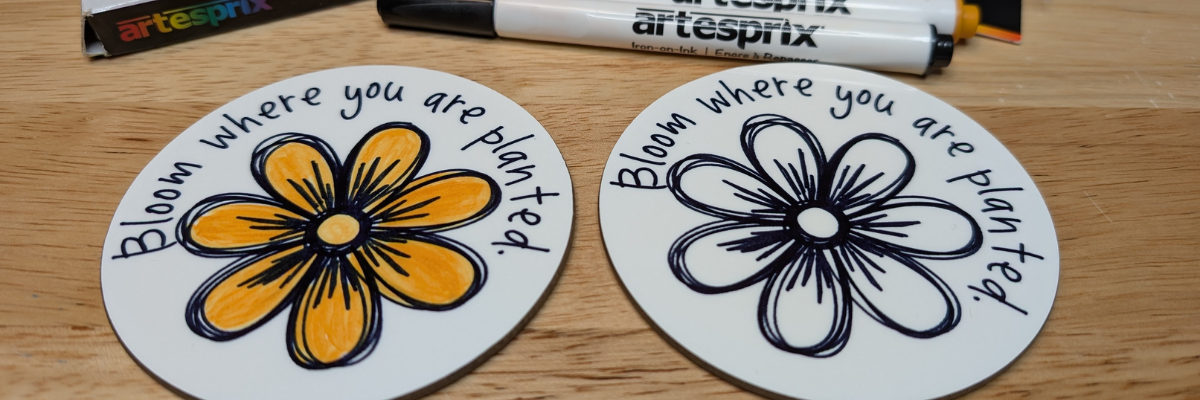
I used the sketch designs to create sublimation coasters using the Artesprix sublimation markers. Since the class would be viewed by a variety of cutting machine owners, I designed in Silhouette Studio and then saved the file as a SVG.
Here is the supply list for the sublimation coasters in case you want to create too!
Watch the video belowand follow along as we unlock the creative power of sketching with your Silhouette machine! Can you spot my mistake I made in the video?
What custom sketch designs will you create? Let us know in the comments below.
Save this for future reference by pinning the image below.
Enjoy !
THANK YOU for your support! How can you help? Click HERE & buy a coffee. Every little bit helps with the cost of running the site.
Silhouette Classes
Never stop learning! Let me help you take the anxiety out of learning with Silhouette and get to creating faster! My Silhouette classes are heavily focused on software, so you can take the skills & techniques taught and apply them to many future projects!
**This post may contain affiliate links. What that means is that I may receive compensation if you purchase through the links I have provided. The price you pay for the product or service is not higher but I may get compensated for sharing.
Did you miss this video tutorial? Don’t worry — I’ve got you covered! In this step-by-step tutorial from the Silhouette Secrets+ YouTube channel, I walk you through exactly how to create a layered stencil design in Silhouette Studio. Whether you’re a beginner or just looking to level up your stencil projects, this video will show you how to break a design into layers, align them perfectly, and prep each one for cutting. Layered stencils are perfect for multi-color painting, mixed media, and more — and with these tips, you’ll be designing your own in no time! Watch the full video and start crafting with confidence.
Affiliate links may be present in the following blog post and as an Amazon Associate, I earn from qualifying purchases.
What would you use stencils for? Let us know in the comments below.
Save this for future reference by pinning the image below.
Enjoy !
THANK YOU for your support! How can you help? Click HERE & buy a coffee. Every little bit helps with the cost of running the site.
Silhouette Classes
Never stop learning! Let me help you take the anxiety out of learning with Silhouette and get to creating faster! My Silhouette classes are heavily focused on software, so you can take the skills & techniques taught and apply them to many future projects!
**This post may contain affiliate links. What that means is that I may receive compensation if you purchase through the links I have provided. The price you pay for the product or service is not higher but I may get compensated for sharing.
Looking for a fast and easy way to jump into designing with Silhouette Studio? In this quick tutorial, I’ll show you how to create a custom design in under 1 minute! Whether you are brand new to Silhouette or just short on time, this step-by-step guide is perfect for beginners and seasoned crafters alike. From shape tools to compound paths, you’ll learn how to make a project-ready design in no time—ideal for faux leather, fabric, vinyl, HTV, paper crafts, and more. Let’s get designing in 60 seconds or less!
Quick Design in Silhouette Studio
Open Silhouette Studio and grab the teardrop shape from the Flexishapes menu on the left side of Silhouette Studio.
Left click on the design mat and drag down to create the teardrop shape to create approximately a 2″ tall shape. It does not have to be perfect. Then right click and choose Convert to Path.
With the tear drop selected, in the top QAT (Quick Access Toolbar), highlight the numbers in the H box and change it to 2″. Press Enter.
Double click on the tear drop shape to activate the Edit Points. Click on the edit point at the top of the tear drop and 2 blue nodes will appear.
Grab the blue node on the left and drag it out so it is even with the red cut line on the left side.
Grab the blue node on the right side and move it to the right so it’s even with the red cut line.
Ta-da! Ok. It probably took longer than a minute to read the steps and follow them, but you can do this again and could design this shape in less than a minute. But you don’t have to! It’s not a speed test.
If you want to create the hole for the top of the earrings. Grab the Draw Ellipse tool on the left side, hold the Shift key down to draw a perfect circle. Let the mouse button go before you let the Shift key up and you will have a perfect circle. Decide what size you would like and adjust as needed. Place the circle at the top, select both the circle and the tear drop and Align Center.
With both the circle and the tear drop selected, right click and choose Make Compound Path. Fill the design with color and you will see the hole is “punched out” of the tear drop shape.
Quick Video of Designing in Silhouette Studio
Check out this quick video below showing these steps in less than 1 minute.
Save this for future reference by pinning the image below.
Enjoy !
THANK YOU for your support! How can you help? Click HERE & buy a coffee. Every little bit helps with the cost of running the site.
Silhouette Classes
Never stop learning! Let me help you take the anxiety out of learning with Silhouette and get to creating faster! My Silhouette classes are heavily focused on software, so you can take the skills & techniques taught and apply them to many future projects!
**This post may contain affiliate links. What that means is that I may receive compensation if you purchase through the links I have provided. The price you pay for the product or service is not higher but I may get compensated for sharing.
THANK YOU for your support! How can you help? Click the link to buy a coffee. Every little bit helps in the cost of running the site.