Posted on Leave a comment

How to Make ATCs (Artist Trading Cards) with Silhouette

Silhouette Secrets+ with EllyMae

Have you ever heard of an ATC? Or Artist Trading Card? They are a very popular thing to create to swap or pass out to other creatives at events or even through the mail. I had a good friend many years ago who collected them and would put them into trading card pockets. I thought it was such a neat idea. Then fast forward and I started attending Silhouette events and started making things to trade. Without even thinking about it, I was creating ATCs and swapping them. ATCs can be created with physical supplies or digital supplies and then printed. There is NO WRONG WAY to create one.

Affiliate links may be present in the following blog post and as an Amazon Associate, I earn from qualifying purchases.

When I’m traveling, I like to make digital ATCs, so they take up less room and are not bulky. And you don’t even need to own a Silhouette machine to create and print from Silhouette Studio. The Silhouette Studio software basic edition is free for anyone to download from Silhouette America.

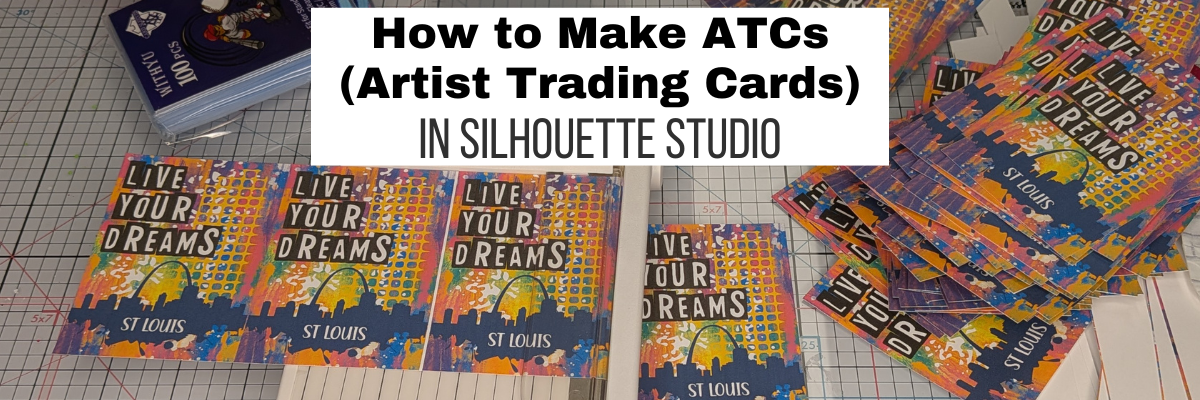
Here is a look at the ATC design in Silhouette Studio that I created for Creativation 2026 that was held in St Louis. I used a colorful background pattern, mixed media design, and a font by Sarah Hurley, along with a St Louis svg I found.

Colorful graphic design featuring the text 'LIVE YOUR DREAMS' and 'ST LOUIS' against a vibrant background with abstract shapes.

Now, one thing to note, if you want to open svg files in Silhouette Studio, it does require a software upgrade to Designer Edition or higher. Find more details on that HERE.

Once I had the design how I wanted, then I grouped it all together and replicated the design and centered them all to the page.

Design layout featuring multiple artist trading cards (ATCs) with a colorful background, text reading 'LIVE YOUR DREAMS', and company branding at the bottom, displayed on the Silhouette Studio software interface.


I also wanted this one to be a double-sided ATC so created a second page by using File > Save As, then deleting the details inside the rectangles and adding new information. This ensures that the design placement is exactly the same for both sides.

Screenshot of Silhouette Studio software displaying a design for business cards with a template for ATC (Artist Trading Cards) stickers.

Now, the biggest thing about a double-sided print is figuring out how your printer loads, pulls the material through the machine, and which side it will print on. Every printer is different and the only way to know is to test it and make a few mistakes. It never fails every time I do this that I have a few I mess up.

A close-up image of printed stickers featuring the text 'Live Your Dreams' and colorful abstract backgrounds. A hand with a ring is holding the sheet of stickers.

Since my design is straight lines, I opted to not use print and cut and have the registration marks take up space or spend the time loading each page into the machine for it to be cut out. I grabbed 2 of my paper trimmers, a 12″ to cut the long lengths and then a smaller one to cut each card apart. It ended up being faster to do this than if I let the machine do it for me and I can get more to a page.

However, if I have a design that needs to be cut exactly around the design, then I definitely set up a print and cut project.

A crafting workspace featuring a paper trimmer, colorful printed cards with the text 'LIVE YOUR DREAMS' and 'ST LOUIS', various art supplies, and a cutting mat.

I share the full creation process of the ATCs in the video below or on the Silhouette Secrets+ YouTube channel.

Supplies to Create ATCs in Silhouette

Additional Resources:  

What will you create today? Sometimes it’s fun to just play around and put things together to see what happens, even if you don’t have a purpose for it at the moment.

Save this for future reference by pinning the image below.

A close-up of an Artist Trading Card (ATC) displayed on a cutting mat with colorful designs, featuring the text 'Live Your Dreams' and 'ST LOUIS'.

Enjoy !

THANK YOU for your support! How can you help? Click HERE & buy a coffee.
Every little bit helps with the cost of running the site.

Silhouette Classes

Never stop learning! Let me help you take the anxiety out of learning with Silhouette and get to creating faster! My Silhouette classes are heavily focused on software, so you can take the skills & techniques taught and apply them to many future projects!

Silhouette step-by-step Classes by Silhouette Secrets+

Silhouette Secrets+ with EllyMae
**This post may contain affiliate links. What that means is that I may receive compensation if you purchase through the links I have provided. The price you pay for the product or service is not higher, but I may get compensated for sharing.

Posted on 3 Comments

Distressed Background Designs in Silhouette Studio

Distressed Backgrounds in Silhouette Studio
Silhouette Secrets+ with EllyMae

Have you ever wanted to have distressed background or edges on a pattern or photo? While Silhouette Studio does not have the same tools as a graphics program like Photoshop does, there are still ways you can get distressed or grunge edges in the Silhouette Studio software.

Affiliate links may be present in the following blog post and as an Amazon Associate, I earn from qualifying purchases.

Recently I was creating a bundle of 20 cards for a card swap that I signed up for through Erin Reed Makes and saw an idea to create 6 card backgrounds from 1 sheet of 12″ x 12″ paper on Pinterest. It was a distressed background with white space left for additional elements to be added to the card front.

Silhouette Printed Pattern with Distressed Background Card Backgrounds

Now, these distressed designs are not ideal for cutting as they are quite detailed, but they are awesome for print projects, like creating card backgrounds, sublimation, or other printed projects.

I grabbed some clipping mask png files from ClikChic Designs on Etsy and created exactly what I wanted. But, I knew it could be easier or more available to Silhouette users, so I reached out to ClikChic Designs and we started working together testing some designs and I’m excited to say there are a few in the Silhouette Design Store! If this is a popular idea, you may see more too – so make sure to leave a comment below so we know if you like this style of designs.

Let’s take a look at how I created this distressed background pattern in Silhouette Studio.

Distressed Background Designs in Silhouette

Open Silhouette Studio and set up the page size for your printer.

If you don’t have the capability to print a 12″ x 12″ sheet of paper, don’t let that stop you. This could be done with whatever size you can print on to create projects with.

Open the distressed design and scale it to the size you want to fill as much of the page as you want.

This is called Grungy Ink Clipping Mask or Border by Clikchic Designs – Design #368071 or you can grab Dry Paint Grunge Clipping Mask Frame or Border by Clikchic Designs – Design #368127

Open Distressed Design in Silhouette Studio

A .studio file, which is what is in the Silhouette Design Store or a .svg file is a cut file. This means that you can add patterns to the design. If you open another file type such as a .png or .jpeg, you would need to do additional steps to work with that file. (See below for additional information)

**Currently as I type this, you will need to download these files direct to your computer to use as the library syncing is broken – click HERE for how to do that.

If the pattern is outside Silhouette, drag it from the My Computer folder location and hold it over top of the design. The design will fill with that pattern.

Drag Pattern to Design in Silhouette Studio

If you move too fast doing this step, it may not work or you may end up with a small square that won’t disappear without closing the software to reset it. Go slow and hold that pattern on top of the design in Silhouette Studio until it fills the shape.

Patterns from the Silhouette Library could also be used as well. For more on Patterns in Silhouette, check out these tutorials HERE.

Next, change the Line Color to Transparent to see how the pattern will look. This step also ensures that the red cut border will not print.

Silhouette Studio Change Line Color to Transparent

The next steps would depend on what project you are working on. I printed the design on a 12″ x 12″ sheet of Recollections cardstock.

Silhouette Printed Background Cardstock

Then I used my paper trimmer, cut the 12″ sheet at 6″ in the middle of the pattern and then again cut those sections down to 4″ widths. Once I had each section I could trim it down further to 4″ x 5.25″ for my card backgrounds.

Distressed background pattern cards with Silhouette

I added a stamped sentiment to the front and added some rhinestone gems to each card.

There are so many options! 6 card backgrounds from 1 sheet of 12″ x 12″ cardstock

Distressed Background Pattern Cards with Silhouette

Find more designs like this HERE.

A great big thank you to ClikChic Designs for working with me and the idea to make this style of designs easily available to Silhouette users. Check out their blog post for additional ideas on this technique HERE.

I have collected designs by ClikChic for awhile. And then I saw on their Instagram channel where they showed how they create their designs by hand painting them and then digitizing them. I was mesmerized. So make sure to check out their Instagram too!

For some additional ideas on working with distressed images, check out this blog post – 3 Ways to Distress Photo Edges in Silhouette Studio.

Save this for future reference by pinning the image below.

Distressed Backgrounds in Silhouette Pinterest

Enjoy !

THANK YOU for your support! How can you help? Click HERE & buy a coffee.
Every little bit helps with the cost of running the site.

Silhouette Classes

Never stop learning! Let me help you take the anxiety out of learning with Silhouette and get to creating faster! My Silhouette classes are heavily focused on software, so you can take the skills & techniques taught and apply them to many future projects!

Silhouette step-by-step Classes by Silhouette Secrets+

Silhouette Secrets+ with EllyMae
**This post may contain affiliate links. What that means is that I may receive compensation if you purchase through the links I have provided. The price you pay for the product or service is not higher but I may get compensated for sharing.