If you love designing in Silhouette Studio and want to take your projects to the next level, you won’t want to miss this new LIVE tutorial! In this session, we are Creating Stunning Projects with Nitwit Collections Digital Kits and Cut Files. Learn how to combine beautifully designed digital elements with cut files to craft unique, professional-quality designs. Whether you’re a beginner or an experienced user, this tutorial will walk you through step-by-step techniques to make your projects stand out. Plus, with viewer participation, questions were answered and demonstrated in real time, making it an interactive and engaging learning experience. Watch the replay now and get inspired to create!
In the video I share how I went about designing these cards with the Warm Embrace Knick Knack kit by Nitwit Collections.
Here is a closer look at this layered card. With the high quality graphics of the Nitwit Collections digital kits and layering with 3D foam tape, you can create amazing, unique cards and projects.
THANK YOU for your support! How can you help? Click HERE & buy a coffee. Every little bit helps with the cost of running the site.
Silhouette Classes
Never stop learning! Let me help you take the anxiety out of learning with Silhouette and get to creating faster! My Silhouette classes are heavily focused on software, so you can take the skills & techniques taught and apply them to many future projects!
**This post may contain affiliate links. What that means is that I may receive compensation if you purchase through the links I have provided. The price you pay for the product or service is not higher but I may get compensated for sharing.
Create a Unique Signature Line with Silhouette Studio! 🖋️✨
Want to add a personalized touch to your projects? Whether you’re crafting custom cards, digital designs, or branding your creations, a unique signature line can make all the difference! In my latest YouTube video, I’ll walk you through the process of designing your own signature line using Silhouette Studio (or other design software). You’ll learn how to use the Text Tool, explore different Font Families, adjust Edit Points, and apply creative effects like Offset and Weld to achieve a polished, professional look. Ready to elevate your designs?
I’m also sharing a look at how I used this to create a custom stamp after I made the video tutorial below.
After I made the video, I used the file to create a custom stamp with my Silhouette Mint machine. I love this little piece of technology. While the Mint Stamp machine is no longer manufactured, it is still a very handy tool to have around if you can get the stamp kits.
While the Mint Studio software is no longer updated, it can still be used on most computers. I was able to connect to my Silhouette Mint machine with no problems with a Windows 11 computer. However, we have seen some issues connecting to some MAC systems, but not all and the only way to know is to test it.
Find the Mint Studio Software HERE. It’s like a step back in time to what Silhouette version 2 was like. Make sure to follow my tutorial for how you can design in Silhouette and then open in Mint Studio to create your stamp.
Save this for future reference by pinning the image below.
Enjoy !
THANK YOU for your support! How can you help? Click HERE & buy a coffee. Every little bit helps with the cost of running the site.
Silhouette Classes
Never stop learning! Let me help you take the anxiety out of learning with Silhouette and get to creating faster! My Silhouette classes are heavily focused on software, so you can take the skills & techniques taught and apply them to many future projects!
**This post may contain affiliate links. What that means is that I may receive compensation if you purchase through the links I have provided. The price you pay for the product or service is not higher but I may get compensated for sharing.
Looking to add a creative touch to your journal covers or other projects? In my latest video tutorial, I’ll show you step-by-step how to design a stunning mixed media journal cover using Silhouette Studio and bring it to life with physical mixed media elements. From printable vinyl to layered textures, this project blends digital design with hands-on creativity for a truly unique result! Watch the full tutorial now and get inspired to craft along with me!
Affiliate links may be present in the following blog post and as an Amazon Associate, I earn from qualifying purchases.
I had so much fun creating this project and can’t wait to create more with the digital elements and mixing physical mixed media to add a unique touch.
I am including the supply list for what I used, but you can use what you have and just start playing around.
And find the original blog post and short form video that is on the Grafix YouTube channel HERE.
Save this for future reference by pinning the image below.
Enjoy !
THANK YOU for your support! How can you help? Click HERE & buy a coffee. Every little bit helps with the cost of running the site.
Silhouette Classes
Never stop learning! Let me help you take the anxiety out of learning with Silhouette and get to creating faster! My Silhouette classes are heavily focused on software, so you can take the skills & techniques taught and apply them to many future projects!
**This post may contain affiliate links. What that means is that I may receive compensation if you purchase through the links I have provided. The price you pay for the product or service is not higher but I may get compensated for sharing.
New Silhouette tutorial step-by-step to creating a Pop Out Top Card & Mastering Print and Cut in Silhouette Studio on the Silhouette Secrets+ YouTube channel.
Just a quick note to share the link for the Live Silhouette tutorial that happened this month.
Save this for future reference by pinning the image below.
Enjoy !
THANK YOU for your support! How can you help? Click HERE & buy a coffee. Every little bit helps with the cost of running the site.
Silhouette Classes
Never stop learning! Let me help you take the anxiety out of learning with Silhouette and get to creating faster! My Silhouette classes are heavily focused on software, so you can take the skills & techniques taught and apply them to many future projects!
**This post may contain affiliate links. What that means is that I may receive compensation if you purchase through the links I have provided. The price you pay for the product or service is not higher but I may get compensated for sharing.
Have you ever tried tracing an image in Silhouette Studio only to find the result wasn’t as clean or precise as you’d hoped? You’re not alone! Many users struggle with getting a smooth, accurate trace that leads to a successful cut file. We see questions about this all the time, and that’s why I’ve created an in-depth tutorial to help you master tracing and cleaning up your designs in Silhouette. Whether you’re working with complex images or simple shapes, these tips and techniques will help you put the tools in the Silhouette Studio software to work for you!
Find this FREE in-depth video tutorial on the Silhouette Secrets+ YouTube channel HERE.
Every single image that you trace can be different because each one is made up of different colors, gradients, shading, etc. In the video tutorial, I take you along for the journey and it is step-by-step exactly how I would work with a file that needs clean up. The only way to actually know if the file will be a successful cut file in the end is to cut it, so I included my tips after cutting and shared exactly what I would change after I finished the cut to make it even more successful for the final project.
The original traced image started with 24,528 edit nodes and through the clean up process, I was able to get that down to 1,848. That makes a huge difference in the cuttability of a file.
My goal through the entire process was to maintain as much of the character of the image as possible. This makes a great way to make unique projects & gift ideas.
Check out the full in-depth video to learn more about how you can make the tools in the Silhouette Studio software do what you want.
I hope you pick up a few tips to mastering tracing in Silhouette Studio and how to clean up a file for a cuttable design!
Silhouette Tutorial: In-Depth Guide to Tracing & Cleaning Up Detailed Images – Step-by-Step Video on the Silhouette Secrets+ YouTube channel HERE
For more in-depth tutorials and inspiring projects, explore our comprehensive A to Z of Silhouette section on the website HERE, where you’ll find years of creative resources to help you master your Silhouette skills!
Save this for future reference by pinning the image below.
Enjoy !
THANK YOU for your support! How can you help? Click HERE & buy a coffee. Every little bit helps with the cost of running the site.
Silhouette Classes
Never stop learning! Let me help you take the anxiety out of learning with Silhouette and get to creating faster! My Silhouette classes are heavily focused on software, so you can take the skills & techniques taught and apply them to many future projects!
**This post may contain affiliate links. What that means is that I may receive compensation if you purchase through the links I have provided. The price you pay for the product or service is not higher but I may get compensated for sharing.
The Silhouette Studio software allows you to print directly from the program to any printer that is setup on your computer. This action can be performed easily by going to File > Print and selecting the printer you are using once the design is ready to print. However, the colors you see on the computer screen may not be the actual results that print out from your printer.
Affiliate links may be present in the following blog post and as an Amazon Associate, I earn from qualifying purchases.
Factors That Can Affect Printed Colors
A computer monitor is not calibrated to print colors. Each brand of computer monitor can vary in the visual representative that you see. If you were sitting next to someone else using the exact same Silhouette Studio software version, your colors may not appear the same on screen as that person next to you simply because you are using different computers.
Computer monitors display in RGB (Red Green Blue) versus printers that are CYMK (Cyan, Yellow, Magenta, black) – this can affect the actual printed results versus what is seen on the screen.
There are many different brands and models of printers out there on the market being used worldwide. Different brands and models of printers can yield different results.
Printer ink can vary by brand and yield different results.
The material being printed on can affect the colors. Different materials absorb the ink and the final color you see can vary depending on the material. For instance, plain cardstock will absorb more ink into the paper versus a glossy photo paper. This can make the color appear muted on the cardstock versus a more vibrant print on a shiny gloss of photo paper.
The printer settings selected when printing can affect color outcome. Each printer model has different settings it can print at and what you select for the print job sent can affect the final outcome of colors. For example, draft settings versus normal versus photo quality.
Printer drivers can affect the outcome of colors and other options available, such as print page size, etc. For best results, install the full printer drivers direct from the printer manufacturer’s website for your specific printer model. Simply plugging in a printer or connecting it to your computer does not usually install the full printer drivers. While it may print, it may not have all the options of the full print driver as it’s using a default driver that’s in the computer operating system to perform basic print functions.
Computer operating systems (OS) and updates. Print quality can vary by Windows versus MAC and also by the OS updates on those computer systems. We have seen print color output change overnight with a computer OS update.
Different software programs can have different print color results.
Now that we’ve covered a few things that can make the difference, how can you test what colors you see versus what colors you get when printing?
Silhouette Studio: Color Test Print
Draw out 1-inch squares (or larger if needed) and replicate to fill the page
Open the Fill Color Panel and fill each square with a color that you want to test print.
The full Fill Color Panel on the right side of the Silhouette software has several options for adding colors. Use the preset colors, add your own custom color, or add in colors by HEX, HSL, or RGB codes. Create your own custom color palettes too for easy access on future projects.
I used the Color Cubes by Sarah Renae Clark to fill in a page of color combinations that I want to test print. The color cards give 5 colors with the HEX code for each color and also have shades of that color shown on the card.
In the Silhouette Studio software, at the bottom of the Fill Color Panel, you can adjust the color to another shade easily by moving the custom color dot around on the color palette.
Once page is filled as desired, then select File > Print in top left corner.
Verify on the Print Preview that everything will be printed as desired. The print preview is where you can catch errors before you waste ink printing. For instance, if the design is not showing completely and is cut off, that can indicate the wrong printer is selected or the page size is incorrect. There is still time to make changes before you commit to printing and using ink. If you are doing a print and cut project, verify that all 3 registration marks show as printing completely on the page before you click print.
When ready, click Print. The printer menu will pop up and you can select what options you would like to print at and where to print from. I use the rear tray on my printer when printing any specialty materials or cardstock.
If you make any changes such as the actual printer being used or the page size, you will need to apply those changes and then cancel out to the main design screen to reset those settings completely.
Once printed, you can see how the colors will print on that particular material. It’s always best to test on the actual material you will be using to know for sure.
I printed this on higher quality copy paper using the regular print settings from my printer. I was also notified that one ink cartridge was low on ink, so I know that will affect the colors that are printed as well.
Additional Tips for Printing:
Objects or designs need to be filled with color to print.
Silhouette Studio is designed as a cutting software. That means the red lines you see on the design mat are cut lines for a Silhouette machine to follow. When a shape is drawn or text typed out, it is generally not filled with any color and the software sees it as empty. Which is exactly how it will print to a printer if sent. This is one great thing about utilizing print preview, you can catch issues before you’ve actually tried to print the project.
Cut lines do not print unless told to do so.
There are 2 options if you want the line of an object to print.
1 – Increase line thickness above 0. Any line thickness above 0 will print on the material.
Here is what the text above will show on the Print Preview when the top text line is set to 0 line width and the bottom is set to 1.75.
2 – Select the objects you want the lines to print on and check the Print Lines of Selected Shapes box on the bottom of the Line Style Panel.
Here is what the text above will show on the Print Preview when the top text has the print lines of selected shapes chosen.
There is also an italic note stating: This will display your 0 pt cut lines as 0.1 pt lines in prints and in SVG and PDF exports.
Sublimation prints need to be pressed to show true color.
If you are printing using sublimation inks, the true colors will not show until the design has been pressed. A sublimation print will always look dull or muted prior to pressing. For best results and the most accurate colors, press onto 100% polyester. This will show the final colors
New equipment may not function the same as old equipment.
Getting a new, updated printer model can be a great thing! However, users can be quickly frustrated when things do not work the same or the new printer doesn’t print the same colors the same as the old one did. It can take some getting used to for all new equipment.
Low ink of any cartridge or tank can affect the color outcome.
Most home printers have a set of color cartridges or tanks, for instance, my Canon TS9521C has 3 colors and 2 black cartridges. To make up the colors you are asking it to print, the printer combines those inks in order to make the color output. If a color cartridge or tank is low on ink, it may not yield the desired results.
The results that each user sees and has when printed can vary simply because we all have different equipment we are using.
Save this for future reference by pinning the image below.
Enjoy !
THANK YOU for your support! How can you help? Click HERE & buy a coffee. Every little bit helps with the cost of running the site.
Silhouette Classes
Never stop learning! Let me help you take the anxiety out of learning with Silhouette and get to creating faster! My Silhouette classes are heavily focused on software, so you can take the skills & techniques taught and apply them to many future projects!
**This post may contain affiliate links. What that means is that I may receive compensation if you purchase through the links I have provided. The price you pay for the product or service is not higher but I may get compensated for sharing.
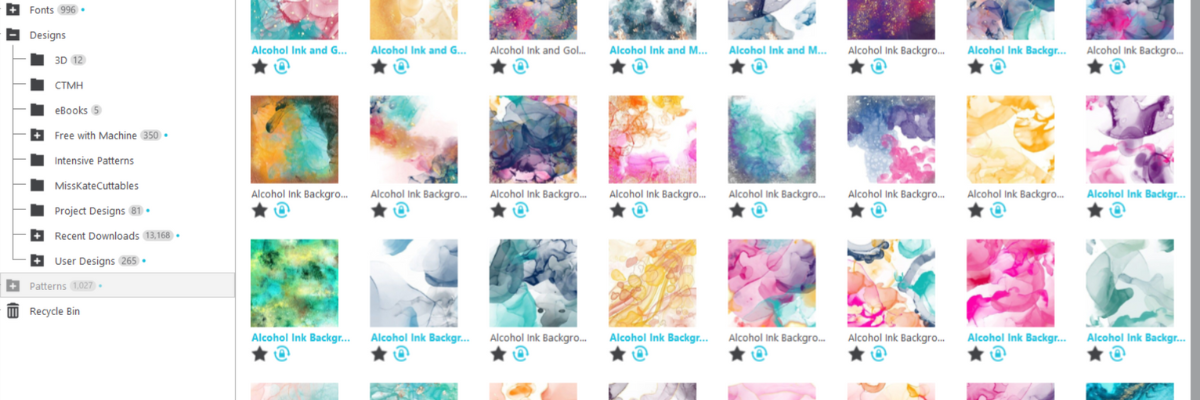
Using patterns in the Silhouette Studio software can give your projects a unique look. Whether you are doing a print and cut project or creating a digital graphic image. Digital patterns can be a great asset to your toolbox. As with many tools in the Silhouette Studio software, there can be multiple ways to do it. I’m sharing 4 ways that patterns can be opened in Silhouette Studio below, but first what is a pattern?
A digital pattern is a photo file. It is typically a JPEG, PNG, or TIFF file format. Before we get too far into it, one thing to note about digital patterns is that they can be quite large. A digital pattern, when designed properly should be 300 dpi for print quality. That means the file size is much greater than your average SVG file. Since every user has a different computer with different specifications, that also means that each user’s computer may handle data differently. When working with heavy data files, close any programs that are not necessary and any tabs within Silhouette that are not needed. I’d also recommend clearing out any Recovered Documents and keep that cleared out as well. This will help your computer and software run as smooth as it can.
4 Ways to Open Patterns in Silhouette Studio
1 – Open the pattern from the Silhouette Library Patterns Folder. If you want to open the full pattern on the design mat, double click on the pattern in the Silhouette Library Patterns folder. If you want to fill a particular shape, click on the shape to select it on the design mat. Then click on the Library Tab, Patterns folder and single click on the pattern. Click back on the Design tab and the shape will be filled with the pattern selected. If you double click with a shape selected, it will fill the shape and then also open the full pattern on top of that too.
2 – Select a pattern from the Fill Color Panel – Tab 3.
3 – Click on the Show/Hide Library icon in the bottom left corner of the design tab. This will open a split screen showing the library and the design tab. This can be much easier to see larger images of thumbnails and design with instead of having to swap back and forth between the Design and Library tabs. Select a pattern the same way as in #1.
4 – Drag and drop a pattern from a folder saved on your computer or storage device. When dragging and dropping, drag the pattern to the shape you want to fill and hold it until the pattern has filled the shape. If you move too fast and release the mouse button too quick a little white rectangle will appear and not go away. The only way to get it to disappear is to close and reopen the software.
I hope these tips have helped give you some ideas on how to work with patterns and create unique projects in Silhouette Studio. Check out the additional resources below to learn even more!
Save this for future reference by pinning the image below.
Enjoy !
THANK YOU for your support! How can you help? Click HERE & buy a coffee. Every little bit helps with the cost of running the site.
Silhouette Classes
Never stop learning! Let me help you take the anxiety out of learning with Silhouette and get to creating faster! My Silhouette classes are heavily focused on software, so you can take the skills & techniques taught and apply them to many future projects!
**This post may contain affiliate links. What that means is that I may receive compensation if you purchase through the links I have provided. The price you pay for the product or service is not higher but I may get compensated for sharing.
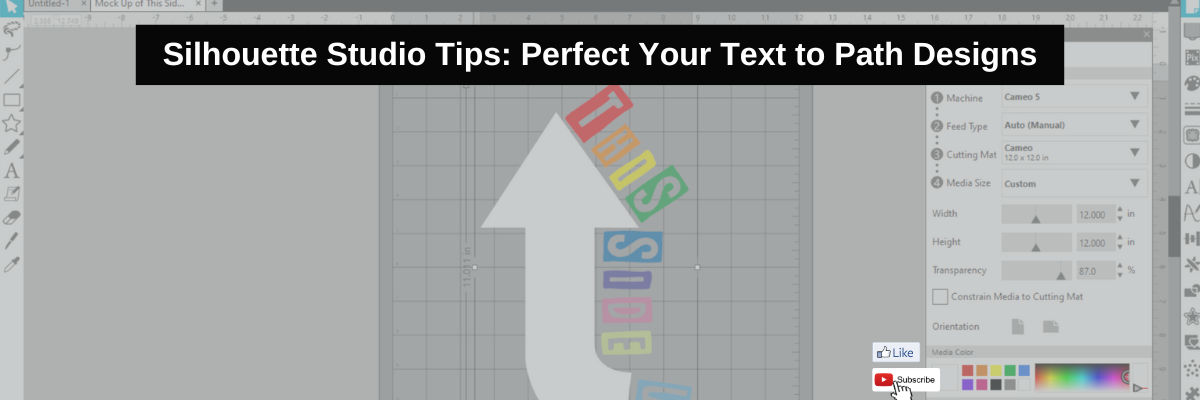
Have you ever wanted to add text along a shape? A circle? Or even just along a wavy line? The Silhouette Studio software has just the tool and it is available for everyone! It’s called Text to Path and I have a new video tutorial out showing how I used this to create a fun t-shirt.
Affiliate links may be present in the following blog post and as an Amazon Associate, I earn from qualifying purchases.
This design was created in Silhouette Studio and I have a few tricks to show you. I used 1 arrow elements from a stencil/background design by Sarah Hurley and used it as my base to build on.
A few more tips came to mind after the video was recorded that can help you with Text to Path in Silhouette Studio for your future projects.
What is a Path?
A path is any line in Silhouette Studio. This can be a single line, a closed shape, a design. The red “cut” lines you see in the Silhouette software around a design are “paths”.
If 2 or more “paths” are close together, it can get take some work to get the text to snap to the shape you want. The text may jump back and forth to the path you don’t want it on.
Sometimes it can be easier to work with individual shapes and then put the design together after the text to path has been added.
Text Styles for Text to Path
There are millions of different font styles out there and each one can act a bit differently when added to a path. Every font style is unique and that means it can have different spacing, characters, glyphs, etc. However, it’s not just the font style, but can be the font style in combination with the shape/path that it’s added to.
In the photo above are 3 examples of different font styles and how they can vary when added to a path. Probably the most difficult font styles to add and adjust so they look pleasing are scripty fonts. Since text has to be in editable mode, you cannot weld the font together prior to adding it to a path. Once it’s added to a path, the spacing may not look right for the script to connect.
Not all font styles will look good when added to a shape or path or they may need some additional manual manipulation to adjust.
Editable Text Mode – #1 Tip for Text to Path
The biggest factor for adding text to a path is that the text HAS to be in editable text mode. This means that you type the text out and immediately add it to path. It cannot be changed in any way such as welding, ungrouping, release compound path, etc. When text is modified in any of those manners, it is no longer editable text and you will not get the Text to Path Control point on the bottom left of the text box.
In the same manner, text designs cannot be added to a path since they are not editable text, but are vector designs.
Text to Path Video Tutorial T-shirt Design Creation
Please let me know if you have any questions in the comments below.
Save this for future reference by pinning the image below.
Enjoy !
THANK YOU for your support! How can you help? Click HERE & buy a coffee. Every little bit helps with the cost of running the site.
Silhouette Classes
Never stop learning! Let me help you take the anxiety out of learning with Silhouette and get to creating faster! My Silhouette classes are heavily focused on software, so you can take the skills & techniques taught and apply them to many future projects!
**This post may contain affiliate links. What that means is that I may receive compensation if you purchase through the links I have provided. The price you pay for the product or service is not higher but I may get compensated for sharing.
Sharing a bit of information today on how to install fonts for use in the Silhouette Studio software. Well, any program really. Fonts are installed directly on the computer and then software programs pull from the Fonts folder on the computer hard drive to access.
Affiliate links may be present in the following blog post and as an Amazon Associate, I earn from qualifying purchases.
Font files are typically OTF or TTF font files. OTF stands for Open Type Font and if you have the option to install this, that is the one you should install. The OTF file is the newer font format and is the one that has all the special characters, also called glyphs, that we have seen evolve over time. Over time we have seen a shift in font development and are now seeing hundreds of characters in one font file versus the original 26 characters of the alphabet + numbers.
TTF stands for True Type Font and these are the older style font files that do not have as many special characters. If TTF is the only option you have to install for a font, that will work just fine. All it means is that the font file does not contain as many special characters.
How to Install Fonts for Silhouette
Check out the new video tutorial on the Silhouette Secrets+ YouTube channel as I’m sharing step-by-step how to install fonts for use in Silhouette.
As a Silhouette user we’ve been kind of spoiled in seeing font file thumbnails show up in the Fonts folder of the Silhouette library and with most of your basic fonts, the font will install on the computer when the font thumbnail syncs to the library. However, with the Silhouette website migration issues that started on 5/22/24, we have seen fluctuation in files actually syncing properly to the Silhouette library.
The fonts from the Silhouette Design Store, do NOT have to sync to the library for use. It’s just kind of a perk that we have gotten used to. Once things are back to working like they should with the Silhouette websites someday, we may see things return to normal.
The Silhouette Fonts folder only contains thumbnails for fonts that are purchased and synced to the library directly from the Silhouette library. Font files can be found in many online sites. Check out the Recommended Design & Retailers for the group for more options HERE.
The same steps apply for all fonts to be installed no matter what site you obtain them from.
I also have a written tutorial that I published a few year back called Let’s Explore v4 – Installing Fonts. In this tutorial I have provided additional details on things you might encounter such as extracting downloaded files and installation steps for a MAC.
As technology changes and we see updates from both Microsoft and Apple in the computer operating systems, there can be new ways they “hide” things or change things that users have to figure out. For instance, with the release of Windows 11, Microsoft hid the “Install for all users”. It is an important step in the process or the font file might not show up in all programs. That is also another change by Microsoft that occurred with Windows 10 release. If you encounter any issues with installing fonts or see something different than my video tutorial shows, please check out the written tutorial HERE for more details.
If you have any questions, please let me know in the comments below.
Save this for future reference by pinning the image below.
Enjoy !
THANK YOU for your support! How can you help? Click HERE & buy a coffee. Every little bit helps with the cost of running the site.
Silhouette Classes
Never stop learning! Let me help you take the anxiety out of learning with Silhouette and get to creating faster! My Silhouette classes are heavily focused on software, so you can take the skills & techniques taught and apply them to many future projects!
**This post may contain affiliate links. What that means is that I may receive compensation if you purchase through the links I have provided. The price you pay for the product or service is not higher but I may get compensated for sharing.
Compound paths are one of the things in Silhouette Studio that can take the longest to grasp. We see compound paths every day but are not always really “seeing” them. Most often the initial experience with compound paths leaves you saying, “What the heck?” or something along those lines. Or “Why did it do that?
Affiliate links may be present in the following blog post and as an Amazon Associate, I earn from qualifying purchases.
Compound Paths in Silhouette Studio
In this month’s LIVE YouTube tutorial we covered compound paths and I walked through several different demonstrations starting with simple compound paths and working our way up to a little more complex designs with compound paths.
Those who attended live were able to ask questions and I answered those on the spot and showed additional demonstrations.
Make sure to check out the Events Tab HERE for upcoming LIVE tutorials and more events too!
Save this for future reference by pinning the image below.
Enjoy !
THANK YOU for your support! How can you help? Click HERE & buy a coffee. Every little bit helps with the cost of running the site.
Silhouette Classes
Never stop learning! Let me help you take the anxiety out of learning with Silhouette and get to creating faster! My Silhouette classes are heavily focused on software, so you can take the skills & techniques taught and apply them to many future projects!
**This post may contain affiliate links. What that means is that I may receive compensation if you purchase through the links I have provided. The price you pay for the product or service is not higher but I may get compensated for sharing.
THANK YOU for your support! How can you help? Click the link to buy a coffee. Every little bit helps in the cost of running the site.