Compound paths are one of the things in Silhouette Studio that can take the longest to grasp. We see compound paths every day but are not always really “seeing” them. Most often the initial experience with compound paths leaves you saying, “What the heck?” or something along those lines. Or “Why did it do that?
Affiliate links may be present in the following blog post and as an Amazon Associate, I earn from qualifying purchases.
Compound Paths in Silhouette Studio
In this month’s LIVE YouTube tutorial we covered compound paths and I walked through several different demonstrations starting with simple compound paths and working our way up to a little more complex designs with compound paths.
Those who attended live were able to ask questions and I answered those on the spot and showed additional demonstrations.
Make sure to check out the Events Tab HERE for upcoming LIVE tutorials and more events too!
Save this for future reference by pinning the image below.
Enjoy !
THANK YOU for your support! How can you help? Click HERE & buy a coffee. Every little bit helps with the cost of running the site.
Silhouette Classes
Never stop learning! Let me help you take the anxiety out of learning with Silhouette and get to creating faster! My Silhouette classes are heavily focused on software, so you can take the skills & techniques taught and apply them to many future projects!
**This post may contain affiliate links. What that means is that I may receive compensation if you purchase through the links I have provided. The price you pay for the product or service is not higher but I may get compensated for sharing.
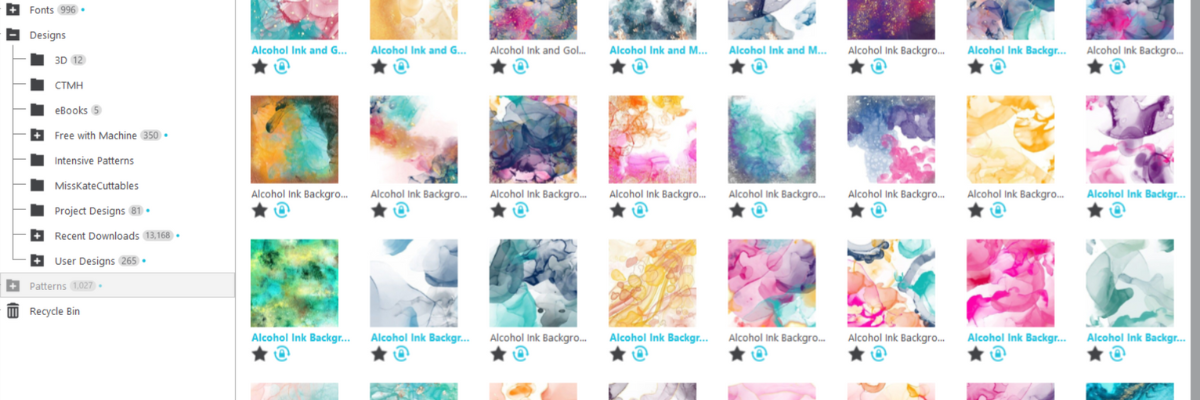
Have you ever wanted to have distressed background or edges on a pattern or photo? While Silhouette Studio does not have the same tools as a graphics program like Photoshop does, there are still ways you can get distressed or grunge edges in the Silhouette Studio software.
Affiliate links may be present in the following blog post and as an Amazon Associate, I earn from qualifying purchases.
Recently I was creating a bundle of 20 cards for a card swap that I signed up for through Erin Reed Makes and saw an idea to create 6 card backgrounds from 1 sheet of 12″ x 12″ paper on Pinterest. It was a distressed background with white space left for additional elements to be added to the card front.
Now, these distressed designs are not ideal for cutting as they are quite detailed, but they are awesome for print projects, like creating card backgrounds, sublimation, or other printed projects.
I grabbed some clipping mask png files from ClikChic Designs on Etsy and created exactly what I wanted. But, I knew it could be easier or more available to Silhouette users, so I reached out to ClikChic Designs and we started working together testing some designs and I’m excited to say there are a few in the Silhouette Design Store! If this is a popular idea, you may see more too – so make sure to leave a comment below so we know if you like this style of designs.
Let’s take a look at how I created this distressed background pattern in Silhouette Studio.
Distressed Background Designs in Silhouette
Open Silhouette Studio and set up the page size for your printer.
If you don’t have the capability to print a 12″ x 12″ sheet of paper, don’t let that stop you. This could be done with whatever size you can print on to create projects with.
Open the distressed design and scale it to the size you want to fill as much of the page as you want.
A .studio file, which is what is in the Silhouette Design Store or a .svg file is a cut file. This means that you can add patterns to the design. If you open another file type such as a .png or .jpeg, you would need to do additional steps to work with that file. (See below for additional information)
**Currently as I type this, you will need to download these files direct to your computer to use as the library syncing is broken – click HERE for how to do that.
If the pattern is outside Silhouette, drag it from the My Computer folder location and hold it over top of the design. The design will fill with that pattern.
If you move too fast doing this step, it may not work or you may end up with a small square that won’t disappear without closing the software to reset it. Go slow and hold that pattern on top of the design in Silhouette Studio until it fills the shape.
Patterns from the Silhouette Library could also be used as well. For more on Patterns in Silhouette, check out these tutorials HERE.
Next, change the Line Color to Transparent to see how the pattern will look. This step also ensures that the red cut border will not print.
The next steps would depend on what project you are working on. I printed the design on a 12″ x 12″ sheet of Recollections cardstock.
Then I used my paper trimmer, cut the 12″ sheet at 6″ in the middle of the pattern and then again cut those sections down to 4″ widths. Once I had each section I could trim it down further to 4″ x 5.25″ for my card backgrounds.
I added a stamped sentiment to the front and added some rhinestone gems to each card.
There are so many options! 6 card backgrounds from 1 sheet of 12″ x 12″ cardstock
A great big thank you to ClikChic Designs for working with me and the idea to make this style of designs easily available to Silhouette users. Check out their blog post for additional ideas on this technique HERE.
I have collected designs by ClikChic for awhile. And then I saw on their Instagram channel where they showed how they create their designs by hand painting them and then digitizing them. I was mesmerized. So make sure to check out their Instagram too!
Save this for future reference by pinning the image below.
Enjoy !
THANK YOU for your support! How can you help? Click HERE & buy a coffee. Every little bit helps with the cost of running the site.
Silhouette Classes
Never stop learning! Let me help you take the anxiety out of learning with Silhouette and get to creating faster! My Silhouette classes are heavily focused on software, so you can take the skills & techniques taught and apply them to many future projects!
**This post may contain affiliate links. What that means is that I may receive compensation if you purchase through the links I have provided. The price you pay for the product or service is not higher but I may get compensated for sharing.
Have you ever had this little bullseye pop up in Silhouette Studio? Has it ever annoyed you? The Center of Rotation is its official name, but many simply refer to it as a bullseye or target-shaped feature that appears on an object in Silhouette.
Affiliate links may be present in the following blog post and as an Amazon Associate, I earn from qualifying purchases.
What if I told you this Silhouette bullseye was a really useful tool when you get to creating your own designs?
And what if I told you that it is easy to turn on and off?
Silhouette Center of Rotation
In this quick video tutorial on the Silhouette Secrets+ YouTube channel, I demonstrate how to turn it on, turn it off, and utilize it. Or continue reading below for more details.
The Center of Rotation can be turned on for several reasons in Silhouette. Center of Rotation is available in the Designer Edition upgrade or higher. We see users ask about this a lot and it wasn’t until recently that we found out that it is not on the upgrade list, but it is in fact an upgrade feature. When a user upgrades to Designer Edition or higher, it can be turned on in the software by default.
The Center of Rotation might turn on for other reasons, such as if you open a file and the designer had previously activated it, or, most commonly, if the letter “O” on the keyboard has been pressed. The letter “O” is the keyboard shortcut for Center of Rotation.
To toggle the Center of Rotation on and off using the keyboard shortcut, you need to select the design.
Or you can find the Center of Rotation under the Preferences Panel, under the Defaults tab.
Preferences Panel
You can find the Preferences panel in several ways:
Click the gear icon in the bottom right corner
Click the Edit menu in the top left corner & Preferences is at the bottom of the menu
There are probably 2 things that are the most annoying about this little bullseye in Silhouette.
The first is merely the sight of it. If you do not know what it is, what it does, or how to turn it off, it can be distracting or just a visual eyesore.
The second is that when you are trying to move an object, the Center of Rotation wants to play. When you think you are grabbing the design to move it, the Center of Rotation moves and not the design.
But, once you know what it is and how to turn it off, you can easily make it disappear.
What purpose does the Center of Rotation serve?
It is exactly as the name says. It is the Center Point of Rotation, whether you are rotating a single object or you are replicating an object.
The default for the Center of Rotation is exactly in the center of an object. If you rotate the object as is, it is going to act as you would normally see with it turned off.
If you move the Center of Rotation away from the center point of the design and then rotate the object, it will rotate around wherever you placed the Center of Rotation bullseye.
Round and round she goes!
Now, what would you use this for?
The most common way I use it is for creating designs such as flowers or snowflakes. I am sure you can think of many other applications as well.
If I move the Center of Rotation to the bottom of the design as shown below.
I can then open the Replicate Panel and replicate the shape around the Center of Rotation.
And I have the beginnings of a snowflake design.
Or if I use a different shape, like an oval, then a beginning shape of a flower.
While it can be an annoying little thing that pops up, it is also a very useful tool too!
I hope you will take some time today and just play! See what you can create using basic shapes and the Center of Rotation. Keep in mind that designing is simply placing shapes together to make new shapes. Just like a beginners drawing book!
Save this for future reference by pinning the image below.
Enjoy !
THANK YOU for your support! How can you help? Click HERE & buy a coffee. Every little bit helps with the cost of running the site.
Silhouette Classes
Never stop learning! Let me help you take the anxiety out of learning with Silhouette and get to creating faster! My Silhouette classes are heavily focused on software, so you can take the skills & techniques taught and apply them to many future projects!
**This post may contain affiliate links. What that means is that I may receive compensation if you purchase through the links I have provided. The price you pay for the product or service is not higher, but I may get compensated for sharing.
Want to learn more in Silhouette Studio and start creating your own designs? I have 2 new classes on designing in the Silhouette Studio software available. on the Silhouette Secrets+ Teachable site.
Affiliate links may be present in the following blog post and as an Amazon Associate, I earn from qualifying purchases.
Easily Create a Custom Gift Tag & Keepsake Ornament in Silhouette Studio
This class uses basic tools in the Silhouette Studio software to design custom tags that could be used for a wide variety of projects. While I demonstrate on a 3″ acrylic circle, once you know the tools used and put them together, you can use it for so much more! Shirts, tote bags, ornaments, wood rounds, and more!
And included with the class is a printable guide for tips to cutting small fonts and designs!
Check out the full class description and supply list HERE.
Easily Create Custom Gift Tags & Keepsake Ornaments in Silhouette Studio
Designing in Silhouette Studio – Creating Keepsake Ornament Designs 2
In this next class, we take it a step farther and move beyond just the basics and get into a little more creative designing. We start off with some basic shapes to see how the tools work and then by the end you have drawn your own holly berry wreath design completely from scratch! Yes! YOU!
Once you have the design steps down, you can easily use the skills to create other designs as well. Everyone has the power inside them! We just need to unlock that and that starts with learning how things work in Silhouette Studio.
Check out the full class description and supply list HERE
Let me help you get started with Silhouette faster and learn more! Find all of the current Silhouette classes available on the Silhouette Secrets+ Teachable site HERE.
Save this for future reference by pinning the image below.
Enjoy !
THANK YOU for your support! How can you help? Click HERE & buy a coffee. Every little bit helps with the cost of running the site.
**This post may contain affiliate links. What that means is that I may receive compensation if you purchase through the links I have provided. The price you pay for the product or service is not higher but I may get compensated for sharing.
Designing in Silhouette Studio does not have to be difficult or complicated. With a few basic tools, you can create your own designs to use in projects.
Anyone can do this! Yes – that means you! Let me show you how!
This technique could be used for a variety of projects from adhesive vinyl, heat transfer vinyl, cardstock and more! It is how I created the Swift Creek Customs logo that my husband and I use for our shirts, social media logos, project creations, watermarks, and more!
What would you use it for? Let us know below.
————————–
Updates and News
As social media evolves and followers are seeing less and less of what they want, there are 2 additional ways you can follow along with Silhouette Secrets+ and get information direct to your inbox.
Blog Notifications
Subscribe to the blog below – this means you will get notified by email each time a new blog post is published on the Silhouette Secrets+ website.
Enter your email address to follow this blog and receive notifications of new posts by email.
Weekly Newsletter
– Subscribe to the weekly newsletter – New! Subscribe HERE Every Friday I will publish a newsletter that features tips, “secrets”, tutorials, and more. Sign up for the weekly newsletter and get information delivered straight to your inbox. No more relying on social media to show you information I share!
Enjoy !
THANK YOU for your support! How can you help? Click HERE & buy a coffee. Every little bit helps with the cost of running the site.
Silhouette Classes
Never stop learning! Let me help you take the anxiety out of learning with Silhouette and get to creating faster! My Silhouette classes are heavily focused on software, so you can take the skills & techniques taught and apply them to many future projects!
**This post may contain affiliate links. What that means is that I may receive compensation if you purchase through the links I have provided. The price you pay for the product or service is not higher but I may get compensated for sharing.
But, you can also find it under the Edit menu in the top left corner of the Silhouette Studio software too.
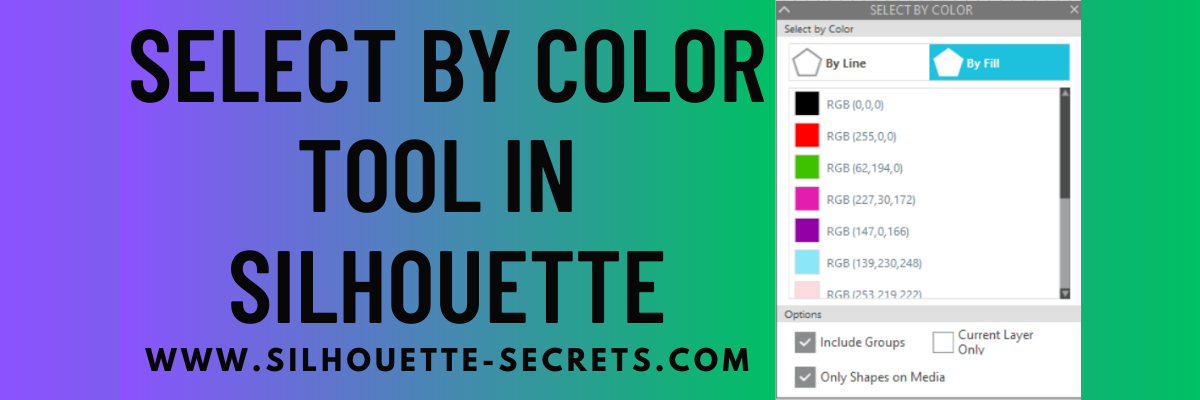
Once you have selected the tool, a panel will open on the right side and you have several options that you can use. Click on either the By Line or the By Fill option at the top and you will see a list of colors for the design on the screen show up.
Select a color of your choice and all of the pieces of that same color will be selected at once. This comes in handy when you have multiple pieces throughout a design and want to easily group them together quickly or select them all for any reason.
At the bottom of the Select By Color Panel, you have a few more options to further specialize the way the tool works.
The Select By Color tool worked awesome when creating this faux stained glass design with Oracal 8300 transparent vinyl and black Oracal 651.
Check out my recent blog post about Custom Color Palettes HERE and how they can help you in your project creation too! It came in real handy for the butterfly project as well!
So many tools in the Silhouette Studio software that can help you in your projects now and in the future!
Don’t miss out on any Silhouette tutorials, classes, or news! Sign up below to get email notifications every time I publish a new blog post. My goal is for 1 new post a week, unless there is exciting news to share in between. I know we are all busy and daily emails are not my thing.
Enter your email address to follow this blog and receive notifications of new posts by email.
Save this for future reference by pinning the image below.
Enjoy !
THANK YOU for your support! How can you help? Click HERE & buy a coffee. Every little bit helps with the cost of running the site.
Silhouette Classes
Never stop learning! Let me help you take the anxiety out of learning with Silhouette and get to creating faster! My Silhouette classes are heavily focused on software, so you can take the skills & techniques taught and apply them to many future projects!
**This post may contain affiliate links. What that means is that I may receive compensation if you purchase through the links I have provided. The price you pay for the product or service is not higher but I may get compensated for sharing.
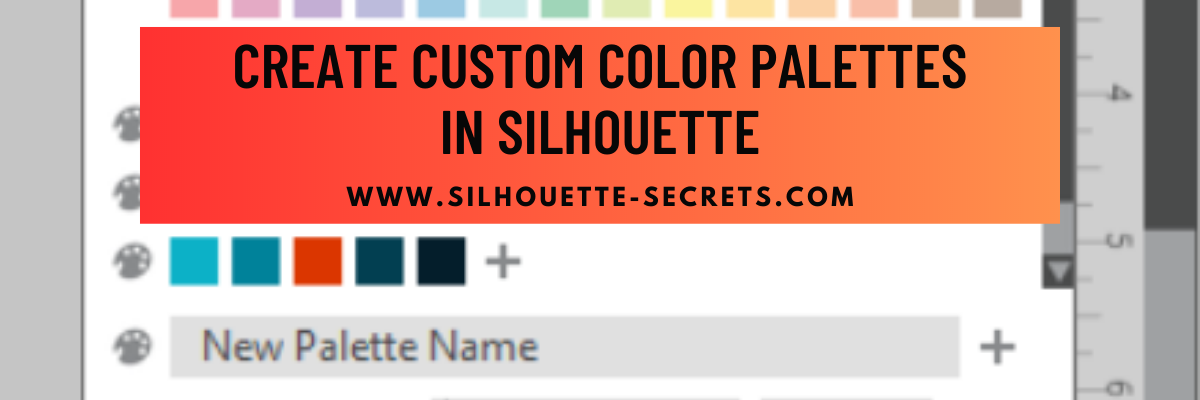
Did you know you can add your own custom color palette into the Silhouette Studio software?
This is a feature that was first introduced in version 4.3.263 in September 2019, but I don’t think a lot of users know about it still.
This tutorial is written in v4.5.196.
Today I wanted to share some examples of how you can use this in your projects.
There are a few limits to mention before we get started.
The first I want to mention is that custom color palette’s are computer specific. They are not saved with you “cloud” data, so will not show if you use the software on multiple computers. But, you could easily add them into another computer by saving the original file to your Silhouette library and open on the new computer. Then follow the same steps below to add that custom palette to the other computer.
As you can see in the photo above, the panel space is limited so you will only see a few custom palettes displayed if you create lots. This can also depend on your screen size. Smaller screens sizes can’t fit as many icons as a larger screen size could. You’ll also see this in the panels displayed along the right side and in the QAT at the top too. There is a scroll bar on the right side of the panel so you can scroll down and see more of the options you have created.
Also keep in mind that the colors that show on your computer screen may be different than what your printer actually prints. The only way to know what color will print is to test it.
And the media that you are printing on can make a difference in the final color outcome as well. Different brands of media, different types of paper, glossy, photo, matte, etc. can all vary in the final color outputs.
Enter your email address to follow this blog and receive notifications of new posts by email.
Affiliate links may be present in the following blog post and as an Amazon Associate I earn from qualifying purchases.
How to Create a Custom Color Palette
Let’s take a look at the basics to create a custom color palette. Here is a video from Silhouette America on how to create a custom palette
Now that we know how it works, let’s take a look at how we can use it in projects.
Now you may be the type of crafter who can pick and choose color combinations easily, but I need help. I found this really neat website called Paper Heart Design Co. and I reached out to the artist, Anne Stout, to ask if I could share in a tutorial.
Anne is a graphic designer and has these amazing color palette’s on her website that caught my eye one evening as I was scrolling through Pinterest and I fell in love. Not only does she provide a visual of the photo used for the colors, but she also provides the Hex code as well.
When you view the color palette’s on the Paper Heart Design Co. website, the HEX code is listed below the color palette.
This gives you a couple options for working in the Silhouette Studio software. We can use the eyedropper tool to grab the colors or at the bottom of the Fill Color Panel, you can enter the Hex code for each color.
I saved the specific color palette from Paper Heart Design Co. and then opened it into the Silhouette software. This will be the reference I use to create a custom color palette and change the colors in my design. By creating the custom color palette, I can come back and use that palette over and over again without the setup work.
The eyedropper can be found in the top of the Fill Color Panel, while the HEX code can be found at the bottom of the Fill Color Panel.
I created a Summer Color Palette and then used it to change the colors in my design.
I actually really like the navy color the original design had in it, so I worked with it as well, but you could also mix and match additional color palette to add more colors in.
Now, if I want to come back and use this same colors on a different design, it’s all in my Fill Color Panel and ready to go.
You could use this for so many things from printing on actual projects or creating mock-ups to see how a design or color combination can work together.
Here is another example of using a custom color palette on a more complex project. This was a class taught by my colleague Barbara Foster of Let’s Go Silhouetting at the All Things Silhouette Conference in 2022.
We created a custom color palette with the colors of Oracal 8300 we were using for the faux stained glass design and then it also helped to be able to Select by Color and group all the pieces of the design when we went to cut.
As I mentioned above, this tool can have many uses. Here are a few ideas: – Print and Cut projects: cards, home décor, scrapbook layouts – custom branding for theme projects – visual only on screen – creating mock ups – testing out material colors – selecting colors to cut easier on complex designs
Hopefully this information has sparked a creative thought process on how you might use this tool in your projects.
Save this for future reference by pinning the image below.
Enjoy !
THANK YOU for your support! How can you help? Click HERE & buy a coffee. Every little bit helps with the cost of running the site.
Silhouette Classes
Never stop learning! Let me help you take the anxiety out of learning with Silhouette and get to creating faster! My Silhouette classes are heavily focused on software, so you can take the skills & techniques taught and apply them to many future projects!
**This post may contain affiliate links. What that means is that I may receive compensation if you purchase through the links I have provided. The price you pay for the product or service is not higher but I may get compensated for sharing.
This week I released a new video tutorial on the Silhouette Secrets+ YouTube channel on how to create a shaped edge text card. This was inspired by my Silhouette Secrets+ with EllyMae group admin, Teresa. She is an amazing crafter and I love seeing all the projects she creates. Such an inspiration to myself and other group members!
Affiliate links may be present in the following blog post and as an Amazon Associate I earn from qualifying purchases.
As I started in the Silhouette software, the project took on a life of it’s own. Let’s take a look at each card I created and I’ll share how they are different. I am also sharing a supply list for this project below the project photos.
All of these cards are created at a 5″ x 7″ size. I used the Project Wizard in this tutorial for creating the card base quickly, however, you can create this in any size that suits your needs. Check out this tutorial – Create a Card Base with Silhouette
I created this card by filling in the text with color as I showed in the video tutorial. Then used print and cut with a sheet of 12″ x 12″ cardstock to print and cut the 5″ x 7″ card. So quick to do! And with print and cut, you don’t have the individual letters to glue down, but you definitely can cut from any colors of cardstock that you would like and piece it together too! So many options.
For more information on Print and Cut check out this section on the blog HERE.
For this card, I took a sheet of 8.5″ x 11″ dark purple cardstock and cut the base out. Then I cut light purple adhesive vinyl and added that to the front of the card. I also drew a rectangle that fit inside one side of the card base and then cut that from white and added that to the inside of the card for an area to write on.
In this card I used the same technique as the second card, I cut the card base from an 8.5″ x 11″ sheet of cardstock and then used a teal adhesive vinyl, but I used a stacked font called BFC Mean Ones Stacked Font to give it a little bit different look.
And I just noticed a weeding error on my part in the card. It happens to us all!
Now this one I think is my favorite!
I used print and cut again for this card and added a pattern fill called Tropical Beach Pattern to the entire card base. Then I picked up a blue color from the water in the pattern and made it a bit darker to add to the Happy text on the card.
Want to see more Shaped Edge Card ideas or paper craft ideas? Check out the Card section on the Silhouette Secrets website HERE.
Save this for future reference by pinning the image below.
Enjoy !
THANK YOU for your support! How can you help? Click HERE & buy a coffee. Every little bit helps with the cost of running the site.
Silhouette Classes
Never stop learning! Let me help you take the anxiety out of learning with Silhouette and get to creating faster! My Silhouette classes are heavily focused on software, so you can take the skills & techniques taught and apply them to many future projects!
**This post may contain affiliate links. What that means is that I may receive compensation if you purchase through the links I have provided. The price you pay for the product or service is not higher but I may get compensated for sharing.
In today’s video tutorial on the Silhouette Secrets+ YouTube channel, I am sharing how you can take a design and using some of the tools in Silhouette Studio, alter the design to fit your needs.
I love all the possibilities in the Silhouette Studio software!
Save this for future reference by pinning the image below.
Enjoy !
THANK YOU for your support! How can you help? Click HERE & buy a coffee. Every little bit helps with the cost of running the site.
Looking for more in-depth, step-by-step classes, check out all of my online Silhouette classes on my Teachable site HERE.
**This post may contain affiliate links. What that means is that I may receive compensation if you purchase through the links I have provided. The price you pay for the product or service is not higher but I may get compensated for sharing.
In this class we explore Text in Silhouette Studio including: – the Text Tool – Text Style Panel – How to get accurate text sizing – Resizing text – Font Families – Welding – Script Fonts – Offsetting text – Tracing text – Installing fonts – Glyphs
It cover all the aspects of text in Silhouette Studio that I see so many users ask about. Become a text expert with me and expand your skills!
And use coupon code TEXT2023 to save $5 off this class. Good through 3/31/23. There are now 2 purchase options. A 60-day access and a lifetime access. This is also NEW for 2023!
In this class you will learn how to create all of these designs in the photo above and you can choose what you want to create as a finished project. Choose to make one or choose them all!
In this step-by-step class, we put the Silhouette Studio tools to work for us! This class is designed for all levels of users to follow along and create. A few of the tools we will discuss and use are: drawing tools, compound paths, text, offset, knife, glyphs, text to path, and more!
This is a custom design created by YOU could be used for all kinds of projects from adhesive vinyl, HTV, Mint stamps, stencils, and more!
I share examples of different finished projects with the techniques used and include optional supplies for additional projects on the class supply list.
As a bonus, I have also included a demonstration of Citristrip etching on a powder coated tumbler using a design created as the stencil.
Check out the full class description and supply list HERE.
Silhouette “Secrets” – Because some things are just too good not to share! –
Text Tool, Fill Color Panel, Line Style Panel, Align Tools, Trace Panel, Drawing Tools, Replicate Panel, Offset Panel, Quick Access Toolbar (QAT), Edit Points
These are the Top 10 tools I think that Silhouette users can put to work for them right away. You probably use most of them without even thinking about them.
Make sure to Like and Subscribe if you want to be notified of future content released on YouTube!
Silhouette “Secret” #3
I have been writing Silhouette tutorials and teaching classes now for 6+ years. That’s a lot of information out there on the website to comb through. I compiled all of it into an A to Z Silhouette Resource section on the blog.
Click on the keyword and it will take you to more resources on each topic. Check it out HERE.
I hope this month’s “secrets” help you to be more successful with your Silhouette!
—–
I want to hear from you! If you have any classes, tutorials, or techniques you would love to learn, please let me know on this Google Form below.
I want to make sure I am putting out content that is relevant to my followers. Thank you for taking the time to provide your feedback!
Silhouette Secrets+ Sponsor
CrafterCuts, a Silhouette Authorized reseller is a sponsor for my Silhouette Secrets+ Teachable site.
And I have a coupon code to save 10% on your order Use code SECRETS at CrafterCuts Get free shipping with a $35 order I always recommend having extra blades and mats on hand for your projects this year! You will also find this information under the NEW “Sponsor” tab at the top of the Silhouette Secrets+ Teachable site HERE.
Don’t forget to check out all of the Recommended Retailers and Font sites on the blog HERE. Thank you for your support! Each time you use an affiliate link to make a purchase, it supports me and what I do. You do not pay any more for that product, but I may get credit for the referral.
I also have a “Buy Me a Coffee” option as well on Ko-Fi because I know not everyone buys new supplies each month, but many still asked for a way to support Silhouette Secrets+. Thank you all for your continued support of my small business!