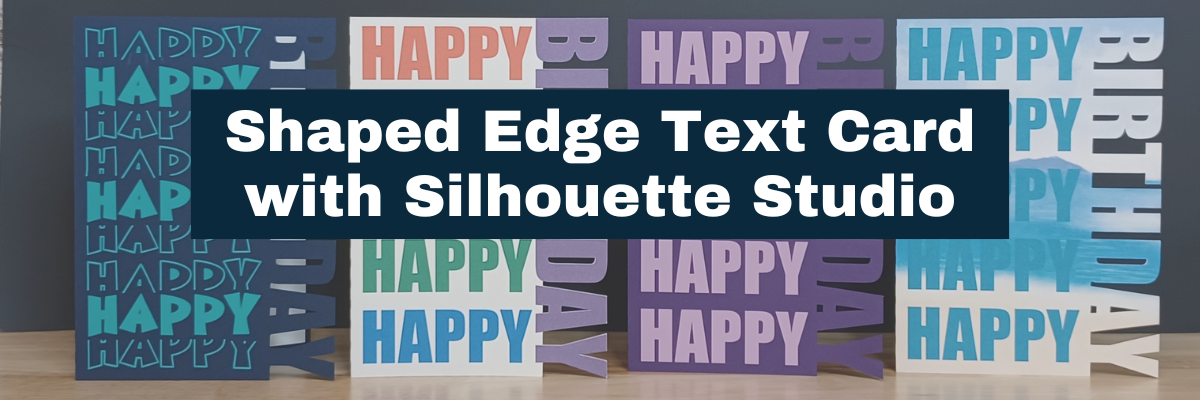
This week I released a new video tutorial on the Silhouette Secrets+ YouTube channel on how to create a shaped edge text card. This was inspired by my Silhouette Secrets+ with EllyMae group admin, Teresa. She is an amazing crafter and I love seeing all the projects she creates. Such an inspiration to myself and other group members!
Affiliate links may be present in the following blog post and as an Amazon Associate I earn from qualifying purchases.
As I started in the Silhouette software, the project took on a life of it’s own. Let’s take a look at each card I created and I’ll share how they are different. I am also sharing a supply list for this project below the project photos.
All of these cards are created at a 5″ x 7″ size. I used the Project Wizard in this tutorial for creating the card base quickly, however, you can create this in any size that suits your needs. Check out this tutorial – Create a Card Base with Silhouette
I created this card by filling in the text with color as I showed in the video tutorial. Then used print and cut with a sheet of 12″ x 12″ cardstock to print and cut the 5″ x 7″ card. So quick to do! And with print and cut, you don’t have the individual letters to glue down, but you definitely can cut from any colors of cardstock that you would like and piece it together too! So many options.
For more information on Print and Cut check out this section on the blog HERE.
For this card, I took a sheet of 8.5″ x 11″ dark purple cardstock and cut the base out. Then I cut light purple adhesive vinyl and added that to the front of the card. I also drew a rectangle that fit inside one side of the card base and then cut that from white and added that to the inside of the card for an area to write on.
In this card I used the same technique as the second card, I cut the card base from an 8.5″ x 11″ sheet of cardstock and then used a teal adhesive vinyl, but I used a stacked font called BFC Mean Ones Stacked Font to give it a little bit different look.
And I just noticed a weeding error on my part in the card. It happens to us all!
Now this one I think is my favorite!
I used print and cut again for this card and added a pattern fill called Tropical Beach Pattern to the entire card base. Then I picked up a blue color from the water in the pattern and made it a bit darker to add to the Happy text on the card.
Want to see more Shaped Edge Card ideas or paper craft ideas? Check out the Card section on the Silhouette Secrets website HERE.
Save this for future reference by pinning the image below.
Enjoy !
THANK YOU for your support! How can you help? Click HERE & buy a coffee. Every little bit helps with the cost of running the site.
Silhouette Classes
Never stop learning! Let me help you take the anxiety out of learning with Silhouette and get to creating faster! My Silhouette classes are heavily focused on software, so you can take the skills & techniques taught and apply them to many future projects!
**This post may contain affiliate links. What that means is that I may receive compensation if you purchase through the links I have provided. The price you pay for the product or service is not higher but I may get compensated for sharing.
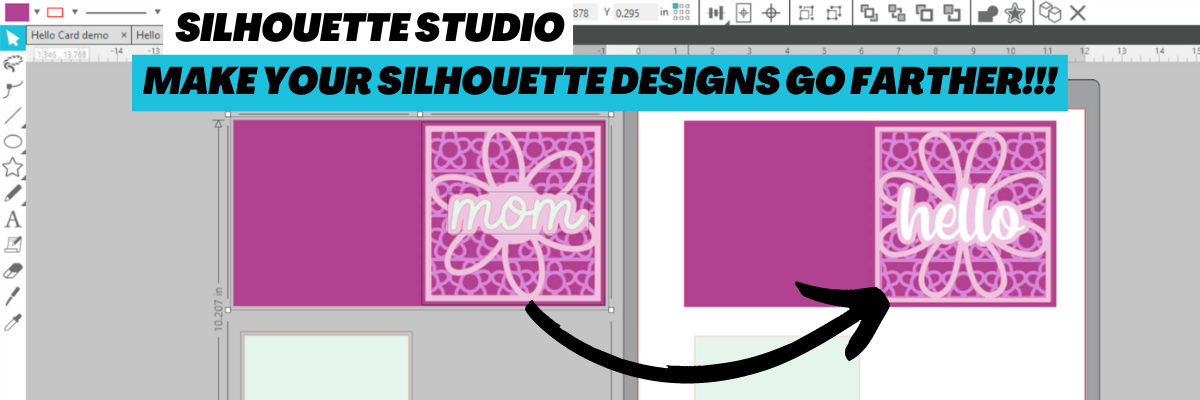
In today’s video tutorial on the Silhouette Secrets+ YouTube channel, I am sharing how you can take a design and using some of the tools in Silhouette Studio, alter the design to fit your needs.
I love all the possibilities in the Silhouette Studio software!
Save this for future reference by pinning the image below.
Enjoy !
THANK YOU for your support! How can you help? Click HERE & buy a coffee. Every little bit helps with the cost of running the site.
Looking for more in-depth, step-by-step classes, check out all of my online Silhouette classes on my Teachable site HERE.
**This post may contain affiliate links. What that means is that I may receive compensation if you purchase through the links I have provided. The price you pay for the product or service is not higher but I may get compensated for sharing.
In this class we explore Text in Silhouette Studio including: – the Text Tool – Text Style Panel – How to get accurate text sizing – Resizing text – Font Families – Welding – Script Fonts – Offsetting text – Tracing text – Installing fonts – Glyphs
It cover all the aspects of text in Silhouette Studio that I see so many users ask about. Become a text expert with me and expand your skills!
And use coupon code TEXT2023 to save $5 off this class. Good through 3/31/23. There are now 2 purchase options. A 60-day access and a lifetime access. This is also NEW for 2023!
In this class you will learn how to create all of these designs in the photo above and you can choose what you want to create as a finished project. Choose to make one or choose them all!
In this step-by-step class, we put the Silhouette Studio tools to work for us! This class is designed for all levels of users to follow along and create. A few of the tools we will discuss and use are: drawing tools, compound paths, text, offset, knife, glyphs, text to path, and more!
This is a custom design created by YOU could be used for all kinds of projects from adhesive vinyl, HTV, Mint stamps, stencils, and more!
I share examples of different finished projects with the techniques used and include optional supplies for additional projects on the class supply list.
As a bonus, I have also included a demonstration of Citristrip etching on a powder coated tumbler using a design created as the stencil.
Check out the full class description and supply list HERE.
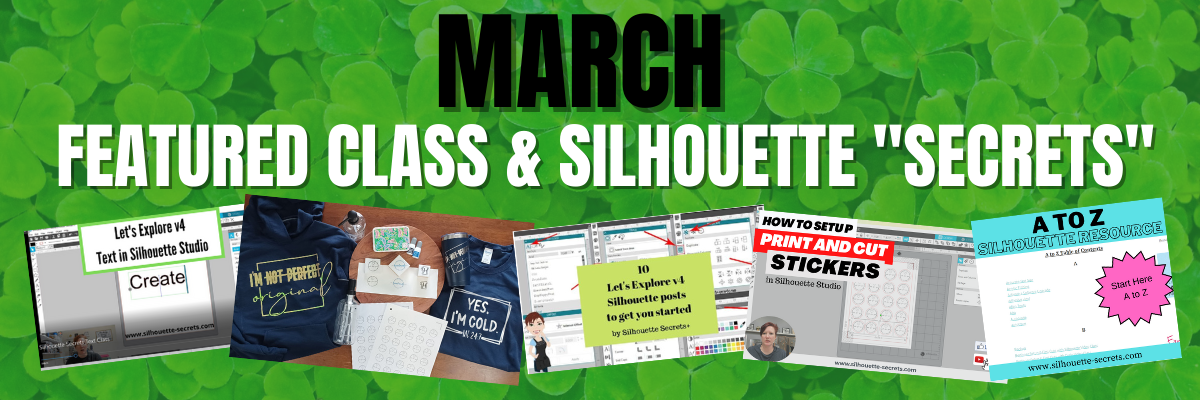
Silhouette “Secrets” – Because some things are just too good not to share! –
Text Tool, Fill Color Panel, Line Style Panel, Align Tools, Trace Panel, Drawing Tools, Replicate Panel, Offset Panel, Quick Access Toolbar (QAT), Edit Points
These are the Top 10 tools I think that Silhouette users can put to work for them right away. You probably use most of them without even thinking about them.
Make sure to Like and Subscribe if you want to be notified of future content released on YouTube!
Silhouette “Secret” #3
I have been writing Silhouette tutorials and teaching classes now for 6+ years. That’s a lot of information out there on the website to comb through. I compiled all of it into an A to Z Silhouette Resource section on the blog.
Click on the keyword and it will take you to more resources on each topic. Check it out HERE.
I hope this month’s “secrets” help you to be more successful with your Silhouette!
—–
I want to hear from you! If you have any classes, tutorials, or techniques you would love to learn, please let me know on this Google Form below.
I want to make sure I am putting out content that is relevant to my followers. Thank you for taking the time to provide your feedback!
Silhouette Secrets+ Sponsor
CrafterCuts, a Silhouette Authorized reseller is a sponsor for my Silhouette Secrets+ Teachable site.
And I have a coupon code to save 10% on your order Use code SECRETS at CrafterCuts Get free shipping with a $35 order I always recommend having extra blades and mats on hand for your projects this year! You will also find this information under the NEW “Sponsor” tab at the top of the Silhouette Secrets+ Teachable site HERE.
Don’t forget to check out all of the Recommended Retailers and Font sites on the blog HERE. Thank you for your support! Each time you use an affiliate link to make a purchase, it supports me and what I do. You do not pay any more for that product, but I may get credit for the referral.
I also have a “Buy Me a Coffee” option as well on Ko-Fi because I know not everyone buys new supplies each month, but many still asked for a way to support Silhouette Secrets+. Thank you all for your continued support of my small business!
Creating a Custom Knockout Design in Silhouette Studio
New Silhouette class available on my Teachable site HERE.
This class is one I created for the May 2022 All Things Silhouette Conference and it was a hit! The attendees took the class ideas and ran with it. I loved seeing all of their creations and it really inspired me to want to create even more.
I’ll be honest and typically after all the time that goes into the testing, recording, and editing to create a new class – I usually am “over” the class topic and it might be awhile for me to do it again. For instance, my Foil Quill didn’t get unpacked for a year after teaching at an ATS conference a few years back. But, this class has been different as I see all the creations coming in. I am sharing a few of those below the class information so make sure to keep scrolling below.
This is a step-by-step class that explores the complete process of creating your own unique design. We start with downloading an image, tracing, discuss compound paths, text, offset, and the modify-subtract tools. This class is jam-packed with information that will help you in many future projects!
I am including the list of supplies I used in the class below. Affiliate links may be present in the below and as an Amazon Associate I earn from qualifying purchases.What that means is that I may receive compensation if you purchase through the links I have provided. The price you pay for the product or service is not higher but I may get compensated for sharing.
I have also included a list of the class content in the description on Teachable. There is a lot of information packed into this class. The best part is once you are registered, you can watch at your convenience and as many times as needed to really soak in the information. Check out all the details HERE.
During the All Things Silhouette Conference attendees will post their completed project photos in our private Facebook group and WOW! I was blown away with their creations and the variety of different patterns, shapes, and text used in this class.
It truly shows that the techniques learned in the class can be used in many different ways for all users.
Custom Knockout Show & Tell
Here are a few that I received permission from the creators to share with you all.
There were so many fabulous creations! It is a good thing it was not a contest as I could not have picked just one!
When creating a class, I always have several demos that I’ve created in the testing and recording times of the course. Here are a few more I created using this same technique.
I do not necessarily like the feel of glitter HTV on a shirt that I wear, but I still love the look of glitter. This is Siser Glitter HTV applied to a piece of fabric and then I glued the fabric to the photo backing.
Here is the same design with a different pattern on a tote bag.
And once you start, sometimes it’s hard to stop, especially when you have a stash of patterned HTV.
And one more!
I have had this patterned HTV for several years and never found a design that I wanted to use it for. This pattern reminds me of a Lisa Franks design and it was perfect for this Inspire and Create design by Donna Downey – Design #32502.
And now after seeing all the creations from those who’ve already done the class, I have so many more ideas. I’ll have new shirts for the rest of the year!
And I would love to see what you create with it! I’d love to see what you are creating with your Silhouette software & machines! Feel free to post on my Facebook group at Silhouette Secrets with EllyMae.
Save this for future reference by pinning the image below.
Enjoy !
THANK YOU for your support! How can you help? Click HERE & buy a coffee. Every little bit helps with the cost of running the site.
Or if you are looking for more in-depth, step-by-step classes, check out all of my online Silhouette classes on my Teachable site HERE.
**This post may contain affiliate links. What that means is that I may receive compensation if you purchase through the links I have provided. The price you pay for the product or service is not higher but I may get compensated for sharing.
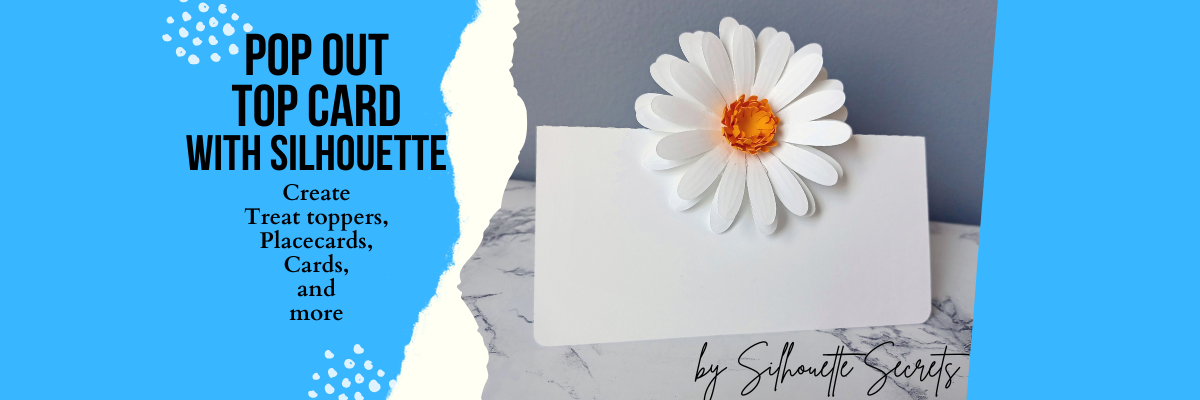
This pop out top place card technique could be used to create many different projects including a treat topper, a place card for an event, a card for a friend, and more!
Affiliate links may be present in the below and as an Amazon Associate I earn from qualifying purchases.
I used the daisy from the Envelope with 3D Daisy Flowers by Lucilla Paper – Design #350668 to create this pop out top place card example.
Here’s a fun twist on the Pop Out Top Place Card! For this project, I added an adorable Bunny Butt design to transform it into a cute treat topper! This is just one of the many ways you can customize the place card for different occasions and projects. The possibilities are endless! Whether you’re prepping for a party or just want to make something fun and unique, this bunny-inspired treat topper is sure to bring smiles.
What kind of project would you use the pop out top place card technique for?
Check out the video tutorial on the Silhouette Secrets+ YouTube channel HERE to see how this pop out top place card was created in the Silhouette Studio software.
Be sure to watch this video on Shaping a Paper Daisy Flower for creative tips to make your paper projects even more unique!
Save this for future reference by pinning the image below.
Find more tutorials in the A to Z to Silhouette on the website HERE.
Enjoy !
THANK YOU for your support! How can you help? Click HERE & buy a coffee. Every little bit helps with the cost of running the site.
Silhouette Classes
Never stop learning! Let me help you take the anxiety out of learning with Silhouette and get to creating faster! My Silhouette classes are heavily focused on software, so you can take the skills & techniques taught and apply them to many future projects!
**This post may contain affiliate links. What that means is that I may receive compensation if you purchase through the links I have provided. The price you pay for the product or service is not higher but I may get compensated for sharing.** The pop out top place card technique discussed here can be adapted based on project needs.
The Knife Tool in Silhouette Studio can be an awesome tool to add into created and editing designs.
One thing to keep in mind is that the Knife tool can be data heavy because you are asking the software to reorganize all the data of the file or the area that you are trying to “cut” through.
If you are not familiar with using the Knife Tool, I recommend reading through this tutorial explaining all of the features on the Knife Tool Let’s Explore v4 – Knife Tool post HERE
Depending on the project that you are working on you may want to increase the size of the Knife Line that is going to be cut. For instance, if you are cutting a “bridge” for a stencil, you could increase the Knife Line width in order to make it a little wider “bridge”.
I am going to use the stencil project as an example.
If I want to create a “bridge” on the R and the A in the word CREATE, I can use the Knife Tool to draw a line. By holding the Shift key down when using the Knife Tool, it draws a straight line. When increasing the Knife line thickness, make sure to uncheck the Auto Apply box. This will allow us to make changes to the Knife line before they actually “cut” through the design.
Let’s take a closer look at the size of the default Knife line.
The width of this line is really small. If we were to cut this line, it would just make a slice through the R and not create an actual “bridge” with any width to it.
With the Knife line selected, open the Line Style Panel on the right side.
Next to the Thickness in the Panel, increase pt size and you will see the Knife line grow in thickness.
Next, click Apply in the top Knife Toolbar.
It will now “cut” a thicker line where we have placed the Knife line.
Here is a comparison of the default knife size versus the thicker line we created.
On the left is the thicker knife line we just created and on the right is the default line.
Play with the pt thickness of the line. Each design or project may vary. Larger designs may need larger size “bridges” or cut lines.
Try different line thicknesses or even rotate the line in order to create different effects for your design.
Once you are done editing the text, make a copy of everything and pull it off to the side. It’s always a good idea to have an original. Then select the entire design and text, right click and choose Make Compound Path, then fill it with color. It will give you an idea of what the stencil will look like.
I challenge you to just open the software and just play! We would love to see what you are creating or learning with! Feel free post on the Silhouette Secrets+ Facebook Group.
Save this for future reference by pinning the image below.
Enjoy!
THANK YOU for your support! How can you help? Click HERE & buy a coffee. Every little bit helps with the cost of running the site.
Or if you are looking for more in-depth, step-by-step classes, check out all of my online Silhouette classes on my Teachable site HERE.
**This post may contain affiliate links. What that means is that I may receive compensation if you purchase through the links I have provided. The price you pay for the product or service is not higher but I may get compensated for sharing.
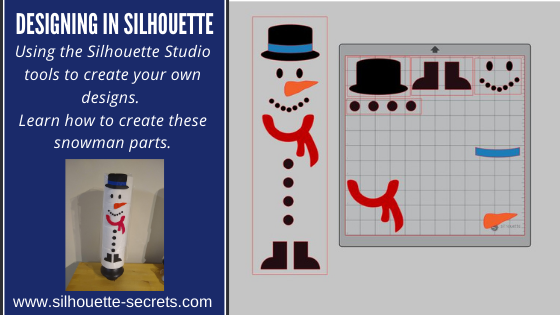
So you want to learn to design in the Silhouette software? I see user’s asking how to create their own designs in Silhouette often. And it can be done. The more familiar you can become with the tools in the software, the easier things will be for you to create designs. The more you do it the more you will start to use those tools without even knowing you are doing it! The absolute best thing you can do to learn the software is to dive in. Follow this step-by-step, even if you never make the finished physical project. You will have created the design yourself, used many tools in the Silhouette software, and learn new things as you do it.
Affiliate links may be present in the following blog post and as an Amazon Associate, I earn from qualifying purchases.
A group member had sent a message asking if I knew where to buy a file. I did not find the exact file, but I started looking at it and decided it was a great way to show how you can create your own designs. After all, if you think about it, designs are just shapes combined to make up an image. This little snowman are created from stacking toilet paper on a new toilet plunger. It has a cellophane gift bag that the adhesive vinyl is applied to and then it is slid down over top of the toilet paper rolls.
The first one I created, I wanted it to be all from creating the entire design in Silhouette.
First, measure the 4 rolls of TP or the blank that you are going to be applying it to. My TP rolls are 5″ x 17.25″ when stacked on top of each other. Using the Draw Rectangle tool & Scale tab, draw a rectangle 5″ x 17.25″ so you know what area you have to design within.
Next, let’s draw the boots. Using the drawing tools again, draw a rectangle. Then using the Flexishape tools, draw a half circle. Flexishapes are a Designer Plus or Business Edition upgrade feature. It is one reason I would highly recommend upgrading the software. Hold the Shift key down when you draw the flexishape and it will snap to 0 degrees. Align the half circle with the bottom of the rectangle using the Align tools. Select both shapes and make a copy. Move it off to the side, just in case it is needed later. Select both the original rectangle and the half circle. Right click and choose weld. Fill with color using the Fill color Panel.
Use the Replicate Mirrored tool to make a 2nd copy. Then use the Align tools to line the boots together at the bottom. Once aligned, right click and choose Group.
Now let’s draw the buttons. Choose the Draw Ellipse tool on the left side. Then hold the Shift key down to draw a perfect circle. Fill the circle with black using the Fill Color Panel or QAT (Quick Access Toolbar). Duplicate the circle 3 times up. Move the top circle up a bit. Select all 4 circles – choose Align Center. Then choose Vertical Spacing. Group together once Aligned.
Working up, the scarf is next. Under the Flexishapes, click on the draw arc tool. Then click in the middle of the rectangle and draw a line to the right a little ways. Move the mouse to the left and it will draw the arc. Adjust the middle arrows to make it thinner or wider.
Once done, right click and choose Convert to Path. Double click on the design to bring up edit points. Click on the corners of the arc and choose Make Curve in the Edit Points Panel.
Choose the Draw a Curved Shape tool. Then draw a “tail” for the scarf. Play around with it until you like it. When finished, select both the arc and the tail, right click and choose Weld.
Fill it with red color from the Fill Color Panel on the right side or in the QAT (Quick Access Toolbar).
Next, let’s draw the mouth. Using the Draw Ellipse tool on the left side, hold down the Shift key and draw a small circle. Fill the circle with black using the Fill Color Panel. Use the Replicate Panel to replicate the circle 5-6 times.
Arrange the circles in the shape of a smile by clicking on each and moving. Select all of mouth pieces. Use the Align tools to space them Horizontally from each other. Arrange how you like. Select all the mouth pieces, right click and choose group.
Now let’s draw the carrot nose shape. Click on the Flexishape lighting bolt. Draw a small shape. Then adjust using the red dots as desired. Right click on the shape and choose Convert to Path.
Then double click to bring up the Edit Points. Hold the Shift key down and drag to select across the entire design. This will select all of the edit points at once. Choose Make Curve.
Click on individual edit points to delete a few on the inside. Adjust the design as desired.
And now the eyes, choose the Draw Ellipse tool and draw a small oval. Fill it with black from the Fill Color Panel/QAT. Then duplicate and move to the right. Select both of the ovals, use the Align Middle tool and group them together.
The final piece to design is the hat. To do this we will use the Draw ellipse and rounded rectangle tool. Draw one oval for the bottom brim. Make a copy and move it above the first. Scale the 2nd oval down for the top of the hat by grabbing the corner bounding box and moving it in. Use the Align tools to center the ovals together. Then draw a rounded rectangle between the ovals. Use the Align tools to center the shapes together.
Make a copy and pull it off to the side. Select both ovals and the rounded rectangle, right click and choose Weld.
Make a copy of the welded design and pull it to the side. Then fill the original design with black using the Fill Color Panel.
Next, make a copy of the bottom oval on the hat shapes copy. Bring it over to the and place it were the brim meets the stack of the hat as shown.
Select the hat and the 2nd oval and use the Align tools to align the middle.
Next, with both objects still selected, open the Modify Panel and choose Crop.
Make a copy of the bottom oval again and drag it to the top of the cropped section. Use the Align tools to align the middle of the 2 shapes.
With both shapes selected, choose Subtract under the Modify Panel.
Fill the hat band with color and move it on top of the original hat. Use the Align tools to make sure it’s aligned middle.
Arrange the snowman pieces as desired to see how it will fit on your space.
Congratulations! You created your own design! Now, that may seem like a lot of steps or using a lot of tools, but like I said above, it is a design you have drawn yourself and the more you use the tools in the software, you will start to use them without even thinking about it. Hopefully you picked up on the fact that we continued to use the same basic tools over and over.
If you are cutting the finished design, arrange all the pieces to cut out of the different colors of vinyl.
Check out this video showing all of the steps to create the snowman as well.
If viewing by email, please click the photo to open up the YouTube video.
Supplies used: 4 rolls of TP per snowman New plunger – Target $4.99 Clear gift basket bag Adhesive Vinyl Silhouette Studio Software
The more you use the tools, the better you will get. And sometimes, I’ll be honest, the only way to know what is going to work for the design you are creating is to push the buttons and use the UNDO button.
Or use Ctrl+Z on PC or Command+Z on Mac for the keyboard shortcut
I would highly recommend getting into the software and just start creating!
Even if you do not cut the snowman, I would love to see the snowmen design that you make or any other design you have created using the tools in the software!
Feel free to post on my Facebook group at Silhouette Secrets with EllyMae. If you have questions feel free to post below or on the Facebook group too!
Save this for future reference by pinning the image below.
Enjoy!
**This post may contain affiliate links. What that means is that I may receive compensation if you purchase through the links I have provided. The price you pay for the product or service is not higher but I may get compensated for sharing.
It is so hard to just show one feature in a post. This post started out as a one to show you how to add patterns to your designs so that you can print unique creations and use digital papers. But, then it morphed.
Today we will talk about 3 features in the v4 software.
Adding patterns to your design to create unique projects
Print Bleed
Show/Hide Libary feature
What are patterns used for?
Patterns can add a unique element to your creations that you can print out.
Affiliate links may be present in the following blog post and as an Amazon Associate I earn from qualifying purchases.
Filling a design with a pattern can open a whole new world of possibilities. I have these card pieces on my design mat and I want to fill them with one of the new digital pattern that’s available at Sparkleberry Ink called Choose Happy Digital Pattern Collection. With everything going on right now, these patterns were released to bring out a little bright color and happiness. I saw them and knew I had to create something with them.
Select the objects you want to fill with the pattern and then in the Fill Color Panel – Patterns Tab (Tab 3), choose the Pattern you want to fill it with. And watch the magic happen.
I set up my page to do a Print and Cut and then printed a 12″ x 12″ page with my Canon TS9521C printer.
Adding patterns to the Silhouette library is a Designer Edition upgrade feature. Find out more about the Pattern Fill Panel HERE.
Print Bleed
Something that is new in the v4 software is a feature called Print Bleed. What this does is it will bleed the outside edge of your design color out away from the design. This helps when you are doing a print and cut to eliminate a white border that you may have around the design.
The Print bleed can be found in the v4.4 software on the Page Setup Panel – Registration Marks Panel.
Print Bleed in v4.4
In previous versions of v4, the Print Bleed is found on Tab 1 of the Page Setup Panel.
Once the Print Bleed option is checked, then you can adjust the distance you want the bleed to have from the design. However, something to note here is that the print bleed does not show up on the design screen and it applies to all objects on your screen.
As each design is different, it can also affect designs differently. For instance, a design that is made up of different parts that are all individual pieces and colors, it will bleed all of those colors of the individual pieces. Print bleed works well on a single object, a graphic file, or print and cut design.
This time when I added the pattern I used a different method though. On the Design tab in the bottom left corner, there is now a Show/Hide Library option.
Show/Hide Library on Design Tab
Click on this little folder and the Library will expand out from the left side, so you have a split screen and can see both designs in the library and on the design mat at the same time. Of course, your screen size will determine if this is a suitable feature for you to use or not.
Show Library Split Page Design Tab
Select the object on the screen and choose one of the patterns from the Patterns folder in the library and it will fill with that pattern. This will work for adding other designs to your current design mat in the software too. (Sometimes you may notice it will add an extra pattern piece, you can just delete what you don’t need.)
In the Advanced Options of the Fill Color Panel – Patterns tab (3rd tab), you will find options for panning the pattern, rotating it, or scaling it as well.
Sometimes I find it hard to see the little patterns that show up in the Patterns Tab on the Fill Color Panel. They are not well organized and the pattern photo is small, so using the Show Library split panel can be an option to make it easier to find a pattern you are looking for.
Cutting aftermath
Go big or go home, right? When I cut out papercraft projects that have several pieces to them, I tend to make extras. I can set these pieces aside to assemble at a later date or have extras on hand. In this case, I cut the pieces to make 6 each of 4 different pattern designs. So I have 24 cards that I can now send out to friends.
Card pieces
Once the file is set up in the Silhouette software is it just a matter of loading and unloading the cutting mat each time and I just started making piles for each set of cards.
Craftermath from cutting
A couple hours later and I had all the pieces to assemble these cards. About half way through I had the thought that I could hook up another machine and then cut from multiple machines at the same time to make it go faster. But, I was enjoying cutting with the Cameo 4 and didn’t go that route.
But it’s an option – check out how to use multiple Silhouette machines at the same time HERE.
24 finished cards
Now here is the really fun part!
Flip card video
I love being able to create custom designs with my Silhouette and make the cutting of all the pieces go so smooth. I embellished these cards with a few stamps from Close to My Heart and they are ready to send off.
What are you creating with your Silhouette today? I’d love to see it over on my Facebook group at Silhouette Secrets with EllyMae.
Save this for future reference by pinning the image below.
Enjoy!
**This post may contain affiliate links. What that means is that I may receive compensation if you purchase through the links I have provided. The price you pay for the product or service is not higher but I may get compensated for sharing.
Whether you are a beginner or experienced with the Silhouette software, there is always something new to learn in it. I don’t think any one person can remember every single thing this software is capable of. And speaking from my own personal experience, I think all users get in a routine of doing the same things with the same tools and sometimes we don’t even think of a “new” way to do things.
For example, using the Quick Access Toolbar (QAT) versus the panels on the right side.
I am more comfortable using the panels on the right because I like the expanded panel and am just not in the habit of using the quick icons at the top. But, I am getting better at it.
Going through this series, I have learned a lot of new features that I just didn’t use on a regular basis. This is a very powerful graphics program!
Now, if the software seems overwhelming, I would suggest grabbing this free PDF and downloading it to your computer. When you open it and click on the titles, it will take you to a corresponding blog post with more details on that feature.
Today let’s look at the top 10 posts from the “Let’s Explore v4” series that I think will help you learn the software and get you started or more comfortable with designing in the software.
Silhouette Secrets+ Top 10 Let’s Explore v4 Tools
1 – Text Tool & Text Style Panel
Text is one of the first things any user will work with in the Silhouette software. The Text Tools are found on the left side of the software and the Text Style Panel, which allows you to change the properties of the text is on the right side.
2 – Fill Color Panel
I use the fill color panel every single time I open the Silhouette software. Not only does it help you see the design better and give you an idea of how the finished project will look, but it can also make it easier to select the object if it is filled with color.
3 – Line Style Panel
This panel can be very helpful if you want to change the line color of the design so it doesn’t show as a red line or if you are printing a design. Cut lines do not have any weight to them, so if you want to print the lines you would either need to increase the line thickness or choose to “print lines of selected shapes”.
4 – Align Tools
This is another tool that I use every single time I open the software. I like to have my designs and text perfectly aligned and centered in my object. The Align tools are found under the Transform Panel on the right side.
5 – Trace Panel
The trace panel can come in handy for many projects from creating basic designs to print and cut projects with jpeg or png files.
6 – Drawing Tools
These tools can come in handy when you want to create something yourself add your own weeding lines around a design, draw a frame around the design, and many other things. The more comfortable that you get with the software, the more options you will find to create things in it.
7 – Replicate Panel
Want to create an exact copy of the design you just drew or make several copies with the click of 1 button? This can happen under the Replicate Panel.
8 – Offset Panel
Want to make that font a little thicker? The Offset Panel can help with that and so much more.
9 – QAT – Quick Access Tool bar
This is a fluid tool bar that will change depending on what you have selected on the design mat. You will notice that the icons will be the same as the panels on the right side.
With objects selected on the design screen these are the icons you might see in the QAT bar.
Look at all the information in the Quick Access Toolbar. All of this information can also be found on the right side in the Panels, but these are quick buttons to access it as well. There are multiple ways to do things in the software, no one way is right or wrong, but the best way is what works for you.
It is a fluid tool bar, which means that it changes depending on what is selected. If you have text selected on the design screen, then you will see text options in the tool bar.
10 – Edit Points
While this isn’t something that I would label as a beginner tool. I do think knowing what those gray dots are when they pop up is a relief. You don’t need to understand how to work with them right now, but understanding why they appear & how to make them disappear is something I believe is very helpful.
There are so many different tools in the Silhouette software. The best thing you can do is just get started. Play, play, play. Start with 1 project and get that down and then move on to new things.
Save this for future reference by pinning the image below.
Enjoy !
THANK YOU for your support! How can you help? Click HERE & buy a coffee.
Every little bit helps with the cost of running the site.
Silhouette Classes
Never stop learning! Let me help you take the anxiety out of learning with Silhouette and get to creating faster! My Silhouette classes are heavily focused on software, so you can take the skills & techniques taught and apply them to many future projects!
**This post may contain affiliate links. What that means is that I may receive compensation if you purchase through the links I have provided. The price you pay for the product or service is not higher but I may get compensated for sharing.
If you have downloaded a v4.3 software version or higher, then you may see a few changes that have been made to a couple screens. A few icons, a few new options, etc.
We discussed the new Page Setup Panel look in this post a few weeks back – Let’s Explore v4.3 – Page Setup Panel and today let’s look at another change.
While this is not a big, big change. You may notice in some tutorials that the when referencing the glyphs panel, the icon has changed. That’s it – just the icon.
The glyphs icon is the only thing that has changed in this panel at the moment. As we all know, changes happen. It’s better to know they are there than to be surprised someday in the future.
1 – Text Search bar – Just like on Tab 1, the name of the font that is selected will appear in this box or you can highlight it and type a name in the box and it will select that font.
2 – Glyphs – This area is where you will see the glyphs of the font that you are using show up.
Note: sometimes not all the glyphs will show up here and you will need to access those through Character Map (PC) or Fontbook (Mac).
It just depends on how the font was created.
3 – Recently Used Glyphs – This handy feature shows the ones you have recently accessed.
4 – Icon size – Those little icons can be hard to see. Change the size of how the Icons appear in the glyphs panel. And when you hover over a glyph it magnifies it as well.
How do you use glyphs?
There are 2 ways I use glyphs.
1 – Type out the word you are using. Highlight the letter you want to replace and then click on the glyph icon one time to replace that letter with the new glyph.
2 – Double click on the glyph icon and it will add it to the top left corner of the design mat as an individual “letter”. You can continue to click on the glyph icons to add more or just click off of it to keep the design as a separate text box.
I use this second way most often when I am using Dingbat fonts that are a bunch of designs all in one font file or if I want to add a swirl onto the end of a letter.
Glyphs can be so fun to play with and add a little extra creative flair to your designs. Each font file will vary in the glyphs it may have. Some have just a few and others have lots.
Keep in mind the larger the number of glyphs, the longer it will take to load that font in the text style panel. Be patient with your computer as it processes the data.
I’d love to see how you are using glyphs in your projects!
Feel free to post on my Facebook group at Silhouette Secrets with EllyMae.
To save this for later reference pin the image below to Pinterest
Enjoy!
**This post may contain affiliate links. What that means is that I may receive compensation if you purchase through the links I have provided. The price you pay for the product or service is not higher but I may get compensated for sharing.
THANK YOU for your support! How can you help? Click the link to buy a coffee. Every little bit helps in the cost of running the site.