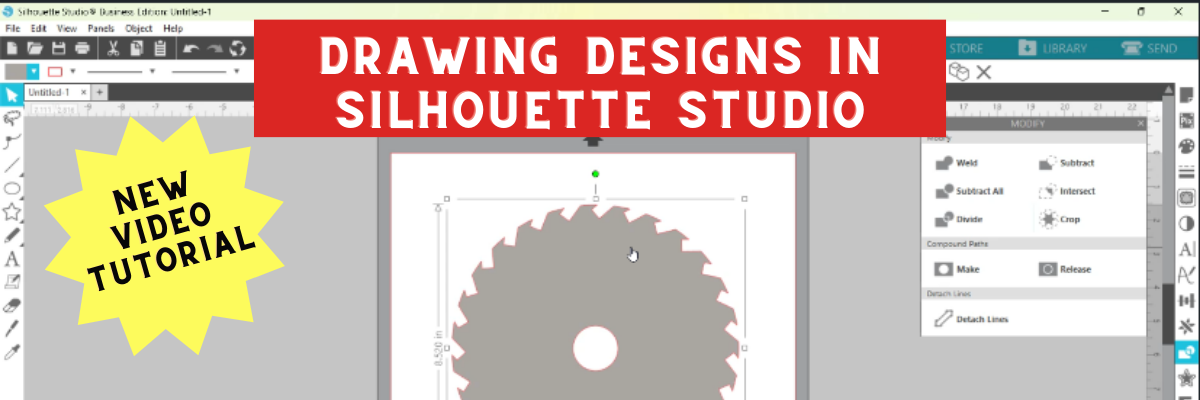
This past week there was a question on my Silhouette Secrets+ Facebook Group and I was working on my computer so did a quick video tutorial on how they could accomplish the design they wanted. Several asked if there was a way to save that video so I re-recorded it and put it up on the Silhouette Secrets+ YouTube Channel.
While the video shows how to create a saw blade because that was what the user was asking, the techniques could be used to create all kinds of designs from wreaths, frames, and so much more!
And check out the A to Z Silhouette Resource tab at the top of the website as well. You can search for any tool or keyword for Silhouette in alphabetical order.
If you are looking for step-by-step classes for Silhouette, check out all my Silhouette classes on Teachable HERE.
Save this for future reference by pinning the image below.
Enjoy !
THANK YOU for your support! How can you help? Click HERE & buy a coffee. Every little bit helps with the cost of running the site.
**This post may contain affiliate links. What that means is that I may receive compensation if you purchase through the links I have provided. The price you pay for the product or service is not higher but I may get compensated for sharing.
Whether you are a beginner or experienced with the Silhouette software, there is always something new to learn in it. I don’t think any one person can remember every single thing this software is capable of. And speaking from my own personal experience, I think all users get in a routine of doing the same things with the same tools and sometimes we don’t even think of a “new” way to do things.
For example, using the Quick Access Toolbar (QAT) versus the panels on the right side.
I am more comfortable using the panels on the right because I like the expanded panel and am just not in the habit of using the quick icons at the top. But, I am getting better at it.
Going through this series, I have learned a lot of new features that I just didn’t use on a regular basis. This is a very powerful graphics program!
Now, if the software seems overwhelming, I would suggest grabbing this free PDF and downloading it to your computer. When you open it and click on the titles, it will take you to a corresponding blog post with more details on that feature.
Today let’s look at the top 10 posts from the “Let’s Explore v4” series that I think will help you learn the software and get you started or more comfortable with designing in the software.
Silhouette Secrets+ Top 10 Let’s Explore v4 Tools
1 – Text Tool & Text Style Panel
Text is one of the first things any user will work with in the Silhouette software. The Text Tools are found on the left side of the software and the Text Style Panel, which allows you to change the properties of the text is on the right side.
2 – Fill Color Panel
I use the fill color panel every single time I open the Silhouette software. Not only does it help you see the design better and give you an idea of how the finished project will look, but it can also make it easier to select the object if it is filled with color.
3 – Line Style Panel
This panel can be very helpful if you want to change the line color of the design so it doesn’t show as a red line or if you are printing a design. Cut lines do not have any weight to them, so if you want to print the lines you would either need to increase the line thickness or choose to “print lines of selected shapes”.
4 – Align Tools
This is another tool that I use every single time I open the software. I like to have my designs and text perfectly aligned and centered in my object. The Align tools are found under the Transform Panel on the right side.
5 – Trace Panel
The trace panel can come in handy for many projects from creating basic designs to print and cut projects with jpeg or png files.
6 – Drawing Tools
These tools can come in handy when you want to create something yourself add your own weeding lines around a design, draw a frame around the design, and many other things. The more comfortable that you get with the software, the more options you will find to create things in it.
7 – Replicate Panel
Want to create an exact copy of the design you just drew or make several copies with the click of 1 button? This can happen under the Replicate Panel.
8 – Offset Panel
Want to make that font a little thicker? The Offset Panel can help with that and so much more.
9 – QAT – Quick Access Tool bar
This is a fluid tool bar that will change depending on what you have selected on the design mat. You will notice that the icons will be the same as the panels on the right side.
With objects selected on the design screen these are the icons you might see in the QAT bar.
Look at all the information in the Quick Access Toolbar. All of this information can also be found on the right side in the Panels, but these are quick buttons to access it as well. There are multiple ways to do things in the software, no one way is right or wrong, but the best way is what works for you.
It is a fluid tool bar, which means that it changes depending on what is selected. If you have text selected on the design screen, then you will see text options in the tool bar.
10 – Edit Points
While this isn’t something that I would label as a beginner tool. I do think knowing what those gray dots are when they pop up is a relief. You don’t need to understand how to work with them right now, but understanding why they appear & how to make them disappear is something I believe is very helpful.
There are so many different tools in the Silhouette software. The best thing you can do is just get started. Play, play, play. Start with 1 project and get that down and then move on to new things.
Save this for future reference by pinning the image below.
Enjoy !
THANK YOU for your support! How can you help? Click HERE & buy a coffee.
Every little bit helps with the cost of running the site.
Silhouette Classes
Never stop learning! Let me help you take the anxiety out of learning with Silhouette and get to creating faster! My Silhouette classes are heavily focused on software, so you can take the skills & techniques taught and apply them to many future projects!
**This post may contain affiliate links. What that means is that I may receive compensation if you purchase through the links I have provided. The price you pay for the product or service is not higher but I may get compensated for sharing.
There are so many things that the Silhouette Studio program can do. It is really an amazing program and I hope that you have learned something throughout the series. There is still so much more to explore!
Please let me know what is one thing you have learned that you did not know before by leaving a comment here or on my Facebook group.
Enjoy !
THANK YOU for your support! How can you help? Click HERE & buy a coffee.
Every little bit helps with the cost of running the site.
Looking for more in-depth, step-by-step classes, check out all of my online Silhouette classes on my Teachable site HERE.
**This post may contain affiliate links. What that means is that I may receive compensation if you purchase through the links I have provided. The price you pay for the product or service is not higher but I may get compensated for sharing.
I am sure you have seen other projects where people had a design replicated multiple times in a shape and you’ve said “How did they do that?”
Well, today we are going to explore how to do that right in the Silhouette Studio v4.
The Replicate Object on Path tab can be found under the Replicate Panel on the right side and is tab 3 on the panel.
First add the design and the shape you want the design to follow onto the design mat.
For this design, I drew a heart using 2 circles and a square turned 45 degrees, then placed them overlapping and welded them. I resized the heart down to a manageable size. And then drew a perfect circle by holding down my Shift Key and dragging my Draw Ellipse tool out.
Now let’s take a look at the Object to Path tab.
Show Grab Handle – Click on the Object you want to move to the shape to select it, then click on Show Grab Handle button in the panel. A grab handle will appear in the object and you click and drag that towards your shape.When you drag it on to the shape, it will replicate copies of that object around the shape. And you get another little circle (drag handle) on the shape to the right of the original object. By clicking and dragging on this drag handle you can increase or decrease the spacing between the objects on the path, this will also change the number of objects around the shape.
*If for some reason the object will not snap to the path, try this – right click on it and choose Make Compound Path. Sometimes strange things happen and even though a design isn’t really a compound path at all, this seems to work to help it to decide it can snap to a path.
Here I moved the drag handle so there is more space between the objects. Notice that the numbers change on the panel as well under the Position.
Perpendicular – Change the orientation of the object on the path by leaving this box checked or un-check it to change the angle of your object.
Start Angle – Change the rotation angle of your object on the path to an exact angle.
Increment Angle – Change how each object is placed in relation to the previous object. In this case, each heart is rotated 90 degrees from the previous heart. This creates a pattern of your design around the shape. With this option, you can make many variations of the same design.
Start Position – Change the position of the original object on the shape by changing. In this photo, I have changed the position to 0, which places the original object at the 3 o’clock position. You can also move the grab handle on the original object and move it manually too.
Section Length – Changes the length between the beginning and end object on your path.
Number of Repeats – Change the number of times the object is replicated on the path.
Step length – Change the distance between each object on the path by adjusting this figure. This will change number of objects on the path.
Release Copies – When the design is complete, click on this to release the objects from the path and remove the shape your were using as your path.At this point, all of your objects are now single objects, as you can see by the selection boxes around each. I would suggest grouping these together before you go further, so you don’t accidentally move one.
And there you have the Replicate Object on Path – how cool is that?
THANK YOU for your support! How can you help? Click HERE & buy a coffee.
Every little bit helps with the cost of running the site.
Looking for more in-depth, step-by-step classes, check out all of my online Silhouette classes on my Teachable site HERE.
**This post may contain affiliate links. What that means is that I may receive compensation if you purchase through the links I have provided. The price you pay for the product or service is not higher but I may get compensated for sharing.
Want to make a copy of your design, font or an object?
Then the Replicate Panel can be very helpful!
This is found on the right side of the Silhouette Studio v4.
This tool works great if you are wanting to replicate several copies of your design.
Let’s Explore the Replicate panel!
Duplicate – Choose which way you want 1 copy of your design to replicate left, right, down or up.
Rows or Columns – Choose to Replicate 2 copies right, 3 copies right, 2 copies down or 3 copies down.
Fill Page – Choose to Replicate the design as many times as it takes to fill the page.
Mirror – Choose to Mirror 1 copy of the design down, up, left or right.Something to note about the Replicate and Mirror tools above is that it may look like the designs are overlapped, however, they are placed just perfect so when you cut, it will cut both lines.
As you can see in the photo above, there is no overlap in the cut lines and both copies will cut just fine.
Rotate Copies – Choose to Replicate and rotate 1 copy, 2 copies, 3 copies or 5 copies.
The second tab under the Replicate Panel gives you even more options on choosing how many and where to replicate the design to.
Number of copies – Choose how many copies you would like to replicate of your design.
Position of each Copy – Choose what direction you would like the copies to replicate in.
Rotate each Copy – Choose a certain degree to replicate those copies to.In the photo above, I chose to make 3 copies, rotated to the right at 30 degrees. So each copy will rotate 30 degrees from the previous one.
There is so much that you can do with this Silhouette software and every time I open it, I love seeing what it can do.
I hope you have fun playing with the Replicate Panel – it can really come in handy when you are designing.
Enjoy !
THANK YOU for your support! How can you help? Click HERE & buy a coffee.
Every little bit helps with the cost of running the site.
Looking for more in-depth, step-by-step classes, check out all of my online Silhouette classes on my Teachable site HERE.
**This post may contain affiliate links. What that means is that I may receive compensation if you purchase through the links I have provided. The price you pay for the product or service is not higher but I may get compensated for sharing.
THANK YOU for your support! How can you help? Click the link to buy a coffee. Every little bit helps in the cost of running the site.





 When you drag it on to the shape, it will replicate copies of that object around the shape. And you get another little circle (drag handle) on the shape to the right of the original object. By clicking and dragging on this drag handle you can increase or decrease the spacing between the objects on the path, this will also change the number of objects around the shape.


 At this point, all of your objects are now single objects, as you can see by the selection boxes around each. I would suggest grouping these together before you go further, so you don’t accidentally move one.


 Something to note about the Replicate and Mirror tools above is that it may look like the designs are overlapped, however, they are placed just perfect so when you cut, it will cut both lines.
 As you can see in the photo above, there is no overlap in the cut lines and both copies will cut just fine.


 In the photo above, I chose to make 3 copies, rotated to the right at 30 degrees. So each copy will rotate 30 degrees from the previous one.









