Posted on 7 Comments

Let’s Explore v4.4 – Page Setup Panel – Updated

Over the years the Silhouette Studio software has changed. If you’ve been using Silhouette for a while, you may have seen it, but if you are new, you may not have noticed these changes.

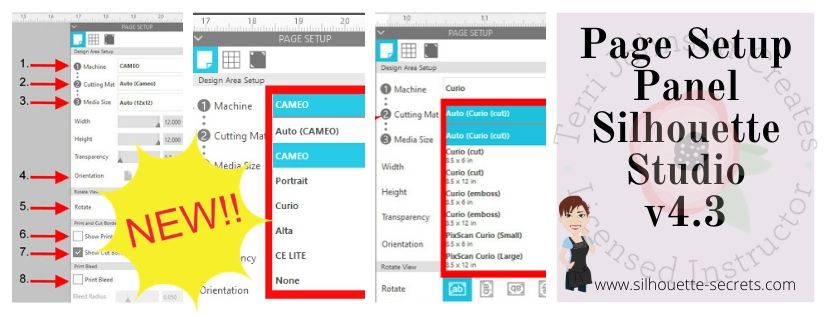
I’m sharing an updated tutorial today on the Page Setup Panel in the Silhouette Studio software v4.5+. With new versions, new features are added or moved. This means the panels change and sometimes they can change quickly.

If you are still using an older version of software or yours looks a bit different, that is ok – you do NOT need to update. Check out these older tutorials HERE for more details. This is all dependent on your software version.
Again, I DO NOT recommend you update just so it looks like this tutorial, especially if your software is running just fine.

I’ve also created a video tutorial that you can find on the Silhouette Secrets+ YouTube channel HERE as well.

This tutorial is written in version 4.5 of the Silhouette software.
*Note: tutorial is photo heavy

What software version are you currently using?

Here is how to find out this information.

On a Windows computer, in the top left corner, click on Help > About Silhouette.

Software version

On a MAC, navigate to the top left menu, click on Silhouette Studio, and then click on About Silhouette.

MAC About Silhouette copy


(Thanks Libby Ashcraft for this MAC screenshot!)

This little window tells us a lot of information.

From this screen we can tell what the exact software version is and what level of upgrade the user has. This helps immensely in troubleshooting issues with users as some bugs can be version specific.

Let’s Explore v4 – Page Setup Panel

The Page Setup Panel is found in the top right corner of the Silhouette Studio software and it opens automatically when you open the software.

It is one of the most important panels in the software because it’s where you tell the program, and ultimately your Silhouette machine, exactly what you are doing.

Simply click the top right icon if you need the Page Setup Panel to open again.

Now, let’s take an in-depth look at what is included on this panel. As I mentioned above, it is one of the most important panels in the setup for your projects.

At the top of the Page Setup Panel is the Design Area Setup.

This is where you tell the software and machine exactly what you are using.

#1 – Machine
This where you tell the software what machine you will be using.

With the release of v4.4 software, several changes were added and you have more options in the machines selection, even if you do not own that particular model machine.

#2 Feed Type
This one you may or may not see. It is completely dependent on what Silhouette model machine you have. This option will show up when the Cameo 4, Cameo Plus, Cameo Pro, or Portrait 3 models are selected. This is only an option for the Silhouette Auto Sheet Feeder.

If you do not have a Silhouette Auto Sheet Feeder, you do not need to do anything here.
For more information on the Silhouette Auto Sheet Feeder, click HERE.

#3 – Cutting Mat
This is where you tell the software & machine what size cutting mat you are using or if you are not using a cutting mat.

When a cutting mat is selected, you will see the cutting mat appear on the screen. Notice the gray border around the cuttable area. The Silhouette software virtual mat is calibrated exactly to a Silhouette cutting mat. This is how the machine knows how far in to pull the cutting mat before it starts the cut.

The black arrow is ALWAYS the top of the cutting mat that is the leading edge going into the machine, no matter what direction it is turned on the screen.

When no mat is selected, you will only see a white page and you are telling the machine to start the cut at the top of the material.

#4 – Media Size
This means your page size or your material size. Media = material.

Select from the preset option in the drop down or set your own custom size in the width and height boxes.

Transparency
Slide the transparency slider over to reveal the cutting mat below the media page.

At 0.0% it means the media will be white*
(*read below for additional information)

As you slide the Transparency up, it reveals the cutting mat below. The media becomes more transparent on the mat. The photo above shows at 65% transparency.

I use this option all the time when making projects. It is how I line up multiple colors of material on one cutting mat and send it through the machine to cut once.
Check out this tutorial on Cutting Multiple Colors at Once HERE.
It also is how I make my mats last longer and save the adhesive on my cutting mat. Shhhh don’t tell anyone!

Constrain Media to Mat
This was introduced in v4.4 and it is often confusing for users. Basically it means with this option checked that the media will not go outside of the cutting mat borders, no matter what the user sets it to.

As as example, if I set the media size to 14″ wide and 11″ height, with the Constrain Media not checked, the page/media will hang off the edge of the cutting mat as shown in the photo.

With the Constrain Media to mat, it will not allow you to set the custom media size to larger than the cutting mat size. It will automatically recalculate that based on the machine selected and cutting mat selected.

Orientation
This is in reference to your media size. Portrait Orientation is vertical and Landscape is horizontal. Here is an example of Portrait Orientation.

With the release of v4.4 software versions there was a bug released that we call the “orientation bug”. It is a bit difficult to explain in photos and this tutorial is already photo heavy, so I would recommend checking out the video tutorial HERE for more details on that. At the time I write this, the “orientation bug” has been present since July 2020, so I don’t really see it going away. I explain in the video how it works and why.

Now let’s take a look at the bottom half of the Page Setup Panel.

Media Color
This is new and was introduced somewhere around v4.4.8xx.

This was implemented as a user request to make it easier to see what a design might look like on top of a particular color instead of drawing a rectangle behind the design and filling it with color.

It does not print or cut, but simply changes the color of the background of the media set in #4 at the top of the Page Setup Panel.

Rotate View
This is a visual reference only! Rotate the cutting mat or material (set to no mat) on the screen for better viewing while you are designing.

No matter what direction you rotate the mat on the screen, the black arrow is ALWAYS the top of the cutting mat or leading edge of the material that gets fed into the machine.

I show you how you can use this to “fix” the orientation bug in the video on the Silhouette Secrets+ YouTube channel HERE.

Print and Cut Borders

Show Print Border
Check this option and a gray box appears around the area that is set by the current printer set up with your computer. I recommend checking this box anytime you are doing a print and cut project or printing from the Silhouette Studio software.

The Print border does NOT affect your cutting ability. It only affects printing and if your design is outside of your print border, it will not print. This is especially important if your registration marks for a print and cut are outside of this area and do not print properly.

Show Cut Border
Check this option to see a red border for the maximum cuttable area on the media size you have setup.

If you do not see your Cut Border extended to the edge of the page and you want it to, click the gear icon in the bottom right corner to open the Preferences Panel. Then select the Defaults tab and check the box to Cut to Edge of Page. Click Apply (if available) and OK.

I work with my Cut Border on the majority of the time. It is especially handy when you are cutting without a mat and need to know the space you have to place your design so it will cut.

Look at where the red cut border is adjusted to when cutting without a mat. This is for a very specific reason! The left and right margins and the 1″ on the backside are for the rollers on the machine to securely grip the materials as it’s being cut. If you try to “trick” the machine, you risk the material falling out of the machine when it’s cutting. It’s an easy way to waste a good piece of vinyl.

Whew! Who knew the Page Setup Panel contained so much information! It is one of the most important panels as it’s where you start with the setup of your project!

Save this for future reference by pinning the image below.

Enjoy !

THANK YOU for your support! How can you help? Click HERE & buy a coffee.
Every little bit helps with the cost of running the site.

Silhouette Classes

Never stop learning! Let me help you take the anxiety out of learning with Silhouette and get to creating faster! My Silhouette classes are heavily focused on software, so you can take the skills & techniques taught and apply them to many future projects!

Silhouette step-by-step Classes by Silhouette Secrets+ with EllyMae

SS Logo snip it
**This post may contain affiliate links. What that means is that I may receive compensation if you purchase through the links I have provided. The price you pay for the product or service is not higher but I may get compensated for sharing.
Posted on 27 Comments

Let’s Explore v4.3 – Page Setup Panel

It’s new! The new v4.3 software has been released and there are a few changes to how things look in the software. With the release of the new Cameo 4, a new software update had to be released in order for the Cameo 4 to be recognized in the software.

Today we are going to take a look at what the Page Setup Panel – Tab 1 looks like now in v4.3 software. If you have an older software version prior to v4.3, check out this post HERELet’s Explore v4 – Page Setup Panel – Page Size and Cutting Mat.

How do I know what software version I have?

First, let’s see what software version you are using.

On a PC, in the top left corner, click on Help > About Silhouette.

Software version

On a MAC, navigate to the top left menu, click on Silhouette Studio, and then click on About Silhouette.

MAC About Silhouette copy
(Thanks Libby Ashcraft for this MAC screenshot!)

This little window tells us a lot of information and is handy to have when troubleshooting an issue a user is having.

About Silhouette info copy

It tells me that I am using version 4.3.353 (currently a Beta version) and that I have Silhouette Studio Business Edition (ssbe) active on my computer.

Now, you may ask why I am using a Beta version? Well, I am part of the Silhouette Beta testing group and test the software releases that may have bug fixes or if I find bugs I can report those to the folks who need to know.
Do I recommend the Beta for the average user? NO
I only recommend the Beta version if someone is having an issue I know is resolved by updating to the Beta version or if you are very familiar with the software. The Beta version is a TEST version and with that can come unknown bugs.
The main thing I want you to find here is where to find your software version information.

Now that you know that information, you can tell if you are on a version prior to v4.2 or if you have a v4.3 software.

So let’s take a look at the differences between the Page Setup Panel – Tab 1 in v4.2 versus v4.3.

Page Setup Panel difference copy

So if you are a v4.2 or prior user, you will want to look at this post HERE for the Page Setup Panel look that matches your software.

If you are a v4.3 software user or just curious what v4.3 holds, keep reading as we go through the entire panel.

The Page Setup Panel is found in the top right corner of the Silhouette software and is one of the most important panels to get started designing.

Page Setup Panel Tab 1 copy

Let’s take a look at what each of these sections tells us.

Page Setup Panel details copy
  1. Machine – Select the machine that you want to design with. Now you can choose between a Cameo, Portrait, Curio, Alta, CE Lite, or none for the designated machine.
    Machine option copy
    This is great for Silhouette owners who may want to design on a Curio mat when they are not connected to the machine.
    It will allow the Curio mat to come up on the design page so a user can then design within that Curio mat versus having to go plug their machine in for it to be recognized.
    Curio mat copy.jpg
    This is the biggest reason for the Page Setup Panel change.
    However, something to note is that while you can select the machine to design with, you would still need to have plugged in a Curio and it be recognized by the software to unlock the Curio features such as the Emboss Panel.
  2. Cutting Mat – Choose the cutting mat size depending on what you are using.
    Each machine type selected will have a variety of options.
    Here are the Cameo options:
    Cutting mat copy

    Here are the Curio options:
    Curio cutting mat option copy

    Each drop down list will vary depending on what you have chosen in the #1 area.

  3. Media Size – this was previously known as page size and now has been changed to media as the materials you can use in your Silhouette has expanded. In the drop down are several preset sizes for the most common media sizes.
    Media Size copy

    Choosing a specific media size will adjust the media size on the screen and you will see a white “page” show up on the screen depending on the size chosen. White will appear for the media size if the transparency is at 0% – see below*
    Media Size white copy
    In the photo above, I have selected the Machine: Cameo, Cutting Mat: Auto (Cameo), and Media Size: Letter. Notice that the white has adjusted to match the Letter size paper of 8.5″ wide by 11″ height.

    Under this Media size section, you can also select a custom size by entering the dimensions into the Width and Height section.

    Custom width height copy
    Note: the width of the Media Size cannot be set larger than 12″ since the Silhouette Cameo cannot cut wider than 12″.
    If you try to adjust the width larger than 12″, it will revert it back to 12″.
    If you want to design with a page size larger than 12″, change the Cutting Mat to none & then you will be able to adjust the Media size larger than 12″ wide.

    Transparency – adjust the transparency of the media size you have selected. At 0% it shows as a solid white media on the screen. As you increase the transparency the white disappears and you will see the grid spacing of the cutting mat appear.

    This was formerly called “Reveal” under the cutting mat section.
    Transparency copy

  4. Orientation – change the orientation of the page to Portrait or Landscape orientation
  5. Rotate View – change the orientation of the entire design mat on the Silhouette software. This only rotates the view of the mat on the screen.
    Keep in mind that the black arrow is always the “top” of the mat or the “top” of the media. This is the first part of the media that is loaded into the machine.
    Rotate View copy

    Here is the view rotated to 270 degrees. No matter where the black arrow is pointing on the screen, that is always the top of the mat or media that is loaded into the machine.
    This is something to keep in mind when you are placing your design and media on the cutting mat.
    Rotate View 270 copy

  6. Show Print Border – check the box next this option to turn the Print Border on. It will show as a gray border on the screen and is set according to what printer is recognized by the computer
    Show Print Border copy
    The print border should have no affect on the cutting space, it shows what the printer margins are set to for the printer that is set up on your computer.
    If the gray lines are showing at a smaller size, most likely the print size has been changed in the Printer Setup within the software or within the Printer setup on the computer.
    Check under File > Print Page Setup for more details on the printer page size.
    Print Page Setup copy
  7. Show Cut Border – check this box to show the maximum cut border that you have to work with. A red cut border will appear around the media size you have selected.
    Show Cut Border copy

    There are 2 options for the cut border in the software. There is the Cut to Edge of Page, which is what I have my software set at as shown above. This option can be found under the Preferences options > Defaults tab in the software.
    Preferences copy

    Or there is the default, which places the cut border just a bit within the edges of the media size.

    Show Cut Border default copy
    It is all a matter of personal preference in how you have the software set up.

    I always have my Show Cut border checked, especially when doing a Print and Cut project.
  8. Print Bleed – this option can be selected for when a project is being printed through your printer to be cut. The Bleed radius can be adjusted in this section too.
    Print Bleed1 copy
    It will give the colors a bleed area (similar to an offset) around the design that is being printed. This is to help avoiding a white border around the design when it is cut.
    Print Bleed copy
    In this photo you can see that with the Print Bleed option chosen it bleeds the color out from the edges of the design.
    Print bleed final
    Here you can see the print bleed excess once the design is peeled away.

    Something to note about Print Bleed is that it does NOT show the bleed on the design screen. The bleed is only present when you have this option selected and print onto the material.

And there you have the new v4.3 Page Setup Panel. Now, if you made it all the way through the post and are scratching your head as to why your Page Setup Panel does not look this way. It could be that you are not yet on the v4.3 software version.
Check out this post HERE to see if that looks more like what you are seeing.

The next question you may be asking is – Why does it have to change?

Well, whether we like it or not, change can be good. New features, new machines, new techniques! It is a never ending learning process and I for one am grateful that the Silhouette company looks for ways to improve on things.

Check out the “Let’s Explore v4” section on the blog for more Silhouette software explanations HERE.
Header PDF file

I would love to see your projects & I know others in my group do too! Feel free to post on my Facebook group at Silhouette Secrets with EllyMae.

Save this post for future reference by pinning the image below.

Enjoy!

SS Logo snip it

**This post may contain affiliate links. What that means is that I may receive compensation if you purchase through the links I have provided. The price you pay for the product or service is not higher but I may get compensated for sharing.

Posted on Leave a comment

Let’s Explore v 4 Recap

We are half-way through 2018 – can you believe that?

So it’s the perfect time to recap what the “Let’s Explore v4” series has covered so far since January.

Let's Explore Recap final 2copy

Let’s Explore v 4 series

Page Setup Panel – Tab 1 – Page Size & Cutting Mat

Page Setup copy

Page Setup Panel – Tab 2 – Grid Options & Spacing

Page Setup Tab 2 copy

Page Setup Panel – Tab 3 – Registration Marks – Print & Cut

Registration marks panel copy

Fill Color Panel

Fill Color Panel copy

Line Style Panel

Line Style Panel copy

Trace Panel – Tab 1 – Basic Trace

Tracing Panel copy

Trace Panel – Tab 2 – Trace By Color (Designer Edition feature)

Trace Panel copy

Trace Panel – Tab 3 – Magnet Trace (Designer Edition feature)

Magnet Trace Panel copy

Pixscan Panel

Pixscan copy

Text Style Panel – Tab 1 – Text Style

Text Style Panel main copy

Text Style Panel – Glyphs and Spell check

Glyph

Transform Panel – Tab 1 – Align Tab

Transform Panel copy

Transform Panel – Tab 2 – Scale Tab

Scale tab copy

Transform Panel – Tab 3 – Rotate Tab

Rotate main copy

Transform Panel – Tab 4 – Move by Tab

4-25 Transform -Move copy

Transform Panel – Tab 5 – Shear (Designer Edition feature)

Shear Panel copy

Replicate Panel – Tab 1 & 2 – Replicate & Number of Copies

Replicate panel copy

Replicate Panel – Tab 3 – Object to Path

Replicate Object on Path copy

Modify Panel – Part 1

Modify Panel copy

Modify Panel – Part 2 – Compound Paths

Modify Panel details copy

Offset Panel

6-5 Offset Panel copy

Pop Up Panel (Designer Edition feature)

Pop Up Panel copy

Stipple Panel (Curio option only)

Stipple panel copy

Nesting Panel (Designer Edition feature)

Nesting feature copy

There are so many things that the Silhouette Studio program can do. It is really an amazing program and I hope that you have learned something throughout the series. There is still so much more to explore!

Please let me know what is one thing you have learned that you did not know before by leaving a comment here or on my Facebook group.

Enjoy !

THANK YOU for your support! How can you help? Click HERE & buy a coffee. Every little bit helps with the cost of running the site.

Looking for more in-depth, step-by-step classes, check out all of my online Silhouette classes on my Teachable site HERE.

SS Logo snip it

**This post may contain affiliate links. What that means is that I may receive compensation if you purchase through the links I have provided. The price you pay for the product or service is not higher but I may get compensated for sharing.

Posted on 31 Comments

Let’s Explore v4 – Setup Panel – Tab 2

Welcome back to my new series “Let’s Explore v4“!
If you are just joining me you can check out my first post of the series HERE – about Tab 1 of the Page Setup Panel.

Today I am going to be going through the features of Tab 2 on the Page Setup Panel in Silhouette Studio v4.
This panel is located on the right side of your v4 software at the very top.

Tutorial written in v4.1.206

Affiliate links may be present in the following blog post and as an Amazon Associate I earn from qualifying purchases.

This panel is about your Grid spacing. Do you want your Grid to show? Do you want your designs or fonts to ‘Snap to grid’? What increments do you want your grid to show at? What color do you want your grid?

So let’s jump in and go through each option that is available to you. It is all a matter of personal preference and once you understand what each feature does, then you can decide what you want to use.

1 – Show Grid
This option allows you to turn the Grid lines on or off on your Design mat. These grid lines can be useful when you are designing and spacing out objects.Show Grid copy

2 – Snap to Grid
If you have this option checked then your design will jump from grid line to grid line. If you un-check this option you have more control over moving your design in smaller increments.

3 – Show Guides
By checking this option, you can pull “Guides” down from the top ruler or over from the right side ruler. If you click on the ruler, either on the top or right side and hold down and drag, it will drag a “guide” line out and you can place it where you’d like on your design mat. This is another tool used to line up designs or for example make sure you have a design in a square. These “guide” lines do not cut and they do not save to your file. Rulers are an upgrade feature, therefore this is an option only for those who have the Designer Edition upgrade or higher.Guides copy

4 – Snap to Guides
This works the same way as the ‘Snap to Grid’ feature does. If you have it checked and have placed guides on your Design mat, when you move your design, it will snap to the guide lines you have placed.

5 – Ruler
You can turn the rulers that are along the top & right side on & off by selecting this. Rulers are an upgrade feature available in the Designer Edition upgrade or higher.

6 – Crosshairs
This will toggle a cross-hair pointer at the end of your mouse pointer on your screen. If you look closely, you can see the lines running horizontally & vertically from the red square.
Cross hairs_copy

7 – Square vs Isometric
You can choose whether your grid lines show up in a square pattern or for further design purposes, you can change them to an Isometric pattern. Below on the left, I have Square chosen and on the right I have chosen the Isometric.

8 – Spacing
This is used to change the spacing of your grid lines to the increment you want. You can change the spacing by using the slider bar left or right, highlight & type a new number or by the arrow keys to the right of the number.

9 – Divisions
You can choose the number of divisions that your grid spacing is divided into. Below you will see I have my grid spacing set at 2″ for both photos, but the photo on the left I have my Divisions set for 5 and on the right my Divisions are set at 10.

10 – Color
You can change the color that your grid lines show on the screen. There are several colors pre-selected to choose from or you can select a custom color from the color box.Color

These are the features of the Page Setup Panel – Tab 2.
Most of these features are used for designing purposes within the software and you will find each user develops their own preferences for what they see on their screen.

I like to have my mat revealed 100%, while another user may not like that look at all. Now, you know what each feature is and what it does, so you can decide how you like your design mat to look when you are using the software.

I did mention that a few of the features are upgrade features. This means that in order for them to appear on your screen you would need a software upgrade. There are 3 steps of upgrades – Designer Edition, Designers Edition+, and Business Edition. You can find out what features are unlocked with each software upgrade by viewing the chart HERE at the Silhouette America website.
If you would like to purchase an upgrade to your software, I recommend buying through an authorized Silhouette retailer such as Swing Design. After your purchase, you are sent a instant code and can enter the code and activate your upgrade immediately.
Click HERE to be directed to the Swing Design site.

I hope you have enjoyed learning more about the Silhouette Studio v4 software today.

I have made a video of everything covered in the series today.
Check it out here:

The design used in today’s video is called Drink Your Wine We Have Crafts to Do by Lori Whitlock and can be found HERE.

Feel free to post your questions & project photos on my Facebook group at Silhouette Secrets with EllyMae.

Save this for future reference by pinning the image below.

Enjoy !

THANK YOU for your support! How can you help? Click HERE & buy a coffee.
Every little bit helps with the cost of running the site.

Looking for more in-depth, step-by-step classes, check out all of my online Silhouette classes on my Teachable site HERE.

SS Logo snip it
**This post may contain affiliate links. What that means is that I may receive compensation if you purchase through the links I have provided. The price you pay for the product or service is not higher but I may get compensated for sharing.
Posted on 37 Comments

Let’s Explore v4 – Page Setup Panel

Today I’m kicking off a new series called “Let’s Explore v4”. Each week I will highlight a new Panel available in Silhouette Studio v4 and explain a bit about that panel.

One of my goals as a TJC Licensed Silhouette Instructor is to not “reinvent the wheel”. There are lots of great posts, tutorials and videos that are a wealth of information and if you are on my Silhouette Secrets+ Facebook Page or Group, you will see that I share information from other colleagues and industry leader who I think you may benefit from. You will see me post links to their pages, share their information and link them up in my blog posts. Why? I am not in competition with them, we can all learn from multiple sources and what I’ve found is there is always something new to learn with the Silhouette Studio software & the Silhouette machines.

Now on to the fun stuff! I am using Silhouette Software v4.1.201, this information can be found under the Help>About in the software. If you are using an older software version, then my screen will look very different than yours and some of the options may not be available to you. If you’d like to upgrade your software to the latest version, you can find the upgrade HERE on the Silhouette America site, v4.1.206 is the most recent and it will work for these tutorials. You do not want to choose the Beta version unless you know the software very well and are able to spot a bug or two that may be in the program and report that back to Silhouette.

Page Setup Panel

The Page Setup Panel is located on the right side at the top of your Panel bar. Click on it and the Panel will pop up. Now with v4, you can move your panels around – this is called Floating Panels. If you grab the Blue area where it says Page Setup, you can move that panel around and drop it where you like. These Panels will stay open if you do move them on your screen, so it is a nice feature instead of having to keep clicking on the Panel icons on the right side.

Page Setup copy

If your Panel is not letting you grab and move it, check out the Preferences under Edit > Preferences. Under Defaults, change the Panel mode to ‘Flexible Panel Mode’.

Preferences - Flexible Panel mode copy

Now let’s break down the first tab in the Page Setup Panel.

LEv4-Page Setup copy

  1. Page Size – Here you can select the Automatic (machine) size and it will default to whichever machine you have plugged in to your computer or the last recognized connection. Click on the drop down arrow and you have many selections to choose from including a Current Printer option, if you have one connected.
  2. Width & Height – You can make the page size any size from 12″ wide to 10′ long. If I choose to change my Page size to 10″ x 12″, notice how it adjusts the white page or the red cut border (if Show Cut Border is checked). Something to note, if you have your page size set and your design is outside of that page size, it will not cut outside of the Page border. Custom page size
  3. Orientation – this will flip your page either vertical or horizontal on your mat.
  4. Cutting Mat – The Silhouette Cameo can cut any material that has a backing, such as vinyl & HTV without a mat. It can cut materials up to 10 feet long and this is how you accomplish that. You can tell the software you are cutting with ‘None’ or you can choose a 12″ x 12″ or 12″ x 24″ mat or several other options for other machines. Below you will notice that my Cut border is the full dimension of my mat. I have my Preferences set to ‘Cut to Edge of mat’. It does not always cut to the very edge, but it comes close. When you choose to cut with a mat, you are telling the software that it needs to feed that mat in to a certain location before it can begin cutting. It should only be cutting on the grid area of your mat. If it happens to cut higher than that, go check if you have it set to cut without a mat.Mat-Cut Border Now in the photo below, I have chosen Cutting Mat ‘None’ and I want to point out a few differences. You will see that the Cut border (red line) starts immediately at the top of the page. If your design is right at the top of the design mat, when you load your vinyl, it will begin cutting exactly where you have placed it on your screen. Also note, the Cut border on the left & right side. You lose about 1/4″ of cuttable space on both sides of your vinyl when you cut with no mat. This is the allowance that the machine needs to grip the vinyl in the machine. And you will see the Cut border end approximately 1″ from the back end of the page size, this is again cuttable space that is lost so the machine can hold that vinyl in the machine to finish the cut.No Mat - cut borderWhile you can cut without a mat, I personally prefer to use my mat any time that my material will fit on it. It provides stability and there is less that can go wrong, such as your vinyl sliding.Now, if you do decide to cut without a mat, I would strongly suggest investing in a roll feeder. I just used this for a large cut job and it worked beautifully and I did not have to babysit it as much as without. Here is what that looks like: Roll Feeder You can find the Silhouette roll feeder HERE.
  5. Reveal – This one is a favorite of mine. At 0% your design mat shows a white space that equals your page size. As you slide the bar up it starts to reveal the grid lines of the mat underneath that are the exact match to your Silhouette cutting mat. At 100%, it shows your entire cutting mat grid area and this is how I prefer to use my software most of the time.
  6. Rotate – this rotates the orientation of your mat on the screen. It is for visual purposes only and does not actually rotate your design or the way the mat is fed into the Cameo. Notice the photo on the left, it is at 0 degrees – the arrow is facing up. The arrow is the direction you load your Silhouette mat into the machine, it matches the arrow on the physical Silhouette mat. I have placed a design from the Silhouette store (Design #181402) on my mat, so you can see how it changes. Now, look at the photo on the right, I have changed the Rotate to 270 degrees and the arrow is now pointed to the left. This option rotates your entire mat and anything on your mat, but it does not change where your design will cut on your mat. It will still cut in the top left corner because you are loading the mat into the Cameo with the arrow pointing in.
  7. Show Print Border – If you check the box next to it, a gray box will appear on your screen. This is the Print Border for the current printer you have connected to your computer. It shows you the maximum border that you can put a design at to be able to print it on a material. Show Print Border
  8. Show Cut Border – This is another feature that I always have checked. As you can see in the photo above, I have the Show Cut Border feature checked and it shows a red line around what my maximum cut border is. I have it set to Letter size paper, so it is showing me it will cut to and 8.5″ x 11″ space. If I change my Paper size to 12″ x 12″, it will expand to the full 12″ x 12″ and outline my grid on my mat, as seen in several photos above.

I encourage you to check out each of these features in the Page Setup Panel and as you click on them, you will see things change on your screen. If you have an understanding of how these features work, you can spot and fix a problem when you notice something is not right.

I hope you have enjoyed the first session of “Let’s Explore v4.”

I am EllyMae with Silhouette Secrets+ and my goal as a TJC Licensed Silhouette Instructor is to teach the Silhouette Studio software. Once you know how to do things in the software, you have the skills to create any design for a project that you want.

Check out my Silhouette Instructions and Events tab for more information on Personalize Silhouette Instruction.

Have fun Exploring your Silhouette Software v4!

Enjoy !

THANK YOU for your support! How can you help? Click HERE & buy a coffee. Every little bit helps with the cost of running the site.

Looking for more in-depth, step-by-step classes, check out all of my online Silhouette classes on my Teachable site HERE.

SS Logo snip it

**This post may contain affiliate links. What that means is that I may receive compensation if you purchase through the links I have provided. The price you pay for the product or service is not higher but I may get compensated for sharing.