Posted on Leave a comment

Drawing Designs using Object to Path & Tools in Silhouette Studio

This past week there was a question on my Silhouette Secrets+ Facebook Group and I was working on my computer so did a quick video tutorial on how they could accomplish the design they wanted.
Several asked if there was a way to save that video so I re-recorded it and put it up on the Silhouette Secrets+ YouTube Channel.

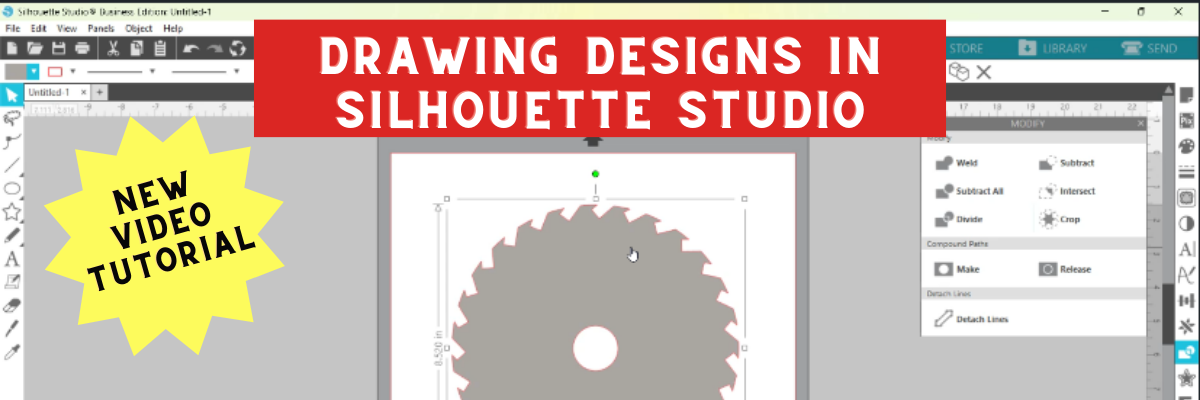
While the video shows how to create a saw blade because that was what the user was asking, the techniques could be used to create all kinds of designs from wreaths, frames, and so much more!

Check out this video HERE

Here is more information on the tools I used in Silhouette Studio:
Drawing Tools
Rotate Panel
Replicate Object to Path
Modify Panel
Compound Paths

And check out the A to Z Silhouette Resource tab at the top of the website as well. You can search for any tool or keyword for Silhouette in alphabetical order.

If you are looking for step-by-step classes for Silhouette, check out all my Silhouette classes on Teachable HERE.

Save this for future reference by pinning the image below.

Enjoy !

THANK YOU for your support! How can you help? Click HERE & buy a coffee.
Every little bit helps with the cost of running the site.

Watch for more from me on the Silhouette Secrets+ blog and YouTube channel this month!

Find me online at: Silhouette Secrets+ Blog – https://bit.ly/3CnLZ8s
Silhouette Secrets+ FB Page – https://www.facebook.com/SilhouetteSecretsplus
Silhouette Secrets+ FB Group – https://www.facebook.com/groups/silhouettesecretsplus
Silhouette Secrets+ Instagram – https://www.instagram.com/silhouettesecretsplus/
Swift Creek Customs FB Page – https://www.facebook.com/swiftcreekcustoms
Swift Creek Customs FB Group – https://www.facebook.com/groups/swiftcreekcustoms

SS Logo snip it

**This post may contain affiliate links. What that means is that I may receive compensation if you purchase through the links I have provided. The price you pay for the product or service is not higher but I may get compensated for sharing.

Posted on Leave a comment

Let’s Explore v 4 Recap

We are half-way through 2018 – can you believe that?

So it’s the perfect time to recap what the “Let’s Explore v4” series has covered so far since January.

Let's Explore Recap final 2copy

Let’s Explore v 4 series

Page Setup Panel – Tab 1 – Page Size & Cutting Mat

Page Setup copy

Page Setup Panel – Tab 2 – Grid Options & Spacing

Page Setup Tab 2 copy

Page Setup Panel – Tab 3 – Registration Marks – Print & Cut

Registration marks panel copy

Fill Color Panel

Fill Color Panel copy

Line Style Panel

Line Style Panel copy

Trace Panel – Tab 1 – Basic Trace

Tracing Panel copy

Trace Panel – Tab 2 – Trace By Color (Designer Edition feature)

Trace Panel copy

Trace Panel – Tab 3 – Magnet Trace (Designer Edition feature)

Magnet Trace Panel copy

Pixscan Panel

Pixscan copy

Text Style Panel – Tab 1 – Text Style

Text Style Panel main copy

Text Style Panel – Glyphs and Spell check

Glyph

Transform Panel – Tab 1 – Align Tab

Transform Panel copy

Transform Panel – Tab 2 – Scale Tab

Scale tab copy

Transform Panel – Tab 3 – Rotate Tab

Rotate main copy

Transform Panel – Tab 4 – Move by Tab

4-25 Transform -Move copy

Transform Panel – Tab 5 – Shear (Designer Edition feature)

Shear Panel copy

Replicate Panel – Tab 1 & 2 – Replicate & Number of Copies

Replicate panel copy

Replicate Panel – Tab 3 – Object to Path

Replicate Object on Path copy

Modify Panel – Part 1

Modify Panel copy

Modify Panel – Part 2 – Compound Paths

Modify Panel details copy

Offset Panel

6-5 Offset Panel copy

Pop Up Panel (Designer Edition feature)

Pop Up Panel copy

Stipple Panel (Curio option only)

Stipple panel copy

Nesting Panel (Designer Edition feature)

Nesting feature copy

There are so many things that the Silhouette Studio program can do. It is really an amazing program and I hope that you have learned something throughout the series. There is still so much more to explore!

Please let me know what is one thing you have learned that you did not know before by leaving a comment here or on my Facebook group.

Enjoy !

THANK YOU for your support! How can you help? Click HERE & buy a coffee. Every little bit helps with the cost of running the site.

Looking for more in-depth, step-by-step classes, check out all of my online Silhouette classes on my Teachable site HERE.

SS Logo snip it

**This post may contain affiliate links. What that means is that I may receive compensation if you purchase through the links I have provided. The price you pay for the product or service is not higher but I may get compensated for sharing.

Posted on 13 Comments

Let’s Explore v4 – Rotate

Hi everyone! This week we are continuing on our journey to explore more of Silhouette Studio v4.

We are looking today at the Transform Panel – Rotate tab. You will find this on the right side of the Silhouette Studio v4 as shown below.

Rotate main copy

If  you want to manually rotate an object, you can do that on the design screen by grabbing the green circle at the top of the design when it’s selected and hold down the mouse button and drag it left or right.

Manual rotate copySoftball Mom by SM Designs

But if you want something more precise, then you want to use the Rotate tab on the Transform Panel.

Let’s take a look at how this can help.

Rotate detail copy

  1. Rotate to 0, 90, 180 or 270 degrees – Choosing one of these options will rotate your object to the exact degree you choose.Rotate 90 degrees copy
  2. Custom – Change the numbers in the box to a specific degree you would like it to rotate to.Custom rotation copy
  3. Rotate by 45 or 90 degrees, 180 degrees, -90 or -45 degrees – Using this option will move the design exactly the distance you select. For example, in my photo above, I have it selected at 30 degrees. If I now choose -45, it will rotate it to the left exactly -45 degrees from where it started at 30 degrees, placing it at 345 degrees.Rotate by -45 copy
  4. Custom – Type in a custom amount if you want something in between the standard options.
  5. Apply – You can click this after changing the custom amount or just hit the Enter key.

There are many reasons that you would use these rotate tools.

For instance, let’s draw a heart. Now, you’ll notice that the Drawing tools on the left side does not have a heart shape. So let’s make one. Select the Draw and Ellipse tool and then hold down the Shift key and drag your mouse on the design mat. This will draw a perfect circle. Now, let’s fill it with color so it’s easier to work with. (Check out the Let’s Explore Fill Panel here)

Draw heart

Next, make a copy of your circle. There are several ways to do this – Ctrl+c and Ctrl+v, right click & choose copy and then again for paste or hold down the Alt key and drag a copy off, or use the toolbar (QAT) at the top.

And then draw a perfect square by choosing the Draw a Rectangle tool and holding the Shift key down. Fill your square with color as well.

Draw heart2

Now let’s use the Rotate tab to turn our square to a 45 degree angle.

Draw heart3

Next move the square up to meet the circles and align them how you like it. You may need to enlarge your circles (select them both and resize) to get the dimensions of the heart to align.

Draw heart final

And there you have drawn a heart shape using just the basic shapes in the Silhouette software and the Transform panel – Rotate tab. Make sure to select all your shapes and choose weld or it will cut out the individual shapes.

Heart no weld.JPG

After you weld the shapes together you will have your heart design.

Heart weld

And there is one way you would use the Rotate tab and as a bonus you learned how to draw a heart from basic shapes.

Hope you’ve enjoyed the Let’s Explore v4 session today! Check out all the previous panels we’ve explored HERE.

Enjoy !

THANK YOU for your support! How can you help? Click HERE & buy a coffee. Every little bit helps with the cost of running the site.

Looking for more in-depth, step-by-step classes, check out all of my online Silhouette classes on my Teachable site HERE.

SS Logo snip it

**This post may contain affiliate links. What that means is that I may receive compensation if you purchase through the links I have provided. The price you pay for the product or service is not higher but I may get compensated for sharing.