Looking for a creative way to personalize your home decor projects? Glass etching is a fun and easy technique that can completely transform simple glass surfaces into beautiful custom pieces! In this post, I’m sharing how I used Etchall etching creme on a floating glass floral frame to create a unique one-of-a-kind decor project perfect for displaying photos, pressed flowers, inspirational quotes, and more. The frosted etched finish adds an elegant touch while still allowing the beauty of the floating frame design to shine through. Whether you’re new to glass etching or looking for fresh DIY project ideas, this custom etched glass frame is a great way to create personalized decor with a professional look.
Affiliate links may be present in the following blog post and as an Amazon Associate, I earn from qualifying purchases.
Steps to Etched Glass Projects
Create a stencil for etching.
Clean glass blank with alcohol and allow to dry.
Apply stencil.
Mask off edge of stencil to prevent bleeding
Apply Etchall Etching Creme and allow to sit for 20 minutes.
Remove any excess Etching Creme and place back in the bottle.
Wipe off remaining excess with a paper towel and safely discard paper towel.
Run water in the sink and rinse off decal thoroughly.
Remove masking tape and adhesive vinyl under running water.
Gather the supplies. I am using a floating frame which has 2 panels of glass and the photos will be sandwiched in between the glass panels.
I cut the adhesive vinyl with the Silhouette Cameo and weeded out the design for my stencil. Then applied it to the backside of the glass frame. I also taped off the glass panel edges with painters tape to make it easier to handle and not cut myself.
Since there were some small details and pieces, I did apply a bit of heat to set the adhesive vinyl and give it a good seal. Be very careful here and let the glass cool before handling.
Then apply a generous layer of Etchall etching creme and let it sit for 20 minutes.
Scrape off any excess Etchall creme and put it back in the bottle. I scrape as much as I can and then use a paper towel carefully to wipe away any excess. Then rinse with a generous amount of running water until the glass is clean. Remove the adhesive vinyl stencil and rinse again.
I add some of the bright, colorful flower photos that I had taken from my front yard a few years ago and it really made it pop!
Take this idea and make it your own! What supplies do you have in your craft stash that you could make a custom glass etched
Save this for future reference by pinning the image below.
Enjoy !
THANK YOU for your support! How can you help? Click HERE & buy a coffee. Every little bit helps with the cost of running the site.
Silhouette Classes
Never stop learning! Let me help you take the anxiety out of learning with Silhouette and get to creating faster! My Silhouette classes are heavily focused on software, so you can take the skills & techniques taught and apply them to many future projects!
**This post may contain affiliate links. What that means is that I may receive compensation if you purchase through the links I have provided. The price you pay for the product or service is not higher, but I may get compensated for sharing.
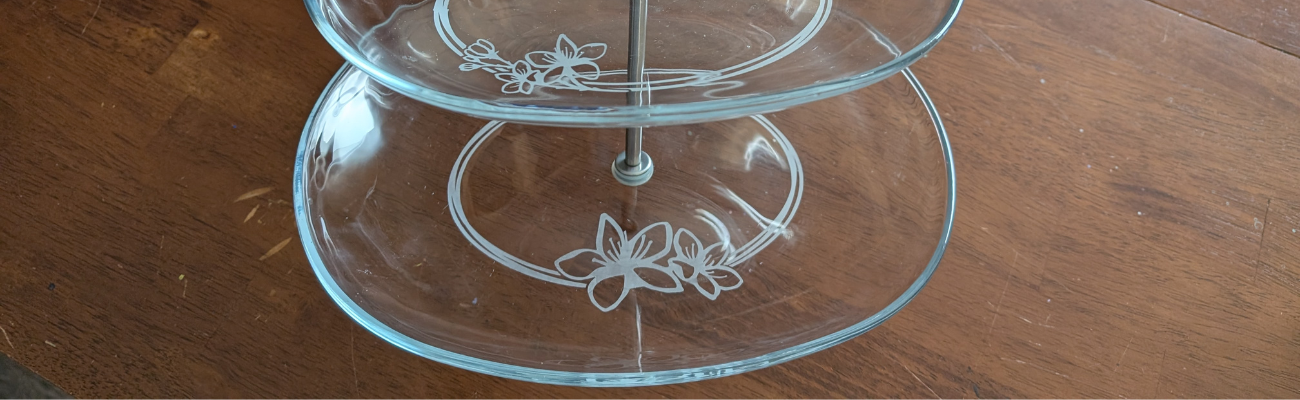
If you’ve ever spotted a hidden gem at a thrift store and talked yourself out of it… this project is your reminder to turn back and grab it! That’s exactly how this Etched Tiered Tray came to life. I found a gorgeous three-tiered glass tray tucked behind a stack of dishes, walked away, and then thankfully circled back to bring it home. Today I’m sharing how I transformed that thrifted treasure using custom-designed stencils created in Silhouette Studio and Etchall etching creme. With the right design setup and a few simple steps, you can get beautifully crisp results that make any glass piece look high-end and completely personalized.
Affiliate links may be present in the following blog post and as an Amazon Associate, I earn from qualifying purchases.
If you have a cutting machine, you have unlimited possibilities of custom designs at your fingertips.
I started by measuring each level of the tiered tray. This gives me a starting point to draw out a template in Silhouette Studio to design within. If the tiered tray has a curve to it, then you’ll want to make sure to account for that. Adding a stencil onto a curved area can get a bit tricky to lay it straight and flat. I created my stencils so the design would be on the flat area before the curve starts.
Here is a look at my working file in Silhouette Studio.
On the left side are some designs I was playing around with to decide what I wanted to work with. I settled on using the Cherry Blossom Design by Tanya Batrak. On the right you can see the design for each level of the tiered tray. The outer oval is the template from my measurements and then I was able to design within the template for each level.
I knew I wanted something that went all the way around and I designed an oval frame using the same technique that I shared in the video tutorial on the Silhouette Secrets+ channel – Creating a Circle Frame in Silhouette Studio with Basic Tools.
Then I brought in the Cherry Blossom Design and scaled it to the size I wanted and placed it on top of the oval frame.
I modified the design a bit by cutting off the branch on one side and then for the largest tiered tray, I cut off the top 3rd flower and used edit points to make the design smooth. So each layer of this tiered tray is a bit different. Here is a close up look at my final designs.
I then made an offset of the entire design and subtracted the offset from the circle frame to give the design some space and set it apart.
Here is a look at my stencil file on the Send tab in Silhouette. I used the Cut by Line Color tab so I could set up 2 different settings and have it kiss cut around the stencil and then cut the red cut line all the way through on the offset around the entire design. This way the center of the design was cut out for me by the Silhouette machine.
Then I grabbed a color of Oracal 651 adhesive vinyl that has been in my stash for awhile and not used. Scraps or colors that you don’t use often are great for stencils.
Once the designs were cut, then carefully weed out the design. And if you mess up in the weeding or application process, grab another sheet of vinyl and cut another one. I messed up along the way on one decal and ended up cutting another stencil. So glad I have this option with owning a cutting machine!
If your tiered tray comes apart easily, it may be easier to apply the stencils and etch by taking it apart. My husband suggested I do this, but with the rubber rings separating each layer, I didn’t want to mess something up taking it apart or putting it back together, so I worked with it fully assembled.
This meant that I needed to cut the stencil apart for 2 of the layers to wrap it around and apply to the bottom of the tier.
I looked for a good section of the design to slice it apart at that would be easy to line up and get connected again when I was applying.
Find some way to set up so your glass is secure and is as flat as possible for the stencil application and while the etching creme is on the glass.
Since I left my tiered tray assembled, I propped it up using my bulk roll of AT65 Transfer Tape.
This was actually a really sturdy way to hold my tiered tray and it was stable, secure, and level the entire time.
Make sure to clean the area where you’ll be applying the adhesive vinyl with alcohol first to remove any dirt and debris so you get a good adhesion. And then let it dry completely.
The bottom layer was the easiest since it was the most accessible and that is where I started. I applied the Oracal 651 adhesive vinyl stencil and then I applied a bit of heat to help the adhesive vinyl to adhere well. I have some intricate areas and I wanted to give myself the best chance of success and not have any bleed. While this is step is not mandatory for glass etching, I do think whatever you can do to set yourself up for success saves your time and money.
Not all glass etches too! And I wasn’t sure if this would work or not on the tiered tray. Starting with the bottom layer first, this was my test. I heated it a bit and then carefully smoothed down the vinyl edges all along. Be careful as hot glass looks the same as cold glass. I then waited for the glass to cool completely before applying the Etching creme so that the adhesive could set up and less likely to move around on the smooth surface.
The next step isn’t mandatory either, but I do feel it will help you be successful! Tape off the edges around the stencil in case any etching creme gets outside of where you want it to be. It never fails that if the etching creme even touches an area you don’t want it to etch, it will.
Use painter’s tape or in this case, I had lots of excess transfer tape and since it was an oval object on a curved surface, I ended up cutting smaller sections of the AT65 transfer tape and applying it around the outer edge and the inside edge of my stencil.
For flat objects, you can simply make your stencil larger to cover a larger area of the object. However, on a curved object that can be more difficult to lay the adhesive vinyl completely flat, so I chose this method.
Next, I applied the Etchall etching creme around the entire design. And set my timer for 20 minutes.
The next steps are very important! After 20 minutes, carefully remove any excess Etchall etching creme and put it back in the bottle. It can be reused over and over again. Then I take a paper towel and wipe away any excess. And once all the excess has been removed, I will run water in my sink and then washed the entire design and remove the stencil while under running water.
It worked!!! So I dried it off and then repeated the same steps on the other 2 layers of the tiered tray.
As you can see I have 2 different colors of adhesive vinyl as I messed up weeding the top layer stencil. Easily remedied by cutting another stencil with my Silhouette machine.
All the extra steps to secure with heat and taping off the design paid off!
This etched tiered tray project turned out fantastic!!!
The hardest part about glass etching is getting a good photo and in this case, getting a good photo that shows all 3 levels off well.
I love being able to create custom and unique projects. This one was quickly claimed by my youngest, who put it to work immediately. I asked if she could to a “lifestyle” photo for me to use and this is what she did.
It is definitely being put to good use and she loves it.
Check out more information for even more creative ideas and tips to take your crafting to the next level HERE!
Save this for future reference by pinning the image below.
Enjoy !
THANK YOU for your support! How can you help? Click HERE & buy a coffee. Every little bit helps with the cost of running the site.
Silhouette Classes
Never stop learning! Let me help you take the anxiety out of learning with Silhouette and get to creating faster! My Silhouette classes are heavily focused on software, so you can take the skills & techniques taught and apply them to many future projects!
**This post may contain affiliate links. What that means is that I may receive compensation if you purchase through the links I have provided. The price you pay for the product or service is not higher but I may get compensated for sharing.
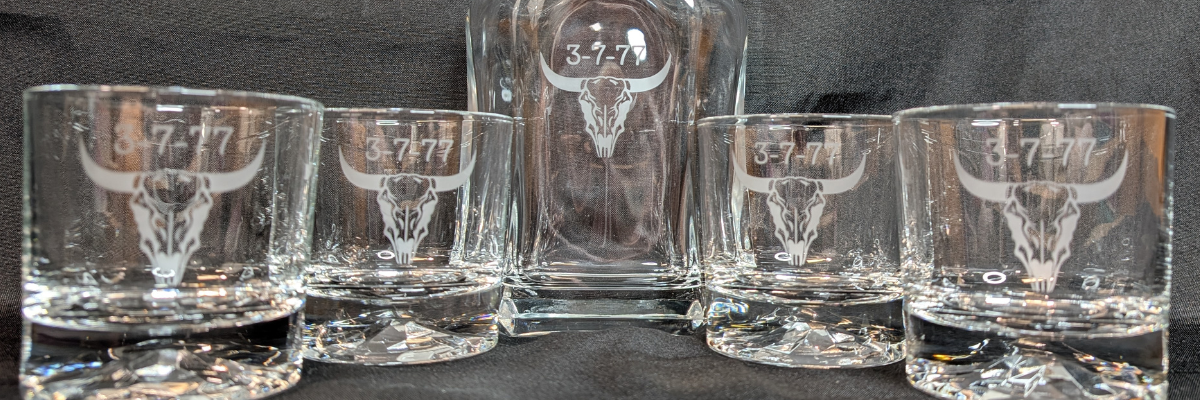
Looking for a unique and elegant gift idea? This custom glass etched decanter set is the perfect project to showcase both creativity and craftsmanship! Using Silhouette Studio to design the stencil and cutting it from Oracal 651 adhesive vinyl with the Silhouette Cameo 5, I created crisp, intricate, and detailed stencils that made the etching process a breeze. With a little help from Etchall etching creme, each piece transformed into a beautifully personalized set — perfect for gifting or adding a touch of class to your own home bar. Keep reading for a full supply list, a look at the step-by-step process, and plenty of inspiration photos of the finished project!
Affiliate links may be present in the following blog post and as an Amazon Associate, I earn from qualifying purchases.
The best part about this project is that it came together for less than $20! I found the perfect glassware and decanter set during a quick trip to Goodwill, and I couldn’t pass it up. It was a very successful shopping trip to Goodwill for glassware.
After a good cleaning, the glass pieces were like new and ready for a makeover. My husband had the idea to create our own custom etched decanter set, and it turned out even better than we imagined. It just goes to show — with a little creativity (and a great thrift store find!), you can create something beautiful, personal, and completely unique without spending a fortune.
Ready to make your own custom etched decanter set? Here’s a look at the supplies and tools I used to bring this project to life — from the thrifted glassware to the vinyl stencil and etching cream that made the magic happen!
Now that you’ve got your supplies ready, let’s take a look at how this custom etched decanter set came together! I snapped a few photos along the way to show each step — from creating the stencil in Silhouette Studio to applying the Etchall etching creme and revealing the final design.
I started by using a file I purchased on Etsy and then did some clean up on the file to make it more suitable for the glass etching project. I did not need all of the fine, intricate details of the original design at the size I was creating with. On the left is the original design I purchased, and on the right is the file I used for my stencil.
Creating a clean cutting stencil can take some test cut attempts just to make sure that the details you want will remain and you won’t have any cutting issues. I started with one stencil, adjusted my design a bit after seeing how it cut, and then cut the rest of the stencils I needed.
I used scraps of Oracal 651 adhesive vinyl for this project. Or if you have a color in your stash that isn’t your favorite, this is the perfect project for it!
I applied the stencils using AT65 Transfer Tape and then I highly recommend adding painters tape around the edges of your stencil design, especially on a curved object. Etching cream is awesome and can work super quick, especially if it gets onto a spot of the glassware that you do not want to be etched. It seems like those mistakes always seem to etch the fastest.
The next step I took is optional, but since I knew my stencils were detailed, I thought it was worth the extra step to apply a bit of heat to the adhesive vinyl and make sure it had a really good adhesion. I grabbed my Heat It Gun by Ranger and applied it for a few seconds all around. Be careful as hot glass looks like cold glass. I let it cool completely so the adhesive vinyl would be well stuck.
I really like this Heat Gun by Ranger as it has more of a direct heat towards your project and doesn’t blow the hot air out around as much. I know that sounds odd, but it’s one of those things that you don’t really “get” until you have used the tool. I used it in a class at Creativation 2025 and came home and bought myself one even though I have several embossing guns already in my tool box.
Here is a close up look at the etching cream as it sneaked off my stencil and why I highly recommend using the painters tape. With curved objects, it’s not always easy to simply make the stencil bigger. That can be more difficult to get a smooth application on the glass object, so the painters tape is a great way to help add an additional barrier.
I leave the etching cream on for 20 minutes and then this is IMPORTANT! Scrape off any excess etching cream and put it back in the bottle!!! It can be reused over and over again. I’ve had bottles of Etchall Etching Creme for many years, and it is still good to use, no matter what color it turns into.
Then I take a paper towel and wipe off any excess etching cream before rinsing it thoroughly in the sink.
They turned out FANTASTIC! And I was doing a happy dance. I do believe that taking the extra time to heat the adhesive vinyl and let it cool before applying the etching cream helped to seal the edges of the stencil to prevent any seepage of the etching cream and give it crisp, smooth lines.
The next step – put them to the test & enjoy our new custom decanter set.
For our project, we thought that Buffalo Trace fit it perfectly and filled the decanter well. (*not sponsored or a promotion for Buffalo Trace – please enjoy responsibly)
Whether you’re creating a special gift or adding a custom touch to your own space, glass etching is a simple way to make something truly unforgettable. With your cutting machine, Oracal 651 vinyl, and a little Etchall etching creme, you can personalize glassware, mirrors, and so much more! I hope this project inspires you to give etching a try and see just how easy it is to get professional-looking results at home. Check out more information for even more creative ideas and tips to take your crafting to the next level HERE!
Save this for future reference by pinning the image below.
Enjoy !
THANK YOU for your support! How can you help? Click HERE & buy a coffee. Every little bit helps with the cost of running the site.
Silhouette Classes
Never stop learning! Let me help you take the anxiety out of learning with Silhouette and get to creating faster! My Silhouette classes are heavily focused on software, so you can take the skills & techniques taught and apply them to many future projects!
**This post may contain affiliate links. What that means is that I may receive compensation if you purchase through the links I have provided. The price you pay for the product or service is not higher but I may get compensated for sharing.
Ready to unlock the full potential of your Silhouette machine? Whether you’re a seasoned crafter or just starting out, stenciling is a fun and versatile technique that can transform almost any project. In this post, I’m sharing creative stencil ideas you can cut right now with your Silhouette—think custom doormats, etched glass, painted wood signs, fabric decor, layered art journaling, and more. You’ll also find must-know tips for designing stencils, multiple stencil materials that can be cut, and step-by-step tutorials below too! This blog post is packed with Silhouette information, tips, and tutorials—so make sure to bookmark it for future reference.
Affiliate links may be present in the following blog post and as an Amazon Associate, I earn from qualifying purchases.
Stencils can be created from many different materials. Cardstock, adhesive vinyl, plastic stencil materials, and more! I’m sharing some of those materials below with tips and tutorials to help you design and create in Silhouette Studio.
Project #1 – Custom Stencils with Silhouette Stencil Material
Create your own stencils with basic shapes and patterns in the Silhouette Studio software.
I created these 2 stencil patterns and cut them from the Silhouette non-adhesive stencil material using the Silhouette Autoblade.
Silhouette has both adhesive backed and non-adhesive backed stencil material as shown above. One might work better for your projects versus another. Since my plan was to use the stencil on a flat material like mixed media paper, I didn’t really need it to be sticky on the backside.
I also kept all the negative bits that were cut out from this stencil for a possible future project. They could be used as elements on a card, creating a pattern on a card, as a stencil by itself, and more!
Then I pressed a piece of bubble wrap into the stencil butter to give it even more texture.
Make sure to let the stencil butter dry completely before touching it. I sometimes get impatient, so having a heat gun can be handy to help speed up the process too.
I shared how I created these stencil designs in the video below.
I use adhesive vinyl for many different projects as a stencil such as glass etching, painting, or in this project below – I was trying it with a Scorch marker for wood burning.
When creating a stencil with adhesive vinyl, weed out the design and that creates the stencil. In the photo below, I have weeded the flower design out of the black adhesive vinyl. I use basic shapes such as a rectangle around the design to create the outer edge of the stencil. The actual project I’m creating will determine the size of the shape I place around my design for the stencil outer edge. For projects such as painting or glass etching, I will give myself plenty of space around the design. For something smaller, as shown below, I don’t need as much extra space since it will be close to the edge of the blank being used.
Now, in this case, my project failed, but I’m still sharing it with you because it happens! Projects don’t turn out, projects fail and what you see on social media is not always reality.
These wood earring blanks were a bit too porous, and the Scorch marker liquid just bled too much. It looks more like those therapy cards – What shape do you see?
And that’s just how it goes sometimes. Some projects fail!
Here is another example of adhesive vinyl cut for stencils that I was using for glass etching.
And this one turned out fabulous!
Additional Resources for the tools I used to create the design:
Project #3 – Layered Stencil with Plastic Stencil Material
We see a lot of questions by users on cutting stencil materials. Typically, it is in reference to plastic materials that a user is trying to cut. While Silhouette machines can cut a lot of different materials, there are limits and it is not just about thickness, but also density and composition.
Another thing to keep in mind is that stencil material is plastic and plastic will dull the blade quicker than other materials. It is perfectly normal to have to increase the blade settings or passes the more that is cut. And if you are cutting this material a lot, you may go through more blades than other thinner, easier to cut materials.
I cut this 6 mil stencil material using the preset for Stencil Material in the Silhouette Studio software. All I changed was to increase the passes to 2 and then when that started having a few hang ups, I increased it to 3 passes.
The settings that work for you will depend on the blade sharpness, material, and your machine. There is no perfect setting that works for all users magically.
I do recommend cutting one stencil design at a time. This way you can catch any issues before you’ve wasted time and materials.
Do not unload the cutting mat before you check the cut and if it did not cut through you can send it again.
I was using the same Autoblade that I used with the Silhouette Stencil material mentioned above and it’s still going strong with the settings pictured above on the 6 mil stencil material.
The hardest part for me was that I had to stop the design and creation process and move on to other things. Once you get started cutting, it is easy to get wrapped up in the projects. Here are a couple more I cut before I moved on to the next phase – using the stencils.
Want to learn even more on how I designed the layered stencil used to create the design pictured above? Check out video tutorialbelow or on the Silhouette Secrets+ YouTube channel.
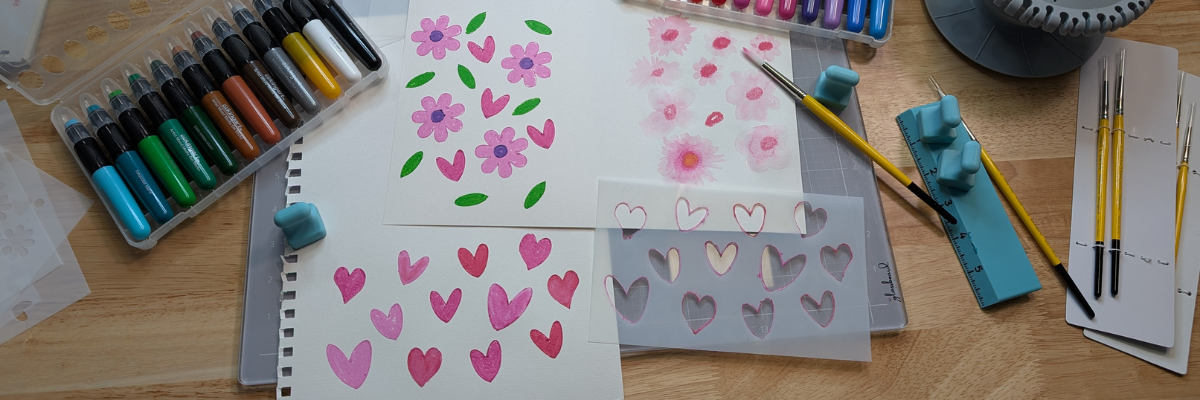
And there is more!!! A follower asked for more design tutorials after seeing the video above. So, I also shared how to quickly design a flower and a heart in Silhouette too!
Click the images above or the links below to watch these quick tutorials:
When working with stencils whether it is a design or a font, the pieces have to all remain in the stencil somehow. If a piece is completely cut out, it will fall out of the stencil.
For instance, for letters A, B, D, O, P, Q, and R, they all have “counters”, which are the centers of the design that would fall out when cut. In order to cut as a stencil and remain in place, the letter needs a “bridge” so it can be held in place when cut.
I typed in “stencil font” to the Silhouette Design Store search and many options come up. All kinds of styles and the perfect one will vary based on your project and taste.
You can see my taste varies and some of these will cut better at larger sizes than smaller. Each project may vary and you never really know until you test it.
The fastest way to create a stencil font is to use a premade font file, but you can also create your own from a font. This works best with a bold font where you can make “bridges” to help hold the centers (counters) of the letters in place.
I used a font style called Grossura to create the stencil quote shown above.
Once you see how easy it is to alter a font, you may not want to stop creating and the ideas may just continue to flow. See how easy it is in this video tutorial below or on the Silhouette Secrets+ YouTube channel HERE.
There is so many different projects you can create with stencils! And you can apply the same techniques and design steps to other projects as well. I hope you’ve picked up a few new ideas and techniques!
Looking for more creative ideas and inspiration? Check out the Crafting Creativity blog posts for a treasure trove of fun and unique projects! Each month, I share a fresh collection of craft ideas designed to spark your imagination and help you expand your skills with confidence. Don’t miss out—your next favorite project could be just a click away!
Save this for future reference by pinning the image below.
Enjoy !
THANK YOU for your support! How can you help? Click HERE & buy a coffee. Every little bit helps with the cost of running the site.
Silhouette Classes
Never stop learning! Let me help you take the anxiety out of learning with Silhouette and get to creating faster! My Silhouette classes are heavily focused on software, so you can take the skills & techniques taught and apply them to many future projects!
**This post may contain affiliate links. What that means is that I may receive compensation if you purchase through the links I have provided. The price you pay for the product or service is not higher but I may get compensated for sharing.
This has been a very popular technique that has popped up in the last year. I have made several tumblers with it and love it!
Affiliate links may be present in the following blog post and as an Amazon Associate I earn from qualifying purchases.
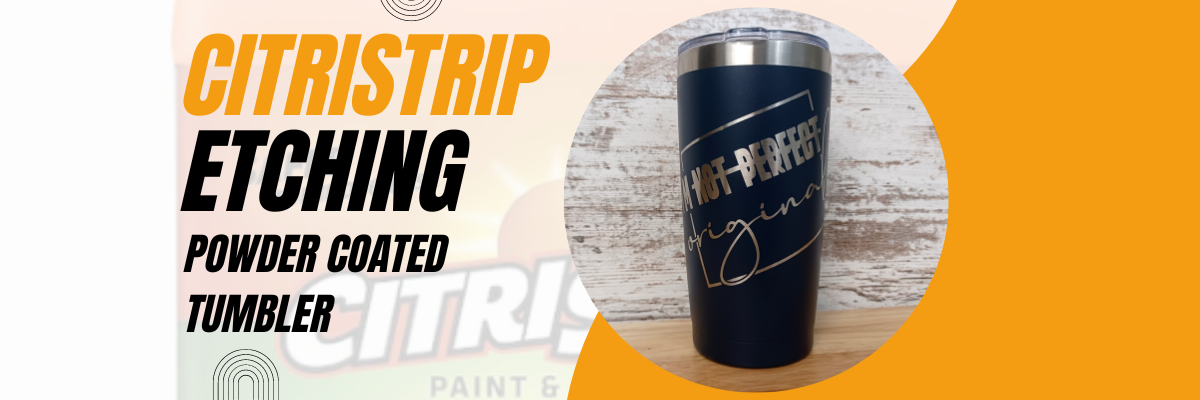
Did you know you could etch a design on a powder coated tumbler? Well, it’s not really “etching”, but that is still the term used in the industry. It’s really the same process as glass etching with an etching cream such as Etchall or Armour Etch. The etching cream is “eating” away at the surface of the object. In the case of glass, it’s an acid etching the glass. But, the same process is done with CitriStrip, which is a paint stripper. So it’s basically “eating” the powder coated surface off the tumbler.
The CitriStrip video demonstration was created for a class I developed earlier this year that does just that!
In the video class, you will learn how to create 4 different designs in the Silhouette Studio software, including how I modified the design used in the video demonstration.
For more details on the class check out the full description HERE on Teachable.
The classes are designed to help you get started faster and take the guess work out of designing or creating projects with your Silhouette. No more anxiety or guessing, follow along at your own pace and watch as many times as needed to fully understand and retain the information. I hope you find something that will help you in your Silhouette journey!
If you have a suggestion on a class you’d like to see in the future, I would love to hear your ideas. You can make those suggestions HERE.
As I mentioned above, I have made several of these tumblers. Here is one of the first ones we made.
You can find the video on us creating the ones pictured above HERE on the Swift Creek Customs YouTube channel too! This was a video I partnered with my husband on and was really a test to see if it really worked!
I hope you have a chance to be creative today!
Save this for future reference by pinning the image below.
Enjoy !
THANK YOU for your support! How can you help? Click HERE & buy a coffee. Every little bit helps with the cost of running the site.
Silhouette Classes
Never stop learning! Let me help you take the anxiety out of learning with Silhouette and get to creating faster! My Silhouette classes are heavily focused on software, so you can take the skills & techniques taught and apply them to many future projects!
**This post may contain affiliate links. What that means is that I may receive compensation if you purchase through the links I have provided. The price you pay for the product or service is not higher but I may get compensated for sharing.
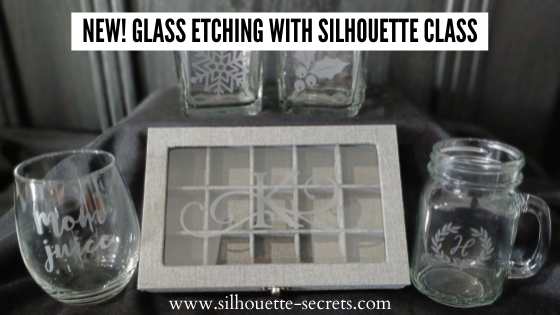
This is a great technique to use for personalized gifts!
In this class, we use the Silhouette software to create stencils for glass etched projects.
I chose to use several different shaped objects in the class to show tips for them all. You do not have to etch the same objects, but it’s good to know tips for multiple shapes. Not all glass objects can be etched. Tempered glass and some types of cookware cannot be etched due to the composition of it. The only real way to know is to test it or learn from others.
We will use the Silhouette Studio software to size the stencils, cut stencils with the Silhouette machine from both Oracal 651 & Oramask 813, transfer the stencils to get a good seal, and then etch with etching cream.
Glass etching is a great way to create unique projects that can be used for home décor, gifts, and more!
Check out the full class description, supply list, and class content HERE.
And use coupon code GLASS2023 to save $5 off this class. Good through 2/28/23. There are now 2 purchase options. A 60-day access and a lifetime access. This is also NEW for 2023!
New Silhouette Curio Class Released
I have updated and released a new Beginner Acrylic Etching Curio Class. This new class is updated to include information on the Silhouette Studio v4.5+ changes, tips on working with acrylics.
In this step-by-step class we will discuss the supplies for etching acrylics with the Silhouette Curio and the entire process to get set up etching acrylics. I will share all of my tips & tricks for getting a good etch on acrylics. This class is designed to give you the tools and resources so you can test and etch on any acrylics that you might be able to source.
Check out the full class description and supply list HERE.
Silhouette “Secrets” – Because some things are just too good not to share! –
Silhouette “Secret” #1
If you are a paper crafter, you may have heard of the Dreaming Tree website. They have some awesome files! This past month I shared a way that can save you time when working with their files, especially if they have many pieces to the file. That is the SVG Merge program.
Troubleshooting cut issues is one of the top searches on both my website and the Silhouette Secrets+ YouTube channel. This month I wanted to share the Troubleshooting Silhouette Cut Issues with EllyMae video. These steps can solve 98%+ of any cutting issues that we see posted.
Whether you are experiencing cutting issues currently or just want to tuck this away for future reference, it has already helped many users get back to cutting faster!
Make sure to Like and Subscribe if you want to be notified of future content released on YouTube!
Silhouette “Secret” #3
I just released a new blog post on Silhouette Library Issues & Troubleshooting Tips. I have been seeing more posts on social media of the library not syncing or missing files, which means some of you may also be experiencing the same thing.
Check out this new post HERE I am sharing quite a bit of information in it. Once I started to write it all out more and more just kept flowing and like my tagline says – Because some things are just too good not to share! – I have a hard time not sharing it all for you!
I hope this month’s “secrets” help you to be more successful with your Silhouette!
Silhouette Secrets+ Sponsor
CrafterCuts, a Silhouette Authorized reseller is a sponsor for my Silhouette Secrets+ Teachable site.
And I have a coupon code to save 10% on your order Use code SECRETS at CrafterCuts Get free shipping with a $35 order I always recommend having extra blades and mats on hand for your projects this year! You will also find this information under the NEW “Sponsor” tab at the top of the Silhouette Secrets+ Teachable site HERE.
Also check out the latest blog post on all of the Recommended Retailers and Font sites HERE. Thank you for your support! Each time you use an affiliate link to make a purchase, it supports me and what I do. You do not pay any more for that product, but I may get credit for the referral.
I also have a “Buy Me a Coffee” option as well on Ko-Fi because I know not everyone buys new supplies each month, but many still asked for a way to support Silhouette Secrets+. Thank you all for your continued support of my small business!
**This post may contain affiliate links. What that means is that I may receive compensation if you purchase through the links I have provided. The price you pay for the product or service is not higher but I may get compensated for sharing.
Let me tell you, this class was challenging. Teaching how to use Silhouette is the easy part that I can do with my eyes closed (maybe most of the time). However, the tech issues, it was non-stop for me this round. And not Silhouette tech issues, but everything else, from recording software to the editing process. It was driving me batty! But 2 days and many hours later, I got it finished, with a few cuss words at the editing/recording software.
Glass etching is not difficult to do and I share my tips & tricks in this 1 hour 42 minute video class. In the class, I share cutting tips for measuring, sizing, and cutting 4 different stencils on 2 different materials. I cut from Oracal 651 and Oramask 813. Then I also demonstrated and provided tips to applying the stencils to 4 different shaped objects. For the class, you do not have to use the same glass objects or do all of the projects, but it will give you ideas so you could use a wide variety of blanks.
The most difficult part of glass etching is getting a good photo of it due to the glass and glare.
Affiliate links may be present in the following blog post and as an Amazon Associate I earn from qualifying purchases.
I’ve included the class supply list below to help prepare for what I used in the class.
Supplies needed:
– Silhouette machine – Etchall Etching Cream – Amazon or – Etchall.com use code silhouettesecretsplus and save 10% *This class uses Etchall cream. Using other brands of etching cream may not yield the same results. Etchall can be reused so is a great investment. – Oracal 651 or 631 – Oramask 813 – Transfer tape – Alcohol swabs – Silhouette spatula or popsicle stick – Painters Tape – Rubber gloves – Access to a sink & paper towels
*Not all glass items can be etched. Tempered glass cannot, cookware from Ikea cannot, etc. The only way to know is to test it out for sure.
**You do not have to have the same items that I am using for class, but I will share some tips for these different shaped objects using the items in the photo above.
Or check out the 19 other Silhouette classes available on my Teachable site HERE.
I’d love seeing what you are creating with your Silhouette machines or software. Feel free to post photos or questions on my Facebook group at Silhouette Secrets with EllyMae.
Save this for future reference by pinning the image below.
Enjoy!
THANK YOU for your support! How can you help? Click HERE & buy a coffee. Every little bit helps with the cost of running the site.
Or if you are looking for more in-depth, step-by-step classes, check out all of my online Silhouette classes on my Teachable site HERE.
**This post may contain affiliate links. What that means is that I may receive compensation if you purchase through the links I have provided. The price you pay for the product or service is not higher but I may get compensated for sharing.
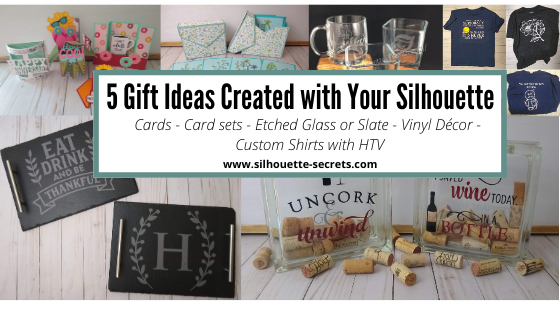
There are so many possible things that you can create using your Silhouette machine. Today let’s take a look at some possible gift ideas you can create.
Each one of these gifts can be tailored to your needs or personalized in their own way.
I’ve provided more details on each project below such as examples, supply lists, and resources. Perfect to get started with gifts for the year!
Gift idea details
Affiliate links may be present in the following blog post and as an Amazon Associate I earn from qualifying purchases.
1 – Cards
The great part about cards is anyone can do it! They can be simple 2 color cards or range up in complexity.
A hand-made card is a special gift, no matter if the recipient appreciates that or not. It is because you created it! You used your time & talent to create it!
– Glass coffee mug from Target – Glass candle holders from Dollar Tree – Slate: Serving tray in photo above from Johnson Plastics Plus Other slate: Cheese board, hexagon coasters, circle coasters also can be found on Amazon – Etchall Etching cream Some use Armour Etch, but I prefer Etchall and get a perfect etch each time. I have used Armour Etch in a pinch and it was ok, but highly recommend using in a well ventilated area for either. – Oracal 651, 631, or Oramask 813 for stencil – Transfer tape Adhesive vinyl and transfer tape can be found at: Expressions Vinyl, Heat Press Nation, Silhouette America or Swing Design Pretty much anything that can stick and seal well so the etching cream does not seep underneath can be used as a stencil
Supplies used: – Glass blocks from Hobby Lobby or other (these have a hole to insert objects inside) – Adhesive Vinyl and transfer tape Adhesive vinyl and transfer tape can be found at: Expressions Vinyl, Heat Press Nation, Silhouette America or Swing Design
Here are a few shirts I created for family members. Having the ability to customize and create designs in the Silhouette software is a big plus.
These VooDoo designs had jumped in my cart at some point in the past and it was perfect for a couple family members having surgery and who have chronic pain. They loved them!
Whether you go big or go small, the ability to create a custom or handmade gift with your Silhouette is awesome!
I always see user’s frantically creating gifts at the end of the year for the holidays, but why not start now. Use these gift ideas for birthdays, anniversaries, house warming gifts, and holiday gifts as well!
I would love to see what you create with your Silhouette! Feel free to post on my Facebook group Silhouette Secrets with EllyMae. If you have questions feel free to post below or on the Facebook group too!
Save this for future reference by pinning the image below.
Enjoy!
THANK YOU for your support! How can you help? Click HERE & buy a coffee. Every little bit helps with the cost of running the site.
Or if you are looking for more in-depth, step-by-step classes, check out all of my online Silhouette classes on my Teachable site HERE.
**This post may contain affiliate links. What that means is that I may receive compensation if you purchase through the links I have provided. The price you pay for the product or service is not higher but I may get compensated for sharing.
This 1 hour and 12 minute video class includes: – Setting up a design page using a Silhouette file to cut – Setting up the software to cut cardstock – Setting up the Curio to cut cardstock – Test cuts – Setting up a design page using a Silhouette file to cut adhesive vinyl – How to move a test cut – Weeding adhesive vinyl – Applying transfer tape to adhesive vinyl
Don’t own a Curio, no problem! Other Silhouette classes are available too! Click HERE for the full list or keep scrolling below to view. These classes are created in the Silhouette Studio v4 software and include all my tips, tricks, and supply lists to complete each class. All of the classes are created using the same class content that I use when teaching a hands-on, in-person lesson and have as little video editing as possible, in order for you to get the full class effect.
However, you learn the Silhouette machine, the best way is to play, play, play. Each user may be different in how they learn best. I get a lot of requests for online classes. Want to see student testimonies? Click HERE.
What ever tools you use to learn your Silhouette machine, the key is to do it! Don’t let it sit in the box. Get it out and start playing with it!
Enjoy!
Want to save this information for later – pin the image below!
**This post may contain affiliate links. What that means is that I may receive compensation if you purchase through the links I have provided. The price you pay for the product or service is not higher but I may get compensated for sharing.
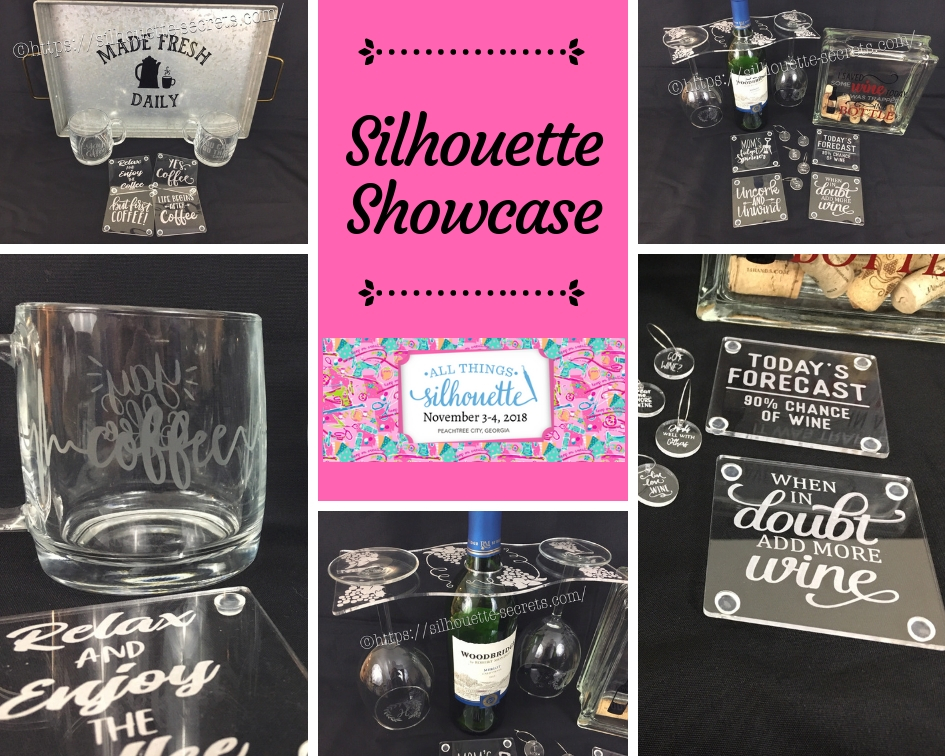
This year I am honored to be teaching several classes at the 2018 All Things Silhouette Conference hosted by Terri Johnson Creates. An option at the conference is participating in the Silhouette Showcase. This is a chance to show off things that you have made using your Silhouette machines or software and is open for all levels of users. Each person who enters gets an extra ticket to a prize drawing and while the staff is excluded from winning, we can display items in the hopes of inspiring others and showing all the possibilities with Silhouette.
I was so excited to be able to make up a few things to display during this event and wanted to share those with you.
Silhouette Showcase
Not sure what you start your day with, but mine is coffee.
So I started with this coffee inspired collection.
If you have followed me in my “Let’s Explore v4” series or on my Facebookpage or group, you may know that I enjoy a glass of wine at the end of the day.
So of course, a wine collection set is right up my alley.
Glass etched wine glasses.
For the etching stencil, I once again used the Oracal 651 vinyl and Etchall etching cream. The Monogram Wreath Font by Kristen Magee – Design #260225 was used to create these personalized glasses.
Don’t forget when doing a print and cut, to select all the objects that you do not want to cut out and then choose the No Cut option on the Send Tab.
For instance, all I want is the outside edge to cut, so all the Cut lines except the outside edge need to be turned off.
I started my Silhouette journey with paper crafting and continue to have a passion for it as well as all the other neat things you can do with it such as vinyl, glass etching & acrylic with the Curio, etc.
I could have just left it at that, but of course, I didn’t. I added a little detail to the back that makes it stand up even more.
This easel adds the perfect touch to my recipe, so I am easily able to transport it on the plane and display it at the Silhouette Showcase.
This is a file by Lori Whitlock called Easel for Back of Card – Design #76159 and I have used it many times when creating paper crafts.
I hope you have enjoyed seeing the projects I created using my Silhouette software and machines for the Silhouette Showcase at the 2018 All Things Silhouette Conference.
Enjoy!
I love seeing what you are creating with your Silhouette machines!
Feel free to post on my Facebook group at Silhouette Secrets with EllyMae.
**This post may contain affiliate links. What that means is that I may receive compensation if you purchase through the links I have provided. The price you pay for the product or service is not higher but I may get compensated for sharing.
THANK YOU for your support! How can you help? Click the link to buy a coffee. Every little bit helps in the cost of running the site.