
Have you been joining in on the Silhouette and Michael’s free Zoom classes?
I have and I am loving them!

Affiliate links may be present in the following blog post and as an Amazon Associate I earn from qualifying purchases.
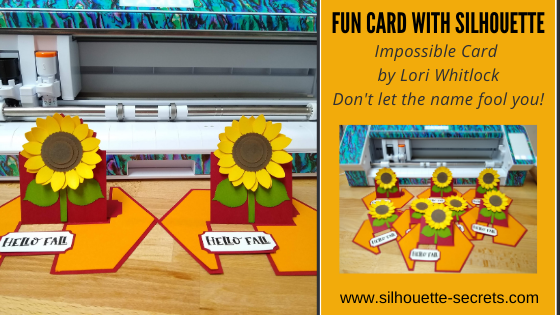
This weeks class was with Lori Whitlock and she showed how to cut and assemble the Impossible Card Sunflower – Design #330051.
Don’t let the name trip you up! They are pretty easy to assemble!

I thought I’d share a few tips that I like to do when I’m working with cards or projects like this.
Tips
Cut multiples of the Design
When I’m working with something like this, especially cards that have multiple pieces to cut, if I can fit more than one of the main card piece on a sheet of 12″ x 12″ cardstock, I’ll cut multiples out.

Since I am already cutting one out, it is not much more effort to cut a couple extras. Whether I assemble them all at the same time or set them aside for later, I will have the cutting part done.

Cut material down to the size needed.
By cutting the material down to the size I need, I can fit multiple colors onto the cutting mat to cut it all at one time and it can save the adhesive on the cutting mat as well.

How does this save the adhesive on the cutting mat?
Yes, there is still cardstock covering most of the cutting mat.
However, by cutting it down to the size I need in each color, I am only placing it on the mat one time versus putting 3 full sheets of cardstock on the cutting mat and removing it after each cut.
That right there will add a bit more life to your cutting mat.
For more tips on getting the most out of your cutting mats click HERE.
How do you know where to line up the colors?
I use the Transparency slider on the Page Setup Panel to reveal the grid of my cutting mat so I can line up the design and see where I need to place the cardstock on the cutting mat.
If you are using a Silhouette cutting mat, the grid on the cutting mat lines up with the cutting grid on the Silhouette software if the cutting mat is loaded properly.

Use the Textured Cardstock setting
I use the Textured Cardstock Setting to cut almost all cardstock. However, I do prefer to cut smooth cardstock as textured can be more of a headache to cut because of that textured surface. That does not mean you cannot cut textured cardstock, however, it may not always give you the clean cut you want.

Now, not all cardstock is the same so the best thing you can do is a Test Cut. My go to cardstock is Recollections brand from Michaels or Close to My Heart cardstock.
Test cut, Test cut, Test cut!!!
Why did I say it 3 times? It is one of the most important habits that you can get into when cutting on the Silhouette. This will save you a lot of time and wasted materials if you start with a test cut anytime you are using a new material or changing materials.
You can use the Test Cut feature in the software that is located at the bottom right corner of the Send tab.

Or my preferred method is to type out a capital B and move that around on my design mat as needed.

Why a B?
There is nothing magic about a capital B and it doesn’t have to be a specific font, the default font is fine. A capital B has straight lines, corners, and curves. This makes it perfect for seeing how the settings and your blade will work for the material you are cutting.
Keep a dedicated cardstock blade
Keeping separate blades for each materials can help the blades last longer. Different materials dull the blade at a different rate. It is just like having separate scissors for fabric vs paper.
Add designs for future projects to a print and cut page
If there is a print and cut aspect to the project, add more designs onto the page to fill it up. Set those extras aside for when you get a chance to cut out the pieces for those cards.

I cut 8 of the Impossible Card Sunflower design but still had extra space on the print and cut page so I looked in my library for future cards I might make and had 2 more of the Impossible cards. I opened each file and then copied the sentiment from the file to my print and cut page. I cut several of each to fill up my page. Now my print and cut portion is done for those future projects. Make sure to keep them some place safe that you remember for later.
For more tips on print and cut check out these two posts:
Print and Cut Basics
More Print and Cut Tips
and my final tip for the day….
Take advantage of these free Zoom classes hosted by Silhouette and Michaels.
When you join the call, come to pick up the tips and tricks from the instructor.
Watch the video and soak up the creative energy and then later create the project!
I wouldn’t recommend trying to create at the same time as the class. They are typically quick, 1 hour classes and it is hard to keep track of it all at once.
Don’t forget that you can come back and watch the replay after it’s posted.
Check out this video on Michaels YouTube channel HERE.
I am loving these Zoom classes to connect with other Silhouette users and spark that creative energy again. This has been an interesting year and at least this is one good that has come out of it – more online classes.
Find Lori Whitlock’s designs in the Silhouette Design Store or on her website HERE.
She is an amazing graphic designer and has some awesome cut files!
And you will find that she has a wide selection of tutorials to go along with those cut files HERE.
I hope these tips have helped give you some ideas on how you can be more productive with your Silhouette machines.
What are you creating with your Silhouette? I’d love to hear!
Feel free to post photos or questions on my Facebook group at
Silhouette Secrets with EllyMae.
Save this for future reference by pinning the image below.

Enjoy!

**This post may contain affiliate links. What that means is that I may receive compensation if you purchase through the links I have provided. The price you pay for the product or service is not higher but I may get compensated for sharing.
Discover more from Silhouette Secrets-Swift Creek Customs
Subscribe to get the latest posts sent to your email.


[…] cut fileLet’s Explore v4 – Creating a Card – Free Fancy Fold Flip Card cut fileA Fun Card with SilhouetteSketching with […]