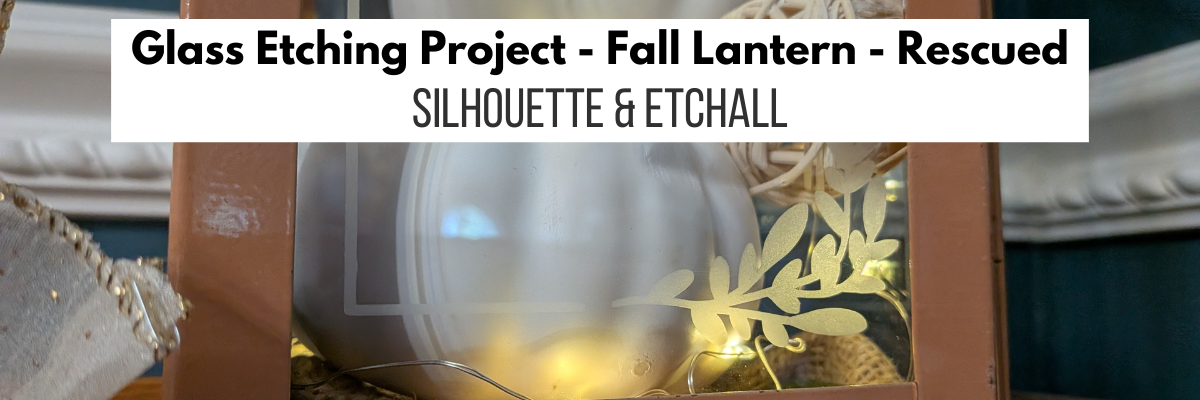

As I’ve mentioned in my past glass etching projects, I look for glass blanks whenever I’m out at a thrift store. Not only can you find great deals, save money on blanks, but can repurpose an item and give it new life too! I found this lantern at a thrift store and it was not perfect. But it was kismet because I knew just what I wanted to do with it.
Affiliate links may be present in the following blog post and as an Amazon Associate, I earn from qualifying purchases.

It was dirty – no problem. That can be cleaned up. It was pretty beat up – scratches in the paint, sticky residue on the panels, the handle, top and the, door were bent. But, it was the perfect blank for this project.

Now the only thing left to do was take the time to pull the entire project together. I am sharing the steps to glass etching, supplies, and my project process below.
This project was inspired by something I found on Pinterest, which turned out to be an AI image and not a real project that a human had created, until now. I used that creative inspiration and made my own real life Glass Etched Fall Lantern design.
Steps to Etched Glass Projects
- Create a stencil for etching.
- Clean glass blank with alcohol and allow to dry.
- Apply stencil.
- Mask off edge of stencil to prevent bleeding
- Apply Etchall Etching Creme and allow to sit for 20 minutes.
- Remove any excess Etching Creme and place back in the bottle.
- Wipe off remaining excess with a paper towel and safely discard paper towel.
- Run water in the sink and rinse off decal thoroughly.
- Remove masking tape and adhesive vinyl under running water.
- Rinse blank thoroughly.
- Dry and Enjoy!
Glass Etched Lantern Supplies
- Silhouette Studio Software
- Silhouette Cameo or other cutting machine
- Silhouette Autoblade
- Silhouette cutting mat
- Etchall Etching Creme
- Glass Container: Vase, Candle Holder, etc. – Dollar Tree
- Rectangle Leaves Frame by Silhouette – Design #395355
- Adhesive Vinyl
- AT65 Transfer Tape
- Squeegee
- Silicone Mat
- Nitrile Gloves
- Popsicle Stick
- Optional: Ranger Heat It Craft Tool
Customized Fall Decor Lantern Supplies
- Magnolia Wreath by Maison Gregoria – Design #391405
- Lia Griffith Extra Fine Crepe Paper – Secret Garden – cream
- Lia Griffith Heavy Crepe Paper – English Garden – brown
- Alcohol Ink Markers – yellow and brown
- Hot Glue Gun
- Hot Glue Sticks
- Gold Wire Ribbon
- Fairy Lights
- White Pumpkins
- Burlap Fabric
- Other: Home Decor Balls
Glass Etched Lantern with Silhouette
Gather the supplies for the glass etching project and protect your work space.
I started by measuring the panels. On this lantern, the panels are not the same size and the design needed to be adjusted to fit. I did modify this design a bit to make it work for this project.

Once I had all of the panel stencils designed to fit, then I grabbed some vinyl in a color I don’t use much of and cut each panel. I did do a test cut before cutting the entire stencil design.

I love being able to create my own stencils with a cutting machine and having the option that if I mess something up, such as put it on crooked, I can simply remove it and cut another stencil. My project is not lost and I don’t have to go buy more. I do use scrap vinyl whenever I can or colors that I don’t typically use on projects or have more of than others. The stencils do not have to match either.

I used transfer tape to apply the stencil onto the glass panels on the lantern. This particular lantern the panels were not removable and I worked on each panel separately. I tried to apply the stencil as straight as possible, however, as I mentioned, this lantern is a bit damaged, so not everything is perfectly aligned. And that is OK!

Glass etching is permanent and I like to ensure success, especially with detailed designs. So I used a little bit of heat with my heating tool. Be careful here and let the glass cool after this. Hot glass looks like cool glass.
I also add a layer of painter’s tape around the edges just in case any etching creme dribbles or runs. For this project, I felt it was very important given the edges of the glass panels and the damage making things crooked.

I then cover the entire stencil area where the design is with Etchall etching creme and wait 20 minutes.

When 20 minutes is up, I carefully scrap the Etchall etching creme off and put it back in the jar. Etchall etching creme can be reused and does not lose its potency. After the excess is scrapped off, I will carefully wipe the design with a paper towel before running water in the sink and rinsing off any remaining residue. At this step, you do want to be careful not to dislodge any pieces of the design. It never fails that when an oops happens and the creme touches an area you do not want to etch; it will etch in seconds.

Once the Etchall etching creme has been rinsed, removed the stencil and painter’s tape, and then carefully dry the glass container.

Here is a close up look at the top of the first panel etched.

I then repeated that process for the other 3 panels on the lantern. Do you have to do all 4 sides? No, but why not! For my project I wanted it to show from every angle.
After all the etching is done, then it was time to start working on the rest of the project. I love magnolias and made some a few years back that I have on display in my living room. And the best part was I had extra crepe paper already prepped for the double sided magnolia leaves.
I used the Magnolia Wreath file by Masion Gregoria and cut out a template from cardstock for the magnolia flowers. Then easily cut them by hand. I find this much faster than setting up my machine to cut as I can cut through multiple layers of crepe paper easily with scissors.

I took an alcohol ink marker and colored long rectangles of crepe paper for the stamin. Then used fine scissors and fringed it before rolling and gluing it for the centers.
And then I assembled the flowers and leaves. I ended up with 4 magnolia flowers.

This was one of those projects that I test to see what works and then decide if I liked it before gluing things into place. I placed a piece of burlap fabric in the bottom of the lantern, added a few drops of glue to hold it down, then added the white pumpkins and some other random decor items inside.
Hot glued the flowers to the outside, strung the fairy lights inside and around the outside edge. I hid the switch under the back flower. And added a gold wired ribbon bow on top. I love how it turned out. I think the lantern cost me $7 at the thrift store and it turned out amazing! The biggest investment on my end was the time to create it after I decided to stop dreaming and get to work.

Here is a close up look at the front top of the front panel.

And a close up look at the bottom of the front panel.

Another awesome project with Etchall Etching Creme!

Here is a look at the left side of the glass etched lantern showing the magnolia blooms.

A look at the back of the glass etched lantern. The little battery pack for the fairy lights fit perfect underneath the magnolia leaves and is easily accessible.

And a look at the right side of the glass etched lantern.

Glass etched projects are a great way to turn something plain into something unique. Or something that others might pass up on because it’s a bit damaged and repurpose it into an amazing decor piece.
I love using Etchall etching creme and have perfect etches each time! I’ve compared etching creme’s and it is the best. Glass can have its flaws, which can cause some imperfections in the etch, but those are few and far between with Etchall etching creme.
I’ve already picked up my next project piece at a craft thrift store a few weeks back and it’s calling my name to be customized.
Check out more glass etching projects HERE.
Save this for future reference by pinning the image below.

Enjoy !
THANK YOU for your support! How can you help? Click HERE & buy a coffee.
Every little bit helps with the cost of running the site.

Silhouette Classes
Never stop learning! Let me help you take the anxiety out of learning with Silhouette and get to creating faster! My Silhouette classes are heavily focused on software, so you can take the skills & techniques taught and apply them to many future projects!