
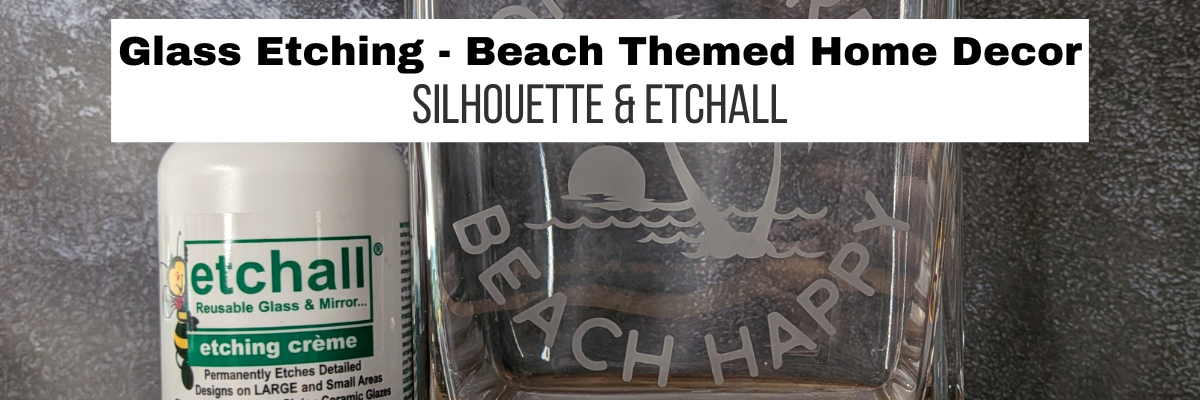

I love glass etching and being able to take something plain and make it stand out. I am always on the hunt for glassware at thrift stores and I’ve found some really good things. Thrifting is a great way to make amazing projects and keep on budget too. And Etchall etching creme never disappoints! It is so worth it, and a bottle lasts me a long time and more projects than I can count.
Affiliate links may be present in the following blog post and as an Amazon Associate, I earn from qualifying purchases.
Here is a recent find from the thrift store and I love how it turned out. Now, full confession, it takes me a long time to find a design I like and settle on. I’ll share a glimpse of that farther in the blog post.

Steps to Etched Glass Projects
- Create a stencil for etching.
- Clean glass blank with alcohol and allow to dry.
- Apply stencil.
- Mask off edge of stencil to prevent bleeding
- Apply Etchall Etching Creme and allow to sit for 20 minutes.
- Remove any excess Etching Creme and place back in the bottle.
- Wipe off remaining excess with a paper towel and safely discard paper towel.
- Run water in the sink and rinse off decal thoroughly.
- Remove masking tape and adhesive vinyl under running water.
- Rinse blank thoroughly.
- Dry and Enjoy!
Glass Etched Decor Supplies
- Silhouette Studio Software
- Silhouette Cameo or other cutting machine
- Silhouette Autoblade
- Silhouette cutting mat
- Etchall Etching Creme
- Glass Container: Vase, Candle Holder, etc. – Dollar Tree
- Don’t Worry Beach Happy by Sophie Gallo – Design #266835
- Adhesive Vinyl
- AT65 Transfer Tape
- Squeegee
- Silicone Mat
- Nitrile Gloves
- Popsicle Stick
- Optional: Ranger Heat It Craft Tool
Glass Etched Decor with Silhouette
Gather the supplies. I use scraps whenever I can. As you’ll see through the photos my adhesive vinyl color changes. I grabbed a scrap of adhesive vinyl and unfortunately, it was bad. It cut fine, but when I went to weed it, I knew there was an issue because it was not easy to weed. And in my true stubborn fashion, I worked hard and weeded the entire thing and then it wouldn’t stick to the glass. I know better. And I still continue to punish myself and try to salvage it. I’m sure there is at least one other person reading this that understands.

A couple signs that adhesive vinyl has gone bad is that with a good cut it’s still hard to weed and the backing separates from itself. This generally appears that the backing sticks to the adhesive vinyl and is difficult to weed. This can also happen when the cut is too deep, but as you get more and more experience you will start to recognize old vinyl versus a bad cut.
I measure the blank and create the shape the same size in the Silhouette software using the Drawing Tools. Then it is time to find the design for your project. This takes me the longest time. I will go through so many options, but I don’t delete them, I just move them off to the side and keep on creating.

Glass etching is permanent and I like to ensure success, so I like to hit it with a little bit of heat. But, be careful and let the glass cool after this. Hot glass looks like cool glass. This step can help with little bits being held in place better. It can also help smooth out any areas that may have had allowed etching creme to seep underneath. I also add a layer of painter’s tape around the edges just in case any etching creme dribbles or runs. This has saved me so many times.

I then cover the entire stencil area where the design is with Etchall etching creme and wait 20 minutes.

When 20 minutes is up, I carefully scrap the Etchall etching creme off and put it back in the jar. Etchall etching creme can be reused and doesn’t lose its potency. After the excess is scrapped off, I will carefully wipe the design with a paper towel before running water in the sink and rinsing off any remaining residue. At this step, you do want to be careful not to dislodge any pieces of the design. It never fails that when an oops happens and the creme touches an area you do not want to etch; it will etch in seconds.
Once the Etchall etching creme has been rinsed, removed the stencil and painter’s tape, and then carefully dry the glass container. I love using Etchall etching creme and have perfect etches each time! I’ve compared etching creme’s and it is the best. Glass can have its flaws, which can cause some imperfections in the etch, but those are few and far between with Etchall etching creme.

I love it! That sounds like a broken record, but it’s true when I etch with Etchall etching creme. Now the only thing left to do is find the perfect thing to fill this glass etched decor vase with. I tried some shells and sea glass, but just wasn’t happy with how it looked, so I am still on the hunt for the perfect fit to this gorgeous piece.
Give it a try! But I’ll warn you, it might be addicting and then you’ll be on the hunt for more glassware to etch and more projects get added to your to do list.
Check out more glass etching projects HERE.
Save this for future reference by pinning the image below.

Enjoy !
THANK YOU for your support! How can you help? Click HERE & buy a coffee.
Every little bit helps with the cost of running the site.

Silhouette Classes
Never stop learning! Let me help you take the anxiety out of learning with Silhouette and get to creating faster! My Silhouette classes are heavily focused on software, so you can take the skills & techniques taught and apply them to many future projects!


**This post may contain affiliate links. What that means is that I may receive compensation if you purchase through the links I have provided. The price you pay for the product or service is not higher, but I may get compensated for sharing.
Discover more from Silhouette Secrets-Swift Creek Customs
Subscribe to get the latest posts sent to your email.









