Posted on — Leave a comment

1 Stencil, 6 Creative Projects: Transform Your Design into Home Décor, Jewelry, Decals & More with Silhouette

Silhouette Secrets+ with EllyMae

Looking for stencil craft ideas to spark your creativity? This week, I’m sharing how one stencil design can be transformed in six fun and unique ways! Using the Hand Carved Flower Stencil by Kassy’s Parlour, created by artist Kassandra Louise Designs, I turned this single file into a home décor sign, cup decal, jewelry pendants, painted canvas, and more. It’s incredible how one design can inspire so many creative projects.

Affiliate links may be present in the following blog post and as an Amazon Associate, I earn from qualifying purchases.

When you look at a design file, do you see one project idea, or can you envision it on multiple projects? I started the Crafting Creativity series to help spark ideas and inspiration to do more with your files.

In this episode, I’m featuring this Hand Carved Flower Stencil Pattern by Kassy’s Parlour.

Digital stencil design featuring hand-carved flowers on a black background, labeled with available file formats.

Crafting Creativity Projects – Stencil Craft Ideas

Project #1 – Stencils with Stencil Material

Once I got started cutting stencils out, it was hard to stop.

A silhouette cutting machine with a flower stencil design and a quote stencil cut out, placed on a wooden tabletop.
Designs by Kassy’s Parlour

These are cut from 6 mil stencil material and it cut beautifully.

A person holding a flower stencil design above a cutting machine with a light-colored cutting mat.

Here is a look at the stencil before I unloaded it from the machine. For harder to cut materials, checking the cut before unloading the machine is a great habit to get into. If the cut did not complete, you can send it again and it should cut in the same place. This is great for materials such as stencil materials that dull blades quicker and may need extra passes to cut through.

Once the stencil is cut, it can be used for many different projects and mediums.

One thing to keep in mind is that stencil material is plastic and plastic will dull the blade quicker than other materials. It is perfectly normal to have to increase the blade settings or passes the more that is cut. And if you are cutting this material a lot, you may go through more blades than other thinner, easier to cut materials.

I cut this 6 mil stencil material using the preset for Stencil Material in the Silhouette Studio software. All I changed was to increase the passes to 2 and then when that started having a few hang ups, I increased it to 3 passes.

Additional Resources:

Supplies Used:

Project #2 – Card Background with Stencil

Have you ever used a Gel Press or Gelli Plate before? This is such a fun technique!

A hand holding a printed stencil design featuring various flower shapes, showcasing a lilac color against a white background.

Basically, a gel press is a jelly plate that you can add paint or other mediums on top of and then you press a piece of paper over top of it and pull the paint off. You can layer colors, add textures, and have lots of options.

An overhead view of a crafting workspace featuring a gel press printing technique. A teal and purple patterned paint layer is applied on a piece of paper, with a roller and stencil positioned nearby.

Here are a couple of pulls that I did using the stencil on top of the Gel Press.

A workspace displaying a stenciled design on paper with blue and purple acrylic paints, accompanied by two bottles of DecoArt paint. A ruler and cutting mat are visible in the background.

These can turn out so neat and each one is unique. Once dry the pages can be used for many projects such as cards, mixed media pages, tags, backgrounds and more!

A craft workspace featuring a handmade card reading 'Just a Note' surrounded by acrylic paint bottles, tools, and a gel press.

I used two of the gel prints to make this card and then stamped with black ink directly on top of the print. It turned out pretty neat with the paint showing through the black ink.

A handmade card featuring a floral stencil design in shades of purple, with the words 'just a note' and 'to say hello' printed in bold black text.

Supplies Used:

Project #3 – Home Decor Sign

For this project, I opened the stencil design, changed the fill color to transparent and then right clicked and chose “Release Compound Path”. This will break up the design into pieces. I then deleted all the pieces around the full flower design. Then selected all of the flower pieces, right click and choose “Make Compound Path”.

I am using a 8″ frame, so drew a square and sized it to 8″ x 8″. I selected the flower design and filled it with black, just to see it better. Then started playing around with patterns. I filled the flower design with a pattern and decreased the transparency in the Fill Color panel. Then I started filling the background square with patterns and testing them out.

Here is a look at my working file where you can see the different pattern options I was playing around with.

Silhouette Studio design screen showing a floral background with the text 'It never gets easier You just get better' for creating custom decals.

Then I printed the design onto Epson Presentation Paper – Matte and cut it with my paper trimmer.

A printed design with the text "It never gets easier. You just get better" is placed on a wooden table near a cutting machine and a paper trimmer.

When there are straight lines and a larger image as shown above, an old school paper trimmer does the trick versus trying to set up for a print and cut. I use Silhouette Studio to do the design work and printing and then with 4 swipes, my paper trimmer has the project ready to go.

A framed wall art piece featuring the quote 'It never gets easier. You just get better.' against a blue background with a floral design, alongside a white pitcher holding purple flowers.

And the best part about this is, you can change it out whenever you feel like. Print a new image and swap it out to coordinate with the season, your decor, or your mood.

Additional Resources:

Supplies Used:

Project #4 – Cup Decal

I cut several flower decals from patterned adhesive vinyl to decorate my new travel coffee cup. I used the same technique as described above to separate the flower design from the stencil and cut individual flower decals.

A hand holding a white insulated cup featuring a blue floral design, set against a grassy background.

After I weeded the decals, I cut them apart and then applied transfer tape and placed each one individually around the cup, so I could control where they were and how they fit together.

Here is a close up of the decal where I hope you can see a bit of it’s sparkle & shine.

Close-up of a travel coffee cup featuring a blue flower decal with a glossy finish.

Tips for Creating Cup Decals with Adhesive Vinyl

Surface Area

When applying adhesive vinyl to a surface that may be handled often, you want to keep in mind the size of the pieces of the design. The smaller the piece, the less adhesive there is to stick to the surface of the blank. So thin letters, intricate flourishes, delicate designs may not stick well to the surface of an object that’s handled or washed.

Even if using “permanent” adhesive vinyl, that doesn’t mean it will never come off or lift. Permanent adhesive vinyl simply means it has a stronger adhesive on the backside than “temporary” vinyl once cured. You can still peel it off, pick it off, scrape it off, etc.

The greater the surface area of the solid pieces of the design, the more adhesive there is to stick to the object.

There are a couple things you can do to help with a decal staying put longer.

  • thicken fonts or enlarge small areas of the design
  • eliminate the smaller or tiny sections of a design if possible
  • clean the surface of the cup with an alcohol swab & let it dry completely – this cleans off any dust or oils off the surface that can repel the adhesive
  • after applying the decal, let it sit for 48-72 hours for the adhesive to set up
  • apply a bit of heat to help the adhesive vinyl stick – not too much, you don’t want to melt it

Surface of the Cup

Stain resistant, nonstick, or silicone surfaces are designed to repel anything from sticking to it. Even if you are able to get a decal to stick initially, it usually does not for long.

It doesn’t just apply to cups though. There are a lot more stain resistant paints on the market and being used to paint interior walls of homes. Stain resistant is designed so things don’t stick to it, so even a “permanent” adhesive vinyl decal may not stick.

Textured surfaces can also be more difficult for a decal to stick to or it may not last long on a texture surface.

Placement of the Decal

When placing decals onto a cup, keep in mind where it is placed. I purposely placed my designs higher up on the cup knowing that it would be set into a car cup holder.

The more a cup is handled, the greater chance there is that the decal can catch, lift, or come off. This would include things like someone picking at the design, washing the cup, scrubbing the cup, sliding in and out of a car cup holder, being tossed around in a bag, etc.

And…

Sometimes things just happen and it won’t last. The best part about having a cutting machine is that you can cut another one. Or you can take the current one off, clean the cup, and apply a new decal to fit your mood.

Additional Resources:

Supplies Used:

Project #5 – Custom Jewelry for Pendants, Bag Tags, Keychains, Earrings…

I created a collection of jewelry pendants with matching earrings, bag tags, keychains and more

A collection of custom jewelry including necklaces, earrings, and keychains featuring vibrant floral designs encased in circular metal settings, displayed on a dark background.

Once I got started with this, it was hard to stop and I ended up creating quite a few.

A set of jewelry including a pendant, earrings, and a charm, featuring intricate blue floral designs with glitter, accompanied by a blue tassel.

When working with digital supplies, it’s so easy to change things up and I think the Mod Podge Sparkle added so much to this project.

A collection of colorful jewelry items including necklaces, earrings, and keychains featuring vibrant floral designs and glitter accents, displayed on a dark surface.

See all the written details in this blog post – Sparkle & Shine: DIY Custom Jewelry HERE

A display of various DIY jewelry pieces made using Silhouette, including pendants, earrings, and tassel accents with vibrant colors and glitter.

Or watch the video tutorial on the Silhouette Secrets+ YouTube channel HERE.

A close-up view of DIY sparkling jewelry pieces on a black surface, featuring colorful pendants and leather tassels with a step-by-step tutorial overlay.

And by request, I also created a set of printable instructions that can be found HERE too.

Supplies Used:

Project #6 – Painted Canvas Decor

I tried several different things with these and they are still a work in progress. Some things didn’t turn out such as using the stencil with white sharpies or sponging on white texture paste. I had too much bleed, so I ended up painting another layer to cover it up.

An arrangement of three canvases displaying floral designs in pink and white, alongside a printed sheet featuring a similar floral stencil pattern on a blue background.

When the white Sharpie and texture paint didn’t work out on this one, I switched gears and cut a stencil from Silhouette adhesive backed stencil material and started filling it in with TCW Stencil Butter. OH MY! I have to say that the Silhouette adhesive backed stencil material worked AWESOME! Even with the texture of the canvas, it worked great! I will definitely be using this more in the future. The only drawback is that it is letter size and I would have loved to create a larger stencil.

A close-up view of a flower stencil applied to a blue canvas, with fuchsia stencil butter visible in the stencil design.

But I made it work. I had to let the first flower dry and then I added more.

A blue canvas featuring pink flower designs on the left, alongside a stencil with white flower outlines on the right.

All I need now is the perfect saying to add to it. Let me know if you have any ideas that jump out at you when you see the project!

The next one has several layers of paint on it, but ultimately, I ended up with a solid pink background. I had cut a 12″ x 12″ stencil to use with this, but then I started looking at all of those negative pieces that were left over from the stencil and wondered if I could use those in some way.

A person holding a floral stencil above a cutting machine on a wooden work surface, with additional craft supplies visible in the background.

I ended up applying transfer tape and picking up all of those pieces that I then used as a negative stencil on the wet paint. It was really just a “let’s see what happens moment”. I just laid the transfer tape on top of the wet paint with the negative pieces attached and smoothed it down to see what would happen.

Close-up view of a pink textured canvas with an embossed pattern.

It gave it an interesting pattern. Once the paint was dry, I then simply traced around with the white Sharpie Creative Maker and then I added a layer of Mod Podge Sparkle on top of it.

A pink canvas with white flower stencil designs on it, placed next to a clear stencil sheet on a wooden surface.

I am not sure if it’s finished yet or if I will add more to it. Just waiting a bit to see where the art goes.

Additional Resources:

Supplies Used:

All of these projects were completed using just 1 stencil design file from Kassy’s Parlour.

Find designs by Kassy’s Parlour on Etsy HERE.

Follow along with Kassandra Louise Designs of Kassy’s Parlour on:

A great big thank you to Kassy for contributing the free file for the Silhouette Secrets+ newsletter for the month of August! If you missed grabbing the free design in August, it is available in the HERE.

This year I started offering a free file each month for Silhouette Secrets+ newsletter subscribers. I love designing in the Silhouette Studio software and have shared some of my creations as well as look forward to collaborating with more artists in the future too!

Silhouette Secrets+ Newsletter

Never miss out on the news, tips, “secrets”, deals, classes, and more that I share on Silhouette Secrets+. Sign up for the newsletter and get information delivered to your inbox every Friday.
Unsubscribe at anytime.

Sign up for the weekly newsletter HERE to have information delivered direct to your inbox and grab each month new freebie.

Did this spark your imagination? ✨ It’s amazing how one single file can be transformed into so many unique projects! I loved exploring all the creative possibilities with this design. You can find even more inspiration and project ideas in the Crafting Creativity section on the website — check it out HERE.

Save this for future reference by pinning the image below.

A collage of various crafting projects made using a hand-carved flower stencil design. The projects include decorative cards, jewelry pendants, a travel cup decal, and painted canvas art, showcasing creative uses of vinyl and stencil techniques.

Enjoy !

THANK YOU for your support! How can you help? Click HERE & buy a coffee.
Every little bit helps with the cost of running the site.

Silhouette Classes

Never stop learning! Let me help you take the anxiety out of learning with Silhouette and get to creating faster! My Silhouette classes are heavily focused on software, so you can take the skills & techniques taught and apply them to many future projects!

Silhouette step-by-step Classes by Silhouette Secrets+

Silhouette Secrets+ with EllyMae
**This post may contain affiliate links. What that means is that I may receive compensation if you purchase through the links I have provided. The price you pay for the product or service is not higher but I may get compensated for sharing.
Posted on — Leave a comment

One SVG, Four Stunning Projects: Crafting with Diva Watts Designs and Silhouette

Silhouette Secrets+ with EllyMae

Looking for creative ways to get more out of your cut files? In this post, I’m sharing how I used one SVG file from Diva Watts Designs to create four unique and beautiful projects—all with Silhouette! From a layered cardstock sign with vinyl to an interchangeable home décor frame, greeting cards, and even a custom wood sign, you’ll see just how versatile one SVG project can be. Whether you’re crafting for fun, decorating your space, or creating gifts, this post is packed with inspiration and ideas to help you make the most of your designs.

Affiliate links may be present in the following blog post and as an Amazon Associate, I earn from qualifying purchases.

When you look at a design file, do you see one project idea, or can you envision it on multiple projects? I started the Crafting Creativity series to help spark ideas and inspiration to do more with your files.

Design featuring a floral pattern with the words 'Oh, Hello' on a circular background, accompanied by the logo of Diva Watts Designs.

I took this Oh Hello design by Diva Watts Designs and am sharing several projects below that could be created from this one file.

First, here is a look at a finished wood sign by Diva Watts Design using this design.

A round wooden sign featuring a floral design with the text 'Oh, Hello' in a stylish script. The sign has a natural wood background and a black band at the bottom with white lettering.

Crafting Creativity Projects with Diva Watts Designs

One simple design opens the door to endless crafting ideas. You may look at this design and say, “I don’t have a laser, so I cannot do anything with it.” But that’s simply not the case! Let’s take a look at a few possibilities.

Project #1 – Door Hanger with Cardstock and Vinyl

A round chalkboard sign featuring a floral design with the text 'Oh, hello' written in a playful font. 
Blog post features one SVG to create multiple projects.

Rather than limit yourself to a specific material, use different materials to create a similar style. I used cardstock and vinyl added to a pre-made wood backer for this design.

Check out this post – How to Make a DIY Door Hanger Sign with Cardstock & Vinyl Using Silhouette HERE for more details.

A round wooden sign featuring the phrase 'Oh Hello' with floral designs above and a dark horizontal band across the middle, resting on a crafting mat with tools nearby.

Additional Resources:

Supplies Used:

Project #2 – Card Designs

I love this one! I used just the hello part of the design, cut a bit off the left side using the Knife tool and then welded it to rectangle frame. Then I made an offset of the design and layered it together to make it pop.

A close-up of a layered cardstock project featuring the word 'hello' in a decorative font, set on a wooden table with adhesive tools and a cutting machine in the background.
Blog post features one SVG to create multiple projects.

Using just the text from the wood sign design I created the next cards. Don’t throw out those bits! In some cases, like this one, you can use the negative part of the design that’s been cut and create with it too!

Craft projects featuring the phrase 'Oh Hello' on colorful cardstock, along with crafting tools like scissors and a tape runner, displayed on a wooden surface.
Blog post features one SVG to create multiple projects.

When using the negative of a design, a quick trick to get the placement is to use the positive part of the design as your “stencil” and glue the pieces in place first. This means that the design will be placed exactly where you want it. I show using this technique in a video on the Swift Creek Customs channel HERE.

After I used the background as a stencil, I used double-sided foam tape to pop up the striped background to give it some dimension on it’s own card. One cut = 2 card designs.

Additional Resources for the tools I used to create the designs:

Supplies Used:

Project #3 – DIY Glass Frame Sign with Vinyl and Sharpie Markers

I love creating projects that can be repurposed and have use all year long! This glass frame with the flower portion of the design does just that.

A colorful glass frame sign featuring the text 'hello FRIENDS' with a floral illustration at the bottom, surrounded by crafting markers and tools.
Blog post features one SVG to create multiple projects.

I cut the flower design from adhesive vinyl and added it to the backside of the frame. Then colored that in using Sharpie markers on the backside. While that was drying and the adhesive vinyl curing, I designed several backgrounds to swap out in the frame. This really makes the project versatile and something that can be used year round.

A framed sign featuring the text 'life is beautiful' with a colorful gradient background and floral design at the bottom, surrounded by craft markers.
Blog post features one SVG to create multiple projects.

There are so many patterns & design sentiments options out there!

A framed design featuring floral elements and an inspirational quote, surrounded by craft markers and tools on a workspace.
Blog post features one SVG to create multiple projects.

This was another project that I didn’t even bother to use registration marks with. I designed it the size I needed and then used a paper trimmer to cut the straight edges to fit the frame. Sometimes I think we can overcomplicate projects just because we have a machine that can cut things. A good ole paper trimmer is a great tool to have in your tool box!

See the step-by-step tutorial for this project here – DIY Interchangeable Glass Frame Sign with Silhouette Studio – One Project for All Seasons

Additional Resources:

Supplies Used:

Project #4 – Wood Sign

Finished laser wood sign created with a design by Diva Watts Designs. Blog post features one SVG to create multiple projects.

I used my Glowforge laser to cut all the pieces out of a piece of Maple Plywood. Here is a look at the pieces etched, scored, and cut out.

Laser-cut wood pieces featuring the text 'Oh Hello' and floral designs on a cutting bed.

I prefer to mask my wood pieces before cutting with the laser and then I can simply remove the masking and they are much cleaner.

Once I had all the pieces cut, the Posca Paint Markers made this so easy to color in. Painting is not my favorite part of the finishing process and I hate waiting for things to dry, but I’m getting used to it. Coloring with the paint markers was so satisfying.

Close-up of a round wooden plaque with a floral design, surrounded by various colored markers and a measuring tool, showcasing crafting materials.

The larger pieces I did end up using a bit of acrylic paint to cover the larger surface area.

Crafting workspace with colorful markers, a green wood piece, and a round wooden sign adorned with flowers and the word 'hello' in yellow.
Blog post features one SVG to create multiple projects.

I shared my process including how I set up the “OH, hello” to score on the wood section so that I knew exactly where to glue the pieces in place in this video on the Silhouette Secrets+ YouTube channel HERE – Laser Engraved Wood Sign Using Silhouette Studio

A workspace displaying tools and materials for crafting a laser wood sign, featuring markers and a circular cut wood piece with flower designs.
Blog post features one SVG to create multiple projects.

Additional Resources:

Supplies Used:

All of these projects were completed using just 1 file from Diva Watts Designs! Stacey has so many more amazing designs too!

Find designs by Diva Watts Designs at:

Follow along with Diva Watts Designs on the Diva Watts Designs website, Facebook and Instagram too!

A great big thank you to Stacey at Diva Watts Designs for contributing the free file for the Silhouette Secrets+ newsletter for the month of July! If you missed grabbing the free design in July, it is available in the Silhouette Design Store HERE.

This year I started offering a free file each month for Silhouette Secrets+ newsletter subscribers. I love designing in the Silhouette Studio software and have shared some of my creations as well as look forward to collaborating with more artists in the future too!

Silhouette Secrets+ Newsletter

Never miss out on the news, tips, “secrets”, deals, classes, and more that I share on Silhouette Secrets+. Sign up for the newsletter and get information delivered to your inbox every Friday.
Unsubscribe at anytime.

Sign up for the weekly newsletter HERE to have information delivered direct to your inbox and grab each month new freebie.

Did this give you some ideas? How about how you can take 1 file and create a variety of projects with it. I had so much fun brainstorming, designing, and creating with this file. See more ideas and inspiration in the Crafting Creativity section on the website HERE.

Save this for future reference by pinning the image below.

Collage of four crafting projects showcasing the 'Oh Hello' design by Diva Watts Designs, featuring a wooden sign, a floral artwork, and greeting cards, highlighting creative variations using Silhouette tools.

Enjoy !

THANK YOU for your support! How can you help? Click HERE & buy a coffee.
Every little bit helps with the cost of running the site.

Silhouette Classes

Never stop learning! Let me help you take the anxiety out of learning with Silhouette and get to creating faster! My Silhouette classes are heavily focused on software, so you can take the skills & techniques taught and apply them to many future projects!

Silhouette step-by-step Classes by Silhouette Secrets+

Silhouette Secrets+ with EllyMae
**This post may contain affiliate links. What that means is that I may receive compensation if you purchase through the links I have provided. The price you pay for the product or service is not higher but I may get compensated for sharing.
Posted on — 2 Comments

3 Ways to Customize Acrylic Shapes with Silhouette

I’m in love with these Layered Snowflake Arabesque Tile acrylic shapes from Craft Chameleon. They come in a wide variety of colors and I’ve been using them for testing. I want to share 3 methods I tested, my results with each, and which one is my favorite at the end – you might be surprised.

Affiliate links may be present in the following blog post and as an Amazon Associate, I earn from qualifying purchases.

Layered Acrylic Shapes Snowflakes Craft Chameleon

I am calling these ornaments, but they can be so much more. Gift tags, ornaments, stand alone decor item, and more!

3 Ways to Customize Acrylic Shapes with Silhouette

  1. Etching Acrylic with the Silhouette Curio 2 Power Engraver – Let It Snow Design
  2. Etching Acrylic with the Silhouette Curio 2 Punch Tool – top left Snowflake saying
    (the Curio 1 and Silhouette etching tool can do this too – more info below)
  3. Adhesive Vinyl Decal – any cutting machine can do this with good quality vinyl!

1 – Etching Acrylic with the Silhouette Curio 2 Power Engraver

I have been doing a lot of testing with the Silhouette Curio 2 and just had to try this with the new Silhouette Power Engraver Tool.

Silhouette Curio 2 Power Engraver Acrylic Etching

I have had great results with the Silhouette Power Engraver. However, it is not a fine detail engraving tip. When you are working with it, you want to keep that in mind and may need to adjust the design to work with it.

I have a full step-by-step class the Silhouette Secrets+ Teachable site on setting up for etching/engraving on acrylic with the Silhouette Curio 2 including how to get exact placement on shapes. I share all the things that worked and those that did not in the class too!
Find all the details and see more examples of my etching tests HERE.

Silhouette Curio 2 Power Engraver Etched - Engraved Acrylic

The etch is pretty subtle on the colored acrylic. Acrylic blanks are also one of the most difficult things to photograph too! Right up there with glass objects.

I love the sparkle of the top layer of this acrylic shape.

Check out a quick look at the Silhouette Power Engrave Tool in action on the Silhouette Secrets+ YouTube channel HERE.

Supplies used:

Silhouette Curio 2, Curio Debris Tray, Silhouette Cutting Mat, Silhouette Power Engraver, Let It Snow by Jamie Lane Designs, Layered Snowflake Arabesque Tile acrylic shape, lint roller, super glue, craft clamps, ribbon
*use code SECRETS at CrafterCuts to save 10% on Silhouette supplies – does not apply to new machines

For more details on the Silhouette Curio 2 click HERE.

2 – Etching Acrylic with the Silhouette Curio 2 Punch Tool

With the release of Silhouette released version v4.5.760+, which means the Silhouette Punch Tool has been unlocked for etching with both the Silhouette Curio 2 and the Silhouette Cameo 5. I have been testing the Silhouette Punch Tool for etching with both models of machines.

For more details on etching with the Silhouette Cameo 5 and Punch Tool check out this post HERE.
Note: etching on the Silhouette Cameo 5 is designed for Silhouette metal etching sheets and not for acrylics – more details in my blog post

The Silhouette Punch Tool is supposed to be the etching tool for finer details with the Silhouette Curio 2 and Cameo 5. While it does etch, it definitely is no where near the same quality of etch as the Silhouette Curio 1 was with the Silhouette etching tool.

If you have a Silhouette Curio 1, I would recommend hanging on to it and get that baby out to etch on acrylic. It does a fantastic job.

However, the Silhouette Curio 2 is here to stay. It is the new machine model and the Silhouette Curio 1 is no longer manufactured. Honestly, the Curio 1 had a really, really long lifespan for a machine model. I am surprised that it was manufactured for so long.

The Silhouette Curio 2 and the Silhouette Cameo 5 has a specialized Carriage 2 housing that allows not only for specialty tools, but also a higher force. While the Carriage 1 housing on Silhouette models is an up and down motor, the Carriage 2 housing on Silhouette model machines is a round and round motor. This means that it is different than the Silhouette Curio 1 machine that was designed over 10 years ago. Different machine, different results.
I’ll have more details on the blog later about all of that.

Bottom line is – the Silhouette Punch Tool does etch.

Check out a quick look at the Silhouette Curio 2 & Punch Tool in action on the Silhouette Secrets+ YouTube channel HERE.

Supplies used:

Silhouette Curio 2, Curio Debris Tray, Silhouette Cutting Mat, Silhouette Punch Tool, Snowflake Kisses Holiday Wishes Design, Layered Snowflake Arabesque Tile acrylic shape, lint roller, super glue, craft clamps, ribbon
*use code SECRETS at CrafterCuts to save 10% on Silhouette supplies – does not apply to new machines

For more details on the Silhouette Curio 2 click HERE.

3 – Adhesive Vinyl Decal

I used Oracal 651 white adhesive vinyl and cut this with the Silhouette Cameo 5 using the Silhouette Autoblade.

Yes! The Silhouette Autoblade!

Silhouette Cameo 5 Detailed Vinyl Cut with Autoblade

I selected the Vinyl Glossy setting and increase the blade depth to a 2. Actual cut settings that will work for you will depend on your material, machine, and blade life. Test cuts are the only way you will know what works for you. Find more information on Perfect Cut Settings HERE.

One of the big key factors is you want high quality adhesive vinyl and good quality transfer tape for detail works. Low quality vinyl can just be a mess and more of a headache than the money it tricked you into saving. If you have ever cut low quality vinyl or old vinyl, you are nodding right now and know exactly what I mean!

Silhouette Oracal 651 Vinyl Cut with Autoblade

Now, yes, I lost the dots to my i’s. But holy smokes! This is tiny details! At this size, I could care less about those little dots on the i’s. I can either cut more and add them or add in a different embellishment to the project.

Silhouette Oracal 651 Fine Detail Cut with Autoblade

One of the things that can help when cutting this small is adding Weeding Lines to the design and it definitely helped in this small detail cut.
For more details on adding Weeding Lines click HERE.
For designs like this, I prefer to draw my own weeding lines. It takes just a little more time in the setup and cutting process, but it can be 100% worth it to save you headache when weeding.

I have more tips on cutting small fonts & designs HERE too!

Silhouette Oracal 651 Vinyl Fine Detail Cut with Autoblade

Check out a quick look at weeding this design on the Silhouette Secrets+ YouTube channel HERE.

Supplies used:

Silhouette Cameo 5, Silhouette Autoblade – Type B, Silhouette Cutting Mat, Oracal 651 White adhesive vinyl, AT65 Transfer Tape, Snowflake Kisses Holiday Wishes Design, Layered Snowflake Arabesque Tile acrylic shape, super glue, craft clamps, ribbon
*use code SECRETS at CrafterCuts to save 10% on Silhouette supplies – does not apply to new machines

My Favorite

Out of all 3 methods, this one has to be my favorite because it really stands out. And the best part is, anyone with a cutting machine could do this method!

Silhouette Cameo 5 Detailed Adhesive Vinyl Decal with Autoblade

I hope that gives you some ideas how you can create and customize with acrylic shapes. You are not limited to Snowflake Arabesque Acrylics either! Craft Chameleon has a wide selection of acrylic blanks. The 3″ clear acrylic rounds are my favorite and I make sure to stock up each time I order.

Save this for future reference by pinning the image below.

Enjoy !

THANK YOU for your support! How can you help? Click HERE & buy a coffee.
Every little bit helps with the cost of running the site.

Silhouette Classes

Never stop learning! Let me help you take the anxiety out of learning with Silhouette and get to creating faster! My Silhouette classes are heavily focused on software, so you can take the skills & techniques taught and apply them to many future projects!
Silhouette step-by-step Classes by Silhouette Secrets+

**This post may contain affiliate links. What that means is that I may receive compensation if you purchase through the links I have provided. The price you pay for the product or service is not higher but I may get compensated for sharing.
Posted on — Leave a comment

Halloween Sign Decor with Silhouette

Affiliate links may be present in the following blog post and as an Amazon Associate, I earn from qualifying purchases.

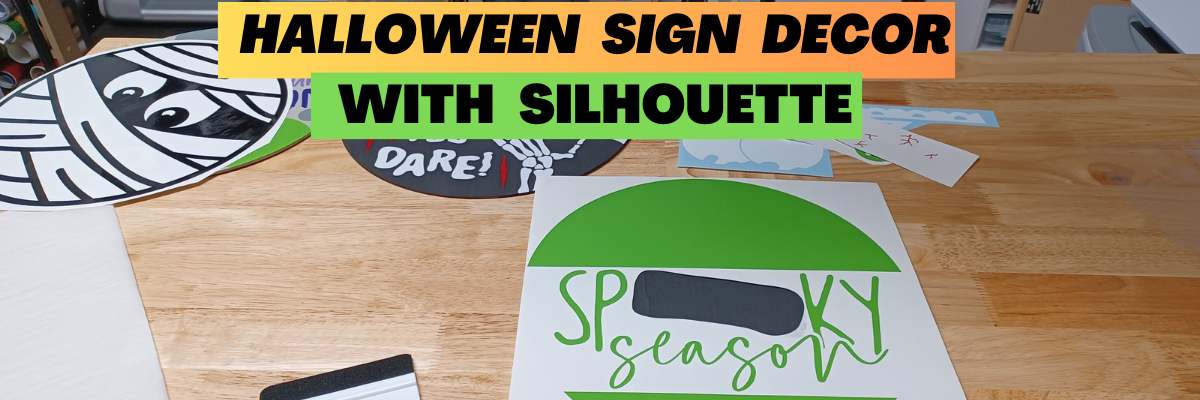
Just popping in to share a couple Halloween signs I finished up this week. I mean, there is nothing like decorating 2 days before Halloween right?

I have been collecting round door hangers designs by Diva Watts Designs for a long time and finally just told myself to stop everything else and get it done! She has so many different design styles available, make sure you go check out her store HERE. I’ve already got a list started for Fall and Christmas.

Here are the first 3 I made.

Supply list

I started by painting the boards. I painted both sides and let it dry overnight.

While the boards were drying, I cut all of the Oracal adhesive vinyl for each sign with the Silhouette Cameo 5 and organized them into piles. This way it was ready for when the boards were completely dry.

And then I started adding each piece to transfer tape and applying to each sign. It went pretty quick, since I had it all cut and organized by sign.

I thought this one was appropriate for my son’s room.

I just loved the look of this one with the eyeballs.

But this one I think is my favorite. I think it just may be because it has so many pieces to puzzle together and it wasn’t that hard.

And this one was just dying to come out….

Hinge Method

Have you ever used the hinge method?

This allows you to apply a small section of the design and get it placed without committing everything at once.

I removed all of the backing off of the vinyl and then cut the backing into sections.
Then removed only the top section and lined it up.

This allowed for easier positioning and I didn’t have to commit the entire design all at one time.

Then I removed each section and smoothed it down to the wood round.

So fun! Can’t wait to make more! I may need to buy another package of wood rounds as I keep seeing more doors in my house that need a sign.

Save this for future reference by pinning the image below.

Enjoy !

THANK YOU for your support! How can you help? Click HERE & buy a coffee.
Every little bit helps with the cost of running the site.

Silhouette Classes

Never stop learning! Let me help you take the anxiety out of learning with Silhouette and get to creating faster! My Silhouette classes are heavily focused on software, so you can take the skills & techniques taught and apply them to many future projects!

Silhouette step-by-step Classes by Silhouette Secrets+

**This post may contain affiliate links. What that means is that I may receive compensation if you purchase through the links I have provided. The price you pay for the product or service is not higher but I may get compensated for sharing.
Posted on — 1 Comment

Fall Decor with Oracal 651

Affiliate links may be present in the below and as an Amazon Associate I earn from qualifying purchases. What that means is that I may receive compensation if you purchase through the links I have provided. The price you pay for the product or service is not higher but I may get compensated for sharing.

First, a great big THANK YOU is in order!

There are many aspects of teaching classes or hosting events that many followers do not realize or think about. Costs is one of those. It is a wide range from venue rental fees, food, taxes, resort fees, transportation, shipping, class supplies… and the list could go on and on!

In September I taught at an in-person workshop organized by Marjorie with Atlanta Stylish Point in Atlanta. This was the first in-person workshop we have been able to organize since 2020 and just like everything else worldwide, costs have gone up.

Sponsors are a big part of teaching classes and hosting events. A BIG PART!
I want to give a great BIG SHOUT OUT to my class sponsor for that event!!!
Thank you H & H Sign Supply!

They sponsored my Acrylic Decor class and sent extra goodies for the students too!

Without sponsors like H & H Sign Supply, I could not do classes and events.
I greatly appreciate the support and the students loved all the goodies!

Here is a photo of the class project I taught at the event.

This was a project that the attendees designed completely from scratch using several fonts styles.

Here is a list of the supplies used to create this project:
– Oracal 651 adhesive vinyl in the following colors:
Brown, Golden Yello, Purple Red, Dark Red, Light Orange

– Oratape MT80P application tape
– Acrylic Panel or sign
– Wood stand (optional for panel)
– Spiced Pumpkin DecoArt Americana Acrylic Paint
– Saffron Yellow DecoArt Americana Acrylic Paint
– Paint brush with bristles
– Paint palette (optional)
– alcohol wipe
– weeding tool

Fonts used in design creation:
– Maxwell font by Silhouette – Design #259151
– BFC Magical Writing Handwriting Font by Blush Fonts – Design #387314
– Fall Leaf Dingbats by Lori Whitlock – Design #222723

Need help installing fonts? Check out this tutorial HERE – Let’s Explore v4 – Installing Fonts

In this class, I taught attendees how to create their own design using shapes as templates and designing within that to create a project. They were in charge of the design from start to finish.

Here are few of the students creations


Some created the exact same design I developed the class with and others took off on their own, using different fonts and phrases!

It was so neat to see what everyone at the event did!

The best part of creating your own designs is that they can turn out a bit different each time!

Thank you to H & H Sign Supply for being a sponsor for our Silhouette events!

Stay tuned as I have another acrylic sign project coming your way soon sharing some of the techniques we used in class!

For a few more ideas of how you can create different seasonal décor projects with acrylic signs and adhesive vinyl, check out these 10 other examples in this Acrylic Sign Decor post from last year found HERE.

Save this for future reference by pinning the image below.

Enjoy !

This image has an empty alt attribute; its file name is logo.jpg

THANK YOU for your support! How can you help? Click HERE & buy a coffee.
Every little bit helps with the cost of running the site.

Or if you are looking for more in-depth, step-by-step classes, check out all of my online Silhouette classes on my Teachable site HERE.

SS Logo snip it
**This post may contain affiliate links. What that means is that I may receive compensation if you purchase through the links I have provided. The price you pay for the product or service is not higher but I may get compensated for sharing.
Posted on — 7 Comments

10 Creative Acrylic Sign Decor Ideas for Every Season and Style

Silhouette Secrets+ with EllyMae

Acrylic sign decor is a versatile and stylish way to enhance any space, whether you’re sprucing up your home for the holidays or adding a personal touch to your everyday surroundings. With endless design possibilities, acrylic signs offer the perfect blend of elegance and creativity for seasonal and year-round decor. In this post, we’ll showcase 10 creative acrylic sign decor ideas that are easy to make and guaranteed to inspire, whether you’re a seasoned crafter or just starting with your Silhouette cutting machine. Get ready to elevate your decor game with these stunning designs!

10 examples of acrylic sign décor for seasonal or everyday décor

Affiliate links may be present in the following blog post and as an Amazon Associate I earn from qualifying purchases.

Acrylic Sign Decor Autumn theme with Silhouette

Autumn Shows Us How Beautiful design by Silhouette – Design #383335

Basic supplies for all sign decor

How to Create Acrylic Sign Decor:

Gather the supplies for your sign.

Paint the backside of the design with acrylic paint in the color(s) of your choice.
Let this completely dry before moving on to the next step.

Measure the size of your acrylic sign. Draw a rectangle the same size as the sign. If using an odd shape, make sure to measure inside of the narrowest part of the sign.

Acrylic Sign Template for Sizing
Red rectangle shows narrow part of an odd shaped sign. Draw your design template that size to make sure your design fits within the sign space.

Select your design and size it inside of your drawn rectangle to best fit the shape you are working with.
Some designs will work better within a certain shape or portrait vs landscape orientation.

Cut adhesive vinyl in the color(s) of your choice.
Weed away the excess vinyl around the cut design.
Apply to the front side of the acrylic sign using transfer tape.

Hang your sign by the twine attached (if applicable) or use a wood stand.
Note: test your acrylic thickness with your wood stands – this may vary depending on the acrylic purchased and stands used.

Create signs to change out seasonally with your decor or just for general home decor purposes to enjoy all year long!

Store acrylic signs in page protectors when not in use to minimize any scratching on the acrylic sign or acrylic paints used. I will also wrap them in bubble wrap when storing as well.

I’ve created a few more signs to share with you and hopefully spark your creative thought process in how you can use this technique to fit your style.

Thankful Grateful Blessed Acrylic Sign Decor

Design used: Thankful Grateful Blessed design by Silhouette – Design #388089

Believe in the Magic of Christmas Acrylic Sign Decor

Designss used:

I don't have ducks in a row. I have squirrels and they are at a rave acrylic sign decor.

Designs used:

This house runs on love laughter and inappropriate humor acrylic sign decor.

Designs used:

Crafting Forever - Housework Whenever acrylic home decor

Design used: Crafting Forever Housework Whenever by Jillibean Soup – Design #295547

Laundry Acrylic Sign Decor

Design used: Laundry Schedule by Lori Whitlock – Design #93059

Everyone wants to change the world acrylic sign decor

Design used: Change the Toilet Paper Roll by Jillibean Soup – Design #285168

Bee Yourself Acrylic Sign Decor

Designs used:

Happy Fall Acrylic Sign Decor

Design used: Happy Fall Autumn Phrase by Angele Kamp – Design #227654

Hopefully those have given you some ideas to start creating your own acrylic decor!

I had the incredible opportunity to teach this class at Silhouette HQ for a Michaels Live YouTube tutorial, where I shared tips, techniques, and inspiration for creating stunning acrylic sign decor using a Silhouette cutting machine. You can catch the full tutorial and learn along with me by watching it HERE.

Find more Silhouette tutorials on the website HERE.

Save this for future reference by pinning the image below.

Acrylic Sign Decor Pinterest

Enjoy !

THANK YOU for your support! How can you help? Click HERE & buy a coffee.
Every little bit helps with the cost of running the site.

Silhouette Classes

Never stop learning! Let me help you take the anxiety out of learning with Silhouette and get to creating faster! My Silhouette classes are heavily focused on software, so you can take the skills & techniques taught and apply them to many future projects!

Silhouette step-by-step Classes by Silhouette Secrets+

Silhouette Secrets+ with EllyMae
**This post may contain affiliate links. What that means is that I may receive compensation if you purchase through the links I have provided. The price you pay for the product or service is not higher but I may get compensated for sharing.
Posted on — 3 Comments

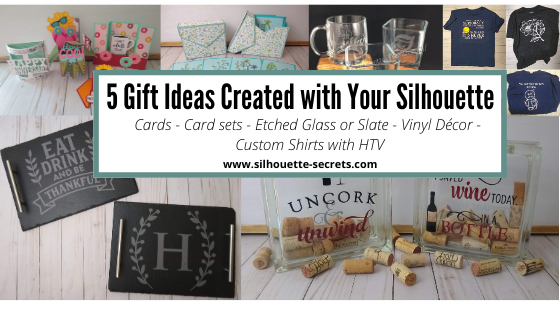
5 Gift ideas created with Your Silhouette machine

There are so many possible things that you can create using your Silhouette machine. Today let’s take a look at some possible gift ideas you can create.

Each one of these gifts can be tailored to your needs or personalized in their own way.

5 Gift ideas

1 – Cards
2 – Card sets
3 – Custom Etched projects
4 – Glass block décor
5 – Custom t-shirts with HTV

I’ve provided more details on each project below such as examples, supply lists, and resources. Perfect to get started with gifts for the year!

Gift idea details

Affiliate links may be present in the following blog post and as an Amazon Associate I earn from qualifying purchases.

1 – Cards

The great part about cards is anyone can do it!
They can be simple 2 color cards or range up in complexity.

A hand-made card is a special gift, no matter if the recipient appreciates that or not. It is because you created it! You used your time & talent to create it!

Supplies used:
Cardstock
– Michael’s Recollection cardstock
– Close to My Heart cardstock
– any high quality cardstock will work, cut settings may vary by brand
Adhesive
– Scrapbook EZ Runner tape runner
– Scrappy Tape or Score Tape
– Xyron Sticker Maker
– Glue Dots
– Foam Tape
– I use a variety or combination of whatever is best for the project
Assorted Embellishments or Tools as needed
– Silhouette sketch pens*
– Watercolor pencils*
– Water brush*
*used in the sketch cards above

You can use as little or as much as you want on the cards.

Resources:
Cards with your Silhouette
Cutting Cards with the Silhouette
Creating Cards with Your Silhouette – Free Z-fold card cut file
Let’s Explore v4 – Creating a Card – Free Fancy Fold Flip Card cut file
A Fun Card with Silhouette
Sketching with Silhouette

2 – Card sets

Need a special gift for someone who has everything.
A set of Thank You cards or Birthday cards might be the perfect idea!

Make a custom card box for the cards to be stored and gifted in to add to it.

Supplies used:
– Floral Border Sketch by Silhouette – Design #67187
– Sketched Florals by Silhouette – Design #334152
– Sketch font of your choice
– A2 Card Envelope box by Lori Whitlock – Design #315108
– Cardstock and Adhesive – *see card details above for suggestions

3 – Custom Etched Projects

Etched glass

Etched slate serving tray

Supplies used:

– Glass coffee mug from Target
– Glass candle holders from Dollar Tree
– Slate:
Serving tray in photo above from Johnson Plastics Plus
Other slate: Cheese board, hexagon coasters, circle coasters also can be found on Amazon
– Etchall Etching cream
Some use Armour Etch, but I prefer Etchall and get a perfect etch each time. I have used Armour Etch in a pinch and it was ok, but highly recommend using in a well ventilated area for either.
– Oracal 651, 631, or Oramask 813 for stencil
– Transfer tape
Adhesive vinyl and transfer tape can be found at:
Expressions Vinyl, Heat Press Nation, Silhouette America or Swing Design
Pretty much anything that can stick and seal well so the etching cream does not seep underneath can be used as a stencil

Designs used:
Glass Etched designs:
– Coffee Pulse by Sophie Gallo – Design #149882
– Yay Coffee by Dawn Nicole Designs – Design #188578
– Shells by Tanya Batrak – Design #205625
– 1 Piece Flower by Samantha Walker – Design #7833
Etched Slate designs:
– Eat Drink and Be Thankful by Jillibean Soup – Design #280222
– Monogram Family 6 by Lori Whitlock – Design #271080

Resources:
Step-by-step Glass Etching Class on Teachable

4 – Glass block décor

Supplies used:
– Glass blocks from Hobby Lobby or other (these have a hole to insert objects inside)
– Adhesive Vinyl and transfer tape
Adhesive vinyl and transfer tape can be found at:
Expressions Vinyl, Heat Press Nation, Silhouette America or Swing Design

Designs Used:
– Uncork & Unwind Phrase by Kolette Hall – Design #142100
– I Saved Some Wine Today Phrase by Kolette Hall – Design #131228

Resources:
– Layering Vinyl
– Layered Vinyl decal for a teacher gift
– Layered Vinyl Acrylic Ornament
– Creating a Vinyl Decal & Layering Adhesive Vinyl class on Teachable

5 – Custom shirts with HTV

Here are a few shirts I created for family members. Having the ability to customize and create designs in the Silhouette software is a big plus.

These VooDoo designs had jumped in my cart at some point in the past and it was perfect for a couple family members having surgery and who have chronic pain.
They loved them!

Supplies used:
– Shirts
– Siser HTV
Can be found at the following retailers:
Expressions Vinyl, Heat Press Nation, Michaels or Swing Design

Designs used:
– LW Love Letters Font by Lori Whitlock – Design #240682
– Smiley Face Whatever by Loni Stevens – Design #8114 with a yellow circle behind it
– Magnolia Flower by Sophie Gallo – Design #341162
– Voodoo Doodles by Jamie Lane Designs – Design #332386
– CG Create Font by Carina Gardner – Design #290474

Resources:
– Silhouette “Secrets” Beginner HTV Tips & Tricks
– Subtracting Text for HTV
– Cutting & Layering HTV in Silhouette Studio Class on Teachable
– Creating a Knockout Design with HTV – Bonus Subtracting HTV Class on Teachable

Whether you go big or go small, the ability to create a custom or handmade gift with your Silhouette is awesome!

I always see user’s frantically creating gifts at the end of the year for the holidays, but why not start now. Use these gift ideas for birthdays, anniversaries, house warming gifts, and holiday gifts as well!

I would love to see what you create with your Silhouette!
Feel free to post on my Facebook group
Silhouette Secrets with EllyMae.
If you have questions feel free to post below or on the Facebook group too!

Save this for future reference by pinning the image below.

Enjoy!

This image has an empty alt attribute; its file name is logo.jpg

THANK YOU for your support! How can you help? Click HERE & buy a coffee.
Every little bit helps with the cost of running the site.

Or if you are looking for more in-depth, step-by-step classes, check out all of my online Silhouette classes on my Teachable site HERE.

SS Logo snip it
**This post may contain affiliate links. What that means is that I may receive compensation if you purchase through the links I have provided. The price you pay for the product or service is not higher but I may get compensated for sharing.
Posted on — 1 Comment

Adhesive Vinyl on Acrylic Blanks

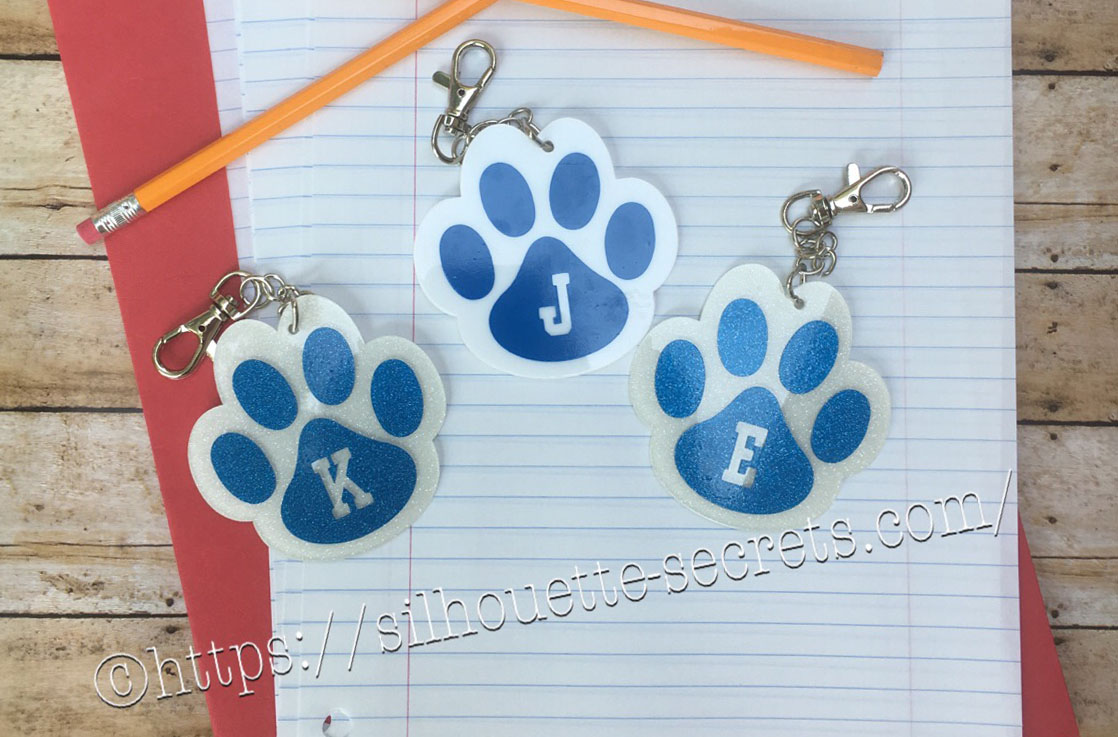
It is Back to School here for us and I made a little something to add to my kid’s backpacks. These bag tags are 3″ in size and with the lobster claw, perfect to clip onto their backpack zipper.

DYQL3512_resized

Our school colors are blue and white, so this little paw print acrylic from Craft Chameleon works great. There are many options for colors both solid and glitter, just click on the drop down box for more options.
For the girl’s tags I used the white glitter with Siser PSV in blue and the boy’s are solid white with Oracal 651 blue.

It came with a cut file that is sized perfectly for the acrylic blank, so all you have to do is customize it if needed and set it up to cut.

CC cut file

*Line color added and thickened for visual

How to make the bag tag design

For these bag tags, I wanted to add the first initial into the design. I typed the first initial using the Text Style Tool and then changed the font using the Text Style Panel.
I used Lori Whitlock’s School Font Design #273761 from the Silhouette Design Store because it was a nice bold font.

Girls paws

Once the properties (color, font style, etc) of the first letter is set, then make a copy of the letter and change the text to the next letter. I find this saves time when you are using multiple text designs that are similar. In this case, all of the initials would be the same font, so I just copied and pasted the letter and then changed it for the next one.

Place the letter in the design where you want and you are ready to cut.

Girls paws send tab

The Cameo will cut exactly where you see the bold red cut lines when you click on the Send tab. I chose to Send mine to cut this way with weeding lines between the designs.

If you are creating a design to show to someone, you can make the design look more realistic and having the letter “cut out” or subtracted from the paw print by making it a Compound Path.

Compound path

Both designs will cut the exact same way as you can see from the bold red cut lines on the Send tab.

Compound path send tab

I can’t wait to show the kids when they get home from school.

FZET7724

Here are the supplies I used to create these bag tags:
– 3″ acrylic paw print
– Swivel Lobster Clasp
– 1 inch Silver Tone Links
– Triangle bail (small)
– Bent Nose pliers
– Siser PSV adhesive glitter vinyl (blue)
– Siser PSV transfer tape
– Oracal 651 adhesive vinyl

And here is a quick video on how I applied the vinyl to the acrylic blanks.

I love that with my Silhouette, I can make so many different custom projects.


Enjoy !

THANK YOU for your support! How can you help? Click HERE & buy a coffee. Every little bit helps with the cost of running the site.

Looking for more in-depth, step-by-step classes, check out all of my online Silhouette classes on my Teachable site HERE.

SS Logo snip it
**This post may contain affiliate links. What that means is that I may receive compensation if you purchase through the links I have provided. The price you pay for the product or service is not higher but I may get compensated for sharing.

Posted on — 2 Comments

Layered vinyl decal for a teacher gift

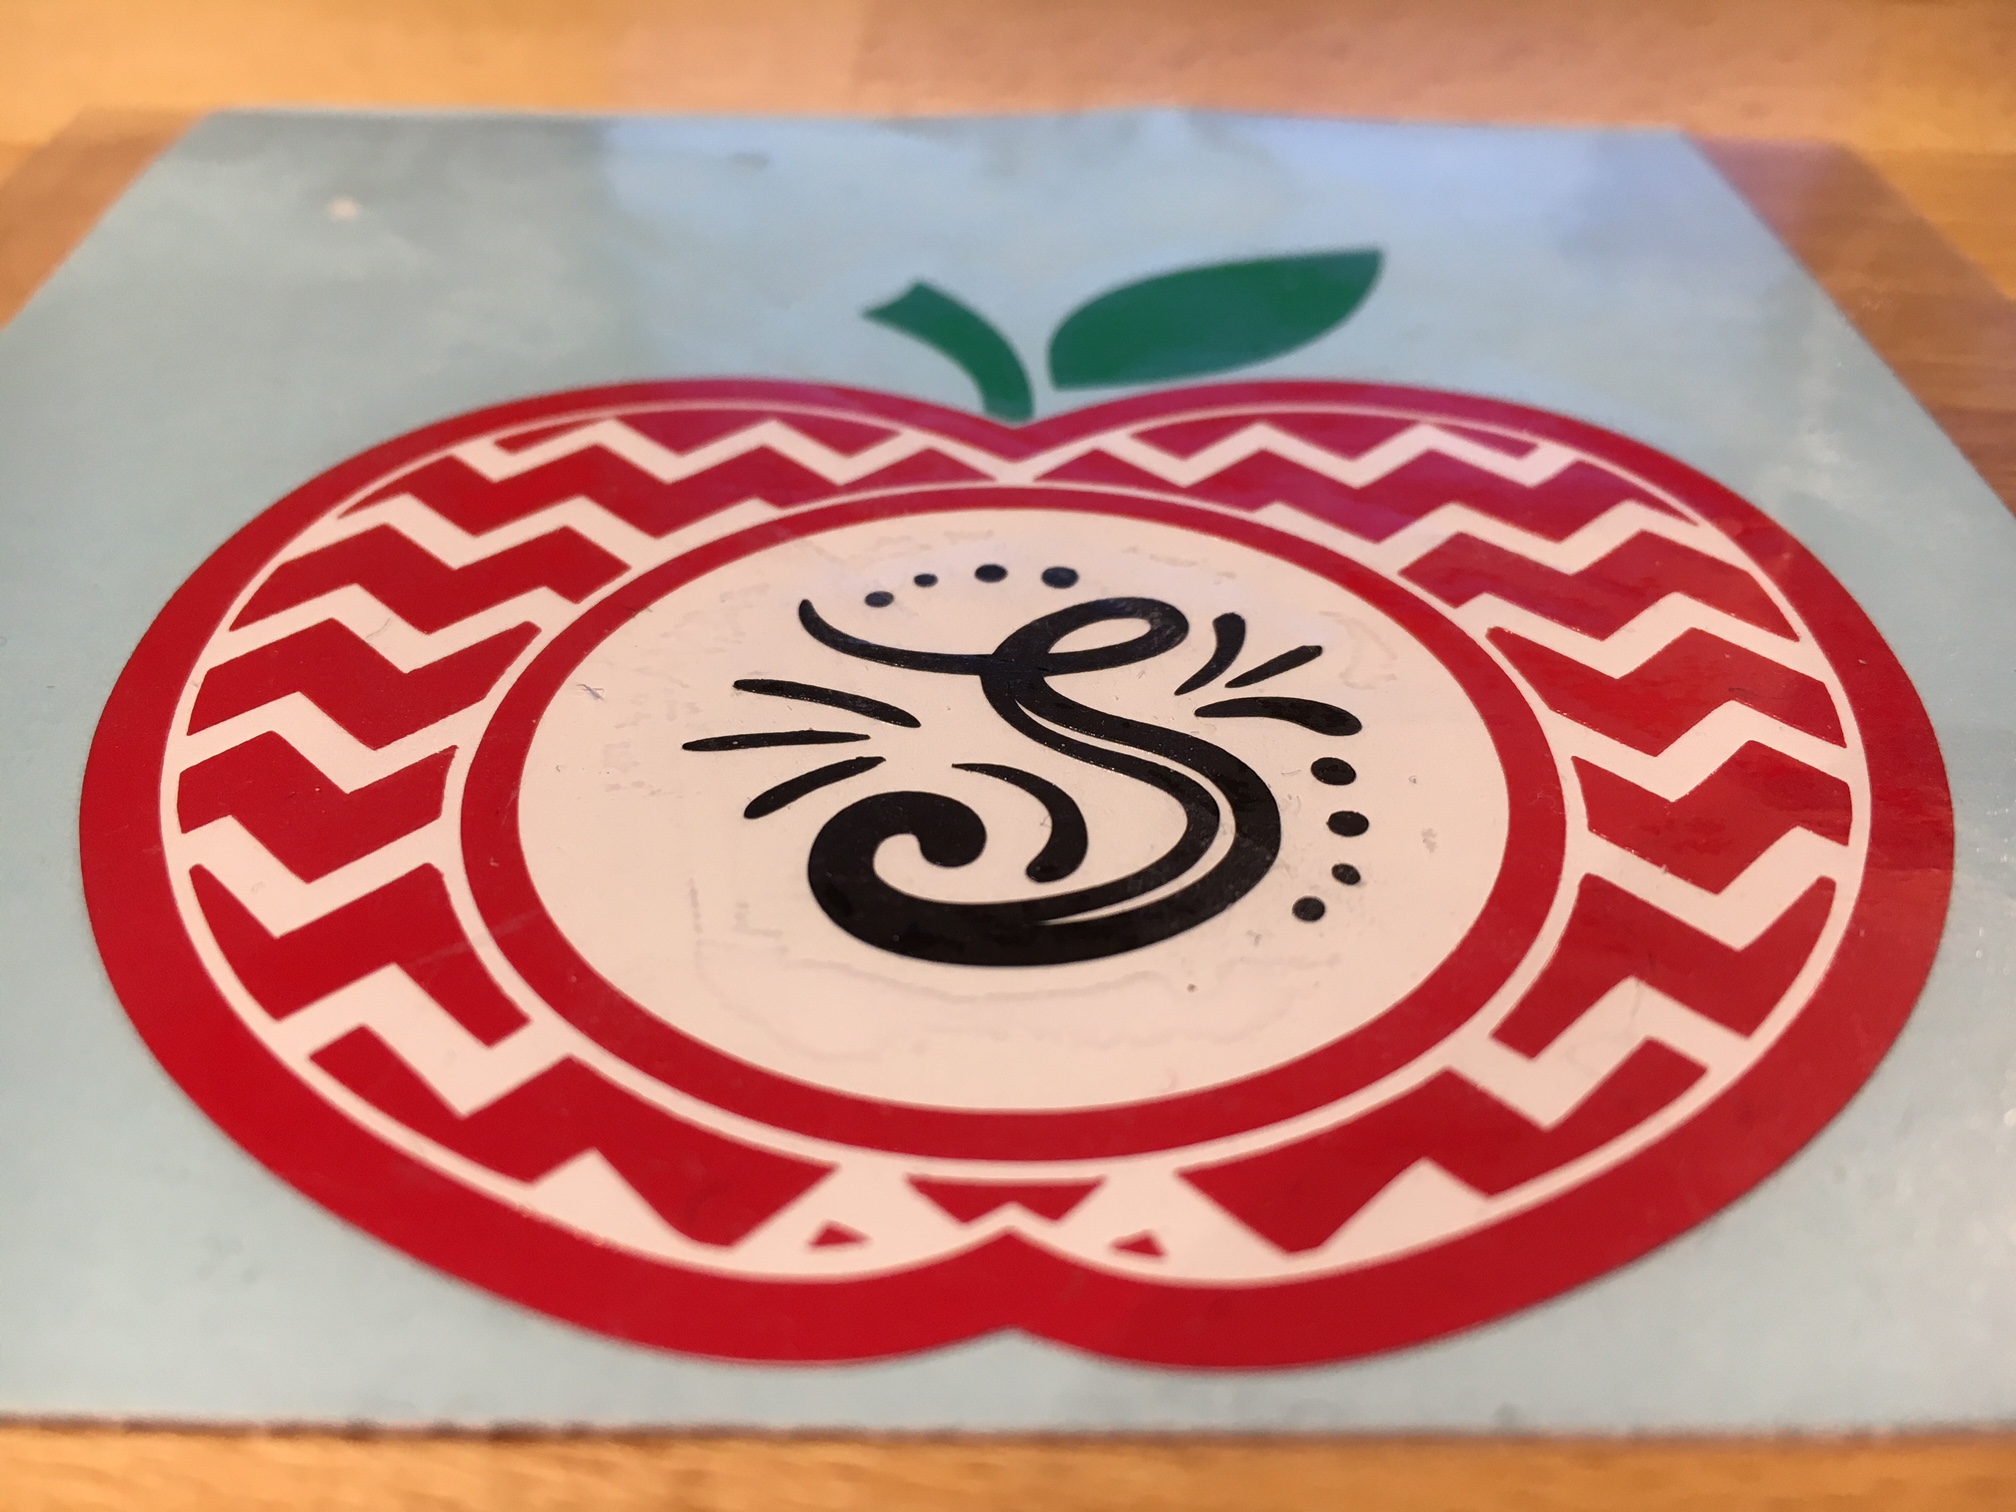
Today I am creating a vinyl decal that could be applied to a variety of items that would be great for a teacher.

Vinyl decal

For this decal, I am combining 2 files found in the May Bundle at SoFontsy – Apple Monogram Frames and A-Z Hand lettered Initials.

Measure and create your design to the size you want. I added an apple layer of white behind the red, so that gives this design 4 colors to layer.

The mat is revealed at 50% here so I can see where on the cutting mat my decal would fit.

Vinyl decal demo copy

Since there are 4 colors to this decal, replicate the design with the registration marks so there are 4 copies on your design mat.

Replicate copy

Check out more information on the Replicate Panel HERE.

Move the copies to separate areas on your design mat, then un-group the design and delete the color on each copy that you do not want to cut. Make sure you do not move the design in any way when you are deleting the layers, as it is lined up properly with those registration marks.

It’s also helpful to pull off another copy of the original to the side of the mat, just in case you need to go back.

Vinyl decal copies

Now, you have all the layers of your decal ready to cut on one cutting mat. Cut your material or grab your scraps of vinyl and place them in the same location on the cutting mat as they are on the design screen. I am using Oracal 651 vinyl for my decal.

You’ll notice that I did not weed the bottom black layer. Since it had some small dots in the design I chose to apply the Oracal transfer tape first and use the Reverse weeding technique on it to keep those pieces in place.

IMG_3165

The first time I used the reverse weeding I did not like it as the vinyl stuck to me. But, it definitely has it’s uses and works great for those detailed images. With a little practice, you get the hang of it.

When you are layering the vinyl, you want to start with the top layer first and then work your way down. I started with the black, then green, then red and then white.

IMG_3167

I love how this decal turned out.

What would you apply it to? A coffee mug? An acrylic blank?

Enjoy !

THANK YOU for your support! How can you help? Click HERE & buy a coffee. Every little bit helps with the cost of running the site.

Looking for more in-depth, step-by-step classes, check out all of my online Silhouette classes on my Teachable site HERE.

SS Logo snip it

**This post may contain affiliate links. What that means is that I may receive compensation if you purchase through the links I have provided. The price you pay for the product or service is not higher but I may get compensated for sharing.

Posted on — 2 Comments

Glass cutting board design

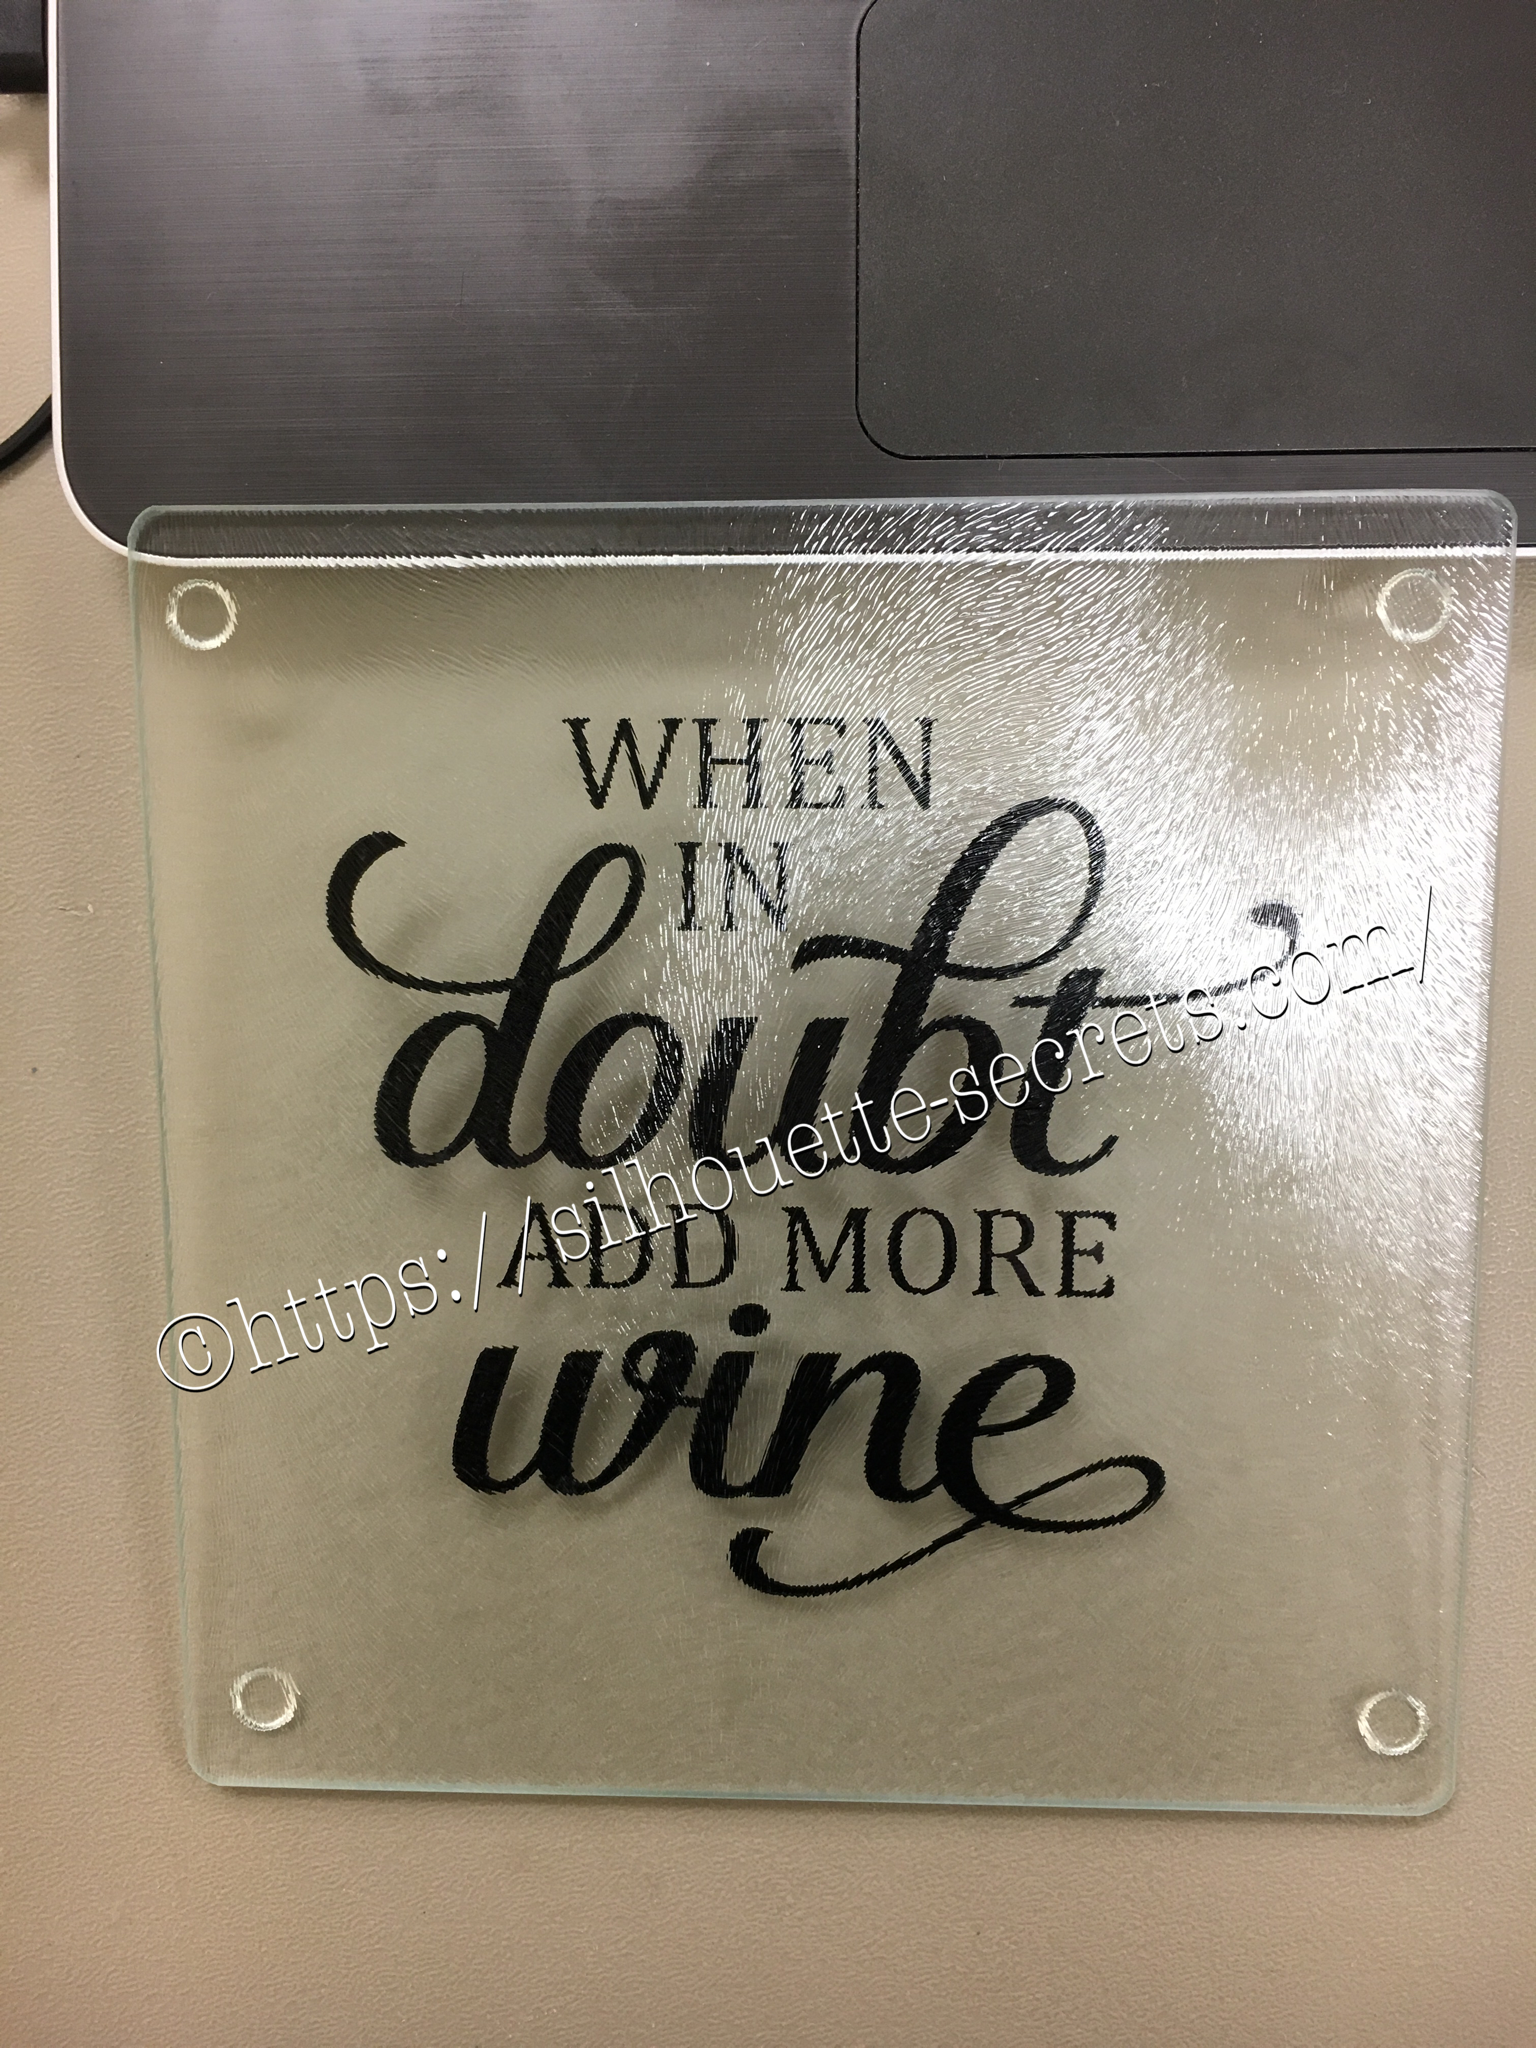
When in Doubt Add More Wine on backside of the glass cutting board.

This is a great project for a a great personalized gift. These glass cutting boards are textured on the top. Personally, I don’t think they make a good cutting board as they are textured on top but it makes a great coaster in my craft room. Of course, if you have been following my blog or my Facebook group, you know I like wine designs…. wine decor, wine…. well anything wine – lol.

With these glass cutting boards, you mirror your image on the Silhouette software before you cut it and then apply on the back side of the cutting board. I used Oracal 651 vinyl on this project, so it has a more “permanent” bond.

img_6042 Once you have the design cut, you can carefully weed the design and leave the image you want to transfer onto your project. Using your transfer tape to place your image on the back of the cutting board. Also as a note, vinyl is not food safe, so this is a great reason to apply it to the back of the cutting board. Next, you burnish your design down really good and carefully peel back your transfer tape. Done!

img_6047 There you go – a quick simple project! Now, I found this cutting board at our local Dollar Tree… however, they keep getting harder to find. You can pick up a glass cutting board anywhere and personalize it. These would be hand wash only as vinyl is not dishwasher safe. Also as a note, vinyl is not food safe, so this is a great reason to apply it to the back of the cutting board.

Enjoy !

THANK YOU for your support! How can you help? Click HERE & buy a coffee. Every little bit helps with the cost of running the site.

Looking for more in-depth, step-by-step classes, check out all of my online Silhouette classes on my Teachable site HERE.

SS Logo snip it
**This post may contain affiliate links. What that means is that I may receive compensation if you purchase through the links I have provided. The price you pay for the product or service is not higher but I may get compensated for sharing.