I used my Siser Juliet cutting machine and set it up to sketch out my text. You could use any cutting machine that the Artesprix sublimation markers fit in or even hand letter a design too!
I briefly covered how I set up the sketch in the Artesprix video. For a more detailed look at sketching with Siser Juliet or Romeo, check out this new video on the Swift Creek Customs YouTube channel.
And then I did some experimenting as well with color saturation on the backside. I LOVE how these have a bright, metallic look to them!
THANK YOU for your support! How can you help? Click HERE & buy a coffee. Every little bit helps with the cost of running the site.
Silhouette Classes
Never stop learning! Let me help you take the anxiety out of learning with Silhouette and get to creating faster! My Silhouette classes are heavily focused on software, so you can take the skills & techniques taught and apply them to many future projects!
**This post may contain affiliate links. What that means is that I may receive compensation if you purchase through the links I have provided. The price you pay for the product or service is not higher but I may get compensated for sharing.
Just popping in really quick to share a new video I released on YouTube sharing some new tools from Crafter Cuts that would be a perfect gift idea for a crafter friend or even yourself! Who doesn’t need more tools handy when creating?
Affiliate links may be present in the below and as an Amazon Associate I earn from qualifying purchases.What that means is that I may receive compensation if you purchase through the links I have provided. The price you pay for the product or service is not higher but I may get compensated for sharing.
Here is a close up of each of the tool kits I received from Crafter Cuts and what each includes.
Includes: Scraper, 3″ x 4″ Vinyl Squeegee with felt, 3″ x 2″ Small Vinyl Squeegee, Angled Anti Static Weeding Tweezers, Hook Tool, Pin Tipped Pen with replacement pin, precision knife with 5 replacement blades
Includes: All Felt 3M Squeegee, Blue Vinyl Squeegee with Felt edge, White Squeegee, Lil’ Chizler Precision Tweezer, Precision knife with 5 replacements, and Crafter Cuts Pick Tools
I’ll have more gift ideas soon! Now I’m off to play with my new tools and give them a talk about not hiding in “safe” places.
Save this for future reference by pinning the image below.
Enjoy !
THANK YOU for your support! How can you help? Click HERE & buy a coffee. Every little bit helps with the cost of running the site.
Or if you are looking for more in-depth, step-by-step classes, check out all of my online Silhouette classes on my Teachable site HERE.
**This post may contain affiliate links. What that means is that I may receive compensation if you purchase through the links I have provided. The price you pay for the product or service is not higher but I may get compensated for sharing.
This year I’m early. Last year I didn’t get the neighbor gifts completed until after Christmas. Check out the TP Snowmen & the file I shared a couple weeks ago from last year HERE.
This year, I decided to create something that I’ve seen pop up over and over the last few years. They are customized oven mitts with a cookie mix and spatula added to them.
I love that with the Silhouette machine you can customize anything and make it unique and your own.
Supplies used: – Siser white HTV – Pocket Oven Mitt – found mine at Dollar Tree – Cookie mix – Spatula – Heat press or iron – Funny Christmas Pot Holder Bundle or other designs
How to Create
Measure the area where HTV would be applied.
Open the Silhouette Studio Software. Using the Draw Rectangle Tool on the left side, draw a rectangle and then resize it to the size you measured. Use the Transform Panel – Scale Tab or Scale Tool in the Quick Access Toolbar at the top of the software to resize the rectangle.
This will give you an idea of the size you have for your design to fit in. I use basic shapes as templates all the time to gauge the size for my designs.
Open the design and then scale it down to fit in the template space you drew with the rectangle. Use the Align Tools to Center the design to get a feel for how it will look.
Now, we no longer need the rectangle that was drawn, unless you want to use it as your weeding box. This can make it easier to weed a design, especially when cutting multiples at a time. Check out more on Weeding Lines HERE. You can either move the rectangle off the cutting mat or resize it to fit around the design better.
Duplicate your design as needed. I like to start cutting with 1 or 2 of the design needed, just in case there are any issues I’ll run into, I can catch them before I’ve tried to cut 12 of the same design. I also highly recommend test cutting prior to sending the design to cut.
After cutting, weed out the design carefully. This means to remove the excess HTV from around the design.
If you happen to come across an area that didn’t cut well, don’t scrap the entire design. If you can save it, just recut the portion of the design that messed up. This was the only part that didn’t weed well on this one cut piece. When I was finished weeding, I used a scrap of white HTV and cut just the part I needed.
I used a bin I had hanging around the house to keep them all in a quick location to be able to grab them as we need them.
And neighbor gifts are done for 2021.
I’d love seeing what you are creating with your Silhouette machines or software. Feel free to post photos or questions on my Facebook group at Silhouette Secrets with EllyMae.
Save this for future reference by pinning the image below.
Enjoy!
THANK YOU for your support! How can you help? Click HERE & buy a coffee. Every little bit helps with the cost of running the site.
Or if you are looking for more in-depth, step-by-step classes, check out all of my online Silhouette classes on my Teachable site HERE.
**This post may contain affiliate links. What that means is that I may receive compensation if you purchase through the links I have provided. The price you pay for the product or service is not higher but I may get compensated for sharing.
Everyone starts out with one material or another, mine was paper. I started with my Silhouette as a paper-crafter and it has grown from there.
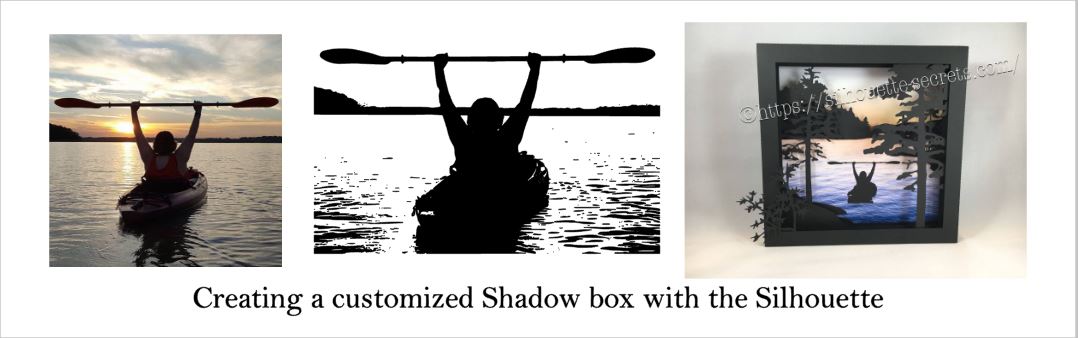
A while back I was visiting friends in Kansas and playing with the Silhouette and my friend asked if I could trace a photo for her that a friend took.
Now, photo tracing can be tricky. Each photo can yield different results tracing in the Silhouette Studio and you just never know until you try to see what will happen.
In this case, it was a great photo to trace.
Here is how the trace came out.
I used Basic Trace panel to achieve this.
Check out the Trace Panel HERE.
Then I released the compound path and deleted the water areas and used the point editing and deleting points to clean up edges and take out the skyline.
Now, like I said above, each photo is going to vary in how it traces and this one turned out to be pretty simple with a little time for editing.
Instead of adding the canoe, I cut and added my traced image of my friend on her kayak. It was perfect!
I am one of those people who has to do a project pretty much exactly like the demo, at least the first time. So I did go to the designer’s website and purchase the file again – yes, sounds crazy – but I wanted the backgrounds for this particular project.
However, you can use any background that you want and add it to your project.
What are you creating today?
Feel free to post your project photos & questions on my Facebook group at
Silhouette Secrets+ with EllyMae.
Enjoy !
THANK YOU for your support! How can you help? Click HERE & buy a coffee.
Every little bit helps with the cost of running the site.
Looking for more in-depth, step-by-step classes, check out all of my online Silhouette classes on my Teachable site HERE.
**This post may contain affiliate links. What that means is that I may receive compensation if you purchase through the links I have provided. The price you pay for the product or service is not higher but I may get compensated for sharing.
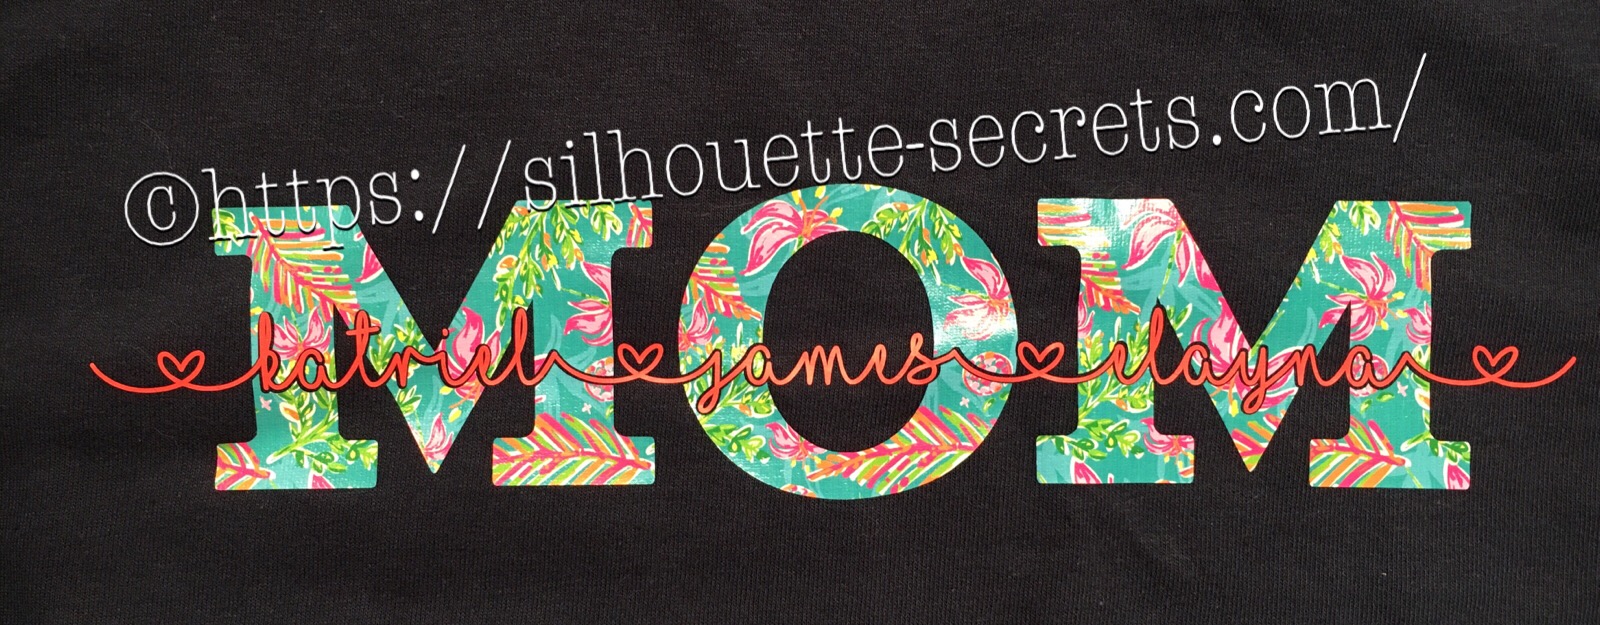
If you’ve ever wanted to turn a simple word into meaningful, personalized word art, the “subtract the name from Mom” technique is one of the most popular and impactful designs you can create in Silhouette Studio. By using basic subtract, weld, and text tools, you can carve a child’s name directly out of the word “Mom,” transforming it into a custom design that feels both modern and deeply personal. In this tutorial-style project, I’ll show you how to build this custom MOM shirt word art and then bring it to life by cutting it from HTV to create beautiful, custom apparel that’s perfect for gifts, family matching shirts, or keepsakes.
These designs have been a big hit for Mother’s Day and we will walk through how to created one.
Affiliate links may be present in the following blog post and as an Amazon Associate, I earn from qualifying purchases.
Create a Custom MOM Shirt with Silhouette & HTV
First click on the Text Tool on the left side of the Silhouette Software.
Click on the design mat & type out the words.
Click off of the words to deselect it and then click back on the text once to select it.
Fill the text with color to make it easier to see & work with.
Now, click on a Font Style Name, the text will change to that font style.
You can then either click on each font, use the text search bar if you know what you are looking for or use the arrow keys to scroll through the text list and as you do the words will change to each font – this is my favorite method if I don’t know what font I want.
For Mom, I chose a font called Gulana – I chose this one by just scrolling through my font list and seeing what I liked best.
Now, resize it how you like it.
Next using the same text tools, type out your second layer.
I used the font MF I Love Glitter by Misti Fonts in this example. The swirl hearts are called Glyphs and are special characters within the font that you can add.
Since this font overlaps make sure to weld the letters together before you cut.
Now position your name design over the top of the Mom design and align it how you want it.
We are going to Subtract the top layer (names) from the bottom layer (Mom).
First, I’d suggest creating an offset. When you are using HTV and pressing individual layers, the HTV can shrink as it’s applied with heat. To help with that we will create an offset, so we don’t have unwanted gaps in our design.
First, make a copy of your design and pull it off to the side in the holding area of the design space. Any time you are working with text, it’s a good idea to make a copy and pull the original off, just in case you need to go back. Once you edit text, it is no longer text and is now treated as a vector image – so the text is no longer editable.
Next, select your name text and click on the Offset Panel on the right side of Silhouette Studio v4.
Then next to the Distance highlight the numbers and type in 0.040, then click on Apply or hit Enter. The Distance of the offset will vary depending on the design you are using. Enter some larger or smaller offsets and see what you like – the Undo button will be your best friend.
The offset option gives you an outline around your text. It can also be used to make text thicker when you are using a very fine line font.
Once you Apply the offset, it will weld any parts that are overlapping. Parts of the design that are not overlapping (like dots of an i) will not be welded together, so you will need to group the offset before you move it, so it all moves as one.
Now move your original text off of the Mom design.
To create this design, we are going to use the Mom and the offset of our name text.
Select both Mom and the offset and under the Modify Panel, choose Subtract.
This will Subtract the top layer (offset) from the bottom layer (Mom) and any pieces that are not connected will now be individual. I would group these together before anything gets moved.
The Group option can be found in the QAT (Quick Access Toolbar) at the top of the software, right click and choose Group or under the Object menu at the top left of the software.
Now, we can move our original text back on top of our Mom design.
You can see when we zoom in that we have created a gap in our layering. This is done with the purpose of allowing for the shrinkage of the HTV and not getting unwanted gaps in our design.
Do you have to do an offset before you use the Subtract option? No, but it can save some frustration when the HTV does shrink.
Now, you are ready to set it up to cut out the material.
I used this awesome Sparkleberry Vaca HTV by Sparkleberry Ink on the Mom design. This is a patterned vinyl and you do not have to mirror or flip your image when you cut their patterned vinyl.
For the name text, I am using Siser Easyweed HTV in Hibiscus. Since this is regular HTV, I will flip (mirror) the text prior to cutting.
Next, prepare your materials. Cut them down to the size you need or place each one on the mat individually, however you like to cut.
Click on the Send tab in the top right corner. Select your Material. Heat Transfer – Smooth is what I used for both the pieces I cut.
Once your mat is loaded, I always suggest doing a Test Cut before cutting the full design. This can save you a lot of frustration in the long run.
Click on the Send button at the bottom and once it’s cut you can weed your designs.
Layer & press the designs on your t-shirt or tote bag and you have a custom made design.
This MOM shirt technique could be used to create many different custom designs such as DAD, NANA, GRANNY, etc.
Save this for future reference by pinning the image below.
Enjoy !
THANK YOU for your support! How can you help? Click HERE & buy a coffee. Every little bit helps with the cost of running the site.
Silhouette Classes
Never stop learning! Let me help you take the anxiety out of learning with Silhouette and get to creating faster! My Silhouette classes are heavily focused on software, so you can take the skills & techniques taught and apply them to many future projects!
**This post may contain affiliate links. What that means is that I may receive compensation if you purchase through the links I have provided. The price you pay for the product or service is not higher, but I may get compensated for sharing.
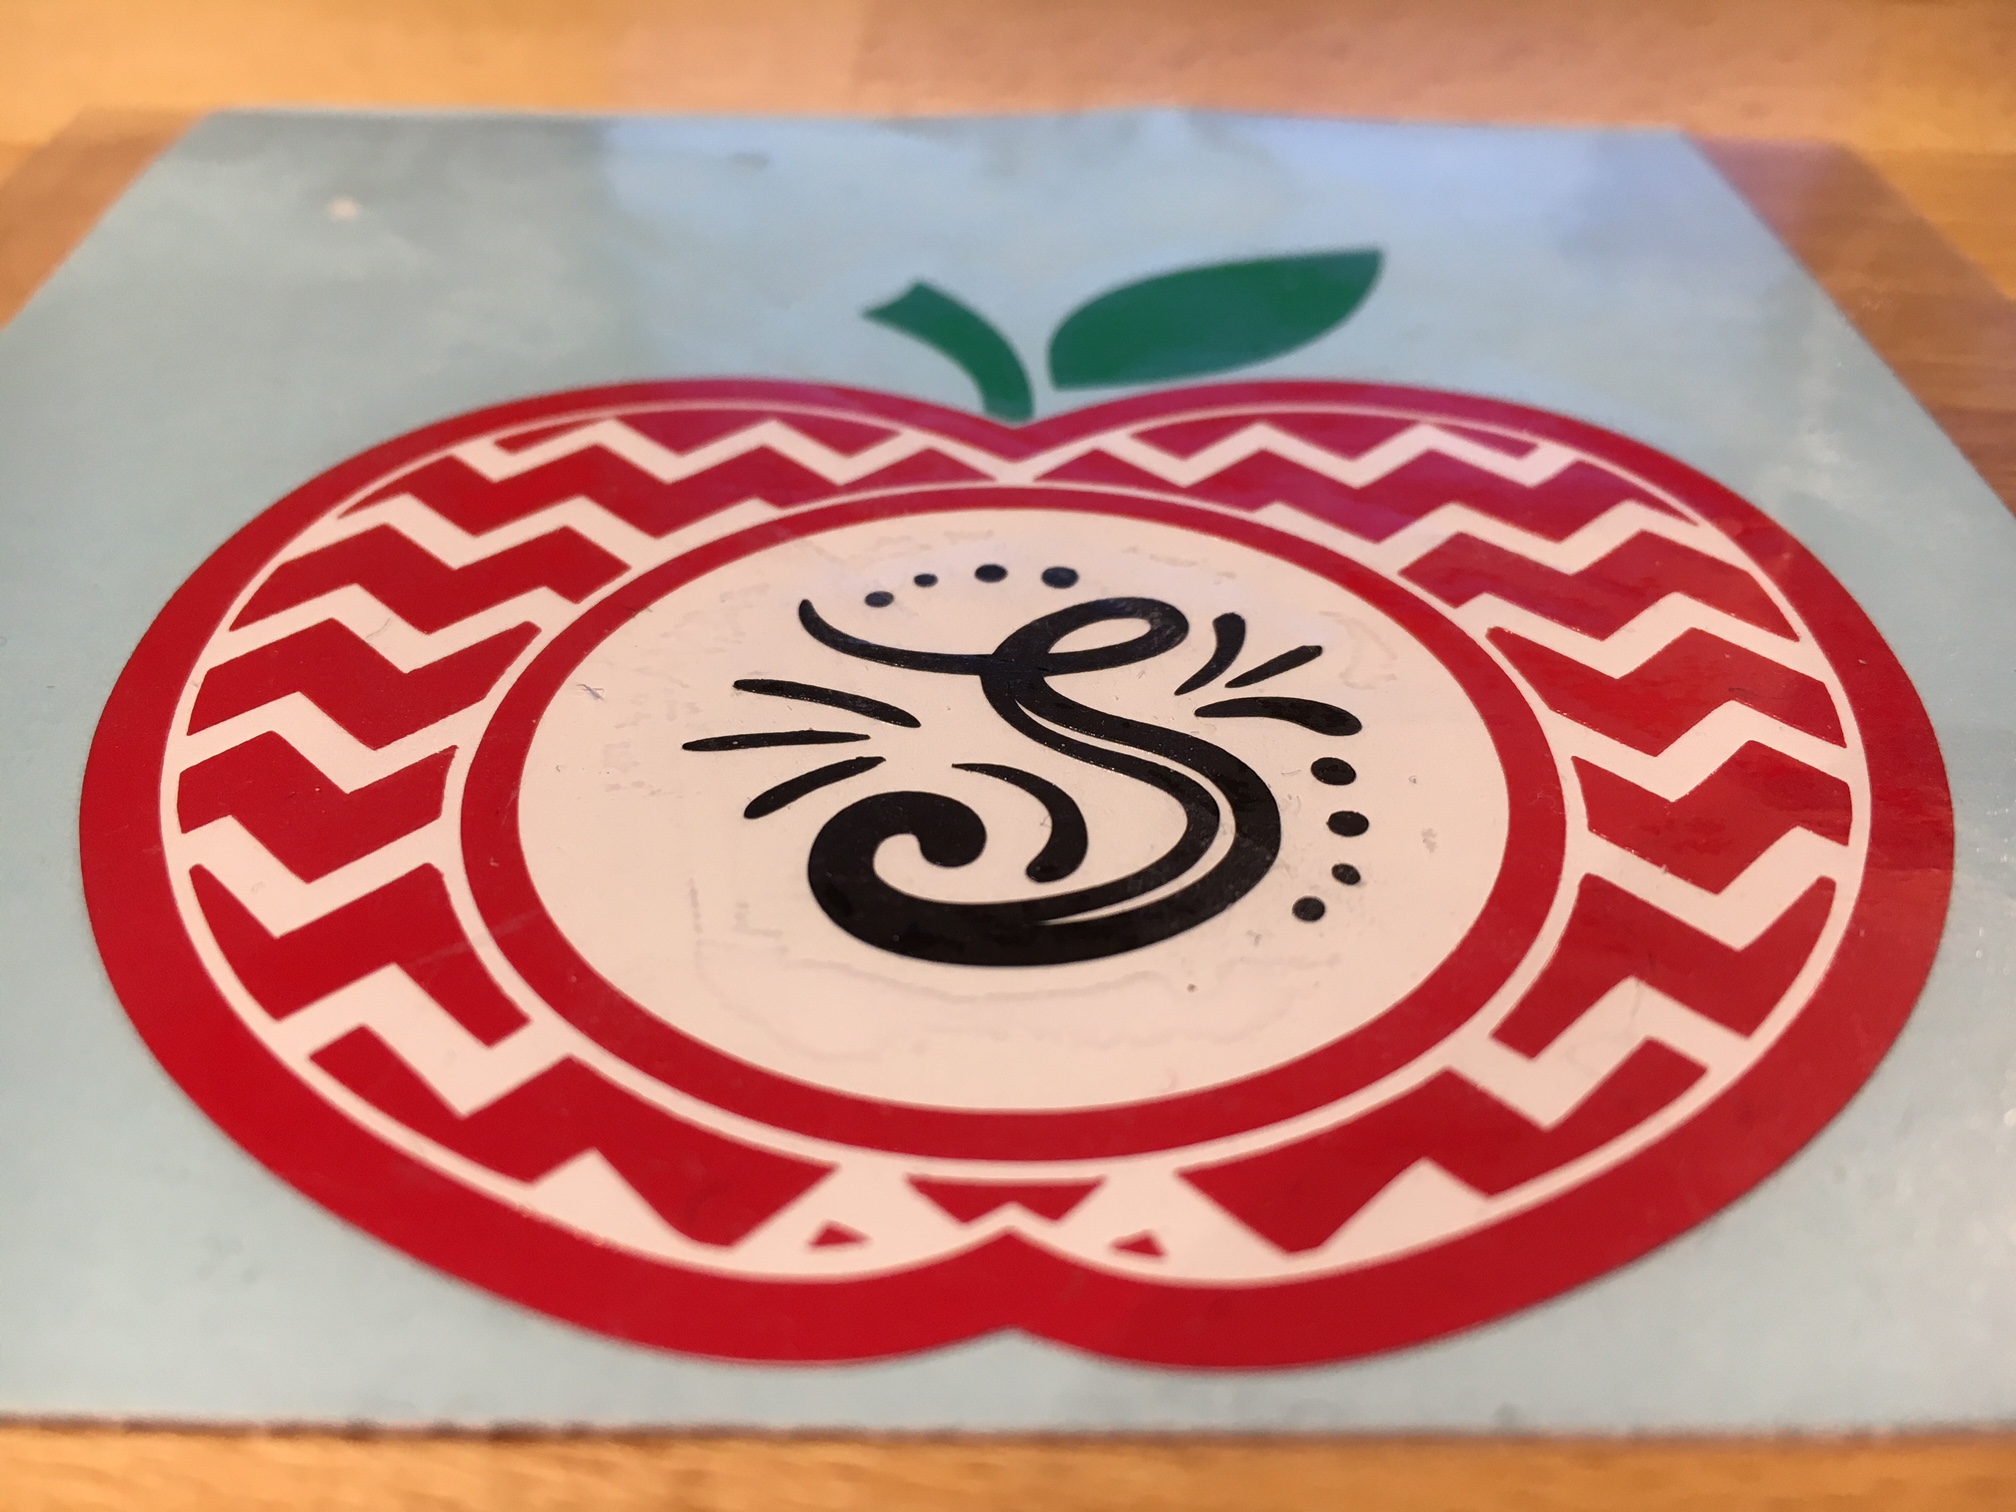
Measure and create your design to the size you want. I added an apple layer of white behind the red, so that gives this design 4 colors to layer.
The mat is revealed at 50% here so I can see where on the cutting mat my decal would fit.
Since there are 4 colors to this decal, replicate the design with the registration marks so there are 4 copies on your design mat.
Check out more information on the Replicate Panel HERE.
Move the copies to separate areas on your design mat, then un-group the design and delete the color on each copy that you do not want to cut. Make sure you do not move the design in any way when you are deleting the layers, as it is lined up properly with those registration marks.
It’s also helpful to pull off another copy of the original to the side of the mat, just in case you need to go back.
Now, you have all the layers of your decal ready to cut on one cutting mat. Cut your material or grab your scraps of vinyl and place them in the same location on the cutting mat as they are on the design screen. I am using Oracal 651 vinyl for my decal.
You’ll notice that I did not weed the bottom black layer. Since it had some small dots in the design I chose to apply the Oracal transfer tape first and use the Reverse weeding technique on it to keep those pieces in place.
The first time I used the reverse weeding I did not like it as the vinyl stuck to me. But, it definitely has it’s uses and works great for those detailed images. With a little practice, you get the hang of it.
When you are layering the vinyl, you want to start with the top layer first and then work your way down. I started with the black, then green, then red and then white.
I love how this decal turned out.
What would you apply it to? A coffee mug? An acrylic blank?
Enjoy !
THANK YOU for your support! How can you help? Click HERE & buy a coffee.
Every little bit helps with the cost of running the site.
Looking for more in-depth, step-by-step classes, check out all of my online Silhouette classes on my Teachable site HERE.
**This post may contain affiliate links. What that means is that I may receive compensation if you purchase through the links I have provided. The price you pay for the product or service is not higher but I may get compensated for sharing.
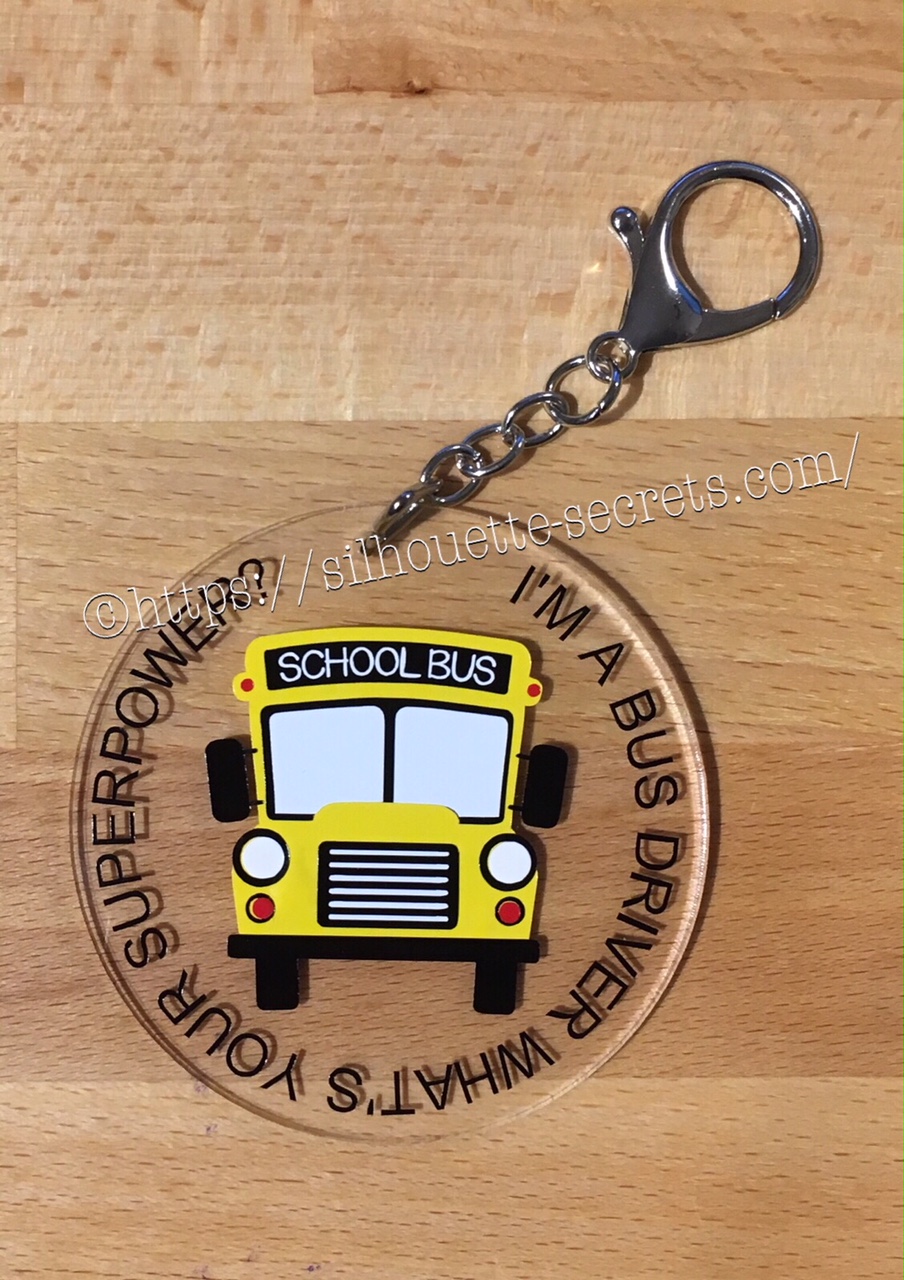
I love that Craft Chameleon acrylics come with a cut file included. I opened up the template for this shape and copied and pasted it to a new design mat to use as my base. Or you could draw a perfect circle by holding down the Shift key and then resizing the circle to the exact dimensions under the Transform Panel – Scale tab.
Now, I can use this to create my design in.
I took the School bus design by Kelly Lollar Designs that I used as an example in my guest post, and shrunk it down with the registration (layering) marks. I wanted to make sure that the bus fit in the center of the acrylic shape with space around the edges for text.
Now, I duplicated my circle and made it a little bit smaller. This is so the text will fit down inside of the acrylic shape better. Move the original 3″ circle off the mat as it’s not needed any longer or you can delete it.
Then select just the bus and the circle and use the Align Tab in the Transform Panel to Align Center or from the QAT (Quick Access Toolbar). Do not include the registration (layering) marks in this, as it is just the bus and circle we want to center together.
Now, type out the text, select the font style and size. Double click back on the text to get the circle in the bottom left corner. Grab that circle and drag it to your circle shape.
As you drag it to the circle you will notice it attaches to the circle. Play around with the alignment of the text to your liking and then use the slider bar to increase the distance from the circle either inside or outside of the circle.
Now, I decided to increase the Character Spacing under the Text Style Panel, just a bit on my letters to spread it out a bit. And then readjust your words around the circle. Each Font style that you choose will give you different looks, so you will need to adjust for whatever you choose.
Now, once the text is modified, it will no longer be editable text. This is a good time to make a copy of the text & circle and pull it off the mat, just in case you want to edit it later. If you select only the text to pull it off, it will release from the shape, so you want to select both the text and the shape and make a copy.
In order to separate the text from the circle, right click on the text and choose Convert to Path.
And now, move the circle off the mat as we do not want it to cut.
Once we have our decal cut out and layered together, we are ready to apply to the acrylic shape.
I went ahead and placed the shape on my Silhouette cutting mat on the sticky side, so it wouldn’t move while I applied the decal. The acrylic blanks come with a protective covering on them to prevent scratching before use, so make sure to peel that off before you add your decal.
And then I lined the decal up and placed it down, burnishing it well and took the transfer tape off.
And with any project there’s always 1 piece that may not work just right. As you can see I’m missing the School bus title on it. This did not weed well when I was layering the decal and after messing with it, I decided I’d just re-cut it and apply.
I duplicated the design and then un-grouped everything and deleted all but the School Bus. Then I duplicated the School bus 3 times just in case…. if I had only cut it once you know it wouldn’t have weeded correctly, but since I cut it 3 times….. all 3 weeded beautifully with reverse weeding.
Then I gathered the rest of the tools to attach the pieces of the bag tag.
I just received these bent nose pliers from Craft Chameleon and using them 1 time, I’m in love with them. They are one of those tools like my Close to My Heart nonstick scissors that will be my go to tools. Now, I could have just gone to the garage and “borrowed” a couple pairs of pliers from there, but these were the perfect size for my hands and worked wonderfully. I am so glad I ordered them after watching Craft Chameleon’s live FB video a few weeks ago.
And now I have a little gift to give to the bus driver.
Can you think of things you might layer with adhesive vinyl?
Those first few times you attempt it can seem daunting, but it is another project that takes practice and the layering (registration) marks make it much more manageable to layer a design.
What will you design and cut?
Enjoy !
THANK YOU for your support! How can you help? Click HERE & buy a coffee.
Every little bit helps with the cost of running the site.
Looking for more in-depth, step-by-step classes, check out all of my online Silhouette classes on my Teachable site HERE.
**This post may contain affiliate links. What that means is that I may receive compensation if you purchase through the links I have provided. The price you pay for the product or service is not higher but I may get compensated for sharing.
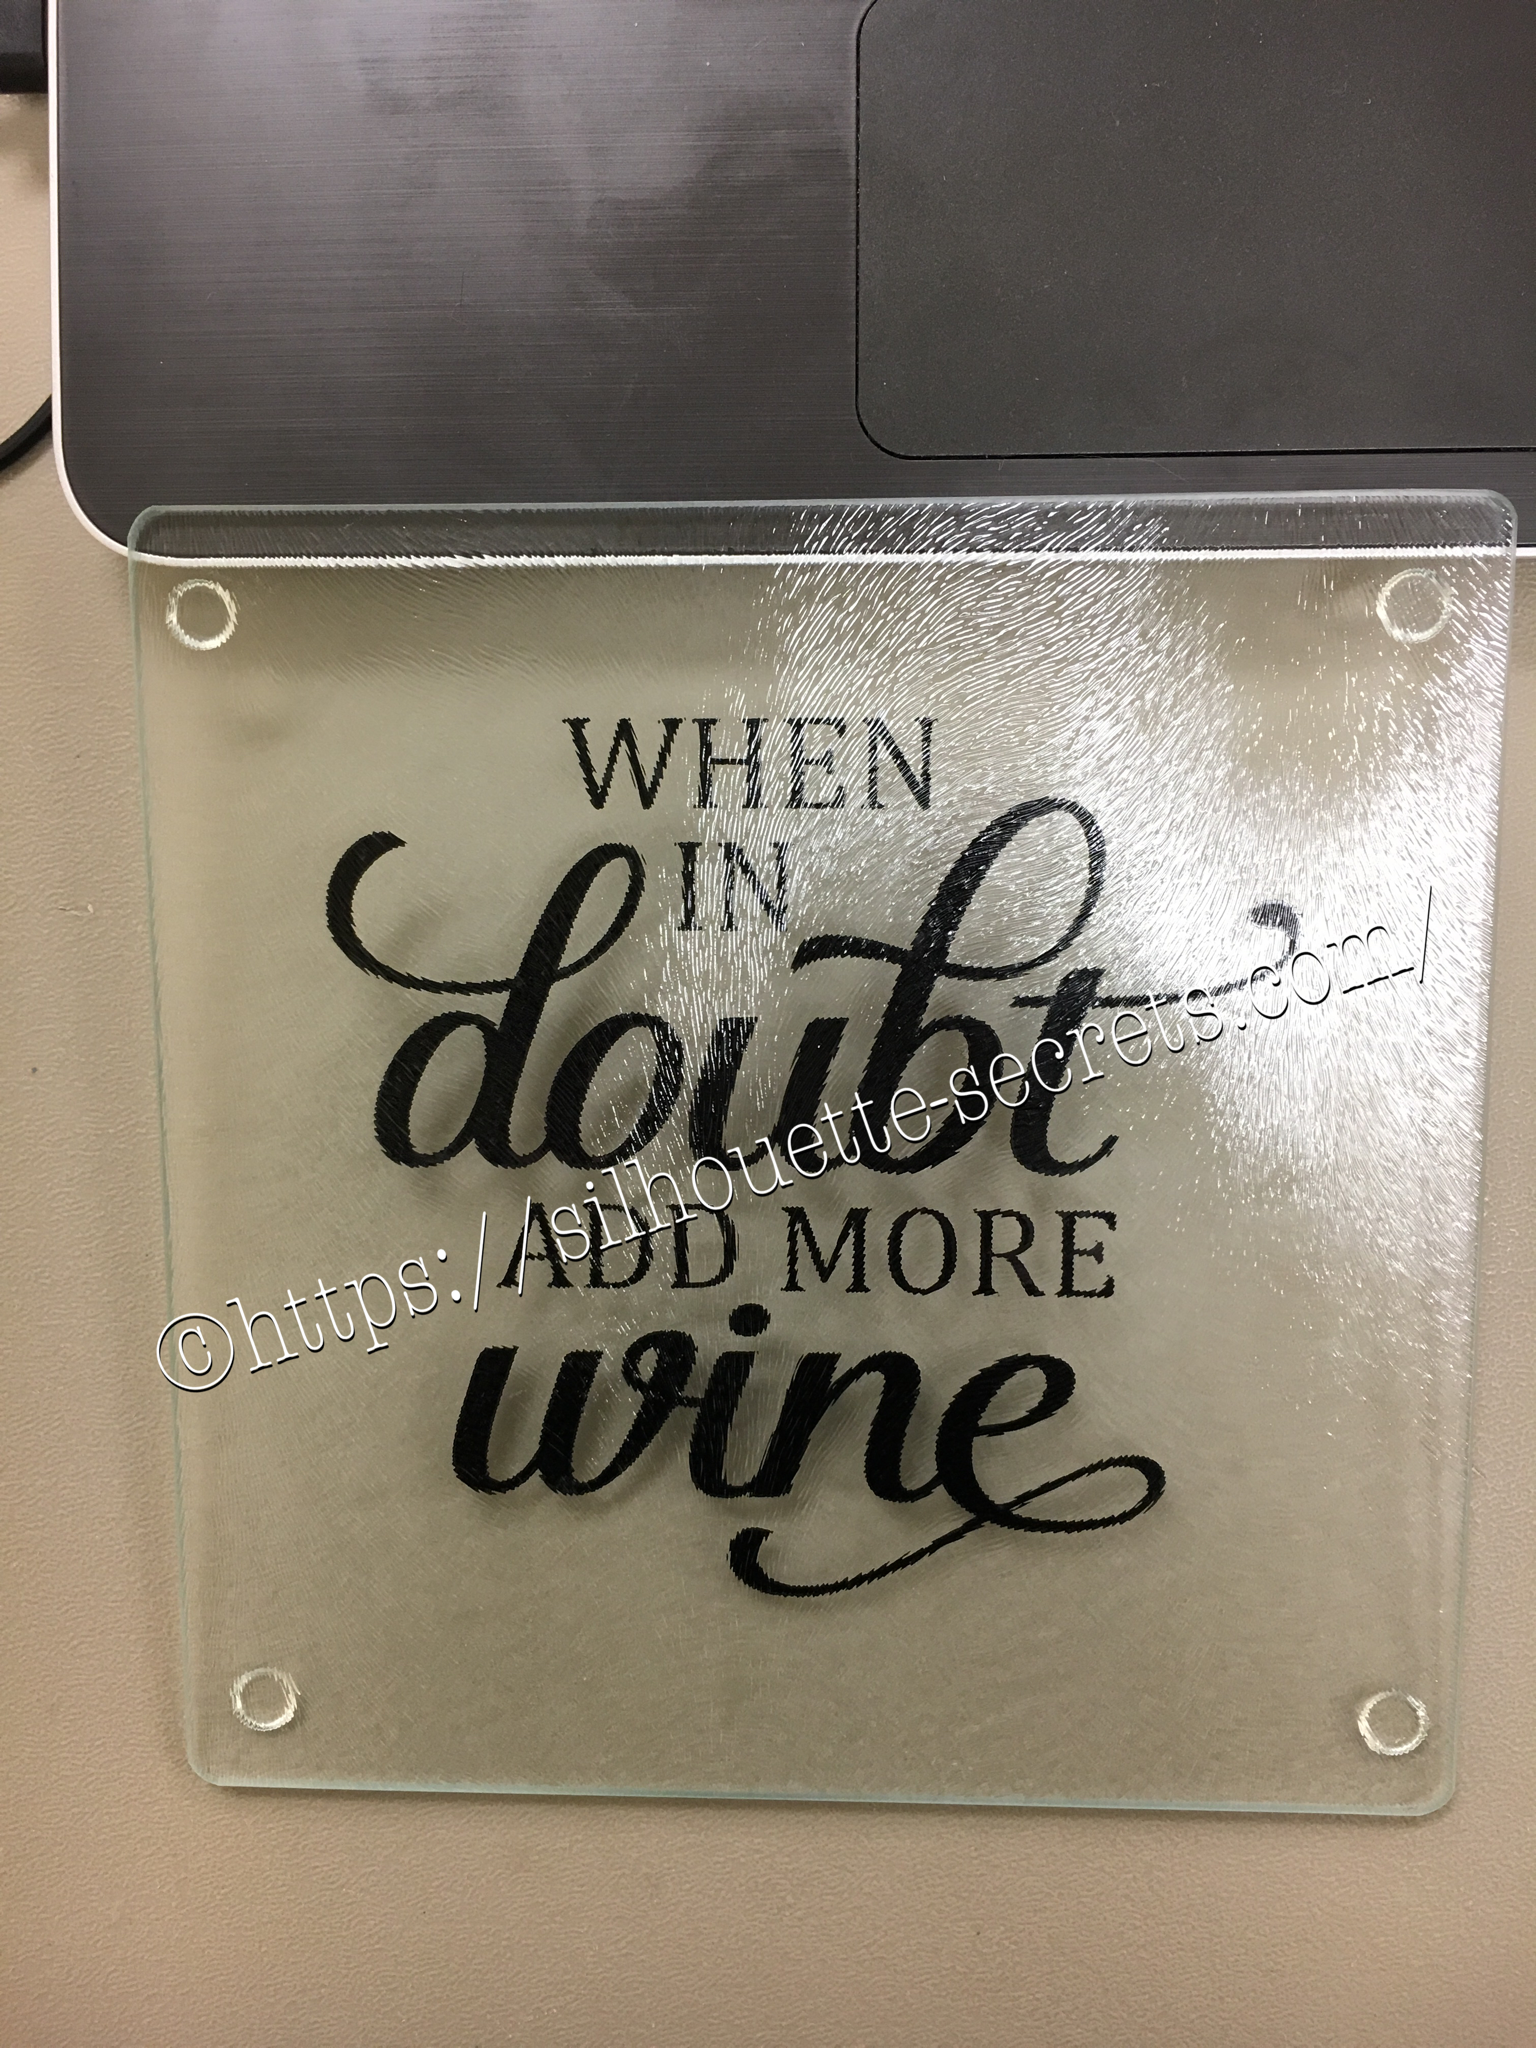
This is a great project for a a great personalized gift.
These glass cutting boards are textured on the top. Personally, I don’t think they make a good cutting board as they are textured on top but it makes a great coaster in my craft room.
Of course, if you have been following my blog or my Facebook group, you know I like wine designs…. wine decor, wine…. well anything wine – lol.
With these glass cutting boards, you mirror your image on the Silhouette software before you cut it and then apply on the back side of the cutting board.
I used Oracal 651 vinyl on this project, so it has a more “permanent” bond.
Once you have the design cut, you can carefully weed the design and leave the image you want to transfer onto your project. Using your transfer tape to place your image on the back of the cutting board.
Also as a note, vinyl is not food safe, so this is a great reason to apply it to the back of the cutting board.
Next, you burnish your design down really good and carefully peel back your transfer tape.
Done!
There you go – a quick simple project!
Now, I found this cutting board at our local Dollar Tree… however, they keep getting harder to find.
You can pick up a glass cutting board anywhere and personalize it.
These would be hand wash only as vinyl is not dishwasher safe.
Also as a note, vinyl is not food safe, so this is a great reason to apply it to the back of the cutting board.
Enjoy !
THANK YOU for your support! How can you help? Click HERE & buy a coffee.
Every little bit helps with the cost of running the site.
Looking for more in-depth, step-by-step classes, check out all of my online Silhouette classes on my Teachable site HERE.
**This post may contain affiliate links. What that means is that I may receive compensation if you purchase through the links I have provided. The price you pay for the product or service is not higher but I may get compensated for sharing.
Rhinestones – once you start, it’s addictive and you just want to make more.
I held off as long as I could, until I took Terri Johnson Creates hands on retreat last July.
In her class, we designed our own rhinestone design and cut it out. After that one design, I was hooked and started shopping in the Silhouette store for more.
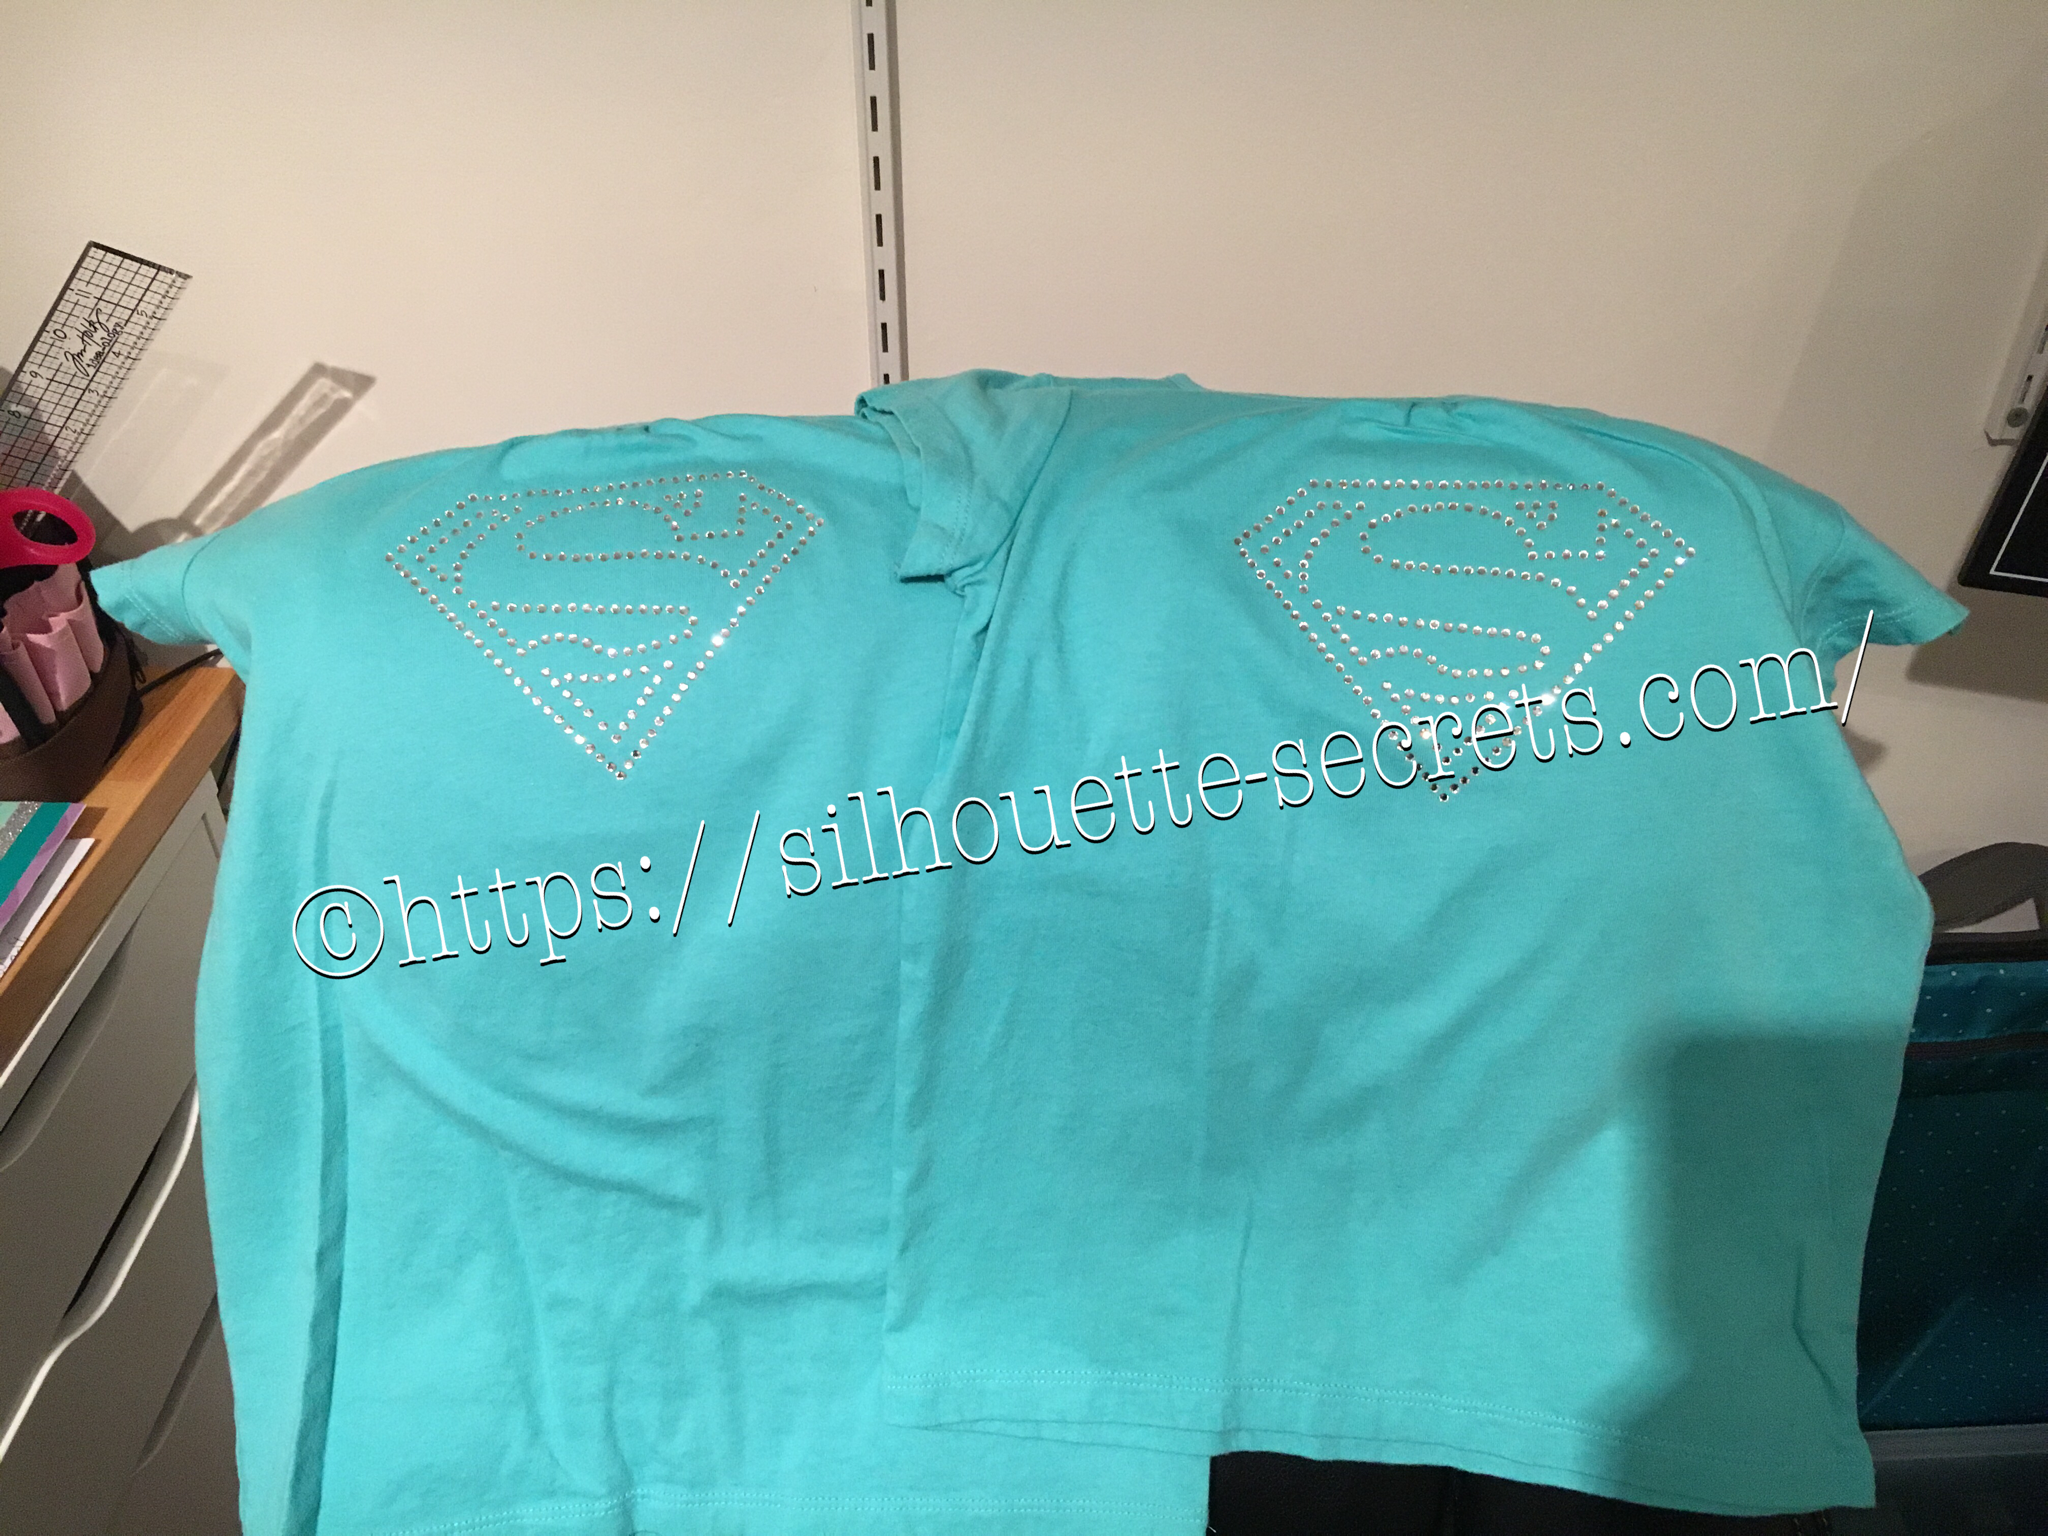
This one jumped out at me and I knew I’d be making some for my nieces in the future.
I had just ordered some supplies from The Rhinestone World and had the opportunity to make these as quick gifts to send with my husband on a trip.
So with this magic flock you cut the design with your machine and then peel it off the backing – rip it like a band aid gets the best results. If it has cut well, the little holes will stay on the backing and you can just scrape them off…..
You can then lay the sticky design down on a safe surface, press it and peel it back again to get more of the circles to stick out.
I then look for any that didn’t come out, remove those and put it back on the backing paper.
Now, sprinkle your rhinestones on top of your template and rub them around until all the holes are full.
Once all the stones are in place, using heat transfer tape, lay it over top of your design and burnish. Carefully life it up and make sure the rhinestones are stuck to the heat transfer tape.
Place your heat transfer on the shirt where you want it and I used an iron with a board under it and lots of pressure on high heat with a teflon sheet to set the stones on the shirt.
I love the ability to make a gift up really quickly and hope you enjoy making rhinestone designs as much as I do.
I would highly recommend attending a retreat by Terri Johnson Creates, you will learn so much and be able to try all kinds of new projects.
The possibilities are endless with the Silhouette Cameo!!!
Enjoy !
THANK YOU for your support! How can you help? Click HERE & buy a coffee.
Every little bit helps with the cost of running the site.
Looking for more in-depth, step-by-step classes, check out all of my online Silhouette classes on my Teachable site HERE.
**This post may contain affiliate links. What that means is that I may receive compensation if you purchase through the links I have provided. The price you pay for the product or service is not higher but I may get compensated for sharing.
The other night my husband shows me a photo on his phone and asks me, “Can you make this?” It was a pop up card with flowers in the middle…. so of course….. challenge accepted!!!
I start looking for cut files that I can make something similar and found several. This one I found in the Silhouette Design store and it was so easy to click buy and cut.
On this particular design there was also information in the product description that leads you to the designer’s blog for instructions on how to assemble and I referenced this several times to know the order that each was glued into the card. You can find the instructions for this card HERE as well.
This card in a box was easy to assemble since everything was included in the one cut file and all you had to do was un-group and arrange the cuts according to the color you wanted to cut. However, do keep in mind that if you want to mail this card, it does need to be resized smaller to fit in a regular size envelope.
I cut all my pieces and set them aside to assemble everything at once. I used several adhesive types: Liquid Glass when gluing the card box, roses & stems together, foam tape to attach the greenery inside the card and then a Xyron sticker maker for the word valentine.
Liquid glass is my go to adhesive for a quick secure hold on these card in a boxes or on rolled flowers…. I use a small amount and hold the paper in place for 10 seconds, sometimes maybe a bit longer, and then give it a few to dry and it holds so well.
Above is my card once all the roses are attached inside the box.
And above is my finished card. I did resize the card, so I would be able to put this in a 5 x 7 envelope and mail it.
After making this smaller version, I decided that I wanted to make some for the teacher’s. Because really, who doesn’t want to receive a dozen roses? And ones you don’t have to water or take care of in any way – bonus!
I hope you take some time to “Do something Creative today.”
Enjoy !
THANK YOU for your support! How can you help? Click HERE & buy a coffee.
Every little bit helps with the cost of running the site.
Looking for more in-depth, step-by-step classes, check out all of my online Silhouette classes on my Teachable site HERE.
**This post may contain affiliate links. What that means is that I may receive compensation if you purchase through the links I have provided. The price you pay for the product or service is not higher but I may get compensated for sharing.
THANK YOU for your support! How can you help? Click the link to buy a coffee. Every little bit helps in the cost of running the site.


 Place your heat transfer on the shirt where you want it and I used an iron with a board under it and lots of pressure on high heat with a teflon sheet to set the stones on the shirt.
 I love the ability to make a gift up really quickly and hope you enjoy making rhinestone designs as much as I do.


