Posted on 10 Comments

Layered Mandala files in Silhouette

Have you seen the layered mandala files that have started circulating?

They are becoming extremely popular and I’m hooked!
Coming into the Silhouette world, I was a papercrafter. What am I saying? I still am a papercrafter, but now I have so many other materials I use as well.

These layered mandalas are pretty simple to cut and assemble.
Of course, that is designer dependent.

While I was browsing Pinterest one night, I pinned this to my future Silhouette projects and it came up in my Facebook group this past week.
So that means it was time to grab these files and create!

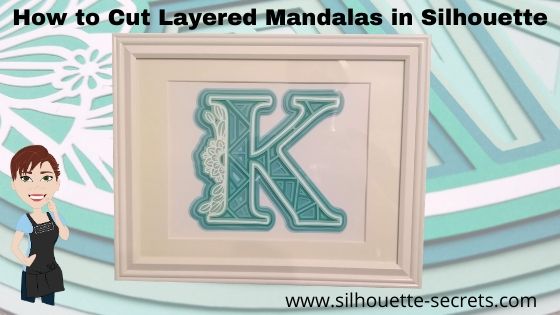
This is a free layered mandala alphabet svg file by Special Heart Studio.

Now, there are 2 things I want you to do.
1. Click HERE to go to Pinterest & pin this file so you don’t lose it.
2. Go grab these FREE svg files directly on the Special Heart Studio website.

Now, that you have the files. Let’s take a look at how to use them in the Silhouette software.
Like I said above, it’s pretty easy with these files the way they are created.

Make sure to download the files HERE and then open the svg file.
Don’t know how to open the svg file?
Click HERE for the detailed instructions on how to unzip and open downloaded svg files.

Letter K Mandala file by Special Heart Studio

When the file opens, all of the layers are ungrouped.
Select the entire design and you will see the selection box around each of the layers.

If the file is grouped together, right click on it and then choose Ungroup to separate the layers.

Draw a rectangle on the left side of the cutting mat in the gray holding area.
I am working with a frame that is for a 8″ x 10″ photo.
Using the Transform Panel – Scale Tab, change the dimensions to 8″ wide by 10″ high.

I am using this 8″ x 10″ rectangle to size my design so I know it will fit in the space I have in my frame.

Next, select all the of the layers of the design.
Left click in the top left above the design, hold the left mouse button down, and drag it across the entire design to the bottom right.
This will select any object that the mouse cursor touches.

Move the design into the drawn rectangle on the left side. With the entire design still selected, use the corner bounding box to scale the design down to fit inside the rectangle as you chose.

Once you have the size you want, you are ready to start cutting the layers.

I started with the bottom layer and worked my way up.
Grab the layer you want to cut and move it to the top left corner of the cutting mat.

I use the Transparency (reveal) option on the Page Setup Panel to see the grid lines of my cutting mat so I know how much material that I need for the design.

I grabbed some Recollections Paper packs from Michaels that work great for these projects and the different shades of color for the mandalas. Great quality cardstock and takes the guessing game out of me trying to match colors up.

Then I cut my material down using my paper trimmer to the size I need. I find that this helps to save the adhesive on my cutting mat, which makes it last longer and gives me scraps of material that are even sizes for future projects.
More tips on getting the most out of the cutting mats HERE.

Load the cutting mat into the Silhouette machine.

Click on the Send tab in the top right corner.

Choose Cardstock Textured as the material. I use this setting for cutting almost all cardstock and it works well. While the Silhouette can cut textured cardstock, I prefer to cut smooth as it is much less of a headache. Depending on the textured nature, it can be a bit more finicky to get clean cuts on.

Click Send in the bottom right corner and watch it work.
After the cut is complete, unload the cutting mat, flip it over and peel the cutting mat from the cardstock. This will help it to release from the adhesive.

Click back on the Design tab.
Move the first layer off to the right side and grab the next layer to cut and place in the top left corner of the design mat.

Click back on the Send tab and verify that the Material has not changed.
Place the next color cardstock on the cutting mat and load it into the machine.
Then click on the Send button in the bottom right corner of the Send tab.

Repeat this process until all layers have been cut.

*Note: as you cut a lot of cardstock, you may find that your not getting as clean of cuts. This can be due to the blade getting duller. As the blade dulls, you can increase the blade depth or force if necessary to get a clean cut. I have used this blade to cut lots of cardstock and during these cuts, I did increase the blade depth by 1 to get a cleaner cut.

When you get to the top layer. Notice that it is a bit more intricate of a design. I turned on the Overcut feature to help with this.
To learn more about what the overcut feature does click HERE.

I found that this gave it a bit cleaner cut on the corners for the top layer of this design.
With the top white layer, be gentle with it getting it off the cutting mat and take the time to carefully remove the cut pieces from the design. I promise it will be worth it.

Once all the pieces are cut, you are ready to assemble.
Since the top layer was rather intricate, I used a Broad Tip Glue pen from Close to My Heart to add adhesive to the backside. Then I glued it down to the first color.

Then I used foam tape to add dimension between the layers.
I used the Thin 3-D Foam Tape by Close to My Heart since I was putting it in a regular frame, I didn’t want to add too much thickness to it, but I still wanted it to have some dimension.

And then sometimes, even when you think you have the right size and you use a rectangle to draw out the size of space you have, don’t always assume the frame/mat is the size it says.
Turns out that my K was just a bit too wide. I should have measured to double check and after cutting the first layer, looked to see if it would fit.

But, I turned it and it fit perfectly the other direction in this frame. If it had not, it wouldn’t have been a lost cause. I would have just reassessed the game plan.

I love the dimension on this!

Once you start, it is hard to stop. I grabbed another layered file from Special Heart Studio for a layered floral heart mandala and started cutting using the same steps as above.

I am loving all the detail and dimension on these layered mandalas.

These layered mandala designs are picking up in popularity and I am seeing them all over Pinterest and Facebook group. Grab one and play today!

If this is a little too much to get you started with cardstock, check out the free card cut file I shared last week on the blog HEREFancy Fold Flip Card.

I would love to see your Silhouette projects!
Feel free to post photos or questions on my Facebook group at 
Silhouette Secrets with EllyMae.

Save this for future reference by pinning the image below.

Enjoy!

SS Logo snip it
**This post may contain affiliate links. What that means is that I may receive compensation if you purchase through the links I have provided. The price you pay for the product or service is not higher but I may get compensated for sharing.
Posted on 7 Comments

Creating cards with your Silhouette

 I started my Silhouette journey as a paper crafter and that still has a big part of my heart. I love to play with paper and creating all kinds of projects with it. There is so much that can be done with the Silhouette but I feel that’s it’s just hard to do it all. And just like anyone else, I get a bug and have to go back to my roots.

I am also a Close to My Heart consultant and have been since right before we moved to Virginia 4 years ago. Gosh, I can’t believe it’s been that long. But I love to be able to combine the two. Close to My Heart has a great quality card stock and I love stamping as well.

So this year, I saw a card kit in the catalog and I just “had to have it”. Why? Who knows? But, it spoke to me and all the supplies to create it jumped in my cart.
That doesn’t happen to anyone else, right?

CTMH card kit.JPG

So this card kit has no Silhouette cuts in it. I didn’t use the software. I actually used the metal die Thin Cuts that come with the card kit and ran them through my Cuttlebug (although an svg file would be much easier if it were available).
So why am I writing about it?

IMG_20191205_105929398 copy

Well, even though I did nothing with my Silhouette for these cards, it gave me some creative inspiration. To be honest, I had hit a little bit of a slump.
I was testing & things weren’t going peachy, which can be frustrating.
So, I got busy doing, got busy creating, just followed the directions, and went with the flow. My kit arrived 2 days earlier than I expected and I dropped everything (including household chores) and started cutting, stamping, and assembling.

It took me longer than I thought to assemble the kit, but that was also because I thought it would be a great idea to make doubles. If I could make 15 cards, I might as well do 30 to send out. It always sounds like a good idea at the the beginning.

But one thing I do know, while I was working I was getting ideas of how to use these papers with my Silhouette and create a fold card design in the software. This was a design I had cut by hand a few years back when I was making card kits for my CTMH customers. I wasn’t focused on trying to come up with the ideas from scratch, they were just coming to me. All of a sudden it was “What about if I use these papers with my Z fold card design & stamp the images for the card?” or “What if I use a print and cut image on the front of the card?” and then “What if I created the file to give away?”
And it was back… that creative spark!

IMG_20191205_105313795 copy

And then one thing leads to another, the creative spark lights a fire. I remembered I had this little guy I had been saving to do Christmas Cards with for a long time.

I used the Print & Cut feature to cut out several Moose in Sleigh Christmas designs that would fit right on the front of the card.

Print & Cut Moose copy

This is Moose In Sleigh Christmas Print and Cut by Stinkin Cute Paper Piecings – Design #50960. And I have to admit, I have found him “stinkin’ cute”.

My new Cameo 4 registered and cut this design out beautifully.

IMG_20191204_141554050 copy

Adding it on to the front of this Z-fold card worked great!

IMG_20191205_105329983 copy

But maybe you don’t have time to create Christmas cards this year. That’s ok grab this FREE cut file below and create cards for all occasions throughout the year.

IMG_20191205_105338514 copy

I used Happy Birthday Layered by Deborah Stine – Design #57087 and turned the cut lines off, changed the color to match my patterned paper, set it up as a print & cut with the center front rectangle around it.

For more information on setting up a Print & Cut project check out Print & Cut – Part 1, Part 2 – Text, and Part 3 – Images.

Now, if you are still with me. Let’s get down to it – the FREE cut file. I hope this gets you excited to create your own cards.

Grab the FREE Z-fold cut file for this card HERE.

When you open the card file all of the pieces are stacked on top of each other so you can see where the pieces will be adhered after cutting. Move the pieces off and position them on the design cutting mat to cut each piece out. When I am cutting cards or layered designs, I like to cut several at a time and then I can sit and assemble them later while watching tv or when I just need a break.

Zfold card photo copy

Once all your pieces are cut, check out this video with tips to assemble the card.

This free z-fold card file was created by me completely in the Silhouette Studio software. I measured, drew rectangles, added score lines, and drew more rectangles to create the design. This is available to you for your own personal use and I hope that you enjoy creating with it.

I think we all hit a “creative block” sometimes and it is just good to stop and just create. Do something you love. Make something you’ve had on your list for awhile. Especially as we all go into this busy time of year, we can feel overwhelmed. Whether it’s because you just came out of an event, have continuous events going on, are filling orders, or just creating gifts for friends and family – stop and take a few moments for you today too! Whether that involves using your Silhouette or starting a project without it.
You never know when a creative idea will hit!

Now, off to get these addressed and mailed out for this year.

I would love to see what you create with this Z-fold cut file or any of your Silhouette projects that are bringing you joy today!

Feel free to post on my Facebook group at Silhouette Secrets with EllyMae.

Enjoy!

SS_Signature copySS Logo snip it

**This post may contain affiliate links. What that means is that I may receive compensation if you purchase through the links I have provided. The price you pay for the product or service is not higher but I may get compensated for sharing.

Posted on 1 Comment

Creating a shadow box with Silhouette

Everyone starts out with one material or another, mine was paper. I started with my Silhouette as a paper-crafter and it has grown from there.

A while back I was visiting friends in Kansas and playing with the Silhouette and my friend asked if I could trace a photo for her that a friend took. Now, photo tracing can be tricky. Each photo can yield different results tracing in the Silhouette Studio and you just never know until you try to see what will happen.

In this case, it was a great photo to trace.

Bobbi's photo

Here is how the trace came out. I used Basic Trace panel to achieve this. Check out the Trace Panel HERE.

Photo trace

Then I released the compound path and deleted the water areas and used the point editing and deleting points to clean up edges and take out the skyline.

Cleaned up

Now, like I said above, each photo is going to vary in how it traces and this one turned out to be pretty simple with a little time for editing.

Then when I saw this Canoe at Sunrise shadow box in the Silhouette Design Store, I knew it was perfect for a gift that I could incorporate this trace into.

Design Store file

Instead of adding the canoe, I cut and added my traced image of my friend on her kayak. It was perfect!

Shadow box

I am one of those people who has to do a project pretty much exactly like the demo, at least the first time. So I did go to the designer’s website and purchase the file again – yes, sounds crazy – but I wanted the backgrounds for this particular project. However, you can use any background that you want and add it to your project.

What are you creating today? Feel free to post your project photos & questions on my Facebook group at Silhouette Secrets+ with EllyMae.

Shadow box

Enjoy !

THANK YOU for your support! How can you help? Click HERE & buy a coffee. Every little bit helps with the cost of running the site.

Looking for more in-depth, step-by-step classes, check out all of my online Silhouette classes on my Teachable site HERE.

SS Logo snip it

**This post may contain affiliate links. What that means is that I may receive compensation if you purchase through the links I have provided. The price you pay for the product or service is not higher but I may get compensated for sharing.