
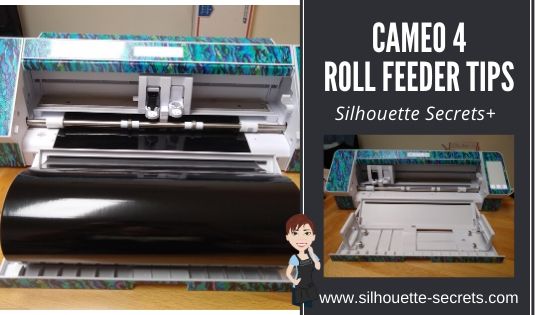
Silhouette Roll Feeder – Cameo 4
On the Cameo 4, the roll feeder is built into the machine with a slide out drawer on the front.

Typically, I don’t need to use of the roll feeder so it stays tucked safely inside of the machine and I use a mat for most of my vinyl cuts. However, I was cutting lots of vinyl and several long cuts that were over 24″, so I put it through the test.
To set up to cut without a mat, there are a few steps you want to take to get a successful cut.
1 – Set up the Silhouette software on the Page Setup Panel for no cutting mat and for the correct page size or media size.

Keep in mind that you will lose 1/4″ of cuttable space and 1″ of cuttable space on the back end of the material. This is so the Silhouette machine can hold the material securely in the machine. Make sure to check the “Show Cut Border” on the Page Setup Panel so the maximum red cut border shows on the design page.
2. Move the right roller in one groove for 12″ materials. This will help the Silhouette grip the material securely.
To move the roller on a Cameo 4, flip the roller bar lever down on the right side to release the roller bar. Then press the lock button on the roller and slide the roller to the left until it settles into the groove on the roller bar. Then flip the roller bar lever up to lock the roller bar in place.

3. Setup the roll feeder on the Cameo 4. Carefully, pull the roll feeder storage drawer out. Carefully, flip the roll feeder guide up. Then carefully, open up the roll feeder supports on the right and left sides. The right roll feeder support slides in to allow for 9″ and 12″ rolls of vinyl to be used.

4. Place the material roll in between the roll feeder supports and slide the right support to the left to the edge of the roll. Place the material through the roll feeder guide.

5. Load material in the machine with the left edge of the material next to the load line on the left side. Press the load button. Make sure that both rollers are gripping the material securely. If the material is pulled in crooked or unevenly, this can affect how it rolls and the cut quality. If needed unload the material and reload to get it loaded as straight as possible.
For more tips on setting up a Silhouette to cut without a mat check out this post
Cutting without a Mat HERE
Roll Feeder Tips
1- Place the material on a cardboard roll.
I have seen many users have an issue with the roll feeder sliding back into the machine while in use. I did notice it worked much better when the vinyl was on a roll.

If the roll feeder support was up against the edge of a cardboard roll, it was smoother going in and out of the machine.
If the vinyl was not on a roll or was longer than the roll being used, it caught more on the edge of the roll feeder support as it was trying to move in and out. The cardboard roll was a smoother surface than the plastic edge of the vinyl itself.

In the photo above, you can see how the vinyl was just a bit longer than the cardboard roll that was being used. The vinyl didn’t roll back and forth as easily as if it was just against the cardboard of the tube.
2. Tightly rolled materials did not roll as freely through the machine as it had to pull against the material harder to feed it into the machine as it was cutting. This could explain why some users have the roll feeder pull back in towards the machine while cutting.

These rolls above have been tightly rolled since I ordered them. (I don’t even want to admit how long ago that was)
I had the best luck with these tightly rolled vinyl colors when I rolled it onto a cardboard tube from a previous vinyl purchase. I have hoarded the cardboard tubes and glad I did for just this moment.

3. Each design may vary.
A more complex design may require the vinyl to roll in and out of the machine more versus a longer design with less cut lines. Keep this in mind when you place the vinyl in the roll feeder. The more freely the material can move in the roll feeder, the better.
4. Use the new cross cutter feature on the back of the machine.
On the Send tab, under the Preferences change the Feed Option to Feed to have it feed out the back.
More information HERE on the Send Tab.

5. Test it out. It is always a good idea to test something before you are working on a deadline.
I hope this gives you a few tips to try if you are having issues with the roll feeder on the Cameo 4.
Looking to upgrade your Silhouette machine or for a first time machine?
Find the Cameo 4 here:
Amazon
Expressions Vinyl
Heat Press Nation
Silhouette America
Swing Design
If you have an older model of the Silhouette machine, there is still a roll feeder available that can be used with it. Find it HERE.
And check out this post on Cutting without a mat to see how it is used HERE.
Save this for future reference by pinning the image below.

I would love to see what you create!
Feel free to post on my Facebook group at Silhouette Secrets with EllyMae.
Enjoy!

**This post may contain affiliate links. What that means is that I may receive compensation if you purchase through the links I have provided. The price you pay for the product or service is not higher but I may get compensated for sharing.
Discover more from Silhouette Secrets-Swift Creek Customs
Subscribe to get the latest posts sent to your email.


[…] If you are cutting without a mat, the cuttable area is different than cutting with a mat. For more information on cutting without a mat click HERE or on this post about the roll feeder HERE. […]
[…] Feed Option – choose between “Return to Origin” or “Feed”Return to Origin tells the machine whether to pull the mat or material back to the front of the machine to unload it Feed tells the machine to feed to the back of the machine to use the Cross Cutter option. This can be helpful when cutting off a roll. For more information on the Cameo 4 roll feeder and cutting from a roll check out this post HERE. […]
[…] out tips for cutting without a mat in this post – Let’s Explore the Silhouette Roll Feeder HEREOr if you have an older model check out this post –Cutting without a mat on the Cameo […]
[…] Feed Option – choose between “Return to Origin” or “Feed”Return to Origin tells the machine whether to pull the mat or material back to the front of the machine to unload it Feed tells the machine to feed to the back of the machine to use the Cross Cutter option. This can be helpful when cutting off a roll. For more information on the Cameo 4 roll feeder and cutting from a roll check out this post HERE. […]