
Specialty Media and Print & Cut with Silhouette
Affiliate links may be present in the following blog post and as an Amazon Associate I earn from qualifying purchases.
Silhouette recently released some new specialty media types and I think I’m in love with these new Brushed Metal Sticker Sheets.

Let’s take a look at how to this set up.
I first set up the design for print and cut, using all the defaults for the registration marks.
For a step-by-step tutorial on setting up print and cut, check out this post
Let’s Explore v4 – Print and Cut Basic.
Something to note for these specialty materials is that the instructions are very specific in saying to use the default settings for the registration marks. That is due to how the sticker sheets are set up. For the best results and printing quality, the corners of the sticker sheets are cut out so the marks can be read with more accuracy.

The corners are a matte finish vs the glossy finish of the sticker sheet area. This is not something that you notice until the package is opened.
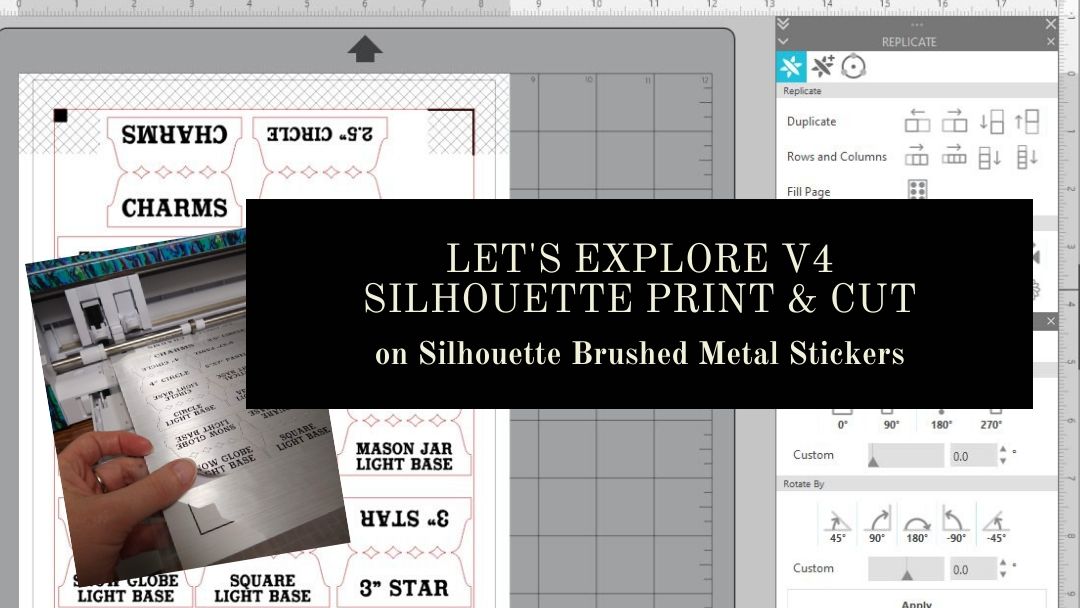
I needed some labels for organizing my collection of Curio templates. I used a tab from the file 3 Tabs by Lori Whitlock – Design #6387 and added text to each of the tab sides using Vintage Sign Font by Lori Whitlock – Design #252472.

Using the Replicate Panel and the Rotate Panel, I could duplicate the text to add to the other side of the tabs.
I am using a Canon TS9521C printer and found that it needed to be printed using the Photo Paper Glossy setting with the print quality as High. Printing at the higher quality settings slows the rate that the image is printed which allows the ink to dry on the media longer before it is finished.

After the design is printed, click on the Send tab and I don’t want the text to cut out. All of the text needs to be selected, by clicking on it, and then choosing the No Cut option to turn the cut lines off.

You may notice that the text looks fuzzy. This is something that has changed in the v4 software. Text now defaults to Cut Edge on and why it is showing up as fuzzy. It will still cut and there is nothing wrong with the text or cut lines. However, by having the text default to Cut Edge, you no longer have to weld fonts that overlap. It will cut the edge of all the text that is connected versus cutting out each individual letter.
In this case, I don’t want the text to cut. But, it is something that has changed in the software and I see many questions on why it’s now fuzzy. If you want the text to show “normal”, then select all of it and choose “Cut” on the Send tab and the lines will clear up a bit. Just keep in mind that you will need to weld the text manually if you do that.
Since I only want the tabs to cut, I turned off all the Cut lines on the text.

The bold red cut lines will turn off on each object that is selected when the “no cut” option is chosen.

After it’s printed, place it on the Silhouette cutting mat, exactly as it shows on the Silhouette design screen. The page should be lined up in the top left corner of the cutting mat and on top of the cutting grid. For best results, you want it to be lined up exactly as it shows on the screen. This means that the page should be covering the grid lines on the left side and along the top edge in the top left corner.

Lining it up properly will help in getting an accurate reading on the registration marks. If the cutting grid is showing, then it can sometimes try to read the cutting grid instead of the printed registration marks and give you a registration error.

Make sure to load the cutting mat properly in the machine with the left edge of the mat next to the line on the left that the arrows point to.
I used the Cardstock – Textured setting to cut these Brushed Metal Sticker Sheets and it cut well.

A good habit to get into is to check the cut before pressing the Unload button. If the design did not cut well, then you could send it back through for a second pass.

I added the tabs onto sheet protector that I can easily slide the Curio Templates in and out of. This is just a portion of the templates I have, so it is going to be great that the ones I use the most are now labeled and organized.
Here is an example of these Curio Templates. These are designed to fit the Craft Chameleon acrylic blanks and help to hold the blank in place and line up the design to the template space.

These plastic Curio templates line up with the pegs on the Curio cutting base and then the acrylic blank sits down in it while etching. I still like to add a layer of double sided tape to my acrylic blank as well, just for another layer of security in holding it in place. The etch is permanent, so if that blank moves at all, it may not line up and etch in the correct location.

Now, I added these all in one location. I picked this accordion folder up a few months back when I first was brainstorming this idea and now I can find them a little easier.

Now, that is one more thing crossed off my to do list. Back to more Silhouette projects!
From now until April 15th, you can get 40% off materials at Silhouette when you use my code SILSECRETS and FREE shipping on orders over $50.

Check out more information on all the April sales happening at Silhouette in this post HERE.
Save this for future reference by pinning the image below.

I would love to see what you create!
Feel free to post on my Facebook group at Silhouette Secrets with EllyMae.
Enjoy!

**This post may contain affiliate links. What that means is that I may receive compensation if you purchase through the links I have provided. The price you pay for the product or service is not higher but I may get compensated for sharing.
Discover more from Silhouette Secrets-Swift Creek Customs
Subscribe to get the latest posts sent to your email.


[…] Check out how I used it to create labels for my Curio Template organizer in this post HERE. […]