Posted on Leave a comment

Cutting Leather with the Cameo 4 & 3 mm Kraft blade class

This class has taken a lot of time, testing and materials to put together, but it was so much fun doing so!

Cutting Leather with the Cameo 4 & 3 mm Kraft blade is now released on my Teachable site with all the other Silhouette classes I currently have available.

If you were a May All Things Silhouette Conference attendee, then you’ve already received access to this class. Make sure you view it before July 31st for regular attendees or if you purchased the Ultimate Experience, you have until September 30, 2021 to watch this class.

Here are some of the designs created during the testing and recording of this class.

For the class I did a quick video explaining some of the types of leather and tips on why some work and some do not. This is also included with the class and I’d recommend anyone who wants to cut leather check it out prior to buying the leather.

A full class supply list can be found on the Leather class page on my Teachable site HERE.

This class is an intermediate class level, however, I do believe that if the instructions are carefully followed, any user will have success with the projects. 

Save this for future reference by pinning the image below.

Enjoy!

This image has an empty alt attribute; its file name is logo.jpg

THANK YOU for your support! How can you help? Click HERE & buy a coffee.
Every little bit helps with the cost of running the site.

Or if you are looking for more in-depth, step-by-step classes, check out all of my online Silhouette classes on my Teachable site HERE.

SS Logo snip it
**This post may contain affiliate links. What that means is that I may receive compensation if you purchase through the links I have provided. The price you pay for the product or service is not higher but I may get compensated for sharing.
Posted on 5 Comments

Let’s Explore Cameo 4 – Tools

This question came up on my Facebook group last week, so let’s take a look at the current tools available for the Cameo 4.

Affiliate links may be present in the following blog post and as an Amazon Associate I earn from qualifying purchases.

Cameo 4 – Tool 1

Tool 1 on the Cameo 4 can use the Cameo 4 Autoblade, Silhouette Black Blade, Premium blade, Deep Cut blade, Sketch pens, Sketch Pen holder, and 2 mm Kraft blade.

Cameo 4 – Tool 1 housing Blades and Tools

The Cameo 4 Autoblade is the only blade that can fit in Tool 1 housing with no adapter. All of the other blades or tools pictured above will fit in the Tool 1 housing with an adapter.

Cameo 4 Tool adapters

Note: this information is accurate as of 6/11/20. The Premium Blade has been redesigned with a small T on the front of it and now fits in the black adapter. Information you may see that was published prior to this date, may show that it fits in the gray adapter.
Older Premium Style blades will fit in the gray adapter, but the new style does not.

The Cameo 3 Autoblade is NOT compatible with the Cameo 4 machine.

Cameo 4 – Tool 2

Tool 2 on the Cameo 4 can use the Rotary blade, the 3 mm Kraft blade, and the Punch Tool.

These are the only blades or tools currently available for the Tool 2 housing on the Cameo 4.

Why can you not put tools from Tool 1 in Tool 2?

The basic answer is because the tool housing for Tool 1 and Tool 2 is not the same. Therefore, the same tools cannot be used in both.

On the Cameo 4, Tool 1 and Tool 2 housings are designed with different motors in them, which means they function differently.

The Tool 1 housing has a motor that allows the housing to move up and down. While the motor is Tool 2 is a circular motor. You can see the difference in these housings if you touch them. Tool 1 will freely move down when you press on the front locking mechanism. While the Tool 2 housing is stationary & does not and should not be forced to move.

I am loving the new tools for the Cameo 4 – Tool 2 housing.

With the Rotary blade I have been cutting crepe paper and fabric. And I love it!
Check out these posts below for more information and tips

Also check out this new free ebook by Silhouette on the Rotary blade available on the Silhouette 101 blog HERE.

I am still in the process of testing several different materials with the 3 mm Kraft blade.
But, I have successfully cut this Light Chipboard from Amazon.
This chipboard is twice as thick as the Silhouette Chipboard.
More details on that coming soon!

What I will say is that each design will vary and some will cut better than others. And it does require multiple passes and patience.
The later is probably the biggest part for successful cuts.
But, all of these were cut using the 3 mm Kraft blade and the Light Chipboard.

Hopefully that helps explain a few of the tools for the Cameo 4!

If you are new to the Cameo 4 and just don’t know where to get started, check out the step-by-step Silhouette Beginner First Cuts video class HERE.

Save this information for later by pinning the image below.

Enjoy!

SS Logo snip it
**This post may contain affiliate links. What that means is that I may receive compensation if you purchase through the links I have provided. The price you pay for the product or service is not higher but I may get compensated for sharing.

Share this:

Posted on 4 Comments

Let’s Explore the Silhouette Roll Feeder

Silhouette Roll Feeder – Cameo 4

On the Cameo 4, the roll feeder is built into the machine with a slide out drawer on the front.

Cameo 4 with built in roll feeder

Typically, I don’t need to use of the roll feeder so it stays tucked safely inside of the machine and I use a mat for most of my vinyl cuts. However, I was cutting lots of vinyl and several long cuts that were over 24″, so I put it through the test.

To set up to cut without a mat, there are a few steps you want to take to get a successful cut.

1 – Set up the Silhouette software on the Page Setup Panel for no cutting mat and for the correct page size or media size.

Keep in mind that you will lose 1/4″ of cuttable space and 1″ of cuttable space on the back end of the material. This is so the Silhouette machine can hold the material securely in the machine. Make sure to check the “Show Cut Border” on the Page Setup Panel so the maximum red cut border shows on the design page.

2. Move the right roller in one groove for 12″ materials. This will help the Silhouette grip the material securely.
To move the roller on a Cameo 4, flip the roller bar lever down on the right side to release the roller bar. Then press the lock button on the roller and slide the roller to the left until it settles into the groove on the roller bar. Then flip the roller bar lever up to lock the roller bar in place.

Move right roller in

3. Setup the roll feeder on the Cameo 4. Carefully, pull the roll feeder storage drawer out. Carefully, flip the roll feeder guide up. Then carefully, open up the roll feeder supports on the right and left sides. The right roll feeder support slides in to allow for 9″ and 12″ rolls of vinyl to be used.

Cameo 4 Roll Feeder Setup

4. Place the material roll in between the roll feeder supports and slide the right support to the left to the edge of the roll. Place the material through the roll feeder guide.

Roll Feeder Setup

5. Load material in the machine with the left edge of the material next to the load line on the left side. Press the load button. Make sure that both rollers are gripping the material securely. If the material is pulled in crooked or unevenly, this can affect how it rolls and the cut quality. If needed unload the material and reload to get it loaded as straight as possible.

For more tips on setting up a Silhouette to cut without a mat check out this post
Cutting without a Mat HERE

Roll Feeder Tips

1- Place the material on a cardboard roll.
I have seen many users have an issue with the roll feeder sliding back into the machine while in use. I did notice it worked much better when the vinyl was on a roll.

Oracal 651 vinyl on roll

If the roll feeder support was up against the edge of a cardboard roll, it was smoother going in and out of the machine.

If the vinyl was not on a roll or was longer than the roll being used, it caught more on the edge of the roll feeder support as it was trying to move in and out. The cardboard roll was a smoother surface than the plastic edge of the vinyl itself.

Vinyl longer than roll

In the photo above, you can see how the vinyl was just a bit longer than the cardboard roll that was being used. The vinyl didn’t roll back and forth as easily as if it was just against the cardboard of the tube.

2. Tightly rolled materials did not roll as freely through the machine as it had to pull against the material harder to feed it into the machine as it was cutting. This could explain why some users have the roll feeder pull back in towards the machine while cutting.

Tightly rolled vinyl

These rolls above have been tightly rolled since I ordered them. (I don’t even want to admit how long ago that was)

I had the best luck with these tightly rolled vinyl colors when I rolled it onto a cardboard tube from a previous vinyl purchase. I have hoarded the cardboard tubes and glad I did for just this moment.

Roll vinyl onto a cardboard tube

3. Each design may vary.
A more complex design may require the vinyl to roll in and out of the machine more versus a longer design with less cut lines. Keep this in mind when you place the vinyl in the roll feeder. The more freely the material can move in the roll feeder, the better.

4. Use the new cross cutter feature on the back of the machine.
On the Send tab, under the Preferences change the Feed Option to Feed to have it feed out the back.
More information HERE on the Send Tab.

Cross Cutter on backside of Cameo 4

5. Test it out. It is always a good idea to test something before you are working on a deadline.

I hope this gives you a few tips to try if you are having issues with the roll feeder on the Cameo 4.

Looking to upgrade your Silhouette machine or for a first time machine?
Find the Cameo 4 here:
Amazon
Expressions Vinyl
Heat Press Nation
Silhouette America
Swing Design

If you have an older model of the Silhouette machine, there is still a roll feeder available that can be used with it. Find it HERE.

And check out this post on Cutting without a mat to see how it is used HERE.

Save this for future reference by pinning the image below.

I would love to see what you create!
Feel free to post on my Facebook group at Silhouette Secrets with EllyMae.

Enjoy!

SS_Signature copy
SS Logo snip it
**This post may contain affiliate links. What that means is that I may receive compensation if you purchase through the links I have provided. The price you pay for the product or service is not higher but I may get compensated for sharing.
Posted on 5 Comments

Interview with Lia Griffith – Paper flower guru

Who is Lia Griffith? And why am I hearing about her on the Silhouette Secrets+ blog?

Lia is a paper flower artist. She & her team develop paper flowers and files that can be reproduced by others. As well as many other crafty projects using different mediums.

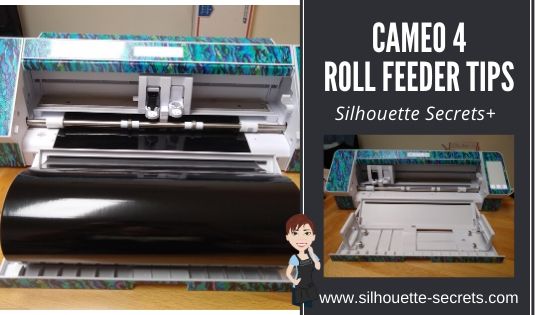
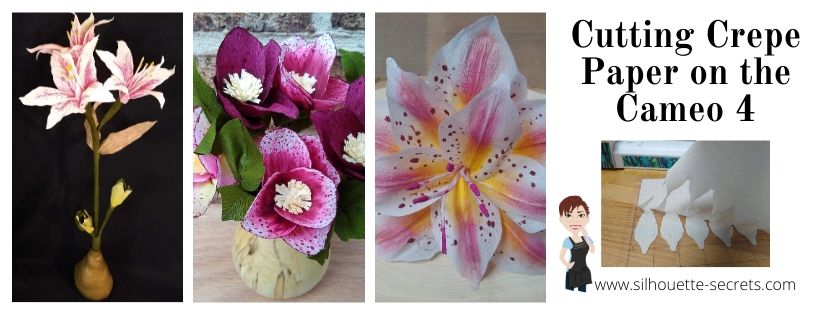
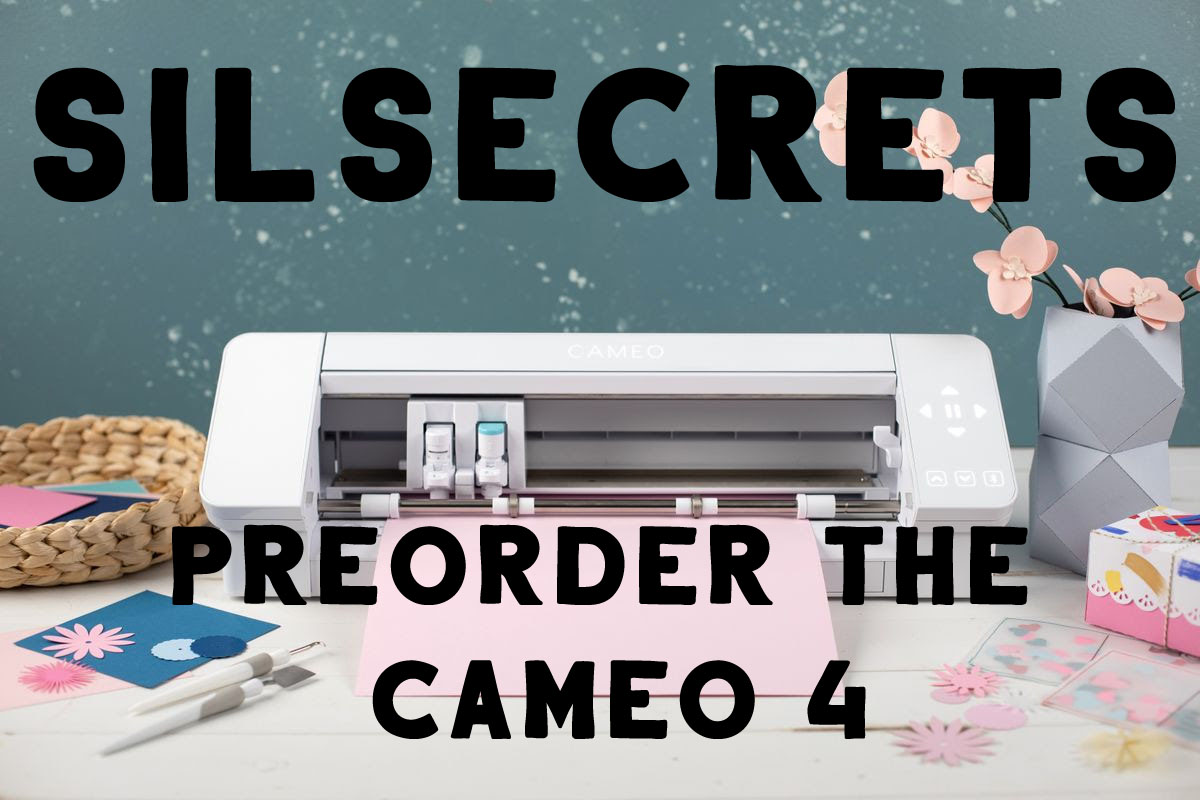
She is a crepe paper guru! And now with the new Silhouette Cameo 4 & the rotary blade it is possible to cut crepe paper. Yea!!!!

Lia Photo

I first met Lia at the Silhouette Summit in May 2019. We happened to be in the same group during the event and just started talking. Of course, since we were at a Silhouette event, the talk turned towards crafting. Lia showed me her Instagram page (https://www.instagram.com/liagriffith/) and I was blown away. The spark was lit and with the new Cameo 4 announced, cutting crepe paper was added to the list of material it could cut.

SilSecrets_Lia

Who better to learn from than the crepe paper guru!

After the Silhouette Summit, I contacted Lia and asked about an interview once the Cameo 4 was released and she’d had a chance to use it. I started cutting crepe paper a little bit before the November 2019 All Things Silhouette Conference to test for the classes that Lia & her team were teaching. It was only the beginning. While I didn’t have a lot of time to really dive in, in December 2019 I took that plunge and I am hooked. I want to share that with all of you.

Crepe Paper Supplies copy
*Note affiliate links may be present in the following blog post and as an Amazon Associate I earn from qualifying purchases.

Interview with Lia Griffith

I recently sat down with Lia and through wonderful ways of technology & Skype had a great time learning more about her, her journey, and her tips for crepe paper and getting started.

How did you get started with crafting? Is it something you’ve always done?

My parents were both artists. When I was born, they were both photographers. And I was the 4th of 4 daughters, so I was the youngest. And our whole life was handmade. Almost by default because we didn’t have money, we were those folks. We had our own garden, we sewed our own clothing, we made Christmas gifts all the time; it was just the way we lived. That’s what we knew.
And then when I went to college, I went to graphic design school, that was my career of choice. And my parents actually the 3 of us went to school together. My Dad was getting his sculpture degree and he went on and got his Masters. And then my Mom was an illustrator and potter. And she went on to be a professional Illustrator. And then I went on to do Graphic Design. So that was kind of a fun part of my life. Just that, going to college with my parents.
So, it was a combination of art was our focus, but yet, our life was crafted. As I said, it was all DIY. Everything was DIY. And I think it came to me naturally too, when I was, I remember, specifically when I was 4 & 5 years old, we lived in this farmhouse in Oregon. And I would spend my time while my sisters were at school & I was home alone, and I would spend my days making things out of paper. So, I would make this cardboard car that I would get in and drive and I would make these paper clothing that I would wear, little costumes and shoes and things out of paper. I would my own dolls out of paper. I would take toilet paper and wrap them and glue it. I actually still have them. And make these little 3-dimensional dolls and then dress them.
So, when did I start crafting – huh? I don’t know how not to.
But as far as doing this for a living, I spent most of my career as a graphic designer. But I was always searching for something bigger. So, I’ve opened a couple retail stores, I had a flower shop, I had a baby clothes store. I actually had a baby clothes line that I produced for a while, that I designed and got out there, got into Nordstrom’s and Disney picked it up. It was ok.
But 7 years ago, I started this company (LiaGriffith.com) and right before that I was working as a Creative Director for a wedding stationary company, and I started a DIY wedding blog for them. Teaching, you know this was a while ago, 7 years ago, and there weren’t a lot of paper flowers back then. And just teaching brides how to take things and make their own DIY things for their wedding. And the blog went crazy of course because it was such a fresh new idea back then. And that’s when I started making paper flowers for real. I had made some prior to that when I did the paper runway show. So, I had made some large, jumbo flowers as part of the costume or part of the outfit and then I started making them in smaller versions. And then started thinking, ok, how can I create this so people can replicate it and it would be beautiful and it’s not difficult? So, my mind started going that direction. And at that point, all of my flowers were, I’d call it frosted paper at this point, but at that point, I would just use printer paper, light weight and I would paint on both sides, then cut it, and make these flowers. And then I discovered the frosted paper, which is something I’d used in graphic design prior. So, all of that 3-dimensional sculpted paper flower was really where I started. And then I looked at crepe paper and I was like “Eh – ok, I know there’s other people doing it. It’s not very pretty to me” And I tried a few things and didn’t love it. And then, I think it was about 4 years ago, well actually a little prior to that, the Italian crepe paper company came and said, “Do you want to try some of our crepe paper?” And I did. I did some videos for them and I liked it ok. I did a couple dozen flowers with them. And then the German crepe paper company came and said we’d love to have you collaborate with us. And that was when I really fell in love with crepe paper. Because they offered up not just the heavy weight crepe paper, but then they offered up the extra fine and then the double sided. So, having that range of 3, really shifted how I looked at crepe paper. And I feel… It’s been great having Megan and Krista as well, where we really dive in and wrap our head around how to best use the crepe paper.

So, that was kind of my journey into the crepe paper flower world and who would have thought, right?

Do you think the cutting machines have made it more popular or made it easier or do you think it was easier to do it by hand, because that’s how you started is by hand?

You know as far as the frosted paper flowers are definitely easier with a cutting machine because of the detail you can get. So, the Hellebore design, these are a pretty detailed design, with the tiny details. The petals aren’t so much but the little tiny stamen and the center bits & pieces, I mean you couldn’t cut that by hand. So as far as cutting machine for this, “Oh yeah!”. And some of the some of the other projects we have on our site, like one of my favorites are the little Amsterdam houses, but the detail work in that, there’s you know… without a cutting machine, who’s going to sit there with a knife and cut all those.
When the cutting machine came into my life, it changed the way I designed. It changed the way I prototyped; I was able to get through design ideas faster because I wouldn’t have to start over. There it was and it was like “Ok, let’s tweak here and there.” and then cut it again. It would get me from point A to point Z quicker… prototyping became a snap. And I think that’s true for all of the designers here on this team, is we rely… our cutting machines are running every day. Every day.

So as far as crepe paper goes, I feel like when we are prototyping crepe paper flowers that we usually cut by hand. And the way I do it is, I’ll prototype it by hand and if I cut something, I’ll sketch it and then take a photo of it with my phone with a ruler. And then put it in my computer and then do the svg cut file from that. That’s my methodology.
So, every single crepe paper flower that we design we always have a svg cut file for it. And I would say we do about 50/50 on the crepe paper. Sometimes if it’s a project, like these peonies, we’ll cut these all by hand just because it’s easier and you can stack them. You can stack 3 or 4 of them at a time and cut them. But, when we are cutting, say for the All Things Silhouette Conference, and we had to get all the packs pre-cut for everybody… those were all cutting machines. So, it sped it up so fast. So, there is definitely a time and a place for both – so I would say about 50/50. 

What would be your top tips for a beginner wanting to make crepe paper flowers?

So, one of the things that I think is a great place to start is the Crepe Paper Flowers book.

CrepePaperFlowersBook_Cover

Not to promote it, but I feel like it’s very simple & basic and it goes through each… everything you might want to know or that you may not know you want to know. It gives an overall view so that it takes the fear away from the crepe paper because I think I’ve heard over and over, “Oh, I’ve got my pack of crepe paper, but I’m so scared to cut it.” So, if you understand that the grain is important, that it goes a certain direction on the petals. And if you understand different techniques of cutting, it takes away the fear.

The book and there’s a video on our site & on YouTube that I recommend for anyone who is wanting to start working with crepe paper. It’s called 10 Amazing Facts You’ll Want to know About Crepe Paper. It covers the really important things that are in the book but I talk about it and show it, so it’s easier to consume. It talks about the different types of crepe paper. It talks about Italian, Chinese, Mexican… so that you understand… and of course German. It talks about why I might use Extra Fine over Double Sided, or where I use the different types of crepe paper. I would recommend that for everybody who wants to make crepe paper flowers, to watch that video. Because again, it just takes away the mystery.
(You can find that video HERE.)

Second, when you are making paper flowers, remember that this is a new skill. People don’t pick up a violin and play it immediately. Be gentle, enjoy it, enjoy the discovery of the new material and seeing how it works and watching the magic of how it will stretch when you pull it this way and that way. It’s a magical material! It’s so fun! And also, with the curling tool. So between with the curling tool and the stretch, there is just so much you can do in shaping. And so, my tip on that is really just go into the magic of how and the process of discovery of crepe paper.

“Because it’s addictive!”

 And the third thing is, when you are making a crepe paper flower, it is really hard to make an ugly crepe paper flower. It’s really hard… I mean you can… but it’s really hard. Every crepe paper flower is a beautiful crepe paper flower.

If there was 1 flower you would recommend for a beginner to start with, what is it?

I always recommend the Anemone. Because it has enough detail that it makes it interesting, but there’s only 9 petals so it’s easy to assemble. And you have the foam ball in the center, or we use the cotton spun balls, so that gives it some structure. So, it gives it kind of a neat detail, structure, and then only 9 petals and it’s beautiful! Easy to make.

Double_Sided_Crepe_Anemone_5

If you had to pick 1 flower to make for each season, what would it be for Winter?

I really love the Hellebore. To me it’s a new discovery flower for me. I only became aware of this flower a couple years ago. Because it’s different and new. And the colors are a bit more plum, mauve, and a limey green.

Crepe_Paper_Hellebore_Christmas_Rose_3

Spring?

I love my tulips! And the tulips we made with crepe paper, we put the wire in the petal center, which shaped them. And it’s so much fun. We are going to be doing some new tulips. We will be doing some beautiful Parrot Tulips this Spring. We will probably be doing a Member Make Parrot Tulip; I think it’s on our list.

Crepe_Ombre_Tulips_2
Summer?

Roses. I love my roses. Peonies.

Crepe_Heirloom_Rose_3

Fall?

Dahlias.

Crepe_Paper_Dahlia_1

We did the Dahlia for a Member Make this fall. Dahlias have been one of those things because it has so many petals that we’ve avoided it for awhile and then finally we had one that was ok. And we finally jumped in and Megan developed this one, it was so easy the way she developed it. It made it so easy to do.

And that’s kind of how we go on all our flowers… how can we do this so that anyone can reproduce it?

What is your favorite flower to create?

The Gardenia – the double-sided Gardenia. There is something about that flower to that… I think it really reminds me of my mother. It just has that homeyness to it.

WhiteDoubleSided

Have you had a chance to cut with the Cameo 4 and rotary blade? What are your thoughts?

Yes! It’s beautiful. The rotary blade is magical! There are so many things you can do with that blade. Not just with crepe paper – which it cuts spot on – but we also love to cut felt with it.

What did you think of your first All Things Silhouette Conference?

I loved it! We had so much fun! I mean after we got back, I said to my team, “We are going back. And more of us are going.”

(You can find out more information about the 2020 All Things Silhouette Conference HERE. Hope you will join us and get a chance to meet Lia in person.)

What do you enjoy doing when you aren’t crafting, creating, or working at the office?

Cooking, eating out, hanging out with friends, all that. I love to be outside in nature, going on hikes and walks, hanging out with my dog. Meditate. I read a lot. I don’t read, read. I listen read. So, I’ll listen to books. Last year, I read “listened” to, I Audible read, 27 books. I like to consume knowledge.

Last year, I did a pottery class, that just put me over the edge. So, I’m really wanting and craving, getting back into pottery more. So, my Mom was a potter. And I took a sewing class. I love to travel and hang out with my 25-year-old daughter.

You just were in Germany; you were there for a trade show. What was exciting about your trip? And are there new things coming for 2020 that you can share with us.

New paper flower kits, the flat ones and are all pre-cut. Which is great because if someone doesn’t have a cutting machine, it’s a way to introduce them to things that can be cut on a cutting machine. So those are doing really well for us. We have 12 packs right now and we are expanding that collection.
And we have new paper pads that are out now and those are really fun, most of those are flower colors for the frosted paper flowers.
We are also getting wires, those are coming. Those should be out in a month or two.
So, we are just trying to expand to be a one stop place to get supplies.
We are going to start doing more kits, we might even do a monthly subscription kit from our shop, eventually. There’s a lot of things in the air.

We are excited about creating beautiful craft experiences for our community, such as craft boxes, events and more. In fact, we are working on plans for a Bloom Summit here in Portland in the fall … a couple days and it would be a combination of making and just inspiration… creating beautiful lives, as women who have businesses. I will provide more details as it comes up.

What is one thing you plan to create in 2020 that you have never done before?

I’ve never done needle punch art. There was so much of that in Germany.

I want to thank Lia Griffith for taking the time to sit down with me and chat about herself and give us her tips for getting started with crepe paper creations!

As a special bonus for all of my readers and followers, they have provided us with a coupon code to save 20% off the annual membership on the LiaGriffith.com website. This gives you access to project templates, step-by-step tutorials, Live Member Makes, a private Facebook group, and more! The coupon code is SILHOUETTESECRETS

Many have asked how I created the crepe paper flowers in the past few weeks and this is how! I am not usually one for a subscription, but I took the leap and treated myself as a Christmas present to try it for the year. I now have more things saved to “My Craft Room” area on the website, then I can possibly complete in a year.

Here is a little peek at what I’ve added.

My Craft Room glimpse

Don’t forget to use code SILHOUETTESECRETS to get 20% off the annual membership!
This coupon is good for the first 50 people to sign up.

Paper_Hellebores_Winter_Wreath_2

Now, do you HAVE to have the membership to start cutting crepe paper with your Cameo 4? 
No!

But, it is what helped me get over any apprehension I had with trying something new and now I am hooked. For me, it was well worth it!

Crepe Paper Supplies

Where do you get crepe paper supplies?

Just like any other project, I think quality matters. Low quality products can end up leaving you with a headache and end up costing you more in the long run.

I have been using the Lia Griffith crepe paper and I love it!
As Lia said above, it is a German crepe paper and it comes in 3 varieties, so you have a lot of options to create flowers with. There is Extra Fine, Double-sided, and Heavy crepe paper that all give a different texture and feel to the projects.

Double_Sided_Crepe_Anemone_1

Find Lia Griffith supplies here:
LiaGriffith.com
or
I’ve compiled a list on my Amazon shop
Silhouette Secrets+ Amazon Shop

I have “collected” supplies from both sites and have had to get a few more totes to keep it all contained.

But, I have to say my favorite thing was receiving this card in my supply box from the LiaGriffith.com site.

Card copy

It is going on my Vision board. (shhh…. that’s on my to-do list too)

It is also in the front of the Lia Griffith Crepe Paper Flowers book, so any time you need a little encouragement, just open it up and read it to yourself.

How do you know which crepe paper to use?

To be honest, I just use what Lia & her team recommend. This is all new to me, so I am learning as I go. But, the best way is to just play with it. “Enjoy it.” as Lia said above.

My main focus is Silhouette & how you can cut the crepe paper on the Cameo 4 with the rotary blade.
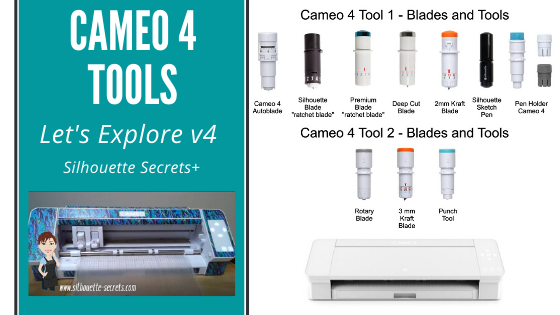
For more tips on cutting cutting with your Cameo 4 check out this post
Cutting Crepe Paper on the Cameo 4

Crepe Paper Header

For tips on what to do after the flower is cut on the Cameo 4, I will refer you to the experts of Lia Griffith and her team at LiaGriffith.com.
That is where I am learning how to assemble these amazing crepe paper projects!

Like it, love it, save it for later by pinning the image below.

Pinterest Graphic

Enjoy!

SS_Signature copySS Logo snip it

**This post may contain affiliate links. What that means is that I may receive compensation if you purchase through the links I have provided. The price you pay for the product or service is not higher but I may get compensated for sharing.


Posted on 36 Comments

Let’s Explore v4 – Print & Cut Basics

With the v4.3 software released, the Registration Marks panel had a small change as well. For software version of v4.3+, there is now an On or Off on the Registration Marks Panel – find the full details on the panel HERE. If you are using a software version prior to v4.3, then you will see it a little bit different and for almost all users, you would choose Type 1 registration marks – find the full details on that HERE.

Registration Marks Panel difference copy

No matter what version of v4 software you are using, the Basics of setting up a print and cut project are the same.

I follow the exact same steps each time and have great success with each print and cut project.

Print and Cut Basics

This tutorial is written using the v4.3.356 Silhouette studio software. For versions prior to v4.3 you may see a few differences in the software, the steps will be the same. However, you may find this Print and Cut Part 1 tutorial to be helpful too.
Affiliate links may be present in the following blog post and as an Amazon Associate I earn from qualifying purchases.

First, you want to start out by setting the design page up.

Step 1 – Open the Page Setup Panel – Tab 1
Step 2 – Choose the correct machine & cutting mat.
Note: users prior to v4.3 will notice the Page Setup Panel is a little different too. Find out more on that HERE.
Step 3 – Choose the Media size. I choose “Printer” as the option when using letter size paper. You will find it at the bottom of the drop down box for Media Size.
*NOTE: for users with software v4.4.450 or higher – choose Letter size – there is a change in the software with “media” size I have found as of 12/15/20. I have reported it and will update the post as I know more information in the future
Step 4 – Move transparency to 0%. This will help you see the page size better.
Step 5 – Choose the Portrait Orientation. This is the orientation I recommend as I see the least amount of issues with it.
Step 6 – Check the boxes next to Show Print Border and Show Cut border. This will show you the boundaries you have to work with.

Planner Sticker PNC1 copy

Next, open the design onto the cutting mat by either right clicking on the file in the Silhouette library and choosing merge or using File > Merge.
This will merge the design directly onto the page you have just set up.

Merge vs File Merge

Next, click on the Page Setup Panel – Tab 3 – Registration Marks and choose On.
Then click the Restore Defaults button.

PNC demo copy
Penguin in Snowball Fight by Stinkin’ Cute Paper Piecings – Design #117611

As with any new project, I would recommend doing a test first. This is why I start with all the default settings. A test print can save you a lot of headache and frustration just like a test cut when you are cutting new materials or a new design.

With a print and cut, design placement is very important. The design cannot be in the cross-hatched areas of the design screen or over the cut border that is shown on the screen. This is why I turn the Show Cut border on first on the Page Setup Panel.

Design placement copy

Make sure the design is away from the cross-hatched area. This is the area that the optical eye on the Cameo needs to read the registration marks accurately in order to find the design on the page. Making this area smaller or placing a design in it, can result in either a registration marks error message or an inaccurate cut.

Now it is ready to print.

There are 2 ways to do this.

Click on the Printer icon in the top left corner. This will send the print job directly to the printer that is set as the default printer connected to your computer.

Printer icon copy

In the top left corner, choose File > Print and you will get a pop up of Printer options. (Ctrl + P)

file print
The options vary by the printer you have connected to your computer.

Choose the printer to send the job to.

Tip: If you have a Preferences button, click on that and look for a “Preview before Printing” option. This is a great feature to see if it is going to print how you want it to before actually committing to the print job.

Preferences copy

Check the Preview before Printing box.

File Print Preview copy

Then click OK.

print copy

And choose Print.

A Printer menu will pop up and the design can be previewed before committing to printing.

Print Preview copy
Note: this will be dependent on the printer and what the printer setup settings are. Not every user will have this and it can vary, but never hurts to look for it.

Tip: Check to make sure that the bottom left registration mark will print completely. I see a lot of print and cut issues and one is the registration marks were outside the users printer margins and did not print. This means you will either get a registration error or it will cut inaccurately because it doesn’t have all the information to read it correctly.

Once you’ve verified the settings are correct, click on Print and it will send it to the current default printer.

Printer

Grab it off the printer. I am using a Canon TS9521C Craft Printer and I love it. This printer has great quality and I love having the option to print on a 12″ x 12″ sheet of cardstock with it.

Place it on the Silhouette cutting mat exactly as it shows on the virtual design screen, in the top left corner of the cutting mat. Make sure that the page is covering the grid lines on the cutting mat, or the Cameo may try to read the black lines when it goes to register.

Page on mat copy

Load the left edge of the cutting mat next to the line on the left side of the machine.

IMG_20200127_154139823 copy

Click on the Send tab in the top right corner and then choose the Material type you are cutting.

Cut Setting copy

Once all the settings are correct, then choose the Send button in the bottom right corner.

Note: a test cut using the Test option in the software will result in part of the upper left registration mark being cut out and can interfere with reading the marks correctly. I would suggest doing a test cut on a spare piece of material or moving the test cut out of the top left corner.

I love print and cut!

IMG_20200127_153032225 copy

I do the same steps every time when setting up the print & cut and rarely have an issue.

IMG_20200127_153058460 copy

I find that in troubleshooting most print and cut issues, it is something in how it is set up or how the design printed. I recommend for all my students and those interested in print & cut, to start with all the default settings to establish a baseline before they start changing things up.

Now that we have a successful print and cut, let’s try another design.

Print and Cut Planner Stickers

Follow the same setup steps listed in the beginning of this tutorial for the Page Setup.

Use File Merge and open the design on the screen.

Open the Page Setup Panel – Tab 3 – Registration Marks and turn the marks on. Click Restore Defaults.

Registration Marks copy
Doughnut Planner Stickers Set by Jennifer Wambach – Design #100816

In the photo above, I have highlighted a few trouble areas of this design. On the left and right edge, the design is over the Cut border and in the bottom left corner, the design is in the cross-hatched area.

To fix this, I select the entire design & cut lines and then use the bounding box in the corner and scale it down just a bit to fit within the borders of my print and cut page. Then move the design to the center of the page.

Planner Sticker demo copy

Once it is all setup the same way, follow the same steps as listed above for printing and loading it in the machine. Click on the Send tab and choose the material type. I am using sticker paper for this set and Send it to the Cameo to cut.

Planner sticker demo cu copy

I used the Silhouette White Sticker paper for this one, as that is what was in my stash. But, I’ve also used the Staples brand sticker paper and I like both.

IMG_20200127_161717399 copy

There are so many options that you can do. The Cameo 4 Autoblade cut beautifully using the Sticker Paper – White setting.

IMG_20200127_161842860 copy

The best thing to do is to start with the basics. Set it up with the defaults, do a test print, and then keep on playing.

If you are still needing help, check out the Print and Cut video class on my Teachable site HERE.

Print & Cut header

This includes 2.5 hours of step-by-step set-up, discussing different file types to print and cut, and troubleshooting tips as well.

Don’t forget to save this for later by pinning the image below – it will work time and time again.

Print and Cut Basics Pin

I would love to see what you create on my Facebook group at Silhouette Secrets with EllyMae.

Having print and cut issues? Feel free to post on the group and we will troubleshoot it with you.

Enjoy!

SS_Signature copySS Logo snip it

**This post may contain affiliate links. What that means is that I may receive compensation if you purchase through the links I have provided. The price you pay for the product or service is not higher but I may get compensated for sharing.

Posted on 11 Comments

Cutting Crepe Paper on the Cameo 4

Cameo 4 – Cutting Crepe Paper

Affiliate links may be present in the following blog post and as an Amazon Associate I earn from qualifying purchases.

By now, I’m sure that you have all seen and heard about the new Cameo 4 machine. Well, I went ahead and purchased it when it was released. As soon as the pre-order went live, I was ready to click order. I ended up being #4 who ordered it from Silhouette America, so there were a couple people just as excited as I was that beat me to it.

Why? Well, for me there are a couple reasons. The biggest factor being that as a TJC Licensed Silhouette Instructor, I teach using the Silhouette machines. There are many new features on the Cameo 4, that I can’t teach if I have not used. Since the Cameo 3 is no longer being manufactured that means that more and more students will have a Cameo 4. And if you follow me on Facebook at all, you know that I do a LOT of troubleshooting for users on many pages and groups. In order to do that, I need to know how this machine works and all the ins and outs.

Now, let’s talk crepe paper. This is one of those new materials that the Cameo 4 can cut. I have been cutting crepe paper using the Rotary blade and having so much fun testing it. The more I play, the more ideas come to me, and the more projects I want to create.

After meeting Lia Griffith at the May 2019 Silhouette Summit, I started looking into this whole new world of creating and it opened up so many things. Well, really it added to my list of projects I want to complete.

SilSecrets_Lia

I have made many 3-D paper flowers, but never used crepe paper because well, I didn’t want to hand cut it all. I have been collecting Pins on Pinterest and supplies ever since.  And now with the Cameo 4 being able to cut new materials, it was perfect timing!

So let’s get down to it.

Cutting Crepe Paper on the Cameo 4

For the design in this tutorial I am using a Lia Griffith file for an Amaryllis flower. This was the December Member Make project and once I saw it, I just had to create it. But, you can do this with other files too, as I’ll show you at the end of this post.

I started by opening the svg file, moving it off my design mat, and ungrouping it.

Svg file copy

In order to open a svg file, the Designer Edition upgrade or higher is required in the Silhouette software. I feel this is a great investment and saves you time & headache in the long run. For more details on that, click HERE.

The file has all the parts needed to make 1 complete flower. And it tells you how to cut the pieces in relation to the grain of the crepe paper. This is something you want to keep in mind when you place the crepe paper on your mat, or if you are moving the pieces around to fit on the mat.

I started with the flower petals and moved those over onto the design mat to cut. Make sure you measure the size of the crepe paper you are using, so you know the exact length of it. I should have measured twice when I was cutting this file and I filled the entire page only to realize after I cut, that I measured wrong. It happens to us all!

Cutting flower petals copy

Once the design is on the mat ready to cut, click on the Send tab in the top right corner. The cut lines default to Tool 1 as designated by the bold red cut lines around the design. Since this will be cutting using Tool 2 and the rotary blade, the cut lines need to be turned off for Tool 1. Select the entire design and choose No Cut. The bold red lines will disappear = turn off.

Tool 1 copy

The Tool 1 cut lines must be turned off first or it will complete the Action with both Tool 1 and Tool 2. This means that it will first try to cut with any blade you have in the Tool 1 housing and then move on to cutting the design with the blade installed in Tool 2. This will most likely not work out well.

Next, with the entire design still selected, click on Tool 2 to expand it out and click Cut.

Tool 2 copy

Bold blue cut lines will turn on indicating that Tool 2 is active.

Currently, there is no Crepe Paper preset setting in the software and you will see a note that there are no compatible settings found for this material. That just means we need to add a custom setting in.

To do this, click on the More button on the right side. A menu will pop up and this is how to input custom cut settings. Choose the small plus sign and this will add a new material to the list. Change the name from New Material to match the material being used.

Custom settings2 copy

I named mine Lia Griffith Extra Fine Crepe Paper because that is what I’m cutting.

Change the material in the drop down box on the right to reflect what material you are cutting. Then click on the large plus sign to access the Tool 2 settings on the Cameo 4. Choose Cameo 4 Tool 2.

Custom settings3 copy

The Cameo 4 Tool 2 defaults to the Kraft Cut Action. Click on the large plus sign and choose Rotary Cut Action.

Custom settings4 copy

Next, click back on the Kraft Cut and then choose Remove Action.

Custom settings5 copy

For this Lia Griffith Extra Fine Crepe Paper, I used the default settings for the rotary blade.

Custom Rotary setting Extra Fine Crepe Paper copy

Click save in the bottom right corner (if needed) and then the big X in the top right corner under the Send tab.

Close out custom settings copy

Ta-da – you have entered a custom cut setting!

Next, select the new material setting that was created from the Materials list and on the screen you will notice additional blue lines.

Custom Setting Crepe Paper copy

These are part of the Smart Cut technology of the Rotary blade and also the Kraft blade. Since these blades are broader tip blades, they do not turn on a dime. The machine lifts the blade up and then sets it down (hook) to turn the tip of the blade in the next direction it needs to be going or it makes a loop so the blade can be start in the next direction.

Think of it just like using a hand held rotary blade. It is a round blade and does not make fine turns when cutting. For example, I have enlarged this flower petal shape. If you wanted to cut this with a hand held rotary blade, you would not cut it all in one pass without lifting the blade up. You would have to make multiple cuts to change direction. The blue lines show an example of the motion you might use with a hand held rotary blade in order to cut this shape. The same concept applies for the Cameo 4 rotary blade.

Rotary blade example copy

Now that the Smart Cuts are explained. We are ready to cut some flower petals.

I placed the crepe paper down on brand new Silhouette cutting mat with the grain running up and down (top to bottom). This lines up with the instructions from the cut file.

Brayer crepe paper down copy

I then used a brayer to smooth the crepe paper down on the cutting mat and make sure that it was stuck very well. I am using a Speedball brayer, but any one would do or you can use a hard roll, such as a vinyl roll core, etc. The main thing is to make sure the crepe paper has a good bond to the cutting mat. Since crepe paper has some stretch to it, you want to make sure it is good and secure before cutting or the paper will just move and get pushed around.

Cutting help copy

Then I crossed my fingers and clicked on Send in the bottom right corner. My supervisor was making sure it was all going according to plan.

IMG_20191225_110523957 copy

So exciting! It cut so well!

Crepe Paper Cut copy

Now, something I mentioned above is that crepe paper has stretch to it, so you want to go slow when removing it from your cutting mat. There may be a few spots that it didn’t quite connect the cut because the paper moved just a bit. But, it’s also pretty easy to either snip that little bit or to pull it gently apart.

IMG_20191226_154632993 copy

And the first pieces of the flower are cut.

IMG_20191226_155015787 copy

Now, to cut the rest of the flower pieces.

IMG_20191226_162425408 copy

Then the leaves for the buds were cut from Lia Griffith Double Sided Crepe Paper. I used a force of 20 for these.

Now, keep in mind if the crepe paper does not stay in place, the cut may not be complete. And not every single cut will turn out perfect. All Silhouette users run into issues or mis-cuts. It is all part of the process.

IMG_20191226_163149534 copy

These pieces were cut from Lia Griffith Heavy Crepe paper and as you can see, that last one didn’t say in place for the cut. The great thing about crepe paper flowers is, not all flowers are “perfect”. Each flower or leaf doesn’t grow uniformly, so in this case it will still work for the finished project. I used a force of 25 for the heavy crepe paper.

I then assembled the flower following the instructions provided by Lia Griffith and her assistant in the Member Make live video.

Amaryllis Full photo copy

The Amaryllis information that I used can be found HERE on Lia Griffith’s website.

Amaryllis Close photo copy

I am so in love with this! I learned a lot in the assembly and I am so glad that I followed the Member Make live to complete it.

Now, do you have to become a Lia Griffith Member to make pretty crepe paper flowers. No! I did because I think it’s something I will enjoy and expand my creative projects.

Since I know that not everyone wants to join a membership, I also tested this with files from the Silhouette Design Store.

I used the Hellebore by the Bleu Dahlia – Design #206393 and Flower Petals by Alaa’ K – Design #16305.

When the Hellebore file opens, it is a large flower design.

Hellebore example copy

I selected the entire design and scaled it down so the flower petal was just under 2 inches tall. I then right clicked on the petal design and ungrouped it and deleted the lines up the center of the design, as those are not needed for crepe paper.

Hellebore 2 copy

I then duplicated the petals, so there was 5 petals per flower. I cut 3 different colors of crepe paper for the flowers and 2 of each color.

Next, I moved to the leaves. From looking at the files in the Lia Griffith Membership site, I saw that they would cut the full leaf in half and angle it on the crepe paper so the grains of the paper would run diagonal on the leaves to make it more realistic. They cut 2 sides for each leaf and then glued them together. I used the knife tool in Silhouette Studio and cut the leaf in half and then replicated and mirrored the half of the design I wanted to keep.

Leaf design copy

Since the crepe paper is placed on the cutting mat with the grain running up and down, I placed the leaves at an angle to get the grains on the leaves in the manner they suggested.

Leaf grain copy

Since this leaf was not design specifically for this flower and I cut it in half of the original design, when I overlapped it and glued it, it didn’t line up perfectly. I found this was just fine and took sharp scissors and snipped both ends. Guess what? Leaves and flowers are not perfect or each one shaped the same. It worked great!

For the stamen (center part) of the flower, I just cut a long rectangle with my paper trimmer and then used scissors to fringe it. The rotary blade does not cut intricate designs and would just shred the crepe paper on this. I found it faster just to do it myself. Sometimes I think we complicate simple things like cutting a rectangle just because we have a machine that will cut it. Now, don’t get me wrong, if this was cardstock, I may or may not use the machine to cut the rectangle – that would depend on how many I’m cutting. Each project will vary.

Hellebore pieces copy

And once all the pieces are cut out, you can color as needed, and start assembling the flowers and leaves.

IMG_20200111_091019229 copy

I sure learned a lot of things in creating these flowers.

IMG_20200111_091353959 copy

But, I am in love with the finished designs.

IMG_20200111_094956364_HDR copy

As I said above, I’ve never worked with crepe paper before, so this is definitely something out of my comfort zone and I just can’t wait to create more!

IMG_20200111_095526325 copy

Things I learned:

  • Crepe paper is forgiving. Neither flowers or leaves are identical and sometimes a blemish makes it much more realistic.
  • While you can create your own flowers, it is so much easier to follow the step-by-step instructions on LiaGriffith.com. Since crepe paper is a new journey for me, I am learning lots on her site and I don’t think these would have turned out as well if I had been left on my own.
  • It is easier to cut some things by hand, like the stamen and simple rectangles.
  • I love crepe paper flowers!
  • It takes time, but the end result is amazing and something you can enjoy for a long time to come!
  • Single petal designs are best if you are looking for files to use for creating your own flowers.
  • They are so fun to make!

And I just couldn’t stop. While this set isn’t finished, I still wanted to share it with you. This one was cut using the Oriental Lily 3D by The Bleu Dahlia – Design #217974 from the Silhouette Design Store. I chose not to cut the stamen centers, but instead used the same technique I learned in the Lia Griffith Amaryllis design so it would look like a photo I found online of the Oriental Lily. I was drawn in by the bright colors.

IMG_20200112_201458273 copy

I can’t wait to share the finished set of 3 Oriental Lilies.

I hope that you will give it a try and I would love to see what you create on my Facebook group at Silhouette Secrets with EllyMae.

Check out 5 additional “secrets” to cutting crepe paper on the Cameo 4 in this guest post on Terri Johnson Creates blog as well.
5 “Secrets” to Cutting Crepe Paper
5 secrets Header photo

I would highly recommend the Lia Griffith Crepe Paper supplies. I have found that they are really high quality and look amazing!
They can be found direct at LiaGriffith.com or find links in my Amazon shop HERE.

Don’t have a Cameo 4, but it’s on your wishlist.
When you decide to take the leap check out these great retailers for Cameo 4 deals:
Heat Press Nation
Silhouette America
Swing Design
Or find it on Amazon

Like this? Pin the image below to find later!

Crepe Paper Pin

Enjoy!

SS_Signature copySS Logo snip it

**This post may contain affiliate links. What that means is that I may receive compensation if you purchase through the links I have provided. The price you pay for the product or service is not higher but I may get compensated for sharing.

Posted on 13 Comments

Silhouette Rotary Blade – First cuts

Silhouette Secrets+ with EllyMae

If you’ve been curious about how the Silhouette Rotary Blade works, you’re not alone! I recently made my first cuts using the Rotary Blade, and I’m excited to share the results. This specialty tool is designed to glide through soft, fibrous materials like felt, fabric, and crepe paper—without needing a backing or stabilizer. In this post, I’ll walk you through how the Rotary Blade works in Silhouette Studio, the key tips I discovered along the way, and how you can get clean, beautiful cuts right from the start. Whether you’re cutting fabric for appliqué or crafting adorable felt stuffies, this tool opens up a whole new world of creative possibilities!

On October 18, 2019 a package showed up in my mail box. My kids were excited, I was excited – we were all excited. While their excitement quickly wore off, mine has not.

Four Silhouette Cameo 4 tools packaged on a wooden surface, including a Punch Tool, Rotary Blade, 2 mm Kraft Blade, and Pen Holder.

Affiliate links may be present in the following blog post and as an Amazon Associate, I earn from qualifying purchases.

The new tools for the Cameo 4 had arrived. After attending the Silhouette Summit in May and learning about the new Cameo 4 release and the new tools to go with it, they are finally here.

Updated 6-15-25 – the Silhouette Rotary blade is compatible with the Silhouette Cameo 4 models, Cameo 5 models, and Curio 2.

From left to right they are: The Punch Tool, Rotary blade, 2 mm Kraft blade (Cameo 3 or 4), and the Pen Holder. The 3 mm Kraft blade was not in my box, but will be coming soon.

Today I’m going to show you my first cut with the Cameo 4 – Rotary blade.
It is a pretty simple cut.

Last week while I was finishing the prep for my Foil Quill on a Traveler’s Notebook class for the upcoming All Things Silhouette Conference, I was having a heck of a time getting the same foil results as I had with my original demo. I ended up having several traveler’s notebooks that were “sacrificed” in the testing process.
What was I going to do with all these “failed” tests?

A pink faux leather notebook cover featuring gold foil compass designs and the word 'Test' repeated vertically.

My fabric selection is very minimal, so I just grabbed the first one I found.

A faux leather traveler's notebook with a compass design, resting on a colorful fabric patterned with wine bottles, beside a Silhouette cutting machine.

And no joke, it was the first one I saw. This is leftover from a gift making session a few years back where I tried my hand at fabric key fobs.

Why not cover the journal as a test?
Cut this thin cotton fabric with the rotary blade and test it out. Perfect!

I measured out how big the traveler’s notebook was and then drew a rounded rectangle in the Silhouette software. I added a little bit to the measurements to allow for some overlap around the edges of the cover. In hindsight, I should have allowed a bit more.

So the first thing I want to mention is that when you get the Cameo 4 Rotary Blade, you want to twist the bottom to expose the blade. This is a safety feature so the blade is not exposed right out of the package.
And it won’t cut very well at all if you don’t twist the bottom to expose the blade. You’ll have to trust me on that one.

Close-up of a hand holding a white rotary blade tool for the Cameo 4, with a cutting mat in the background.

Once you install the Rotary blade in the Cameo 4 Tool 2, the software will recognize the tool has been installed with the new Tool Recognition and will give you the cut options for that tool.

Next, when you use the Cameo 4 Rotary blade, you will notice that you have these extra lines on your design mat when you go to the Send tab. This is so the rotary blade can orientate the blade to the correct position to cut the design out.

Journal cover copy

It is just like a hand held rotary blade and rolls across the material to cut.

A close-up of a Cameo 4 cutting machine with its tool holder, displaying a colorful fabric featuring wine bottle designs laid on a wooden surface.

Now, my design is a very simple rounded rectangle.

A close-up of a cutting mat with a piece of fabric featuring wine bottle patterns, positioned in front of a Silhouette Cameo cutting machine.

While it may be simple, it is a great way to test out the blade to see if it will cut this thin cotton fabric.

And success! There were a few threads that needed to be clipped around the edge, but I’m good with that. And it is improving. There are software updates coming that are improving the cut settings and allowing more possibilities to customize those settings because we all know that not all materials are created equal. As I found with Foil Quill foil, even in the same brand of items, not all will perform the same. The Gold Finch 4″ x 6″ sheets did not foil the same way as the foil that was included in the Foil Quill bundle or like the large roll of gold color did.

Now, I was so excited to test this blade out, that I didn’t really think how I was going to apply this piece of fabric to my traveler’s notebook, which is like a faux leather on the outside. So I reached out to my friend Libby for her advice. It was pretty much the answer I had thought – Heat & Bond or Fusible Stabilizer, but confirmation from a fabric user is always better.

Yes, it would have been much easier to put the Fusible Ez-Steam on the fabric and then cut it, it would have even cut with a regular blade since I had such a simple shape. But, it was a test to see how it would cut with the rotary blade and it was a success!

I can’t be the only one that has these hindsight moments on how to make the project easier….. after the first one is done. Or gets excited and just jumps in before thinking the project all the way through.

I ironed the fabric to get it nice and smooth. Then I peeled the paper backing off the Fuzible Ez-Steam and applied it to the backside of the fabric.

An iron is positioned beside a piece of fabric with a protective paper backing, set on a blue ironing board.

Then I placed the fabric on top of the travelers notebook and carefully ironed it on.

A close-up of a hand holding a small fabric cut piece with a backing, placed over a notebook cover that reads '1st Test' in gold lettering.

After I ironed the outside, I flipped it over and then carefully folded the edges over and ironed those down to the inside. The inside of the notebook is a paper material, so I didn’t hold the iron in the same place very long.

A fabric-covered traveler's notebook with a black backing, pinned edges, and an iron in the background.

You can see in the bottom right corner that the edge was a little bit small, this is where I would adjust for the next one and make it a little bigger for a little more edge allowance.

I poked holes through the fabric to thread and threaded the elastic cord back in the holes, added my notebooks back in, and have covered this “test” subject from my failed Foil Quill project.

A traveler's notebook covered in fabric featuring various wine bottle designs, resting on a wooden surface, with a seam ripper and a weeding tool beside it.

Of course, I couldn’t leave it at just that. I had to add a charm made from an 15/16″ acrylic circle and etched with the Silhouette Curio 1.

A traveler's notebook covered with fabric featuring various wine bottles and tags, accompanied by a charm that reads 'live love WINE'.

Can you see yourself using the Silhouette Rotary Blade in any future projects?

Next up on the testing list is leather, faux leather, more fabric or whatever I can find.
I can’t wait to share that too!

Additional Resources:

Save this for future reference by pinning the image below.

Silhouette Rotary Blade against a colorful background, showcasing its design and features.

Enjoy !

THANK YOU for your support! How can you help? Click HERE & buy a coffee.
Every little bit helps with the cost of running the site.

Silhouette Classes

Never stop learning! Let me help you take the anxiety out of learning with Silhouette and get to creating faster! My Silhouette classes are heavily focused on software, so you can take the skills & techniques taught and apply them to many future projects!

Silhouette step-by-step Classes by Silhouette Secrets+

Silhouette Secrets+ with EllyMae
**This post may contain affiliate links. What that means is that I may receive compensation if you purchase through the links I have provided. The price you pay for the product or service is not higher but I may get compensated for sharing.

Posted on 13 Comments

Cameo 4 Cover and more!

Look what I did!
(Read to the end and you’ll find a surprise!)

SilSecrets_Cover copy

*This post may contain affiliate links. Please see the bottom of the post for more information.

Now, usually I am not one who can decide what design to put on my machine. But, when I saw Sparkleberry Ink release this Laura’s Abalone design, I just knew what I wanted to do with it.

Note: you will need a piece of Sparkleberry Ink vinyl or other brand that is at least 12″ x 24″ long.

I created this Cameo 4 cover all by using a tape measure, the drawing tools in the Silhouette software, and cutting test cuts of the templates to make sure they would fit before cutting my precious Sparkleberry Ink vinyl.

So how did I do it?

I started out by measuring each space that I wanted to add a piece of vinyl to and writing that down.

IMG_20191016_190707132

Cameo 4 cover_updated copy

Then I chose the draw rectangle tool in the software and created a rounded rectangle (6.285″ x 2.420) for the top left panel (E).

Drawing rounded rectangle copy

Next, I drew a rectangle (6.285″ x 2.687″). I used the Align tools to center the rectangles together and then moved them together until the total width of the panel was 2.682″. Then I selected both the rounded and regular rectangle and made a copy, this way I have an original shape to go back to. And I’m so glad I did because I had to cut this one a couple of times to get the right rounded rectangle angles.

Next, I right clicked and chose Weld.

Weld copy

Then I cut it from cardstock to see how well it fit. Here are a few of the pieces I test cut to see how they would work for the panels.

IMG_20191016_165058335 copy

Then I continued to measure each and draw the shapes according to those measurements.

IMG_20191016_165117249 copy

By cutting it out of cardstock, I could place the cardstock up to the space available and see how it fit. If it was too big, I could scale it down. If it was too small, I could scale it up a little bit.

I added all my pieces of my design to a “working file” that I saved, just in case something happened.

Working file copy

Once I knew the piece would fit, I then moved it to my original cut file and positioned it on the mat, so I could get the most out of the 12″ x 24″ cutting space.

Silhouette file photo copy

Then I did something daring. I wanted mine to have sparkle to it. So I took a 12″ x 24″ piece of Glitter Laminate Overlay and I applied it to the top of the Sparkleberry InkLaura’s Abalone adhesive vinyl.

Why is this daring? Well, anytime you add a layer on top of another layer, you have the chance of getting bubbles. But, I went for it!

I followed these instructions HERE for using the Glitter Laminate Overlay and it worked! Would I recommend this for all users – No, probably not. I would definitely recommend practicing with a smaller piece first. But, sometimes you just have to go for it 😉 !

IMG_20191011_200646477 copy

Look at it sparkle!

This is definitely one of those times that you feel all giddy when a project is coming together. If you look really close on the right side in the photo above, you may even see a few bubbles. I’m good with that.

IMG_20191011_205303758 copy

After all the pieces were cut, I cut them apart, added transfer tape and started applying 1 panel at a time. I of course started with the largest panel first, the cover.
Well, at this point – might as well go big.

IMG_20191011_205311771 copy

Since this Laura’s Abalone pattern was directional, I realized after I cut the first one, I had turned a couple of the panels to fit on the mat and that affected the way the pattern was. So I ended up re-cutting a few pieces so the entire pattern matched.
(I corrected that in the final cut file – see below)

IMG_20191012_082222452 copy

I was happy with it as it shows above, however, my kids came to inspect it and my 10 year old said, “Mom, what about the top? Aren’t you going to do the top pieces, so when the lid is open, it all flows.”

Very good point!

Cameo 4 cover copy

And the final pieces were created.

Updated – 1/12/20 to include right panel & UK top panel option
IMG_20200112_093933194 copy

Now, is it perfect? Nope, it has a few bubbles in it. But, I’m ok with that and hopefully as it settles, those will work themselves out or I can help them a little bit.

But, I have to say I love it!
It sits on my desk next to my computer and just sparkles at me.

Now, I did all the measuring and test cutting, but you don’t have to!

Feel free to grab this free cut file of the Cameo 4 cover I created HERE.

Silhouette file photo copy

Cameo 4 cover FREE cut file

Header photo copy

Now, what if you do not have a Cameo 4 yet or don’t plan to buy one? Well, you can still use some pretty Sparkleberry Ink vinyl to add a little color to your Cameo if you would like, no matter what model you have.

I’ve updated and created a full cover file for the Cameo 3 model as well.
Grab this free cut file HERE

Cameo 3 cover example copy

I did cut without a mat when creating this one since it is a larger surface area, however, you could use a 12″ x 24″ cutting mat as well and arrange the pieces on it. Just keep in mind that if you pattern has a direction to it, you want to keep the same consistency in how the pattern goes across the cuts.

I’d also suggest going slow and taking your time when applying, especially on the lid. It is a large surface to get lined up. In this cut file, the pieces are designed slightly smaller than the actual panel sizes, so there is a little bit of machine color showing through to break up the pattern.

For more details on cutting without a mat, check out this post HERE.

Cameo 3 and 4 copy

Cameo 3-4 lid closed copy

I did not cover the inside of the Cameo 3 lid as it has some instructions inside. If you would choose to do so, I would recommend measuring the inside and then drawing a rectangle that same size. I used cardstock and cut out a piece that was the same length top to bottom and held it up to the machine to make sure it was the correct size, before I committed a full sheet of adhesive vinyl.

Or if you have other model machines, grab this Silhouette Cameo Cover Template from the Silhouette Design Store, some of your favorite Sparkleberry Ink vinyl & maybe some Glitter Laminate Overlay too and get to cutting.
*Note this file contains cuts for the Cameo 1 panels, Cameo 2 panels, and Cameo 3 lid.

Silhouette cover

I would love to see how you decorate your Silhouette machine!

Here is my Silhouette Mint Stamp machine decorated in another Sparkleberry Ink pattern called Cute Crawlers Lime.

IMG_20190831_190213600

Feel free to post your machine decoration or any Silhouette projects on my Facebook group at Silhouette Secrets with EllyMae.

Enjoy!

SS_Signature copySS Logo snip it

**This post may contain affiliate links. What that means is that I may receive compensation if you purchase through the links I have provided. The price you pay for the product or service is not higher but I may get compensated for sharing.

Posted on 1 Comment

Cameo 4 Unboxing

Just wanted to pop in here really quick and post the video I did unboxing my new Cameo 4. Whether you have decided to add one to your Silhouette family or are waiting a bit, check out the video to see what’s in the box and the first cut with it.

If you have any question feel free to ask on my Facebook group at
Silhouette Secrets+ with EllyMae.

If you do decide to order here are 3 places I’d recommend:
Silhouette America
Heat Press Nation
Swing Design

I am so excited for the new tools – Rotary blade, Kraft blade 3 mm (Cameo 4), Punch Tool, and Kraft blade 2 mm (Cameo 3 & Curio) and can’t wait to show you!

Now matter what machine you have, get that baby out and start cutting with it!

I would love to see what projects you create with any Silhouette machines! Feel free to post on my Facebook group at Silhouette Secrets with EllyMae.

Enjoy!

SS_Signature copySS Logo snip it

**This post may contain affiliate links. What that means is that I may receive compensation if you purchase through the links I have provided. The price you pay for the product or service is not higher but I may get compensated for sharing.
Posted on 1 Comment

Cameo 4 – New release – Pre-Order Now

At the Silhouette Summit in May they announced the release of the new Cameo 4 (check out my Summit Show & Tell post HERE) and I am excited to say that I am in Utah and attending the Silhouette Cameo 4 Launch.

Yesterday we had a tour of the Silhouette Headquarters and I will be sharing more on that and what I see & learn at the Cameo 4 launch later this week.

IMG_20190909_162031317_HDR

The Cameo 4 is available to Pre-Order starting at 12 pm MST through Silhouette America with my code SILSECRETS. And this code is also good for FREE shipping on your order! Keep in mind that this is a Pre-Order, so when the Cameo 4 machines are available to ship those who have pre-ordered will be the first ones to ship.

Cameo 4 copy

A few things you may be asking yourself….

Do I need a Cameo 4?
If you already own a Silhouette machine, the answer may be NO. While there are a few updates to the new Cameo 4, your current Silhouette machine will still work. All the Silhouette machines are great machines. I still have a Cameo 1 that is going strong and it is WELL used.

Do I want a Cameo 4?
The answer could be YES or NO. This answer will vary from user to user. Me personally, I will be getting the Cameo 4 for many reasons.

I want to test it out for cutting thicker materials.

I also teach on the Silhouette machines, so I feel that in order to teach Silhouette users, I need to know the machine. So I will be clicking buy at 12 PM MST when the Pre-Order goes live.

Do you need a Cameo 4 bundle?
Again, this is only a decision you can make for yourself. Me personally, I have the other supplies that a bundle might have and I’ll save that extra little bit for the specialty tools that will be coming soon.

However, if you are a new user or feel a bundle is right for you there are a couple of retailers who have bundles available.
Check them out here:
Heat Press Nation
Swing Design

*Please note that the white Cameo 4 machines will be the machines that are shipping the soonest and the color machines will follow later.

The only person that can make the decision on whether you “need” a Cameo 4 is YOU.

Once I receive a Cameo 4, I will begin testing and becoming familiar with all that this new machine can do.

But until it arrives at my house, I will continue to make lists of what projects I want to “test” on this new machine.

I would love to see what projects you create with any Silhouette machines! Feel free to post on my Facebook group at Silhouette Secrets with EllyMae.

Enjoy!

SS_Signature copySS Logo snip it

**This post may contain affiliate links. What that means is that I may receive compensation if you purchase through the links I have provided. The price you pay for the product or service is not higher but I may get compensated for sharing.