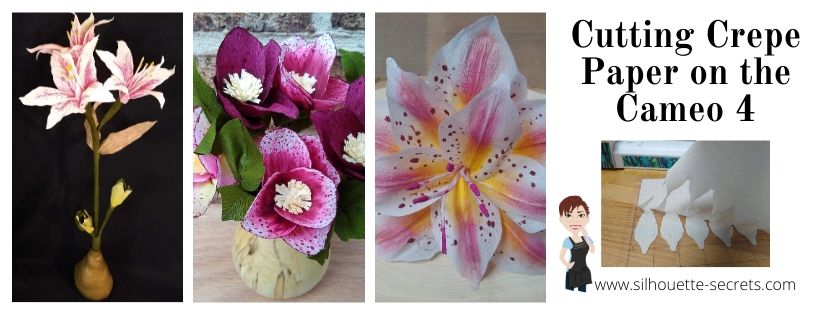
Cameo 4 – Cutting Crepe Paper
Affiliate links may be present in the following blog post and as an Amazon Associate I earn from qualifying purchases.
By now, I’m sure that you have all seen and heard about the new Cameo 4 machine. Well, I went ahead and purchased it when it was released. As soon as the pre-order went live, I was ready to click order. I ended up being #4 who ordered it from Silhouette America, so there were a couple people just as excited as I was that beat me to it.
Why? Well, for me there are a couple reasons. The biggest factor being that as a TJC Licensed Silhouette Instructor, I teach using the Silhouette machines. There are many new features on the Cameo 4, that I can’t teach if I have not used. Since the Cameo 3 is no longer being manufactured that means that more and more students will have a Cameo 4. And if you follow me on Facebook at all, you know that I do a LOT of troubleshooting for users on many pages and groups. In order to do that, I need to know how this machine works and all the ins and outs.
Now, let’s talk crepe paper. This is one of those new materials that the Cameo 4 can cut. I have been cutting crepe paper using the Rotary blade and having so much fun testing it. The more I play, the more ideas come to me, and the more projects I want to create.
After meeting Lia Griffith at the May 2019 Silhouette Summit, I started looking into this whole new world of creating and it opened up so many things. Well, really it added to my list of projects I want to complete.

I have made many 3-D paper flowers, but never used crepe paper because well, I didn’t want to hand cut it all. I have been collecting Pins on Pinterest and supplies ever since. And now with the Cameo 4 being able to cut new materials, it was perfect timing!
So let’s get down to it.
Cutting Crepe Paper on the Cameo 4
For the design in this tutorial I am using a Lia Griffith file for an Amaryllis flower. This was the December Member Make project and once I saw it, I just had to create it. But, you can do this with other files too, as I’ll show you at the end of this post.
I started by opening the svg file, moving it off my design mat, and ungrouping it.

In order to open a svg file, the Designer Edition upgrade or higher is required in the Silhouette software. I feel this is a great investment and saves you time & headache in the long run. For more details on that, click HERE.
The file has all the parts needed to make 1 complete flower. And it tells you how to cut the pieces in relation to the grain of the crepe paper. This is something you want to keep in mind when you place the crepe paper on your mat, or if you are moving the pieces around to fit on the mat.
I started with the flower petals and moved those over onto the design mat to cut. Make sure you measure the size of the crepe paper you are using, so you know the exact length of it. I should have measured twice when I was cutting this file and I filled the entire page only to realize after I cut, that I measured wrong. It happens to us all!

Once the design is on the mat ready to cut, click on the Send tab in the top right corner. The cut lines default to Tool 1 as designated by the bold red cut lines around the design. Since this will be cutting using Tool 2 and the rotary blade, the cut lines need to be turned off for Tool 1. Select the entire design and choose No Cut. The bold red lines will disappear = turn off.

The Tool 1 cut lines must be turned off first or it will complete the Action with both Tool 1 and Tool 2. This means that it will first try to cut with any blade you have in the Tool 1 housing and then move on to cutting the design with the blade installed in Tool 2. This will most likely not work out well.
Next, with the entire design still selected, click on Tool 2 to expand it out and click Cut.

Bold blue cut lines will turn on indicating that Tool 2 is active.
Currently, there is no Crepe Paper preset setting in the software and you will see a note that there are no compatible settings found for this material. That just means we need to add a custom setting in.
To do this, click on the More button on the right side. A menu will pop up and this is how to input custom cut settings. Choose the small plus sign and this will add a new material to the list. Change the name from New Material to match the material being used.

I named mine Lia Griffith Extra Fine Crepe Paper because that is what I’m cutting.
Change the material in the drop down box on the right to reflect what material you are cutting. Then click on the large plus sign to access the Tool 2 settings on the Cameo 4. Choose Cameo 4 Tool 2.

The Cameo 4 Tool 2 defaults to the Kraft Cut Action. Click on the large plus sign and choose Rotary Cut Action.

Next, click back on the Kraft Cut and then choose Remove Action.

For this Lia Griffith Extra Fine Crepe Paper, I used the default settings for the rotary blade.

Click save in the bottom right corner (if needed) and then the big X in the top right corner under the Send tab.

Ta-da – you have entered a custom cut setting!
Next, select the new material setting that was created from the Materials list and on the screen you will notice additional blue lines.

These are part of the Smart Cut technology of the Rotary blade and also the Kraft blade. Since these blades are broader tip blades, they do not turn on a dime. The machine lifts the blade up and then sets it down (hook) to turn the tip of the blade in the next direction it needs to be going or it makes a loop so the blade can be start in the next direction.
Think of it just like using a hand held rotary blade. It is a round blade and does not make fine turns when cutting. For example, I have enlarged this flower petal shape. If you wanted to cut this with a hand held rotary blade, you would not cut it all in one pass without lifting the blade up. You would have to make multiple cuts to change direction. The blue lines show an example of the motion you might use with a hand held rotary blade in order to cut this shape. The same concept applies for the Cameo 4 rotary blade.

Now that the Smart Cuts are explained. We are ready to cut some flower petals.
I placed the crepe paper down on brand new Silhouette cutting mat with the grain running up and down (top to bottom). This lines up with the instructions from the cut file.

I then used a brayer to smooth the crepe paper down on the cutting mat and make sure that it was stuck very well. I am using a Speedball brayer, but any one would do or you can use a hard roll, such as a vinyl roll core, etc. The main thing is to make sure the crepe paper has a good bond to the cutting mat. Since crepe paper has some stretch to it, you want to make sure it is good and secure before cutting or the paper will just move and get pushed around.

Then I crossed my fingers and clicked on Send in the bottom right corner. My supervisor was making sure it was all going according to plan.

So exciting! It cut so well!

Now, something I mentioned above is that crepe paper has stretch to it, so you want to go slow when removing it from your cutting mat. There may be a few spots that it didn’t quite connect the cut because the paper moved just a bit. But, it’s also pretty easy to either snip that little bit or to pull it gently apart.

And the first pieces of the flower are cut.

Now, to cut the rest of the flower pieces.

Then the leaves for the buds were cut from Lia Griffith Double Sided Crepe Paper. I used a force of 20 for these.
Now, keep in mind if the crepe paper does not stay in place, the cut may not be complete. And not every single cut will turn out perfect. All Silhouette users run into issues or mis-cuts. It is all part of the process.

These pieces were cut from Lia Griffith Heavy Crepe paper and as you can see, that last one didn’t say in place for the cut. The great thing about crepe paper flowers is, not all flowers are “perfect”. Each flower or leaf doesn’t grow uniformly, so in this case it will still work for the finished project. I used a force of 25 for the heavy crepe paper.
I then assembled the flower following the instructions provided by Lia Griffith and her assistant in the Member Make live video.

The Amaryllis information that I used can be found HERE on Lia Griffith’s website.

I am so in love with this! I learned a lot in the assembly and I am so glad that I followed the Member Make live to complete it.
Now, do you have to become a Lia Griffith Member to make pretty crepe paper flowers. No! I did because I think it’s something I will enjoy and expand my creative projects.
Since I know that not everyone wants to join a membership, I also tested this with files from the Silhouette Design Store.
I used the Hellebore by the Bleu Dahlia – Design #206393 and Flower Petals by Alaa’ K – Design #16305.
When the Hellebore file opens, it is a large flower design.

I selected the entire design and scaled it down so the flower petal was just under 2 inches tall. I then right clicked on the petal design and ungrouped it and deleted the lines up the center of the design, as those are not needed for crepe paper.

I then duplicated the petals, so there was 5 petals per flower. I cut 3 different colors of crepe paper for the flowers and 2 of each color.
Next, I moved to the leaves. From looking at the files in the Lia Griffith Membership site, I saw that they would cut the full leaf in half and angle it on the crepe paper so the grains of the paper would run diagonal on the leaves to make it more realistic. They cut 2 sides for each leaf and then glued them together. I used the knife tool in Silhouette Studio and cut the leaf in half and then replicated and mirrored the half of the design I wanted to keep.

Since the crepe paper is placed on the cutting mat with the grain running up and down, I placed the leaves at an angle to get the grains on the leaves in the manner they suggested.

Since this leaf was not design specifically for this flower and I cut it in half of the original design, when I overlapped it and glued it, it didn’t line up perfectly. I found this was just fine and took sharp scissors and snipped both ends. Guess what? Leaves and flowers are not perfect or each one shaped the same. It worked great!
For the stamen (center part) of the flower, I just cut a long rectangle with my paper trimmer and then used scissors to fringe it. The rotary blade does not cut intricate designs and would just shred the crepe paper on this. I found it faster just to do it myself. Sometimes I think we complicate simple things like cutting a rectangle just because we have a machine that will cut it. Now, don’t get me wrong, if this was cardstock, I may or may not use the machine to cut the rectangle – that would depend on how many I’m cutting. Each project will vary.

And once all the pieces are cut out, you can color as needed, and start assembling the flowers and leaves.

I sure learned a lot of things in creating these flowers.

But, I am in love with the finished designs.

As I said above, I’ve never worked with crepe paper before, so this is definitely something out of my comfort zone and I just can’t wait to create more!

Things I learned:
- Crepe paper is forgiving. Neither flowers or leaves are identical and sometimes a blemish makes it much more realistic.
- While you can create your own flowers, it is so much easier to follow the step-by-step instructions on LiaGriffith.com. Since crepe paper is a new journey for me, I am learning lots on her site and I don’t think these would have turned out as well if I had been left on my own.
- It is easier to cut some things by hand, like the stamen and simple rectangles.
- I love crepe paper flowers!
- It takes time, but the end result is amazing and something you can enjoy for a long time to come!
- Single petal designs are best if you are looking for files to use for creating your own flowers.
- They are so fun to make!
And I just couldn’t stop. While this set isn’t finished, I still wanted to share it with you. This one was cut using the Oriental Lily 3D by The Bleu Dahlia – Design #217974 from the Silhouette Design Store. I chose not to cut the stamen centers, but instead used the same technique I learned in the Lia Griffith Amaryllis design so it would look like a photo I found online of the Oriental Lily. I was drawn in by the bright colors.

I can’t wait to share the finished set of 3 Oriental Lilies.
I hope that you will give it a try and I would love to see what you create on my Facebook group at Silhouette Secrets with EllyMae.
Check out 5 additional “secrets” to cutting crepe paper on the Cameo 4 in this guest post on Terri Johnson Creates blog as well.
5 “Secrets” to Cutting Crepe Paper

I would highly recommend the Lia Griffith Crepe Paper supplies. I have found that they are really high quality and look amazing!
They can be found direct at LiaGriffith.com or find links in my Amazon shop HERE.
Don’t have a Cameo 4, but it’s on your wishlist.
When you decide to take the leap check out these great retailers for Cameo 4 deals:
Heat Press Nation
Silhouette America
Swing Design
Or find it on Amazon
Like this? Pin the image below to find later!

Enjoy!


**This post may contain affiliate links. What that means is that I may receive compensation if you purchase through the links I have provided. The price you pay for the product or service is not higher but I may get compensated for sharing.


