Posted on Leave a comment

1 Design, 5 Projects: Unlocking Creativity with a Single Silhouette File

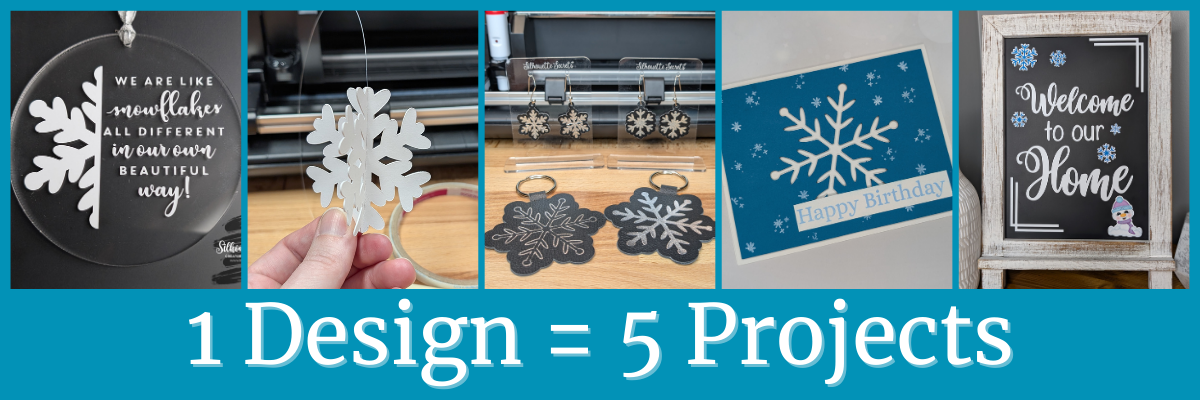
5 Projects with 1 Design
Silhouette Secrets+ with EllyMae

Each month in the Silhouette Secrets+ newsletters, there is a free file offer. I then use that file to create multiple projects, showcasing the endless possibilities you can achieve with just one design. In this blog post I am sharing a variety of creative projects made using snowflakes designs that I created in the Silhouette Studio software. There are so many possibilities when working with just one design and I hope it sparks your creativity to look at your designs differently and think about the possibilities for multiple projects with one file.

Affiliate links may be present in the following blog post and as an Amazon Associate, I earn from qualifying purchases.

The January newsletter files were several snowflake designs that I created in the Silhouette Studio software. This is a great way to learn more about using the tools in the Silhouette Studio software and every single user could create these themselves. Check out the tutorial on the tools I used HERE.

Snowflake Designs by EllyMae Created in Silhouette Studio using the Drawing Tools

Make sure to sign up for the Silhouette Secrets+ newsletter HERE for future free files & project inspiration.

Crafting Creativity with One Design

Project #1 – Acrylic Ornament

Acrylic Ornament with Oracal 651 decal - Silhouette

I drew a 3″ circle in the Silhouette Studio software as my template to create within for placement and getting an idea of what the design would look like. Using one of the snowflake designs, I added an offset and then used the Knife tool in Silhouette to cut the snowflake design in half. Next, I opened a snowflake saying, adjusted it at bit, and added that to the design. Then cut everything from Oracal 651 and applied it to the front of a 3″ acrylic circle.

Oracal 651 adhesive vinyl cut for a decal with Silhouette

I used the Silhouette Autoblade for these cuts and it did beautifully.

Adding weeding lines in Silhouette to a design for easier weeding

Using the Line Drawing Tools to add weeding lines can help so much when you have intricate designs to weed. This allows you to weed smaller sections of the design and not have the material stick back to itself.

Additional Resources:

Supplies Used:

Project #2 – 3-D Snowflakes

Creating 3-D Paper Snowflakes with Silhouette

Using one of the snowflake designs, I added a score line down the center and cut 3 for each 3-D snowflake out of cardstock. Then assembled them together to make the 3-D ornaments. The score line helped to fold each of the snowflake sides directly in half for assembly.

I shared how I did this in a new video on the Silhouette Secrets+ YouTube channel found HERE.

How to Make a Stunning 3-D Snowflake in Silhouette Studio - step-by-step tutorial

Additional Resources:

Supplies Used:

Project #3 – Keychains/Bag Tags and Earrings with Heat Foil on Silhouette Leatherette

Key chains/bag tags and earrings created with the Silhouette Heat Foil Pen and Silhouette Leatherette

This silver foil looks amazing on the Silhouette black leatherette. I highly recommend the Silhouette leatherette for anyone who wants to get started with cutting faux leathers. Create many different projects with the Silhouette heat pen and Silhouette leatherette.

Additional Resources:

Supplies Used:

For older model machines without the powered tool housing

Additional Heat Foils that I’ve tested

Project #4 – Cut Out Card

Snowflake Cut Out Card with Silhouette

I cut the snowflake design out of a blue sheet of cardstock and then had to walk away for a bit because I wasn’t sure how to finish this out.

Snowflake Cut Out Card in Process

I ended up pulling out supplies and stamps just to see what might be good to add on to finish this card out. I stamped some embellishments from a birthday stamp set as snowflakes in white ink and then stamping the sentiment in a light blue and adding it to the card with foam tape for dimension.

Card Making Process using Stamps and Inks

Additional Resources:

Supplies Used:

Project #5 – Printable Magnets

Printable Magnets with Silhouette Printable Magnet Sheets

Print and cut is so awesome and there are many different material types you can use, such as printable magnet sheets. I filled the snowflake designs with color, added an offset and then a few more shapes to fill the page. These could be used to decorate any magnetic surface.

I used them to give additional ideas for a recent class I taught on creating a custom chalkboard for home decor. This chalkboard is magnetic and has so many options you can play around with.

Custom Chalkboard Design for Home Decor Created with Silhouette

Additional Resources:

Supplies Used:

I love discovering how a single design can spark endless creative possibilities! The Crafting Creativity blog series is your ultimate source of inspiration, filled with innovative ideas, practical tips, and expert techniques to take your crafting to the next level. Whether you’re transforming a favorite design, exploring new materials, or refining your skills, these posts are here to fuel your creativity and bring your ideas to life. Check out more in the Crafting Creativity series HERE and see where your imagination leads you! ✨

Save this for future reference by pinning the image below.

5 Projects from 1 Design with Silhouette Pinterest

Enjoy !

THANK YOU for your support! How can you help? Click HERE & buy a coffee.
Every little bit helps with the cost of running the site.

Silhouette Classes

Never stop learning! Let me help you take the anxiety out of learning with Silhouette and get to creating faster! My Silhouette classes are heavily focused on software, so you can take the skills & techniques taught and apply them to many future projects!

Silhouette step-by-step Classes by Silhouette Secrets+

Silhouette Secrets+ with EllyMae
**This post may contain affiliate links. What that means is that I may receive compensation if you purchase through the links I have provided. The price you pay for the product or service is not higher but I may get compensated for sharing.
Posted on 2 Comments

Maximize Your Creativity: 4 Stunning Projects Using Just One Jaime Lane Designs File

Poinsettia Flower Projects with Jamie Lane Designs
Silhouette Secrets+ with EllyMae

Each month in the Silhouette Secrets+ newsletters, I team up with a talented designer to offer a free file. I then use that file to create multiple projects, showcasing the endless possibilities you can achieve with just one design. In this blog post I am sharing a variety of creative projects made using the Poinsettia Gift Tag file by Jamie Lane Designs.

Affiliate links may be present in the following blog post and as an Amazon Associate, I earn from qualifying purchases.

Poinsettia Gift Tag Cut file by Jamie Lane Designs

Make sure to sign up for the Silhouette Secrets+ newsletter HERE for future free files & project inspiration.

Crafting Creativity with Jamie Lane Designs

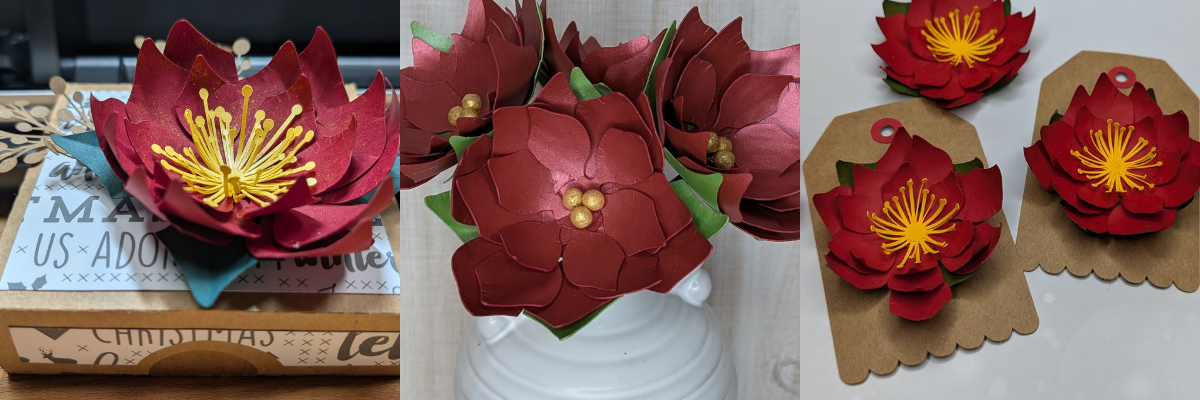
Project #1 – 3-D Poinsettia Gift Tags

Poinsettia Gift Tags by Jamie Lane Designs

To start the month off, I cut the design and assembled it for gift tags using kraft cardstock and colored cardstock. I then inked the edges of the cut pieces and used some paper shaping tools to add dimension to the flowers before gluing it all together.

Additional Resources:

Supplies Used:

Project #2 – Christmas Card Embellishment/Home Decor

I scaled the flower design down just a bit and used it as an embellishment on our Christmas card.

Christmas Card Decor embellished with Poinsettia Design by Jamie Lane Designs

This one shown isn’t quite mail friendly, so I kept it for myself and used it as decoration for this year.

I added an easel to the back of all the Christmas cards I sent out and the one shown above that I have on display in my home.

Christmas Card Easel Stand by Lori Whitlock

The Silhouette LIVE tutorial on the Silhouette Secrets+ YouTube channel from November is what started the entire idea of using this with my Christmas card design. In the live I followed a suggestion from a viewer which began the creation of this years Christmas cards. I also shared sketching tips and a demo using the Silhouette Electrostatic Mat.

Silhouette Sketching & Electrostatic Mat Demo & Tutorial

Watch that Sketching tutorial video HERE.

Additional Resources:

Supplies Used:

Project #3 – Gift Box Topper

Poinsettia Tag Design by Jamie Lane Designs Gift Box Topper

I scaled the poinsettia design up a little bit, cut a few more center pieces for the flower and added it on top of a hinged gift box. Added a little bit of gold sparkle spread on the poinsettia and now have a custom made gift box ready to go.

Hinged Gift box by Jamie Lane Designs

Want to know the perfect cut settings for all cardstock? There isn’t one. There are many factors that affect cut results such as: brand, color, weight, paper finish, blade life, cutting mat adhesion, humidity, the design, and more! Test cuts are the best way to know what will work for your particular cardstock or any material in fact. This will save you time, frustration, money, and supplies.

Additional Resources:

Supplies Used:

Project #4 – Poinsettia Bouquet

Over a year ago, I started working on a poinsettia project and crafted these gold-painted wool ball centers for the flowers. While that project was never finished, I kept all the pieces neatly tucked away in a basket, waiting for the right moment to complete it. As I revisited the project, I realized I had used this exact poinsettia flower file from Jamie Lane Designs. Inspired, I decided to pair it with beautiful pearlescent papers from 12 x 12 Cardstock Shop to create a stunning bouquet.

Poinsettia Bouquet with Jamie Lane Designs File and 12 x 12 Cardstock

I ordered the cardstock and when I went to use it I was surprised at how thick it was. I wasn’t sure if I would be able to successfully cut it with the Silhouette Electrostatic Mat. After feeling it, I went looking for the weight and found it was 105 cover that’s 285 gsm. Even though I thought it might be too thick, the only way you really know if something will work is to test it! So I did just that. I did have to adjust my cut settings a bit at the beginning and then it cut beautifully!

As I mentioned above, there are no perfect cut settings that work for all cardstock. The faster you can learn to accept that, the less frustrating it will be. You will quickly learn that test cuts will save you time and if you are like me, kick yourself when you don’t do them.

Check out the new video on the Silhouette Secrets+ YouTube channel where I shared how I created this paper flower bouquet with tips to using the Electrostatic Mat too!

Perfect Cardstock Cuts with the Silhouette Electrostatic Mat

Additional Resources:

Supplies Used:

Poinsettia Flower Design by Jamie Lane Designs and Neenah Stardream Cardstock from 12 x 12 Cardstock Shop

I miss counted when I was cutting the flowers out and I had more flower pieces cut than I had wool ball centers, but I wasn’t going to let this one sit unfinished. I had extra center pieces leftover from the previous projects and still finished these out to use for a future project or gift.

What are some ideas you have for projects this year?

Find more designs by Jamie Lane Designs at the Silhouette Design Store.

I love exploring how one design can inspire multiple creative projects! The Crafting Creativity blog series is your go-to source for endless inspiration, packed with innovative ideas, practical tips, and expert techniques to elevate your crafting. Whether you’re reimagining a favorite design, experimenting with new materials, or mastering advanced skills, these posts are here to ignite your imagination and help you bring your creative visions to life. Head over to the Crafting Creativity series HERE and discover where your creativity can take you!

Save this for future reference by pinning the image below.

Poinsettia Projects with Jamie Lane Designs

Enjoy !

THANK YOU for your support! How can you help? Click HERE & buy a coffee.
Every little bit helps with the cost of running the site.

Silhouette Classes

Never stop learning! Let me help you take the anxiety out of learning with Silhouette and get to creating faster! My Silhouette classes are heavily focused on software, so you can take the skills & techniques taught and apply them to many future projects!

Silhouette step-by-step Classes by Silhouette Secrets+

Silhouette Secrets+ with EllyMae
**This post may contain affiliate links. What that means is that I may receive compensation if you purchase through the links I have provided. The price you pay for the product or service is not higher but I may get compensated for sharing.
Posted on Leave a comment

Unlock Creativity: 5 Stunning Projects You Can Create with Just One Design by Megan Hardy

Crafting Creativity with Megan Hardy
Silhouette Secrets+ with EllyMae

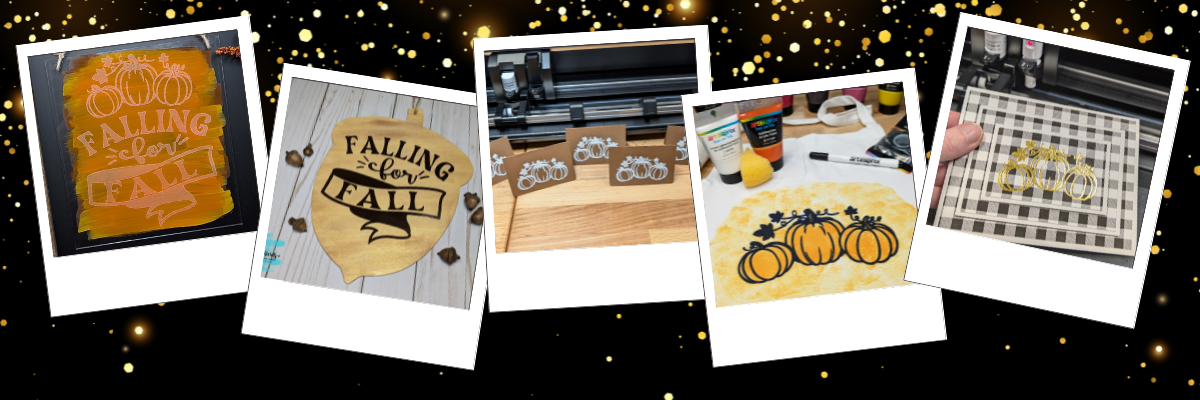
Discover the magic of versatility with Megan Hardy’s creative designs! In this post, we’ll show you how you can transform a single design into five unique projects that are perfect for any occasion. From an etched acrylic sign with the Silhouette Curio 2 to a wood sign using adhesive vinyl, a personalized apron using Artesprix sublimation markers and paints, a sketched place card for stylish gatherings, and a dazzling foiled card featuring the triple mat stacked technique—this post is packed with inspiration and tips to make the most of your crafting tools. Do more with your designs and bring your creativity to life!

Affiliate links may be present in the following blog post and as an Amazon Associate, I earn from qualifying purchases.

Each month in the Silhouette Secrets+ newsletters, I collaborate with an amazing designer to bring you a free file. Throughout the month, I work with the newsletter file to create and share a variety of projects, showcasing the many ways it can be used.

Make sure to sign up for the Silhouette Secrets+ newsletter HERE for future free files & project inspiration.

Crafting Creativity with Megan Hardy

Project #1 – Etched Acrylic Sign with the Silhouette Curio 2

Etched Acrylic Sign with the Silhouette Curio 2 - Design by Megan Hardy

I used the Silhouette Curio 2 with the Power Engraver to etch on a clear acrylic sign.

Silhouette Curio 2 Acrylic Etching Engraving with the Power Engraver

In most cases, I prefer to etch on the backside of acrylic, however, I knew I want to paint on the back, so I etched the front for this design. The Silhouette Power Engraver leaves a pretty smooth finish, but that will also vary based on the actual acrylic being used and the fill options chosen. The only way to know how it will turn out is to test.

I use shapes in the Silhouette Studio software to create a “template” in order to align the design where I want on the blank I’m using. Just make sure to turn the “cut” line off for the template before you send it to etch or it will also etch the outer edge of your blank as well.

Silhouette Studio Setup for Curio 2 Etching

Also make sure to keep the design away from the taped edges or it could affect the etch results. I got lucky in this etching and it still etched through the painters tape, however, that can also gum up the Power Engraver tool too with the tape particles and adhesive.

Silhouette Curio 2 Engraving Tips

Additional Resources:

Don’t have a Silhouette Curio 2 to etch with? No problem!
Check out these other ideas for Acrylic Sign Decor with Silhouette HERE.

Supplies Used:

Project #2 – Wood Sign with Adhesive Vinyl

Wood Sign with Adhesive Vinyl decal - design by Megan Hardy

I grabbed a plain wood sign from my stash that I had picked up years ago in a Target dollar spot. Added a couple layers of paint to the sign and let it dry. Then measured the inside of the blank and used a rectangle as a template to size the design. Once I had the design sized, I moved my rectangle off to the left side and drew in some weeding lines with the line tools so it was easier to weed in pieces.

Silhouette Studio Software - Adding Weeding Lines to a Design

I also cut my material down to the size I need so I can save the adhesive on my cutting mat and don’t have to peel a full sheet of material off the mat each time. To do this I decrease the Transparency on the Page Setup Panel so I can reveal the cutting grid and know what size to cut my material down to.

Cutting Adhesive Vinyl with Silhouette

Now I am not using the adhesive on the rest of the mat and it will increase the lifespan on the cutting mat.

Weeding Lines on Adhesive Vinyl

Adding weeding lines in the Silhouette software may take a couple extra seconds before you send the design to cut, but can save you frustration when weeding adhesive vinyl.

Additional Resources:

Supplies Used:

Project #3 – Sketched Place Cards

Sketched Place Cards with Silhouette - design by Megan Hardy

I love how these turned out! This place card was designed in the Silhouette software, using a rectangle, dashed line for scoring, and the pumpkin design from the Falling for Fall design.

Silhouette Sketched design with white pen - design by Megan Hardy

Let’s not talk about the fact that I created these for Thanksgiving dinner and then totally forgot to use them. There is always next year!

But, they turned out looking awesome! I love the painted liked texture that the sketch fill with the white pen gave it. Each one turned out just a bit different in the way the ink laid down and moved.

After creating these, I did a LIVE tutorial on the Silhouette Secrets+ YouTube channel sharing more on sketching tips and a demo using the Silhouette Electrostatic Mat as well.

Silhouette Sketching & Electrostatic Mat Demo & Tutorial

Watch that Sketching tutorial video HERE.

Additional Resources:

Supplies Used:

Project #4 – Custom Apron with Artesprix Sublimation Markers and Paints

Custom Apron with Artesprix Sublimation - design by Megan Hardy

Artesprix sublimation products are a great way to test and investigate if you want to go deeper into the sublimation side of things. I used the Artesprix black sublimation marker to sketch out the design with my Silhouette.

Silhouette Studio Sketching with Artesprix - design by Megan Hardy

With Artesprix sublimation products, you don’t need any special paper! Plain ordinary copy paper is all that’s needed and if you don’t like what you’ve made, you aren’t out much. I love playing with the Artesprix products and seeing what can happen.

Once the main design was sketched, then I sponged on some paint in 2 shades of orange around the design to complete the custom apron.

Check out more details in the blog post HERE.

Sublimation Custom Apron with Artesprix Sublimation Markers and Paints

Additional Resources:

Supplies Used:

Project #5 – Foiled Card Design with the Triple Mat Stacked Technique

Foiled Card Design with Triple Mat Stacked Technique - design by Megan Hardy

Make your cards pop with the Triple Mat Stacked technique and add heat foil to that for even more wow factor. I love combining things to make unique projects!

This was completed using a digital pattern in Silhouette Studio, setting it up for a print and cut, then using the setup for foiling the design before cutting.

Silhouette Print and Cut plus Foiling a Card Design with Triple Mat Stacked Technique

Foiling can really add a unique touch to your projects! It does take extra time in creating, but can definitely be worth it.

Silhouette Heat Pen Foiling for a card design

You can see this in action in this video – Quick Foil Card Design: Silhouette Cameo 5, Heat Pen, and Print and Cut video on the Silhouette Secrets+ YouTube channel.

Foil Card Magic with Silhouette Cameo 5 & Heat Pen

Additional Resources:

Supplies Used:

Find more designs by Megan Hardy at the Silhouette Design Store or on Etsy.

Follow along with Megan Hardy here:
Facebook: https://www.facebook.com/MeganHardyDesigns
Instagram: https://www.instagram.com/meganhardydesigns/

I love exploring how one design can inspire multiple creative projects! The Crafting Creativity blog series is your go-to source for endless inspiration, packed with innovative ideas, practical tips, and expert techniques to elevate your crafting. Whether you’re reimagining a favorite design, experimenting with new materials, or mastering advanced skills, these posts are here to ignite your imagination and help you bring your creative visions to life. Head over to the Crafting Creativity series HERE and discover where your creativity can take you!

Save this for future reference by pinning the image below.

5 Projects with 1 Design by Megan Hardy

Enjoy !

THANK YOU for your support! How can you help? Click HERE & buy a coffee.
Every little bit helps with the cost of running the site.

Silhouette Classes

Never stop learning! Let me help you take the anxiety out of learning with Silhouette and get to creating faster! My Silhouette classes are heavily focused on software, so you can take the skills & techniques taught and apply them to many future projects!
Silhouette step-by-step Classes by Silhouette Secrets+

Silhouette Secrets+ with EllyMae
**This post may contain affiliate links. What that means is that I may receive compensation if you purchase through the links I have provided. The price you pay for the product or service is not higher but I may get compensated for sharing.
Posted on 1 Comment

Mixed Media Journal Cover with Silhouette & Grafix Laminate

Mixed Media Journal Cover
Silhouette Secrets+ with EllyMae

My mixed media journal is no longer naked!!! I had so much fun creating with a combination of digital mixed media and physical mixed media materials. And I feel confident that my cover is going to stand up to being in and out of a tote bag as I travel with it because it’s protected with the Grafix Laminate. I love how all the layers came together!

Affiliate links may be present in the following blog post and as an Amazon Associate, I earn from qualifying purchases.

I have really not gotten into creating with mixed medias too much. But, it is growing on me! One of the hardest things for me to overcome is that there are no rules. There is no right or wrong way to do it. You can use whatever supplies you want, mix them, match them, throw them at it. There is no wrong way. I just have to tell myself to keep going and if I really don’t like something, leave it alone and come back later. My perspective often changes when I take a step back and am not scrutinizing it so close.

I say all of that to say, I am not an expert in mixed media at all! I am watching others and learning from them.

In today’s project, I’ve taken digital mixed media created in the Silhouette Studio software and combined it with physical mixed media to add dimension and layers to it.

Mixed Media Journal Cover

I created a background in the Silhouette Studio software combining a patterned background and clipping masks that were filled with colors to match the background. Then added the text on top and filled with white. Since it was created in Silhouette, I could move things around, adjust colors, test out the text saying, and tweak things without committing. Once I was satisfied, then I printed it on Silhouette Printable Vinyl using the high quality settings on my printer. Make sure to let that dry completely before moving on to the next step.

Silhouette Printable Vinyl for Mixed Media Cover

I stamped white acrylic paint on top of the printed background and then splattered paint around the design.

Mixed Media Journal Cover Close Up Stamped Paint

I love how the stamps looked with the acrylic paint and how it dried to give it texture.

Mixed Media Journal Cover Close Up

Once that was completely dry, then I applied the Grafix Laminate on top of it. This will act as a protectant for the journal cover, but it does not stop there! I used the Tim Holtz Layering Splatters Stencil with a bit of Staz-On ink and added that to the top of the laminate.

Mixed Media Journal Cover with Stencil on top of Grafix Laminate

And here is a look at the bottom right corner of the journal cover.

Mixed Media Journal Cover with Stenciled Design on top of Grafix Laminate

I love the textured look that is protected with the layers of ink on top of the Grafix Laminate!

Grafix Laminate Mixed Media Journal Cover

This was so much fun to create and I’m not even sure it’s 100% finished. I can continue to add things to it in the future. That’s one of the the things I’m learning more and more with these projects is that there is no wrong way to do it!

Check out the video on the Grafix Arts YouTube channel where I share how I did this HERE and I’ve included a supply list below too!

Supplies used for Mixed Media Journal Cover:

Designs I used in the video:

Save this for future reference by pinning the image below.

Mixed Media Journal Cover with Grafix Laminate Protectant

Find more tutorials on the Silhouette Secrets+ website HERE.

Enjoy !

THANK YOU for your support! How can you help? Click HERE & buy a coffee.
Every little bit helps with the cost of running the site.

Silhouette Classes

Never stop learning! Let me help you take the anxiety out of learning with Silhouette and get to creating faster! My Silhouette classes are heavily focused on software, so you can take the skills & techniques taught and apply them to many future projects!

Silhouette step-by-step Classes by Silhouette Secrets+

Silhouette Secrets+ with EllyMae
**This post may contain affiliate links. What that means is that I may receive compensation if you purchase through the links I have provided. The price you pay for the product or service is not higher but I may get compensated for sharing.
Posted on 3 Comments

Master Perfect Silhouette Cuts: Top Tips for Electrostatic Mat

Master the Silhouette Electrostatic Mat
Silhouette Secrets+ with EllyMae

As a paper crafter I am loving the Silhouette Electrostatic (ES) Mat! This new technology is pretty darn cool and not having to remove the cut pieces from an adhesive cutting mat can save time. Especially when cutting for large projects! In this post, I’m sharing more tips on having successful results when using the Silhouette Electrostatic (ES) Mat.

Affiliate links may be present in the following blog post and as an Amazon Associate, I earn from qualifying purchases.

How Does the Silhouette Electrostatic Mat Work?

When the electrostatic mat is turned on, a static charge is built up between the electrostatic mat and the protective sheet. This holds the protective sheet in place and materials can be placed on top of it. The charge then builds between the protective sheet and the material, which holds it in place while it’s being cut. Once the design is cut simply break that charge by either lifting the protective sheet off the ES Mat or turning the ES mat off. The charge will dissipate and the material can easily be removed.

The Silhouette Electrostatic Mat is an accessory that is compatible with the Silhouette Cameo 5 models or Silhouette Portrait 4. The Silhouette Curio 2 comes with the Electrostatic Mat.

What materials does the Silhouette Electrostatic Mat Work With?

Materials that are smooth and completely flat are going to work best with the Silhouette ES Mat. The material has to be able to build up that electrostatic charge and be held in place the entire time it’s being cut. Textured materials, “breathable” materials such as fabric, or curled materials are not going to work well because it cannot build up a charge to hold it in place.

I have cut vellum, copy paper, sticker paper, 65 lb cardstock, 85 lb cardstock, 110 lb cardstock, adhesive vinyl, and I’m sure I’m probably forgetting a few others in the past year that I’ve been testing it.

I did try a thicker cardstock by Bazzill which was their smooth cardstock and it cut, but it was not as clean of a cut as I prefer. However, I have had the same results when using Bazzil on an adhesive cutting mat too. Some cardstocks are just a bit more difficult to cut cleanly with the Silhouette. I tend to stay away from those for cutting projects, but they work well when cut with a paper trimmer.

Tips for Successful Cuts with the Silhouette ES Mat

While cutting pieces for demo projects for an upcoming class, I knew I wanted to share the tips I’ve learned during testing to achieve successful cuts. The best way to learn what works and what doesn’t is often through the failures encountered along the way. And even though I’ve been using cutting machines for many years, there are still failures along the way.

Check out the new video on the Silhouette Secrets+ YouTube channel where I am sharing a look at the cutting process and sharing things that work and things that don’t work.

Silhouette Cutting Secrets: Master the Electrostatic Mat video tutorial

Don’t forget to like, subscribe, and click the bell for notifications on the Silhouette Secrets+ YouTube channel!

A Closer Look at the Final Cuts

Silhouette Electrostatic Mat cutting cardstock leaves

It is so nice to just lift off the cardstock after the cut and see the pieces laying there.

Silhouette ES Mat Cutting Cardstock Flowers

You will start to see the pieces pile up on the right side of the photos as I share the progression.

Silhouette Electrostatic Mat cutting cardstock pink flowers

These projects and cuts can also be successful on an adhesive cutting mat, but it was so nice to just be able to slide the finished cuts off and be ready for the next sheet of cardstock.

Silhouette ES Mat cutting detailed details

Especially when you have a million tiny pieces like on these film strips!

In the video, I also show how my first attempt at cutting these film strips was not successful. I had the design placed too close to the edge of the cardstock and a piece lifted during the cut and it pretty much ate my cardstock. I simply unloaded the ES Mat, cleaned all the bits up, reset the machine, and then moved my design down on the design mat a little bit and sent it again to cut. Perfect cuts!

Silhouette Electrostatic Mat detailed cuts

Now, this design cut beautifully. The ring design is 2 pieces cut for a background. However, I did have to babysit it a little bit more as some of the cavities of the design would lift as it was being cut with the movement under the roller bar. I carefully removed the pieces as they were lifting during the cut and showed that in the video too.

Silhouette ES Mat cutting cardstock

All of these designs were created in the Silhouette Studio software from scratch for an upcoming class. The cutting process is a bit of the behind-the-scenes of that class creation. Watch the Upcoming Events tab or sign up for the Upcoming Craft Events emails and I’ll send an email direct to your inbox when new events open for registration.

Silhouette ES Mat Cuts

Sometimes, the cut won’t stay in place when the excess is removed. This can happen with smaller designs as there is a smaller surface area to hold the electrostatic charge in place.

Master Perfect Silhouette Cuts: Top Tips for Electrostatic Mat

  • the ES Mat needs a secure connection that is completely flat to connect to the Silhouette Cameo 5 or Portrait 4 machine
  • materials need to be completely flat to maintain the charge
  • designs placed too close the edges can cause cut issues and/or lifting which can affect cut results
  • test cut, test cut, test cut!
  • make sure ES Mat is turned on and remains on during the entire cut
  • you will make mistakes!
  • take time to practice

Silhouette Supplies

A Look at the Finished Projects

Card Design #1

Card Design by EllyMae

Card Design #2

Card Design #2 by EllyMae

Scrapbook Layout #1

Scrapbook Layout #1 by EllyMae

Scrapbook Layout #2

Scrapbook Layout #2 by EllyMae

I was having so much fun in designing for these class projects and love how they turned out.

I hope the tips help you to be successful with the Silhouette ES Mat!

Additional Resources on the blog:

Save this for future reference by pinning the image below.

Silhouette ES Mat Pin

Enjoy !

THANK YOU for your support! How can you help? Click HERE & buy a coffee.
Every little bit helps with the cost of running the site.

Silhouette Classes

Never stop learning! Let me help you take the anxiety out of learning with Silhouette and get to creating faster! My Silhouette classes are heavily focused on software, so you can take the skills & techniques taught and apply them to many future projects!

Silhouette step-by-step Classes by Silhouette Secrets+

Silhouette Secrets+ with EllyMae
**This post may contain affiliate links. What that means is that I may receive compensation if you purchase through the links I have provided. The price you pay for the product or service is not higher but I may get compensated for sharing.
Posted on Leave a comment

Silhouette Curio 2 Guide to Blades and Tools + Free PDF Chart

The Silhouette Curio 2: Blade & Tools Chart

Have you ever wondered what tools are compatible with the Silhouette Curio 2? The Silhouette Curio 2 flatbed cutting machine can use a few additional tools that are not designed for the Silhouette Cameo 5 models. Let’s take a look at those today!

Affiliate links may be present in the following blog post and as an Amazon Associate, I earn from qualifying purchases.

I have created a free PDF chart of all the tools that can be used in the Silhouette Curio 2 . This chart is available as a free download exclusively for confirmed newsletter subscribers.

Join the Newsletter

Subscribe to get our latest content by email.
    We respect your privacy. Unsubscribe at any time.

    I always recommend stocking up on extra blades and cutting mats to have on hand. It can be very frustrating to be in the middle of a project with a dull blade or and adhesive mat that is no longer sticky. It is also one of the fastest ways to rule out a cutting issue you might have.

    You can find blades & tools at Silhouette America, Crafter Cuts, or check out the other retailers in the Silhouette Secrets+ Recommended Retailers list HERE.
    *use code SECRETS at CrafterCuts to save 10% off supplies and free shipping on orders over $35

    For some of the specialty tools listed below I’ve also included links for tutorials and more information on their usage as well.

    Silhouette Blades

    Silhouette Autoblade Type B

    Silhouette Autoblade – Type B
    Carriage 1
    Used for paper, cardstock, sticker sheets, adhesive vinyl, HTV, Chipboard, Acetate, and select specialty materials.
    Materials under 1 mm thick
    Available at Silhouette America or Crafter Cuts
    *This is the blade I use most often. Most cut issues occurring with this blade can be fixed by following the steps in this video HERE – Troubleshooting Cut Issues


    Silhouette 1 mm Manual Blade
    Carriage 1
    Used for paper, cardstock, sticker sheets, adhesive vinyl, HTV, Chipboard, Acetate, and select specialty materials.
    Materials under 1 mm thick

    Silhouette 1 mm Manual Blade

    Silhouette 2 mm Manual Blade

    Silhouette 2 mm Manual Blade
    Carriage 1
    Used for paper, cardstock, sticker sheets, adhesive vinyl, HTV, Chipboard, Acetate, Craft Foam, and select specialty materials.
    Materials under 2 mm thick


    Silhouette 2 mm Kraft Blade – Type B
    Carriage 1
    Used for chipboard, acetate, craft Foam, leather, and select specialty materials
    Materials up to 2 mm thick
    *15+ Tips for using the Kraft blade found HERE

    Silhouette Kraft blade 2 mm - Type B

    Silhouette Adapter Set

    Silhouette Tool Adapter Set
    Carriage 1
    Adapters are color coded for specific blades/tools
    Black adapter = Silhouette blade (ratchet) & Premium blade
    White adapter = 2 mm Kraft blade
    Gray adapter = Deep Cut blade
    Blue adapter = Silhouette Sketch pens


    Silhouette Blade – often referred to as a “ratchet” blade but the official name is Silhouette blade
    Carriage 1 with black adapter
    Used for paper, cardstock, sticker sheets, adhesive vinyl, HTV, Chipboard, Acetate, and select specialty materials.
    Materials under 1 mm thick

    Silhouette ratchet blade

    Silhouette Premium blade

    Silhouette Premium Blade
    Carriage 1 with black adapter
    Used for paper, cardstock, sticker sheets, adhesive vinyl, HTV, Chipboard, Acetate, and select specialty materials.
    Materials under 1 mm thick


    Silhouette Deep Cut Blade
    Carriage 1 with gray adapter
    Used for paper, cardstock, sticker sheets, adhesive vinyl, HTV, Chipboard, Acetate, Craft Foam, and select specialty materials.
    Materials under 2 mm thick

    Silhouette Deep Cut blade

    Silhouette Kraft Blade 2 mm

    Silhouette 2 mm Kraft Blade
    Carriage 1 with white adapter
    Used for chipboard, acetate, craft Foam, leather, and select specialty materials
    Materials up to 2 mm thick
    *15+ Tips for using the Kraft blade found HERE


    Silhouette 3 mm Kraft Blade
    Carriage 2
    Used for chipboard, acetate, craft Foam, leather, and select specialty materials
    Materials up to 3 mm thick
    *15+ Tips for using the Kraft blade found HERE

    Silhouette 3 mm Kraft blade

    Silhouette Rotary Blade

    Silhouette Rotary blade
    Carriage 2
    Used for fabrics, crepe paper, felt, wool, and select specialty materials
    *Rotary Blade Tutorial HERE

    Additional Silhouette Tools

    Silhouette Pen Holder Type B
    Carriage 1
    Use with a variety of pen styles to sketch onto materials such as cardstock, paper, faux leather paper, etc.
    *Step-by-step Sketching Class HERE
    **More tutorials on sketching HERE

    Silhouette Pen Holder - Type B

    Silhouette Punch Tool

    Silhouette Punch Tool
    Carriage 2
    Used with adhesive vinyl or HTV to punch a hole to designate where to weed the material out.
    Also used with the Cameo 5 for etching on Silhouette metal sheets.
    *12+ Tips for Etching with the Silhouette Cameo 5 HERE


    Silhouette black bodied sketch pens
    Carriage 1 with blue adapter
    Used to sketch onto materials such as cardstock, paper, faux leather paper, etc.
    *Step-by-step Sketching Class HERE
    **More tutorials on sketching HERE

    Silhouette Sketch Pens

    Silhouette Pen Holder Type C

    Silhouette Pen Holder – Type C
    Carriage 2
    Use with a variety of pen styles to sketch onto materials such as cardstock, paper, faux leather paper, etc.
    Type C Pen Holder has a broader barrel on the end so you can use wider bodied pens and markers


    Silhouette Embossing Tool Set – Type C
    Carriage 2
    Embosses onto materials such as cardstock, embossable foil, etc.
    Set includes a fine and wide tip.

    Silhouette Embossing Tools

    Silhouette Heat Pen Set

    Silhouette Heat Pen Set – Powered Tool
    Carriage 2
    Applies foil transfer material to surfaces of many materials such as cardstock, faux leather, etc.
    Cordless design and powered by the Cameo 5 Tool 2 housing
    *Heat Pen Setup & Foiling tutorials HERE


    Silhouette Heat Pen Super-Fine
    Carriage 2
    Applies foil transfer material to surfaces of many materials such as cardstock, faux leather, etc.
    Cordless design and powered by the Cameo 5 Tool 2 housing
    0.5 mm Super Fine Tip


    Silhouette Power Engraver

    Silhouette Power Engraver
    Carriage 2
    Surface engraves on materials such as metal sheets, acrylic, etc.
    To be used with the Silhouette Curio Debris Tray
    *Beginner Acrylic Etching Class with Power Engraver HERE
    **Additional Silhouette Curio 2 Information HERE


    Silhouette Leather Punch Tool
    Carriage 2
    Powered tool to punch holes in compatible materials such as cardstock and leatherette.
    Not for use with real leather.
    To be used with the Silhouette Curio Debris Tray
    1 mm, 3 mm, and 5 mm Tip included
    Replacement tips are available for purchase.

    Silhouette Leather Punch Tool

    Additional Supplies

    There are a few additional supplies for use with some of the specialty tools listed above.

    Silhouette 12″ x 12″ Embossing Mat
    For use with the Silhouette Embossing Tools

    Silhouette Embossing Mat

    Silhouette Heat Transfer Foil

    Silhouette Heat Transfer FoilGold & Silver
    For use with the Silhouette Heat Pen Set
    2 heat foil rolls (3 in x 33 feet)
    *Heat Pen Setup & Foiling tutorials HERE


    Silhouette Curio 2 Debris Tray
    For use with the Silhouette Power Engraver


    Silhouette Electrostatic Protector Sheet

    Silhouette Electrostatic Protection Sheet
    12″ x 12″ – 2 per pack
    Protects the Electrostatic Bed from damage.

    Grab the free PDF chart of all the Silhouette Curio 2 tools for future reference when you subscribe to the Silhouette Secrets+ newsletter.
    *chart is the current tools available for the Silhouette Curio 2January 2024

    Join the Newsletter

    Subscribe to get our latest content by email.
      We respect your privacy. Unsubscribe at any time.

      Find even more information on the Silhouette Curio 2 HERE including an unboxing, setup, first cuts, and the Electrostatic Bed.

      Please let me know if you have any questions in the comments below.

      Save this for future reference by pinning the image below.

      Silhouette Curio 2 Blade and Tool Chart

      Enjoy !

      THANK YOU for your support! How can you help? Click HERE & buy a coffee.
      Every little bit helps with the cost of running the site.

      Silhouette Classes

      Never stop learning! Let me help you take the anxiety out of learning with Silhouette and get to creating faster! My Silhouette classes are heavily focused on software, so you can take the skills & techniques taught and apply them to many future projects!

      Silhouette step-by-step Classes by Silhouette Secrets+

      **This post may contain affiliate links. What that means is that I may receive compensation if you purchase through the links I have provided. The price you pay for the product or service is not higher but I may get compensated for sharing.
      Posted on 2 Comments

      A Guide to Silhouette Cameo 5 Blades and Tools + Free PDF Chart

      Let’s talk tools. Tools for the Silhouette Cameo 5 and Cameo 5 Plus model machines specifically in this post.

      Affiliate links may be present in the following blog post and as an Amazon Associate, I earn from qualifying purchases.

      With the release of the Silhouette Cameo 5, a couple new tools were released that can be used with the new machines. These include the Embossing tools, Heat Pen Set, and Pen Holder Type C.

      I’ve created a free PDF chart listing all the tools compatible with the Silhouette Cameo 5 and Cameo 5 Plus. This chart is available as a free download exclusively for confirmed newsletter subscribers.

      Join the Newsletter

      Subscribe to get our latest content by email.
        We respect your privacy. Unsubscribe at any time.

        I always recommend stocking up on extra blades and cutting mats to have on hand. It can be very frustrating to be in the middle of a project with a dull blade or and adhesive mat that is no longer sticky. It is also one of the fastest ways to rule out a cutting issue you might have.

        You can find blades & tools at Silhouette America, Crafter Cuts, or check out the other retailers in the Silhouette Secrets+ Recommended Retailers list HERE.
        *use code SECRETS at CrafterCuts to save 10% off supplies and free shipping on orders over $35

        Let’s take a look at all the blades and tools that can be used in the Silhouette Cameo 5. For some of the specialty tools listed below I have also included links for tutorials and more information on their usage as well.

        Silhouette Blades

        Silhouette Autoblade Type B

        Silhouette Autoblade – Type B
        Carriage 1
        Used for paper, cardstock, sticker sheets, adhesive vinyl, HTV, Chipboard, Acetate, and select specialty materials.
        Materials under 1 mm thick
        Available at Silhouette America or Crafter Cuts
        *This is the blade I use most often. Most cut issues occurring with this blade can be fixed by following the steps in this video HERE – Troubleshooting Cut Issues


        Silhouette 1 mm Manual Blade
        Carriage 1
        Used for paper, cardstock, sticker sheets, adhesive vinyl, HTV, Chipboard, Acetate, and select specialty materials.
        Materials under 1 mm thick

        Silhouette 1 mm Manual Blade

        Silhouette 2 mm Manual Blade

        Silhouette 2 mm Manual Blade
        Carriage 1
        Used for paper, cardstock, sticker sheets, adhesive vinyl, HTV, Chipboard, Acetate, Craft Foam, and select specialty materials.
        Materials under 2 mm thick


        Silhouette 2 mm Kraft Blade – Type B
        Carriage 1
        Used for chipboard, acetate, craft Foam, leather, and select specialty materials
        Materials up to 2 mm thick
        *15+ Tips for using the Kraft blade found HERE

        Silhouette Kraft blade 2 mm - Type B

        Silhouette Adapter Set

        Silhouette Tool Adapter Set
        Carriage 1
        Adapters are color coded for specific blades/tools
        Black adapter = Silhouette blade (ratchet) & Premium blade
        White adapter = 2 mm Kraft blade
        Gray adapter = Deep Cut blade
        Blue adapter = Silhouette Sketch pens


        Silhouette Blade – often referred to as a “ratchet” blade but the official name is Silhouette blade
        Carriage 1 with black adapter
        Used for paper, cardstock, sticker sheets, adhesive vinyl, HTV, Chipboard, Acetate, and select specialty materials.
        Materials under 1 mm thick

        Silhouette ratchet blade

        Silhouette Premium blade

        Silhouette Premium Blade
        Carriage 1 with black adapter
        Used for paper, cardstock, sticker sheets, adhesive vinyl, HTV, Chipboard, Acetate, and select specialty materials.
        Materials under 1 mm thick


        Silhouette Deep Cut Blade
        Carriage 1 with gray adapter
        Used for paper, cardstock, sticker sheets, adhesive vinyl, HTV, Chipboard, Acetate, Craft Foam, and select specialty materials.
        Materials under 2 mm thick

        Silhouette Deep Cut blade

        Silhouette Kraft Blade 2 mm

        Silhouette 2 mm Kraft Blade
        Carriage 1 with white adapter
        Used for chipboard, acetate, craft Foam, leather, and select specialty materials
        Materials up to 2 mm thick
        *15+ Tips for using the Kraft blade found HERE


        Silhouette 3 mm Kraft Blade
        Carriage 2
        Used for chipboard, acetate, craft Foam, leather, and select specialty materials
        Materials up to 3 mm thick
        *15+ Tips for using the Kraft blade found HERE

        Silhouette 3 mm Kraft blade

        Silhouette Rotary Blade

        Silhouette Rotary blade
        Carriage 2
        Used for fabrics, crepe paper, felt, wool, and select specialty materials
        *Rotary Blade Tutorial HERE

        Additional Silhouette Tools

        Silhouette Pen Holder Type B
        Carriage 1
        Use with a variety of pen styles to sketch onto materials such as cardstock, paper, faux leather paper, etc.
        *Step-by-step Sketching Class HERE
        **More tutorials on sketching HERE

        Silhouette Pen Holder - Type B

        Silhouette Punch Tool

        Silhouette Punch Tool
        Carriage 2
        Used with adhesive vinyl or HTV to punch a hole to designate where to weed the material out.
        Also used with the Cameo 5 for etching on Silhouette metal sheets.
        *12+ Tips for Etching with the Silhouette Cameo 5 HERE


        Silhouette black bodied sketch pens
        Carriage 1 with blue adapter
        Used to sketch onto materials such as cardstock, paper, faux leather paper, etc.
        *Step-by-step Sketching Class HERE
        **More tutorials on sketching HERE

        Silhouette Sketch Pens

        Silhouette Pen Holder Type C

        Silhouette Pen Holder – Type C
        Carriage 2
        Use with a variety of pen styles to sketch onto materials such as cardstock, paper, faux leather paper, etc.
        Type C Pen Holder has a broader barrel on the end so you can use wider bodied pens and markers


        Silhouette Embossing Tool Set – Type C
        Carriage 2
        Embosses onto materials such as cardstock, embossable foil, etc.
        Set includes a fine and wide tip.

        Silhouette Embossing Tools

        Silhouette Heat Pen Set

        Silhouette Heat Pen Set – Powered Tool
        Carriage 2
        Applies foil transfer material to surfaces of many materials such as cardstock, faux leather, etc.
        Cordless design and powered by the Cameo 5 Tool 2 housing – 1 mm & 2.5 mm tip
        *Heat Pen Setup & Foiling tutorials HERE

        Silhouette Heat Pen Super-Fine
        Carriage 2
        Applies foil transfer material to surfaces of many materials such as cardstock, faux leather, etc.
        Cordless design and powered by the Cameo 5 Tool 2 housing
        0.5 mm Super Fine Tip

        Additional Supplies

        There are a few additional supplies for use with some of the specialty tools listed above.

        Silhouette 12″ x 12″ Embossing Mat
        For use with the Silhouette Embossing Tools

        Silhouette Embossing Mat

        Silhouette Heat Transfer Foil

        Silhouette Heat Transfer Foil – Gold & Silver
        For use with the Silhouette Heat Pen Set
        2 heat foil rolls (3 in x 33 feet)
        *Heat Pen Setup & Foiling tutorials HERE


        Silhouette Electrostatic Bed
        Uses static electricity to hold materials in place while being cut with the Cameo 5 models
        *Tips for using the Silhouette Electrostatic Bed HERE

        Silhouette Electrostatic Bed

        Silhouette Electrostatic Protector Sheet

        Silhouette Electrostatic Protection Sheet
        12″ x 12″ – 2 per pack
        Protects the Electrostatic Bed from damage.

        There are a lot of options now available with the Silhouette Cameo 5 and Cameo 5 Plus.

        Grab the free PDF chart of all Silhouette Cameo 5 tools for future reference when you subscribe to the Silhouette Secrets+ newsletter.
        *chart is the current tools available for the Cameo 5 and Cameo 5 Plus January 2024

        Join the Newsletter

        Subscribe to get our latest content by email.
          We respect your privacy. Unsubscribe at any time.

          Find even more information on the Silhouette Cameo 5 HERE including an unboxing, setup, first cuts, and the Electrostatic Bed.

          Please let me know if you have any questions in the comments below.

          Save this for future reference by pinning the image below.

          Image of a tool chart for the Silhouette Cameo 5 and Cameo 5 Plus, featuring various cutting tools and their specifications, along with a 'Free PDF' label.

          Enjoy !

          THANK YOU for your support! How can you help? Click HERE & buy a coffee.
          Every little bit helps with the cost of running the site.

          Silhouette Classes

          Never stop learning! Let me help you take the anxiety out of learning with Silhouette and get to creating faster! My Silhouette classes are heavily focused on software, so you can take the skills & techniques taught and apply them to many future projects!

          Silhouette step-by-step Classes by Silhouette Secrets+

          **This post may contain affiliate links. What that means is that I may receive compensation if you purchase through the links I have provided. The price you pay for the product or service is not higher but I may get compensated for sharing.
          Posted on 2 Comments

          Silhouette Electrostatic (ES) Bed Tips

          The new Silhouette Electrostatic (ES) Bed for the Silhouette Cameo 5, Curio 2, and Portrait 4 model machines was announced and demonstrated at the Silhouette Summit in September 2023. It was pretty cool to see this new technology in action.

          Silhouette Cameo 5 Electrostatic Bed Tips

          Affiliate links may be present in the following blog post and as an Amazon Associate, I earn from qualifying purchases.

          I recorded the Electrostatic Bed demo from Silhouette Summit and shared it on the Silhouette Secrets+ YouTube channel HERE. I loved seeing everything first hand and in action at the Silhouette Summit!

          But, until you get the equipment in hand and start to use it, you never really know how it’s going to go. This is new technology and it does have to be set up properly. It is designed to work with thin, smooth materials that can maintain a charge between the ES bed and the material while it’s being cut.

          This was the first time in Silhouette’s history that they released the new machines and features at Silhouette Summit. Usually, in the past, there has been a 4-6 month gap between the announcement and when the new items are released.

          The Silhouette Curio 2 was available first and it comes with the Electrostatic (ES) Bed in the box. For the Silhouette Cameo 5 and Portrait 4 models, the Electrostatic (ES) Bed is an additional accessory that can be purchased separately.

          I received my Silhouette Curio 2 and immediately started testing and seeing what it could do. I have cut vellum, 65 lb. cardstock, 110 lb. cardstock, sticker paper, adhesive vinyl, and copy paper with the Electrostatic (ES) bed so far.

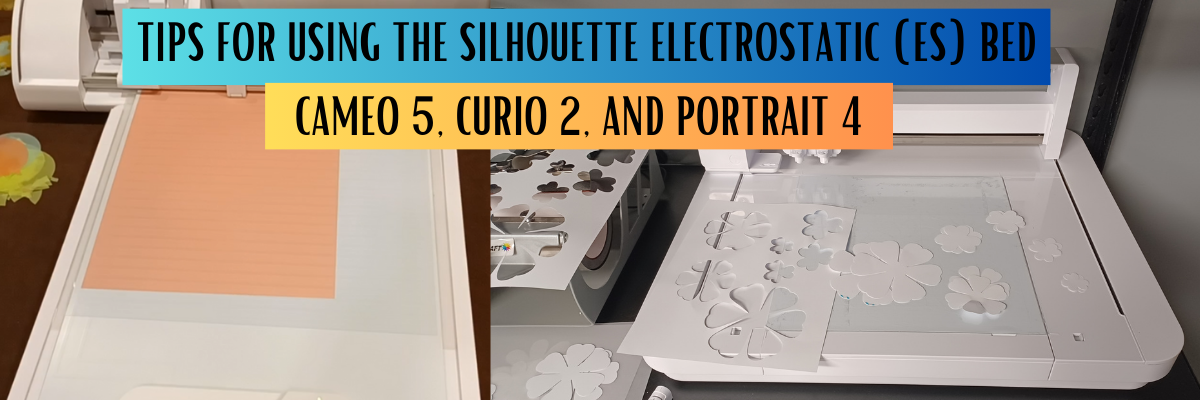
          Check out the video – Tips for Success with the New Silhouette Electrostatic (ES) Bed – Cameo 5, Curio 2, and Portrait 4 HERE.

          I share how you can be successful with the Electrostatic (ES) Bed. These tips will work for the Electrostatic (ES) Bed no matter which Silhouette machine model you are using it with. I’ve also included a few more tips down below this video in this post as well.

          Electrostatic (ES) Bed Tips

          1. The Electrostatic (ES) Bed is powered by the Silhouette machine.
            This is one reason that the Electrostatic (ES) bed is not compatible with older model Silhouette machines. The older machines do not have the technology in them to send power to the ES bed.
          2. The electrostatic charge has to be built up.
            The ES bed needs to be turned on to start building up the charge. It takes time, usually less than a minute for the electrostatic charge to build. It is not a slap it and go. You have to set it up properly for success!
            Place Electrostatic (ES) Protective Sheet on the Bed and smooth out any air bubbles. Make sure that the Electrostatic (ES) Bed has not turned off.
            In early versions of the software with the Silhouette Curio 2, the ES Bed automatically turns off after the cut and the user will need to turn it back on each time.
          3. Not all materials work with the Electrostatic Bed.
            Materials need to be completely flat and smooth to be able to hold and maintain the electrostatic charge. Textured materials will not work or maintain that charge to hold it in place while it’s being cut.
            Smooth materials down on top of the ES Protective Sheet and allow time to build the charge.
          4. Test the materials with your fingertips to see if the materials move. If it moves, it’s not ready. Start again & take the time to build the charge.
            If the charge is broken at any time while it’s being cut, it will be a lost cut.
          5. Keep the design away from the edges of the materials.
            If the cut goes over the edge of the material, it can break the electrostatic charge and the material may move.
          6. Not all designs will work well with this new technology.
            Keep in mind that the smaller the cut pieces are, the less surface area there is for the material to maintain the electrostatic charge. Pieces that are completely cut may move out of place. This may or may not affect the entire cut. If a loose piece of material gets stuck on the blade as it’s cutting, it may hinder the cutting of the blade.
          7. Get extra materials! It is going to take time and practice to learn a new skill and new equipment.

          Supplies used or mentioned in the video:

          And I have more tips!!!!

          Check out this video HERE to see how to install the Silhouette Electrostatic (ES) Bed on the Silhouette Cameo 5. The installation for the Silhouette Portrait 4 will be the same once the electrostatic bed is available.

          I will admit, this is pretty cool technology and not having to remove delicate materials from the adhesive cutting mat is pretty darn awesome!

          Will it work for every project? No!

          But it is definitely fun to play around with and see what can be done with it!

          Here are a few examples of projects I’ve done with the Silhouette Electrostatic (ES) Bed.

          Silhouette Curio 2 Electrostatic Bed Tips

          Koala sticker paper cut using the Silhouette Electrostatic bed. You can find the Silhouette Curio 2 Print and Cut with the ES (electrostatic) Bed HERE on the Silhouette Secrets+ YouTube channel.

          Silhouette Curio 2 Electrostatic Bed Cutting Cardstock

          Recollections 65 lb. cardstock 12″ x 12″ print and cut using the Electrostatic (ES) Bed. See this in action on this video Silhouette Curio 2 Print and Cut 12″ x 12″ with the ES Bed HERE.

          Vellum Flowers cut with the Silhouette Curio 2 Electrostatic Bed

          I cut & created these vellum paper flowers for the Silhouette Curio 2 – Out of the Box class where I share 3+ projects you can complete with the Curio 2 right out of the box. Find more details on that HERE.

          Silhouette Tips for Cutting Small Fonts & Designs

          This is an example of adhesive vinyl from a class I released called Easily Create Custom Gift Tags & Keepsake Ornaments in Silhouette found HERE. In the class I share a demonstration of cutting adhesive vinyl with the Curio 2 on the Electrostatic Bed.

          I also released a tutorial on Silhouette Tips to Cutting Small Fonts and Designs found HERE that can be applied to any Silhouette model machine you are using.

          Silhouette Curio 2 Electrostatic Bed cutting copy paper

          And here is one that I just completed this week cutting copy paper using the new IPT technology to cut 2 sheets that are stacked on top of each other. Yes, you read that right! Stacked materials cut at the same time with the Electrostatic Bed.
          I’ll be sharing more on that soon!

          I’ll be adding more information to the blog and Silhouette Secrets+ YouTube channel as I create projects and play with this new technology. Stay tuned for more!

          I hope those tips help you get started and creating with your new Silhouette model machines and the Electrostatic (ES) Bed.

          Save this for future reference by pinning the image below.

          Silhouette Electrostatic Bed Tips

          Enjoy !

          THANK YOU for your support! How can you help? Click HERE & buy a coffee.
          Every little bit helps with the cost of running the site.

          Silhouette Classes

          Never stop learning! Let me help you take the anxiety out of learning with Silhouette and get to creating faster! My Silhouette classes are heavily focused on software, so you can take the skills & techniques taught and apply them to many future projects!

          Silhouette step-by-step Classes by Silhouette Secrets+

          Silhouette Secrets+ with EllyMae
          Silhouette Secrets+ with EllyMae
          **This post may contain affiliate links. What that means is that I may receive compensation if you purchase through the links I have provided. The price you pay for the product or service is not higher but I may get compensated for sharing.
          Posted on 4 Comments

          Silhouette Cameo 5, Curio 2 & Portrait 4 – Care, Maintenance, and Storage Tips

          Affiliate links may be present in the following blog post and as an Amazon Associate, I earn from qualifying purchases.

          With the release of these new models of Silhouette machines – the Silhouette Cameo 5, Curio 2, and Portrait 4 – along with the new Electrostatic (ES) Beds – care and maintenance is going to be very important in the success and lifespan on your machines!

          We troubleshoot with thousands of users each week and we have seen some very dirty machines. This will affect the lifespan and usage of your Silhouette machines! There is no way to sugar coat that! Especially now with the new technology released.

          I’m sharing tips to the care, maintenance, and storage for the new Silhouette machines and accessories in this video – Silhouette Cameo 5, Curio 2, Portrait 4 – Care, Maintenance, and Storage Tips video on the Silhouette Secrets+ YouTube channel found HERE.

          Care, Maintenance, and Storage Tips

          The #1 biggest thing is to keep your machines clean and free of debris. Especially with the new powered tool housing and power plug on the Cameo 5, Curio 2, and Portrait 4. Any dirt or debris in that power housing plug and it can affect your results and success!

          I recommend keeping the lid on your machine for the Silhouette Cameo 5 and Portrait 4 closed when it’s not in use.

          A Silhouette machine dust cover is a great idea too, especially if you have a workspace that has a lot of particles in the air. The Cameo 4 dust covers fit nicely over the Cameo 5 machines. They are pretty similar in size, just a few differences in the design.

          With the Silhouette Curio 2, keep it free and clear of debris and materials in the way of the housing and channels on the machine. Any dirt, debris, or materials in the channels can interfere with the Curio 2 function and housing moving freely during use.

          I do not recommend storing anything on top of the Silhouette Curio 2 or it could affect the machine function.

          A can of compressed air or a keyboard air duster may be handy to have around to help keep debris off the machine as well.

          For my Curio 2 with acrylic etching/engraving, I’ve been using a handheld vacuum to help with the clean up after the etch.

          Silhouette Electrostatic (ES) Bed

          The Silhouette Electrostatic (ES) Bed is new! It’s awesome! Keep the boxes if you have not already thrown those away. The Electrostatic Bed should be stored completely flat and I do not recommend storing things on top of it.

          The Silhouette Electrostatic (ES) Bed is very specific in that it needs to be completely flat in order to function properly and maintain the charge. Any warping of the bed due to improper storage or materials placed on it over time, can affect the success of using it.

          Keep the boxes and packing materials for storage on the Silhouette Electrostatic (ES) Bed. This will be the best protection that you can use and you know it is stored safely when it’s placed back in the box with the packaging foam.

          Any damage to the Silhouette Electrostatic (ES) Bed and you will need to replace it. Improper storage of the bed is not a machine fault, but is the responsibility of the user.

          For information on how to install the Silhouette Electrostatic (ES) Bed with a Silhouette Cameo 5 click HERE.

          Silhouette Electrostatic (ES) Protective Sheets

          The Electrostatic (ES) Protective Sheets are a very important part of the ES bed as well! The Electrostatic (ES) Protective Sheets need to be store completely flat and kept flat for proper usage on the Electrostatic (ES) Bed. If they are not completely flat, the charge may not be able to build up properly and be maintained during the cut.

          I found 2 options for storing the Electrostatic (ES) Protective Sheets. Both are 12″ x 12″ scrapbook cases and fit the 12″ x 12″ Protective Sheets very well.

          Silhouette Power Tool Storage

          The new Silhouette Power Tools are a bigger tool housing than previous Silhouette tools. This means that they may not fit in the previous tool storage that a user had.

          The storage of these new power tools will be very important because you not only have to protect the Auto Tool Detection metal plate on the backside of the tool, but you also have a Power Plug on the backside of the tool that needs to be protected as well.

          I found a couple options for storage for the tools and they are customizable for what each user might need.

          The Options Grab-n-Go Storage worked great for the Silhouette 3″ foil rolls, the print and emboss squares & fasteners for the Silhouette embossing mat, and holding multiple tools. This is an “Option” that can grow with you.

          Look around your house and see if there is something you can repurpose for tool storage. You may already have an option that works for the tools you have!

          Non-power Silhouette Tool Storage Options

          This is the tool holder that I’ve been using for several years with the non-power Silhouette tools such as the Autoblade, Rotary blade, and Kraft blades. As you can see, I have gathered a selection of tools over the years as I’m writing tutorials and teaching classes.

          This tool holder has worked for me so far with the smaller blade housings.

          Additional Care Tips

          Keep the rollers clean of adhesive. The rollers of the Cameo 5 and Portrait 4 should not be rolling on the adhesive of the cutting mat or it can pick up adhesive residue and affect your future cut projects.

          All of these tips are 100% the user’s responsibility. You have invested in these machines and with proper care, use, and storage the Silhouette machines, tools, and accessories should work well for you.

          Find the new Silhouette model machines and accessories at CrafterCuts or SilhouetteAmerica.

          Save this for future reference by pinning the image below.

          Enjoy !

          THANK YOU for your support! How can you help? Click HERE & buy a coffee.
          Every little bit helps with the cost of running the site.

          Silhouette Classes

          Never stop learning! Let me help you take the anxiety out of learning with Silhouette and get to creating faster! My Silhouette classes are heavily focused on software, so you can take the skills & techniques taught and apply them to many future projects!

          Silhouette step-by-step Classes by Silhouette Secrets+

          **This post may contain affiliate links. What that means is that I may receive compensation if you purchase through the links I have provided. The price you pay for the product or service is not higher but I may get compensated for sharing.
          Posted on 4 Comments

          Silhouette Electrostatic Bed Installation & Tips – Cameo 5

          Affiliate links may be present in the following blog post and as an Amazon Associate, I earn from qualifying purchases.

          Silhouette Electrostatic Bed Installation & Tips

          New equipment is always fun to get to know and play around with. I will admit that when I opened the box for the Silhouette Electrostatic Bed, I had a bit of a questionable moment as I saw something in the box I didn’t know about.

          I had no idea what the “guard tape” was. There is an instruction sheet in the box. Make sure to keep the instructions, your box, and this guard tape for future use.

          I shared more information in the Silhouette Electrostatic Bed Installation & Tips – Cameo 5 video on the Silhouette Secrets+ YouTube channel found HERE.

          In this video I am using the following supplies:

          Find additional tips on using the Silhouette Electrostatic Bed HERE in the Tips for Success with the New Electrostatic (ES) Bed – Cameo 5, Curio 2, and Portrait 4 video on the YouTube channel.

          The Electrostatic Bed is awesome! I have loved creating with some delicate materials using it and can’t wait to share more!

          If you are a Silhouette Curio 2 owner, the Electrostatic Bed comes with the machine. Check out additional information on the Silhouette Curio 2 HERE.

          Save this for future reference by pinning the image below.

          Enjoy !

          THANK YOU for your support! How can you help? Click HERE & buy a coffee.
          Every little bit helps with the cost of running the site.

          Silhouette Classes

          Never stop learning! Let me help you take the anxiety out of learning with Silhouette and get to creating faster! My Silhouette classes are heavily focused on software, so you can take the skills & techniques taught and apply them to many future projects!

          Silhouette step-by-step Classes by Silhouette Secrets+

          **This post may contain affiliate links. What that means is that I may receive compensation if you purchase through the links I have provided. The price you pay for the product or service is not higher but I may get compensated for sharing.