
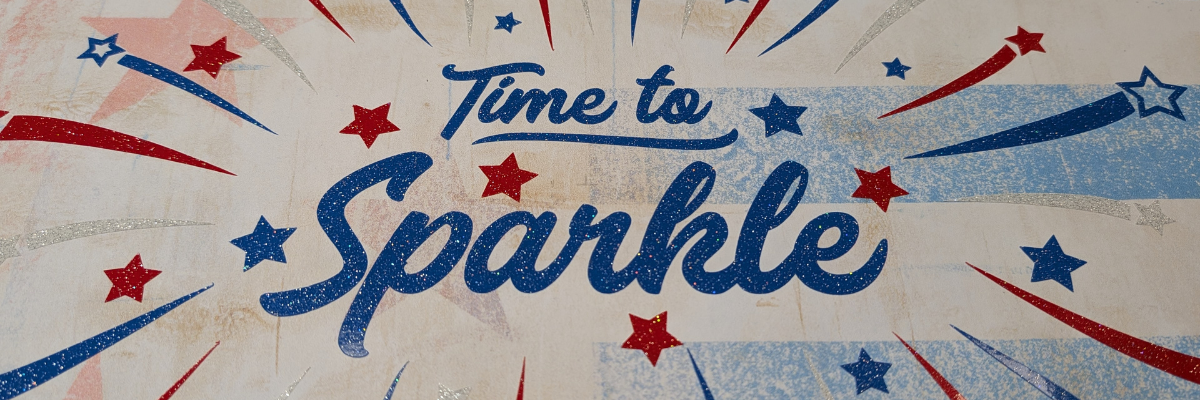

It’s Time to Sparkle! And use your designs for more than just 1 project. Clikchic Designs is this blog posts featured artist and I’m sharing several projects created with one of their designs. I have collected a lot of Clikchic Designs files and love seeing her process of creation. Did you know she creates her designs by hand? That may be one of the things that first caught my eye and made her designs stand out to me. She creates by hand and then digitizes her work to share with us. I am so inspired by her creations! Check out the end of this post for even more inspiration by Clikchic Designs!

Affiliate links may be present in the following blog post and as an Amazon Associate, I earn from qualifying purchases.
The Crafting Creativity series is designed exactly for sharing inspiration, designs, and showing how to make your designs go farther or think outside the box. Find more Crafting Creativity inspiration HERE.
Crafting Creativity with Clikchic Designs: Time to Sparkle
Crafting Creativity video preview of the projects created with Time to Sparkle by Clikchic Designs. Additional photos, details, tips, tutorials, and supply lists can be found by scrolling under the video.
Project #1 – 3-D Mixed Media Canvas
I am a Creative Professional with NAMTA and every year they host Creativation which is a large gathering of craft industry businesses, retailers, and brands from around the world. This year the Creative Professionals had the chance to display art in the entrance hall of the event. We were given the parameters of a 12″ x 12″ canvas and a red, white, and blue theme and told to create to share our skills and talents. I love to be able to make unique creations and start with something flat and give it dimension.

This project was several weeks in the making. I believe we found out we were going to do this in January or February with the conference happening in May. Once a topic is given to me my brain just starts with throwing out ideas. I try to keep a running list, usually in my phone, but often times I find a physical list in my creative journal is what really gets ideas flowing and allows me to narrow things down.

This is one of those projects that is built as it goes along and I continued to add things to it over the entire process.
Supplies Used:
- Silhouette Studio® Software
- Time to Sparkle by Clikchic Designs – Design #377930
- Silhouette Cameo, Silhouette Autoblade, Silhouette Cutting Mat
- 12″ x 12″ Canvas
- Mod Podge
- Mod Podge Sparkle
- Foam Brush
- Oracal 851 Glitter Adhesive Vinyl – red, blue, white
- AT65 Transfer Tape
- Red White and Blue Grunge Stars and Stripes Background by Clikchic Designs – Design #413762
- Red White Blue Grunge Stars and Stripes Background Pattern by Clikchic Designs – Design #413766
- Blue Grunge Coarse Linen Monoprint Background Pattern by Clikchic Designs – Design #393591
- Twinkly Stars Stencil by Uniquely Creative
- TCW Stencil Butter White
- White Cardstock
- Canon TS9521C Printer & Canon Ink
- Sparkler by Paper Beats Dynamite – Design #413610
- 4th of July Firecracker by Lori Whitlock – Design #412066
- Medium 3D Firecracker Box by Paper Closet Designs – #413718
- Glitter Cardstock
- Cardstock – colors of choice
- Bamboo Skewers
- Precision Glue Press
- Glue Gun
- Glue Sticks
- Acrylic Paint – colors of choice
- Embossing Ink Refill
- Embossing powder – red & black
- Star Banner created in Silhouette using Drawing Tools
- Twine
- Mini Stapler
- Beading Wire
- Beads – red, white, blue
Additional Resources:
- 3D Mixed Media Canvas Creation with Silhouette blog post
- 3D Mixed Media Canvas Creation with Silhouette creation video
- Sparkler Creation – Embossing Powder – reel on Instagram or Facebook
- Creativation 2026 – Creative Professional Canvas Wall Preview – reel on Instagram or Facebook
Project #2 – Sublimation Tumbler

I started by measuring the tumbler then drew a rectangle in Silhouette Studio for the template size. Then the process of filling the design with patterns began. After testing many options I decided I loved this pattern with the ombre blues and having the design in white.

I love how it turned out and now have another custom tumbler I can use.

Supplies Used:
- Silhouette Studio® Software
- Time to Sparkle by Clikchic Designs – Design #377930
- Blue Brushed Ombre Watercolor Background by Clikchic Designs – Design #385033
- Epson F170 Sublimation Printer
- Tex Print Sublimation Paper
- Heat Tape
- Sublimation Tumbler
- Craft Pro Tumbler Heat Press
Additional Resources:
- Easy Sublimation Projects for Beginners – Craft Pro Mug & Tumbler Press
- Pattern Fill Resources
- Sublimation & Silhouette Resources
Project #3 – Sketch and Cut Out Card Design
This card design was created by first setting the Time to Sparkle up for sketching and then cutting out the stars and swooshes from the card front.

This design works perfectly for a going away card, new adventure, best wishes, congratulations, and more!
I set the text to sketch and used a crosshatch sketch fill of 0.015″. Then used the “cut” by Line Color on the Send tab to tell it what action I wanted each line color to do.

After the sketching and the cut out was complete on the front of the card, I added a layer of glitter cardstock behind to give it more sparkle.
Supplies Used:
- Silhouette Studio® Software
- Time to Sparkle by Clikchic Designs – Design #377930
- Silhouette Cameo, Silhouette Autoblade, Silhouette Cutting Mat
- White Cardstock
- Glitter Cardstock
- Silhouette Pen Holder – Type B
- SoulBright Glitter Pen
Additional Resources:
Project #4 – Lighted Cake Topper
I added the Time to Sparkle design cut from glitter adhesive vinyl onto a clear transparency layer for this cake topper.

This design was created using the Draw Shapes tool in Silhouette Studio and creating several layers.

Supplies Used:
- Silhouette Studio® Software
- Time to Sparkle by Clikchic Designs – Design #377930
- Silhouette Cameo, Silhouette Autoblade, Silhouette Cutting Mat
- Cardstock
- Clear Acetate
- Fairy Lights on Remote
- Foam Tape
- Double sided tape
- Adhesive Tape Runner
- Gold Reflective Cardstock
- Bamboo sticks or acrylic sticks for easy clean up & reuse
- Cake – with the help of my youngest
I love how one design can be used to create so many projects. The possibilities are endless!
Featured Designer – Clikchic Designs
A great big THANK YOU to Clikchic Designs for collaborating for the Silhouette Secrets+ newsletter!
Find more designs by Clikchic Designs
Follow along with Clikchic Designs on her website, Facebook, and Instagram.
Here are a few Instagram links to get you started – make sure when you visit to like and leave a comment too! Creators love to hear from real people who enjoy their work.
Sign up for the Silhouette Secrets+ newsletter HERE so you don’t miss out on future collaborations.

Silhouette Secrets+ Newsletter
Never miss out on the news, tips, “secrets”, deals, classes, and more that I share on Silhouette Secrets+. Sign up for the newsletter and get information delivered to your inbox every Friday.
Unsubscribe at anytime.
One design can be used in so many different ways. If you’re looking for even more inspiration, tips, and creative project ideas, be sure to browse the Crafting Creativity section on the Silhouette Secrets+ website — click HERE to explore!
Save this for future reference by pinning the image below.

Enjoy !
THANK YOU for your support! How can you help? Click HERE & buy a coffee.
Every little bit helps with the cost of running the site.

Silhouette Classes
Never stop learning! Let me help you take the anxiety out of learning with Silhouette and get to creating faster! My Silhouette classes are heavily focused on software, so you can take the skills & techniques taught and apply them to many future projects!









