

This edition of Crafting Creativity is all about projects with a Monogram Font from Quietfire Designs. The Crafting Creativity series focuses on using your designs to create more! More possibilities, more ideas, more crafting! This month’s feature is a Big Snowflake Monogram Font by Quietfire Designs and has so many options that include unique snowflake letters, but also 3 additional snowflake designs with alternate keystrokes.

Affiliate links may be present in the following blog post and as an Amazon Associate, I earn from qualifying purchases.
The Crafting Creativity series is designed for sharing inspiration, designs, and showing how to make your designs go farther or think outside the box. Find more Crafting Creativity inspiration HERE.
Crafting Creativity with QuietFire Designs
Crafting Creativity video preview of the projects created with Big Snowflake Monogram Font by Quietfire Designs. Additional photos, details, tips, tutorials, and supply lists can be found by scrolling under the video.
Project #1 – Shaped Edge Monogram Card – 2 Ways
I used the letter H monogram from the Big Snowflake Monogram Font and created a side fold and a top fold shaped edge monogram card. Plus, the way the font is created, you end up with a snowflake design cut from the middle that can be used for another project too!

Here is a look at the design file in Silhouette Studio as I was creating these cards.

And I have a YouTube video showing you exactly how I created both of these cards in the Silhouette Studio software on the Silhouette Secrets+ YouTube channel. Watch it below or direct on YouTube.
Supplies Used:
- Silhouette Studio software
- Silhouette Cameo, Autoblade, and Cutting Mat
- QFD Big Snowflake Monogram Font
- Shimmer Cardstock – blue & white
- Precision Glue Press
- Silhouette Tool Kit
Additional Resources:
- How to Install Fonts in Silhouette – written tutorial
- Step-by-Step Guide: How to Install Fonts for Silhouette – video tutorial
- Troubleshooting Fonts in Silhouette Studio | Rectangles, Missing Fonts & Fixes video
Project #2 – Snowflake Ornament and Monogram Ornament
For this project, I used the Big Snowflake Monogram font added an offset and a small circle at the top to create an ornament design. I then exported the design as a SVG file to use with my laser machine.
I originally was just going to do the monogram ornament and then the snowflake jumped in the projects too! In this monogram font, the comma, period, and question mark all create a design too!

And then with a bit of wire bending and wrapping created 2 beaded ornament hangers. You could also use craft twine or premade ornament hangers too!
Don’t have access to a laser? No problem, you could also create ornaments out of many other different materials such as adhesive vinyl, cardstock, HTV, fabric, etc.
Supplies Used:
- Silhouette Studio software – Business Edition
- QFD Big Snowflake Monogram Font
- Wood for laser
- Glowforge Laser machine
- 20 gauge Wire
- Beads
- Jewelry Pliers
- Optional: Ribbon, twine, ornament hangers, etc.
Additional Resources:
Project #3 – Snowflake Shaker Cards
Have you ever created a shaker card? While they may look intimidating, they can also be made very simply too!
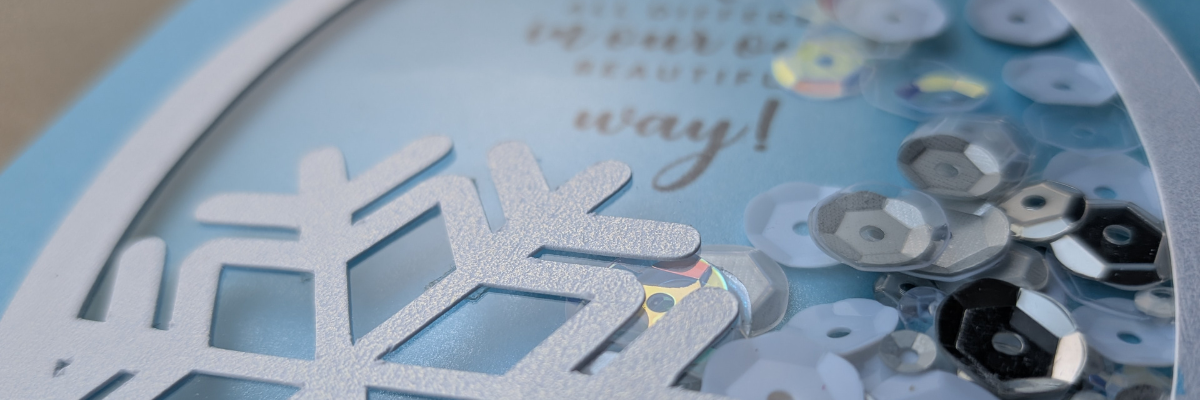
The Big Snowflake Monogram font has the options that the keystrokes of a comma, period, and question mark all give a different snowflake design.
To create this shaker card, I started by creating the background of the card with a printed sentiment. I could print 4 – 4.25″ x 5.5″ card designs on one letter size sheet of paper.

I printed this on a blue shimmer paper and then took my paper trimmer and cut it apart.
Then I took one of the snowflakes and welded it to an oval frame.

I then cut the outer oval from a sheet of clear acetate/transparency film.

Glue the acetate directly behind the frame and then add foam tape to create the “pocket” for the shaker and ta-da – you have a shaker card. I love how it turned out and now have 4 cards created in a short amount of time.

I share exactly how I created these shaker cards in this video tutorial on the Silhouette Secrets+ YouTube channel. Watch below or direct on YouTube.
Supplies Used:
- Silhouette Studio software
- Silhouette Cameo, Autoblade, and Cutting Mat
- QFD Big Snowflake Monogram Font
- Beautiful Snowflakes Quote by Echo Park – Design #311329
- Shimmer Cardstock
- White Cardstock
- Foam Tape
- Shaker bits
- Transparency
- Double sided tape
- Precision Glue Press
Additional Resources:
Project #4 – Custom Snowflake Ornaments, Gift Tags, or Bag Tags
These acrylic etchings could be used for bag tags, gift tags, or ornaments. It can be an embellishment for a gift given or the gift itself.
I used the Silhouette Curio 2 and the Power Engraver to etch 3″ acrylic rounds.

What a great way to personalize a gift and make it unique! I added some wooden beads on twine and made it even more personalized too. You could also match the colors to the gift wrap or bag too!
Now, what if you don’t have the Silhouette Curio 2? Well, maybe it should be on your wish list or…
Use the same idea but cut adhesive vinyl and apply it to an acrylic round instead.
And if you do start making stuff for the holidays, make sure you put it in a place you will remember where to find it. I cut out a vinyl decal and added it to a box so I can continue to add things like Christmas cards and decor to the box and hopefully it doesn’t get lost in a “safe” space when I need it.

Supplies Used:
- Silhouette Studio software
- Silhouette Curio 2, Silhouette Autoblade Type B, Silhouette Cutting Mat
- Silhouette Power Engraver Tool
- Silhouette Curio Debris Tray
- QFD Big Snowflake Monogram Font
- Acrylic Rounds
- Cardstock
- Washi Tape
- Wooden Beads
- Craft Twine
Additional Resources:
- Silhouette Curio 2 Resources
- Silhouette Curio 2 Playlist on YouTube
- Silhouette Curio 2 Etching Acrylic Class
- Silhouette Curio 2 Classes
Project #5 – Custom Snowflake Monogram Glass Etched Decor
This design is the perfect design to use to create and customize gifts. I used it to create a stencil and then etched a monogram onto a glass container for a family friend.

This could be used as a candy or treat dish, candle holder, or a variety of other ideas. And it hardly cost anything to make. I used a piece of scrap adhesive vinyl from my stash and the container is from the Dollar Tree.
This glass container has a bit of a conical shape on it, so I used the Conical Warp tool to help in creating the stencil so it would lay flatter and not have any buckles in the design.
I shared this technique in the March Crafting Community exclusive tutorial when I made the etched martini glasses.

If you are a current subscriber, make sure to check it out in the Creative Community forum!
Not a member? Find out more details on the Creative Community HERE.
Find more details on this glass etching project in the blog post – Custom Etched Monogram Gifts & Decor with Glass Etching

Supplies Used:
- Silhouette Studio software
- Silhouette Cameo, Autoblade, and Cutting Mat
- QFD Big Snowflake Monogram Font
- Adhesive vinyl for stencil
- AT65 Transfer Tape
- Etchall Etching Crème
- Popsicle/craft stick
- Painters Tape
- Spatula
- Paper Towels
- Silicone Mat
Additional Resources:
So many options with one design! And with this monogram font you have endless possibilities on how you can customize and make unique, personalized gift ideas too!
Featured Designer – Quietfire Designs
A great big THANK YOU to Quietfire Designs for collaborating for the Silhouette Secrets+ newsletter!
Find more designs by Quietfire Designs
- Quietfire Website
- Quietfire School
- Quietfire in the Silhouette Design Store
- Quietfire at Cricut Design Space
Follow along with Quietfire Designs on Facebook, YouTube, and Instagram.
Sign up for the Silhouette Secrets+ newsletter HERE so you don’t miss out on future collaborations.

Silhouette Secrets+ Newsletter
Never miss out on the news, tips, “secrets”, deals, classes, and more that I share on Silhouette Secrets+. Sign up for the newsletter and get information delivered to your inbox every Friday.
Unsubscribe at anytime.
For even more inspiration, tips, and creative project ideas, be sure to browse the Crafting Creativity section on the Silhouette Secrets+ website — click HERE to explore!
Save this for future reference by pinning the image below.

Enjoy !
THANK YOU for your support! How can you help? Click HERE & buy a coffee.
Every little bit helps with the cost of running the site.

Silhouette Classes
Never stop learning! Let me help you take the anxiety out of learning with Silhouette and get to creating faster! My Silhouette classes are heavily focused on software, so you can take the skills & techniques taught and apply them to many future projects!


**This post may contain affiliate links. What that means is that I may receive compensation if you purchase through the links I have provided. The price you pay for the product or service is not higher but I may get compensated for sharing.
Discover more from Silhouette Secrets-Swift Creek Customs
Subscribe to get the latest posts sent to your email.









