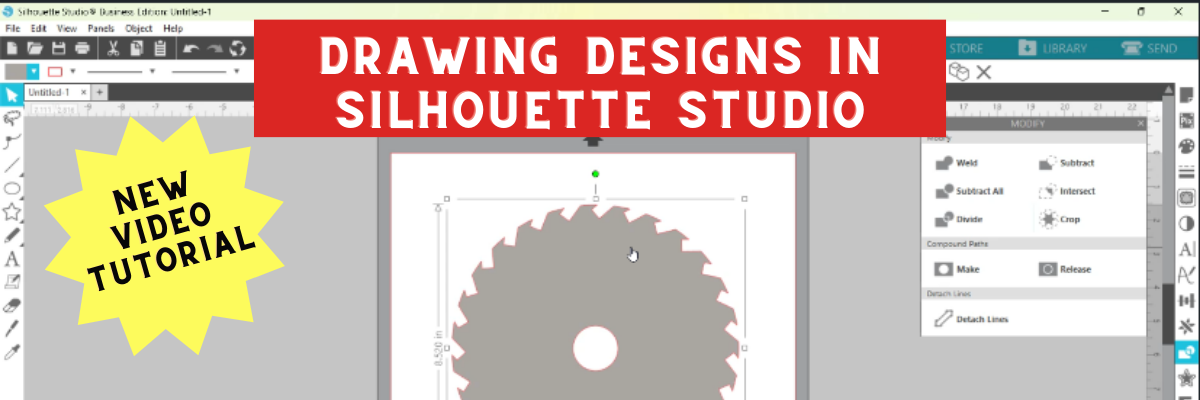
This past week there was a question on my Silhouette Secrets+ Facebook Group and I was working on my computer so did a quick video tutorial on how they could accomplish the design they wanted. Several asked if there was a way to save that video so I re-recorded it and put it up on the Silhouette Secrets+ YouTube Channel.
While the video shows how to create a saw blade because that was what the user was asking, the techniques could be used to create all kinds of designs from wreaths, frames, and so much more!
And check out the A to Z Silhouette Resource tab at the top of the website as well. You can search for any tool or keyword for Silhouette in alphabetical order.
If you are looking for step-by-step classes for Silhouette, check out all my Silhouette classes on Teachable HERE.
Save this for future reference by pinning the image below.
Enjoy !
THANK YOU for your support! How can you help? Click HERE & buy a coffee. Every little bit helps with the cost of running the site.
**This post may contain affiliate links. What that means is that I may receive compensation if you purchase through the links I have provided. The price you pay for the product or service is not higher but I may get compensated for sharing.
Are you a Silhouette owner and just got a new computer? Not sure where to go from there?
It is pretty easy to get setup and running with a new computer and I’m going to share a few tips.
First when you get a new computer, be prepared that it will take a little bit for it to be ready for you to start using. There will be some computer setup instructions for you to follow. And if you are a Windows owner, you may find that you have a lot of Windows updates that need to install in order to get it ready for use. Be patient and let it setup correctly. I know you are excited, believe me, I always am too! But, there really is no rushing it. The updates will finish when they finish.
Steps to Setting Up a New Computer with Silhouette Studio
Below I’m going to list the steps to start with when setting up a new computer with Silhouette Studio. Each step in this process has some tips that can help you get set up faster and I’ve included important information in detail below. I would highly recommend reading the entire post before you get started.
1 – Download Silhouette Studio from the Silhouette America website 2 – Activate Software Upgrades 3 – Log in to the Silhouette Library 4 – Install Fonts 5 – Export User Designs
IMPORTANT TIPS!
1. Silhouette Studio Software Installation
When you get a new computer, you will first need to download the software on to the new computer. This can be found on the Silhouette America website. Click on Software & then Get Software
For the Silhouette cutting machines, you will select the Silhouette Studio option.
For the current version of the software, you simply click Download and it will download the current version to your computer. It is the Basic software program. We will talk about upgrade activation further down.
Note: As of the publication date of this post, I DO NOT recommend the current version unless you have a Silhouette Auto Sheet Feeder to use. I would highly recommend v4.4.554 for most users.
Legacy Versions
To find Legacy versions click on Learn More
Click on Download Legacy Versions
Choose which Legacy version you want to install
This will download the installer to your computer and you will open that to start the installation.
Click HERE to go directly to the Software download page.
There may be some pop ups that come up that need approval in order to proceed. Watch the bottom task bar for any flashing shields if the pop up doesn’t actually pop up.
If a flashing shield appears, click on it and then approve ALL the pop ups. If you do not click on the shields to approve, it will look like it stalled, but it is waiting on you!
Once the installation is complete, you can open the Silhouette Software.
If by chance you have a new Windows Computer and it is running in S mode, it will not let any program that is outside of the Microsoft Store install on the computer. You will need to take it out of S mode in order to install any programs, including the Silhouette software. For more information on how to take it out of Windows S mode click HERE.
2. Activate Silhouette Studio Upgrade
Affiliate links may be present in the following blog post and as an Amazon Associate I earn from qualifying purchases.
Silhouette software upgrades include Designer Edition, Designer Edition Plus, and Business Edition. These upgrades unlock features that are in the software. To see what each upgrade unlocks, click the Feature Comparisons to find out more information. Find this HERE
This will bring up a chart you can scroll down through to see what features are with each upgrade.
If you are using a software version of v4.4.554 or higher, you do not need to enter your upgrade codes in the software. Click on Help – Apply Upgrade Edition and enter your log in information. Do NOT enter your upgrade codes. Once you log in with your Silhouette account info, your upgrade should be active on any computer you log in to.
This is a new feature and is only available in software versions of v4.4.554 or higher. The upgrade can only be active on 3 computers at a time. If you log into a 4th computer, it will deactivate on the oldest computer that has not been active.
For older software, software upgrades do not automatically activate when you download the Silhouette software to a new computer. If you have ever entered an upgrade code, you will need enter the upgrade codes in the order that you purchased them for it to activate on the new computer. So if you purchased the Designer Edition and then the Business Edition later, you would need to enter the code for Designer first and then Business next. If you try to enter Business Edition first, you will get an error and it will not activate.
If you are a brand new user, there is a new system that is in process and you can activate the upgrade on the Silhouette America website to be used on any computer you log into. This is still very new and only available for those that are brand new and have never entered an upgrade code as of 10/15/21.
If you do not remember what the codes were, you can easily access them under your Silhouette account information in the Silhouette Design Store. Open the Silhouette Design Store, make sure you are signed in, move the mouse over the person icon in the top right corner, and then choose Account Settings.
Then click on the License Keys section.
3. Log in to the Silhouette Library
Once the software is open, click in the top right corner on the Library tab.
Enter your Silhouette Account information and all of the files that are in the Silhouette Cloud should Sync up. It will depend on how many files you have in your Silhouette library on how long it will take to fully sync. Another hurry up and wait moment.
As a point of reference, I have high speed internet and 12,000+ files. This took approximately 3 hours to sync my library completely. Keep in mind that each of those files has to sync fully to the new computer. That is a LOT of data, but just depends on how many files you have in the library.
Plug in Silhouette machines to computer & turn on
If you have an older model Silhouette machine of a Cameo 3 or older, the free files download to the library once the machine is recognized. Plug in the Silhouette machine, turn it on, and click on the Send tab. Once it has recognized the machine, then the files will download to the library. You will need to do this for ALL machines that you have had plugged into your software to get those free files to download.
If you have multiple machines, click on the little machine icon in the bottom right corner of the Send tab to choose the machine you want active.
This will also unlock any panels that are associated with a particular machine such as the Emboss Panel for the Curio or the Stipple Panel for the Cameo 4, Cameo 3, Portrait 2, and Curio machines.
Exporting files on old computer
Note: this is only needed if files cannot be recovered in another way
If there are files that did not show up when you logged in and the library synced, the first reason would be they are the free with machine and I would suggest looking at the above information again. If you have done that, then it could be because those files were only stored on the Local User section of the old computer. This will be dependent on the Silhouette software version you were using before. If you were using a version prior to v4.1, you will find more tips on exporting the library in this post – Library Tips (v4.1).
If you have a library backup file, it can then be imported into the Silhouette library by clicking on your name in the top left of the Library and choose Library Import, then select the location of the file backup.
Screenshot from v4.4.892
But this only needs to be done if files are missing and you cannot get them to sync up any other way. If you do it and it’s not needed, you can end up with many duplicate files, which you’ll need to remove manually.
4.Install fonts on the new computer
Keep in mind that when you set up a new computer, you are starting from scratch. That means you will need to install any program or file that you were using on the old computer, if you want it on the new computer. This includes fonts. The new computer comes loaded with the default fonts only and these can vary by computer.
While I have heard of others being able to copy and paste the entire font file from their computer programs folders on the old computer and then pasting it into the new computer fonts folder, I have had mixed results with this. I had to right click on the font and choose “Install for All Users”.
Luckily, I had saved all my font files that I’ve collected onto a folder in my external hard drive, so I could access them direct from the external drive. While I still had to install over 500 fonts, I did get to also pick and choose which ones I really “needed” on the new computer.
I have had several new computers in the last few years and on one I had to install each font and on the other, some worked by copy and paste.
BIG TIP TO NOTE: If you created designs using certain fonts, when you open the design file, if that font is not installed on the computer you are using to open the file, the font will revert to the default font style on that computer.
5. Export User Designs from Silhouette Library
If you have downloaded the current version or a version higher than v4.4.552, there is also a new feature that allows you to export all User Designs from the library as individual files.
Click on your name in the top left corner of the library tab and choose Export User Created Designs.
For more details on this specific features, check out this post HERE
While I do NOT recommend storing your personal files in the Silhouette library, there are times that it is handy when you are accessing files on multiple computers or using Pattern Fills in the Silhouette software.
One big thing to note
when exporting these User Designs is that it will export the entire library folder structure. However, any designs from the Silhouette Design Store, the folders will be empty. Only the user created designs will be exported. This is due to the proprietary nature of the .studio files and to protect the designers of those files from theft.
I would HIGHLY recommend using this export feature when you update to the software of v4.4.552 or higher because it is a really nice feature. However, as a general note, I do not recommend that all users update to this version or higher. There are many factors that I consider before advising a user on whether they should update. It really comes down to the user’s choice, however, before I make a recommendation I do ask for more information. If you would like to know what I’d recommend for your situation, feel free to post on the Silhouette Secrets+ with EllyMae Facebook group and we can take a look at the factors.
Keep in mind that the Silhouette library is not designed as an all inclusive storage area but as a syncing device. This is one reason the Silhouette cloud storage is limited in size. All users get 1 GB of storage space, but if you are a Silhouette Club Member or a Silhouette Design Store Subscriber, you get 5 GB of storage.
————
I hope this helps you start enjoying that new computer and your Silhouette software a little bit quicker! The biggest tip I can say is to be patient! I am not the most patient person when it comes to setting up a new computer, but if I tell myself that in the beginning sometimes it helps.
We love seeing what you are creating with your Silhouette machines or software. Feel free to post photos or questions on my Facebook group at Silhouette Secrets with EllyMae.
Save this for future reference by pinning the image below.
Enjoy !
THANK YOU for your support! How can you help? Click HERE & buy a coffee. Every little bit helps with the cost of running the site.
Or if you are looking for more in-depth, step-by-step classes, check out all of my online Silhouette classes on my Teachable site HERE.
**This post may contain affiliate links. What that means is that I may receive compensation if you purchase through the links I have provided. The price you pay for the product or service is not higher but I may get compensated for sharing.
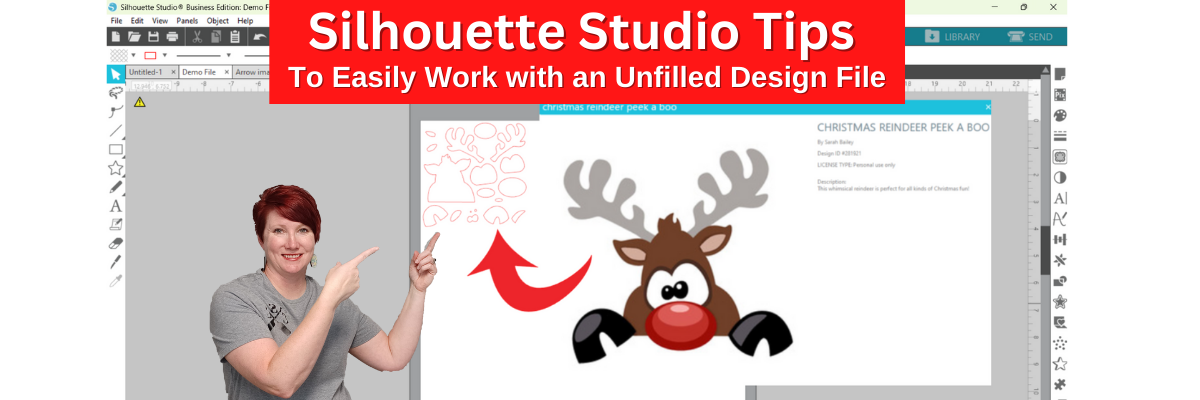
Have you ever opened up a design file and it was not filled with color or did not look like the thumbnail image of the design?
Today I’m sharing a quick video tutorial on the Silhouette Secrets+ YouTube channel on how you can easily work with these types of files and why they may open like this.
Share below what projects you are working on currently!
I would love to see what you are creating with your Silhouette software or machines! Feel free to post on my Facebook group at Silhouette Secrets with EllyMae.
Save this for future reference by pinning the image below.
Enjoy !
THANK YOU for your support! How can you help? Click HERE & buy a coffee. Every little bit helps with the cost of running the site.
Or if you are looking for more in-depth, step-by-step classes, check out all of my online Silhouette classes on my Teachable site HERE.
**This post may contain affiliate links. What that means is that I may receive compensation if you purchase through the links I have provided. The price you pay for the product or service is not higher but I may get compensated for sharing.
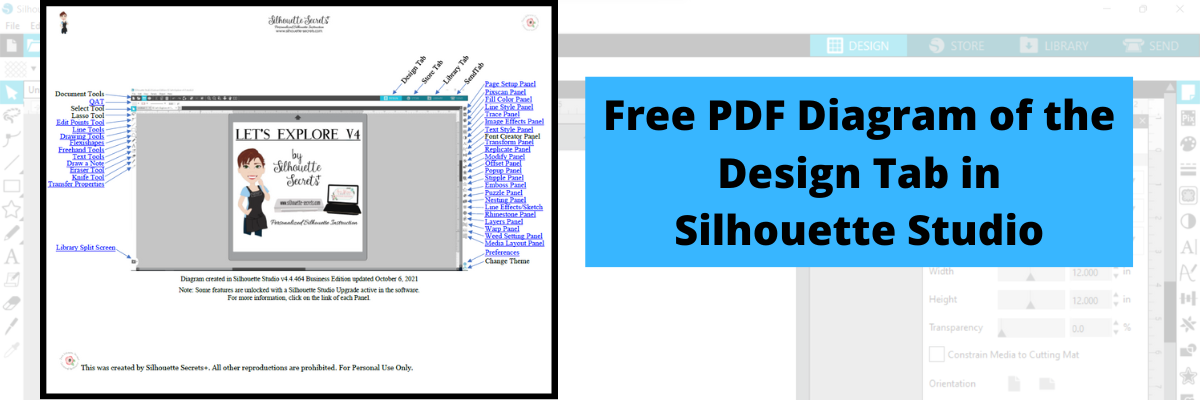
Download this to your computer and open it. Then click on the blue links to be taken to more in-depth information on each of the tools or features.
Print it for a visual reference while working in the software too!
Grab the free PDF file HERE or click the image below.
I have had many comment with feedback that this is very helpful to them when getting familiar with the Silhouette Studio v4 software. All of the information provided is part of the “Let’s Explore v4 series” on the blog HERE.
We love seeing what you are creating with your Silhouette machines or software. Feel free to post photos or questions on my Facebook group at Silhouette Secrets with EllyMae.
Save this for future reference by pinning the image below.
Enjoy!
THANK YOU for your support! How can you help? Click HERE & buy a coffee. Every little bit helps with the cost of running the site.
Or if you are looking for more in-depth, step-by-step classes, check out all of my online Silhouette classes on my Teachable site HERE.
**This post may contain affiliate links. What that means is that I may receive compensation if you purchase through the links I have provided. The price you pay for the product or service is not higher but I may get compensated for sharing.
I love being able to recreate just about anything in the Silhouette Studio software!
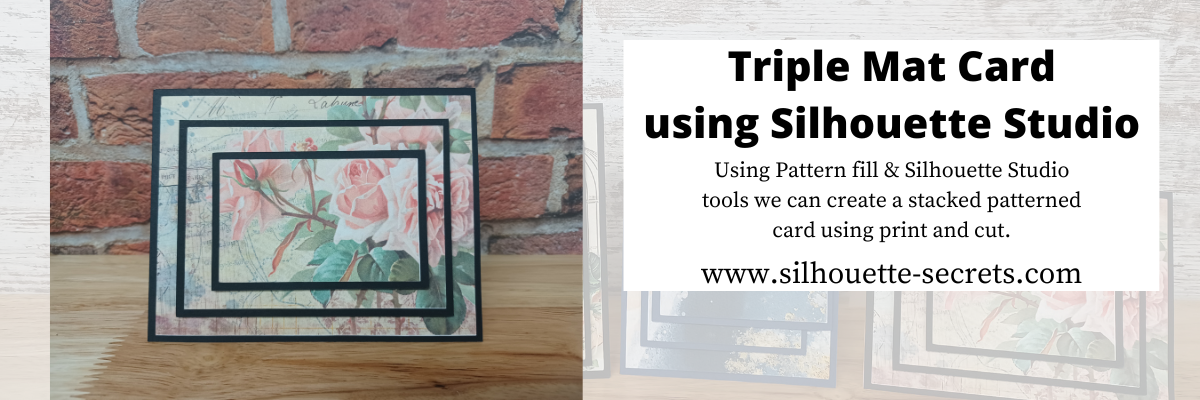
I’ve seen the triple mat technique in the stamping community for many, many years and even created cards with stamps using this same effect. Today we are going to take a look at how we can easily recreate this look with any pattern in the Silhouette Studio software.
First, a great big Thank You to Teresa P. for inspiring and helping with this tutorial.
I also have a video tutorial on my YouTube channel HERE.
Blue words in this tutorial are linked to more information on that particular topic. Click on the word and it will open a new window with a tutorial on that subject.
Creating a Triple Mat Card with Silhouette Studio
Open Silhouette Studio and set up the Page Setup Panel. Select Letter size media or the size page you will be printing on. Select Portrait Orientation. I have the best results with print and cut on Portrait orientation.
I will be using a standard U.S. card size in the tutorial, however, you can adjust this to your desired card size. Create along with me for the technique and then play around with the sizes you normally create a card in.
Using the Drawing Tools on the left side, draw a rectangle any size.
Make a copy of the rectangle. There are about 10 different ways (or more) to copy and paste in the Silhouette Studio software. A couple are Ctrl+C and Ctrl+V, right click choose copy & paste, or right click and choose duplicate. My favorite shortcut is to hold down the Alt key (Option on a MAC) then move the mouse over the red cut line and the cursor changes to a +. Left click on the mouse and drag a copy away.
Resize the 2nd rectangle to 5.25″ W x 4″ H.
Do this 4 more times and resize each rectangle as shown below.
Rectangle Copy 3 – 4.5″ W x 3.25″ H Rectangle Copy 4 – 4.25″ W x 3″ H Rectangle Copy 5 – 3.5″ W x 2.25″ H Rectangle Copy 6 – 3.25″ W x 2″ H
You should end up with 6 rectangles all at different sizes that will make up the stacked technique.
Select Rectangle #1, hold the Shift key down and click Rectangle #3 & #5 to select them all at once. Move those off the design mat area to the gray holding area. Next, with all 3 selected, fill those with black using the Fill Color in the QAT or the Fill Color Panel on the right side. These are the mats that will be cut out of black cardstock or any other color you desire.
With the 3 rectangles centered and selected, right click and choose Make Compound Path. Compound paths are one of the most difficult concepts for a Silhouette user to understand. However, in this case, we are using the Compound Path option in a little bit different way. Check it out below.
Next, click on the Show/Hide Library option in the bottom left corner.
This opens up a split screen of the Library and the Design tab.
Click on the Patterns folder in the library.
Affiliate links may be present in the below and as an Amazon Associate I earn from qualifying purchases.What that means is that I may receive compensation if you purchase through the links I have provided. The price you pay for the product or service is not higher but I may get compensated for sharing.
Now, it may look a bit odd right now, but hang tight and you’ll see the magic happen on the screen.
Click the Show/Hide library button to close the split screen library.
Now, we can adjust the pattern a bit before we move on. Open the Fill Color Panel and click on the 3rd tab at the top. Then click on the Advanced section to open up more options.
Under the Advanced section, you can Scale the pattern up and also Pan the pattern around. Just be careful to watch for white lines to appear as the pattern is “tiled”. The white lines indicate the edge of the pattern page. If you see those on the screen, it will print that way as well.
Adjust the settings to your liking.
Now, are you ready for the magic?
Right click on the rectangles and choose Release Compound Path.
Ta-da! Move the rectangles away and you can see that the pattern fill is now in all 3 rectangles in the exact location that it was when it was stacked together.
What a nifty little trick!
Now that we have our card design, it’s time to set up the print and cut.
Open the Page Setup Panel & make sure the page is setup properly if needed. Choose Letter size (or the size you are printing on). Choose Portrait Orientation.
Then click on the Tab 3 at the top of the Page Setup Panel for the Registration Marks. Choose On. Click the Restore Defaults button. *This is an important step if you have ever had issues with print and cut or are just getting started. The default registration marks are where the machine can read the most accurately.
Arrange the designs on the page within the red cut border and stay away from the cross-hatched area. If needed, use the Transform Panel – Rotate Tab to rotate the design to fit within the red cut border of the print and cut page.
The cross-hatched area is very, very important in the success of the accuracy in the print and cut! The optical eye is a laser eye that turns on when registration marks are on the project. This eye searches for those black registration marks and any part of the design that is in the cross-hatched area can interfere with an accurate reading. It may look like it read the marks, but if it picked up part of the design instead of the edge of the registration mark, it can affect where it cuts. Dark colors in, near, or between the cross-hatched areas can interfere with the reading. If you have every had an issue, look at where your design is placed and are you using the defaults to give the machine the best chance to read?
Some users can successfully adjust the print and cut boundaries, but NOT ALL! The most accurate results with print and cut are with the default registration marks. Once you have established a baseline with the defaults, then you can start changing things and see what works. It does NOT work for all users to adjust.
Print and Cut is an amazing feature on the Silhouette software! Here are some tips on how to set up a basic print and cut Let’s Explore v4 – Print and Cut Basics Starting with the basics will give you the most accurate print and cut results.
Once your page is ready, send it to print using File > Print.
Printed on a Canon TS9521C Craft Printer
I am often asked what printer to buy for print and cut. Any good quality printer will work. Start with the one you have and start with the Basics of Print and Cut, test it and see how it does.
Place the printed page on the cutting mat, exactly as it shows on the Silhouette Design screen in the top left corner and covering the grid lines on the mat.
Using a Silhouette cutting mat will also be the greatest chance of an accurate print and cut. Other 3rd party cutting mats are not the same dimensions and can affect the accuracy of a print and cut project.
Load the cutting mat in the Silhouette machine. On a Cameo, the left edge of the cutting mat should be next to the line on the left and not over top of it. Hold the cutting mat flat as it registers the marks for best results.
Click on the Send tab in the top right corner. Select the material type and adjust the cut settings as needed for your material. Click the Send button in the bottom right corner when ready to cut.
After it’s cut, unload the cutting mat, flip the mat over and carefully peel the mat away from the cardstock.
Add the black cardstock (or other color) to the cutting mat. Click on the Design tab again in Silhouette Studio. Select all 3 of the black rectangles, copy and paste to a new design mat and arrange to cut.
Send to cut.
After it’s cut, unload the cutting mat, flip the mat over and carefully peel the mat away from the cardstock.
Now that the pieces are cut, gather the supplies for assembly.
And since you are already setting up a print and cut, you can also add a sentiment that could either be added directly to the pattern area or create your own shape as well. Print it right along with your pattern pieces.
I would love to see what you are creating with your Silhouette software or machines! Feel free to post on my Facebook group at Silhouette Secrets with EllyMae.
Save this for future reference by pinning the image below.
Enjoy !
THANK YOU for your support! How can you help? Click HERE & buy a coffee. Every little bit helps with the cost of running the site.
Or if you are looking for more in-depth, step-by-step classes, check out all of my online Silhouette classes on my Teachable site HERE.
**This post may contain affiliate links. What that means is that I may receive compensation if you purchase through the links I have provided. The price you pay for the product or service is not higher but I may get compensated for sharing.
Check out the description on the video for links to the supplies used in the video and more information on each Silhouette Studio tool used to create this project.
Watch for the written tutorial coming on Sunday.
Hope you have a fabulous day!
Save this for future reference by pinning the image below.
Enjoy !
THANK YOU for your support! How can you help? Click HERE & buy a coffee. Every little bit helps with the cost of running the site.
Or if you are looking for more in-depth, step-by-step classes, check out all of my online Silhouette classes on my Teachable site HERE.
**This post may contain affiliate links. What that means is that I may receive compensation if you purchase through the links I have provided. The price you pay for the product or service is not higher but I may get compensated for sharing.
Quick post today sharing a new feature! I had previously shared this in a post about getting a new computer- find that HERE. But, I feel it also needs it’s own blog post as well.
Export User Designs from Silhouette Library – New Feature!
If you have downloaded the current version or a version higher than v4.4.552, there is now a new feature that allows you to export all User Designs from the library as individual files.
Click on your name in the top left corner of the library tab and choose Export User Created Designs.
While I do NOT recommend storing your personal files in the Silhouette library, there are times that it is handy when you are accessing files on multiple computers or using Pattern Fills in the Silhouette software.
Affiliate links may be present in the following blog post and as an Amazon Associate I earn from qualifying purchases.
One big thing to note
when exporting these User Designs, is that it will export the entire library folder structure. However, any designs from the Silhouette Design Store, the folders will be empty. Only the user created designs will be exported. This is due to the proprietary nature of the .studio files and to protect the designers of those files from theft.
I would HIGHLY recommend using this export feature when you update to the software of v4.4.552 or higher because it is a really nice feature. However, as a general note, I do not recommend that all users update to this version or higher. There are many factors that I consider before advising a user on whether they should update. It really comes down to the user’s choice, however, before I make a recommendation I do ask for more information. If you would like to know what I’d recommend for your situation, feel free to post on the Silhouette Secrets+ with EllyMae Facebook group and we can take a look at the factors.
If you are on an older software prior to v4.4.552 or before you plan to update the software, I would recommend making a backup of your library. Check out Tip #1 in this post for how to do a library backup in the older software versions of v4 5 Silhouette Studio Secrets HERE
Keep in mind that the Silhouette library is not designed as an all inclusive storage area but as a syncing device. This is one reason the Silhouette cloud storage is limited in size. All users get 1 GB of storage space, but if you are a Silhouette Club Member or a Silhouette Design Store Subscriber*, you get 5 GB of storage. *no longer a benefit of a SDS subscription effective sometime in 2024? (updated 3/28/25)
Hope this tip helps! This is an awesome new feature!
We love seeing what you are creating with your Silhouette machines or software. Feel free to post photos or questions on my Facebook group at Silhouette Secrets with EllyMae.
Save this for future reference by pinning the image below.
Enjoy!
THANK YOU for your support! How can you help? Click HERE & buy a coffee. Every little bit helps with the cost of running the site.
Or if you are looking for more in-depth, step-by-step classes, check out all of my online Silhouette classes on my Teachable site HERE.
**This post may contain affiliate links. What that means is that I may receive compensation if you purchase through the links I have provided. The price you pay for the product or service is not higher but I may get compensated for sharing.
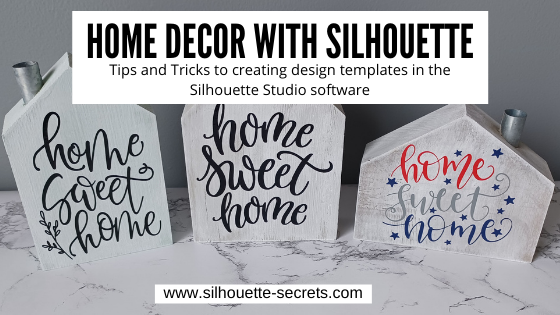
Using the Silhouette Software to Help Design Home Décor
I always have my eye out for things that I can use in creating with my Silhouette machine. Target had these little wooden houses available in their Dollar section.
After debating with my inner self, I finally picked up a set. I always have this inner dialog on – can I make that? Will I make that? Yes, I can cut the wood, but when will I get it done? Right now, in the process of moving, our wood shop is not set up, so I did it. I bought wood shapes.
If you have access to a saw, you could create your own shapes. This tutorial is not limited to these little house shapes, but think about the supplies you have on hand and you can use this same technique for any blanks you use.
Affiliate links may be present in the following blog post and as an Amazon Associate I earn from qualifying purchases.
Next, gather the rest of the supplies. – Paint – Foam brush – Paint palette or small dish – Sponge – Painters Tape – Adhesive Vinyl – Transfer Tape – Squeegee – Weeding tool
Tape off any sections needed with the painters tape. In this case, each house has a metal chimney.
Paint the houses any color you want. I chose to paint a solid color of gray, light blue, or dark gray as the first coat and then used the white chalk paint with the sponge on top of that to give it a distressed look.
Let the wood blanks dry completely.
Next, measure the space of each blank and write that down.
This is just a rough draft and does not have to be perfect or to scale.
Using the information from your measurements and drawing, draw shapes in the Silhouette software to design use as “design templates”.
For these houses I started by using a rectangle under the Drawing Tool on the left side and then used the Edit Points to pull up a point in the roof.
Check out this video tutorial showing the full process of drawing the shapes in Silhouette Studio.
Once all the designs are sized how you want them to cut, move the designs around on the virtual mat to cut out each color vinyl you want them in.
Then send to the Silhouette machine to cut all the adhesive vinyl pieces. I cut everything from Oracal 651 adhesive vinyl. I have been having an issue with the vinyl cutting too deep into the backing using the preset settings, so I am using the settings of: Blade depth – 2 Force – 5 Speed – 5 With a Silhouette Autoblade and it is cutting, weeding, and transferring beautifully.
Cut settings depend on many variables and test cuts will be the way to find out what is going to work best with your material and blade. For more tips on cut settings check out this post – Perfect Cut Setting in Silhouette.
Carefully weed the excess vinyl from around the designs.
This takes practice and the cut settings can make a big difference in the ease of weeding. Do not rip it off like a bandaid.
After all the weeding is done, apply vinyl to blanks
Here is a quick real time video of the application process on one of the wood blanks.
In the above video, I reference a recent tutorial on the Smart Snapping lines. This can be a very helpful tool as shown in the video. Check out the Let’s Explore v4 – Smart Snapping post HERE
And now you have some seasonal or year round décor.
Double sided means that they can pull double duty in your seasonal decorations.
And if I were to ever want to change the designs out, I would just carefully remove the vinyl. Sand it if needed and repaint, then cut and place new vinyl designs on them.
Keep in mind that you can use these tips & techniques for any blanks you might have!
Save this for future reference by pinning the image below.
Enjoy!
THANK YOU for your support! How can you help? Click HERE & buy a coffee. Every little bit helps with the cost of running the site.
Or if you are looking for more in-depth, step-by-step classes, check out all of my online Silhouette classes on my Teachable site HERE.
**This post may contain affiliate links. What that means is that I may receive compensation if you purchase through the links I have provided. The price you pay for the product or service is not higher but I may get compensated for sharing.
This week I put up a new quick video tip on my YouTube channel, but had some of my Facebook members wonder why YouTube didn’t notify them. It was requested that I also put it out on the blog so it would notify more people of the new content.
This is just a quick “Silhouette Secret” that can either be fun or for some users, helpful if they are using multiple machines.
Did you know you can name your Silhouette machines in the Silhouette Studio software?
If you’d like to be notified when new blog posts are published, make sure to subscribe to the blog. On a computer, you’ll find this on the right side and on a mobile device you will need to scroll to the bottom of the page to subscribe. I had several reports from followers that YouTube did not notify them of new content and of course Facebook is hit or miss on that one too. Signing up for notifications in more than one place is a great way to make sure you might see the new tips, tricks, tutorials, and classes when they are released.
Save this for future reference by pinning the image below.
Enjoy!
THANK YOU for your support! How can you help? Click HERE & buy a coffee. Every little bit helps with the cost of running the site.
Or if you are looking for more in-depth, step-by-step classes, check out all of my online Silhouette classes on my Teachable site HERE.
**This post may contain affiliate links. What that means is that I may receive compensation if you purchase through the links I have provided. The price you pay for the product or service is not higher but I may get compensated for sharing.
Today we are going to explore the difference between a dxf and svg file.
So let’s first look at the definition of each.
DXF files are a file type that was created in 1982 for AutoCad program. Which just means computer assisted design. So basically a computer drawing program. It really wasn’t designed as a “cut” file.
SVG files are scalable vector graphics. These are vector files that can be resized without losing image quality. These are “cut” files. They were created in 1999.
When you compare the 2 file types, there can be a BIG difference in the quality of a cut. While you can open DXF files with the Basic software, it can also be a big headache to cut a file. Because of the way DXF files are create, they can have massive amounts of edit points. Edit points are the data points that the Silhouette reads to complete a cut.
All these little gray dots are edit points that the Silhouette has to read to connect the dots. For more on edit points, check out this post here – Let’s Explore v4 – Edit Points.
Here are a couple things you may experience when opening and cutting a DXF file:
It may take a lot longer to open Let’s take a look at an example of opening a dxf file vs a svg file. This video shows opening the above mandala file in dxf format versus svg format. The dxf file took 38 seconds versus the svg file took just a couple seconds. This will also vary depending on the user’s computer and the dxf file. I have a higher than normal spec gaming computer that is used in the video below.
The software may crash or lock up when trying to open a dxf since it’s such a large data file. Due to the data size of a dxf file versus a svg file, the software may just crash as it’s working to try to open the dxf file. This will vary by dxf file and computer.
Software is slow to respond and the computer is “thinking” more with dxf files. Since it is a data heavy file it may take longer to make edits, resize, or work with the file in general.
A design takes forever to cut. Since it has massive amounts of edit points, the Silhouette has to hit every single one of those to complete the cut.
The machine sounds odd cutting, like it’s stuttering. This is because it is making short movements to connect the dots between those edit points.
The cut not completing cleanly because it has open edit points (red dots) and not complete lines If you double click on a design, no matter the file type and you see red dots in it, there is a problem. This means that the cut lines are not complete and it is a broken line. This will affect how it cuts and in turn how it weeds. I have drawn a simple rectangle below as an example- the red dot is a broken point. The cut line does not completely connect to complete a cut.
Those broken edit points will need to be connected in order to close the shape. If the points are close together, double clicking on the red dot can close it, but if they are not, then you will need to connect the dots to close that cut line.
Shapes that have broken edit points cannot be filled with color as they really are not a “shape” but a line since it is not completely closed.
More on edit points on a dxf file
Since a dxf may have massive amounts of edit points, let’s take a look at what happens to those edit points when you scale the design down.
M
Here is what the file looks like when it’s originally opened & edit points are activated. It opens at 9.528″ wide
Now if we scale that down, all of those edit points get squished closer together. They are still there but now you’ve taken those data points and squished them into a smaller space of 4.163″ wide. Since there was already more edit points than necessary in a small space, you’ve now crowded them in even more.
In most cases, cutting this dxf file will just result in a mess of your material.
In the Edit Points Panel, there is the option to “Simplify” and you can try that, but it doesn’t always work or it may change the shape of the actual design.
Each file will be different in how it responds and reacts because they are created differently and are made up of different data. Let’s compare another dxf file and svg file side by side.
On the left is the dxf file and the right is the svg file. In this example, the edit points are not too crazy, however, you can still tell a noticeable difference between the dxf and the svg. The svg file is a much cleaner cut file. Depending on the size you were to cut this file at, you may or may not notice a difference.
I highly recommend at least the Designer Edition upgrade to all Silhouette users and this is just one of the reasons why. The upgrade will save you time, headache, and frustration in the long run.
I hope this has made the differences between working with dxf and svg files a little bit clearer. In my experience, the svg file is almost always the cleaner cut file to use.
Save this for future reference by pinning the image below.
Enjoy!
THANK YOU for your support! How can you help? Click HERE & buy a coffee. Every little bit helps with the cost of running the site.
Or if you are looking for more in-depth, step-by-step classes, check out all of my online Silhouette classes on my Teachable site HERE.
**This post may contain affiliate links. What that means is that I may receive compensation if you purchase through the links I have provided. The price you pay for the product or service is not higher but I may get compensated for sharing.
THANK YOU for your support! How can you help? Click the link to buy a coffee. Every little bit helps in the cost of running the site.