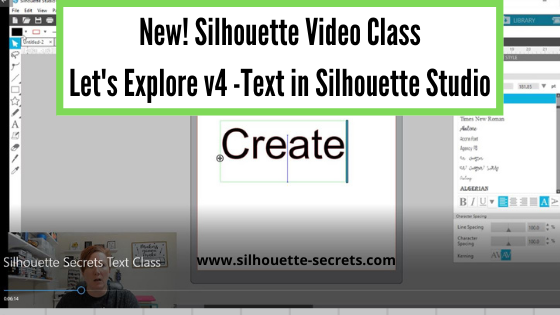
This is a 50 minute Silhouette Studio v4 software class all about Text. We will explore all about text to get you started in the Silhouette Studio v4 software including:
Text tool Text Style Panel How to get accurate text sizing Resizing text Font families Welding Script fonts Offsetting text Tracing text Installing fonts, and Glyphs
Expand your skills in the Silhouette software by learning all about text in Silhouette Studio in this 50 minute video course.
Check out all the Silhouette course available HERE on my Teachable site!
Save this for future reference by pinning the image below.
Enjoy!
THANK YOU for your support! How can you help? Click HERE & buy a coffee. Every little bit helps with the cost of running the site.
Or if you are looking for more in-depth, step-by-step classes, check out all of my online Silhouette classes on my Teachable site HERE.
**This post may contain affiliate links. What that means is that I may receive compensation if you purchase through the links I have provided. The price you pay for the product or service is not higher but I may get compensated for sharing.
Let’s Explore v4 Silhouette Studio Software Upgrades
Affiliate links may be present in the following blog post and as an Amazon Associate I earn from qualifying purchases.
I am seeing a bunch of new Silhouette user’s join us and there is so much information out there. Today let’s talk about software upgrades. I highly recommend this. Don’t be overwhelmed by all the options though! You do not have to learn it all at once, but if you upgrade it will be ready for you when you are ready to learn about it.
What is an upgrade?
A software upgrade is an code you purchase that unlocks additional features in the software. It is a one time fee that can be active on up to 3 computers per code.
I highly recommend at least the Designer Edition upgrade for all of my students. It makes life easier and saves you time and headache. Just being able to open a svg file and cut is well worth it.
But I LOVE the Business Edition upgrade because it unlocks it ALL and I never have to question if some tool/feature is available to me. Both are well worth the investment!
Don’t let the name “Business” edition fool you though – you do not have to have a business to use it or have it be useful. There are just some features that are helpful to those that run a business such as using multiple machines.
If you have the basic (free) software, you would want to purchase 1 of 3 options depending on what upgrade you want to go to: Option 1 – Silhouette Studio to Designer Edition (highly recommend at least this) Option 2 – Silhouette Studio to Designer Plus (unlocks a few more features – see below) In all honesty, if you are upgrading to Designer Edition Plus, you might as well go all the way and unlock it all Option 3 – Silhouette Studio to Business Edition (unlocks it all)
Now here is the important part, if you already have an upgrade, you only need to purchase the step up to the next level you want.
For instance, if you already have the Designer Edition upgrade but you want to go to Business Edition, you want to buy the Designer Edition to Business Edition upgrade. You do not need to buy the full upgrade. You would purchase the level that you need to go from to the level you want to be at.
Now, keep in mind, if you purchase the upgrades in steps it is no different than purchasing the upgrade all together, except that you will need to enter the codes in that same order if you install it on another computer or have to re-enter your codes for any reason.
What does each level of upgrade do?
Here are a few of my favorite features and the ones I find most might use in the software:
Business Edition unlocks all of the above and ….. – Import Ai/CDR/EPS Files – Weed Line Feature – Multi-cutter Support (I use this one all the time) – Multiple Undo/Redo (one of my favorites) – Export SVG, PDF, JPG – Edition Toggle (this is great for those of us who teach, so we can see exactly what the students see in their version) And more…..
Now, the list above is not the extensive list of all the features unlocked with each upgrade. However, it is a list of the features I find the most useful in each upgrade. For the complete comparison chart click HERE to go look at Silhouette America.
I want you to be successful and use your Silhouette software to the fullest! The Vinyl Spectrum has the upgrades to Designer Edition, Business Edition and from Designer to Business at a great price. These are digital codes, so are emailed directly to you after purchase. Check them out HERE. If you are in need of extra supplies too, I have been impressed with their super fast shipping too!
How to activate the upgrade
In the Silhouette software, click on Help in the top left menu. Then choose Upgrade and a pop up window will show up. Enter the information in the window and type the upgrade code exactly as you received it. Make sure you are entering the codes in the order that you purchased them in.
For example, if you ordered Designer Edition and then the Business Edition upgrade later. To activate it on a computer, you would need to enter it in that order. First the Designer Edition code and then the Business Edition code.
If for some reason the digital codes are “out of stock” at one retailer, you can buy the upgrades from another retailer. See my list of recommended retailers and sites HERE. Yes! Digital codes do go out of stock too because it is all an inventory item. The retailer has to purchase the codes from Silhouette America, just like any other product. So it’s not uncommon to see things go in and out of stock as more people buy it.
If you have question about an upgrade just let me know. Comment below or post on my Facebook group at Silhouette Secrets with EllyMae. I would love to see what you creating with your Silhouette machine!
Save this for future reference by pinning the image below.
Enjoy!
THANK YOU for your support! How can you help? Click HERE & buy a coffee. Every little bit helps with the cost of running the site.
Or if you are looking for more in-depth, step-by-step classes, check out all of my online Silhouette classes on my Teachable site HERE.
**This post may contain affiliate links. What that means is that I may receive compensation if you purchase through the links I have provided. The price you pay for the product or service is not higher but I may get compensated for sharing.
Did you know that you can add a note to your Silhouette file?
This option has been in the software for awhile, but depending on what version you are using, it may work better in later versions. In the current v4.4 software version, it does seem to be behaving as it should.
This tutorial is written in v4.4.455
The Draw a Note tool is found on the left side.
Click on the Draw a Note and your mouse will change to a text cursor. Click on the Design Space to add a note box. I would suggest clicking in the gray “holding area” off the cutting mat. In the past, there were some versions that the note would get “stuck” and you couldn’t delete or edit it. For this reason, I would not suggest placing it in the cutting space on the screen. Just in case.
Type whatever information you would want to remember with this file such as text style names, sizes, colors, etc.
Want to delete the note, click the X in the top right corner of the box.
Want to change the size of the note, move the cursor on the outer edge and it will change to allow you to drag the size. This is limited in how much you can change the box.
In the top left corner, when the Draw a Note feature is active, you will see options for changing the text color, font style, size, and other options.
Note: each version of the Silhouette Studio software may vary. Older versions may not have these options and may still have some bugs in the Notes feature. This tutorial was written in v4.4.455.
Save this for future reference by pinning the image below.
Check out the full “Let’s Explore v4” series on the blog HERE as we go through each tool and feature in the v4 Silhouette Studio software in detail. The more familiar you become with the Silhouette software, the easier creating designs, working with designs, and creating your projects will be as you apply those skills to them.
Enjoy!
THANK YOU for your support! How can you help? Click HERE & buy a coffee. Every little bit helps with the cost of running the site.
Or if you are looking for more in-depth, step-by-step classes, check out all of my online Silhouette classes on my Teachable site HERE.
**This post may contain affiliate links. What that means is that I may receive compensation if you purchase through the links I have provided. The price you pay for the product or service is not higher but I may get compensated for sharing.
So you want to learn to design in the Silhouette software? I see user’s asking how to create their own designs in Silhouette often. And it can be done. The more familiar you can become with the tools in the software, the easier things will be for you to create designs. The more you do it the more you will start to use those tools without even knowing you are doing it! The absolute best thing you can do to learn the software is to dive in. Follow this step-by-step, even if you never make the finished physical project. You will have created the design yourself, used many tools in the Silhouette software, and learn new things as you do it.
Affiliate links may be present in the following blog post and as an Amazon Associate, I earn from qualifying purchases.
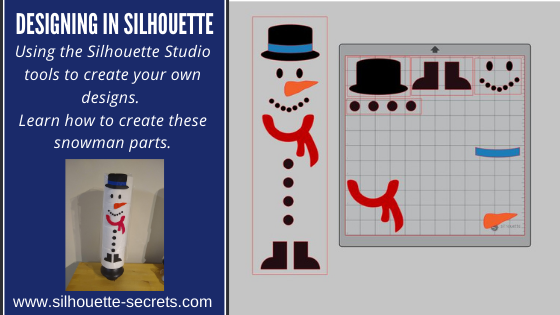
A group member had sent a message asking if I knew where to buy a file. I did not find the exact file, but I started looking at it and decided it was a great way to show how you can create your own designs. After all, if you think about it, designs are just shapes combined to make up an image. This little snowman are created from stacking toilet paper on a new toilet plunger. It has a cellophane gift bag that the adhesive vinyl is applied to and then it is slid down over top of the toilet paper rolls.
The first one I created, I wanted it to be all from creating the entire design in Silhouette.
First, measure the 4 rolls of TP or the blank that you are going to be applying it to. My TP rolls are 5″ x 17.25″ when stacked on top of each other. Using the Draw Rectangle tool & Scale tab, draw a rectangle 5″ x 17.25″ so you know what area you have to design within.
Next, let’s draw the boots. Using the drawing tools again, draw a rectangle. Then using the Flexishape tools, draw a half circle. Flexishapes are a Designer Plus or Business Edition upgrade feature. It is one reason I would highly recommend upgrading the software. Hold the Shift key down when you draw the flexishape and it will snap to 0 degrees. Align the half circle with the bottom of the rectangle using the Align tools. Select both shapes and make a copy. Move it off to the side, just in case it is needed later. Select both the original rectangle and the half circle. Right click and choose weld. Fill with color using the Fill color Panel.
Use the Replicate Mirrored tool to make a 2nd copy. Then use the Align tools to line the boots together at the bottom. Once aligned, right click and choose Group.
Now let’s draw the buttons. Choose the Draw Ellipse tool on the left side. Then hold the Shift key down to draw a perfect circle. Fill the circle with black using the Fill Color Panel or QAT (Quick Access Toolbar). Duplicate the circle 3 times up. Move the top circle up a bit. Select all 4 circles – choose Align Center. Then choose Vertical Spacing. Group together once Aligned.
Working up, the scarf is next. Under the Flexishapes, click on the draw arc tool. Then click in the middle of the rectangle and draw a line to the right a little ways. Move the mouse to the left and it will draw the arc. Adjust the middle arrows to make it thinner or wider.
Once done, right click and choose Convert to Path. Double click on the design to bring up edit points. Click on the corners of the arc and choose Make Curve in the Edit Points Panel.
Choose the Draw a Curved Shape tool. Then draw a “tail” for the scarf. Play around with it until you like it. When finished, select both the arc and the tail, right click and choose Weld.
Fill it with red color from the Fill Color Panel on the right side or in the QAT (Quick Access Toolbar).
Next, let’s draw the mouth. Using the Draw Ellipse tool on the left side, hold down the Shift key and draw a small circle. Fill the circle with black using the Fill Color Panel. Use the Replicate Panel to replicate the circle 5-6 times.
Arrange the circles in the shape of a smile by clicking on each and moving. Select all of mouth pieces. Use the Align tools to space them Horizontally from each other. Arrange how you like. Select all the mouth pieces, right click and choose group.
Now let’s draw the carrot nose shape. Click on the Flexishape lighting bolt. Draw a small shape. Then adjust using the red dots as desired. Right click on the shape and choose Convert to Path.
Then double click to bring up the Edit Points. Hold the Shift key down and drag to select across the entire design. This will select all of the edit points at once. Choose Make Curve.
Click on individual edit points to delete a few on the inside. Adjust the design as desired.
And now the eyes, choose the Draw Ellipse tool and draw a small oval. Fill it with black from the Fill Color Panel/QAT. Then duplicate and move to the right. Select both of the ovals, use the Align Middle tool and group them together.
The final piece to design is the hat. To do this we will use the Draw ellipse and rounded rectangle tool. Draw one oval for the bottom brim. Make a copy and move it above the first. Scale the 2nd oval down for the top of the hat by grabbing the corner bounding box and moving it in. Use the Align tools to center the ovals together. Then draw a rounded rectangle between the ovals. Use the Align tools to center the shapes together.
Make a copy and pull it off to the side. Select both ovals and the rounded rectangle, right click and choose Weld.
Make a copy of the welded design and pull it to the side. Then fill the original design with black using the Fill Color Panel.
Next, make a copy of the bottom oval on the hat shapes copy. Bring it over to the and place it were the brim meets the stack of the hat as shown.
Select the hat and the 2nd oval and use the Align tools to align the middle.
Next, with both objects still selected, open the Modify Panel and choose Crop.
Make a copy of the bottom oval again and drag it to the top of the cropped section. Use the Align tools to align the middle of the 2 shapes.
With both shapes selected, choose Subtract under the Modify Panel.
Fill the hat band with color and move it on top of the original hat. Use the Align tools to make sure it’s aligned middle.
Arrange the snowman pieces as desired to see how it will fit on your space.
Congratulations! You created your own design! Now, that may seem like a lot of steps or using a lot of tools, but like I said above, it is a design you have drawn yourself and the more you use the tools in the software, you will start to use them without even thinking about it. Hopefully you picked up on the fact that we continued to use the same basic tools over and over.
If you are cutting the finished design, arrange all the pieces to cut out of the different colors of vinyl.
Check out this video showing all of the steps to create the snowman as well.
If viewing by email, please click the photo to open up the YouTube video.
Supplies used: 4 rolls of TP per snowman New plunger – Target $4.99 Clear gift basket bag Adhesive Vinyl Silhouette Studio Software
The more you use the tools, the better you will get. And sometimes, I’ll be honest, the only way to know what is going to work for the design you are creating is to push the buttons and use the UNDO button.
Or use Ctrl+Z on PC or Command+Z on Mac for the keyboard shortcut
I would highly recommend getting into the software and just start creating!
Even if you do not cut the snowman, I would love to see the snowmen design that you make or any other design you have created using the tools in the software!
Feel free to post on my Facebook group at Silhouette Secrets with EllyMae. If you have questions feel free to post below or on the Facebook group too!
Save this for future reference by pinning the image below.
Enjoy!
**This post may contain affiliate links. What that means is that I may receive compensation if you purchase through the links I have provided. The price you pay for the product or service is not higher but I may get compensated for sharing.
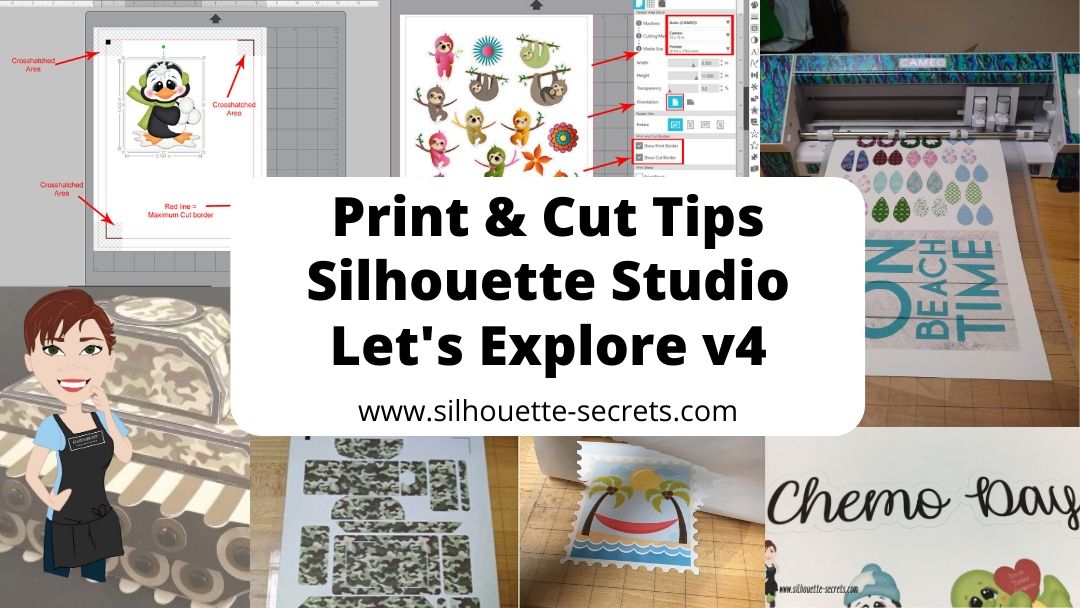
No matter what kind of print and cut project you are doing, I recommend starting with all the basics. I have several posts on print and cut and wanted to give you one landing page to check them all out at and decide which one is going to be the best for your situation.
Print and cut with the Silhouette is one of my favorites and it is often the one issue I troubleshoot a lot with users. Most often it is something that needs to be tweaked on the user’s end on why the Silhouette is not reading the marks. And there is no one solution fits all when it comes to troubleshooting and it’s not always what the user wants to hear, but the first step is to start at the beginning. Otherwise, it’s like throwing mud against a wall and seeing if it sticks. You can try all kinds of things and still end up with the same issue.
Print and Cut Basics is where I would suggest starting if you are new to Silhouette, new to print and cut, or are having problems getting the Silhouette to read your printed page. It is a step-by-step to doing a test print and cut to make sure it’s all working properly.
Print and Cut – Part 1 is a great place to start with setting up a design made for print and cut. It gives tips and tricks to getting the design set up correctly, printing within all the borders, and also several troubleshooting steps if you are having issues.
Print and Cut – Part 2 – Text will show you how to create text and discuss whether you want the text to cut, or how to change it so that text does not cut each piece out.
Want to cut larger than letter size? If you have a large format printer, you can cut several larger sizes. The main limit is how large the printer can print. Check out tips on How to Print & Cut Larger with Silhouette HERE.
With the release of v4.3, the Registration Marks Panel has had a little bit of a change. There is no longer options, but you can turn them on and off. Find out more here in Registration Marks & Print and Cut in v4.3.
Print and cut is another great option if you don’t have the exact paper pattern on hand to create a project. You can make your own and then cut it for your project. Check out how to use the Pattern Fill Panel HERE.
With the options of Pattern Fill in the software, it can definitely keep a project alive versus having to wait on finding that perfect piece of cardstock in the store. I used the Pattern Fill in this 3D Tank project also.
Pattern Fills
Affiliate links may be present in this blog post.
I see it asked often what the patterns in the Silhouette Design Store could be used for. They are a great option for creating unique projects or work in a pinch when you don’t have the right pattern to fit your projects.
Check out all the options for all kinds of patterns in the Silhouette Design Store HERE and then how to use them in the Let’s Explore v4 – Pattern Fills. I love that you don’t have to print the entire page with the pattern, but can fill any section of the design and manipulate that pattern to your liking by adjusting the pan and zoom.
Hopefully this has opened up some new doors to Silhouette projects for you!
I would love to see what you creating with your Silhouette machine! Feel free to post on my Facebook group at Silhouette Secrets with EllyMae.
Enjoy!
**This post may contain affiliate links. What that means is that I may receive compensation if you purchase through the links I have provided. The price you pay for the product or service is not higher but I may get compensated for sharing.
Let’s Explore v4
Silhouette Studio Software Upgrades
Affiliate links may be present in the following blog post.
Software upgrades are on sale right now over at Swing Design. So let’s explore a little bit about them.
What is an upgrade?
A software upgrade is an additional purchase that gives you a code to unlock additional features in the software.
Do I need it?
That is all going to depend on each individual user. I highly recommend at least the Designer Edition upgrade for all of my students. It makes life easier and saves you time and headache. It is well worth the investment!
Which one to I get?
First, that depends on how far you want to go. Like I said above, I highly recommend the Designer Edition upgrade for all students. But, I love the Business Edition because all the features are unlocked and you never have to question if something is available to you.
Next, you have to consider if you already have an upgrade. There are different levels and you want to make sure to buy the correct level.
If you have the basic (free) software, you would want to purchase 1 of 3 options depending on what upgrade you want to go to: Option 1 – Silhouette Studio to Designer Edition (highly recommend at least this) Option 2 – Silhouette Studio to Designer Plus (unlocks a few more features – see below) Option 3 – Silhouette Studio to Business Edition (unlocks it all)
Now here is the important part, if you already have one of the upgrades above, you only need to purchase the step up to the next level you want.
For instance, if you already have the Designer Edition upgrade but you want to go to Business Edition, you want to buy the Designer Edition to Business Edition upgrade. You do not need to buy the full upgrade. You would purchase the level that you need to go from to the level you want to be at.
Now, keep in mind, if you purchase the upgrades in steps it is no different than purchasing the upgrade all together, except that you will need to enter the codes in that same order if you install it on another computer or have to re-enter your codes for any reason.
So how do you activate the code?
In the Silhouette software, click on Help in the top left menu. Then choose Upgrade and a pop up window will show up. Enter the information in the window and type the upgrade code exactly as you received it.
Make sure you are entering the codes in the order that you purchased them in.
To see the full comparison chart, click HERE to go directly to the Silhouette America website and see the full chart. Click on the video camera icon next to each feature to see a short demo.
But, lets briefly name some of the features I find the most useful in each of the upgrades.
Business Edition unlocks all of the above and …..
– Import Ai/CDR/EPS Files
– Weed Line Feature
– Multi-cutter Support (I use this one all the time)
– Multiple Undo/Redo (one of my favorites)
– Export SVG, PDF, JPG
– Edition Toggle (this is great for those of us who teach, so we can see exactly what the students see in their version)
And more…..
Now, the list above is not the extensive list of all the features unlocked with each upgrade. However, it is a list of the features I find the most useful in each upgrade.
For the complete comparison chart click HERE to go look at Silhouette America.
I am all about making a Silhouette user save time and frustration in working with their software AND getting the best cut possible. I would highly recommend at least the Designer Edition to all users, for the ability to open a svg file, as that is generally the higher quality cut file when you compare it to a trace or dxf file.
Check out this post – Let’s Explore v4 – How to open a svg
If you have question about an upgrade just let me know. Comment below or post on my Facebook group at Silhouette Secrets with EllyMae.
I would love to see what you creating with your Silhouette machine!
Enjoy!
**This post may contain affiliate links. What that means is that I may receive compensation if you purchase through the links I have provided. The price you pay for the product or service is not higher but I may get compensated for sharing.
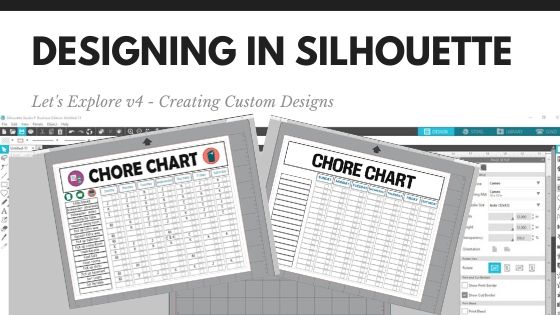
Check out this video below on how I created a chore chart.
I added a couple Chore Chart Icons by Amy Robinson – Design #256141 to the chart to give it a little more color and character than just a boring lines chart.
Now, you may have been putting this off like I was or just haven’t had the time to make a chore chart. So I am also offering this as a free file you can download below.
Click the photo above or download this free file HERE.
Save this for future reference by pinning the image below.
**This post may contain affiliate links. What that means is that I may receive compensation if you purchase through the links I have provided. The price you pay for the product or service is not higher but I may get compensated for sharing.
You found some really neat fonts; now how do you get those to show up in the Silhouette Software? In this tutorial, I’ll share how to install fonts on the computer so they will show up in software programs and are available when you want to use them.
The fonts used in the Silhouette software are found in the Text Style Panel are pulled in from the computer programs Fonts folder.
How to Download Fonts
Affiliate links may be present in the following blog post and as an Amazon Associate, I earn from qualifying purchases.
Let’s start with fonts from the Silhouette Design Store.
**on 5/22/24 the Silhouette websites did a massive migration to a new system and the new website has a new look. Access the downloads in your Account, download direct, install the font as instructed below.
Some simple fonts that have just the basic 26 letters and numbers may install just by syncing the library. That is because they are simple files, straight from the Design Store. However, fonts have recently become larger files with “extra characters” called glyphs – these are called Premium Fonts. For these larger font files, you will need to install those directly onto the computer for them to show up.
After you purchase a font in the Silhouette Design Store, click on the person icon (Account Tools) icon in the top right corner.
Then click on “Download” and click on the Order # that includes the fonts purchased.
Once the order opens, check the box next to Download on the individual fonts file.
The file will begin the download process.
I keep all my fonts in folders on my external hard drive, then I can transfer them to a new computer in the future if I need to.
MAC users – instructions listed below the PC instructions
How to Install Fonts on a Windows Computer
When files download to your computer, whether it is designs or fonts, they will most likely be in a zipped file. This is a condensed file format so large files can easily be stored and downloaded.
In order to access designs and fonts, the folder has to be unzipped or extracted in order to view and access the information inside completely.
Note: some users may be able to access font files without unzipping the folder. I am sharing my process that I’ve found to have fewer issues for a user.
Compressed or zipped files are designated by a zippered folder icon as shown below.
As you can see, all of these folders except the top are zippered folders.
A Windows computers have a built-in file extraction; however, you may have to tell the computer to use it. To do this, right click on the file and choose “Properties”.
Then change the “Opens with:” to the “Windows Explorer”. You may need to click on the “Change” button to find this option.
Now, you should have the option to “Extract” the file
Extracting the folder will now give you access to all of the files inside of it. It will pop up a window asking where you want to save it. Choose Extract and the folder will be ready to use.
After the file is extracted, there will be 2 folders. One without a zipper and one with a zipper. I delete the zippered file, and this is how I know which fonts I’ve finished installing on my computer. As you can see, I have several zippered folders. This tells me that those have not been installed yet.
Next, close the Silhouette Software. Once a font is installed the software has to be closed and reopened after the fonts are installed in order to pull up the new font in the Text Style Panel.
Go back to the Windows folder where the fonts are saved. Double click on the unzipped font folder. This will open up the contents of the font file. Each font file may contain different things. There may be terms of use documents, more zippered files, instructions, etc. in the folder.
As you can see in this folder I downloaded, there are several font files in this download and 2 of them have further folders that need to be extracted to access the font files.
There are 2 types of font files – .otf files and .ttf files. If the font has the .otf font option, that is the one you want to choose as it’s the newer font file and contains any special characters that are in the font file. For more information on the differences in these font file types, I would suggest checking out this post by Cutting for Business – “Fonts – OTF versus TTF – What is the difference?”
Right click on the .otf (or .ttf) file and choose “Install for all users”. A window will pop up that indicates it’s installing on the computer programs folder and then it will disappear when it’s done.
For Windows 11 users, if you do not see “Install for all users”, choose “Show More Options” in the right click menu and select “Install for all users”. This is a VERY important step in the process. If this option is not used, then the fonts may not show up in some software programs. It is a change that Microsoft did, not Silhouette. (see below for screenshots)
If you get a message that the font has already been installed, do you want to replace it, just choose no. This can happen on some Silhouette Design store fonts as I referenced above because they are “simple” font files and were able to install directly on their own.
If there are multiple fonts in the folder or you have more fonts to install, open each folder and repeat the installation process.
Ta-Da! Fonts installed.
Now, open the Silhouette software and open the Text Style Panel. The font should appear in the Text Style Panel once all the fonts load in the program.
Mermaid Font by Rivka Wilkins – Design #303522
Updated 6/23/22Windows 11 users
With the release of Windows 11, Microsoft has hidden some menus within menus. If you do not see the “Install for All Users” after right clicking on the font file, choose “Show More Options”.
Then you should see the “Install for All Users” option.
MAC users continue reading below the MAC instructions for more information.
How to Install Fonts on a MAC
Now, I am a PC gal, so I recruited some help from my friend & TJC Licensed Silhouette Instructor colleague Libby with LibbyAshcraft.com.
— Thank you Libby for the MAC info!
Installing a font on a Mac is quick and easy. If the font is included in a Zip file, you can just double left click on the font name and the file will be unzipped.
Open the font folder. Double click on the font file itself (either TTF or OTF). Font Book will open a window.
Click Install Font. Font Book will open and show you the installed font in your list of fonts.
Close Font Book.
If your Silhouette Studio was open during the installation of the font, close Studio and reopen it. Your font will be in the font drop down list.
You can also select more than one font at a time. To do this, click on the first font. Hold the CMD key down and click on the next font you want to install.
With both fonts selected, right click and select Open With and select Font Book from the fly-out menu. (You can also double click on one of the selected fonts to open the Install Windows.)
The Install Font windows for the selected fonts will open in a cascade.
Click on Install font in the first window. Close the window and click on Install font for the next font. Repeat for all the fonts you wish to install.
Just like when you installed a single font, Font Book will show you the installed font in the Font Book list.
Restart your Silhouette software and use your new fonts!
More Font Tips
– When you click on the Text Style Panel, that is when the software loads all the fonts to the program. Be patient and give it some time to load all the fonts. The more fonts you have the longer it will take for all of them to load in the program and be available.
You may notice if you try to scroll down or search by name in the Text Style Panel, it will jump back up to the top. This indicates it is still loading fonts in the software.
– The more fonts you have installed on your computer, will affect all programs, not just Silhouette Studio in loading the fonts. I have started being very selective in the fonts that I choose. I don’t grab every single free font I see but ask myself if I will use it or not.
It also can make the design process a lot longer because you have so many options to choose from.
– If you don’t see the font by the main name, look for it under another name. Such as the designer’s initials in front of the font name, etc. For instance, a Lori Whitlock font may be named “LW Wide Marker” in the Text Style Panel or a “PN Handicraft Script” font is for ScrapNFonts.
– When you close the software after installing new fonts, you may get a message that Silhouette is installing fonts and will ask you to approve the changes. Click OK and then approve the pop up to make changes.
– While I used a Silhouette Design Store font for the example above, the same steps apply to all font files wherever you would collect them from.
Now that you know how to install new fonts, so they show in the Silhouette software, on to creating fabulous designs!
Save this for future reference by pinning the image below.
Enjoy !
THANK YOU for your support! How can you help? Click HERE & buy a coffee.
Every little bit helps with the cost of running the site.
Silhouette Classes
Never stop learning! Let me help you take the anxiety out of learning with Silhouette and get to creating faster! My Silhouette classes are heavily focused on software, so you can take the skills & techniques taught and apply them to many future projects!
**This post may contain affiliate links. What that means is that I may receive compensation if you purchase through the links I have provided. The price you pay for the product or service is not higher but I may get compensated for sharing.
The Let’s Explore v4 series continues to be a popular series and will continue into 2020 as there is so much information that can be explored in the Silhouette Studio v4 software. Find the full series HERE.
Today we will explore 5 “secrets” or tips to start the New Year off right with the Silhouette Studio software.
5 Silhouette Studio “Secrets” from Silhouette Secrets+
Now, are these really “secrets”? Nope, but many users may not know about these tips or resources that are available in the Silhouette Studio software. And these could save you some headache and frustration down the road.
Back up the Silhouette library.
Do you store personal files in the Silhouette library? Even if you do not, it is still a good idea to create a backup of the library on a regular basis. And what a perfect time to start that to kick off 2020.Backing up the library will vary depending on what version of the Silhouette Studio Software you are using.
How do you know what version of the software you are using?
On a PC, in the top left corner, click on Help > About Silhouette.
On a MAC, navigate to the top left menu, click on Silhouette Studio, and then click on About Silhouette.
This little window tells us a lot of information and is handy to have when troubleshooting an issue a user is having.
It tells me that I am using version 4.3.353 and that I have Silhouette Studio Business Edition (ssbe) active on my computer.
Making a Back up For users who have v4.2+, make sure you are signed into the Silhouette library and the library is synced with the current date and time.
Click on the Library tab in the top right corner and then look in the bottom left corner to see when the last Sync is time stamped.
Ensuring that the library is synced will give you the most up-to-date back up file.
Next, click on your name in the top left corner of the Library tab and choose Library Export.
It will ask where to save the File. Choose browse and choose a safe location.
I have created a folder on my external hard drive called Backups and save all my back up files there for Silhouette. I also add the date to the back up file name so I can locate the most recent one easily.
This backup file is not a file that can be opened outside of the Silhouette Studio software. It only serves as a file that can be imported back into the software if you ever need to. This file does not contain individual files and the information cannot be accessed unless it is imported back into the Silhouette Studio software (if needed). Most users may never need this file, but it is still a good idea to have, just in case.
Once you have chosen the location to save to, then choose Export on the Silhouette pop up window.
Be patient as it may take some time to export the library. This all depends on how much data is in the Silhouette library that it needs to condense into this file.
If you have received a new computer and want to transfer Silhouette to the new computer check out this post “Let’s Explore v4 – New Computer” for tips on getting everything set up.
What about users not on v4.2+?
For users on a software version prior to v4.2, check out this post on Silhouette Studio Library Tips to see how to export back up copies of both sections of the Silhouette library.
Delete Recovered Documents
Does the Recovered Documents panel open when you open Silhouette Studio? This is a feature that will Auto save a file if the software closes down or the computer is shut down unexpectedly. Each time the software is opened, each of those files is brought back up and the software remembers them. Clearing this out on a regular basis will keep your Silhouette software running smoother.For more information on why you want to keep this cleared and steps on how to clear this out check out this post on Recovered Documents.
Set up the Library Snapshot feature
A new feature of the software since v4.2 was released is the Library Snapshot. I love this feature! It will take a snapshot of the library and save it just in case something happens and you might need to revert back. For instance in the case of a corrupt file or downloading a “bad” font – these are 2 instances I’ve seen that a snapshot has helped users.For step by step details to set up the Library Snapshot, click HERE.
Keep in mind that the Library Snapshot will only capture when the software is closed and reopened, no matter what time frame that you have it set for. So if you leave the Silhouette Studio open on your computer for days or weeks, it will only take a snapshot after it’s been closed and reopened.
Also, the Library Snapshot is computer specific, so if you use multiple computers or get a new computer, each computer will have it’s own snapshot log.
Organize the Silhouette library into folders.
Designs in the Silhouette library can be organized into folders to organize in a way that you find helpful. Right click on the folder and choose New Folder.
Type a new name for your folder and then hit Enter.
Create folders for the different designs you have by categories like holidays, seasons, 3D designs, flowers, mermaids, unicorns, etc. However best your feel will help you to find your designs when you are trying to create.
To move designs to a new folder, click on the file you want to move and drag it into the folder in the library tree on the left side. The design will disappear from the main folder and then the folder it was moved to should increase in the number of designs in it. To select multiple files, click on the 1st file, hold down the Shift key and then click on the last file you want to move. Then drag those files to the folder you want them to move to.
Here is a quick video showing the files being moved to the new folders.
5. Create a back up of the library.
But, we already did this? Yes, however, if it is a good idea to do this before and after you have made any changes to the library. So, if you moved files around in the Silhouette library to organize it better, I would suggest creating a new backup that will reflect those changes.
There are so many things available in the Silhouette Studio software and I hope this helps you get the New Year kicked off to a fresh, smooth start!
Check out this video showing each of the 5 tips I shared above.
Feel free to post your project photos or questions on my Facebook group at Silhouette Secrets with EllyMae. We love seeing what you create!
Enjoy!
**This post may contain affiliate links. What that means is that I may receive compensation if you purchase through the links I have provided. The price you pay for the product or service is not higher but I may get compensated for sharing.
The Overcut feature can be a great help in some difficult to cut designs.
This tutorial is written using version v4.3.353 of the Silhouette Studio software.
If you are using a version prior to v4.3, then the Send tab will look just a little bit different and you will find the Overcut option on the right side of the cut settings as shown in this photo.
What is Line Segment Overcut?
It is often just referred to as Overcut. This is a feature that when turned on, takes the blade a little bit past the end of a corner and then lifts the blade, changes directions and sets it back down a little before the start of the cut to make the corner.
If you look at the Overcut icon, you will see that the triangle shows the cut lines of the corners overlapping and this is exactly what it does with the blade.
The normal movement of the blade is to make one long continuous cut on a design with a solid line, however, for some designs or materials this doesn’t always result in a good cut. Corners get bunched up, the cut lines do not meet up, etc.
Each user may experience something different and each design can be different.
The Overcut option can allow for cleaner corners on a design.
For this example I used a Palm Tree by Silhouette – Design #1410 because there are many corners to this design.
On the left side you can see how the corners lifted or bunched up.
On the right side, it is a much cleaner cut.
A couple things to note about the Overcut feature:
– Overcut sounds different than cutting without it on. This is because the blade is lifting and setting down again with each corner.
– Overcut will take longer to cut than without it turned on. This is again because the blade is lifting, moving, and setting down again.
And it will vary, depending on the design.
– Does it always work? No, sometimes you may find it doesn’t work well at all. For instance, sometimes when cutting vinyl, you may find that it will cause the corners to come up and stick to the blade more. But, this is going to vary depending on your design. If you are not getting clean corners it’s worth a shot and the best way to know is to test it out.
Line Segment Overcut Options
The default for the Line Segment Overcut feature is 0.10 mm. This means that it will go 0.10 mm past the point of the corner, lift the blade and move it to set back down at 0.10 mm before the start of the corner it is cutting.
If this is not enough of an overcut for the project, you can adjust this up to 0.90 mm.
Click on the More button on the Send tab (or the 3 dots on the Send tab in older versions)
This will open up the Advanced Materials Panel and the distance can be increased for the Overcut.
Hopefully this information will help you get a smoother cut on your projects in the future.
I would love to hear if you use this feature and see the projects you have created. Feel free to post on my Facebook group at Silhouette Secrets with EllyMae.
Save this post for future reference by pinning the image below.
Enjoy!
**This post may contain affiliate links. What that means is that I may receive compensation if you purchase through the links I have provided. The price you pay for the product or service is not higher but I may get compensated for sharing.
THANK YOU for your support! How can you help? Click the link to buy a coffee. Every little bit helps in the cost of running the site.











 Mermaid Font by Rivka Wilkins – Design #303522









