
I cannot believe it is December already!
I have been trying to get some projects done that have been on my list.
And time just seems to evaporate.
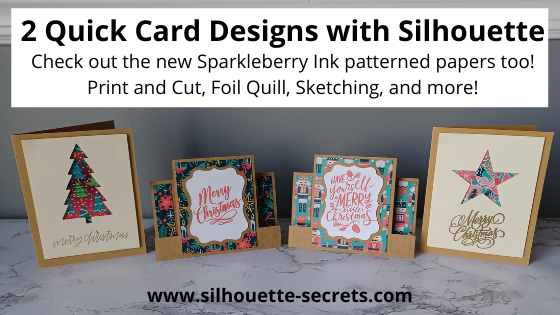
So today I’m going to share 2 quick cards that I’ve been working on.
And the best part about these 2 card designs is that they can be used all year long and for all occasions. Simply change the patterned paper, shapes used, and sentiments and you have birthday, wedding, anniversary, congratulations, or just because cards too!
Affiliate links may be present in the following blog post and as an Amazon Associate I earn from qualifying purchases.
I’ve been playing with the new Sparkleberry Ink patterned papers and I love them!
Now all of the fantastic Sparkleberry patterns are available in a cardstock media.
These are printed directly at the Sparkleberry Ink shop as they are ordered and I’d recommend having a paper trimmer on hand to square up the edges.
Check them out HERE and use my code SILSECRETS to save 10% on your order anytime.
Here are the supplies I used in both these card designs:
– 8.5″ x 11″ Kraft cardstock
– 12″ x 12″ Kraft cardstock
– 12″ x 12″ Sparkleberry Paper
(use code SILSECRETS to save 10% on your Sparkleberry Ink purchases)
– Foam Tape
– 3L Adhesive Tape Runner
The first is a card design that I created using the Drawing Tools and Flexishapes tools in the Silhouette software.

I had hoped to have the full written tutorial on how I created this file, but time just escapes. In most cases, it takes longer to write the tutorial up than it does to create the project.
So I’m sharing the cut file with you, so you can just get to cutting.
Grab the cut file HERE
For the sentiment on the card, you can use any combination of things.
In the photo above, I used the Merry Christmas Vintage sentiment by Chameleon Cuttables – Design #390094 and then did a print and cut onto Kraft Cardstock.
I follow the same steps every single time I do a print and cut and it’s one of my favorite things to do. Check out this post “Let’s Explore v4 – Print and Cut Basics” for setup and tips to getting a successful Print and Cut.
You could also use the Foil Quill and add the sentiments.

For this set I added different sentiments to each card front.

For tips on how to use the Foil Quill check out this post –
Silhouette Cameo 4 – Beginner Foil Quill

I used the following designs on the cards above and below:
– Sketch Merry Christmas Handwritten by Kristen Magee – Design #299750
– Merry Christmas Horizontal by Chameleon Cuttables – Design #390085
– Merry Christmas by Echo Park – Design #306724
– Merry Christmas by Lori Whitlock – Design #280787
– Merry Christmas with Flourishes by Lori Whitlock – Design #107539
– Sketch Handwritten Merry Christmas Phrase by Kristen Magee – Design #301185
Or you could sketch on the card fronts too!

Sketch designs like Design #299750 or #301185 will be quicker to sketch out and are ready to go. In order to fill in text for the Foil Quill or when Sketching, you would use the Line Effects (Sketch) panel to create the fill. Keep in mind the tighter the Sketch fill, the longer it takes to complete the design as it has to sketch all the lines. I used a crosshatched sketch fill with a 0.020 spacing.
Sketching can be so much fun to create unique projects with.
For more in-depth training and a step-by-step class covering the aspects of Sketching, check out the
Sketch Pen & Sketch Pen Design Class on my Teachable site HERE

You could also use stamps and stamp the sentiment on the front of the card front too!
There are so many options with Silhouette!
The second card design is a quick card that any user could cut from beginner to advanced and put together. So it’s perfect for a new user or anyone who is just looking for a neat, quick card to cut and assemble.

Mix and match the patterned papers and sentiments and you have several different designs.

This is a Center Panel Step Card by Lori Whitlock – Design #39775.
The sentiment designs I used are:
– Have Yourself A Merry Little Christmas Handlettering by Loni Harris – Design #232198
– We Wish You A Merry Christmas by Chameleon Cuttables – Design #334183
– Merry Christmas by Sophie Gallo – Design #309990
– Merry Christmas by Echo Park – Design #306724
I added the sentiments to a print and cut page and had them done in no time.

Again, I use the same steps each time I set up a print and cut project and I rarely have any issues with it cutting properly.
Check out those tips HERE.
I hope that has given you a few ideas of how you could quickly complete a project. You may even have all the supplies on hand.
I’d love seeing what you are creating with your Silhouette machines or software.
Feel free to post photos or questions on my Facebook group at
Silhouette Secrets with EllyMae.
Save this for future reference by pinning the image below.

Enjoy!
THANK YOU for your support! How can you help? Click HERE & buy a coffee.
Every little bit helps with the cost of running the site.
Or if you are looking for more in-depth, step-by-step classes, check out all of my online Silhouette classes on my Teachable site HERE.

**This post may contain affiliate links. What that means is that I may receive compensation if you purchase through the links I have provided. The price you pay for the product or service is not higher but I may get compensated for sharing.
Discover more from Silhouette Secrets-Swift Creek Customs
Subscribe to get the latest posts sent to your email.


