
Well, this week has been such a crazy week. Snow days, 2 hour delays and just life has gotten in the mix – I am sure I’m not the only one out there who has these weeks.
I will have the Let’s Explore v4 – Tracing Panel post out next week, make sure to check out the previous posts in the Let’s Explore series.
I thought I would pop in here today and show you the projects we used last night on a webinar that I co-hosted.
The first one we created was a 2 layer decal.

So how did I create this?
- Type out the text and weld. I used the Mystical Wood Smooth Script font found at SoFontsy – you get 4 fonts all in one file when you purchase this.
- Create an Offset. The size of the offset is a matter of personal preference – I used the default of 0.125.
- Create the registration marks. Draw a rectangle, make a copy & move it to the right. Align the marks and group together.
- Click on the Send tab in top right corner, choose Cut by Fill Color, checking the boxes next to each color to select it to cut & uncheck the colors you do not want to cut.

- Line up the registration marks to layer the decal. Always start with the top layer of a decal.
Here is my finished decal & I loved where Barbara placed her’s so I copied her and placed it on my Iris tote that holds my Oracal 651 sheets.

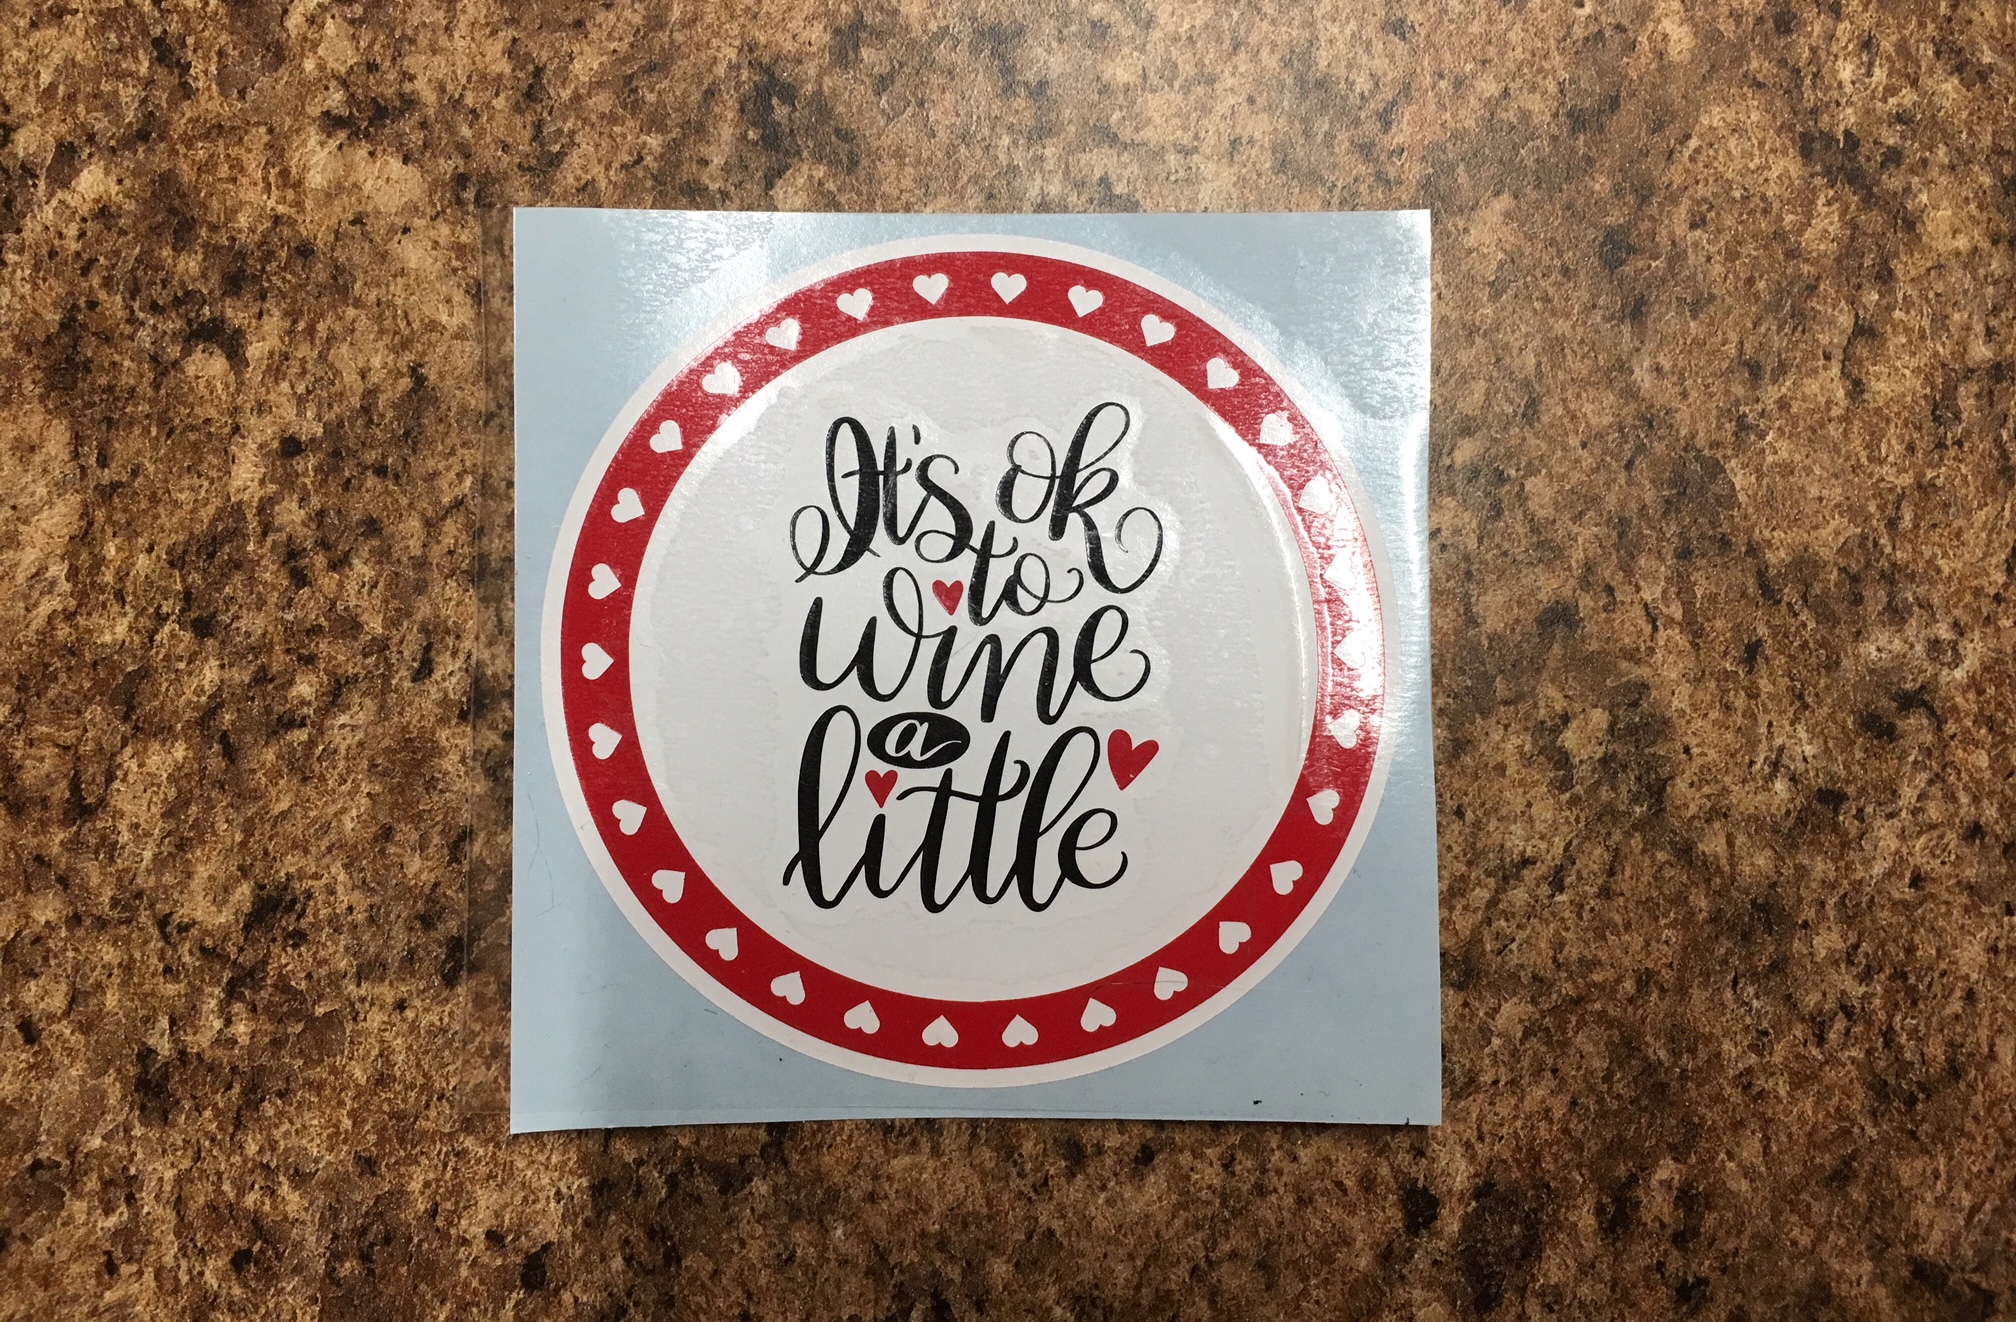
Next, we created a 3 color vinyl decal.

To create this design:
- Start by drawing a large circle using the Circle tool from the left side of v4.
- Download the circle heart frame HERE.
- Open the heart circle frame and resize to fit inside the circle you drew.
- Purchase the It’s Ok to Wine a Little by Dawn Nicole Designs – Design #227534 from the Silhouette Store. Open the design from your Silhouette library by double clicking the design.
- Choose the Fill Color Panel and fill the design with black.
- Resize the Wine a Little design to fit in the center of the white circle.
- Right click on the Wine a Little design and choose Ungroup. While holding down the Shift key, click on the 3 hearts – this will deselect them. Then right click and choose Group. Now your text is all Grouped back together.
- Hold the Shift key down and click on the 3 hearts. When they are all selected, right click and Group.
- Choose the Fill Color Panel on the right and fill the hearts with the same red that the heart circle frame is.
- Select all the layers and choose the center Align tool. Right click and Group those layers together.
- Create the registration marks. Draw a rectangle, make a copy & move it to the right. Align the marks and group together.
- Click on the Send tab in the top right corner, then Cut by Fill Color, checking the boxes next to each color to select it to cut & uncheck the colors you do not want to cut.

- Line up the registration marks to layer the decal. Always start with the top layer of a decal.
And there you go, a 3 color vinyl decal that is aligned perfectly.

And all those little hearts will work perfect as nail decals, just in time for Valentine’s Day!
I also wanted to note that I used an Autoblade on my Cameo 3 to cut this out and as you can see, it has some pretty thin details. It cut beautifully!

I hope you enjoyed seeing how I create a layered vinyl decal.
I would love to see what projects you create! Feel free to post on my Facebook group at Silhouette Secrets with EllyMae.
Enjoy !
THANK YOU for your support! How can you help? Click HERE & buy a coffee. Every little bit helps with the cost of running the site.
Looking for more in-depth, step-by-step classes, check out all of my online Silhouette classes on my Teachable site HERE.

**This post may contain affiliate links. What that means is that I may receive compensation if you purchase through the links I have provided. The price you pay for the product or service is not higher but I may get compensated for sharing.
Discover more from Silhouette Secrets-Swift Creek Customs
Subscribe to get the latest posts sent to your email.


[…] an issue because there is no shrinkage. But, you will still need to get it lined up perfectly and layering marks can help with that – check out how to do that […]
[…] Check out how I created this and then used layering marks to line up the decal exactly HERE. […]
[…] Layering vinyl […]
[…] you want to get the vinyl lined up exactly? Check out this post – Layering Vinyl – to find out more on using layering […]
[…] marks with each color of the design, so I can use them to line the image up. Check out this post on Layering Vinyl for more information on how to create the layering […]
[…] – Layering Vinyl– Layered Vinyl decal for a teacher gift– Layered Vinyl Acrylic Ornament– Creating […]