Posted on 2 Comments

Let’s Explore v4 – Warp Panel

Warp Panel in Silhouette Studio v4

I love that with the Silhouette software you can pretty much manipulate anything. I am one who likes to have control over my designs and files. And that is why I love the Silhouette software – I can do that!

The Basic Warp is a Designer Edition upgrade feature that gives you the ability to move Edit points in the design to manipulate or warp the image.

The Warp Panel can be found on the bottom right side of the Silhouette Studio v4 screen. The size of your computer screen will determine whether you have to click on an arrow to have the menu expand.

On a larger screen, you will find it here:

Warp Panel copy

On a smaller screen, you will see a little arrow pointing left at the bottom of the icons. Click on this arrow and a menu with more icons will pop out.

Warp Panel smaller screen copy.jpg

So let’s take a look at what each part of the Warp Panel means.

Warp detail copy

  1. Warp Selected Shapes – Select the object to warp and then click warp selected shapes and the design will change to points you can edit.Warp Selected Shapes

    I am using Spooky Font by Lori Whitlock found in the Silhouette Design Store.

  2. Restore Original Shapes – Selecting this will revert any changes made back to the original shape. This is very helpful if you want to play around with the design and change your mind.
  3. Release Warp – This option releases the design back to a vector format and the points are no longer editable and how to finish the design once the warp is complete.Release WarpKeep in mind that once the text is changed by welding, converting to path, releasing the warp, etc. it is no longer editable text and is now a vector image. For more information on this and the Text Style Panel see the Let’s Explore v4 Text Style Panel post.
  4. Divisions – Change how the warp is divided up. The default is 3 divisions and each option chosen will change the look of the warped object. Here is the default of 3:Happy Halloween warp

    And here is when there is 2 divisions chosen with the sides pulled down the same.

    Divisions 2

    The more divisions, the more points you have to edit and pull the direction of the design.

  5. Columns – Change the number of columns in the design that can be edited. The default is 1 and the photo below shows it increased to 4.Columns
  6. Rows – Change the number of rows in the design that can be edited. The default is 1 and the photo below shows 5.Rows

As you can see, there are many things in this small panel that can be changed and many ways you can created fabulous, unique designs.

When you are finished with the design, make sure to click the “Release Warp” option to finish the design.

The Warp feature does add a new complexity to the design, so you will notice that it can take more time for your computer to “think” and process the data that you are changing. This will vary by individual users computers and I would recommend saving the design file often, just in case.

Skeleton door sign
*Positionable Skeleton by Samantha Walker – Design #4828

Now I have a little bit of Halloween decor for my door. It may be there until January but it’s a step. I did use the great feature of cutting without a mat to complete this project – find out more about Cutting without a mat HERE.

Final warp
What have you used the Warp Tool for?
I would love to see what you create – feel free to post on my Facebook group at
Silhouette Secrets+ with EllyMae.

Enjoy!

SS_Signature copySS Logo snip it

**This post may contain affiliate links. What that means is that I may receive compensation if you purchase through the links I have provided. The price you pay for the product or service is not higher but I may get compensated for sharing.

Posted on 3 Comments

Silhouette Hands on Workshop

I’m excited to announce a Silhouette hands on Workshop!

This workshop will be held in Woodbridge (Dumfries), VA from 9 am – 6 pm on October 20, 2018.
Hands on retreat copy
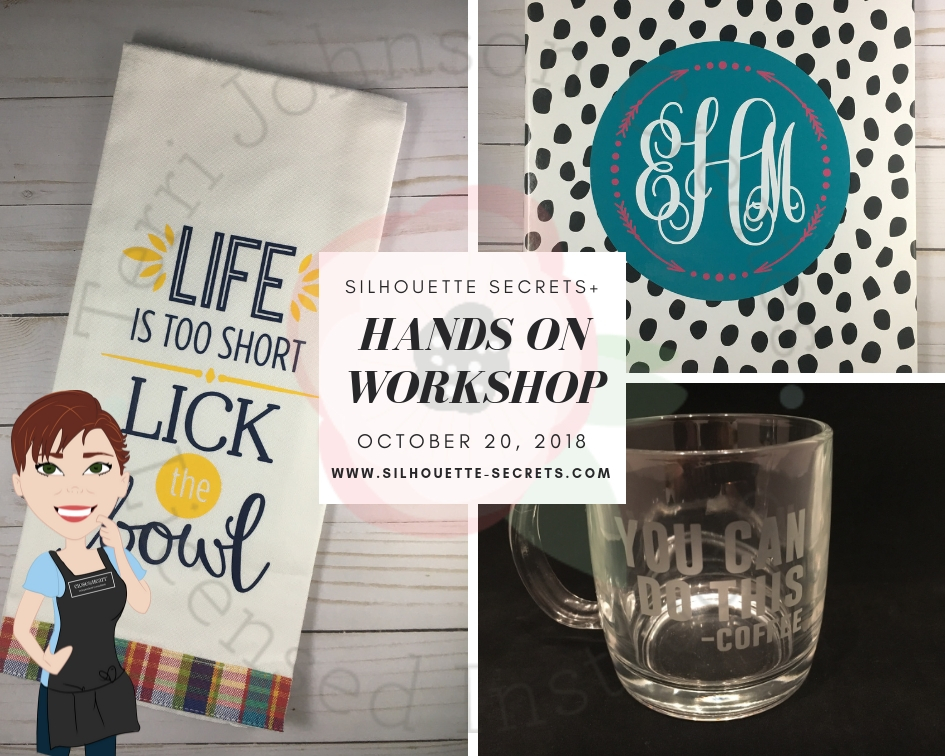
And here is a sneak peek at some of the projects we will be creating.

Hands on Workshop

We will create projects with a variety of products from All About Blanks, Chemica, Etchall, Silhouette America, Sparkleberry Ink, Swing Design and more!

Here is a quick look into the preparation for the hands on workshop – class supplies and goody bag items all ready to go.

IMG_5990

The class size is limited to 10 so register now if you can attend.
Click HERE or the photo below to register!

temp_1

If you are not in the area of Woodbridge, VA but are looking for a hands on event, workshop or Silhouette lessons, check out the list of Terri Johnson Creates Licensed Silhouette Instructors for someone near you or consider a road trip or getaway to attend one.

36064596_10155836579068924_3213699950563033088_n

Not only do you learn new things but you meet new Silhouette friends and that can be priceless! So many of my close friends are because our love for Silhouette has brought us together.

Enjoy!

SS_Signature copySS Logo snip it

**This post may contain affiliate links. What that means is that I may receive compensation if you purchase through the links I have provided. The price you pay for the product or service is not higher but I may get compensated for sharing.

Posted on 7 Comments

Let’s Explore v4 – Layers Panel

Layers Panel in Silhouette Studio v4

Unless you’ve worked in another graphics program, like Photoshop, you may be wondering what layers are. In the Silhouette software, you can create a design in layers which allows you to do many things such as hide, lock, rename, cut by layer, etc.

The Layers Panel is an option if you have the Designer Edition software upgrade or higher for the Silhouette Studio.

If you open the Layers Panel on a blank design mat, you will see that there isn’t much in there.

Layers panel beginning

What this tells us is on the design mat I have open, there is 1 layer.  If I start drawing shapes or text, it will place all of those pieces on Layer 1.

For example, if I open this A2 Pop Up Owl card by Jamie Cripps from the Silhouette Design Store, it will tell us several things.

Owl o ween card example

Here is how the layers panel looks for this design.

Owl o ween card layers

On the right side is the Layers Panel and it shows 1 layer and that this layer is grouped together. If I un-group the design, it will show each shape on that layer or each grouping of shapes, depending on how the file was created. But, the entire design is still on the same layer.

Owl o ween card layers ungrouped

So let’s take a look at what all of this means and what you can do with the Layers Panel.

Layers panel copy

The layers panel can be found on the right side towards the bottom of the Silhouette Studio v4 software, if you have the Designer Edition upgrade to the Silhouette software.

There is a lot of information in this small panel, so let’s explore all the features.

Layers panel detail copy

  1. File name – This is the name of the file that is currently open.
  2. Layer details – The default name for each layer is “Layer 1” and then each proceeding one will be in numerical order, but you can change that by clicking on the word Layer and typing a new name or right clicking and choose Rename Layer.Layers right click options
    There are many options here including: add a layer under this layer, rename layer, delete layer, cut, copy, paste, select or deselect.In additional to those options, there are toggle options too.

    Eye and lock option copy

    The eyeball can be toggled on and off which hides or shows a layer.

    Eyeball on copy
    This can allow you to see how a design will look without moving the shape or object.

    The lock can be toggled on or off and allows a layer to be locked so it cannot be moved by accident. Again very helpful when designing if you want something to stay in place.

    Locked copy

    When a layer is locked, it cannot be selected, moved or altered. The layer can be hidden by clicking on the eyeball, but no changes can be made to the layer without toggling the lock off.

    Maximize and minimize the layer details by clicking on the circle next to the Layer name.

    Maximize copy

  3. Designs on layer – All objects that are on that layer will be listed below the layer title in the order they are on the mat.Designs on layersObjects can be grabbed and dragged to rearrange the order within the Layers Panel.
  4. Additional layers – Add as many layers as needed to a design. Having the parts of the design on separate layers allows more control over things while working with a design.
  5. Add or Remove Layers – Use these quick button to Add or Remove layers as needed.Add or Remove layers

Layers can be fun to play around with and can also serve many useful purposes when designing or using more complex designs.

The other option available once layers have been created is to Cut by Layer.

Cut by Layers copy

On the Send tab, choose the option to Cut by Layer and it will open up a window with all the Layer options. Now the cut lines can be turned on and off, depending on which part of the design is being cut.

I hope this helps explain the layers panel just a bit more!

Layers Panel

Enjoy!

Feel free to post questions or project photos on my Facebook group at
Silhouette Secrets+ with EllyMae.

SS_Signature copySS Logo snip it

**This post may contain affiliate links. What that means is that I may receive compensation if you purchase through the links I have provided. The price you pay for the product or service is not higher but I may get compensated for sharing.

Posted on Leave a comment

Let’s Explore v4 – Advanced Rhinestones

There are so many neat features of the Silhouette Studio software as you move up in the software upgrades. The Advanced Rhinestone Panel is an option if you have the Designer Edition Plus or Business Edition upgrade.

Rhinestone Panel copy

At first glance or if you read the standard description, it may not seem like much of a feature, but let’s take a look at it more in depth.

Rhinestone Panel Detail copy

  1. Rhinestone Library – Contains images of rhinestone designs – 2 sectionsPre-set Images and Sizes – Choose which color and size that you would like to add to your design

    Rhinestone options

    User Rhinestones – designs can be added to the Rhinestone library by either drawing a shape or importing a photo

    Rhinestone Library - User section copy

  2. Size – Designates the size of the rhinestone chosen or the size of the rhinestone design you are creatingSize copy
    This will show grayed out if using a pre-set shape & size.

    If a shape is added to the rhinestone library, then a size can be designated and it is no longer grayed out.

    Size User created copy

  3. Add Selected Shape to Rhinestone Library – Add shape designs to the library for creating a new rhinestone option. Shapes can be drawn or imported from a photoAdd Selected Shape copy

    The default measurement can also be changed under the Preferences in the software. It can be set to inches (default), millimeters, centimeters, meters, inches or feet.

    Change measurement preference copy

    And then it will reflect in the panels that use measurements.

    Change measurement copy

    If the shape drawn is bigger than what is allowed, a pop up will appear stating this.

    Error size

  4. Draw Rhinestones – Single vs Multiple – Choose to draw one style of rhinestone designs or a multiple of designs from the library.Single – drawing rhinestone in repeat of 1 shape with a click of the mouse

    Draw Rhinestone Single click

    Multiple – Draw Rhinestone from a chosen list of varied designs pulled from rhinestone library.

    By clicking on the multiple option, a new option window expands and you can add or delete the order of the designs in the selection window.

    Draw Multiple pattern
    This would come in handy if you are trying to create a rhinestone pattern with different sizes.

    Or you can use the pre-set rhinestone designs and create a pattern too.

    Draw Multiple pattern on shape

  5. Angle – Change the angle of how the rhinestone design follows a shape.Standard = Rhinestones upright
    Center = Rhinestones point to center
    Perpendicular = Rhinestone align to contour

    Angle

  6. Spacing – Change the spacing between the rhinestones when applied to a shape.Spacing.JPG
  7. Angle Offset – Choose what angle the rhinestones are placed along a shape.Angle Offset.JPG
  8. Rhinestone placement – Choose how the rhinestones are placed – options are: Outer edge, perpendicular, or from center.Rhinestone Placement
  9. Draw Rhinestone – Single Click vs Replace – Add a rhinestone with a single mouse click or replace a rhinestone with a different rhinestone.Single = place 1 rhinestone with each click of the mouse
    Replace = Once a rhinestone is placed it can then be swapped out with a different rhinestone for another size or color
  10. Totals (All Shapes) – Gives a count of all the rhinestones on the mat or the image selected.Totals copy

 Now that we have explored the entire panel – what would you use this for?

Here I’ve created what is called a mock up and the design is laid on top of the photo of the tote bag.

Mock up photo

Now I may actually have to make the rhinestone decal for real.
Find out more information on creating a rhinestone template in the Let’s Explore v4 – Rhinestones post.

Have you played with the Rhinestone feature yet?
I would love to see your Silhouette projects! Feel free to post on my Facebook group at
Silhouette Secrets+ with EllyMae.

Enjoy!

SS_Signature copySS Logo snip it

**This post may contain affiliate links. What that means is that I may receive compensation if you purchase through the links I have provided. The price you pay for the product or service is not higher but I may get compensated for sharing.
Posted on 9 Comments

Leatherette Earrings & Earring Card Projects

Affiliate links may be present in the following blog post and as an Amazon Associate, I earn from qualifying purchases.

Who doesn’t love a surprise? And that is just what I received when Silhouette America asked if I wanted to check out their new Mystery box.

When I opened the box, look what I saw:

IMG_5534

Plus a pack of the Kraft Adhesive paper that arrived on my doorstep, it must have forgotten to jump in the box and was just another bonus to the mystery box.

Kraft Paper

And now the fun part of playing with these materials.

I grabbed some designs from the Silhouette Design Store and tackled something I’ve had on my project list.

IMG_5560_edited

I used the Leatherette package and the sketch pens to create these earrings and earring cards.

First, I started off making the earring holders.
I cut several different styles but I ended up really liking Design #14057 by Loni Stevens.

Earring holder file

But, I knew I could add to the earring holder, so I decided to dress them up a bit with the Silhouette sketch pens. I received the Metallic set in my mystery box and after testing several, the silver was my favorite.
I could have told you that before I tested, but I still gave all the colors a chance.

Zoom on stitches and name

To make the dashed sketch line:
– Make a copy of the outer edge of the earring holder design
Resize the copy a little smaller – either by the Scale panel or by dragging the corner bounding box
– Use the Line Style Panel and change the style of the line to a dashed line
– Also under the Line Style Panel change the color of the line to black.
– Select the dashed line, click on the Send Tab and then click on the
Action by: Line at the top –
this means the Cameo will perform the actions we tell it to by the Line Color
Cut by Line color

– Grab the black color option and move it to the top spot –
this action will be performed first
– Change the Tool No. to the blue circle (blue circle = Tool 2)
– Select your Material – Cardstock
– Change the Action to Sketch
– Check & set up the Cut settings for the red line

Now when the design is Sent, it will first sketch the design that has been changed to a black Line color – the dashed line and then after will cut the lines that are red.

Next, I used the Nouradilla Script Font and added my name and Silhouette Secrets to the earring holder as well. Change the line color to black under the Line Style Panel and it will sketch at the same time as the dashed line.

Once I started cutting, it was hard to stop. I do love how this Leatherette cut so smoothly. I started with brand new blade and mat and I believe it made a big difference in how cleanly it cut. In fact, the more I cut and the less sticky my mat became, the cuts weren’t as crisp. A sticky mat makes a big difference.

IMG_5566

This was the first set I cut and might be my favorite. It is Leaf Earring design by Lilium Pixel SVG – Design #266977. The only thing I changed on this file was I released the Compound Path and deleted the top circle for the hardware. After I deleted the circle in each, I selected the entire design and then chose Make a Compound Path again.

I then made a copy of the earring design and right clicked and Flipped horizontally. This made a 2nd copy that I could glue together and make the back have a finished look. I used a Xyron Sticker Maker permanent adhesive to do this.

IMG_5568_resized

Lined Leaf Earrings by Amanda McGee – Design #275057
Leaves Earrings by Amanda McGee – Design #275058
This design was modified to take out the top circles like the first file and then cut & glued together with the Xyron Permanent Adhesive.

IMG_5561_resized

Tear Drop Earrings by Sweet Elsie – Design #273510
– Ungroup the design
– Release the Compound Path and deleted the hardware circle at the top.
– Make a copy and Scale the copy down a little
– Make another copy and Scale it down a little more
– Cut each out of a different color and layer on the earring hardware

You could also use glue and adhere the layers down to each other but I chose to let them hang loose.

Rather than try to get each design to match, I deleted one of the original designs, made my copies and resized how I liked and then make a copy of the entire design before I cut. Then both earrings matched exactly.

IMG_5562

Leaf Earrings by Lori Whitlock – Design #268363
I once again ungrouped the design, released the compound path and then deleted the top circle. You might see a pattern here.
It is nothing to do with the Designer’s file, but for the Double J Earwire hardware I had from Craft Chameleon, it was easier to make my own hardware hole.

IMG_5567_resized

Drop Earrings by Sweet Elsie – Design #273506
I did the same technique with making copies and resizing as I did with the Tear Drop earrings above.

IMG_5565_resized

Layered Feather Earrings by Amanda McGee – Design #275059
This file was cut exactly as it opened.
Again, you could glue the layers down if that is your desired look.

IMG_5563_resized

For this set, I took the Tear Drop Earrings by Sweet Elsie – Design #273510 and then added a dingbat from the Valentine Dingbats Font by Lori Whitlock – Design #243211.
– Make a copy of the Tear Drop design
– Add the dingbat shape from the font to one of the designs
– Select both the earring shape and the dingbat shape, then make a compound path
– Cut each shape out of the colors
– Glue the layers together

All of the earrings above were cut from the Silhouette Leatherette using the Leatherette cut settings in the program and it worked beautifully.
Leatherette cut settings

Again, I did start with a brand new blade and mat, which I believe was very helpful.

The Silhouette cutting mat is very important and the material sticking to the mat for the entire cut is key to getting crisp, clean cuts for all materials.
If the material moves as the blade is going around, it cannot connect exactly and you end up with crunched corners, cuts not connected, frustration and possibly a mess.

I’d suggest always having an extra Silhouette mat & blade on hand for any projects you are doing.

Save this for future reference by pinning the image below.

Leatherette (Pinterest Pin)

Enjoy !

THANK YOU for your support! How can you help? Click HERE & buy a coffee. Every little bit helps with the cost of running the site.

Silhouette Classes

Never stop learning! Let me help you take the anxiety out of learning with Silhouette and get to creating faster! My Silhouette classes are heavily focused on software, so you can take the skills & techniques taught and apply them to many future projects!

Silhouette step-by-step Classes by Silhouette Secrets+

**This post may contain affiliate links. What that means is that I may receive compensation if you purchase through the links I have provided. The price you pay for the product or service is not higher but I may get compensated for sharing.

Posted on 1 Comment

Adhesive Vinyl on Acrylic Blanks

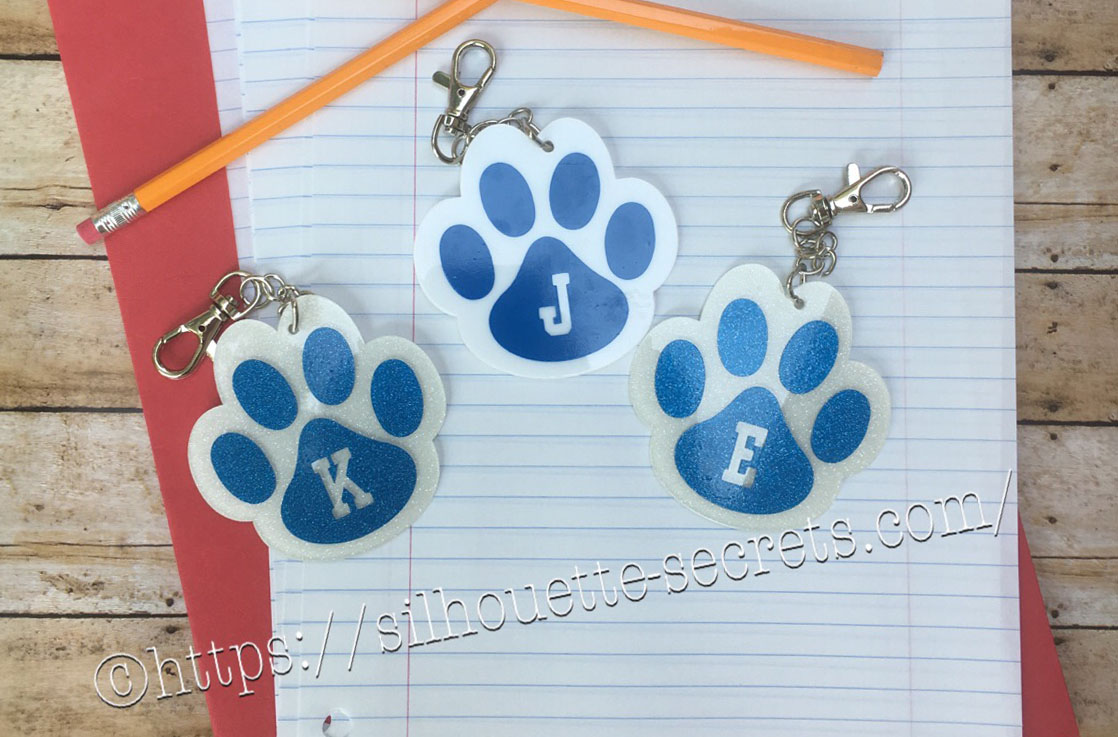
It is Back to School here for us and I made a little something to add to my kid’s backpacks. These bag tags are 3″ in size and with the lobster claw, perfect to clip onto their backpack zipper.

DYQL3512_resized

Our school colors are blue and white, so this little paw print acrylic from Craft Chameleon works great. There are many options for colors both solid and glitter, just click on the drop down box for more options.
For the girl’s tags I used the white glitter with Siser PSV in blue and the boy’s are solid white with Oracal 651 blue.

It came with a cut file that is sized perfectly for the acrylic blank, so all you have to do is customize it if needed and set it up to cut.

CC cut file

*Line color added and thickened for visual

How to make the bag tag design

For these bag tags, I wanted to add the first initial into the design. I typed the first initial using the Text Style Tool and then changed the font using the Text Style Panel.
I used Lori Whitlock’s School Font Design #273761 from the Silhouette Design Store because it was a nice bold font.

Girls paws

Once the properties (color, font style, etc) of the first letter is set, then make a copy of the letter and change the text to the next letter. I find this saves time when you are using multiple text designs that are similar. In this case, all of the initials would be the same font, so I just copied and pasted the letter and then changed it for the next one.

Place the letter in the design where you want and you are ready to cut.

Girls paws send tab

The Cameo will cut exactly where you see the bold red cut lines when you click on the Send tab. I chose to Send mine to cut this way with weeding lines between the designs.

If you are creating a design to show to someone, you can make the design look more realistic and having the letter “cut out” or subtracted from the paw print by making it a Compound Path.

Compound path

Both designs will cut the exact same way as you can see from the bold red cut lines on the Send tab.

Compound path send tab

I can’t wait to show the kids when they get home from school.

FZET7724

Here are the supplies I used to create these bag tags:
– 3″ acrylic paw print
– Swivel Lobster Clasp
– 1 inch Silver Tone Links
– Triangle bail (small)
– Bent Nose pliers
Siser PSV adhesive glitter vinyl (blue)
Siser PSV transfer tape
Oracal 651 adhesive vinyl

And here is a quick video on how I applied the vinyl to the acrylic blanks.

I love that with my Silhouette, I can make so many different custom projects.


Enjoy !

THANK YOU for your support! How can you help? Click HERE & buy a coffee. Every little bit helps with the cost of running the site.

Looking for more in-depth, step-by-step classes, check out all of my online Silhouette classes on my Teachable site HERE.

SS Logo snip it
**This post may contain affiliate links. What that means is that I may receive compensation if you purchase through the links I have provided. The price you pay for the product or service is not higher but I may get compensated for sharing.

Posted on 8 Comments

Let’s Explore v4 – Rhinestones

Bling, sparkle and wow!

Exploring the Rhinestone panel today!

This is a Designer Edition upgrade feature, so if you have the Basic software, you will not see this icon on the screen.

Rhinestone Panel copy

If you only have the Basic software, you can still cut rhinestone designs, but you cannot create rhinestone designs. The Silhouette Design store has many rhinestone designs that can be opened and cut with the Basic software.

The diamond icon is what how you can tell at a glance that it is a rhinestone design or you can use the search box and type in “rhinestone” and it will bring designs up.

Design Store Rhinestone files copy

With a rhinestone design, it comes it at a specific size to use with certain stone sizes, so they cannot be resized if you are using stones.

The description of the design will also tell you more information about the design, such as size, number of rhinestones, and rhinestone sizes needed.

Design Store description copy

With the Designer Edition upgrade to the Silhouette Studio software, you can create your own rhinestone designs in just a few clicks.

There are so many options in creating your own designs in this panel, let’s take a look.

*Please note – throughout the entire post I have filled the rhinestone design in with color so it can be seen better. When a rhinestone design it is not filled with a color.
Check out more information on the Fill Color Panel HERE.

Rhinestone Panel detail copy

  1. Rhinestone Effect – 3 options for rhinestone placement
    Edge Effect – places rhinestones around the edge of the designEffect Edge copyLinear Effect – this fills the design in a linear formationEffect Linear copy

    Here is another example of the linear effect

    Effect Linear demo2 copy

    Radial Effect – fills the design in a radial pattern

    Effect Radial copy

    Here is another example of the radial effect

    Effect Radial demo2 copy

  2. Rhinestone Size – 4 options: 6 ss, 10 ss, 16 ss, 20 ss
    ss stands for Stone SizeStone SizeChoose from the most popular stone sizes or adjust it to a custom size.Adjustable size copy
  3. Rhinestone Spacing – further customize the design by adjusting the spacing between the rhinestonesSpacing
  4. Draw Rhinestones – left click and hold the mouse button down and draw a design. The rhinestone pattern will follow your drawing and the stone size will be what is chosen above in Rhinestone size.Freehand copyHere is a the Freehand rhinestone in action:https://youtu.be/DopgVUlOshQ
  5. Release Rhinestones – releases all the rhinestone circles into individual design pieces. This allows you to manipulate the design even further by moving the rhinestone holes, adding more or deleting some. A selection box will appear around each rhinestone circle.Release RhinestonesZoomed in to see the selection boxes.Release Rhinestones zoomedHere I have moved some and added more to fill in the blank spaces.Freehand finish

    Something to keep in mind when you do release the rhinestones is you are breaking the file up from 1 object to LOTS of objects – each of those boxes around the hole is a new object. This means that it is a lot of data for your computer to process. Do not be surprised if you experience a little lag or it doesn’t react as fast as you’d like. This is normal and depends on the processing speed of your computer and how much data it can process at once.

    After adjusting the design, select the entire image and then Group it back together, so the file will move as 1 object.

    Rhinestone grouped

  6. Totals (all Shapes) – this tells how many rhinestones are either on the mat or if 1 object is selected, how many are in the design.When no objects are selected, it totals all the rhinestones on the mat file.Totals copyWhen 1 object is selected, it totals the rhinestone count for that 1 object.Totals selected copy

Rhinestone designs can be so much fun to create and design!

The design is then cut out of a rhinestone template material that can be reused over and over again to create fabulous rhinestone designs.

IMG_3996

And you have another customized project that you have created with the Silhouette machine.

temp

For a full online video course going step-by-step through the rhinestone process, check out the class on Designing with Rhinestones and Silhouette – Creating 4 projects

Supplies used in this post:
Love design by Silhouette Design #9651
Magic Flock rhinestone material, Hot Fix Transfer tape, and Rhinestones
from The Rhinestone World
Canvas Zipper bag from Craft Chameleon

Feel free to share your sparkly rhinestone projects on my Facebook group at
Silhouette Secrets+ with EllyMae.

Enjoy !

THANK YOU for your support! How can you help? Click HERE & buy a coffee. Every little bit helps with the cost of running the site.

Silhouette Classes

Never stop learning! Let me help you take the anxiety out of learning with Silhouette and get to creating faster! My Silhouette classes are heavily focused on software, so you can take the skills & techniques taught and apply them to many future projects!

SS Logo snip it
**This post may contain affiliate links. What that means is that I may receive compensation if you purchase through the links I have provided. The price you pay for the product or service is not higher but I may get compensated for sharing.

Posted on 8 Comments

Let’s Explore v4 – Sketch Panel

One of the options with the Silhouette machine is using pens in the tool holder and then the Silhouette will draw the design you choose. There are sketch designs that you can find in the Silhouette Design store and are all ready to use with your sketch pens. This is one of my favorites I did while preparing for a class.

IMG_2944

But, did you know that you can turn images into sketched designs? If you have the Designer Edition upgrade to the Silhouette software, you have the Sketch Panel available to you.

Sketch Panel copy

This is so fun to play around with and you never know what you may like until you try it.

Sketch Settings

Sketch Panel detail copy

  1. Edge Sketch – 7 different edge style sketchesEdge SketchAs you can see, each one gives it a little different look. Keep in mind that the more lines you see or the darker the sketch is, the longer it will take to sketch out that design.
  2. Fill Sketch –  8 different fill option for the sketch design.Fill SketchIn the above example, an outer edge sketch line was chosen to help show the design better and then each one is a Fill option.
  3. Release Sketch – This opens up a whole new world of possibilities in editing your sketch design. Once the sketch is released, then you can access individual point editing on the sketched design and can manipulate it how you like. On the left is before the sketch is released. Each of the gray points is an edit point that can be manipulated in this design. On the right is after the sketch has been released. Now, not only do you have the gray edit points, but the sketch fill lines have been released so you can move those as well. Keep in mind that a red dot means that it is an open point and not a closed object, so you will not be able to fill this with color. You can move the red dots towards each other and connect the dots to change the sketch fill.

And there are even more options

Advanced Sketch Settings

Advanced Sketch copy

  1. Edge Effect – 4 options for Edge Effect. These look the same when you first click on them, but with each one there may be more options for you to adjust the design.Plain – there are no further options given. AS Plain Continuous – Option for width, density & waver. AS Continuous I have made a few adjustments from the photo above to show you the difference. AS Continuous2 Rough – Option for stroke length, width, density, splay, curvature. AS Rough 1 And this photo below shows a few adjustments and how it can change the look of the sketched design. AS Rough 2 Scribble – Options for loop separation, loop size, randomness, and density. AS Scribble 1 And here is an example of adjustments made to the Scribble options. AS Scribble 2
  2. Fill Type – 3 additional options for Fill type – none, zigzag, and hatchZigzag – Options for spacing, angle, offset FT Zigzag And here is adjusting those options. FT Zigzag2 Hatch – Options for spacing, angle, sweep, offset. FT Hatch1 And more adjustments made to the Hatch fill. FT Hatch2
  3. Options – As shown in the examples above, these options change for each type of sketch fill you choose.
  4. Fill Effect – 2 advanced OptionsRough – options for stroke length, width, density, splay, curvature. FE Rough1 And changing the options up a bit, yields a different sketched look. FE Rough2 Scribble – Options are loop separation, loop size, randomness, and density FE Scribble 1.JPG And more adjustments to the options. FE Scribble 2

Now, did you know there were so many options? You could play with this feature for a long time and make many different designs with it, just by changing a few things.

Sketch pens are so fun to play with and can make very unique designs.

Keep in mind that that the Sketch Panel is available for those that have the Designer Edition upgrade to the Silhouette software.

Check out this video showing how to turn a design into a sketched design using this Sketch Panel.

Enjoy !

THANK YOU for your support! How can you help? Click HERE & buy a coffee. Every little bit helps with the cost of running the site.

Looking for more in-depth, step-by-step classes, check out all of my online Silhouette classes on my Teachable site HERE.

SS Logo snip it

**This post may contain affiliate links. What that means is that I may receive compensation if you purchase through the links I have provided. The price you pay for the product or service is not higher but I may get compensated for sharing.

Posted on 1 Comment

Creating a shadow box with Silhouette

Everyone starts out with one material or another, mine was paper. I started with my Silhouette as a paper-crafter and it has grown from there.

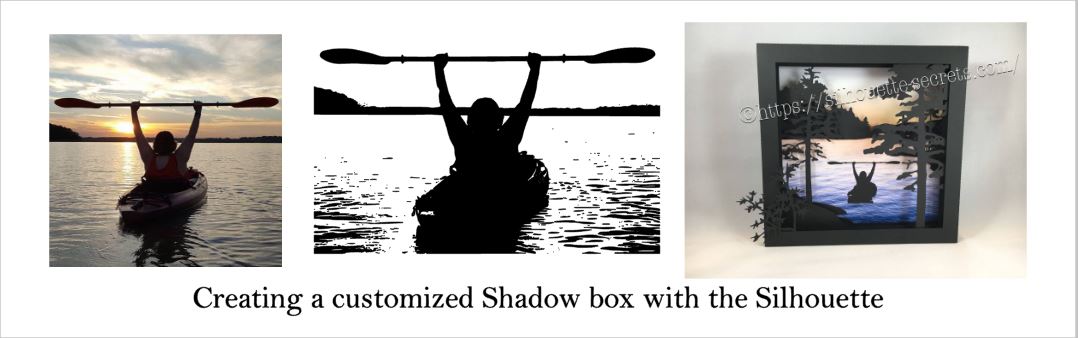
A while back I was visiting friends in Kansas and playing with the Silhouette and my friend asked if I could trace a photo for her that a friend took. Now, photo tracing can be tricky. Each photo can yield different results tracing in the Silhouette Studio and you just never know until you try to see what will happen.

In this case, it was a great photo to trace.

Bobbi's photo

Here is how the trace came out. I used Basic Trace panel to achieve this. Check out the Trace Panel HERE.

Photo trace

Then I released the compound path and deleted the water areas and used the point editing and deleting points to clean up edges and take out the skyline.

Cleaned up

Now, like I said above, each photo is going to vary in how it traces and this one turned out to be pretty simple with a little time for editing.

Then when I saw this Canoe at Sunrise shadow box in the Silhouette Design Store, I knew it was perfect for a gift that I could incorporate this trace into.

Design Store file

Instead of adding the canoe, I cut and added my traced image of my friend on her kayak. It was perfect!

Shadow box

I am one of those people who has to do a project pretty much exactly like the demo, at least the first time. So I did go to the designer’s website and purchase the file again – yes, sounds crazy – but I wanted the backgrounds for this particular project. However, you can use any background that you want and add it to your project.

What are you creating today? Feel free to post your project photos & questions on my Facebook group at Silhouette Secrets+ with EllyMae.

Shadow box

Enjoy !

THANK YOU for your support! How can you help? Click HERE & buy a coffee. Every little bit helps with the cost of running the site.

Looking for more in-depth, step-by-step classes, check out all of my online Silhouette classes on my Teachable site HERE.

SS Logo snip it

**This post may contain affiliate links. What that means is that I may receive compensation if you purchase through the links I have provided. The price you pay for the product or service is not higher but I may get compensated for sharing.

Posted on Leave a comment

Let’s Explore v 4 Recap

We are half-way through 2018 – can you believe that?

So it’s the perfect time to recap what the “Let’s Explore v4” series has covered so far since January.

Let's Explore Recap final 2copy

Let’s Explore v 4 series

Page Setup Panel – Tab 1 – Page Size & Cutting Mat

Page Setup copy

Page Setup Panel – Tab 2 – Grid Options & Spacing

Page Setup Tab 2 copy

Page Setup Panel – Tab 3 – Registration Marks – Print & Cut

Registration marks panel copy

Fill Color Panel

Fill Color Panel copy

Line Style Panel

Line Style Panel copy

Trace Panel – Tab 1 – Basic Trace

Tracing Panel copy

Trace Panel – Tab 2 – Trace By Color (Designer Edition feature)

Trace Panel copy

Trace Panel – Tab 3 – Magnet Trace (Designer Edition feature)

Magnet Trace Panel copy

Pixscan Panel

Pixscan copy

Text Style Panel – Tab 1 – Text Style

Text Style Panel main copy

Text Style Panel – Glyphs and Spell check

Glyph

Transform Panel – Tab 1 – Align Tab

Transform Panel copy

Transform Panel – Tab 2 – Scale Tab

Scale tab copy

Transform Panel – Tab 3 – Rotate Tab

Rotate main copy

Transform Panel – Tab 4 – Move by Tab

4-25 Transform -Move copy

Transform Panel – Tab 5 – Shear (Designer Edition feature)

Shear Panel copy

Replicate Panel – Tab 1 & 2 – Replicate & Number of Copies

Replicate panel copy

Replicate Panel – Tab 3 – Object to Path

Replicate Object on Path copy

Modify Panel – Part 1

Modify Panel copy

Modify Panel – Part 2 – Compound Paths

Modify Panel details copy

Offset Panel

6-5 Offset Panel copy

Pop Up Panel (Designer Edition feature)

Pop Up Panel copy

Stipple Panel (Curio option only)

Stipple panel copy

Nesting Panel (Designer Edition feature)

Nesting feature copy

There are so many things that the Silhouette Studio program can do. It is really an amazing program and I hope that you have learned something throughout the series. There is still so much more to explore!

Please let me know what is one thing you have learned that you did not know before by leaving a comment here or on my Facebook group.

Enjoy !

THANK YOU for your support! How can you help? Click HERE & buy a coffee. Every little bit helps with the cost of running the site.

Looking for more in-depth, step-by-step classes, check out all of my online Silhouette classes on my Teachable site HERE.

SS Logo snip it

**This post may contain affiliate links. What that means is that I may receive compensation if you purchase through the links I have provided. The price you pay for the product or service is not higher but I may get compensated for sharing.