
Silhouette Auto Sheet Feeder
Affiliate links may be present in the below and as an Amazon Associate I earn from qualifying purchases. What that means is that I may receive compensation if you purchase through the links I have provided. The price you pay for the product or service is not higher but I may get compensated for sharing.

Silhouette America recently released a new product called the Auto Sheet Feeder.
Thank You to CrafterCuts who sent me a Silhouette Auto Sheet Feeder in order to test and provide feedback on.
The Auto Sheet Feeders only work with the Portrait 3 or Cameo 4, Cameo Plus, or Cameo Pro Silhouette machine models.
There are 2 Sheet Feeders available.
1. Silhouette Auto Sheet Feeder for the Cameo 4 and Portrait 3 machine models.
2. Silhouette Auto Sheet Feeder for the Cameo Plus and Cameo Pro models.
Make sure you are buying the correct one for the machine model that you are using. The Auto Sheet Feeder is specific for the machine model.
Can the Auto Sheet Feeder Be Used with Older Model Silhouette Machines?
No.
While this may be a disappointment to those who own an older machine model, this is new technology and it is not possible to program that into the older Silhouette models for it to function properly.
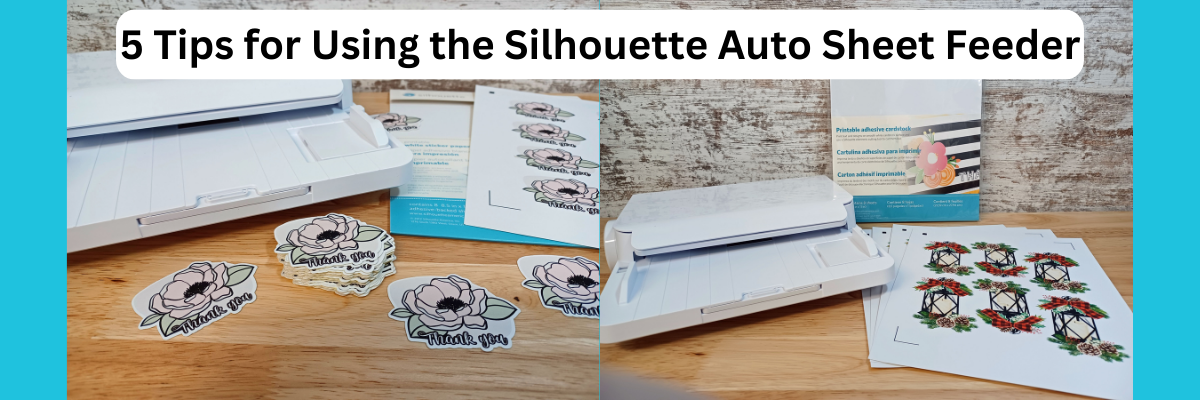
Today, I’m sharing 5 tips for using the Auto Sheet Feeder.
Setup information and links are provided at the end of this post.
Check out the video of these tips on my Silhouette Secrets+ YouTube Channel HERE.
Both the written tutorial and video may contain a few different tips and I would recommend looking at both.

5 Tips for the Silhouette Auto Sheet Feeder
1 – Silhouette Studio Software Version & Firmware
In order to have access to the Silhouette Auto Sheet Feeder, you will need to be using a software version of v4.5.152 or higher.
However, I am recommending that you use version v4.5.155 in order to skip some bugs that are in the .152 version.
Depending on when you are reading this, will depend on what is the current software version or Beta version. Currently, the v4.5.155 is the Beta version as I write this. I normally do not recommend for users to use the Beta version as it’s a test version and there can be unknown bugs in it, however, in this case the bugs introduced in .152 are a pain in the butt.
Download the current Silhouette Studio Software version HERE.
Download the Legacy (older) or Beta software versions HERE.
The most important factor is that you HAVE to use a version of v4.5.152 or higher in order for the Auto Sheet Feeder to be available as a feature.
Firmware
If you do need to update the software, you will also most likely have to do a firmware update before you can use the Auto Sheet Feeder. The Cameo 4 and the Portrait 3 models check for firmware updates automatically on the Send tab.
In the bottom right corner of the Send tab, the software will notify you in orange if there is a firmware update available. This update HAS to be done before it will let you send a job to the machine to cut.

Firmware updates HAVE to be done by the usb cord and cannot be done by bluetooth.
2 – Silhouette Auto Sheet Feeder Connects by USB Only
In order to use the Silhouette Auto Sheet Feeder, you will need to connect it by the USB cords. There is one short cord with the Auto Sheet Feeder that connects between the Sheet Feeder and the Silhouette machine and then use the longer USB cord to connect from the Auto Sheet Feeder to the computer.

It cannot be used by Bluetooth.
If your computer does not have a usb port, you will need an adapter.
Please refer to the setup videos linked at the end of this post for more specific details.
3 – The Silhouette Auto Sheet Feeder Needs Space to Function Properly
The Silhouette Auto Sheet Feeder needs to be securely on a flat surface and fully supported.

When using the Auto Sheet Feeder with a Cameo 4, Cameo Plus, or Cameo Pro model machine, the feet under the front of the Sheet Feeder need to be extended and on a fully stable surface.

If the Auto Sheet Feeder is not set up properly, it will not feed properly.
Not only does the Auto Sheet Feeder need to have clearance in front of the machine for the feeder to sit securely, but it also needs to have clearance behind the machine that is the full length of the material that is being used.
The material cannot be hindered by hitting a wall, cords, or any other object or it can cause the media to jam in the machine or the cut to be off.
The Auto Sheet Feeder for the Cameo 4, Cameo Plus, and Cameo Pro ejects the material to a tray on the bottom of the Sheet Feeder when finished.
If using a Portrait 3 model machine, it ejects the material out the backside of the machine.
4 – Page Setup for the Auto Sheet Feeder & Registration Marks
When using the Auto Sheet Feeder, the Page Setup is very important and the registration marks CANNOT be expanded.
On the Page Setup Panel – Tab 1 make sure the Auto Sheet Feeder is selected and the correct page size that you are printing on.

Turn on the Registration Marks on the Page Setup Panel – Tab 3.
With the Auto Sheet Feeder, the registration marks are in a set location and you will notice that the options are grayed out and you cannot select or change this.

The only options you can change are the thickness and the length, which I do not recommend if you are just starting out or if you’ve had issues. The default registration marks are always the most accurate cut and eliminate things that would cause off-cuts.
The reason you cannot adjust the registration marks is because when you cut without a cutting mat, the machine has to have space on the material that is dedicated to being held securely in the machine.

It needs space on the left and right sides and 1″ of space at the bottom in order to securely hold the sheet of paper in the machine as it’s being cut.
When cutting without a mat, you cannot cut to the edge of the page or the machine cannot hold onto that material securely as it rolls back and forth.
When using the Auto Sheet Feeder, this is not an option you can change. It is set with these defaults for the best success for an accurate reading and cut.
You will need to design within this space and have the design within the red cut border on the page in order for success with your print and cut projects.
Check out the 5 Tips for the Auto Sheet Feeder video on the
Silhouette Secrets+ YouTube channel for a visual on this and how it differs from using a cutting mat.
What About Files Already Designed for Print and Cut?
If you have files that you currently use for print and cut and plan to use the Auto Sheet Feeder, you may want to test your files within the borders of the print and cut with the Auto Sheet Feeder selected.
You may need to redesign your files to fit within the confines of this new print and cut area with the Auto Sheet Feeder.
5 – Material Thickness, Curled Edges, or Static Affects
If the material is too thick, it will not feed through the Auto Sheet Feeder properly and either jam inside or not be successful in finishing the cut job.
I tested Oracal printable vinyl with the laminate overlay, it was too thick to feed through the Auto Sheet Feeder.
This would also affect sticker makers who add a laminate layer on top of their sticker paper before cutting. The only way to know if it will work with the products you are using is to test it.
If the material is too thin, it can also cause issues as well. When the material rolls through the Auto Sheet Feeder and touches the Silhouette machine rollers, if it is too thin and bends, it may not be successful. I tested a brand of sticker paper called iLabel off Amazon and it was too thin to feed properly.
In order to feed through the Auto Sheet Feeder correctly, the paper has to be completely flat and not static cling to the sheet below it.
If the printer curls the edges or causes the paper to curl after it’s printed, that can affect whether it will feed through the machine properly and have success.
What Materials Work With the Auto Sheet Feeder?
First, I am going to share links to the specs listed on the Silhouette America website that show what paper sizes will work for each size of the Auto Sheet Feeder.
Auto Sheet Feeder for Cameo 4 & Portrait 3 Specs – click HERE
Auto Sheet Feeder for Cameo Plus & Cameo Pro – click HERE
But, I also want to share the materials that I did test and had success with as well.
Check out the list below.

Silhouette White Sticker Paper
Silhouette Clear Sticker Paper
Silhouette Printable Adhesive Cardstock
*I really liked how this printed & plan to use it more.
Silhouette Brushed Metal Sticker Sheets
Silhouette Holographic Dots Sheets
*cuts were off a bit as it went down the page. I’d recommend testing the cut settings
Silhouette Printable Kraft Adhesive
*Find the Silhouette America products at CraftCuts or Silhouette America
Recollections White Cardstock 65 lb – I’m not a fan of the pop out cut, but it worked
Staples Sticker Paper – this has been my go to for years for personal use stickers
HTVRont Sticker Paper – the edges of the pages are sticky and it picked up ink as it went through the printer. Corners were more likely to curl
Online Labels Sticker Paper – worked well

I tested a lot of materials and some of them several times as I tested how many pages it would feed through in one job successfully, tested pop-out cutting with cardstock, and other factors that might affect a user’s success.
Overall, I have to say I am impressed with the Silhouette Auto Sheet Feeder.
It exceeded my expectations.
Personally, I think it’s application is limited to those who are cutting multiple sheets and that not all users will benefit from it. But, each user varies and there are some who may find they use it a lot. I do not have a sticker business or cut multiples of sticker sheets often, so it probably will not be one of my most used tools. However, I am very glad that I was able to test it and understand how it works better.
Additional Tips
How long does it take to cut?
There is no specific answer to this question.
Cutting time will depend on how detailed the cuts are and how many pages you are cutting. Each project can vary.
I did test using 5 sheets of the same sticker design and I think it was faster than manually doing it only because you do not have to load, unload, and mess with a cutting mat if you cut that way.
Do not leave the room while it’s cutting
I mention this one because if the material jams in the machine or there is an issue with feeding, the project can completely be derailed in seconds.
As most of use have experienced in one project or another, if you leave the room, something will surely go wrong.
Test Cut, Test Cut, Test Cut
Test your cut settings before sending a job through with the materials you are currently using for the print and cut. If the cut is too deep and cuts completely through, that can cause issues from feeding properly, jamming in the machine, or damage to the cutting strip.
Buy extra cutting strips!!!
The cutting strip is an important part of the Cameo models and if there is any damage to the cutting strip, it can affect your success with the cuts.
Cutting strip for the Cameo 4 HERE
Cutting strip for the Cameo Plus HERE
Cutting strip for the Cameo Pro HERE
Use code 10OFF to save 10% with the links above
There is no cutting strip on the Portrait 3 model.
For more information on the cutting strip and how to change it, check out this post
Silhouette Machine Cutting Strip
Barcode Scanning
There is the ability to cut different projects at the same time if the file has been set up & printed with the barcode option. The barcode contains the cut data and settings in order to read each printed page that is sent through.
I did test this and will have more details on it in the future.
Check out the Barcode Scanning video by Silhouette America HERE for more details.
Note: the barcode feature has been an option in the Silhouette Studio software for many years. However, it did not function properly in many versions. If you want to test the barcode feature even without an Auto Sheet Feeder, I would recommend updating to v4.5.155 or higher in order to have the best success with it.
More Resources on the Silhouette Auto Sheet Feeder
Here are some additional resources on the setup and function of the Silhouette Auto Sheet Feeder from Silhouette America
Everything You Need to know about the New Auto Sheet Feeder post
YouTube videos found at Silhouette America’s YouTube channel
Meet the Silhouette Auto Sheet Feeder
Auto Sheet Feeder – Getting Started
Silhouette Auto Sheet Feeder Quick Setup
————
I did a lot of testing and will have more coming out soon with the Silhouette Auto Sheet Feeder on the Silhouette Secrets+ YouTube channel.
Make sure to Like & Subscribe and ring the bell on YouTube if you’d like to be notified when there is new content posted.
If you’d like to grab the Silhouette Auto Sheet Feeder grab it HERE.
CrafterCuts offers free shipping on orders over $35
If for some reason they are out of stock, please check out the other Silhouette retailers in my Recommended Retailers tab HERE or at the top of the website.
Or check out my Amazon Store HERE where I have the links for both the Auto Sheet Feeders as well.
I would love to see what you are creating with your Silhouette software or machines!
Feel free to post on my Facebook group at
Silhouette Secrets with EllyMae.
Save this for future reference by pinning the image below.

Enjoy !
THANK YOU for your support! How can you help? Click HERE & buy a coffee.
Every little bit helps with the cost of running the site.
Or if you are looking for more in-depth, step-by-step classes, check out all of my online Silhouette classes on my Teachable site HERE.

**This post may contain affiliate links. What that means is that I may receive compensation if you purchase through the links I have provided. The price you pay for the product or service is not higher but I may get compensated for sharing.
Discover more from Silhouette Secrets-Swift Creek Customs
Subscribe to get the latest posts sent to your email.


[…] there are times that you may need to update in order to access new features – like the new Silhouette Auto Sheet Feeder for […]
[…] are occasions that you could be have to replace so as to entry new options – like the brand new Silhouette Auto Sheet Feeder as an […]