

The Silhouette Studio software allows you to print directly from the program to any printer that is setup on your computer. This action can be performed easily by going to File > Print and selecting the printer you are using once the design is ready to print. However, the colors you see on the computer screen may not be the actual results that print out from your printer.

Affiliate links may be present in the following blog post and as an Amazon Associate, I earn from qualifying purchases.
Factors That Can Affect Printed Colors
- A computer monitor is not calibrated to print colors. Each brand of computer monitor can vary in the visual representative that you see.
If you were sitting next to someone else using the exact same Silhouette Studio software version, your colors may not appear the same on screen as that person next to you simply because you are using different computers. - Computer monitors display in RGB (Red Green Blue) versus printers that are CYMK (Cyan, Yellow, Magenta, black) – this can affect the actual printed results versus what is seen on the screen.
- There are many different brands and models of printers out there on the market being used worldwide. Different brands and models of printers can yield different results.
- Printer ink can vary by brand and yield different results.
- The material being printed on can affect the colors. Different materials absorb the ink and the final color you see can vary depending on the material.
For instance, plain cardstock will absorb more ink into the paper versus a glossy photo paper. This can make the color appear muted on the cardstock versus a more vibrant print on a shiny gloss of photo paper. - The printer settings selected when printing can affect color outcome. Each printer model has different settings it can print at and what you select for the print job sent can affect the final outcome of colors. For example, draft settings versus normal versus photo quality.
- Printer drivers can affect the outcome of colors and other options available, such as print page size, etc. For best results, install the full printer drivers direct from the printer manufacturer’s website for your specific printer model. Simply plugging in a printer or connecting it to your computer does not usually install the full printer drivers. While it may print, it may not have all the options of the full print driver as it’s using a default driver that’s in the computer operating system to perform basic print functions.
- Computer operating systems (OS) and updates. Print quality can vary by Windows versus MAC and also by the OS updates on those computer systems. We have seen print color output change overnight with a computer OS update.
- Different software programs can have different print color results.
Now that we’ve covered a few things that can make the difference, how can you test what colors you see versus what colors you get when printing?
Silhouette Studio: Color Test Print
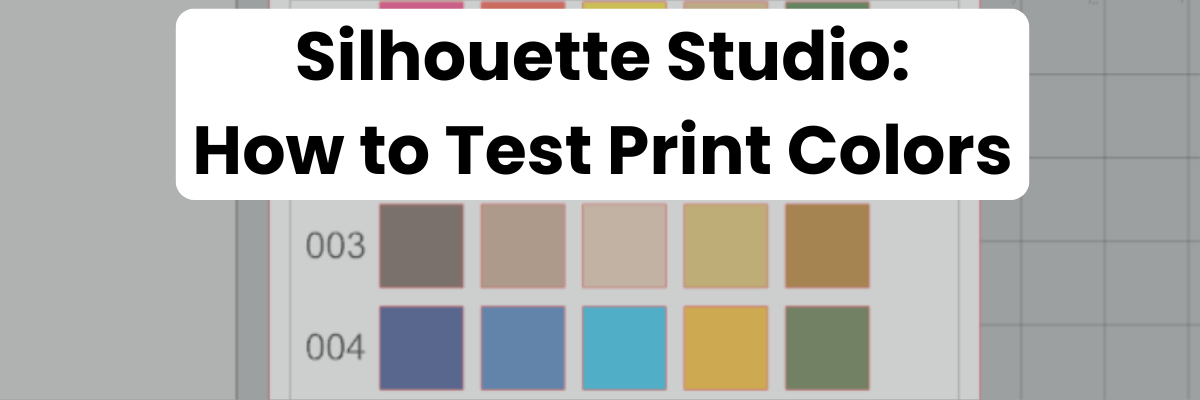
Draw out 1-inch squares (or larger if needed) and replicate to fill the page

Open the Fill Color Panel and fill each square with a color that you want to test print.

The full Fill Color Panel on the right side of the Silhouette software has several options for adding colors. Use the preset colors, add your own custom color, or add in colors by HEX, HSL, or RGB codes. Create your own custom color palettes too for easy access on future projects.

I used the Color Cubes by Sarah Renae Clark to fill in a page of color combinations that I want to test print. The color cards give 5 colors with the HEX code for each color and also have shades of that color shown on the card.

In the Silhouette Studio software, at the bottom of the Fill Color Panel, you can adjust the color to another shade easily by moving the custom color dot around on the color palette.

Once page is filled as desired, then select File > Print in top left corner.

Verify on the Print Preview that everything will be printed as desired. The print preview is where you can catch errors before you waste ink printing. For instance, if the design is not showing completely and is cut off, that can indicate the wrong printer is selected or the page size is incorrect. There is still time to make changes before you commit to printing and using ink.
If you are doing a print and cut project, verify that all 3 registration marks show as printing completely on the page before you click print.
When ready, click Print. The printer menu will pop up and you can select what options you would like to print at and where to print from. I use the rear tray on my printer when printing any specialty materials or cardstock.

If you make any changes such as the actual printer being used or the page size, you will need to apply those changes and then cancel out to the main design screen to reset those settings completely.
Once printed, you can see how the colors will print on that particular material. It’s always best to test on the actual material you will be using to know for sure.

I printed this on higher quality copy paper using the regular print settings from my printer. I was also notified that one ink cartridge was low on ink, so I know that will affect the colors that are printed as well.
Additional Tips for Printing:
Objects or designs need to be filled with color to print.
Silhouette Studio is designed as a cutting software. That means the red lines you see on the design mat are cut lines for a Silhouette machine to follow. When a shape is drawn or text typed out, it is generally not filled with any color and the software sees it as empty. Which is exactly how it will print to a printer if sent. This is one great thing about utilizing print preview, you can catch issues before you’ve actually tried to print the project.
Cut lines do not print unless told to do so.
There are 2 options if you want the line of an object to print.
1 – Increase line thickness above 0. Any line thickness above 0 will print on the material.

Here is what the text above will show on the Print Preview when the top text line is set to 0 line width and the bottom is set to 1.75.

2 – Select the objects you want the lines to print on and check the Print Lines of Selected Shapes box on the bottom of the Line Style Panel.

Here is what the text above will show on the Print Preview when the top text has the print lines of selected shapes chosen.

There is also an italic note stating: This will display your 0 pt cut lines as 0.1 pt lines in prints and in SVG and PDF exports.
Sublimation prints need to be pressed to show true color.
If you are printing using sublimation inks, the true colors will not show until the design has been pressed. A sublimation print will always look dull or muted prior to pressing.
For best results and the most accurate colors, press onto 100% polyester. This will show the final colors
New equipment may not function the same as old equipment.
Getting a new, updated printer model can be a great thing! However, users can be quickly frustrated when things do not work the same or the new printer doesn’t print the same colors the same as the old one did. It can take some getting used to for all new equipment.
Low ink of any cartridge or tank can affect the color outcome.
Most home printers have a set of color cartridges or tanks, for instance, my Canon TS9521C has 3 colors and 2 black cartridges. To make up the colors you are asking it to print, the printer combines those inks in order to make the color output. If a color cartridge or tank is low on ink, it may not yield the desired results.
The results that each user sees and has when printed can vary simply because we all have different equipment we are using.
Additional resources:
- How to Print from Silhouette Studio
- Fill Color Panel
- Sticker Paper Comparison and Print Quality
- Drawing Tools
- Replicate Panel: Fill Page
- Creating Custom Color Palettes
- Line Style Panel
- Print and Cut with Silhouette
- Sublimation with Silhouette
And check out the Silhouette Live Tutorial – Colors in Silhouette HERE on the Silhouette Secrets+ YouTube channel.

Save this for future reference by pinning the image below.

Enjoy !
THANK YOU for your support! How can you help? Click HERE & buy a coffee.
Every little bit helps with the cost of running the site.
Silhouette Classes
Never stop learning! Let me help you take the anxiety out of learning with Silhouette and get to creating faster! My Silhouette classes are heavily focused on software, so you can take the skills & techniques taught and apply them to many future projects!


**This post may contain affiliate links. What that means is that I may receive compensation if you purchase through the links I have provided. The price you pay for the product or service is not higher but I may get compensated for sharing.
Discover more from Silhouette Secrets-Swift Creek Customs
Subscribe to get the latest posts sent to your email.


What do you do when the preview window opens, left side says connecting, and the area it should display in had “Loading preview”. I wait for 5 minutes and nothing. If I cancel out, I can successfully print using the print window. Don’t know if it matters, but I am printing to a Brother SP1. I have been successful in seeing the print preview when I am using this Laptop when I take a class, that they have an SP1 for the students to use.
That is a Windows 11 setting – here is how to change it – https://www.winhelponline.com/blog/restore-legacy-print-dialog-windows-11
[…] colors might print out for a project you are working on. I share even more details in the blog post Silhouette Studio: How to Test Print Colors HERE. Using the Color Cubes I was able to add a variety of colors to the test print page to see how they […]